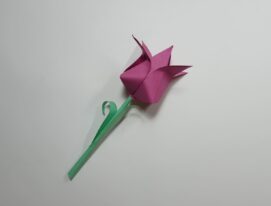
Origami Camellia
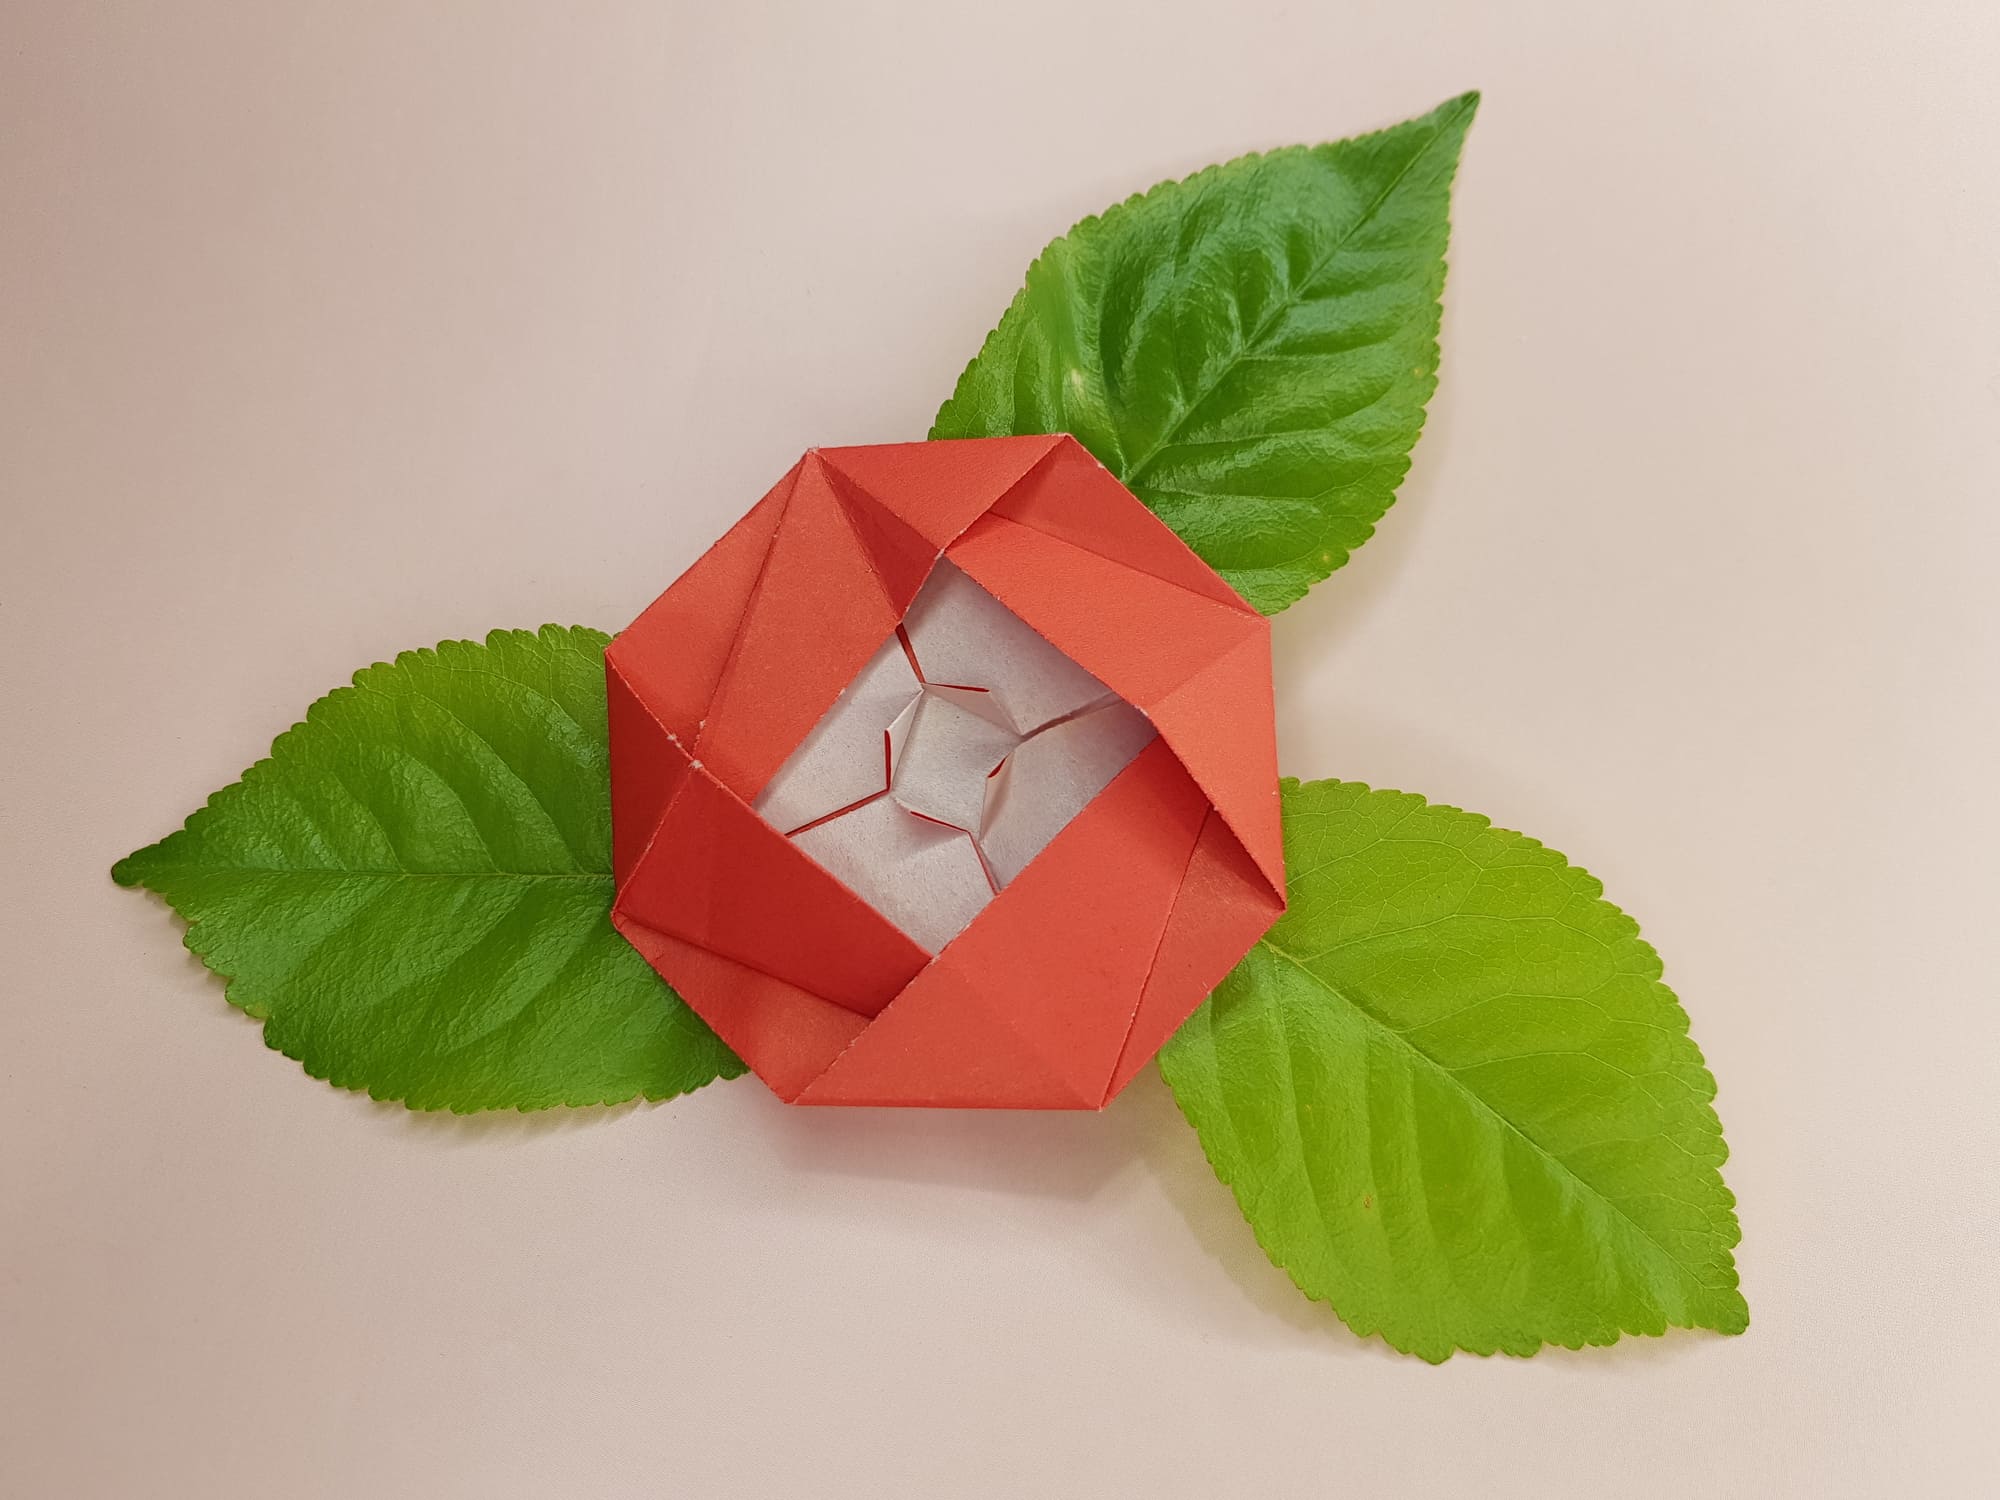
If you want to decorate a postcard or make a whole picture from paper flowers, this origami is what you need. Delicate camellia will decorate any bouquet. The palette of its shades pleases with a wealth of choices – from white to bright pink and red.

Prepare a 15×15 cm square.
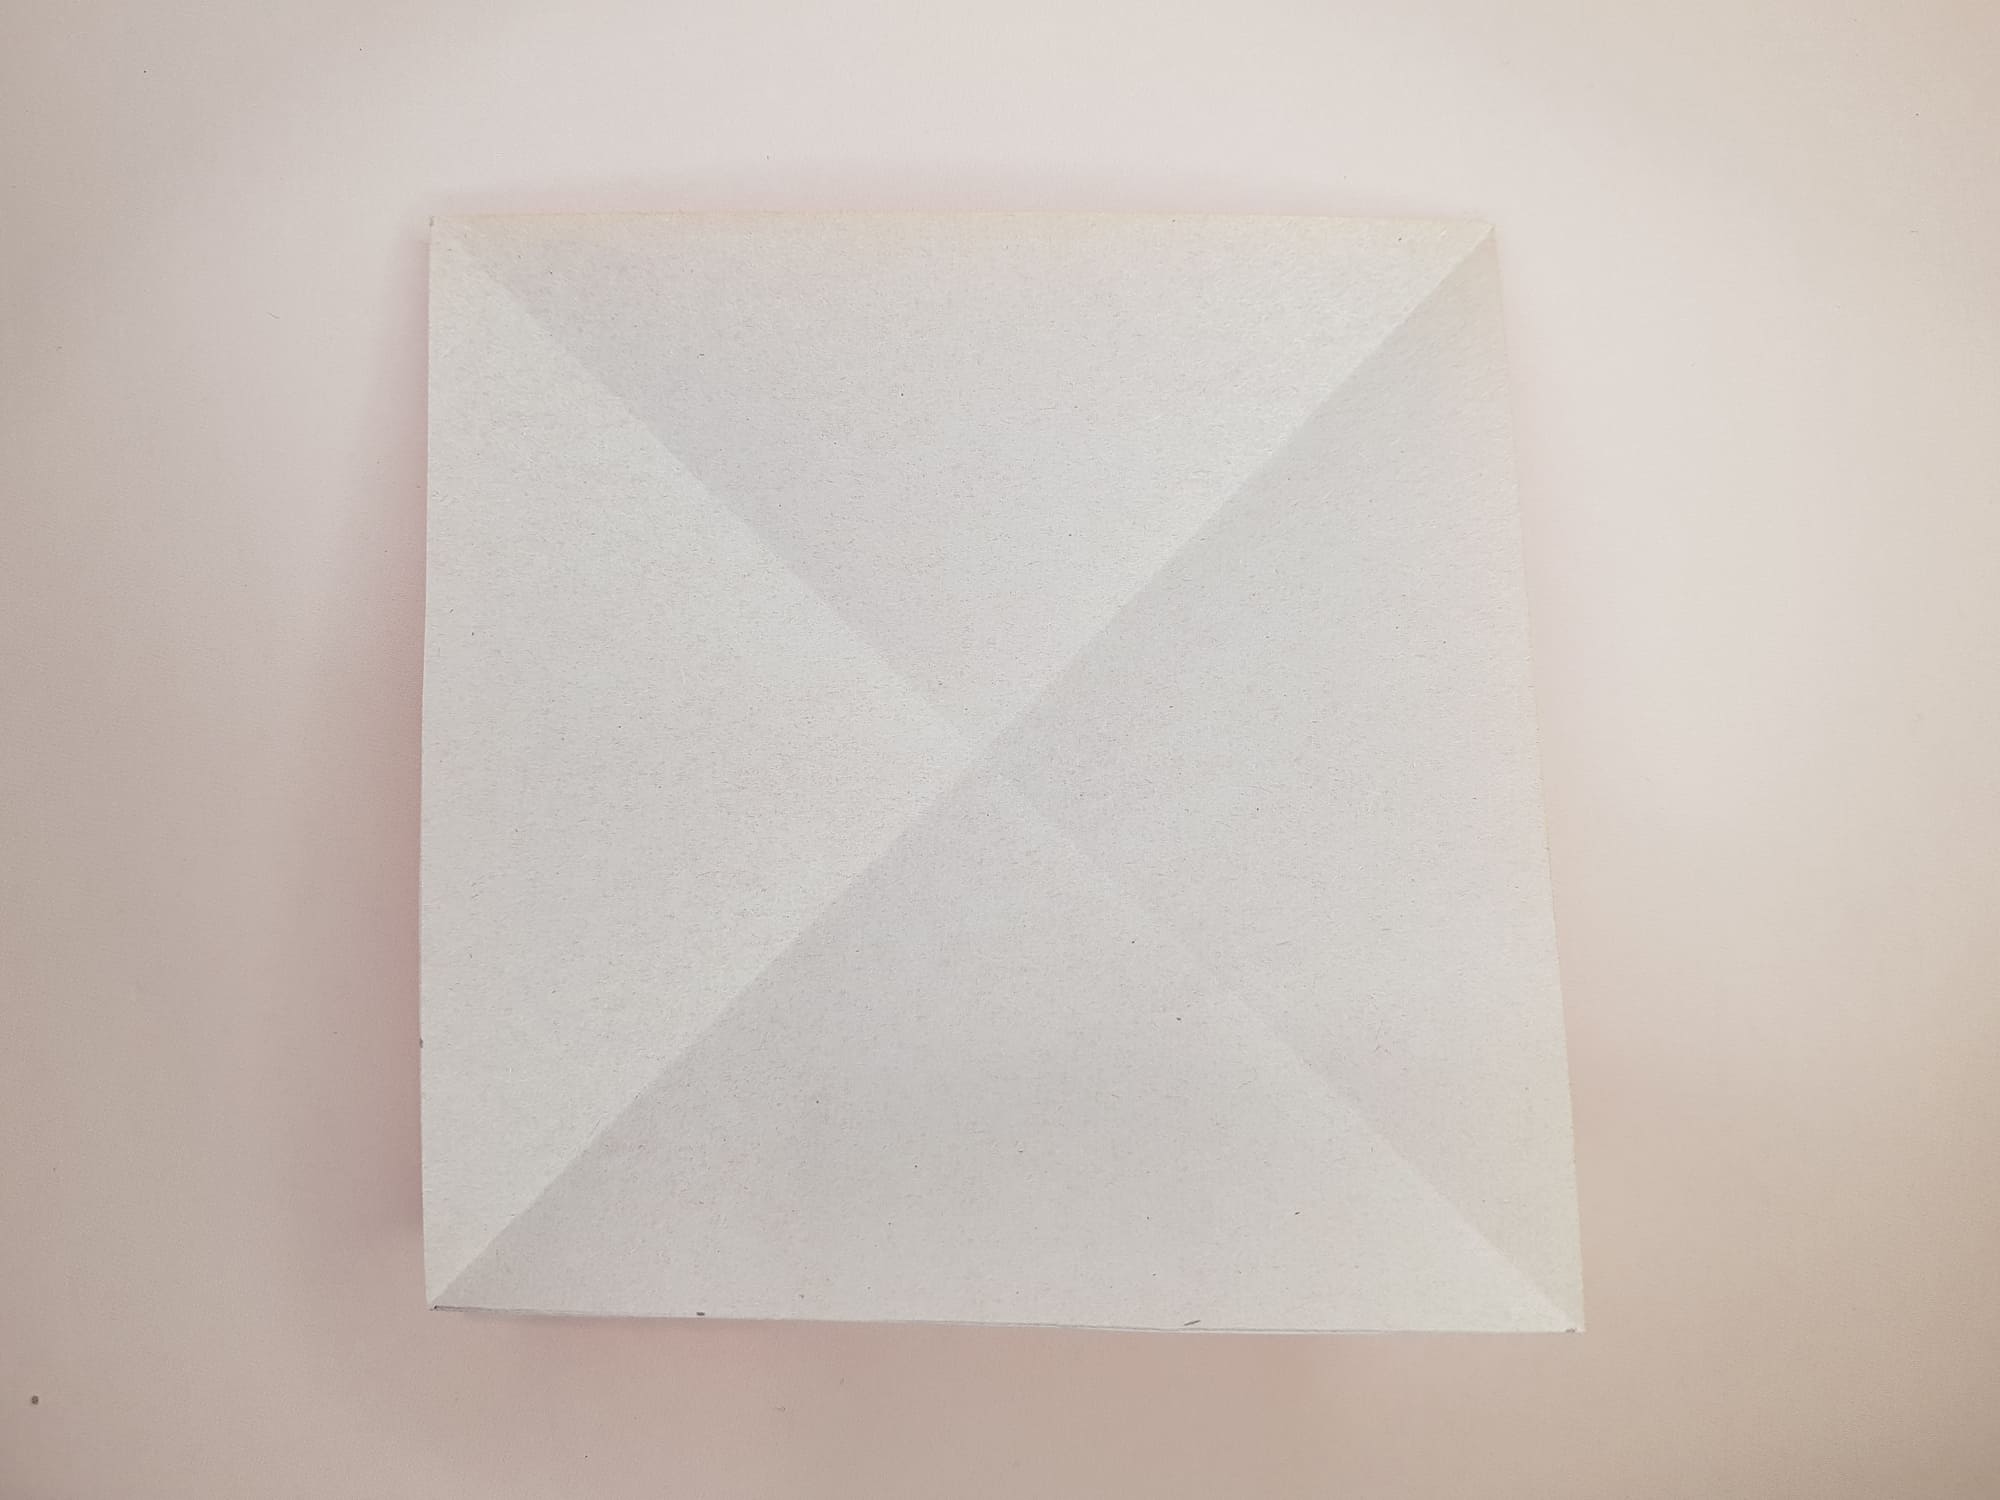
Place it wrong side up and fold it in half diagonally – on one side and the other.
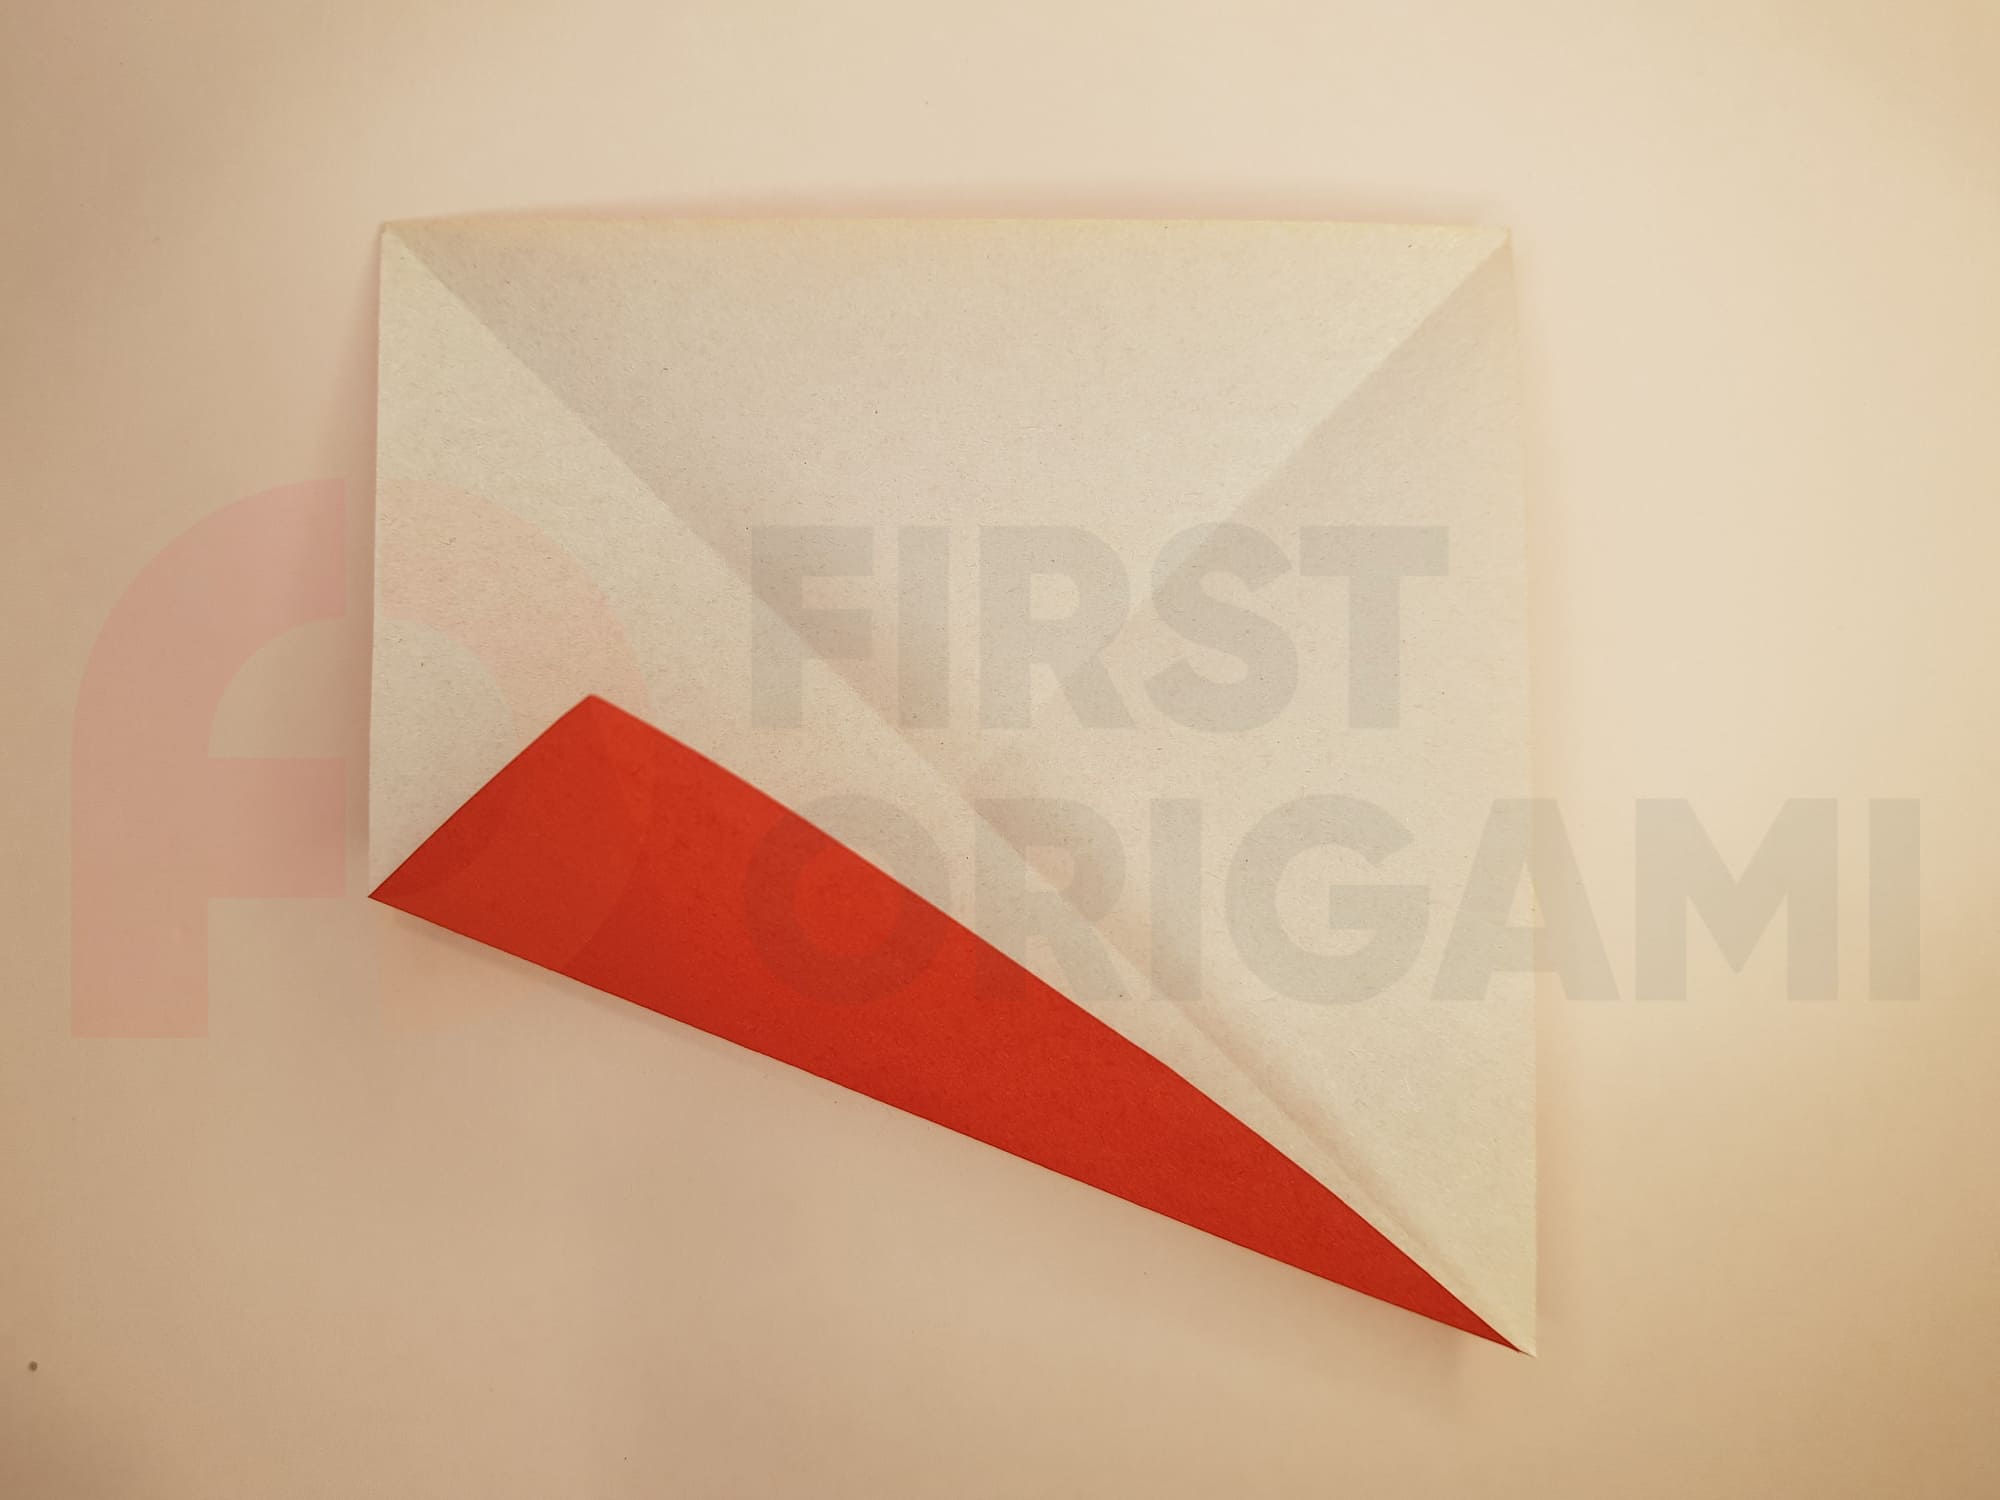
Bend the lower left corner to the center.
Make a fold along the dotted line.
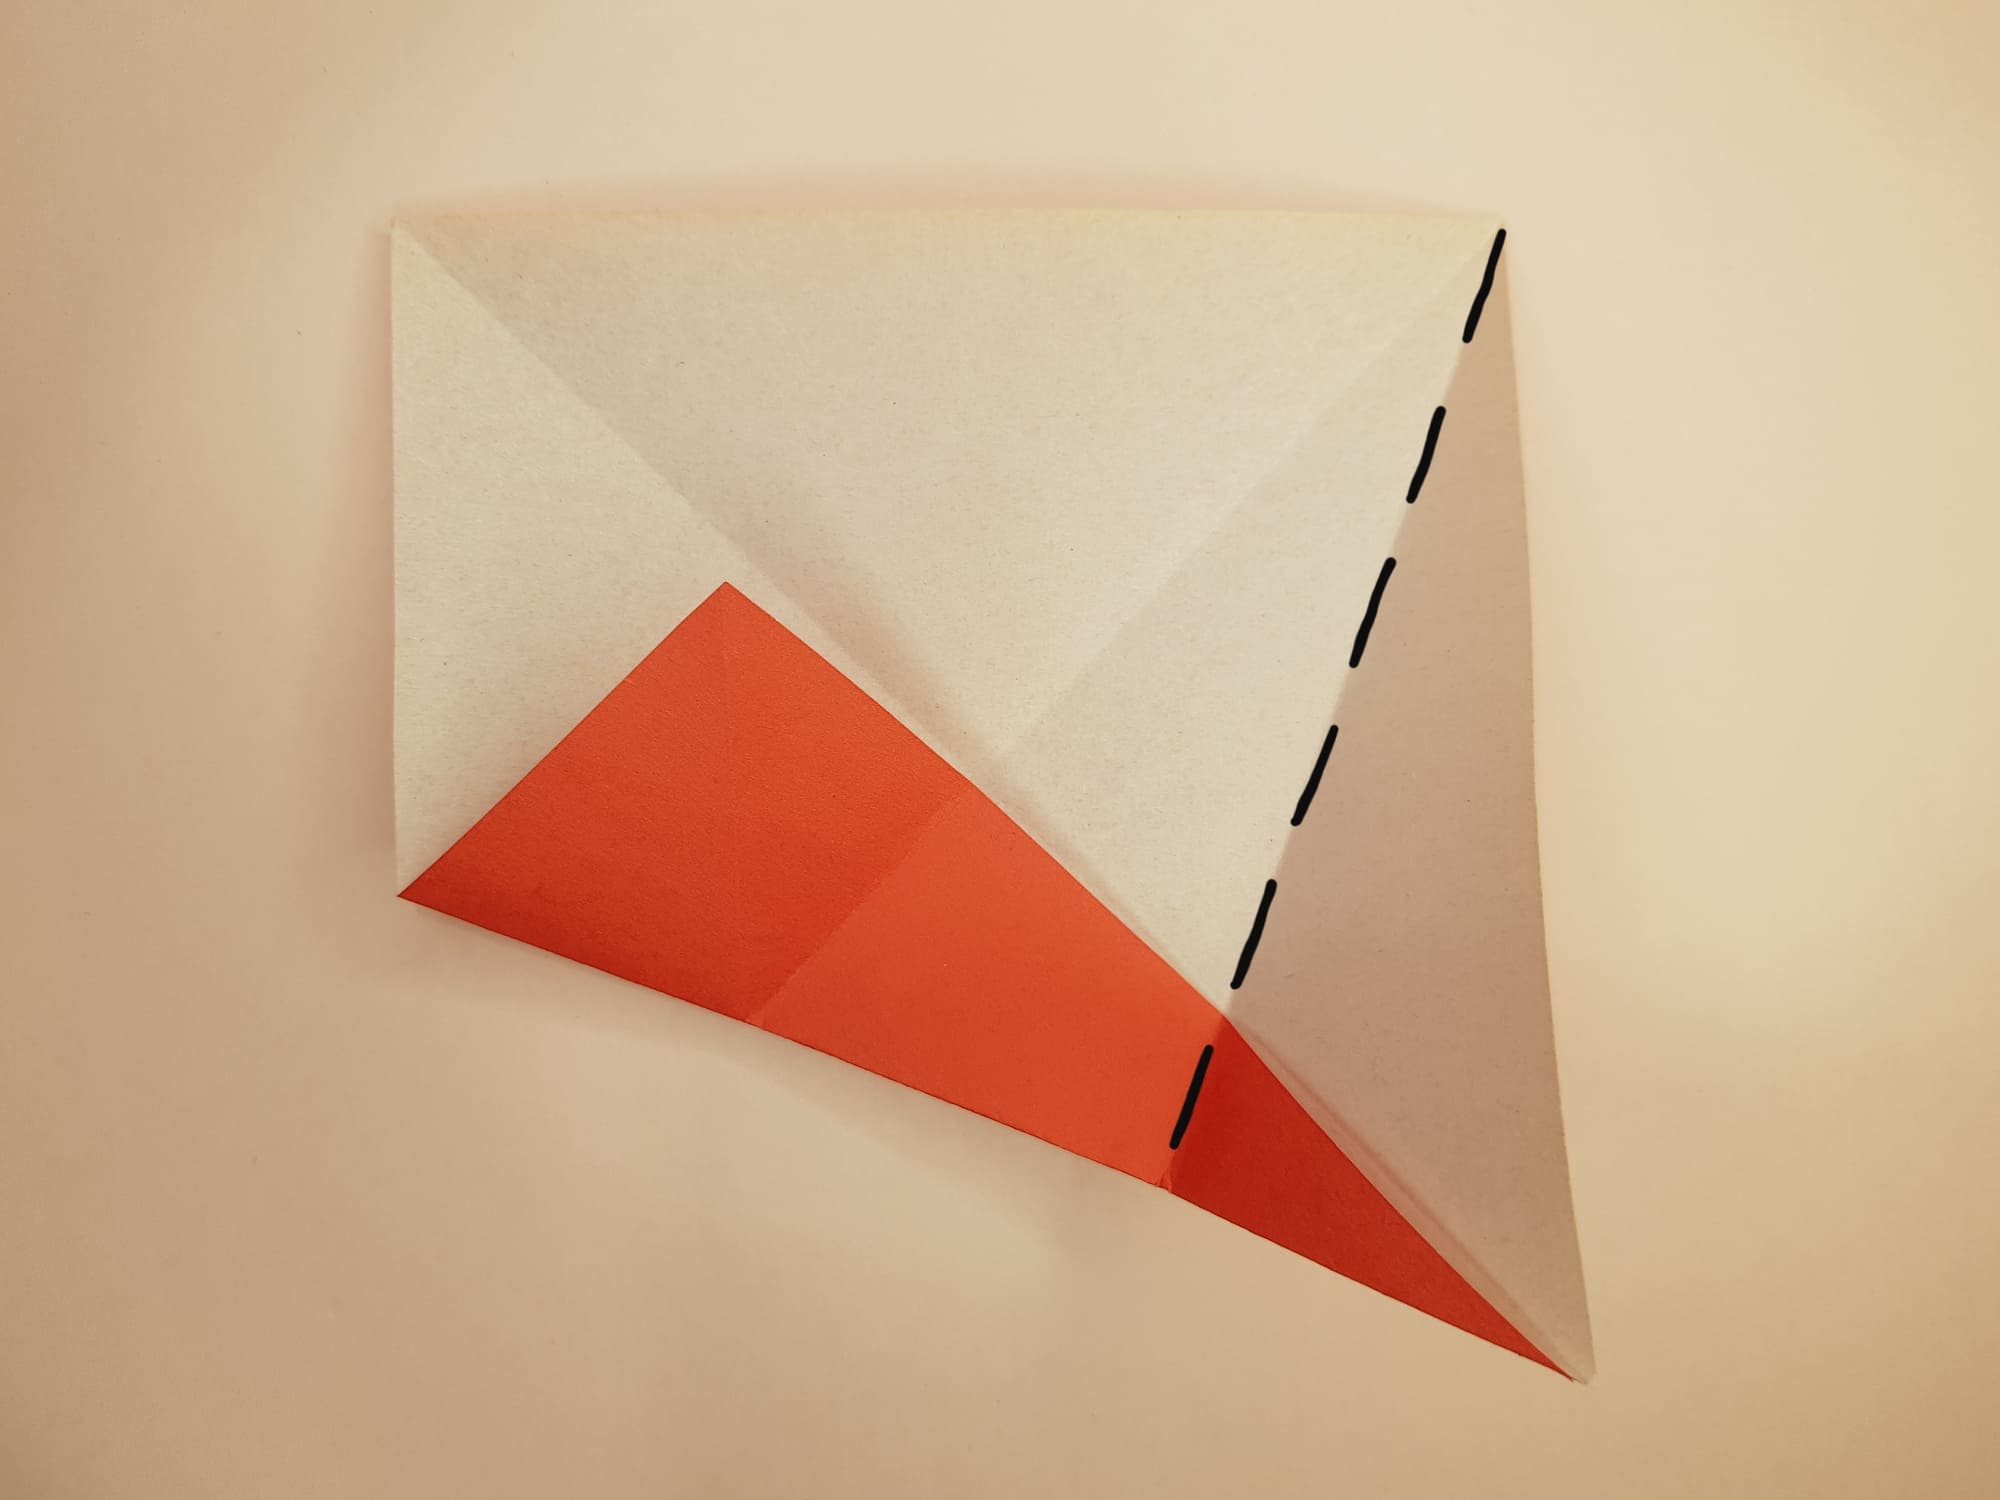
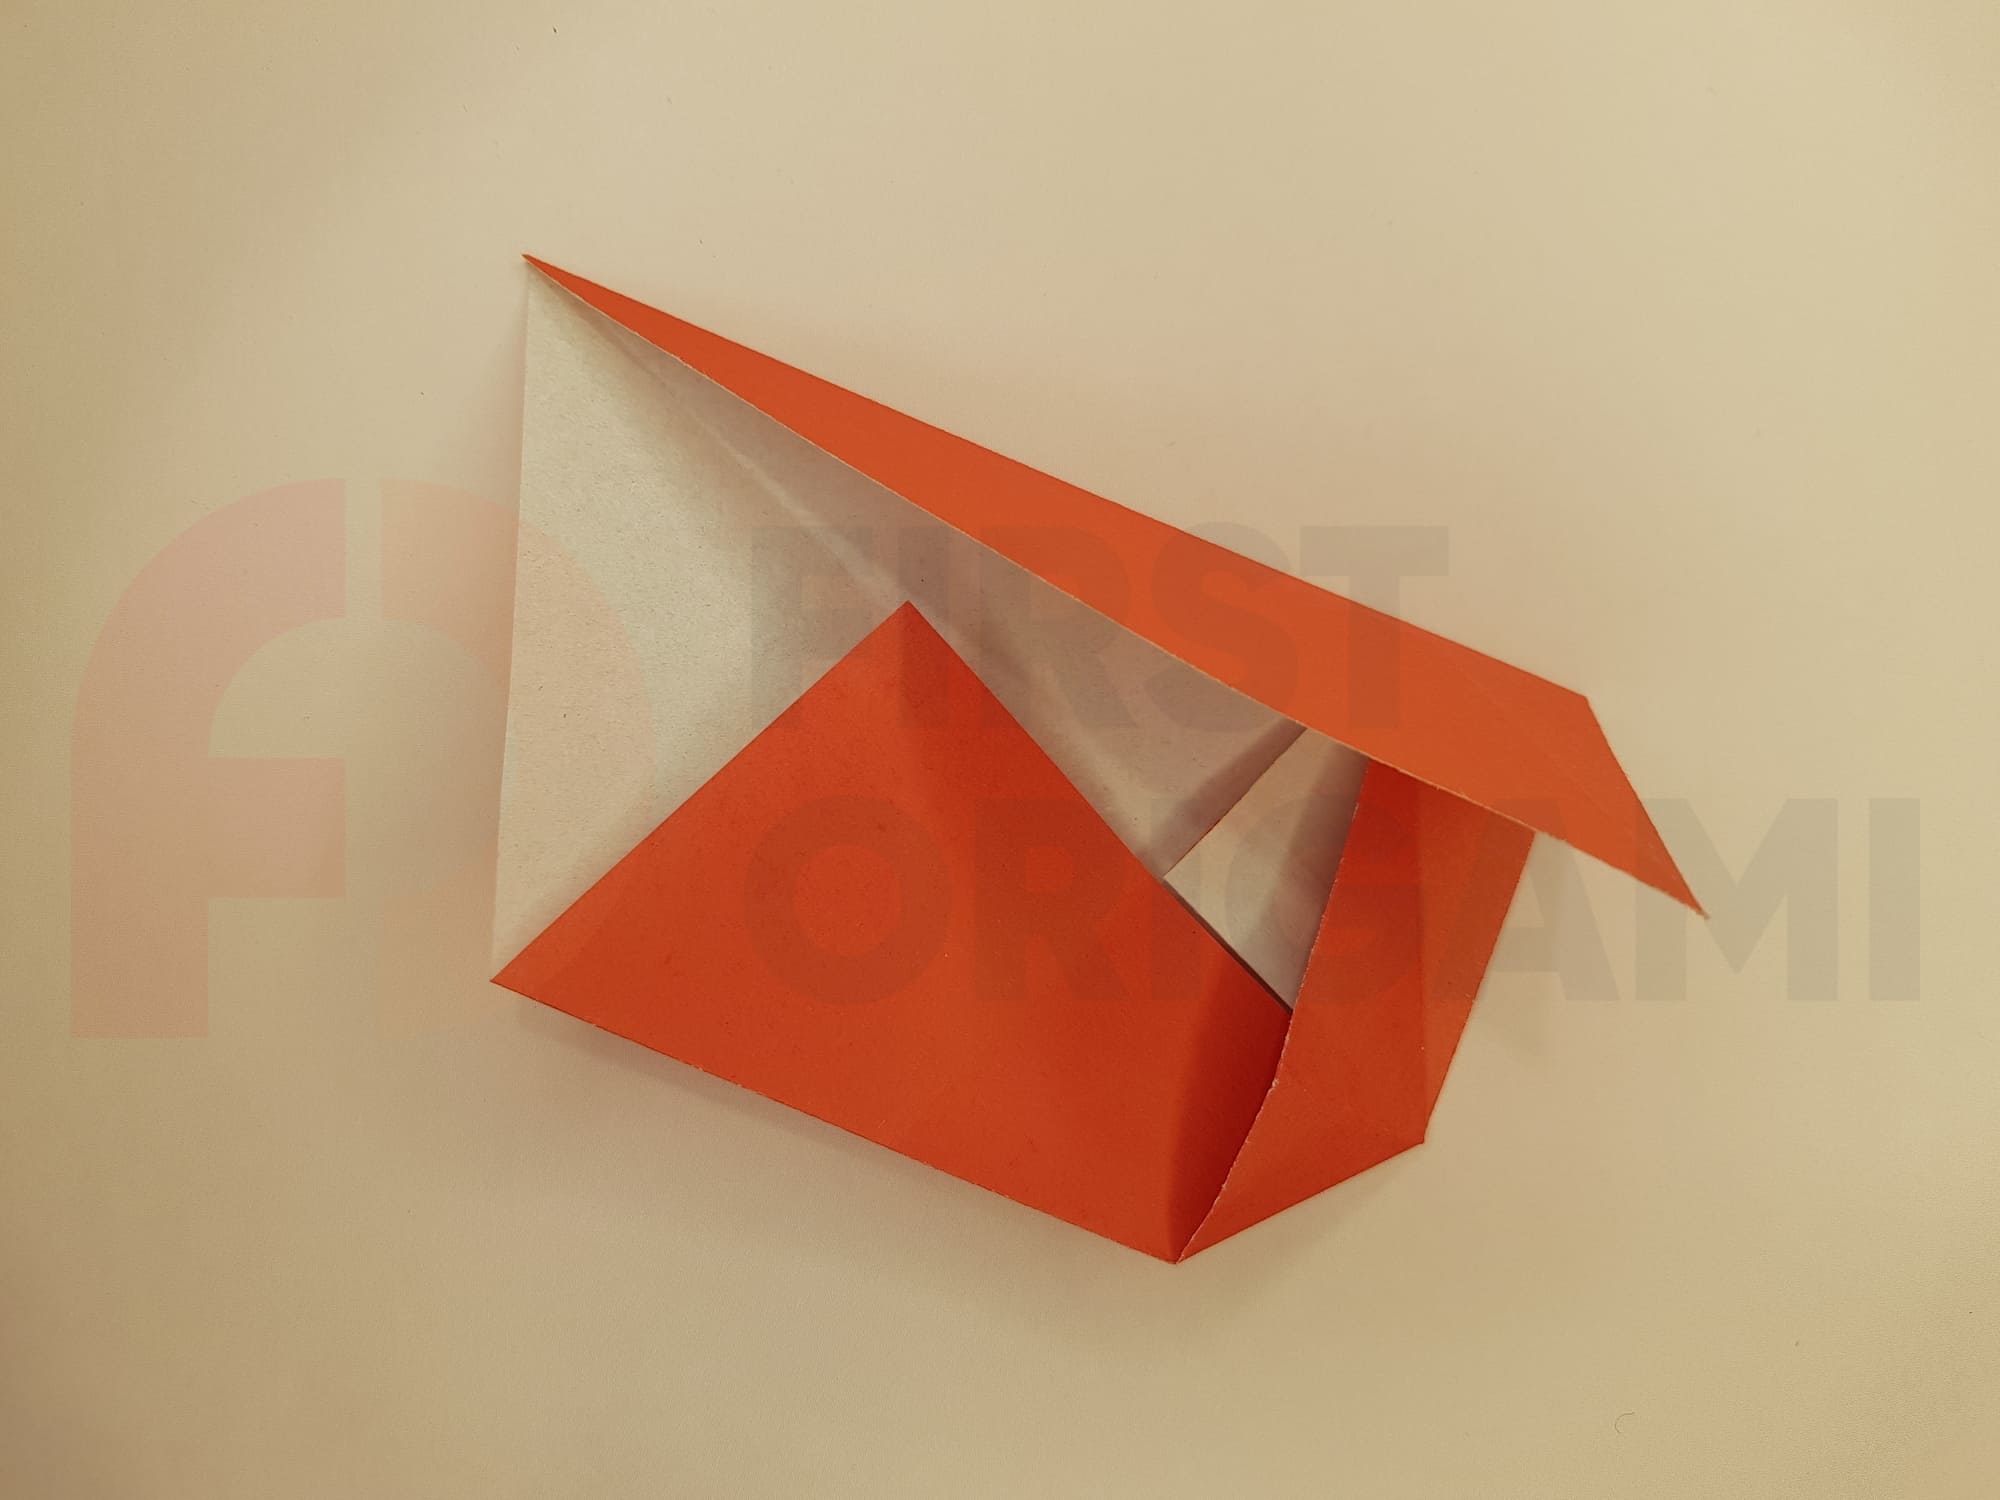
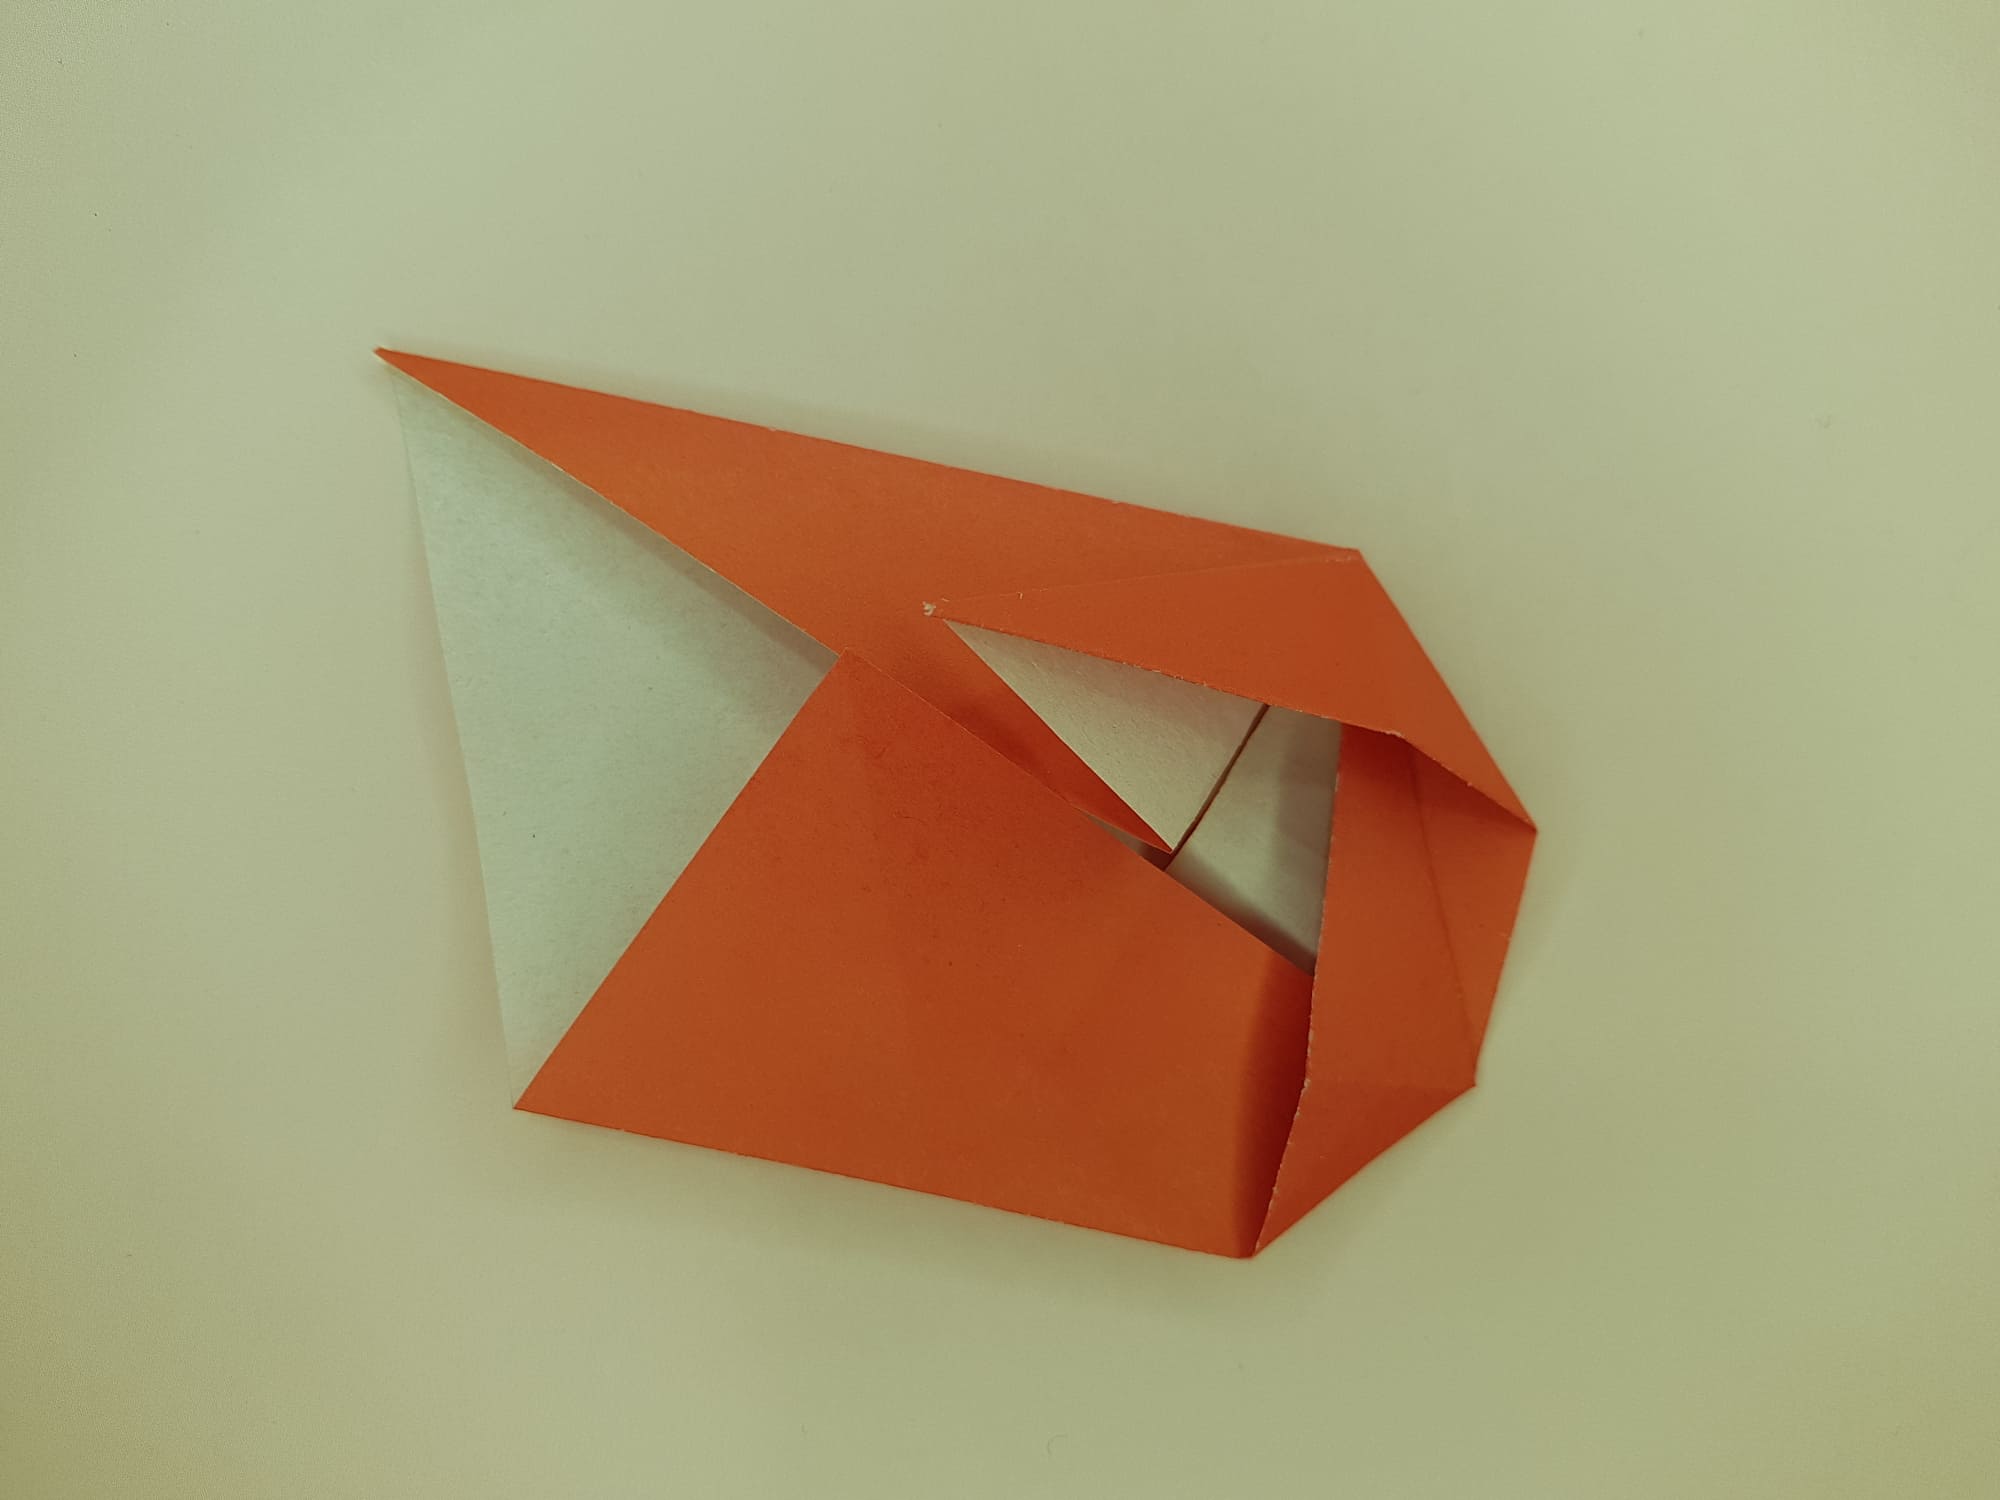
Open the lower right corner, forming a small “pocket”, bend it up, and press it.
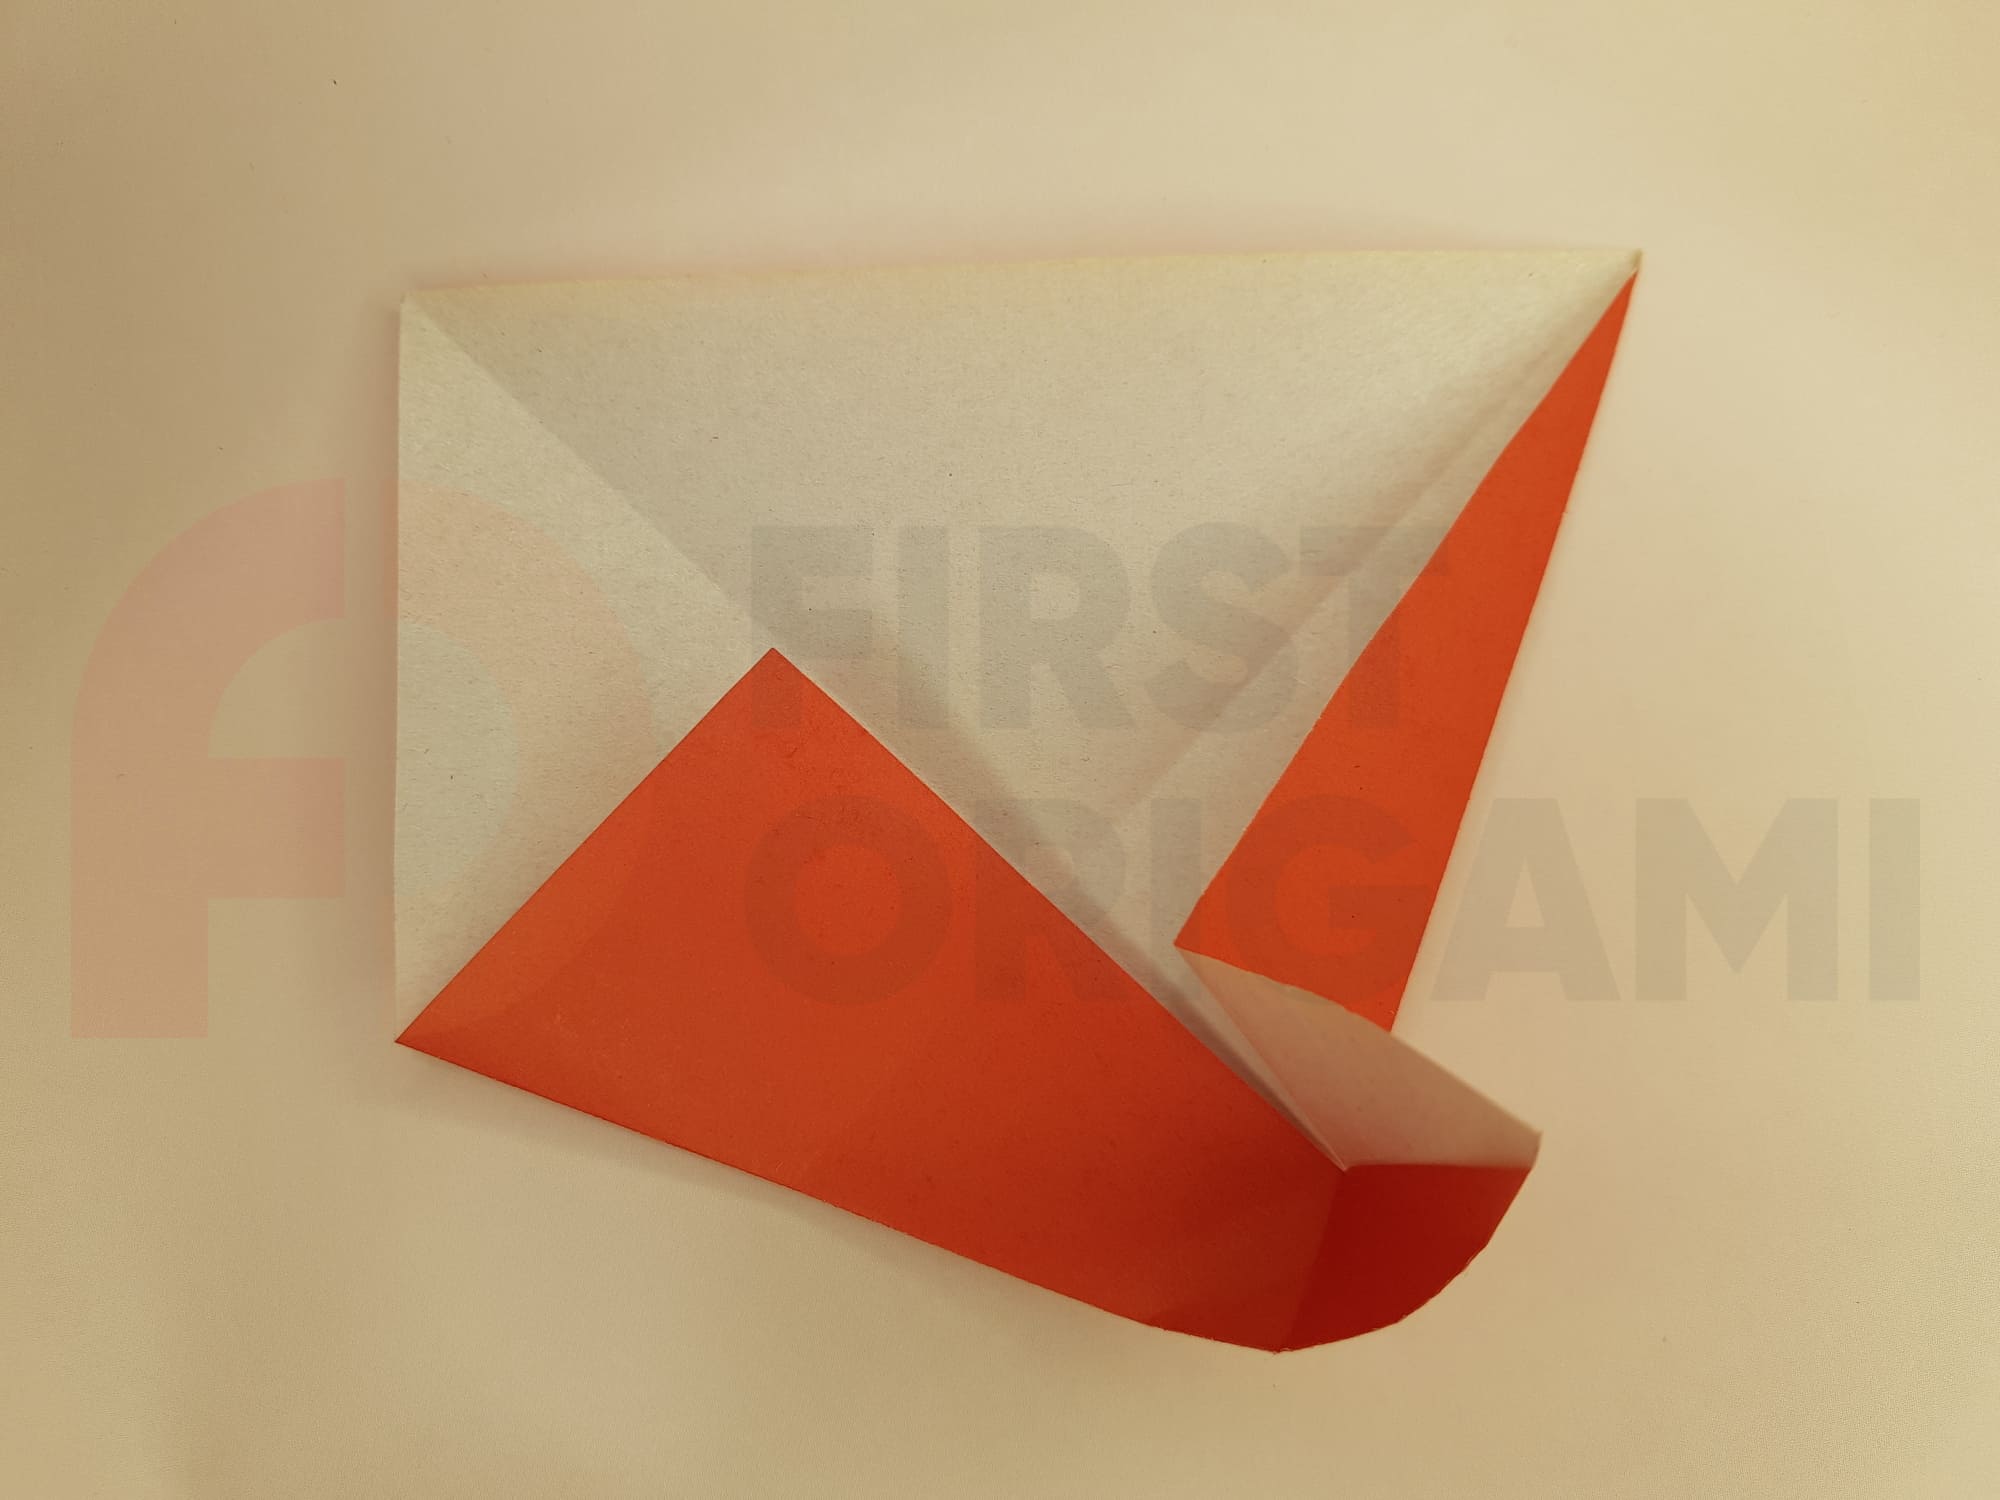

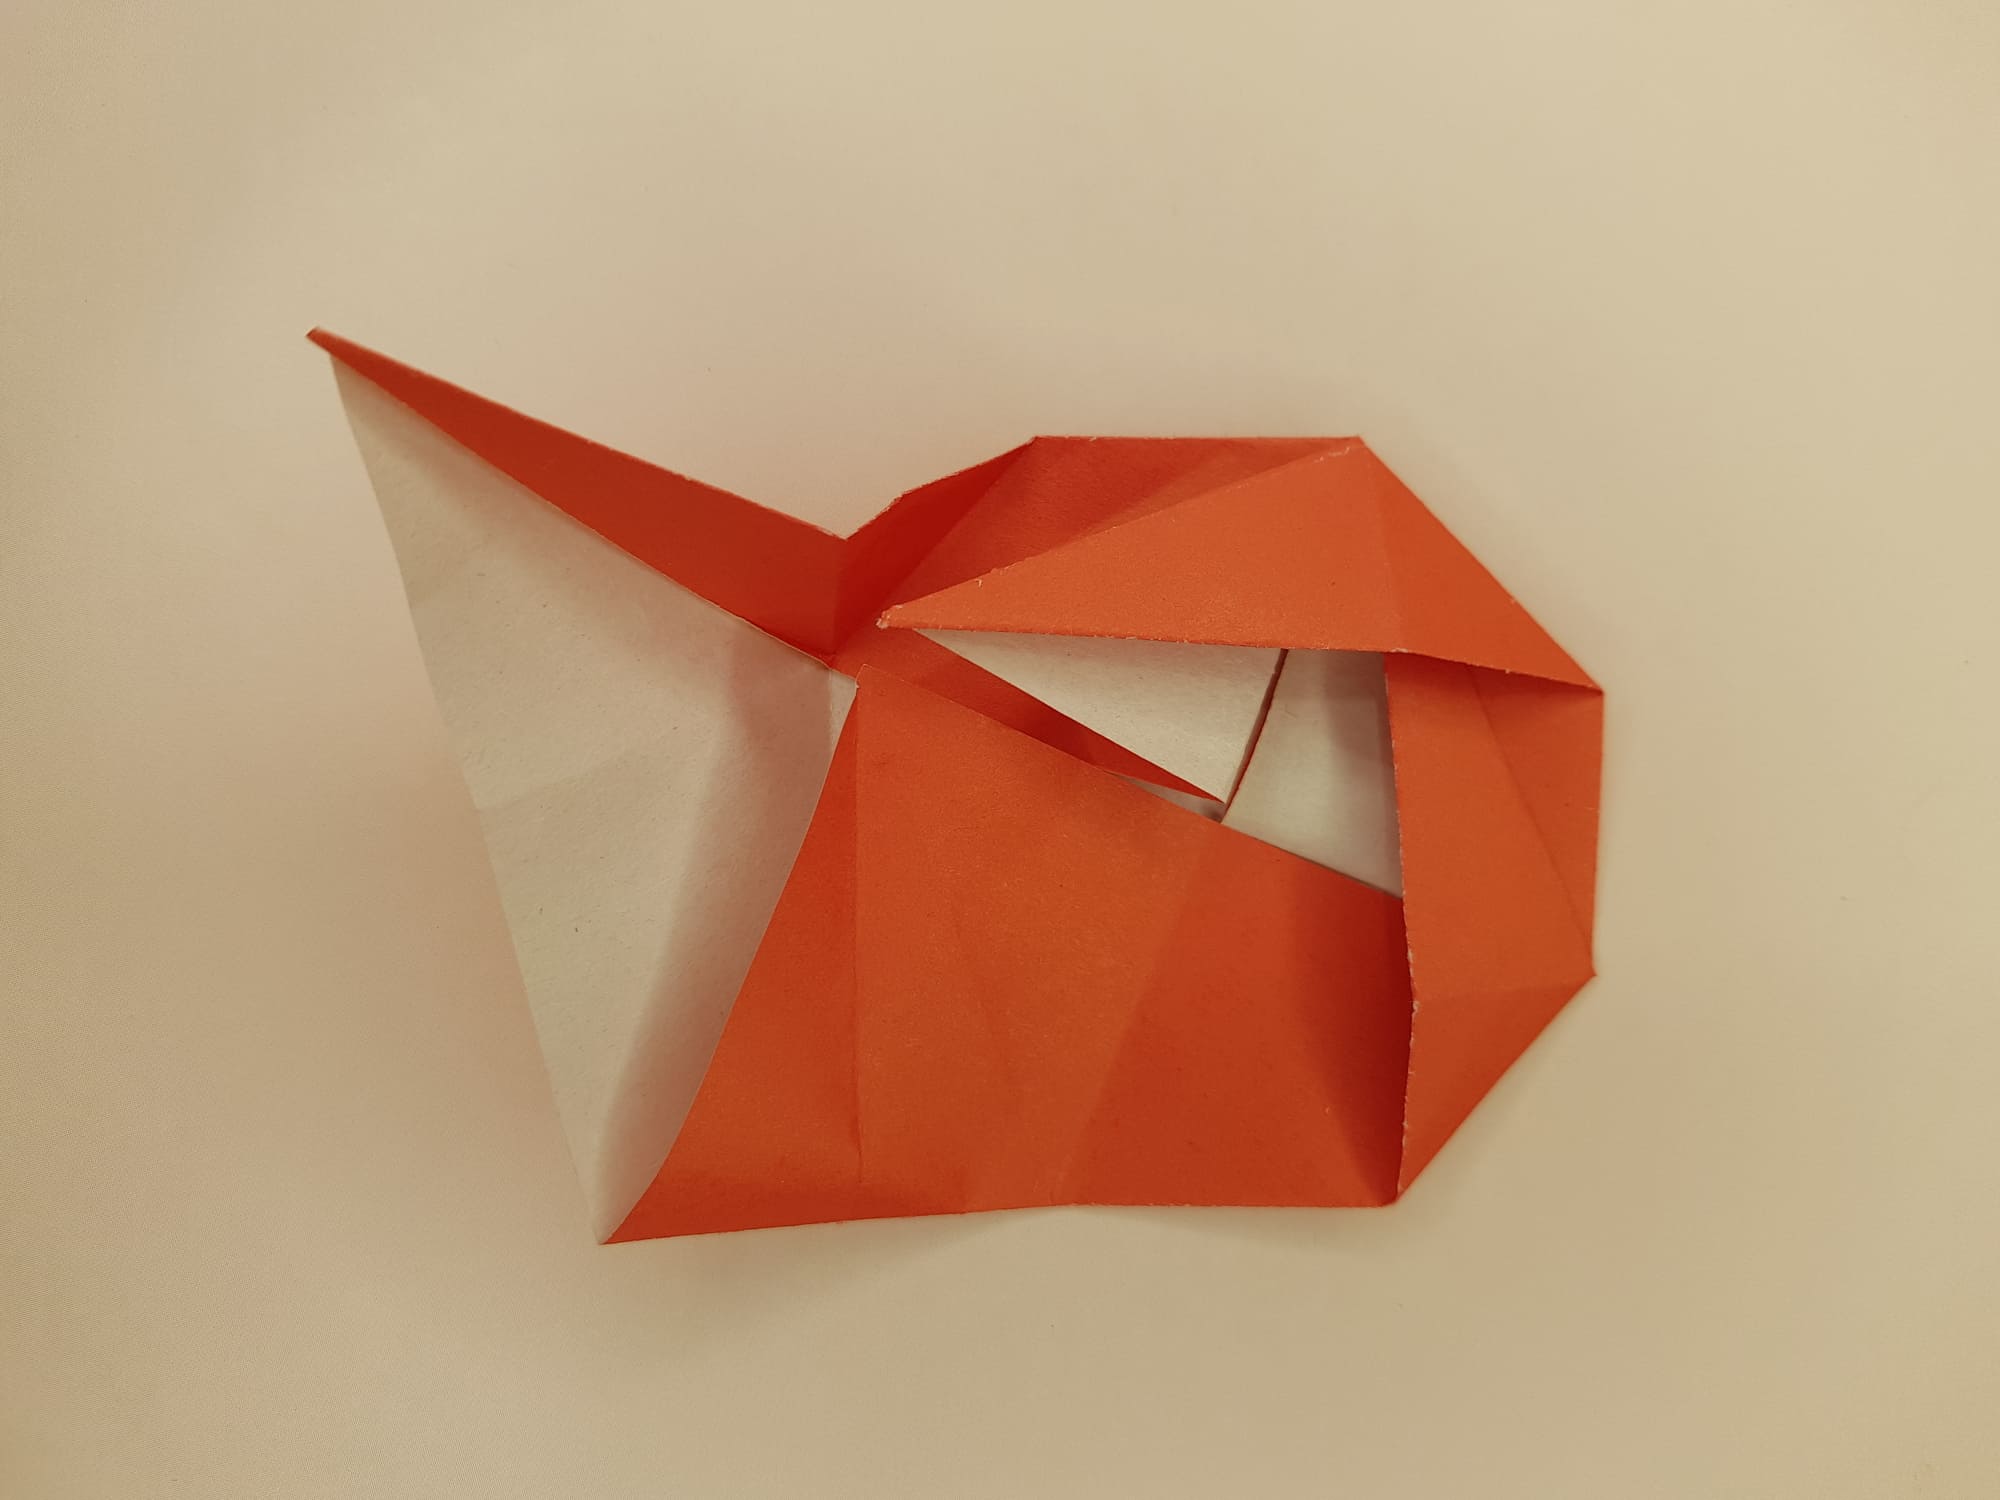
Make a fold along the dotted line.
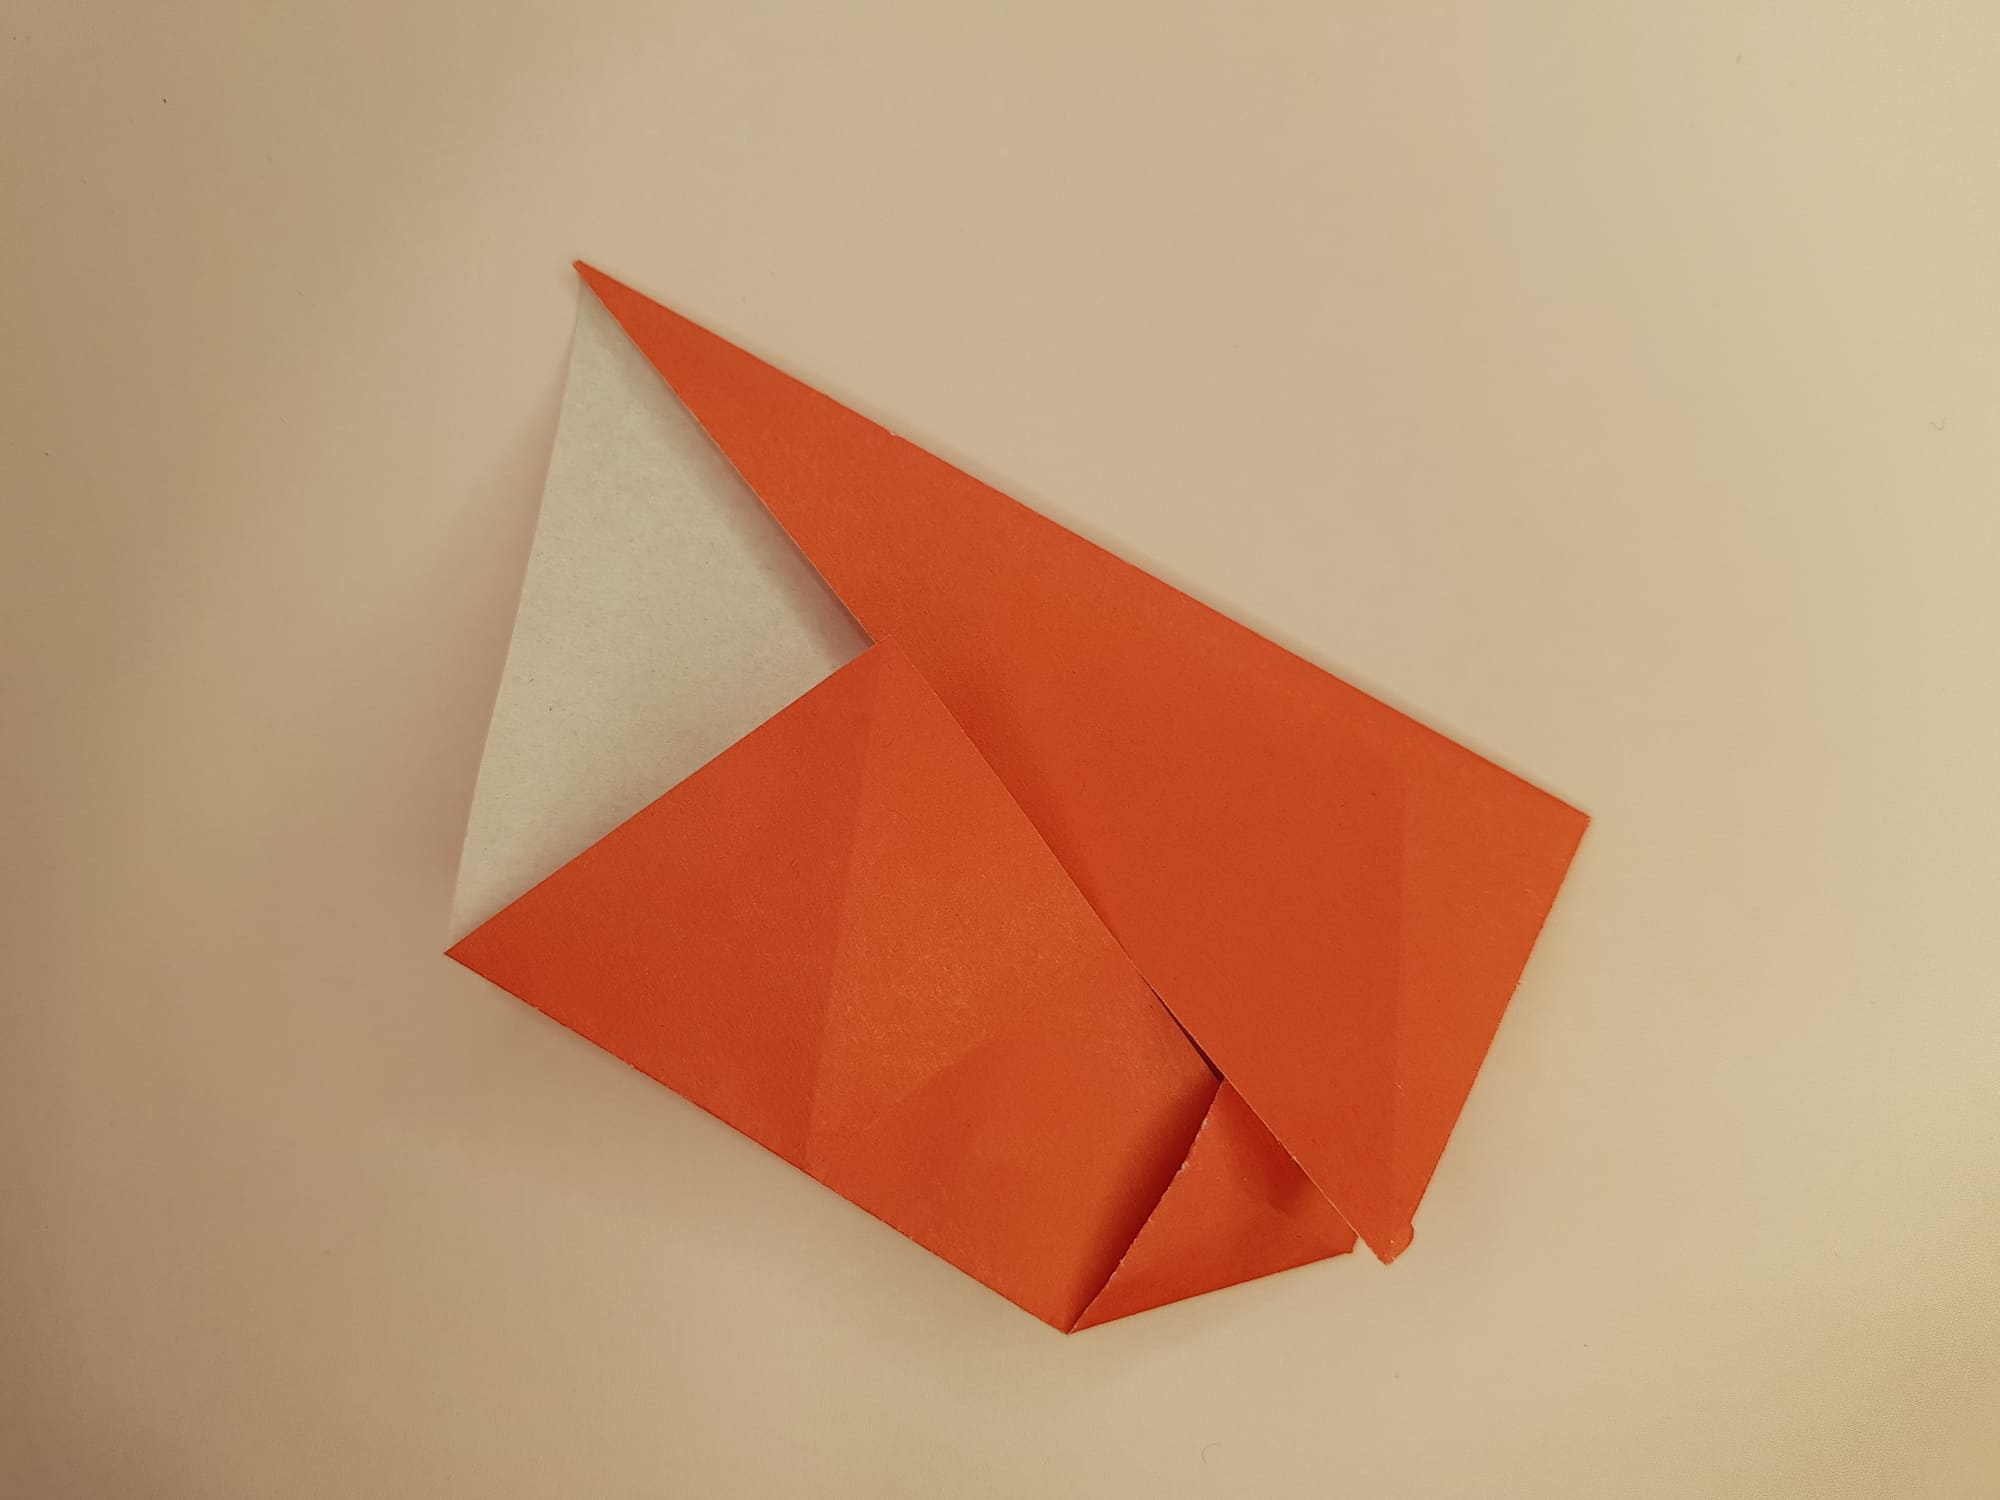
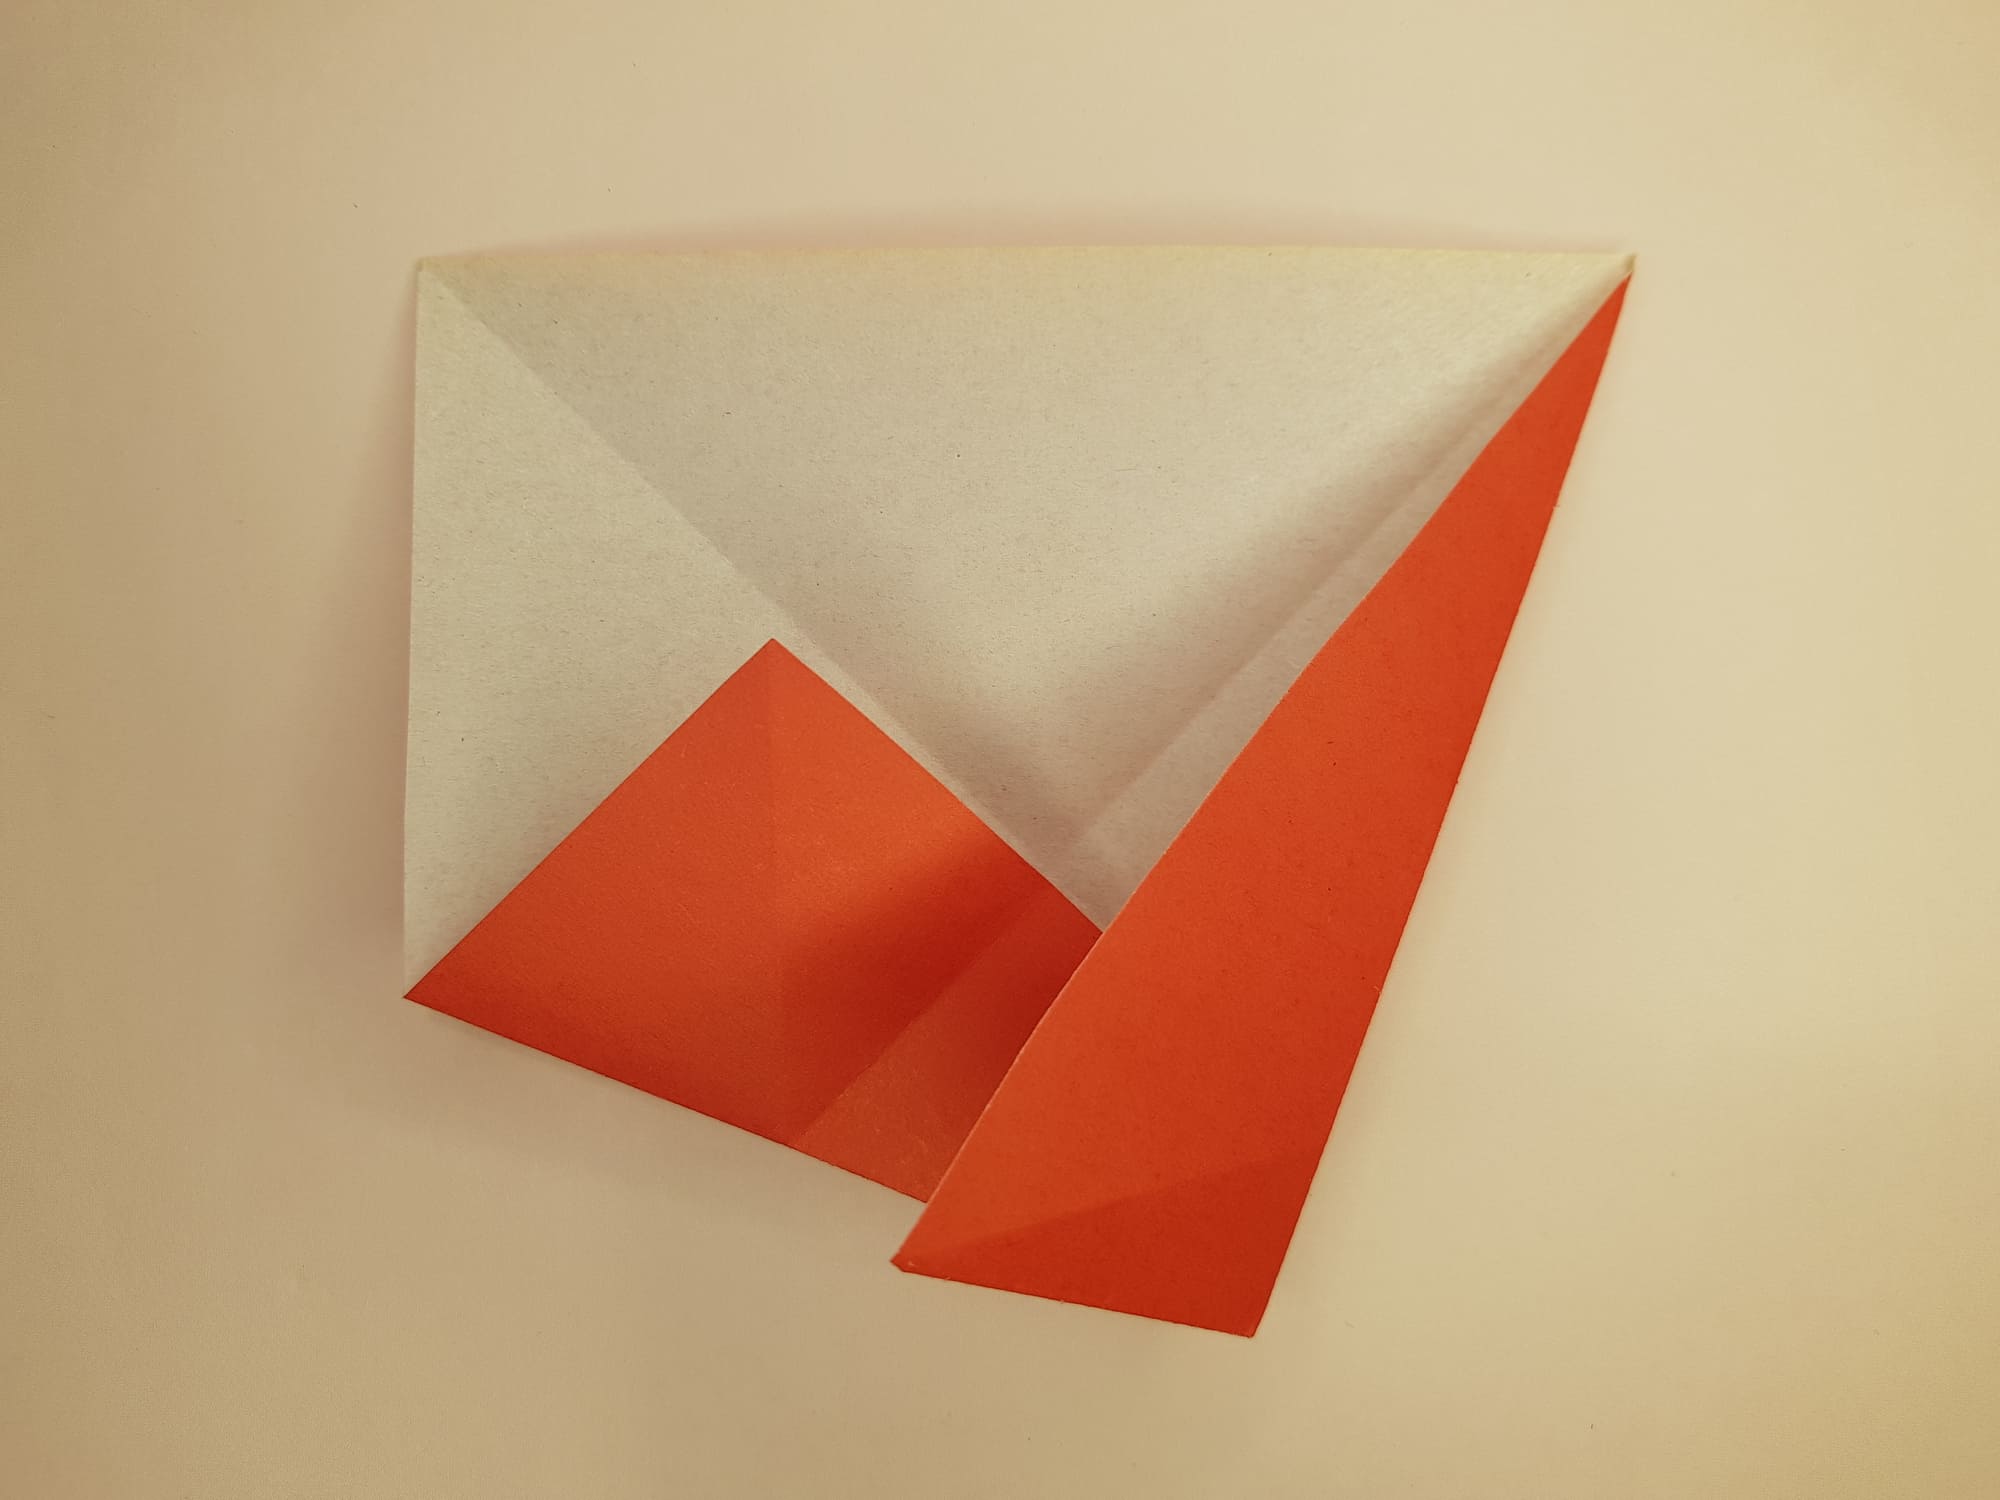
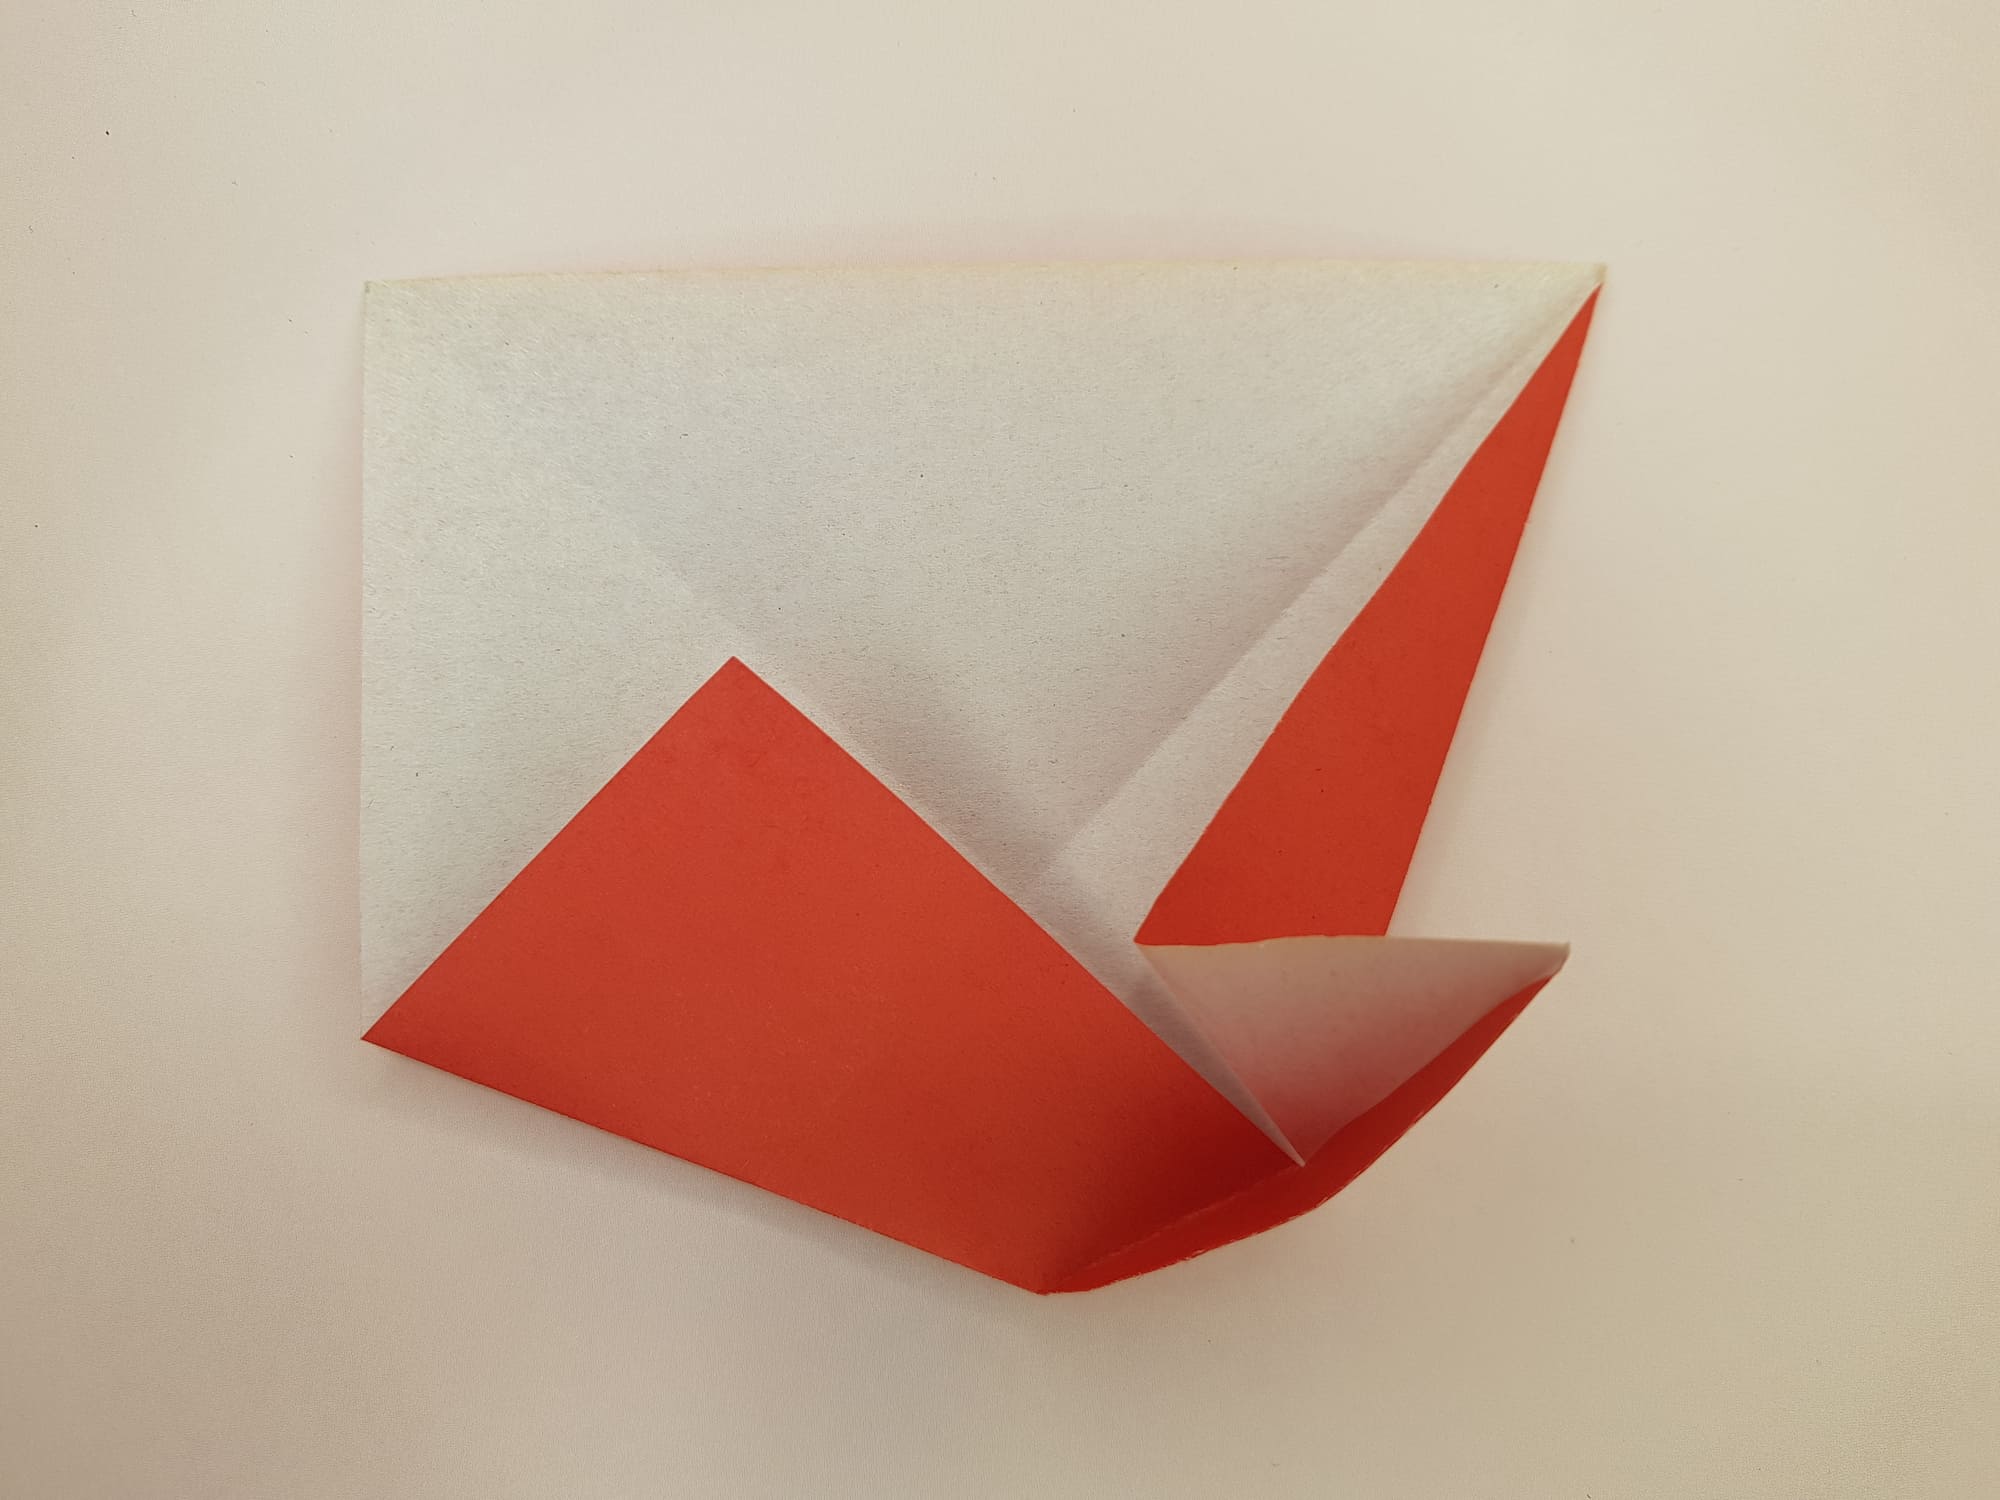
Pull up the corner and bend to the side.
Press and crease the fold.
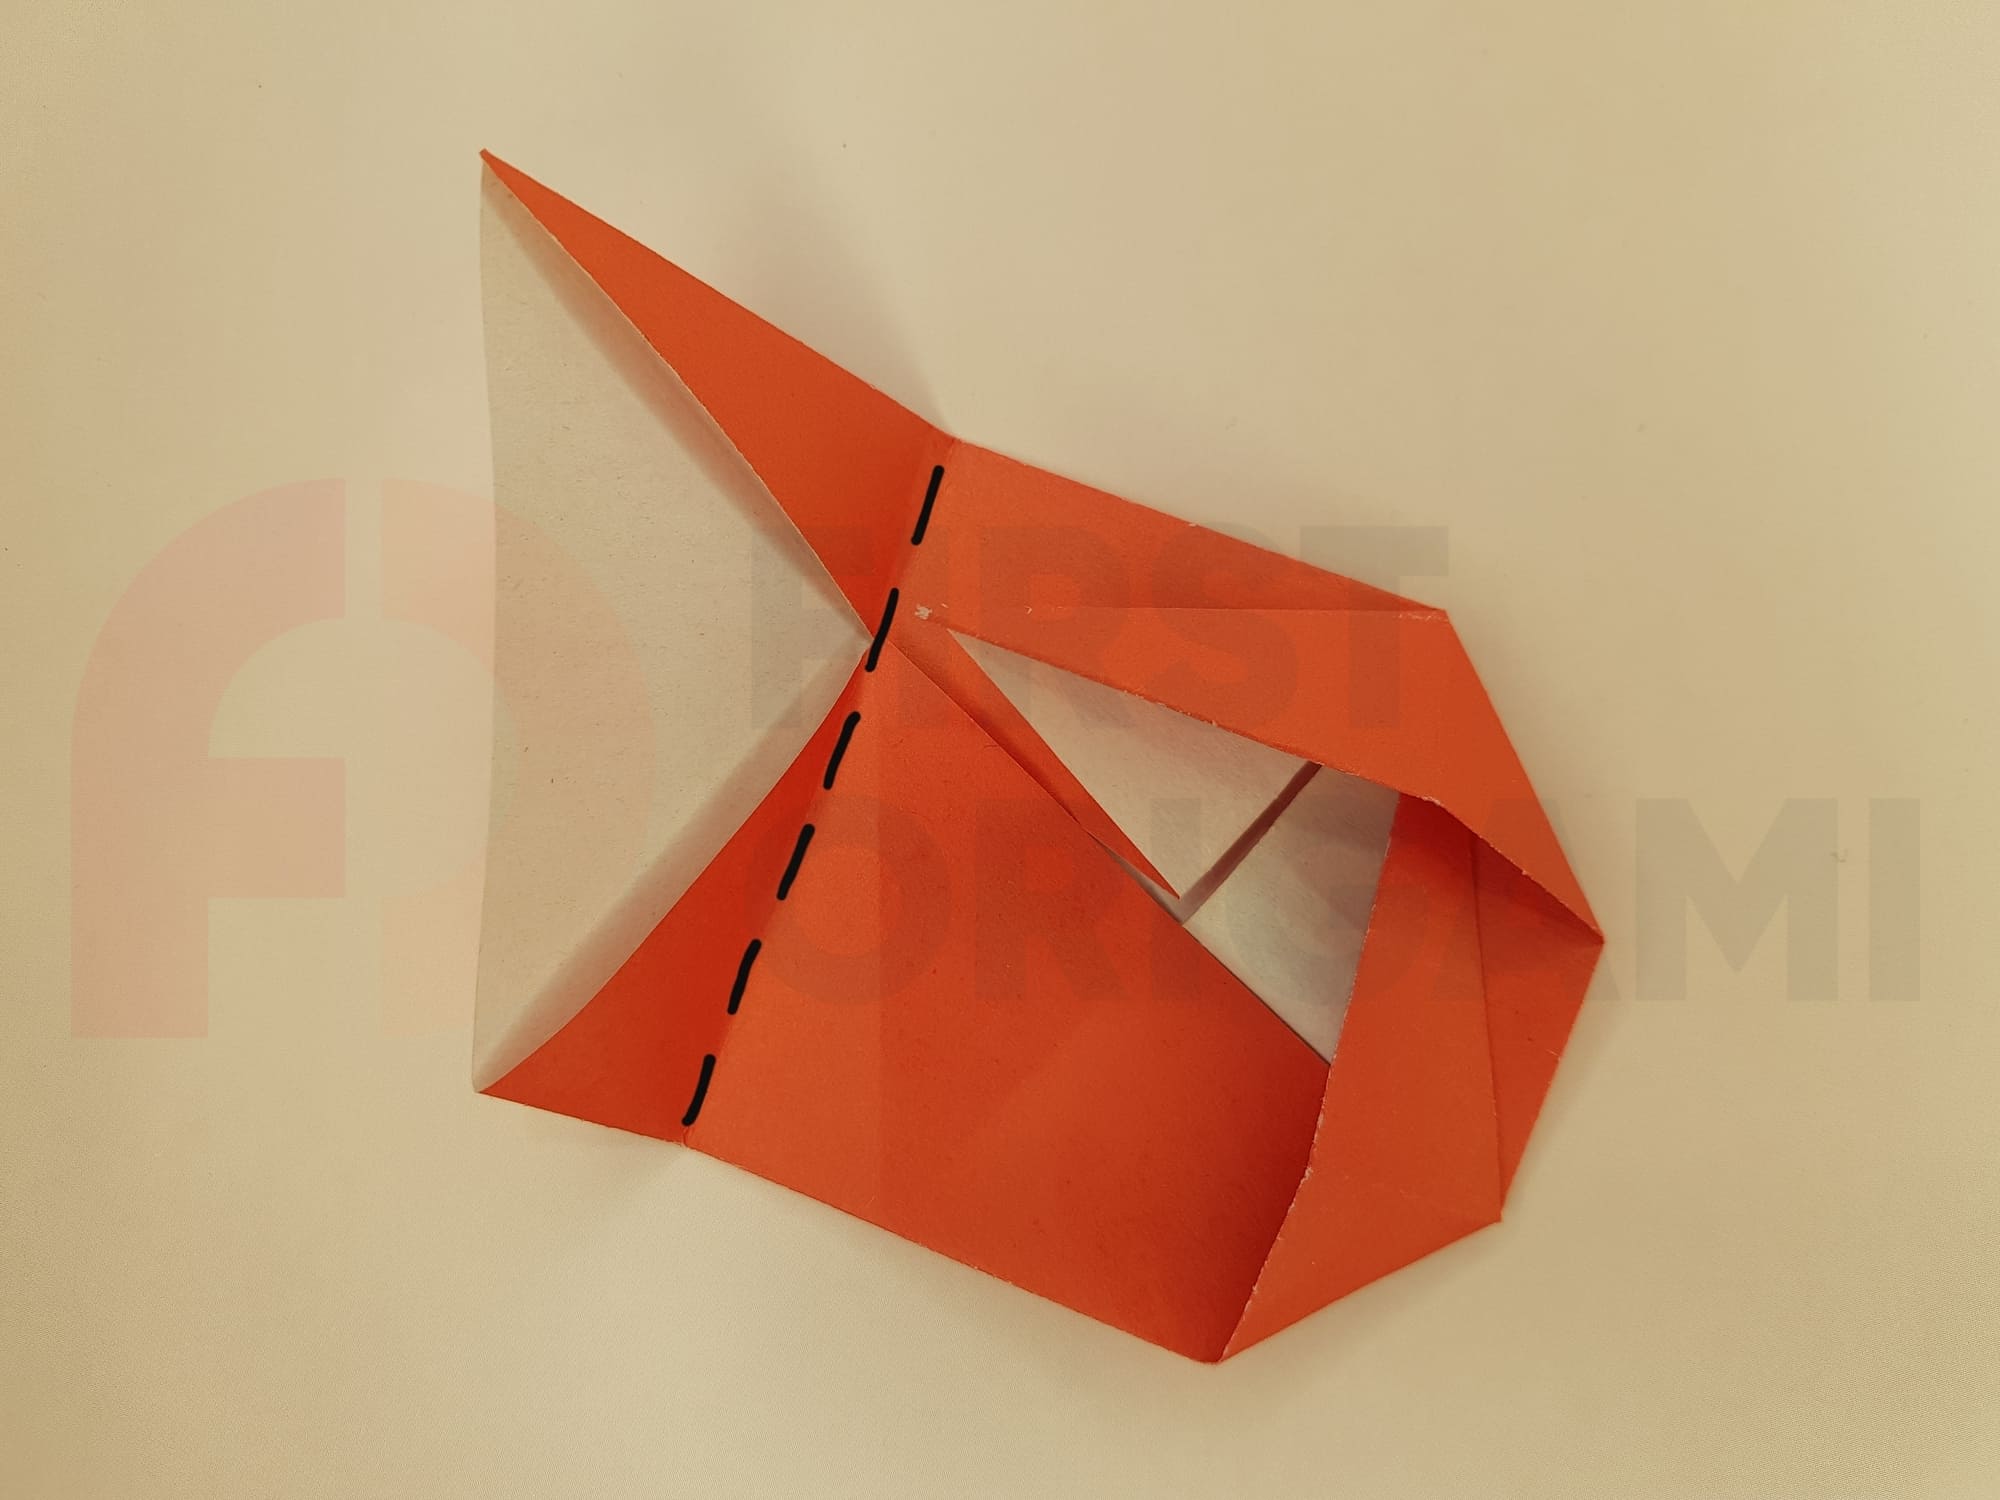
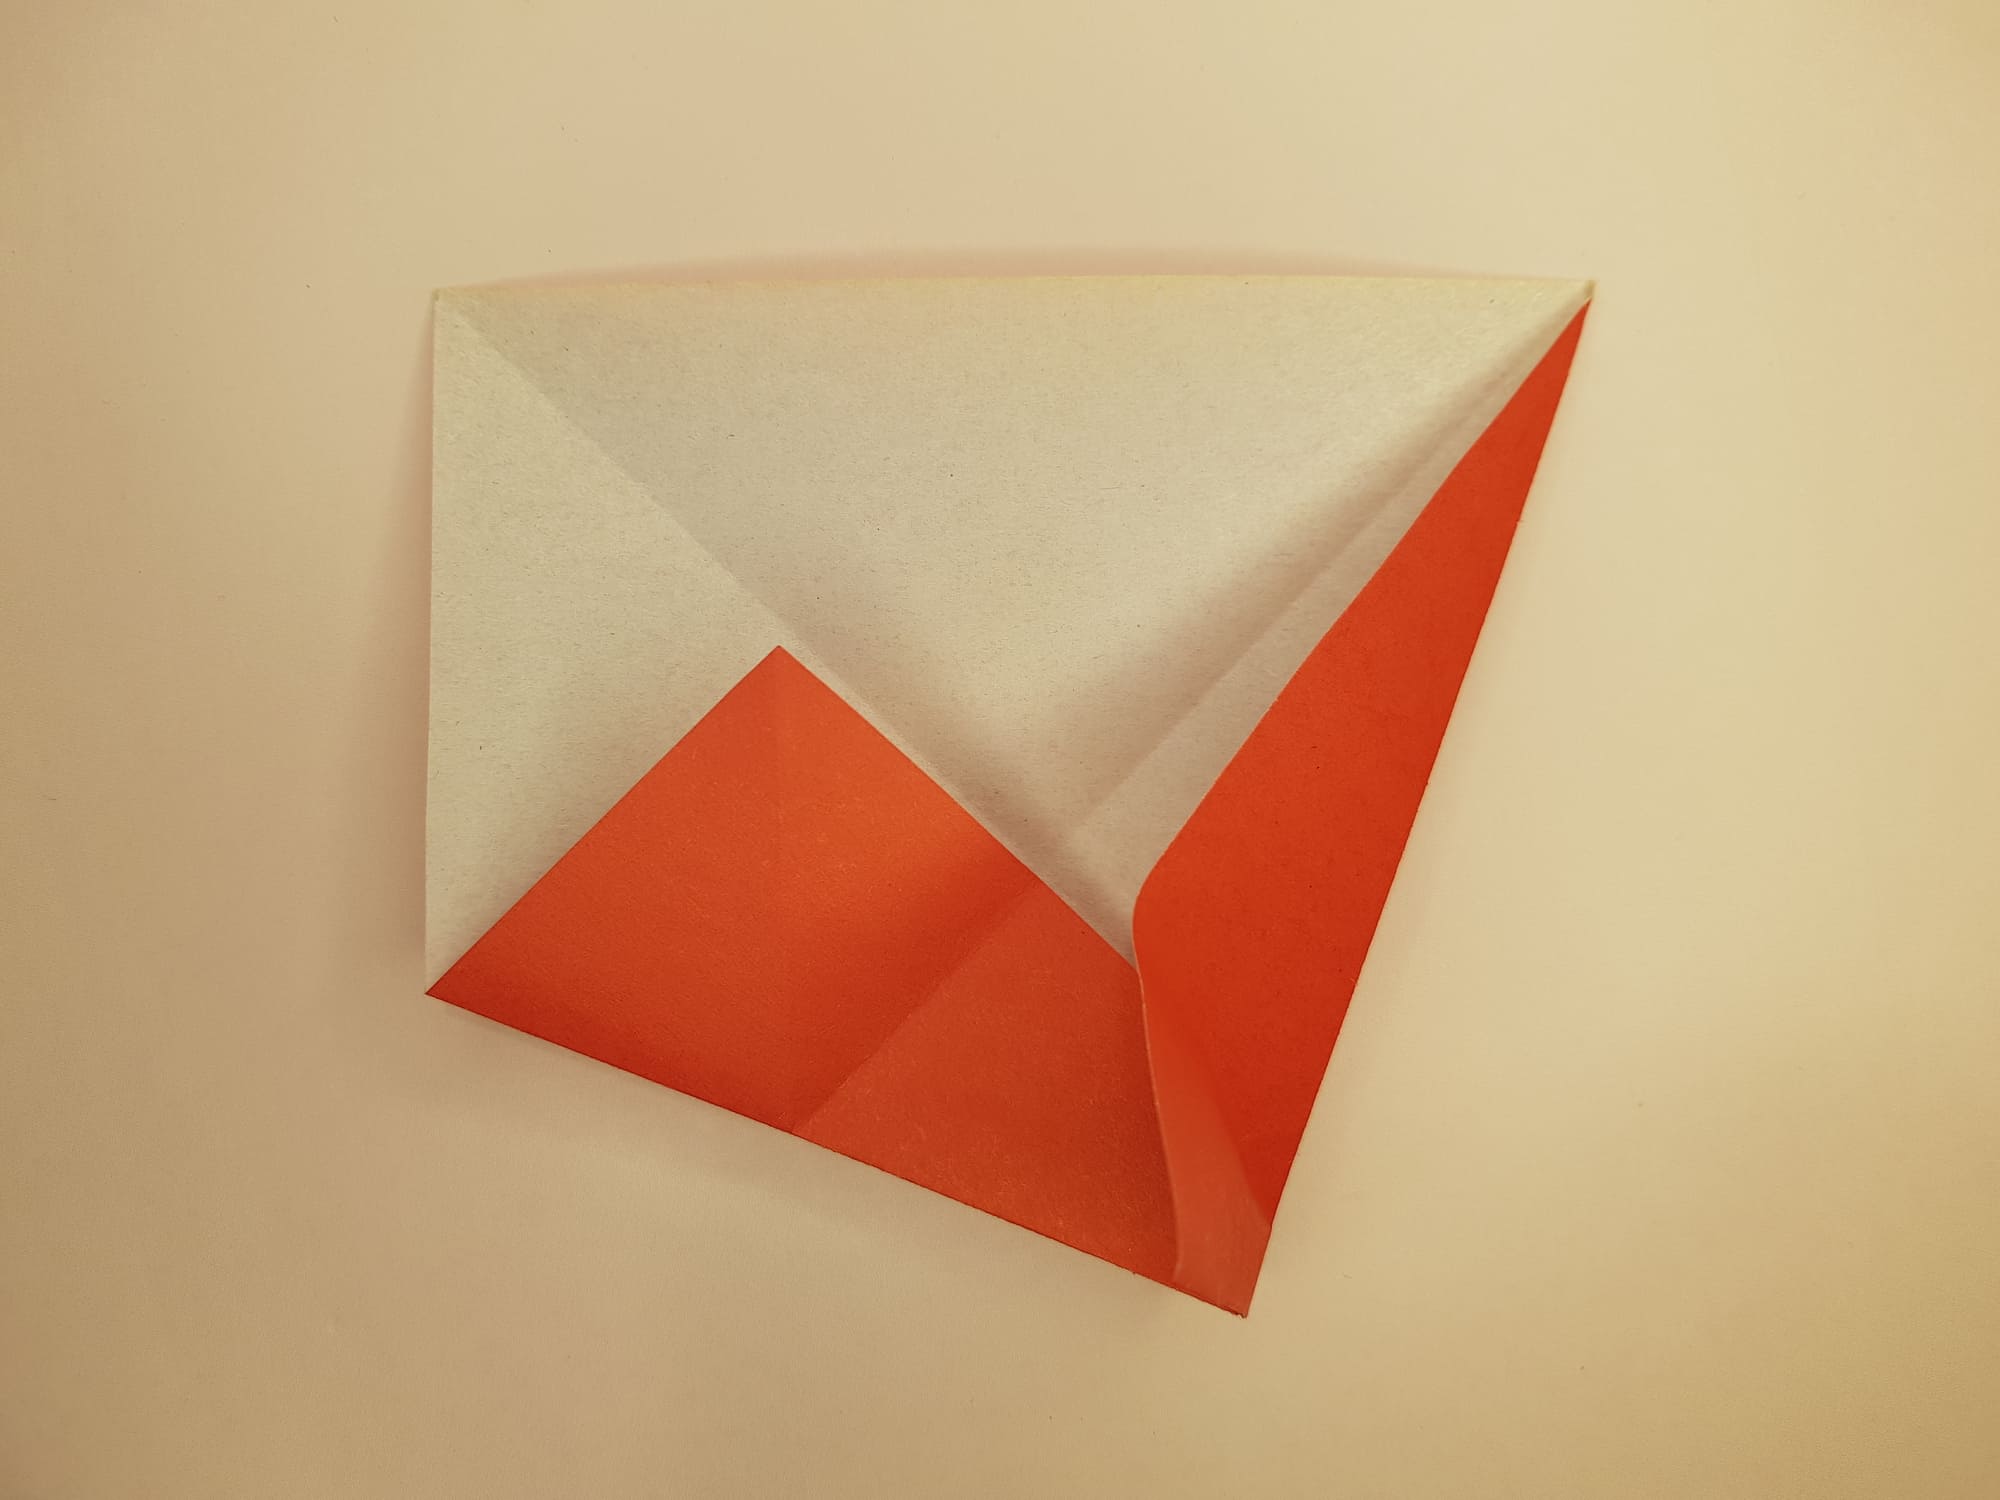
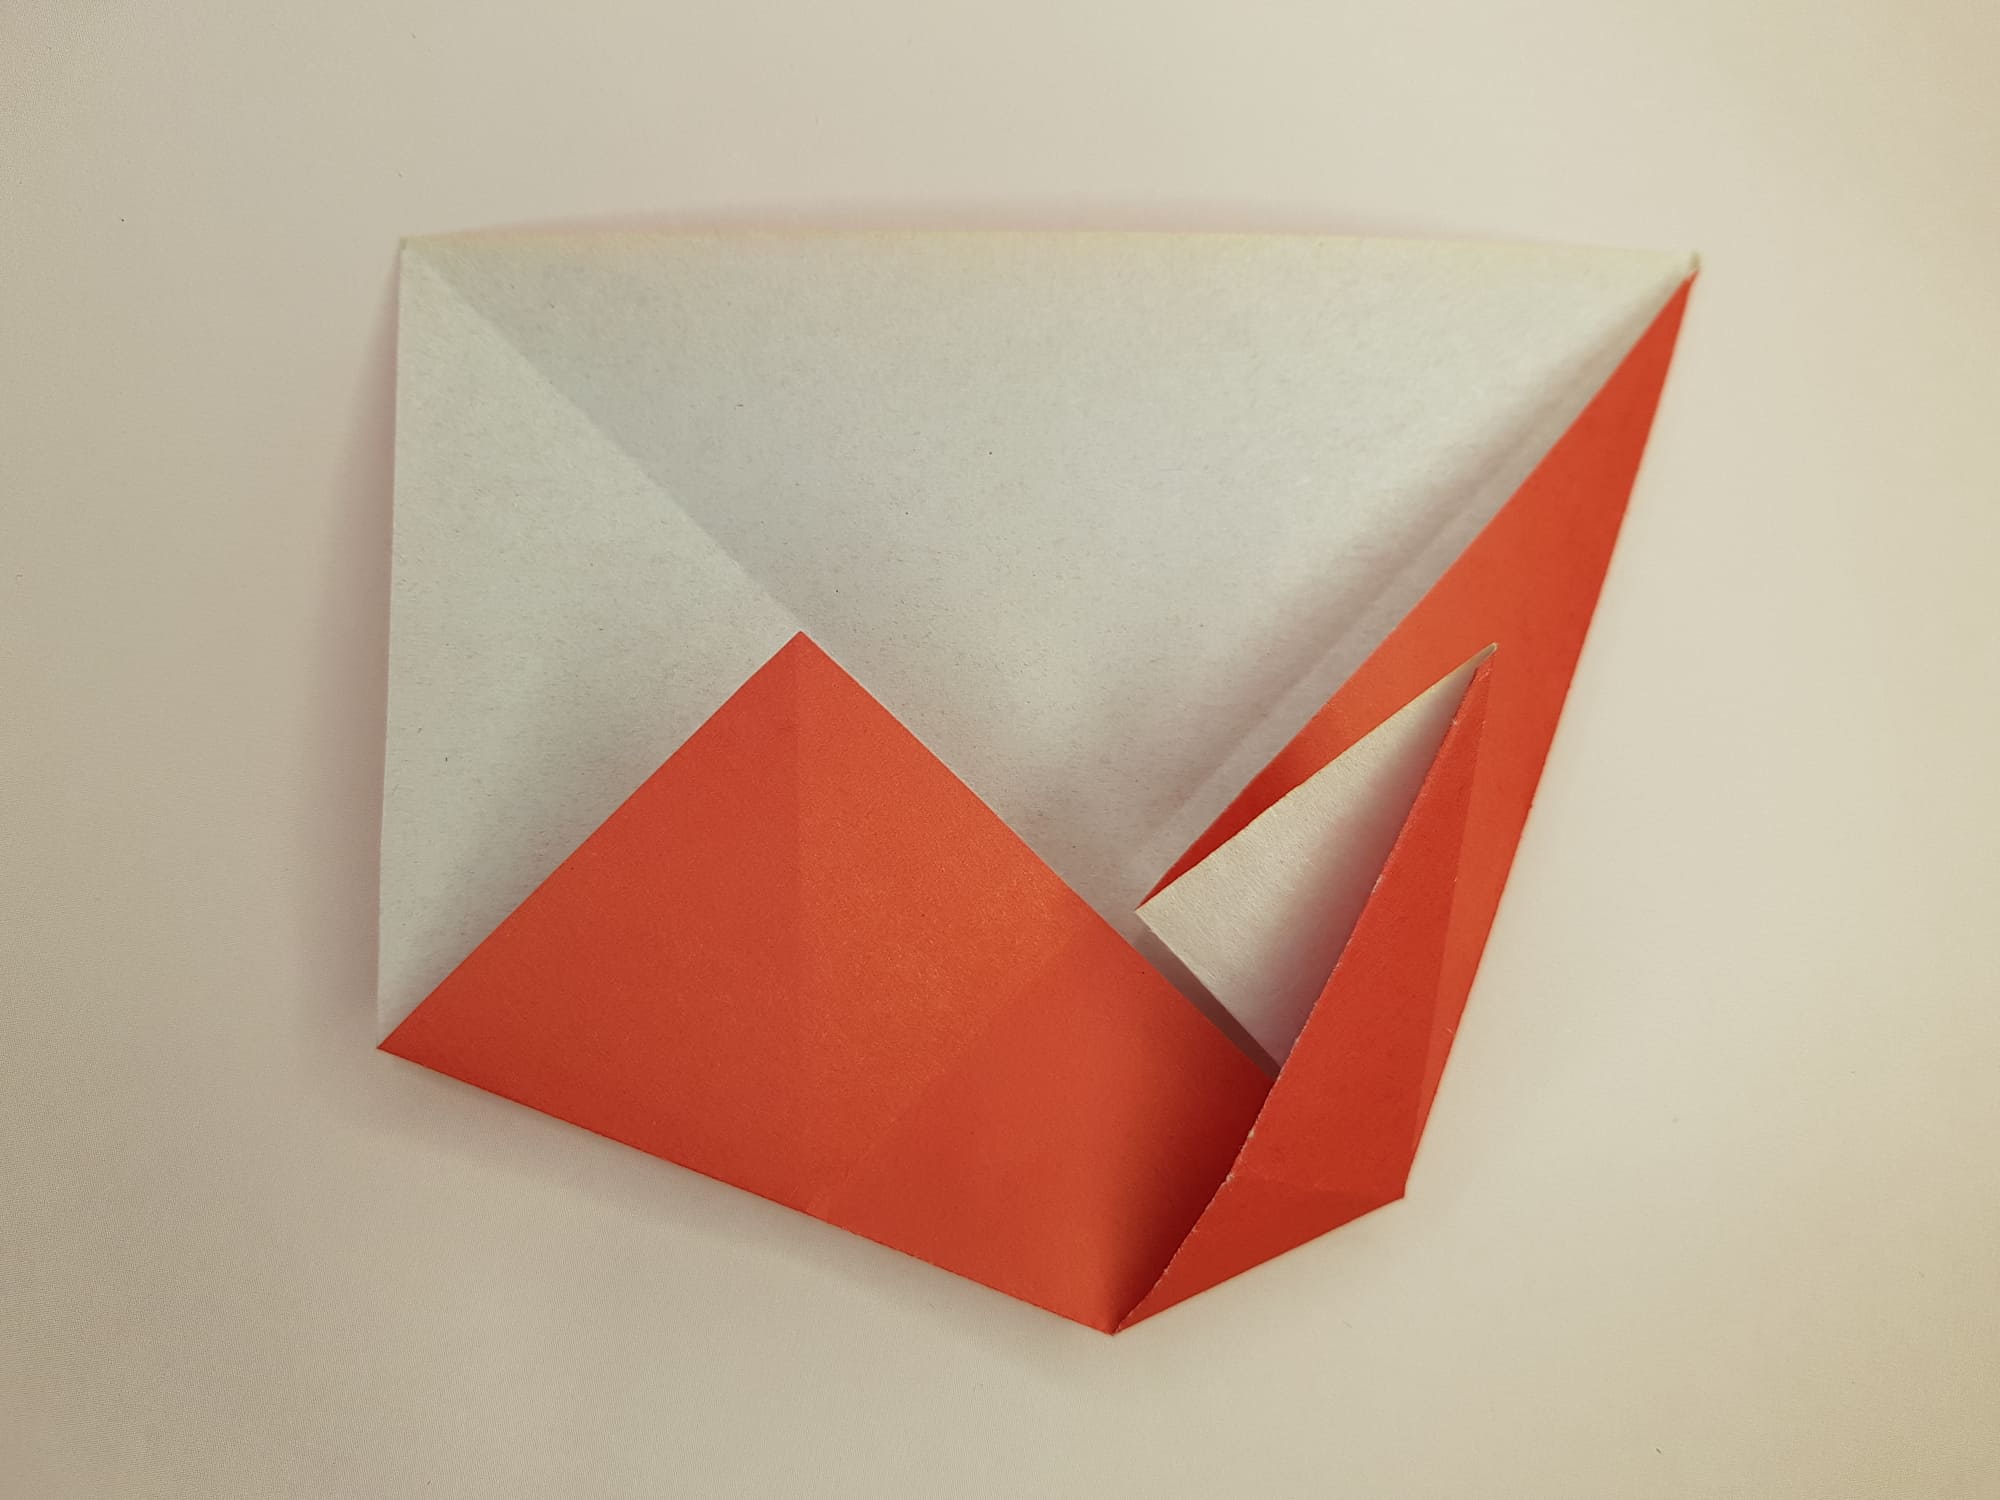
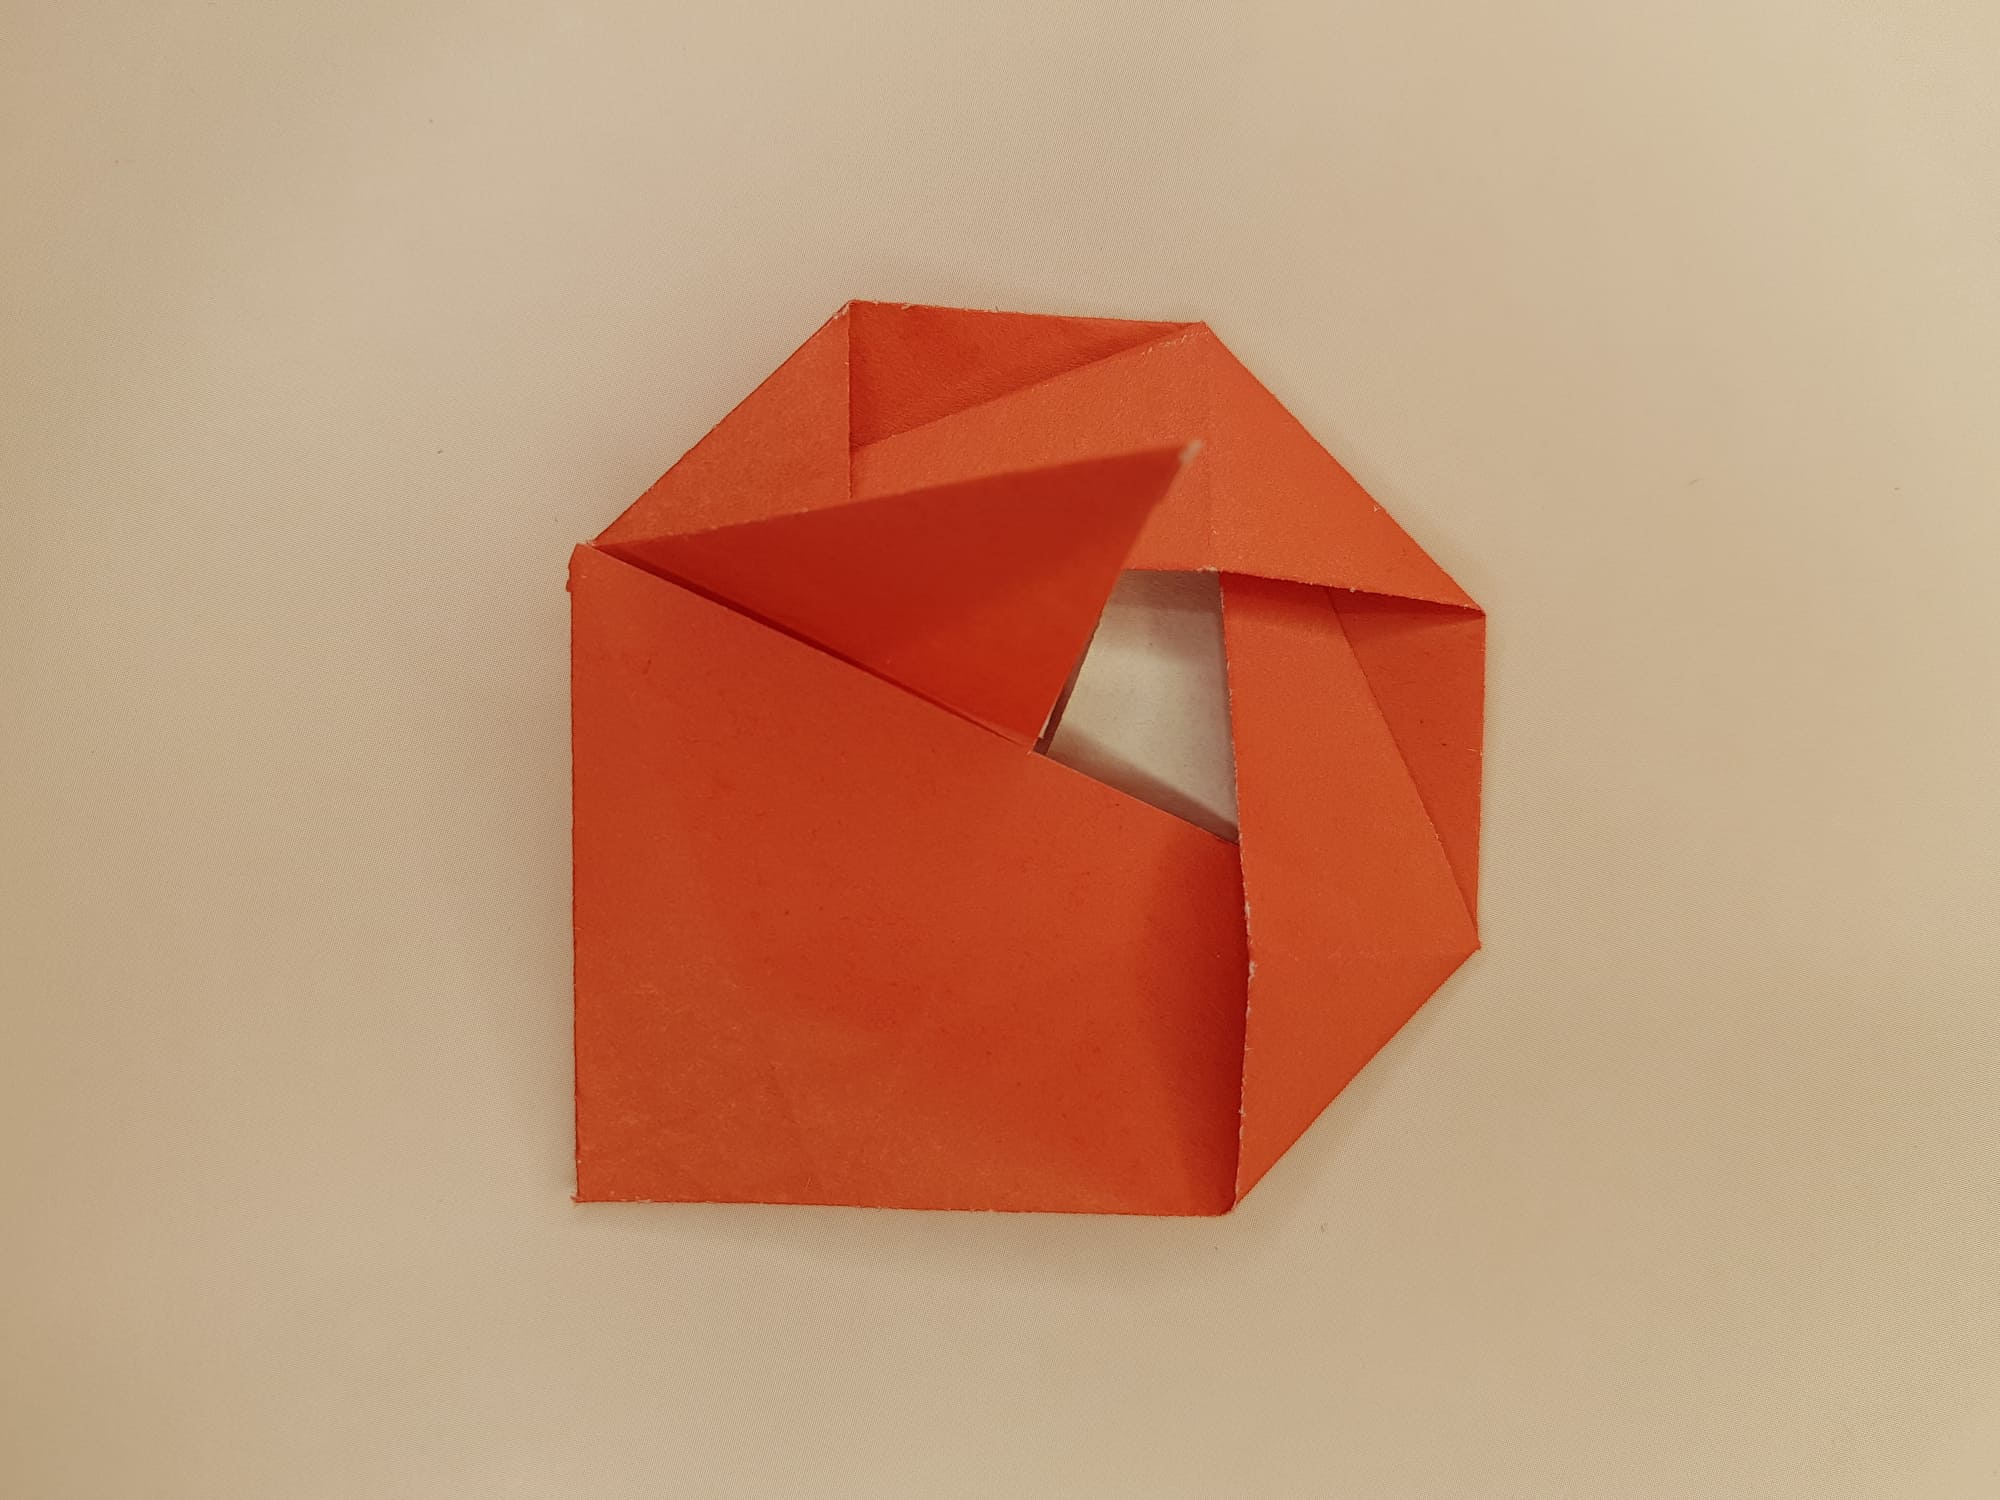
Make a fold along the dotted line.

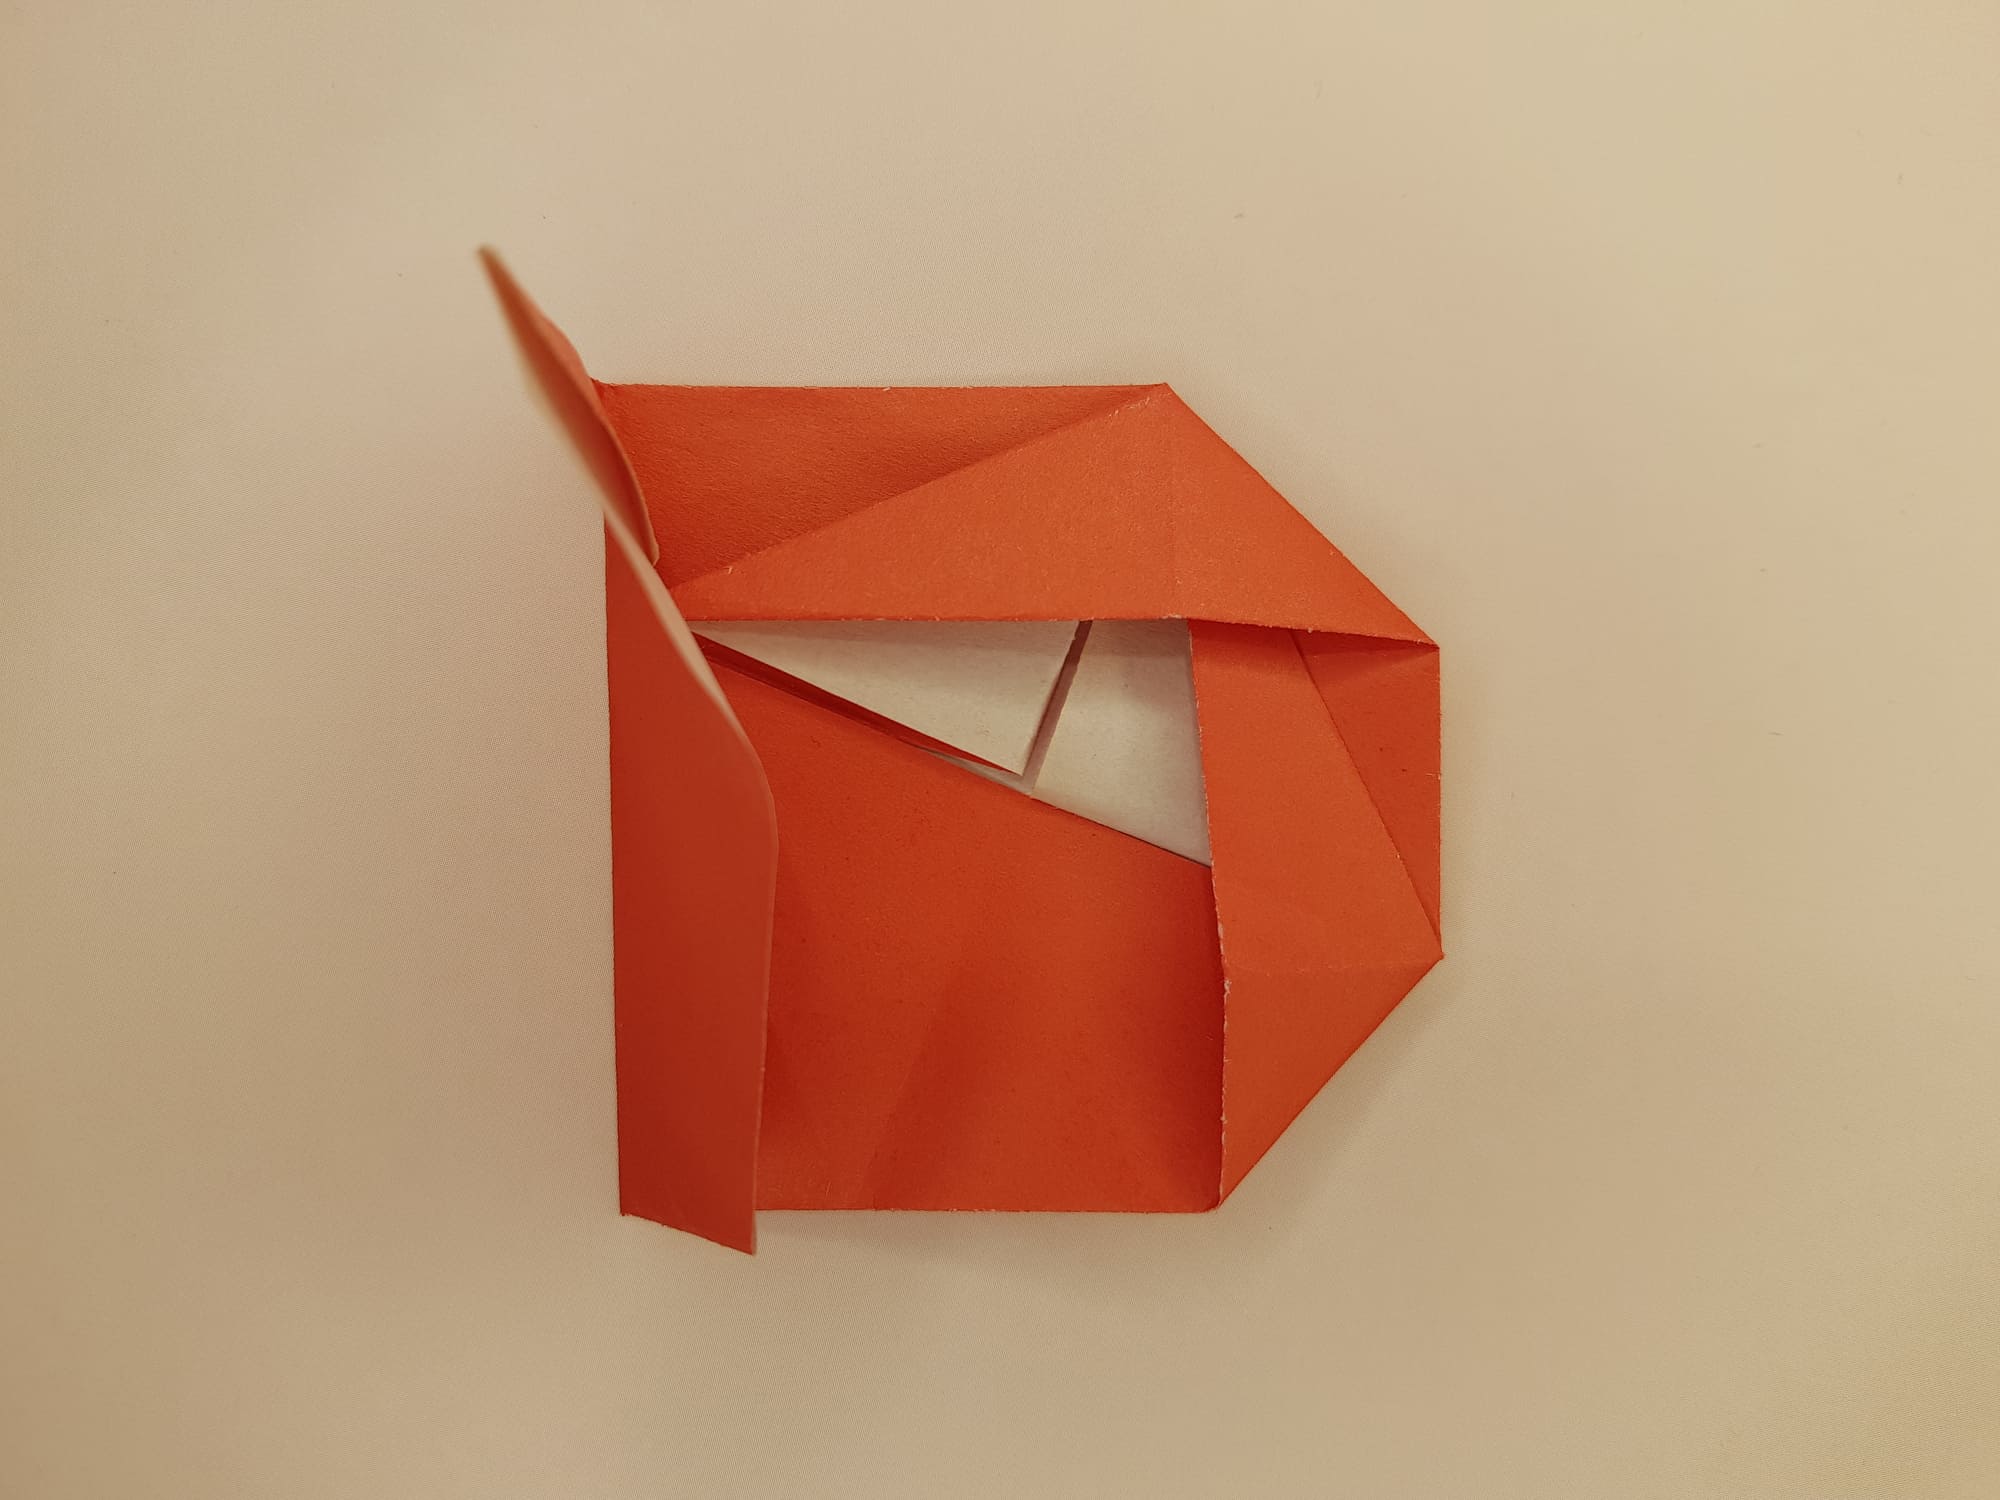
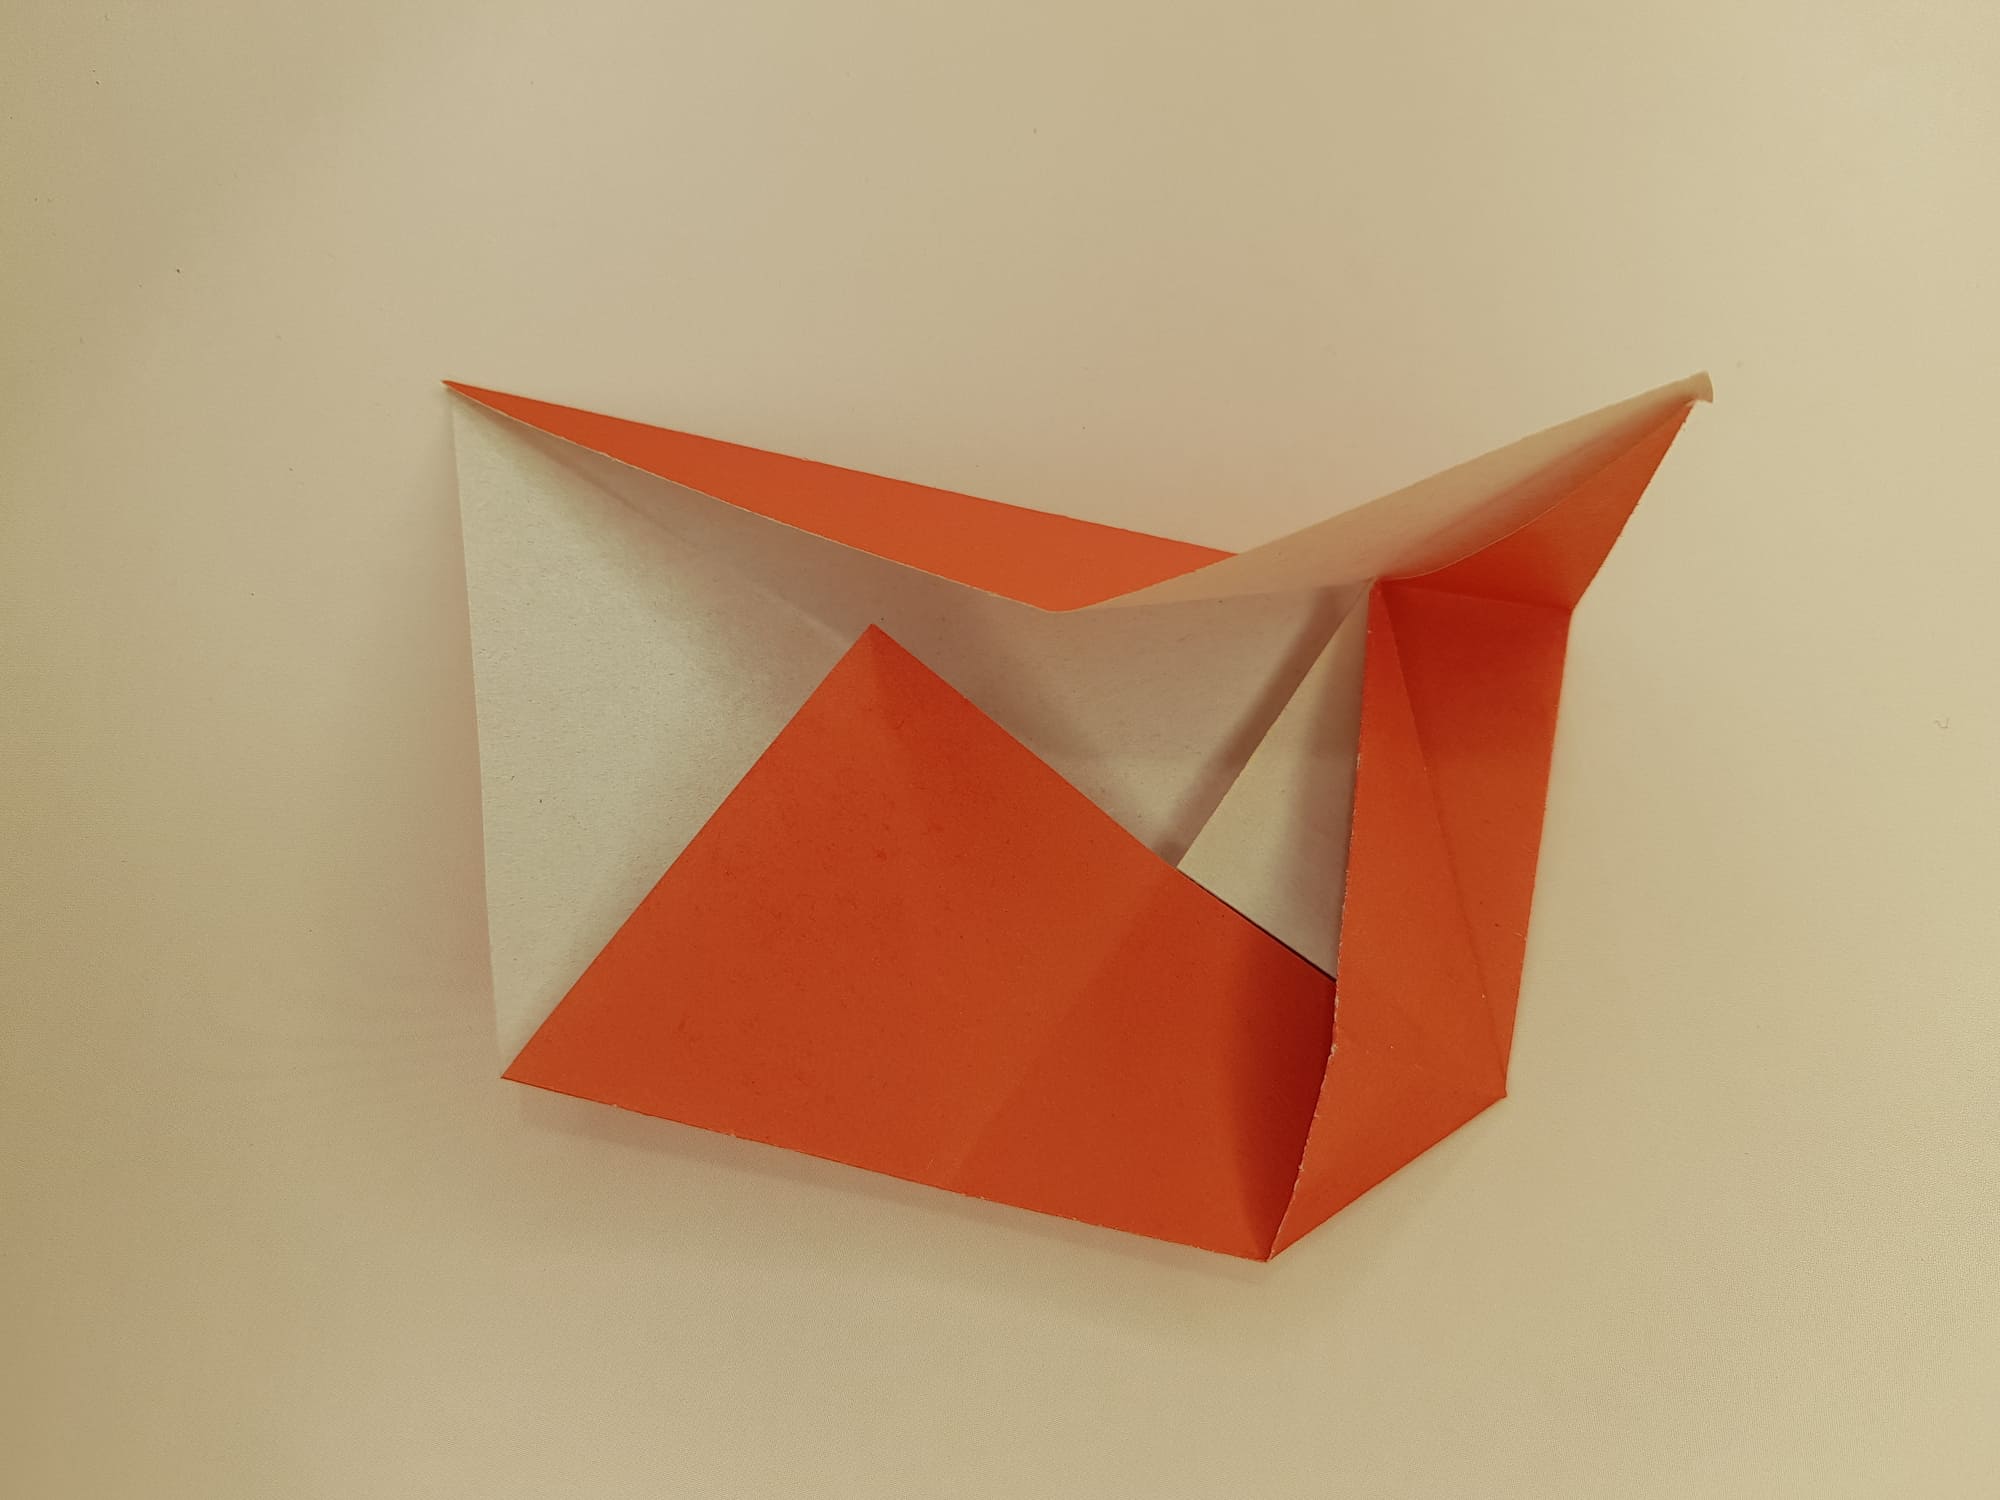
Repeat the action – open the upper left corner, bend down, and press.
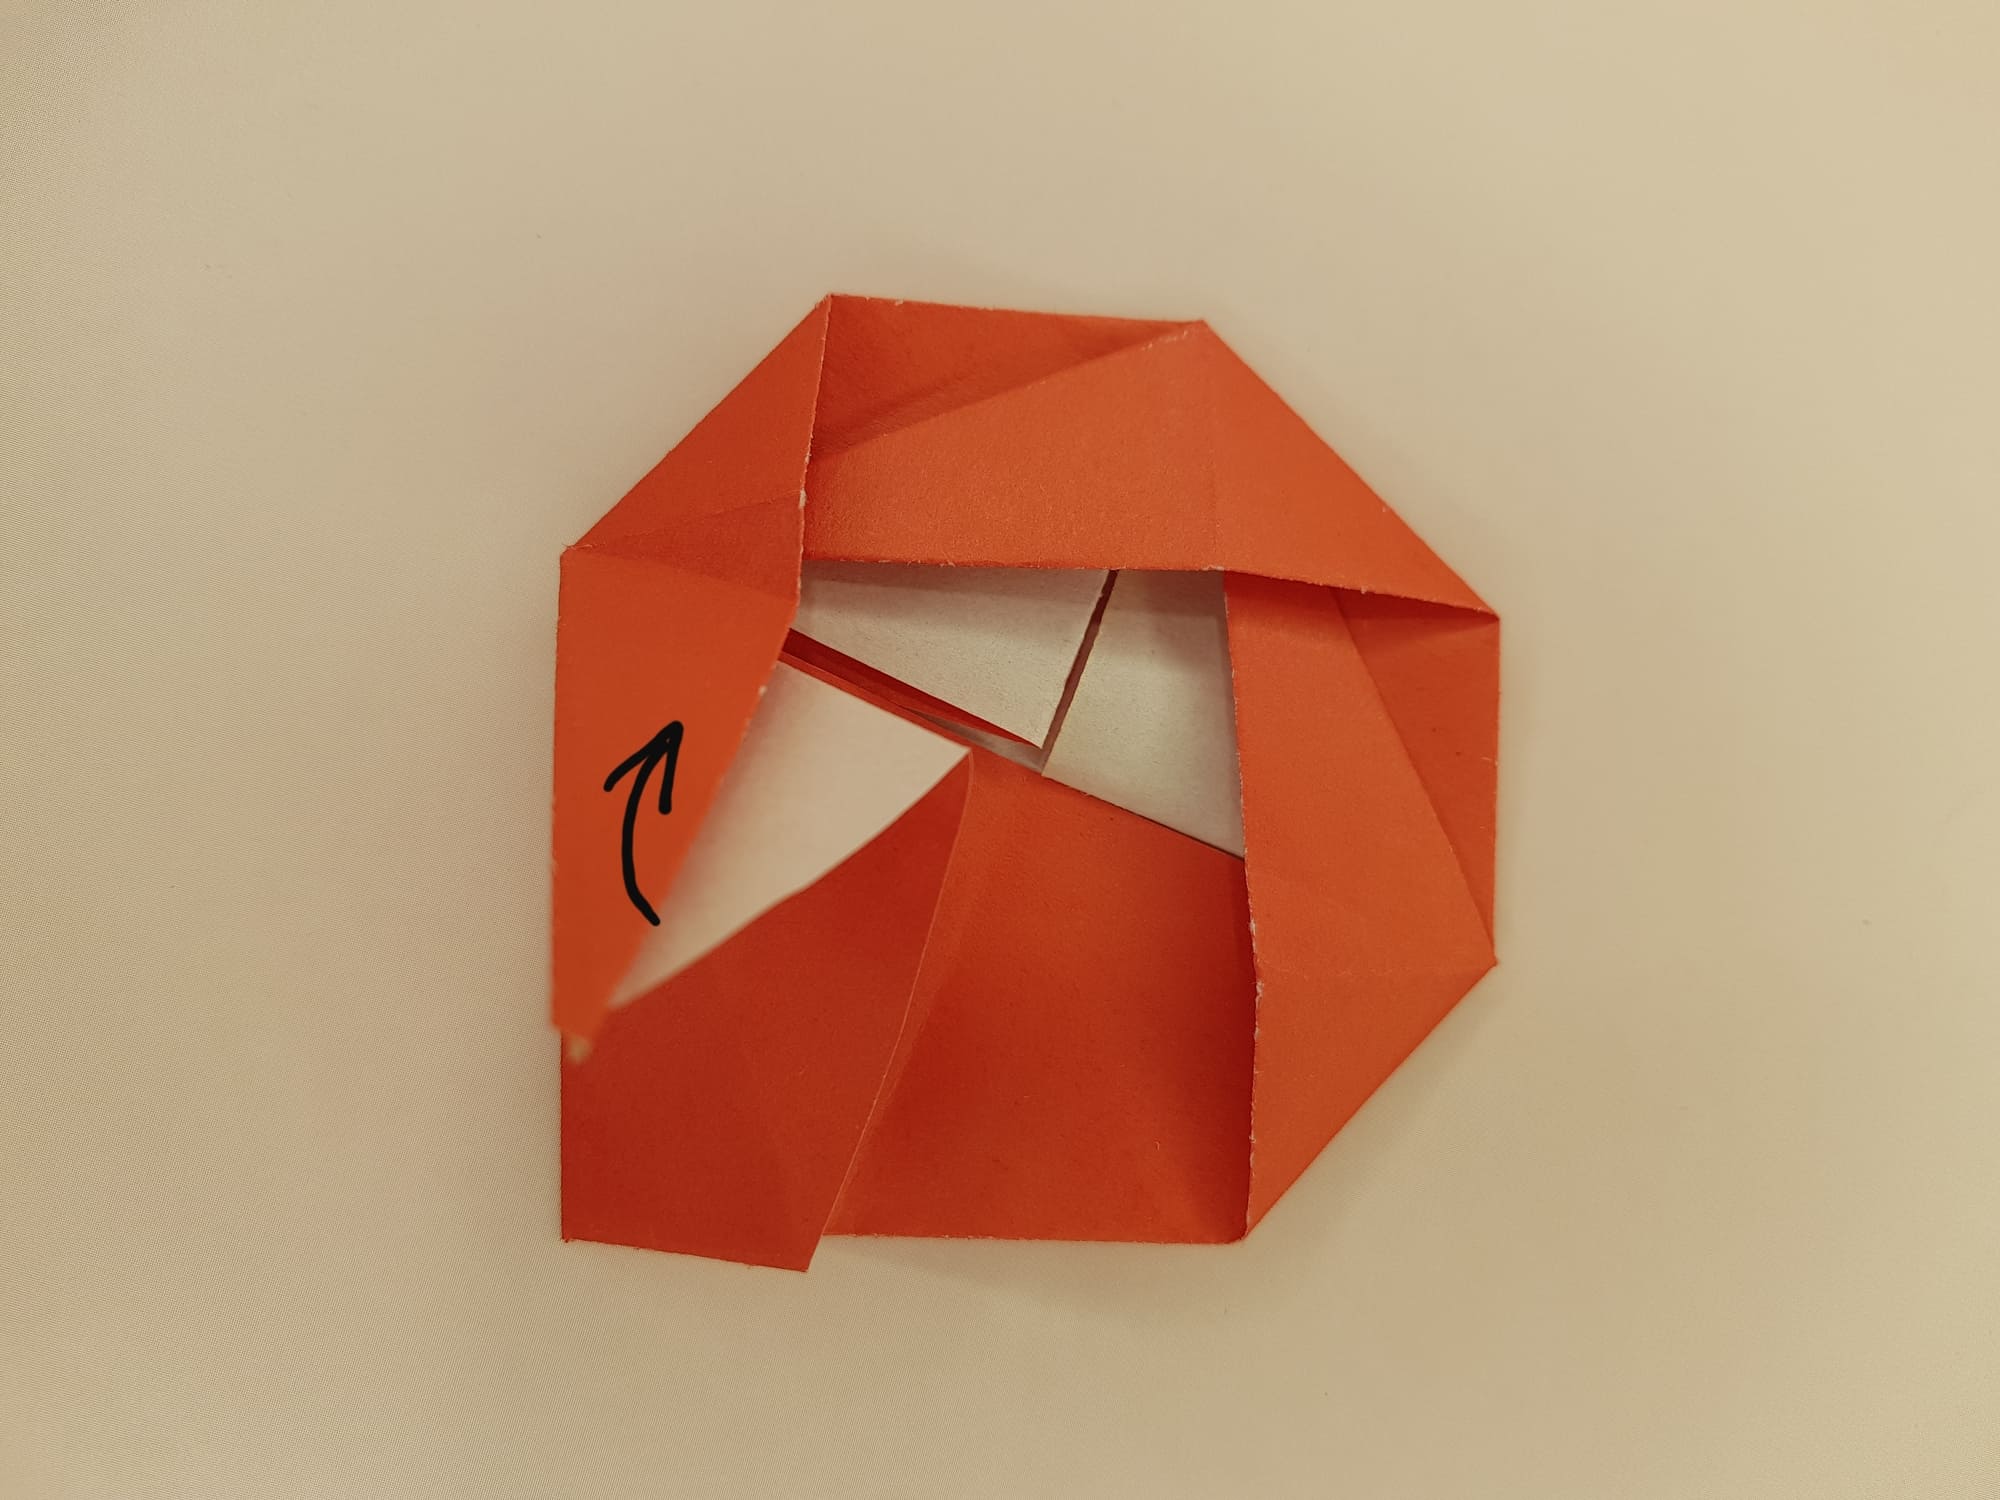
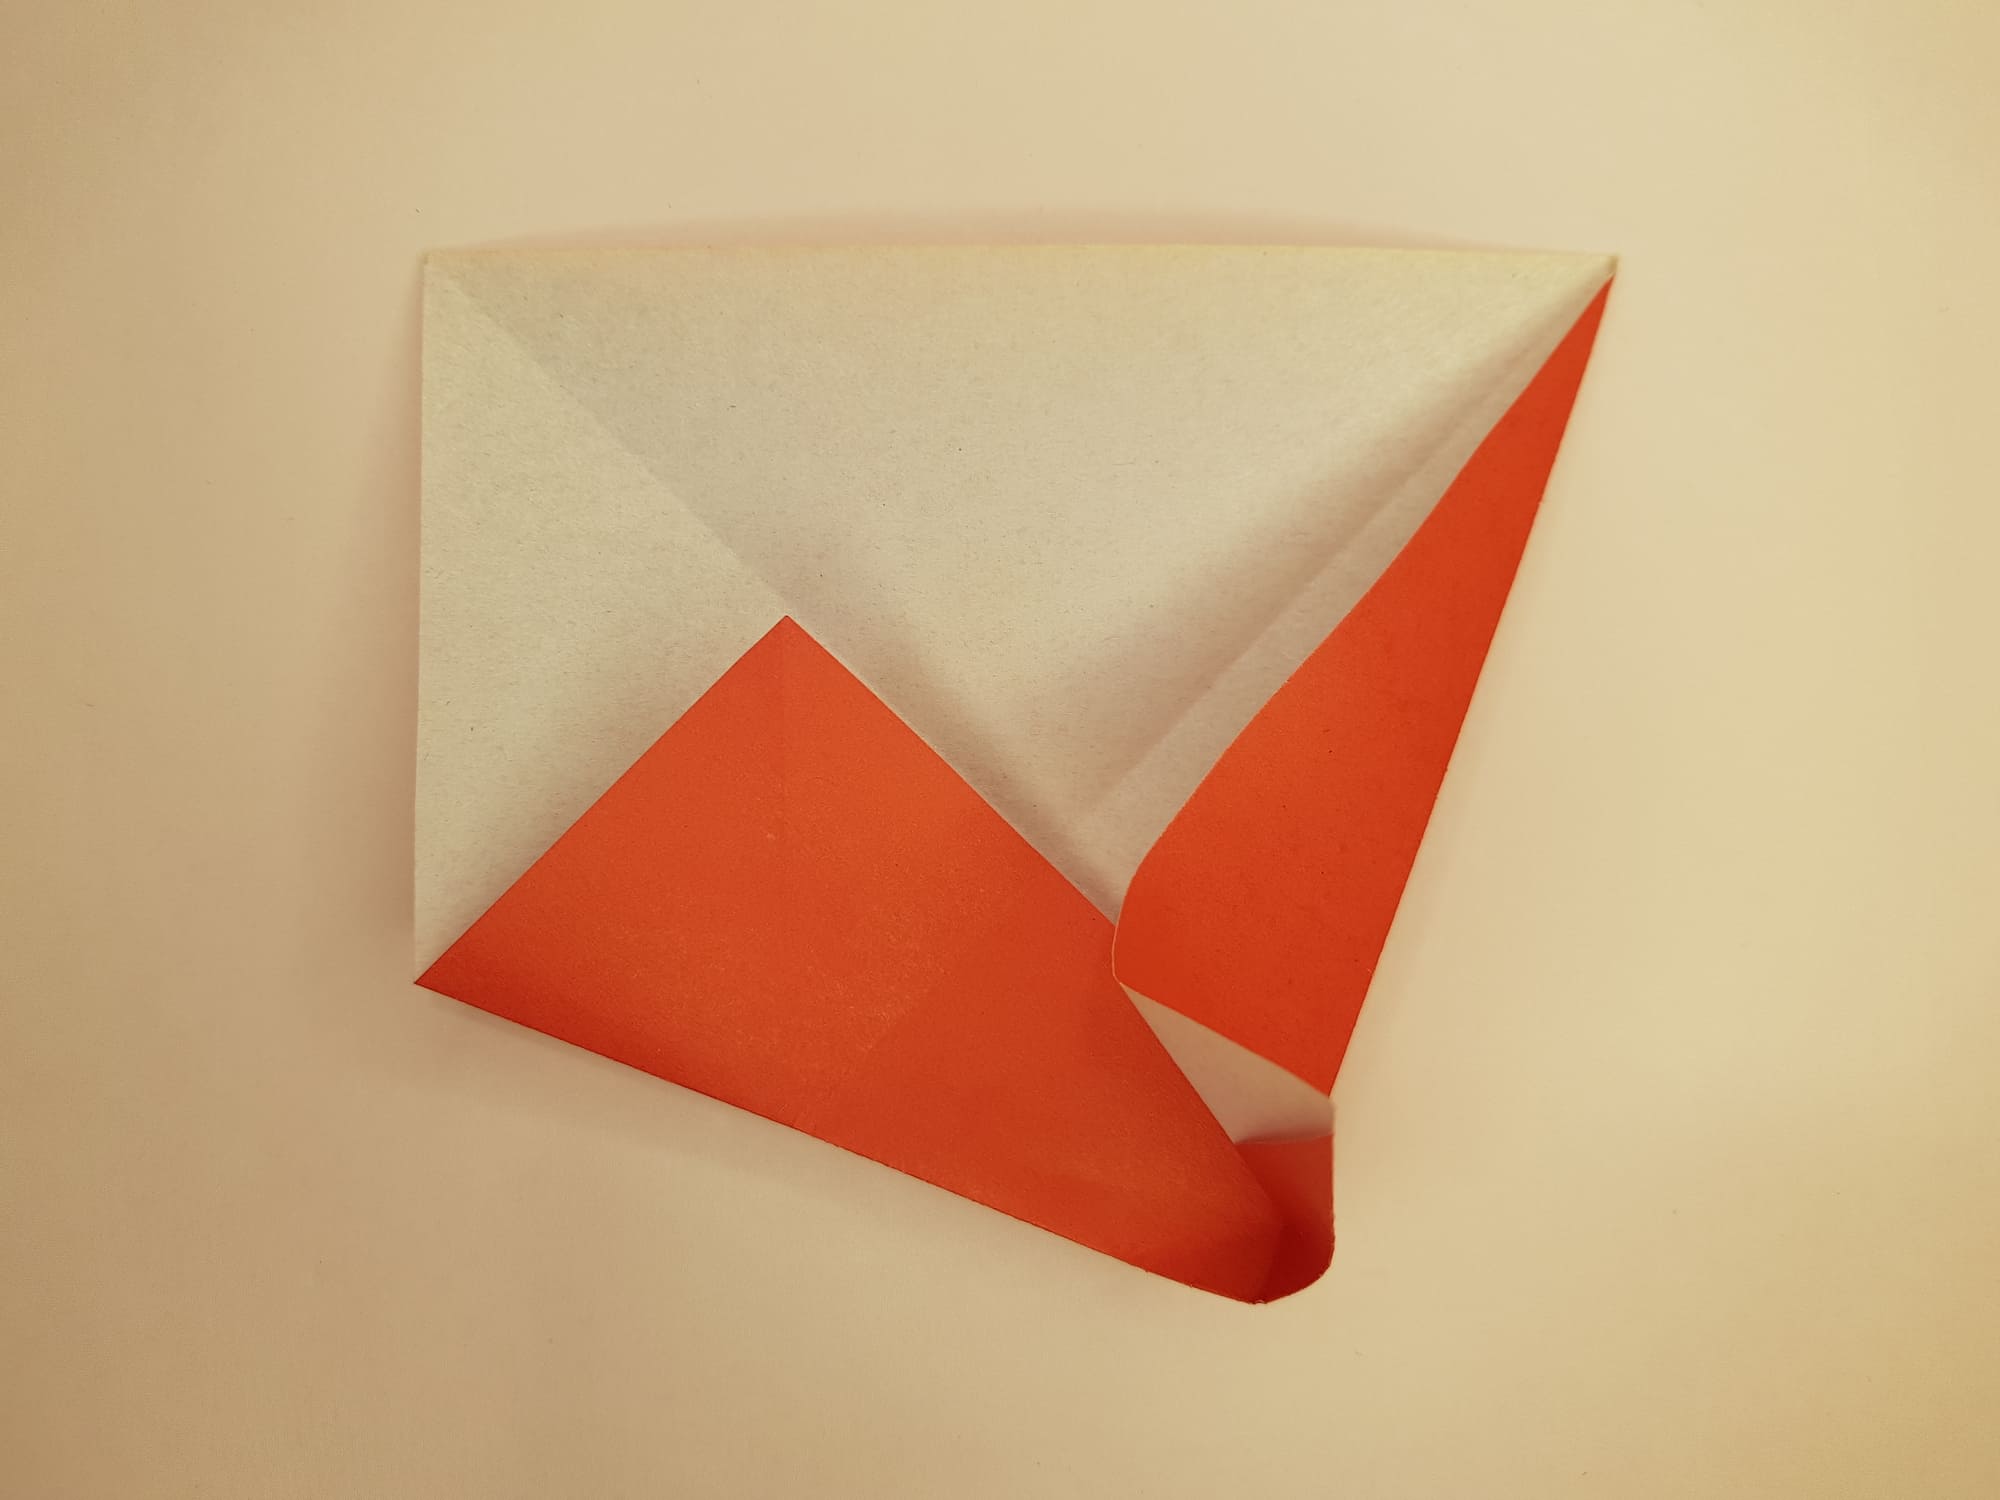
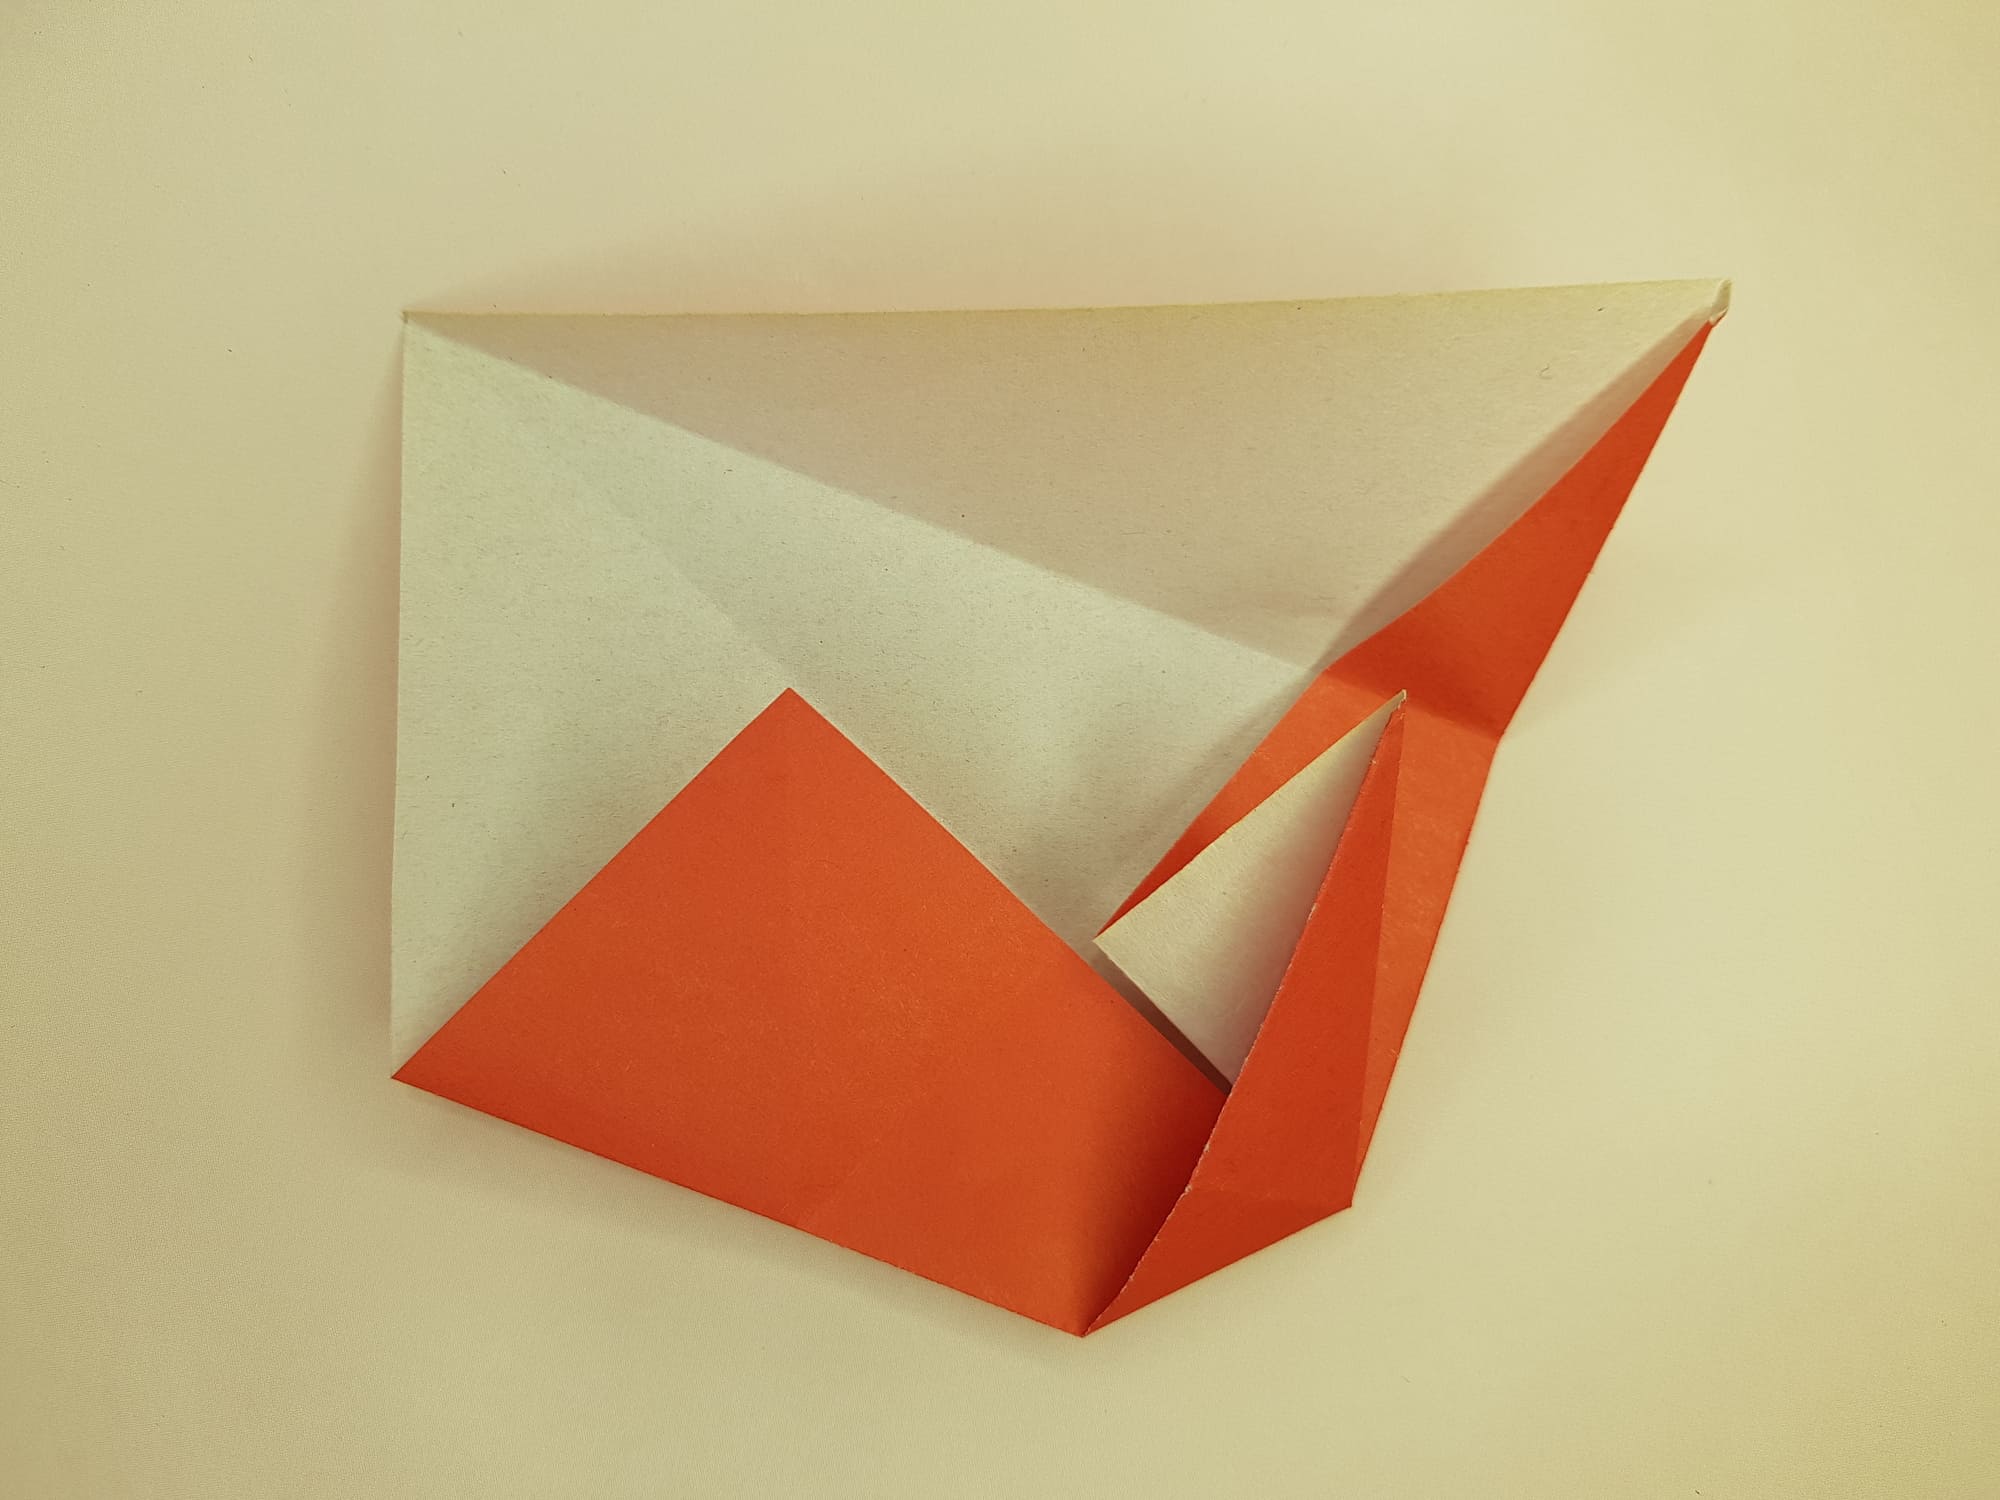
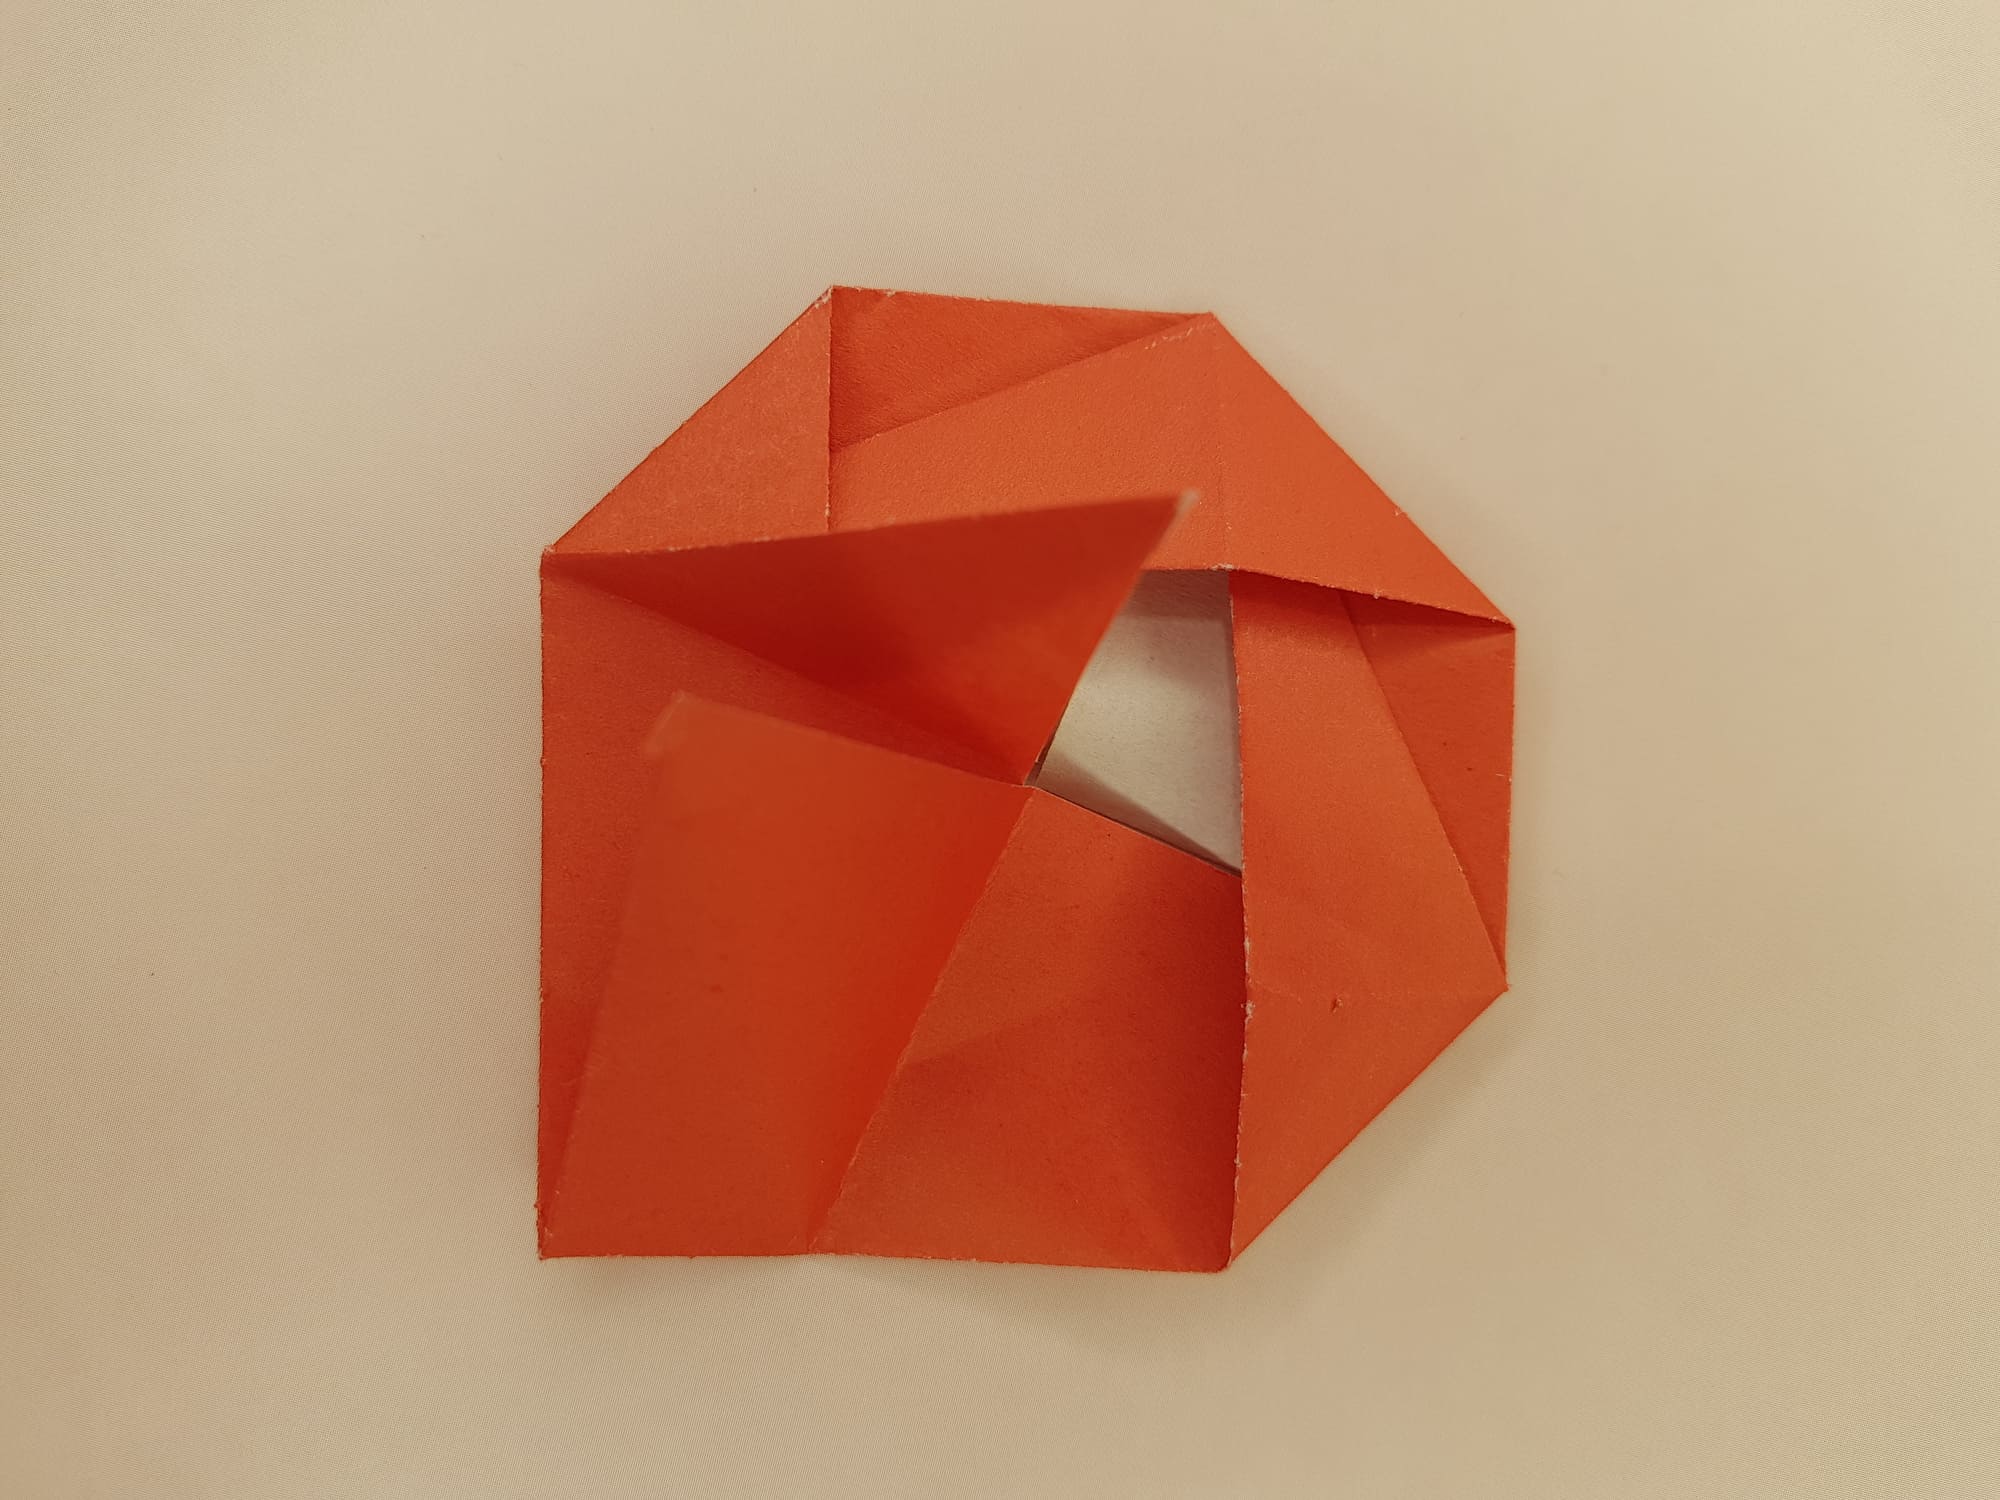
Pull up the corner in the direction of the arrow.
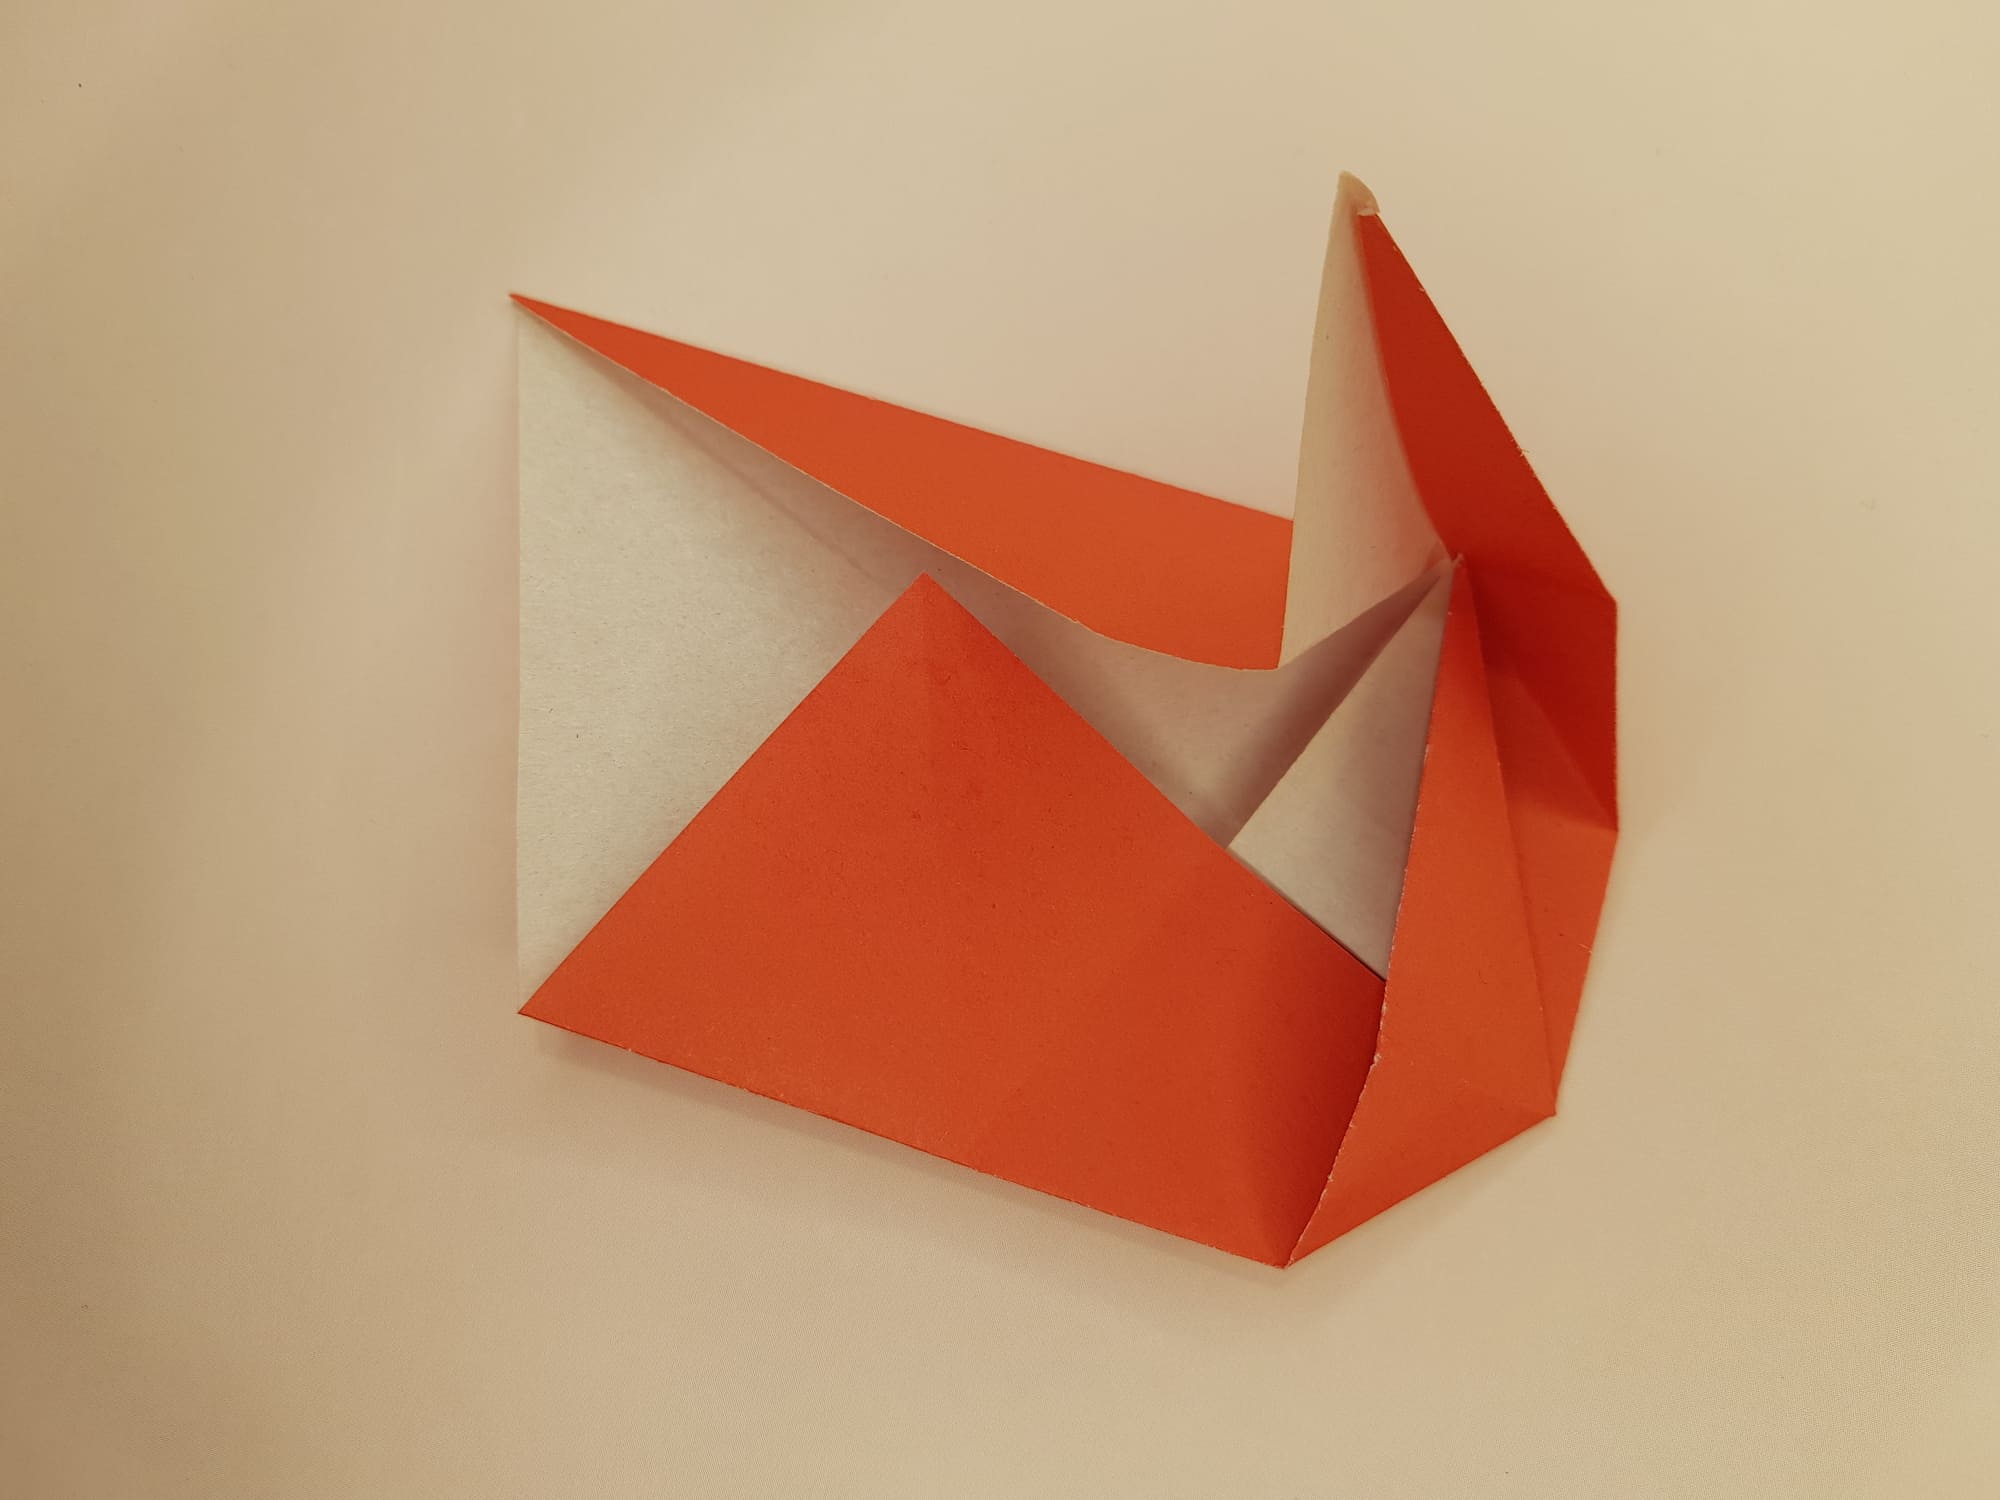
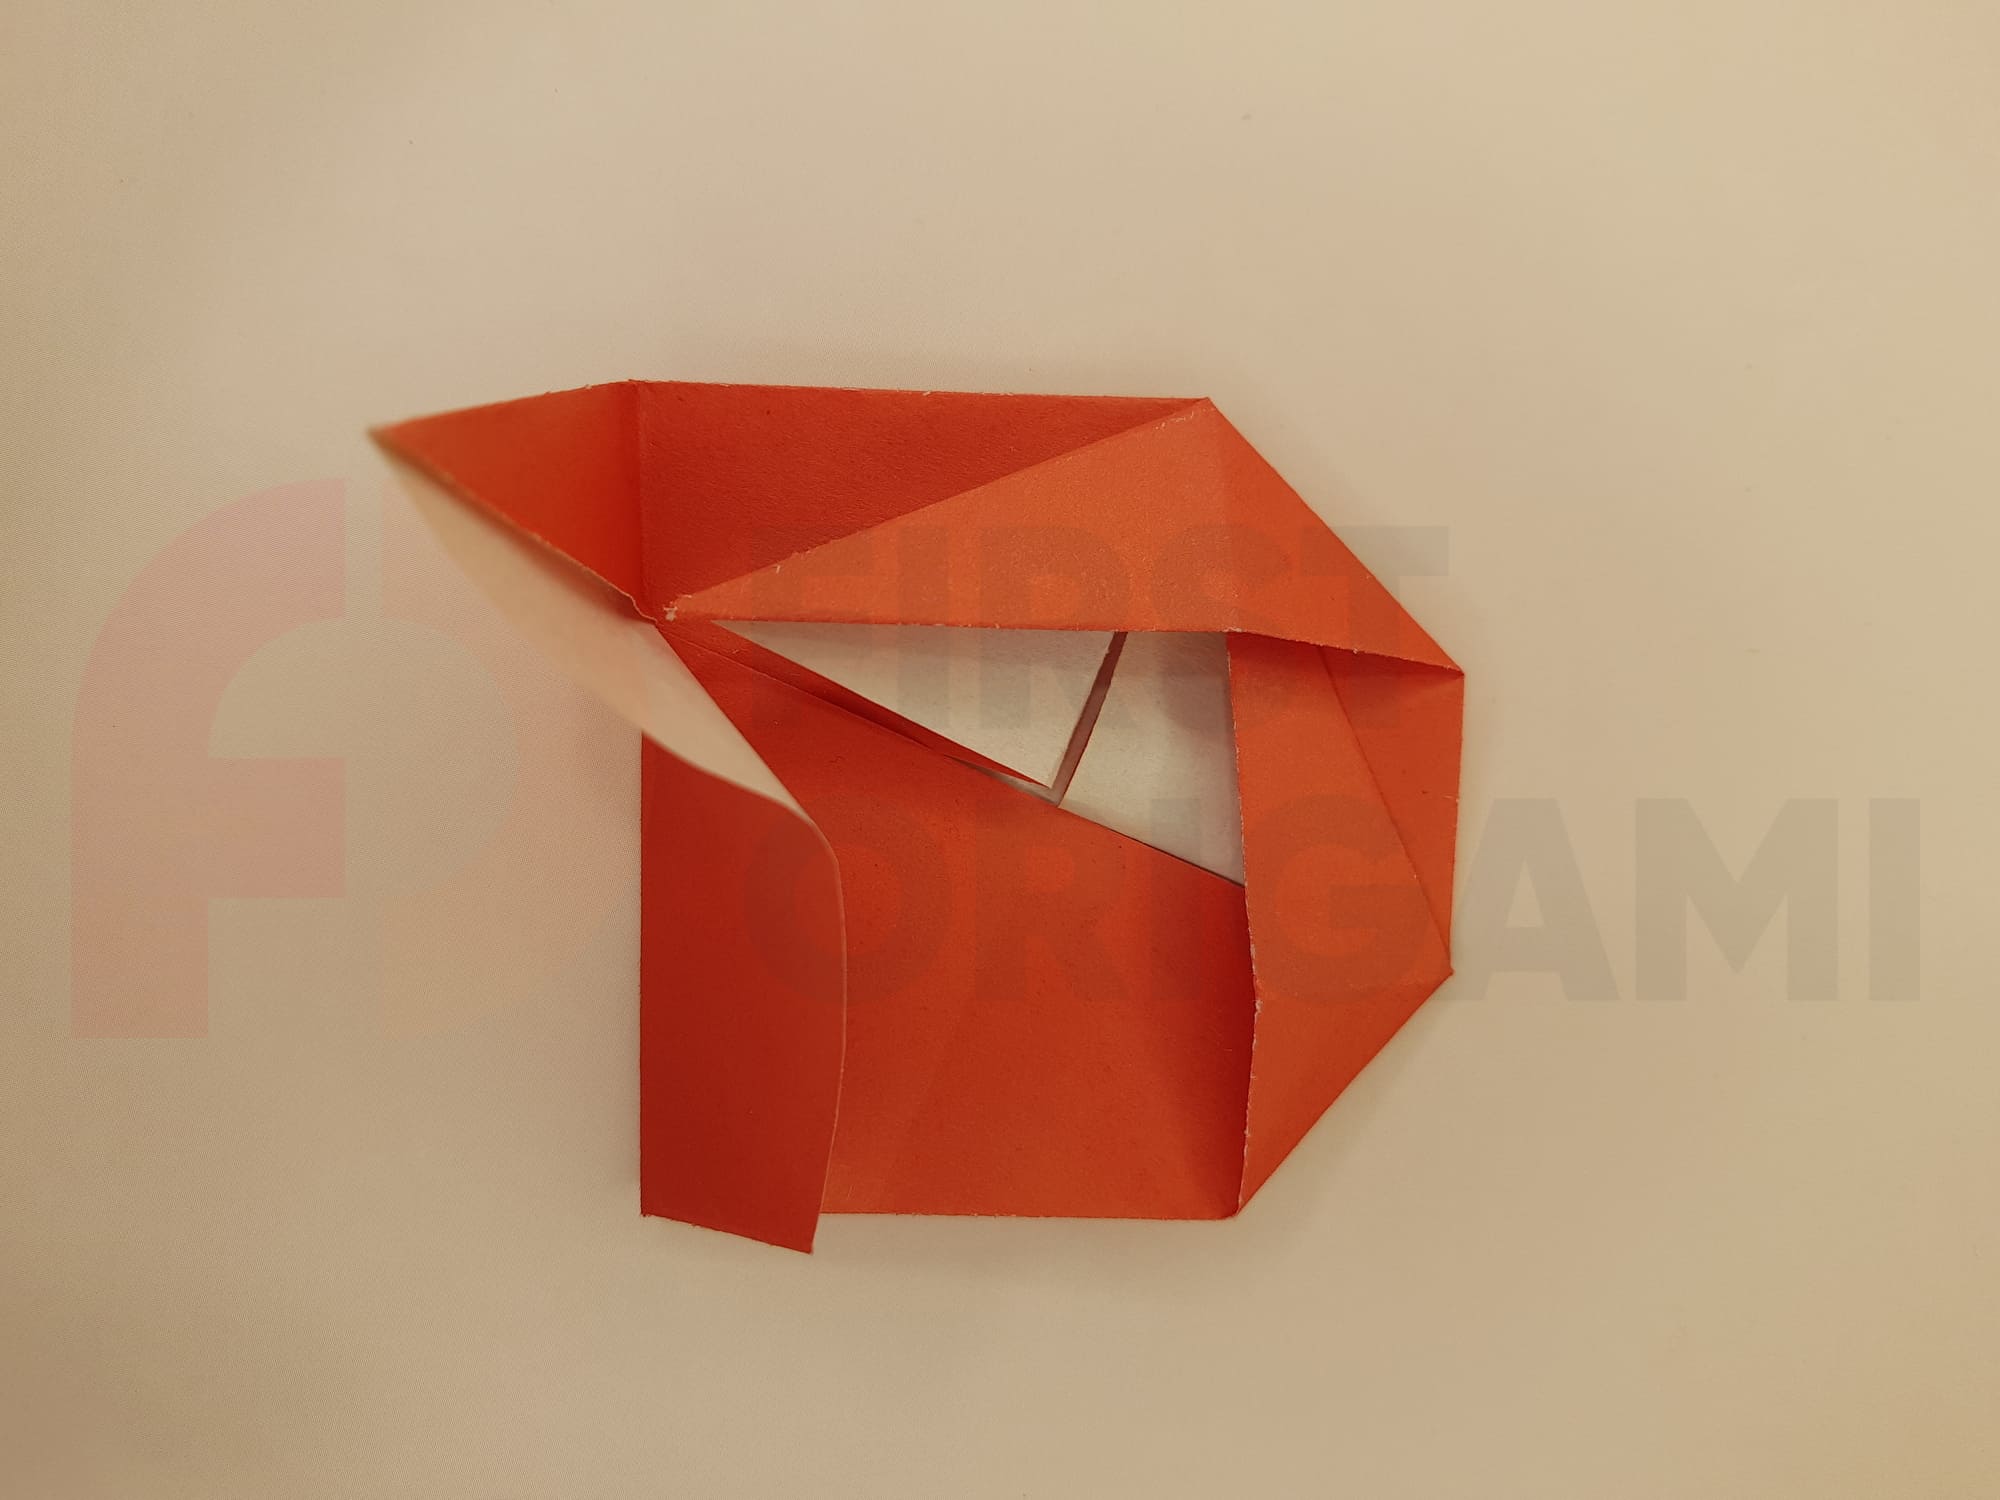
Open it in the direction from the center to the left side.
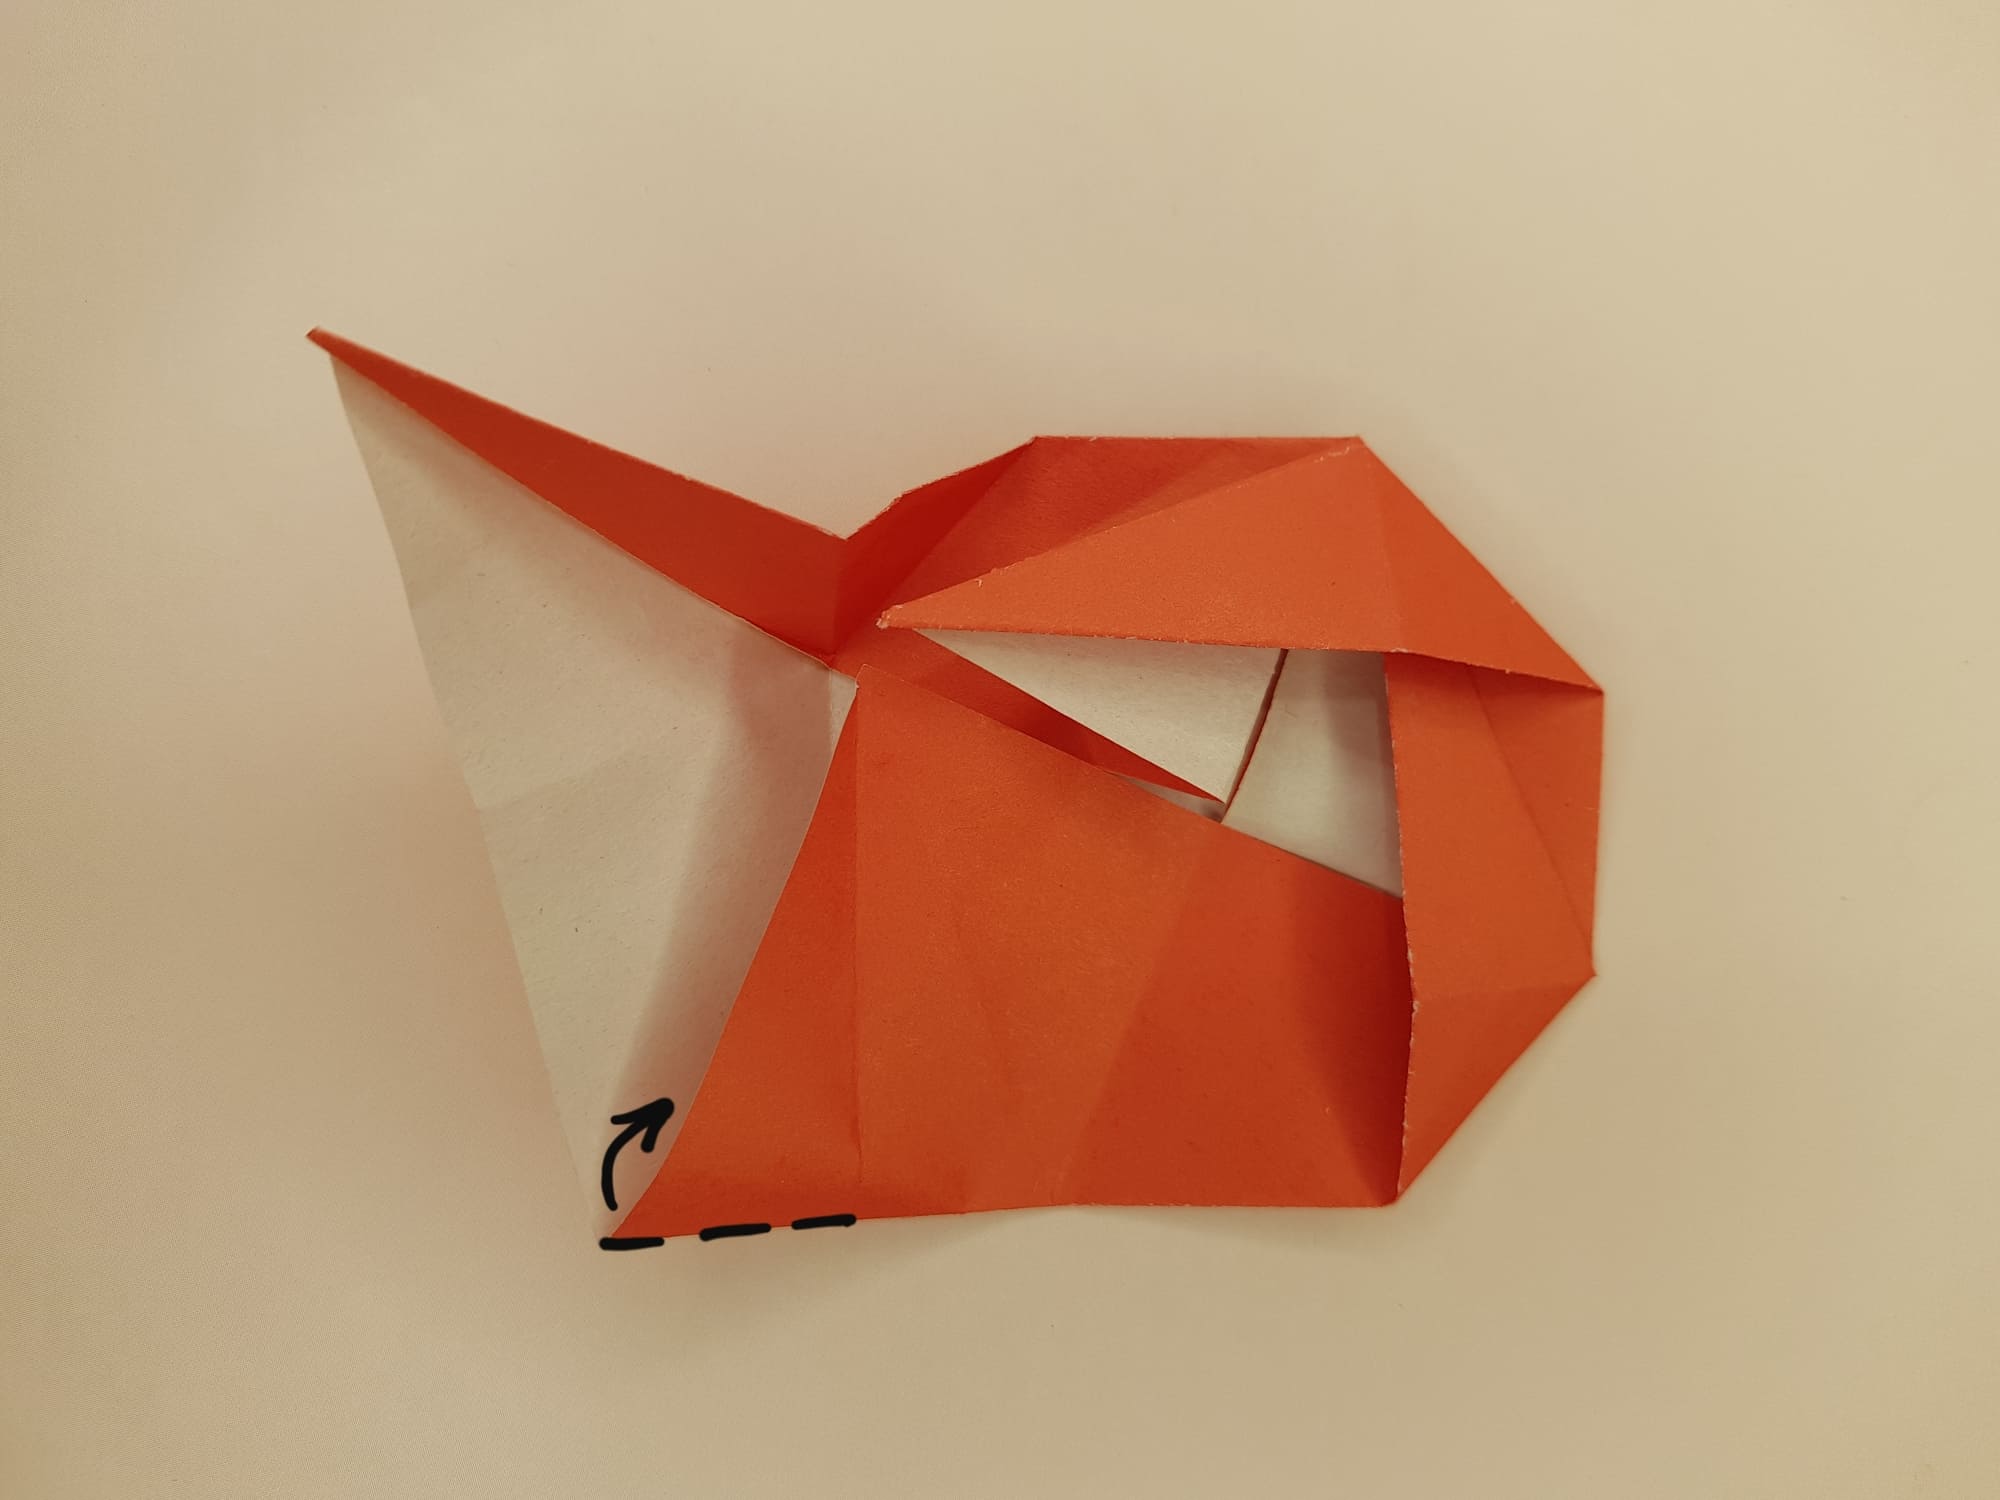
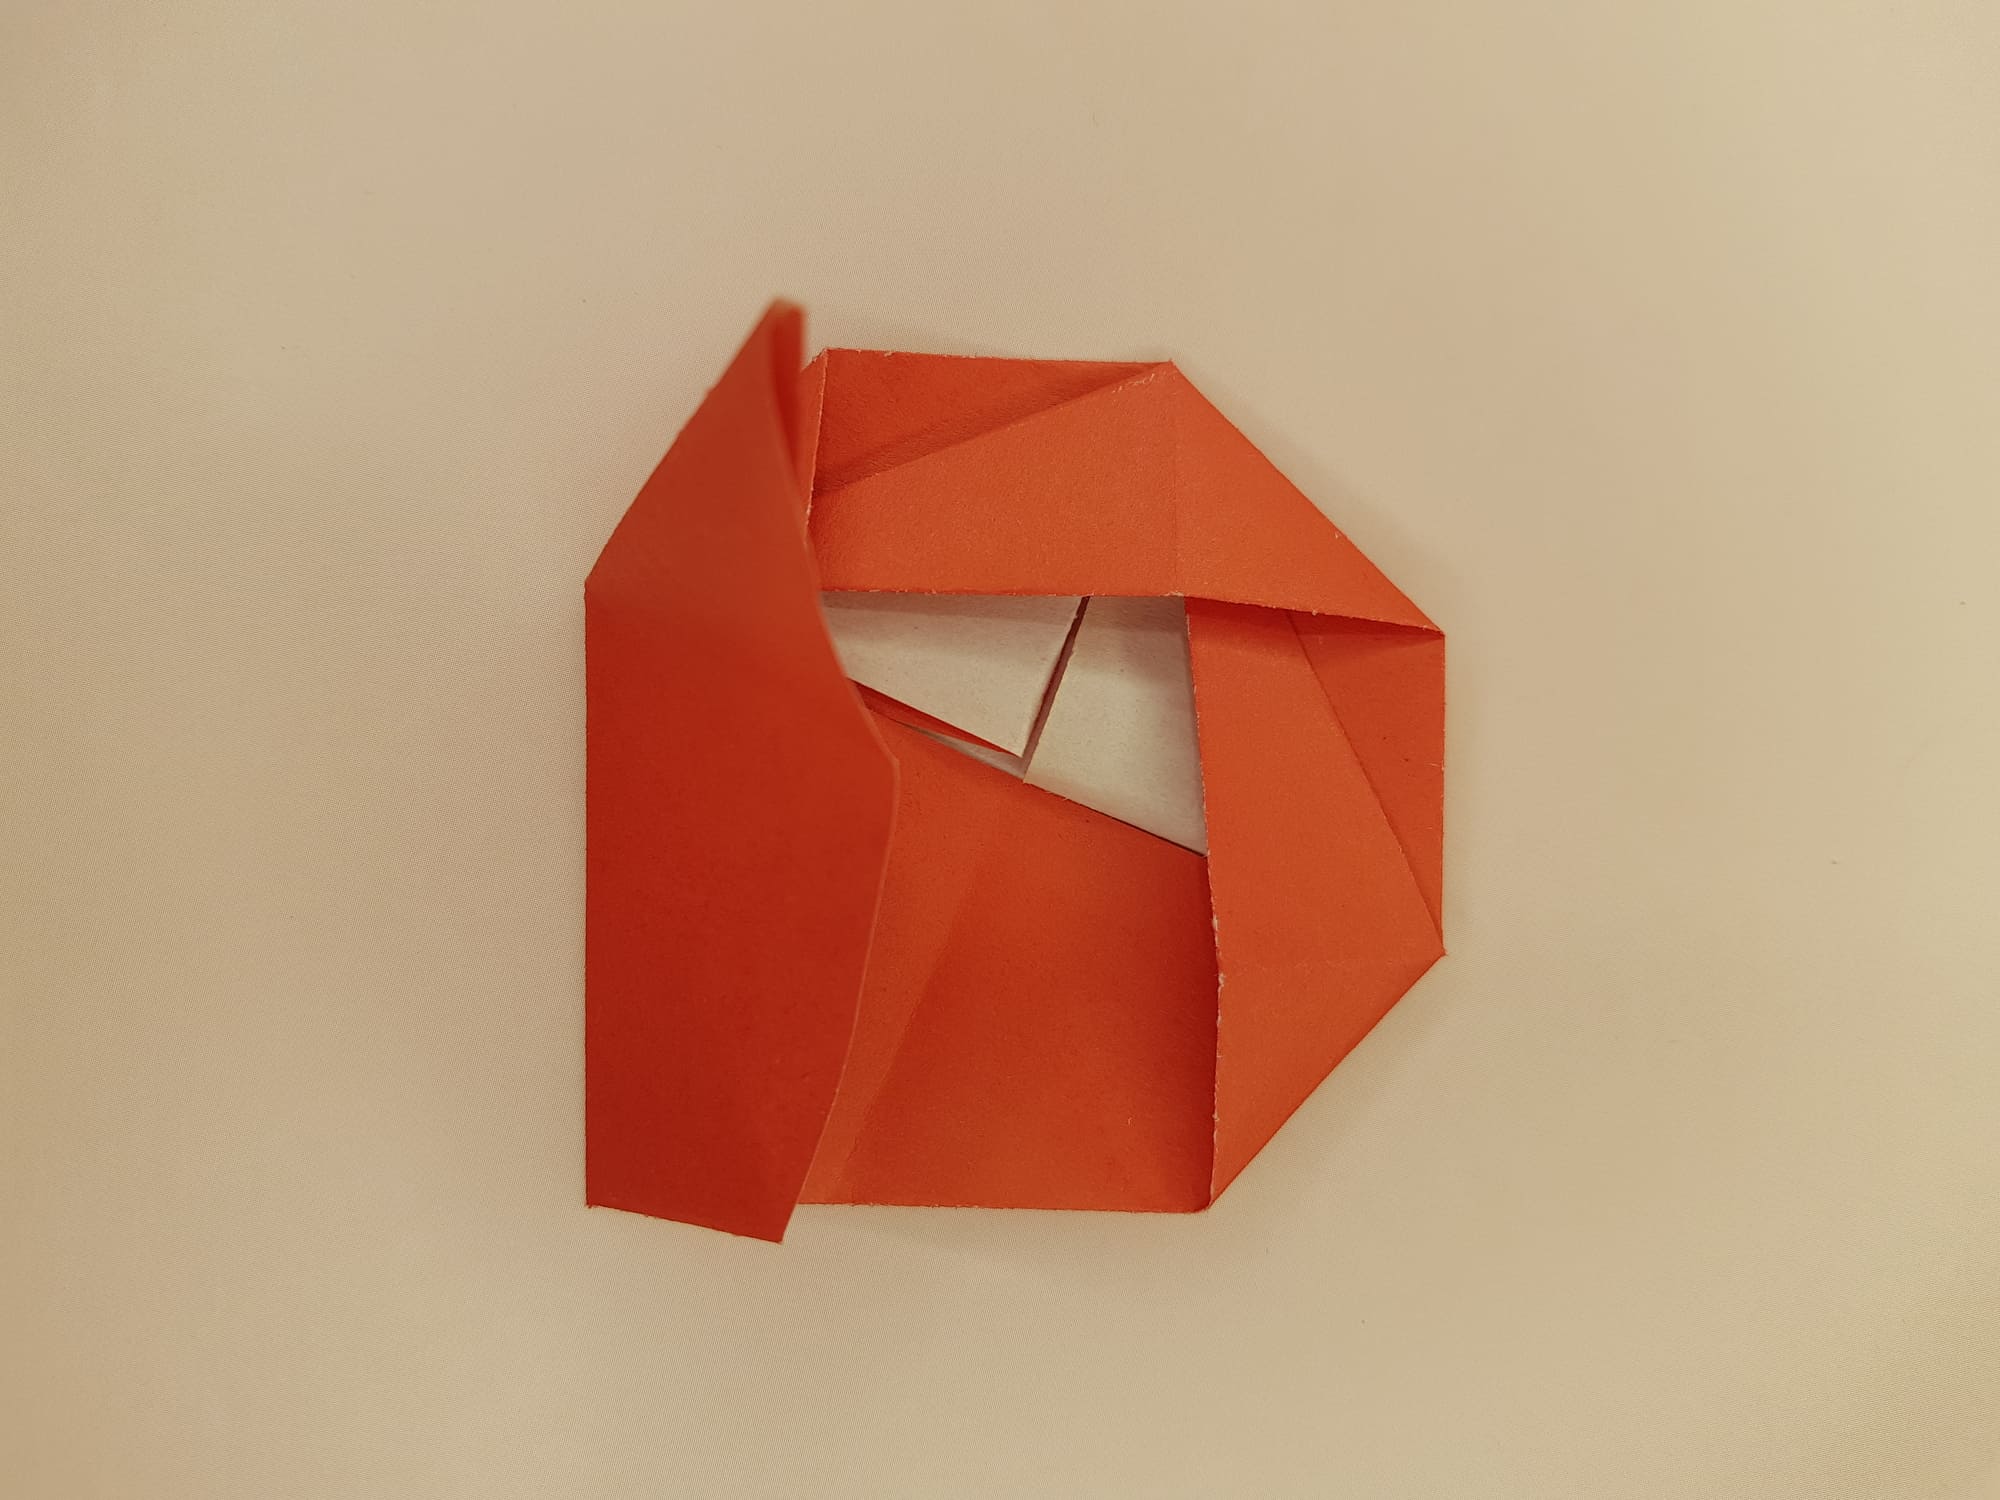
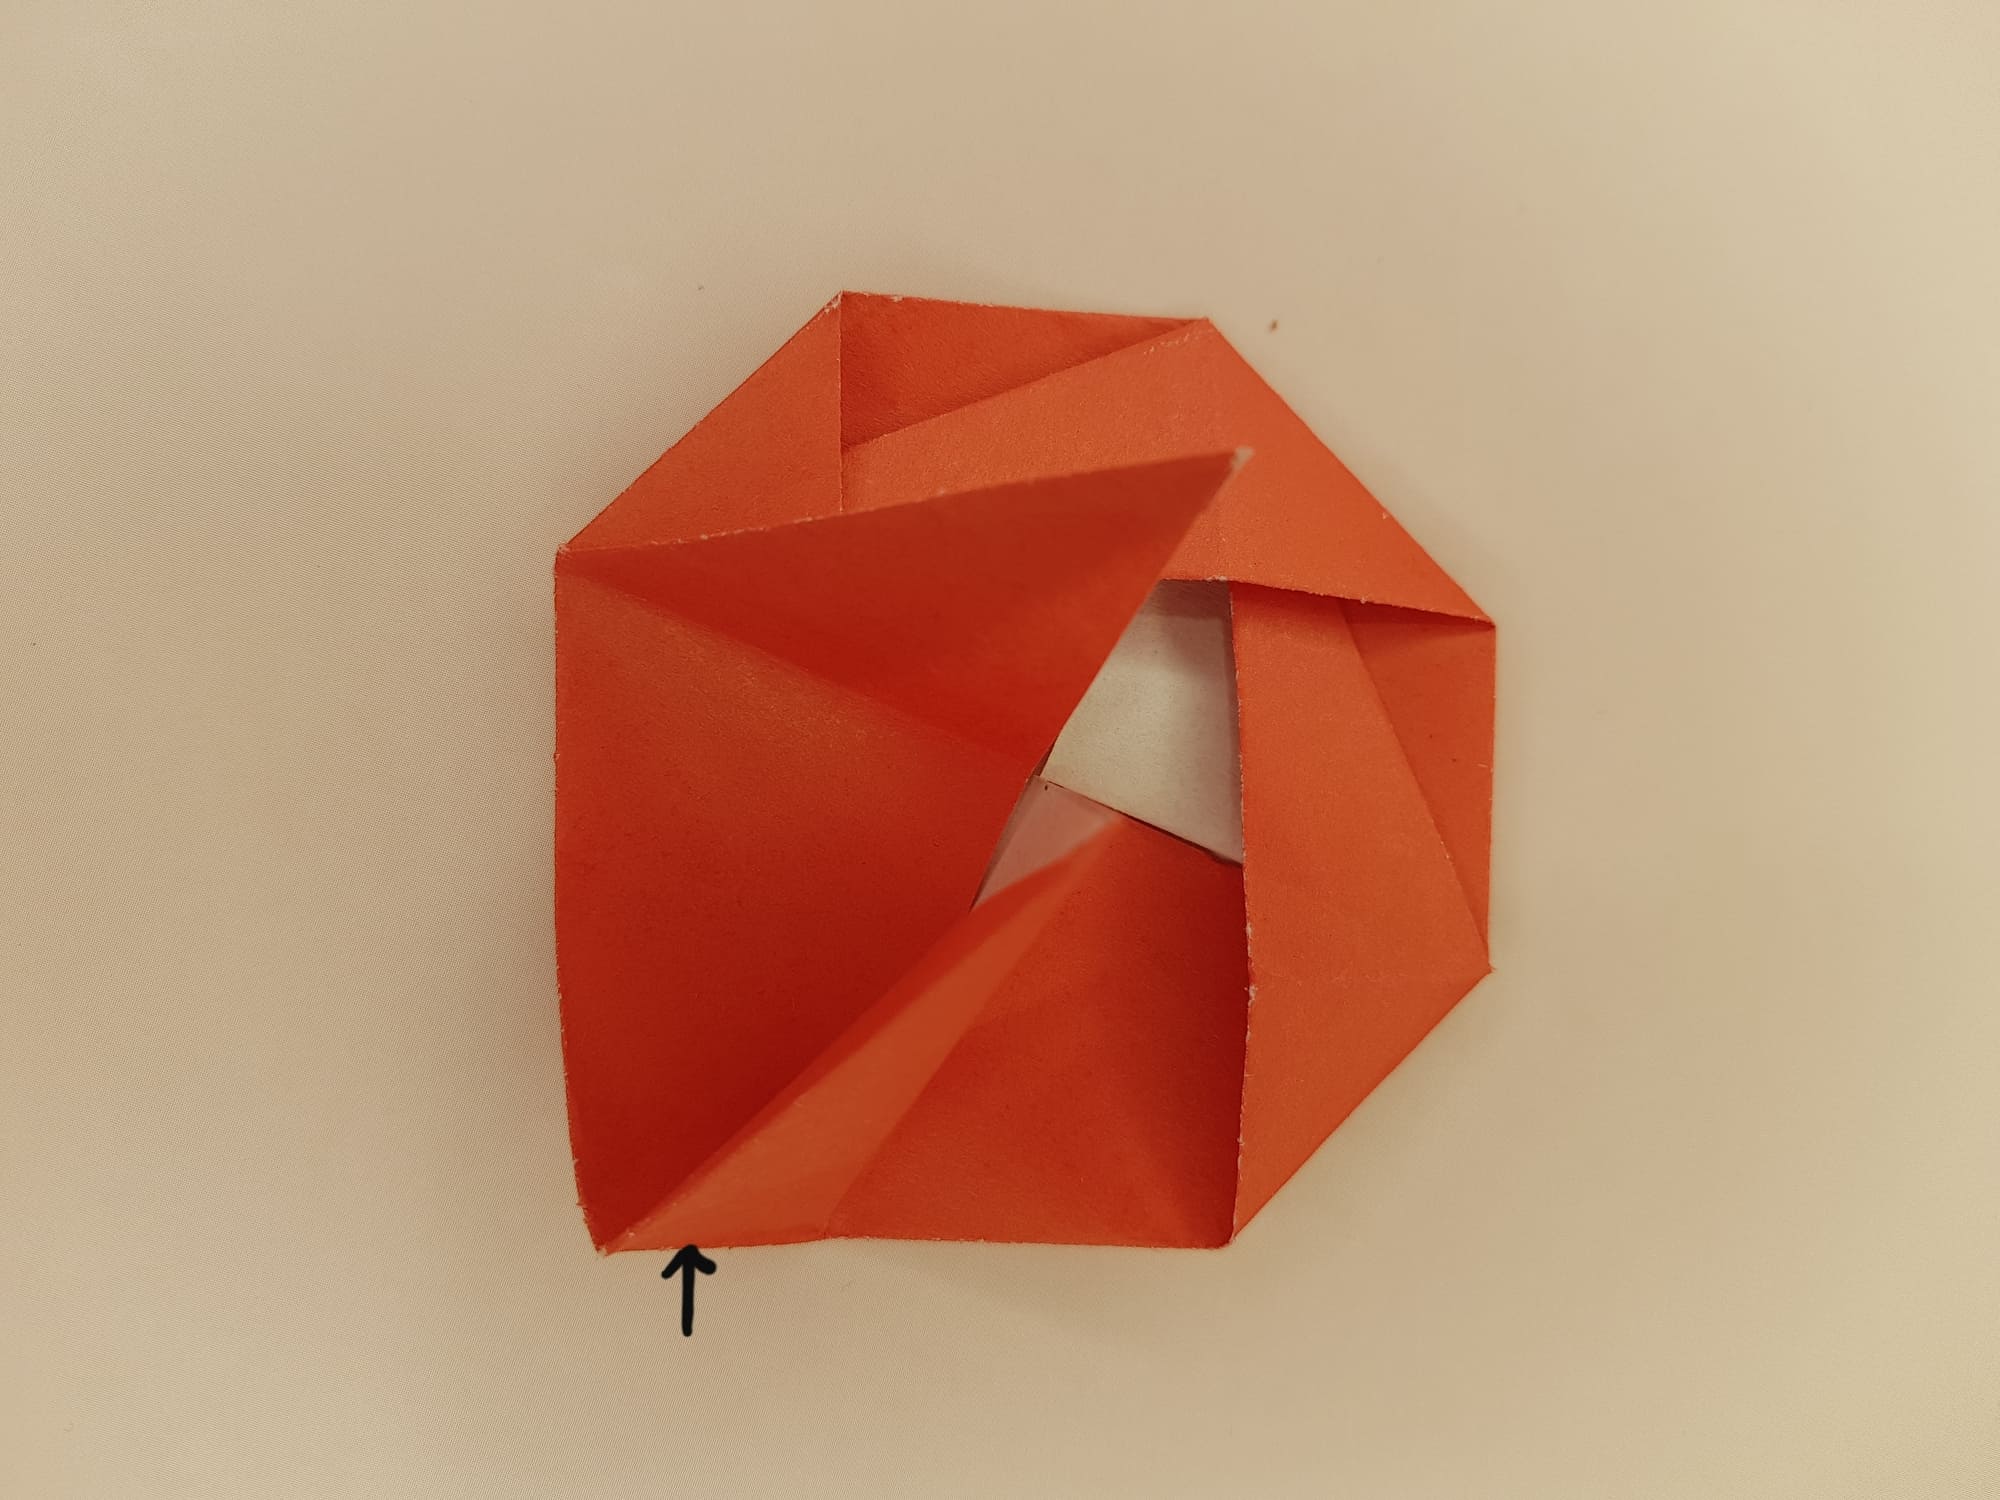
Turn the lower corner of the product, indicated by the dotted line, inward, in the direction of the arrow.
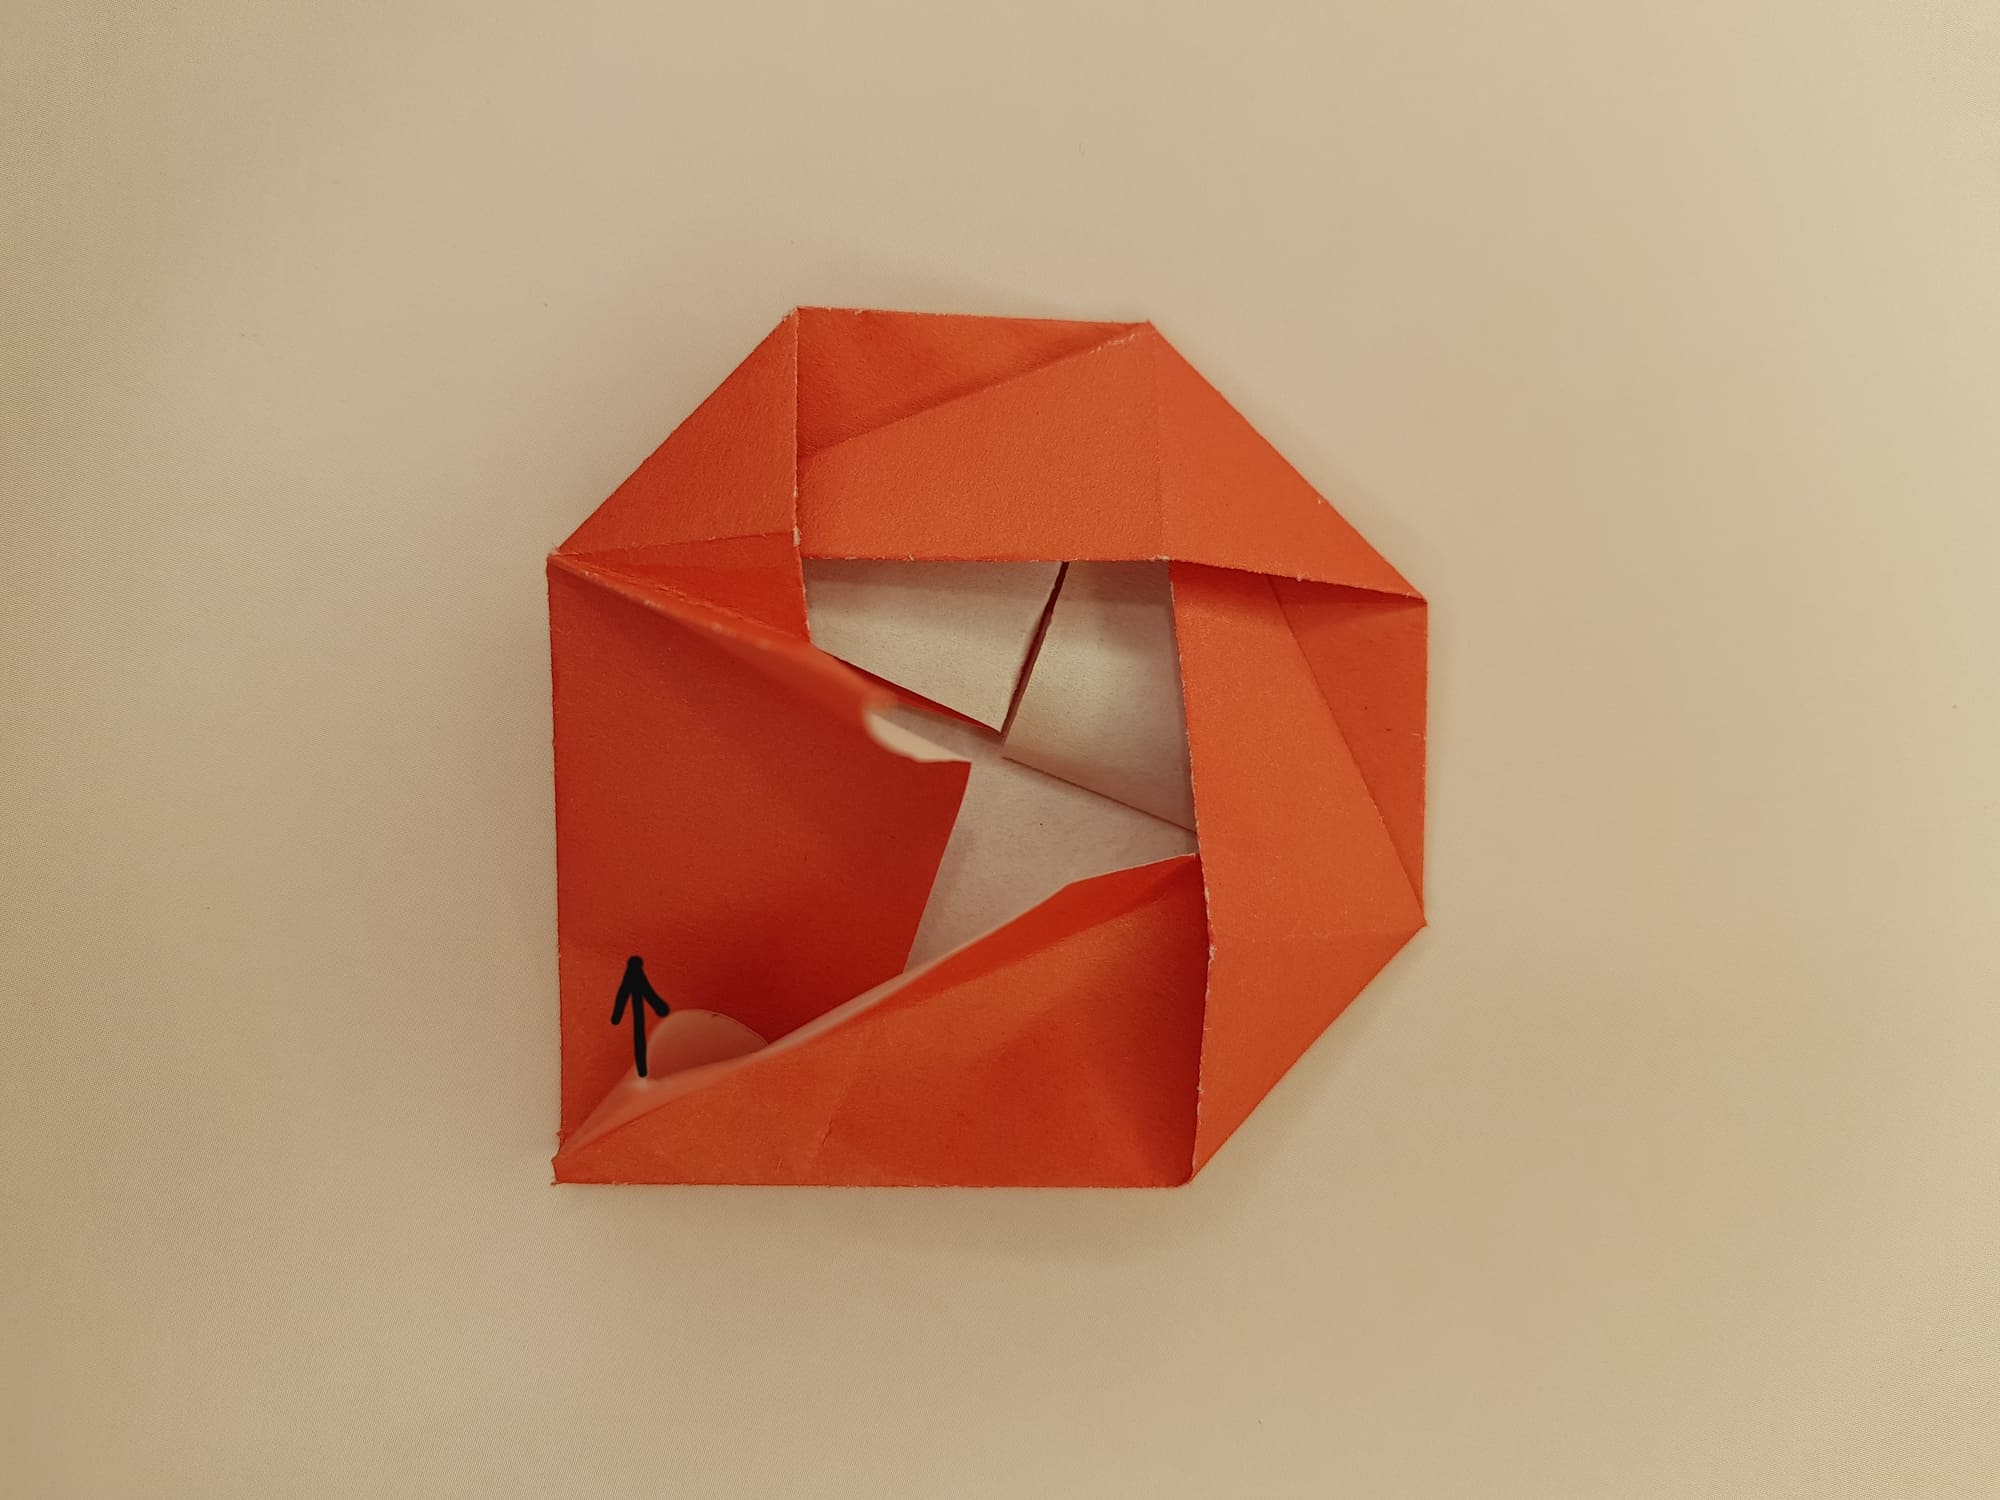
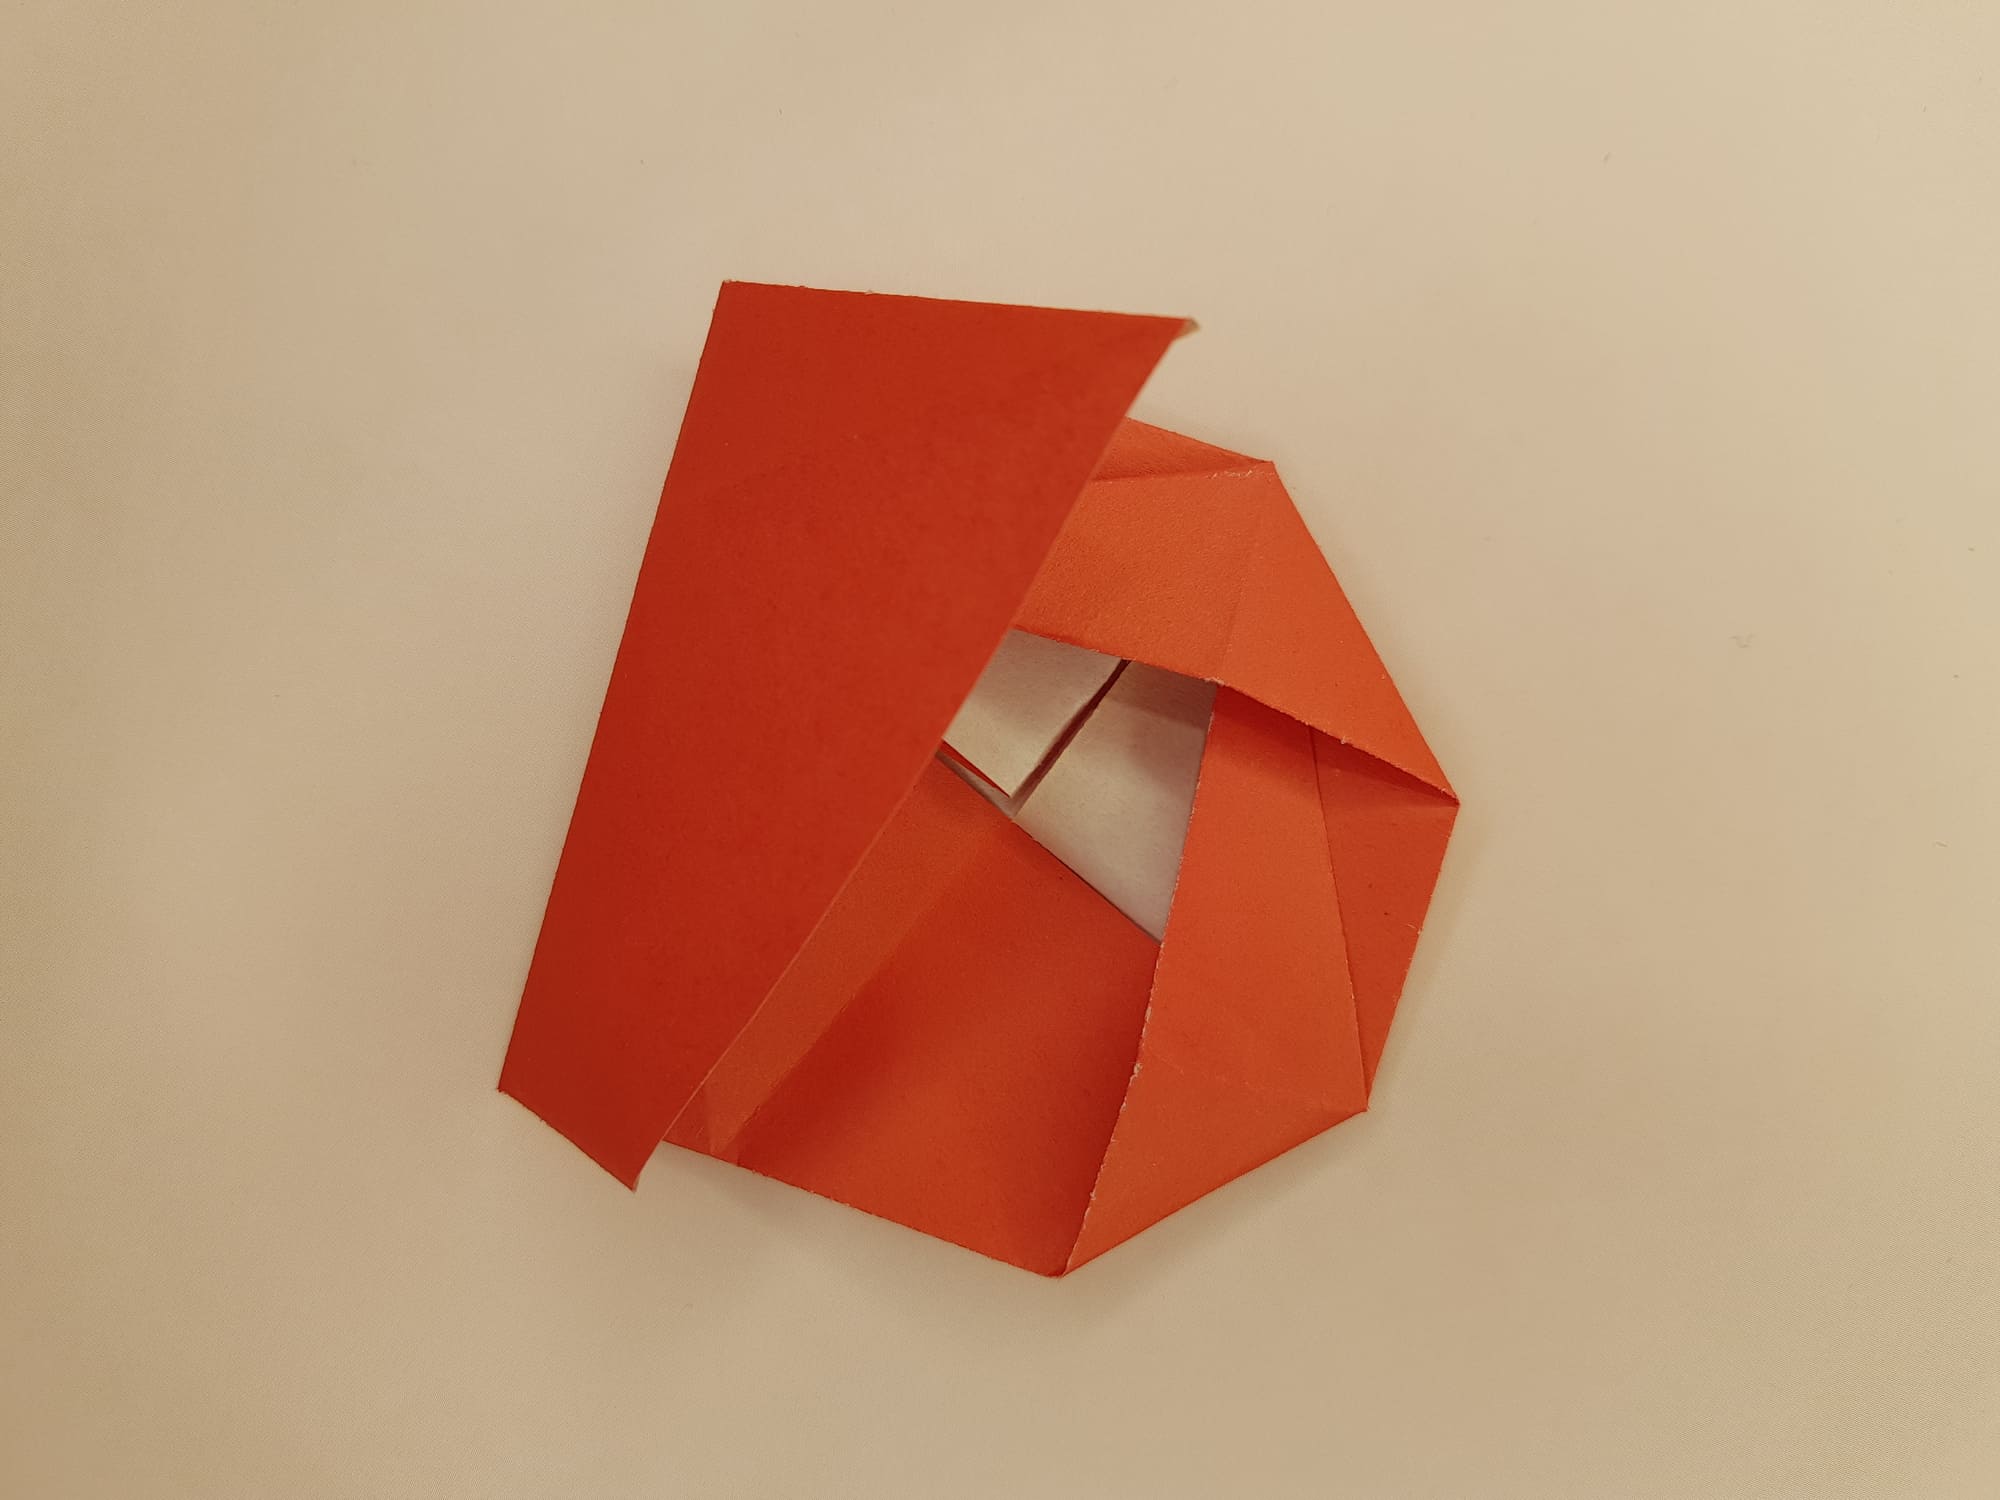
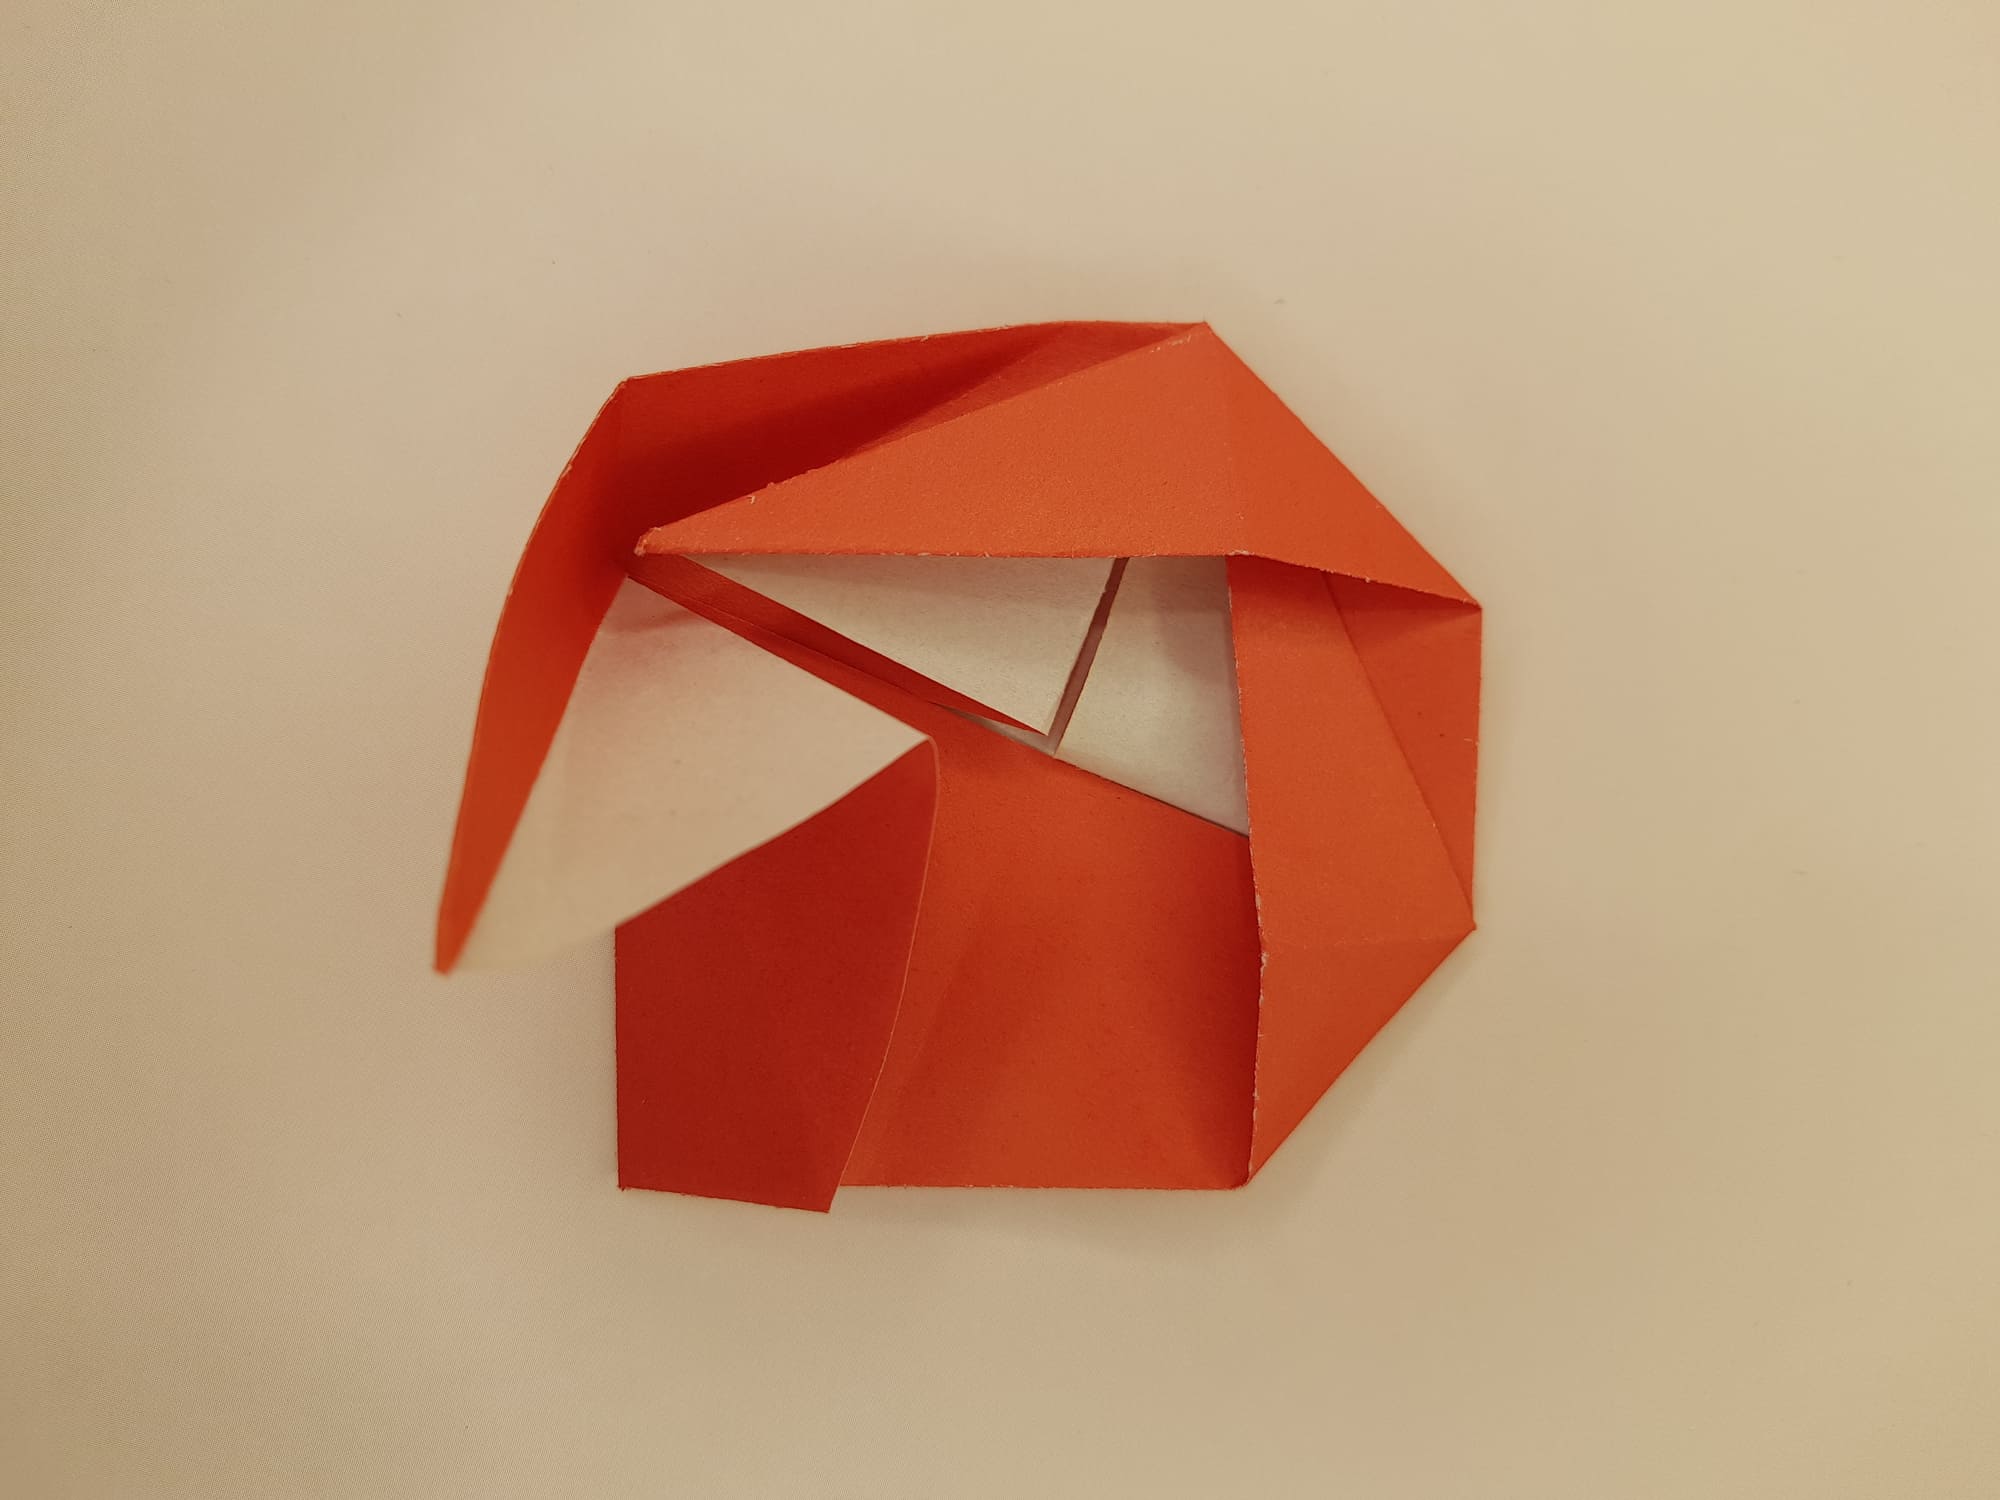
Press the resulting upper part to the main part, as indicated by the arrow.
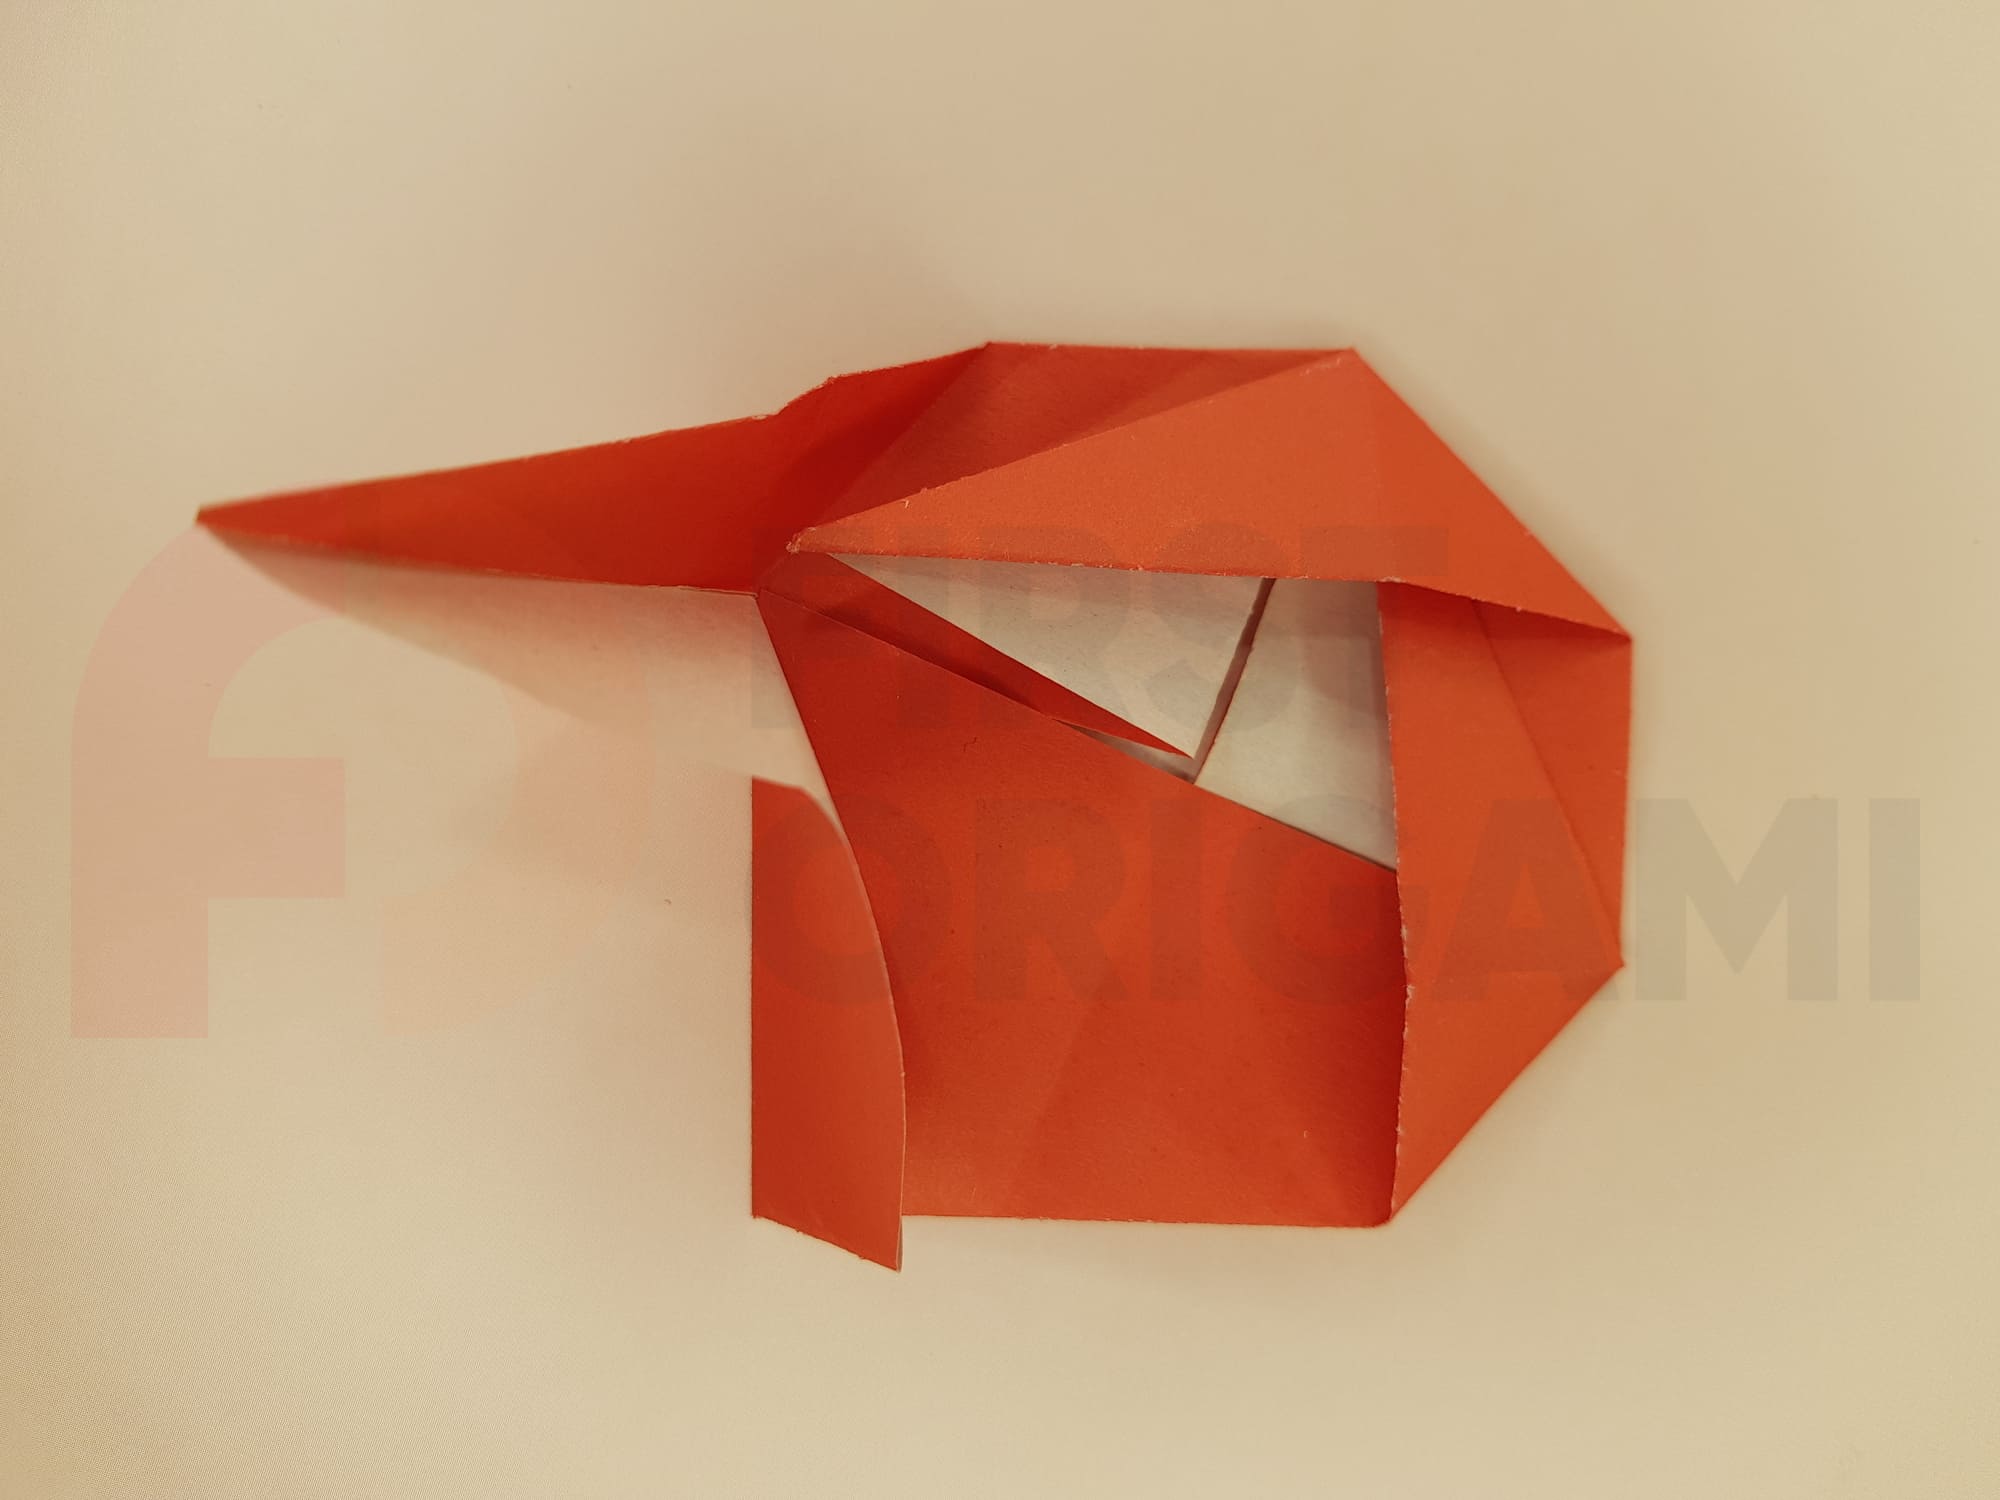
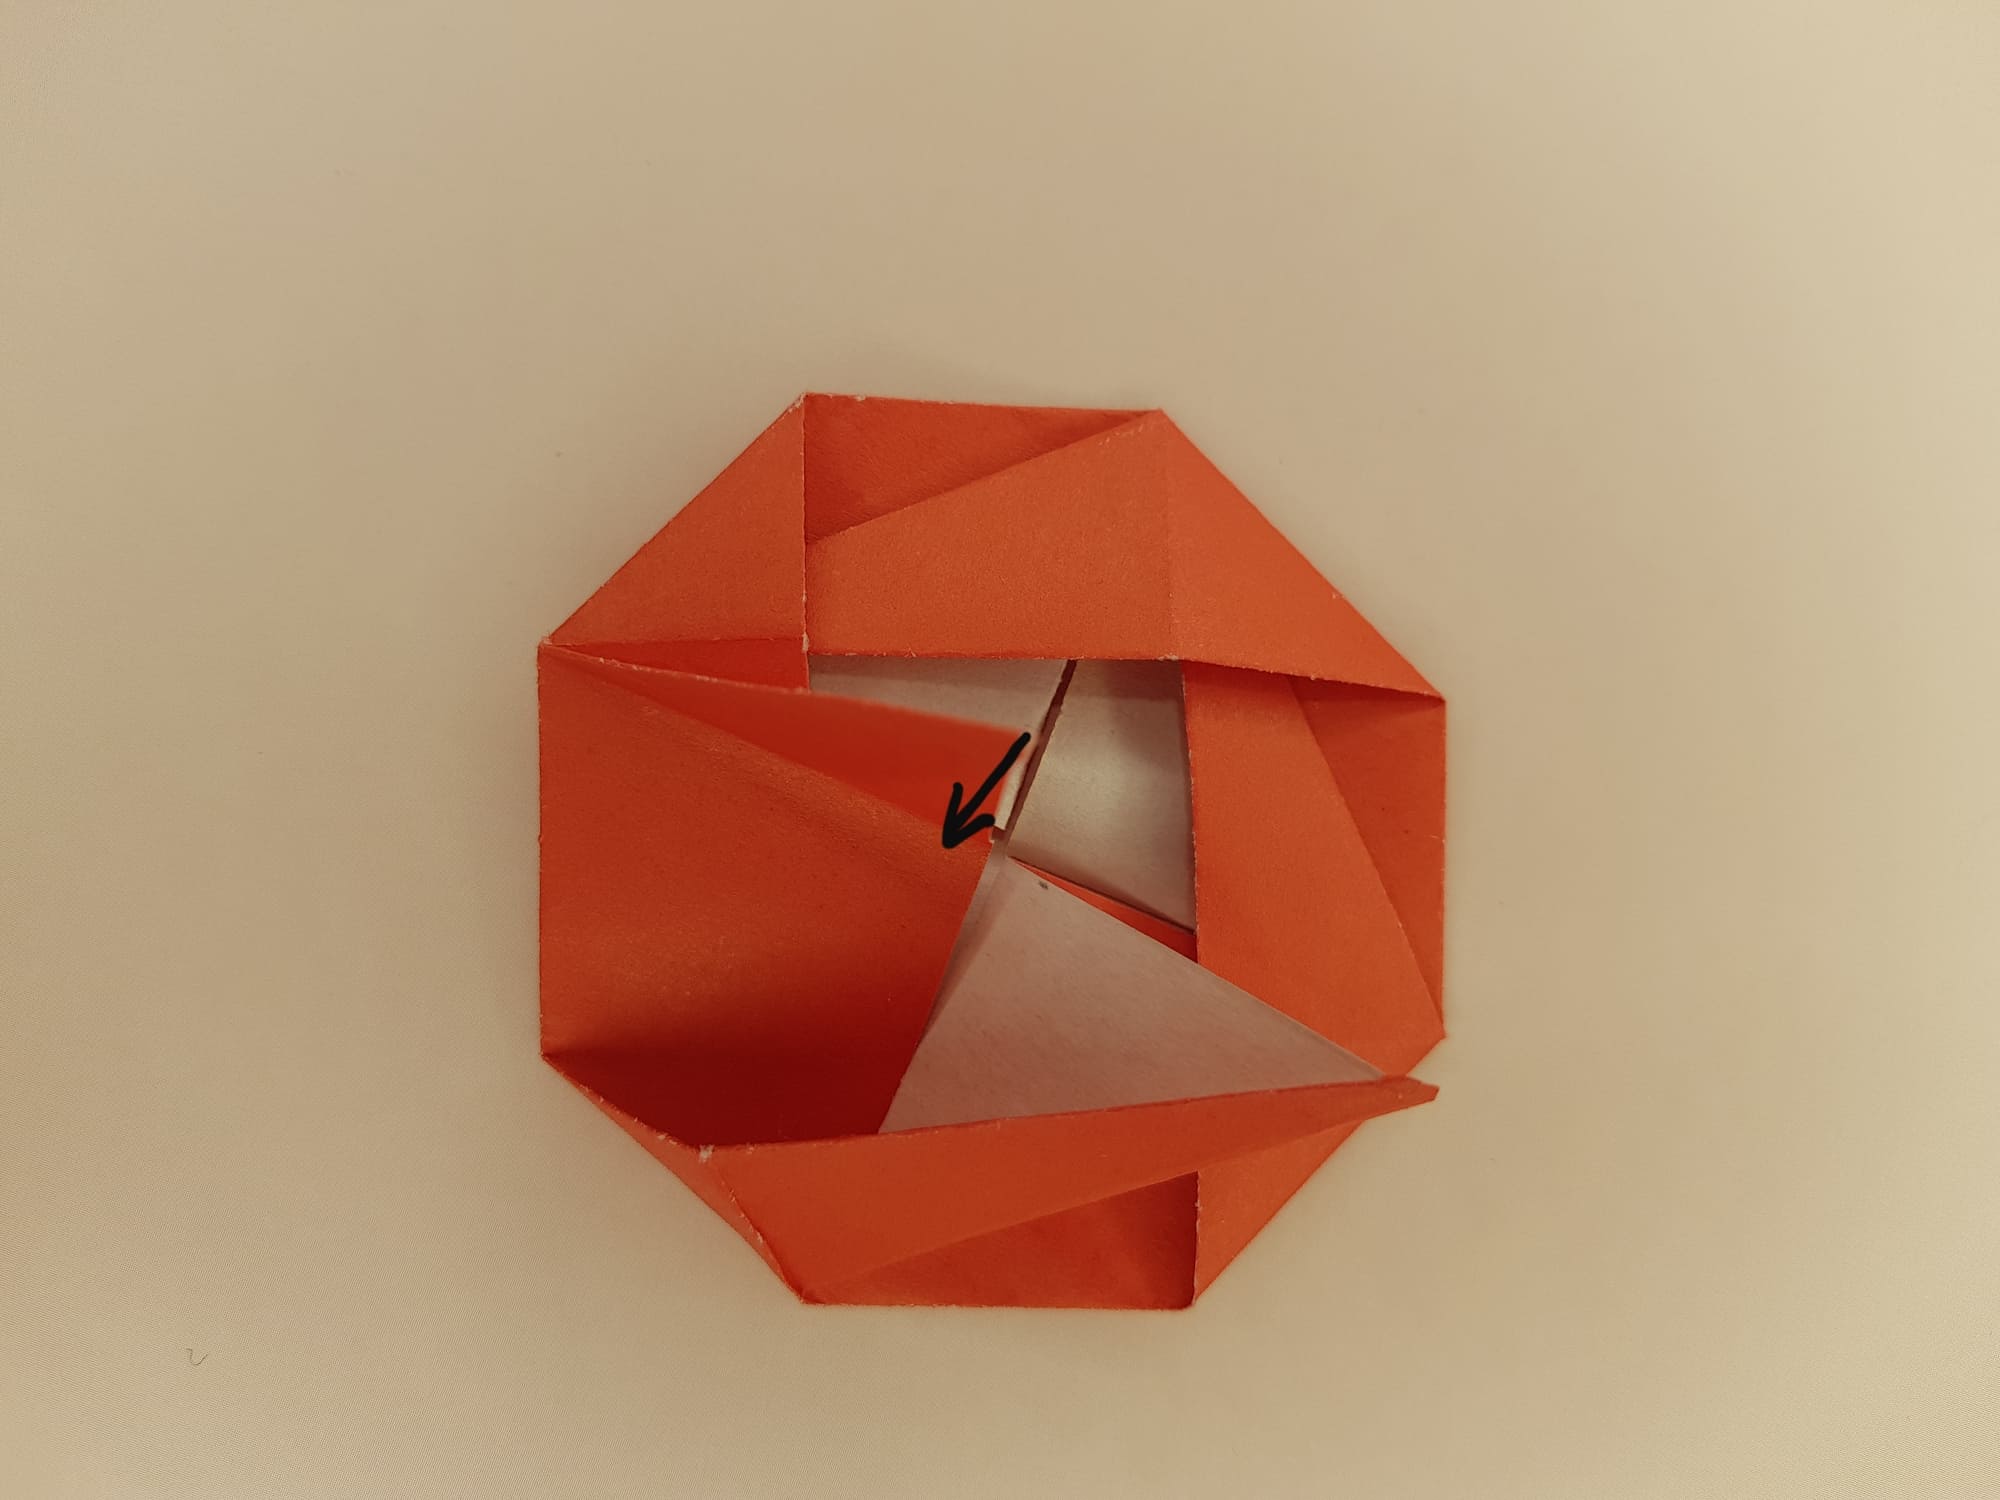
Open the shape folded in the previous step and repeat the action – bend it, forming a corner, and press it.
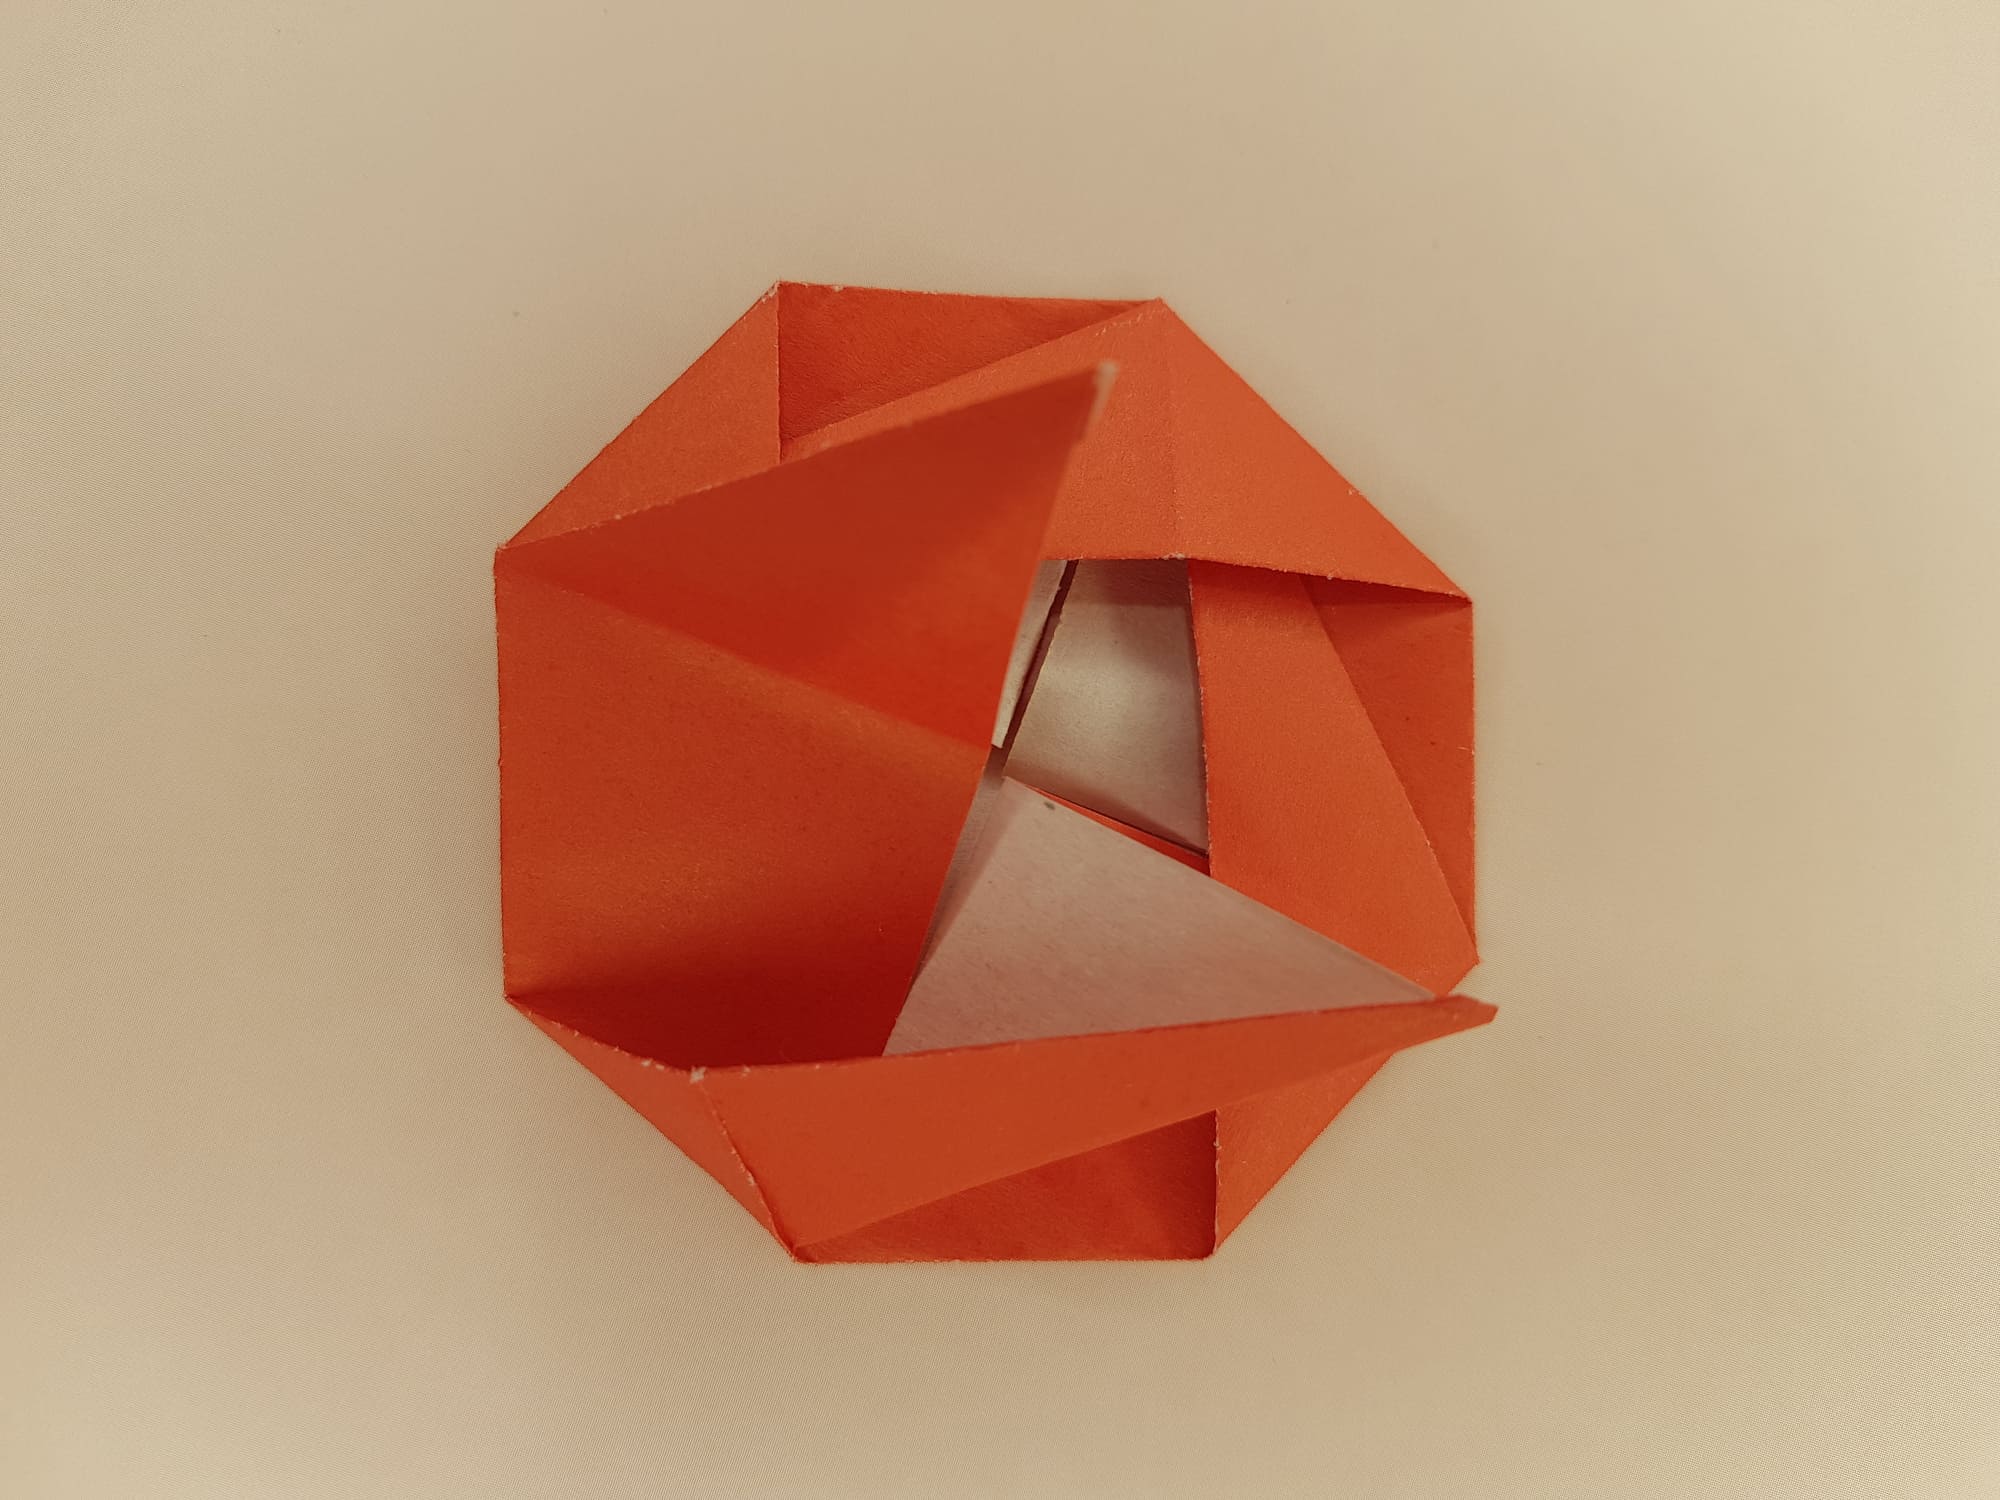

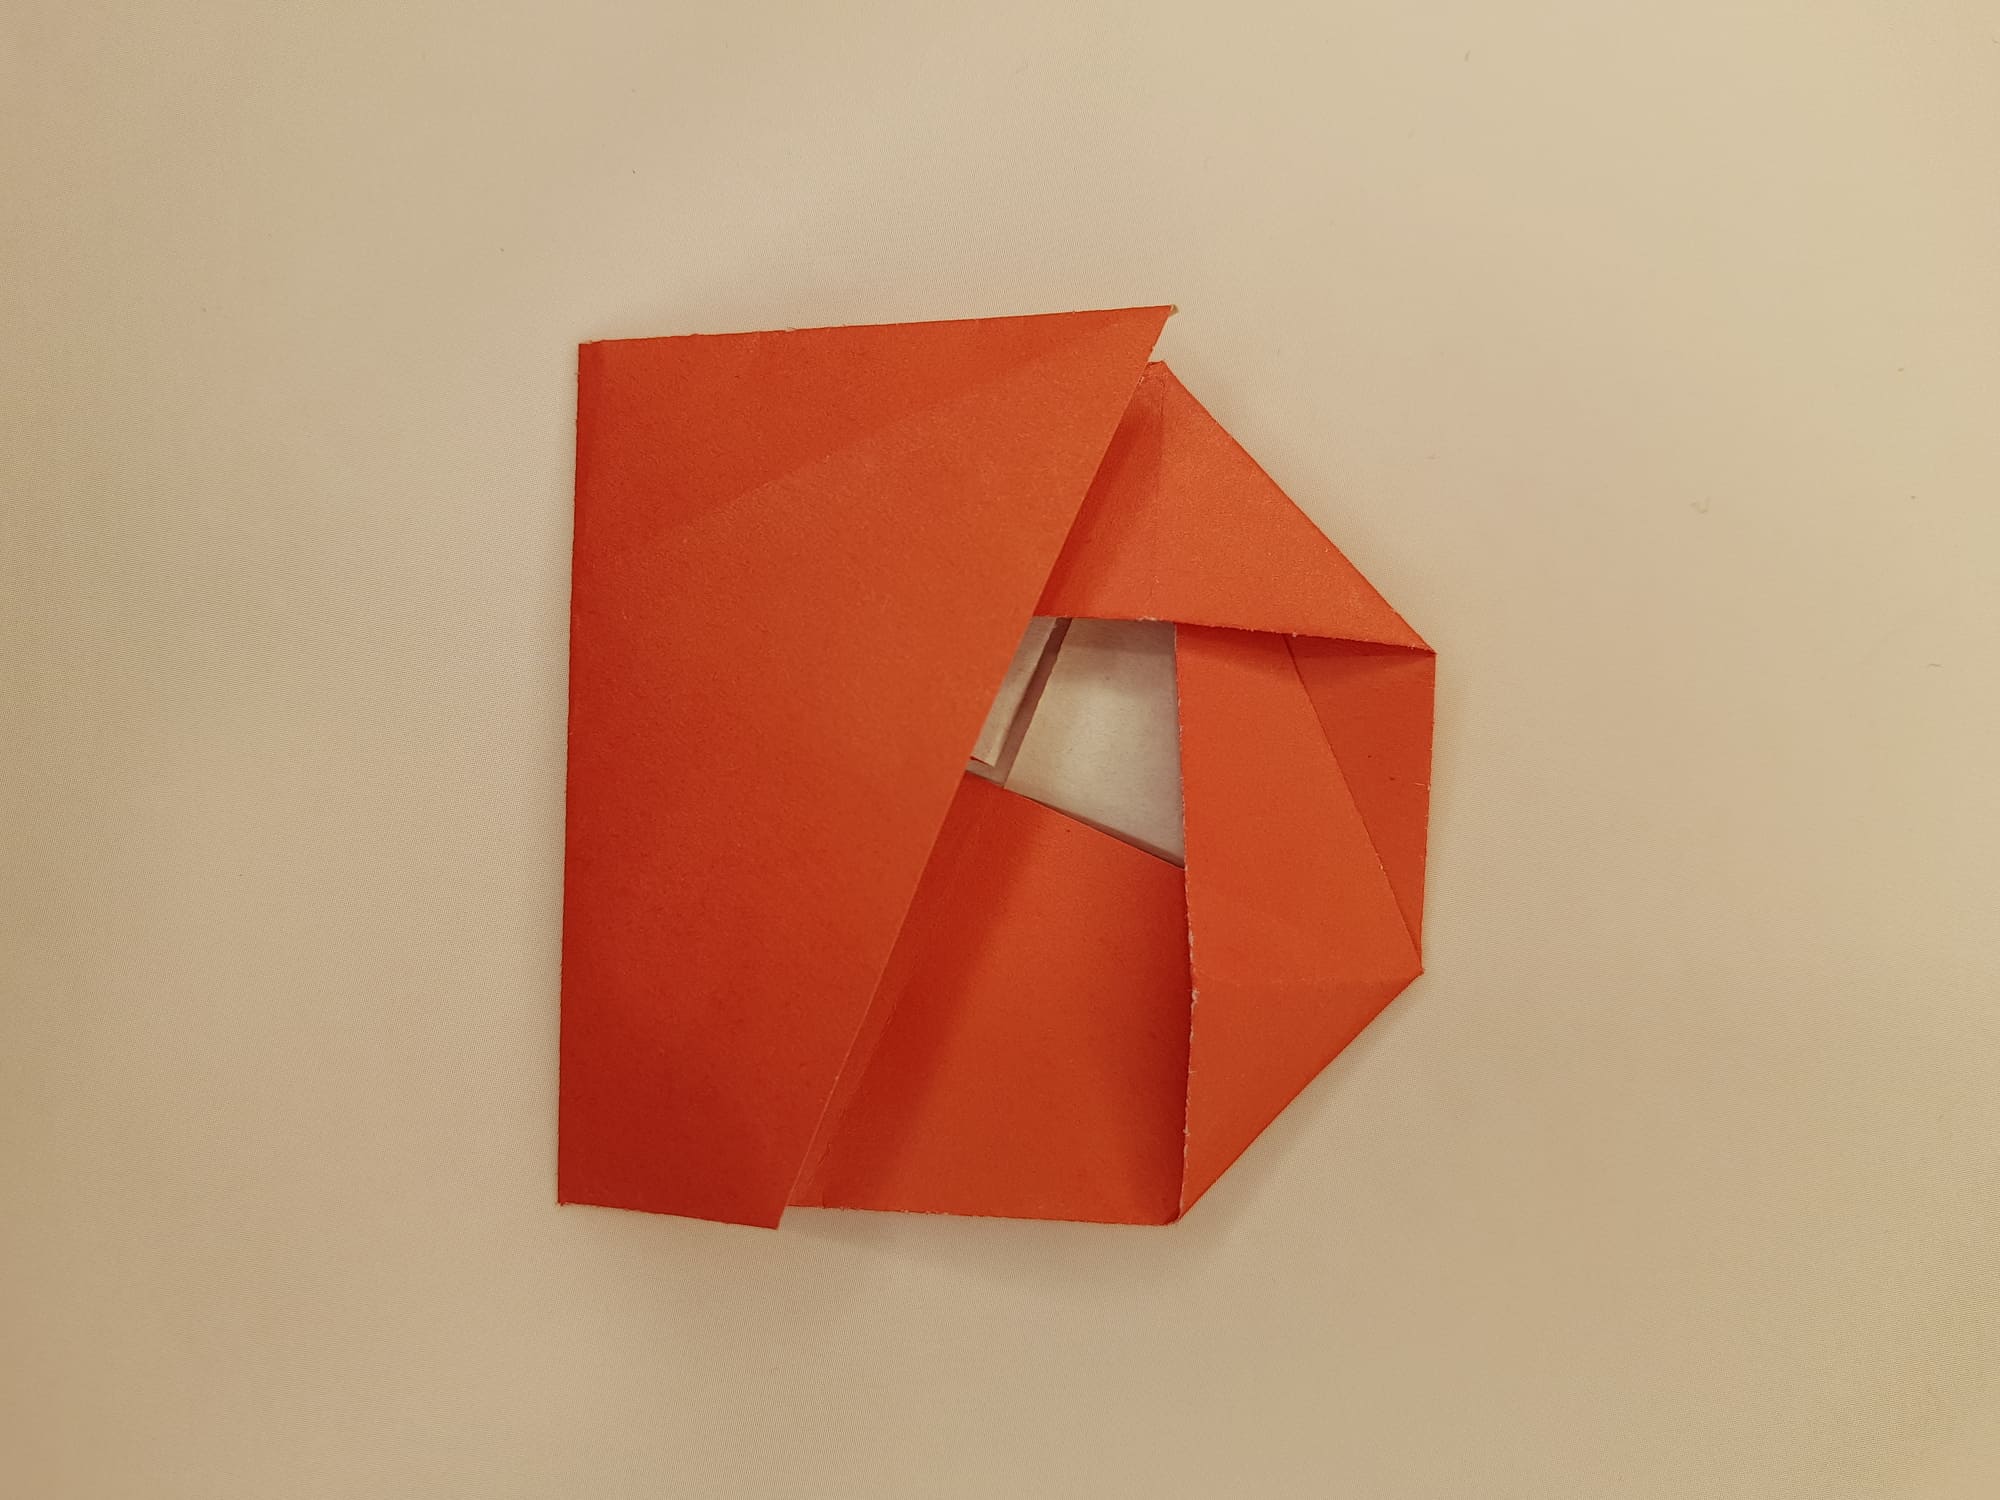
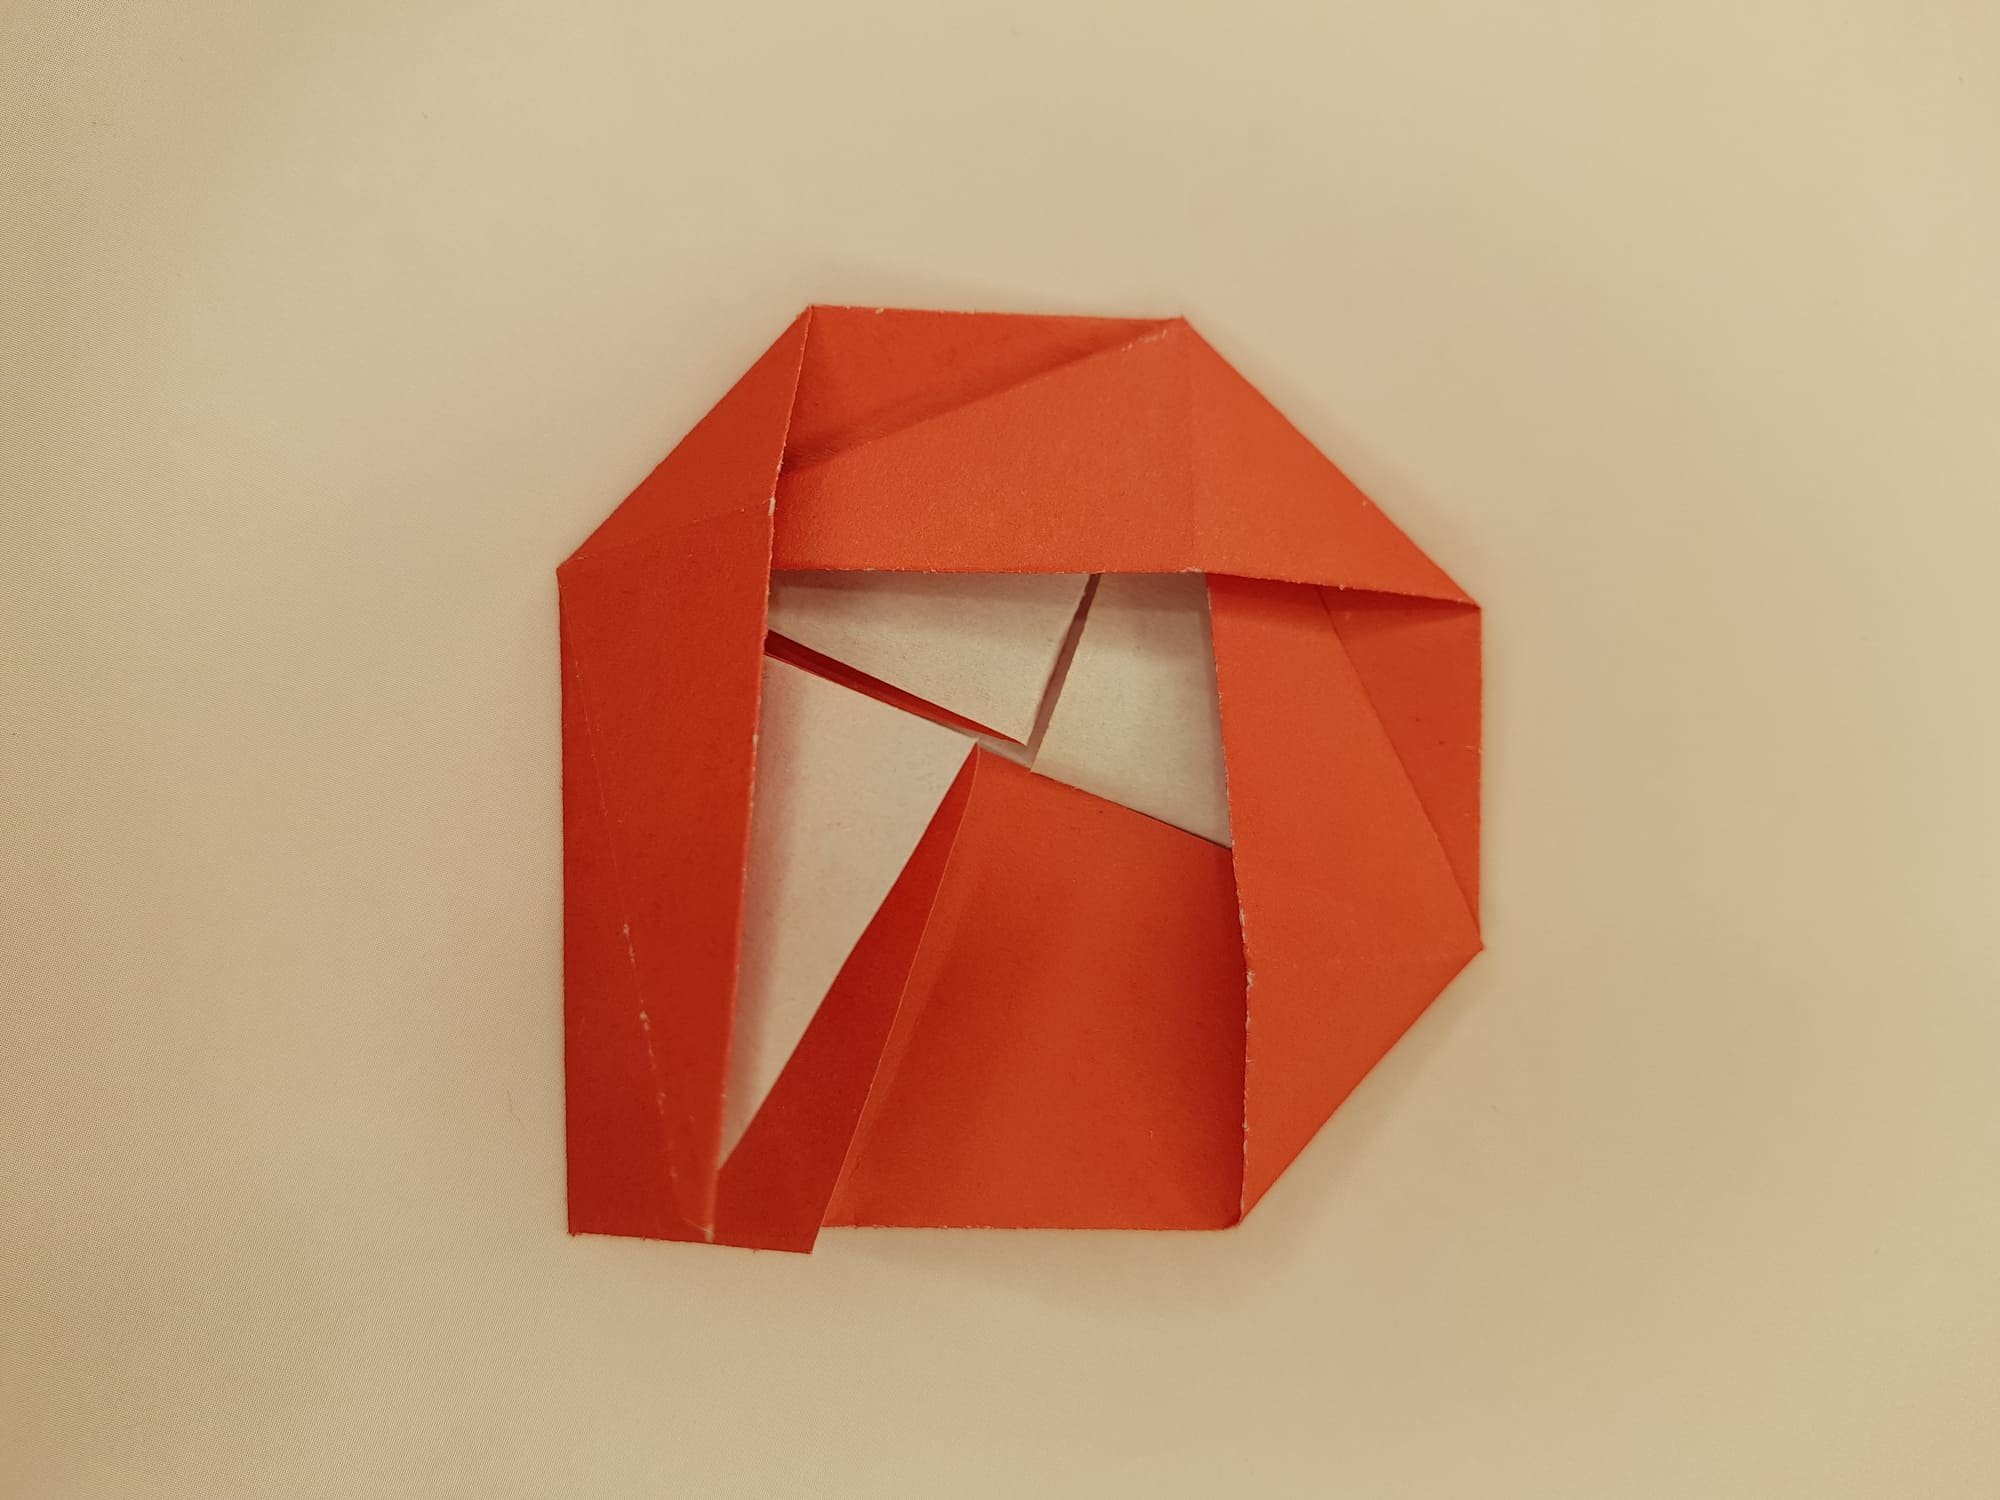
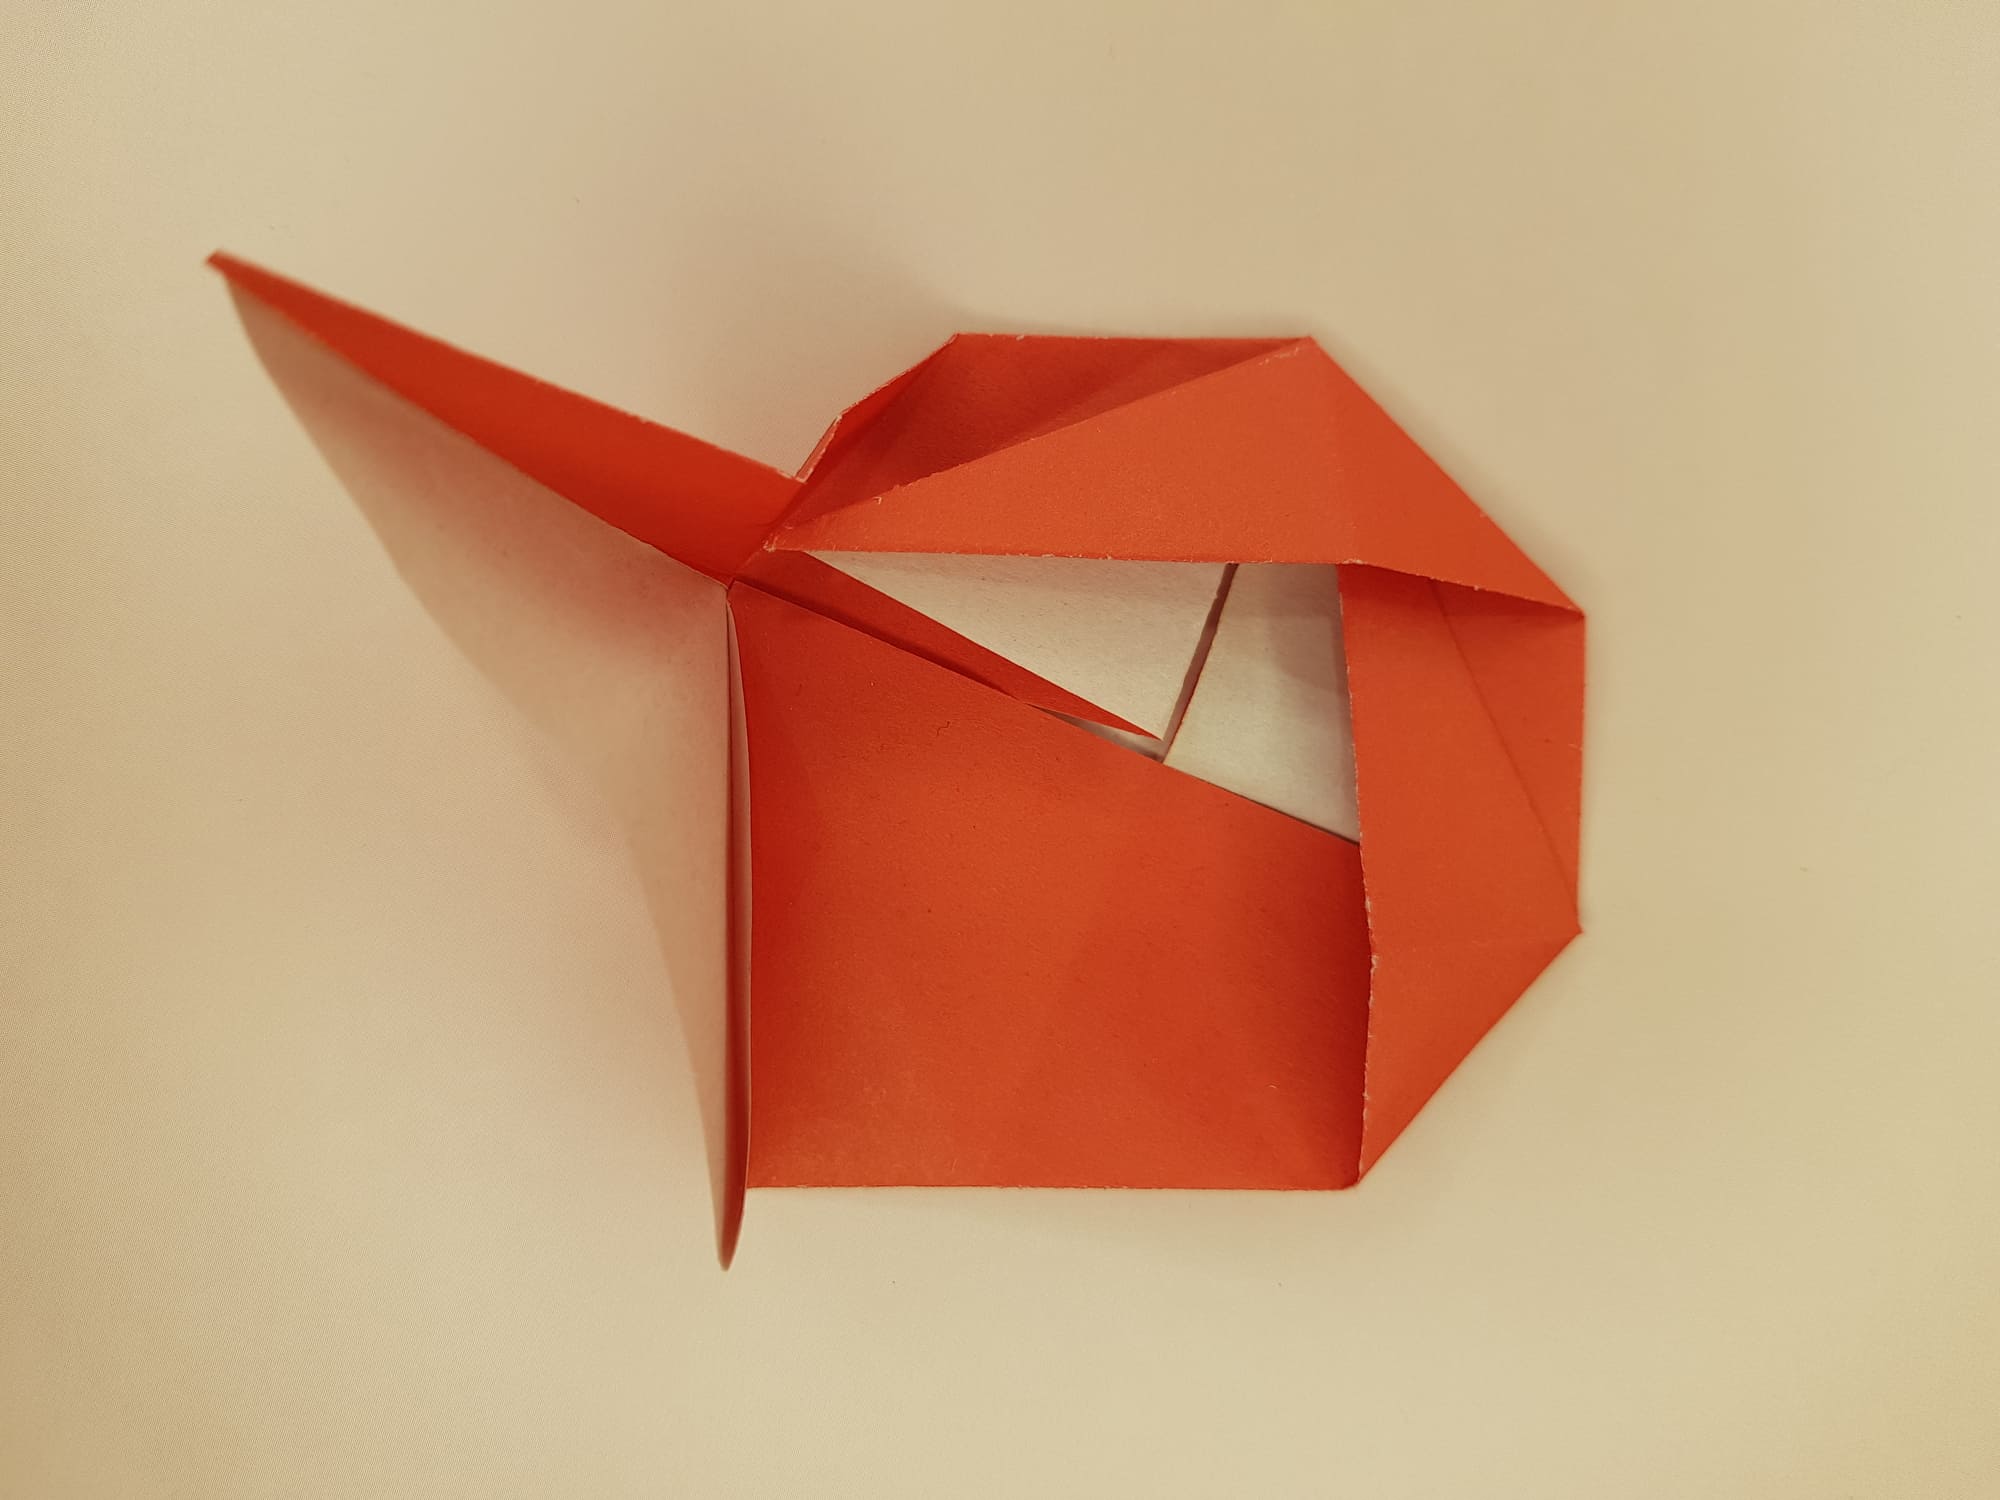
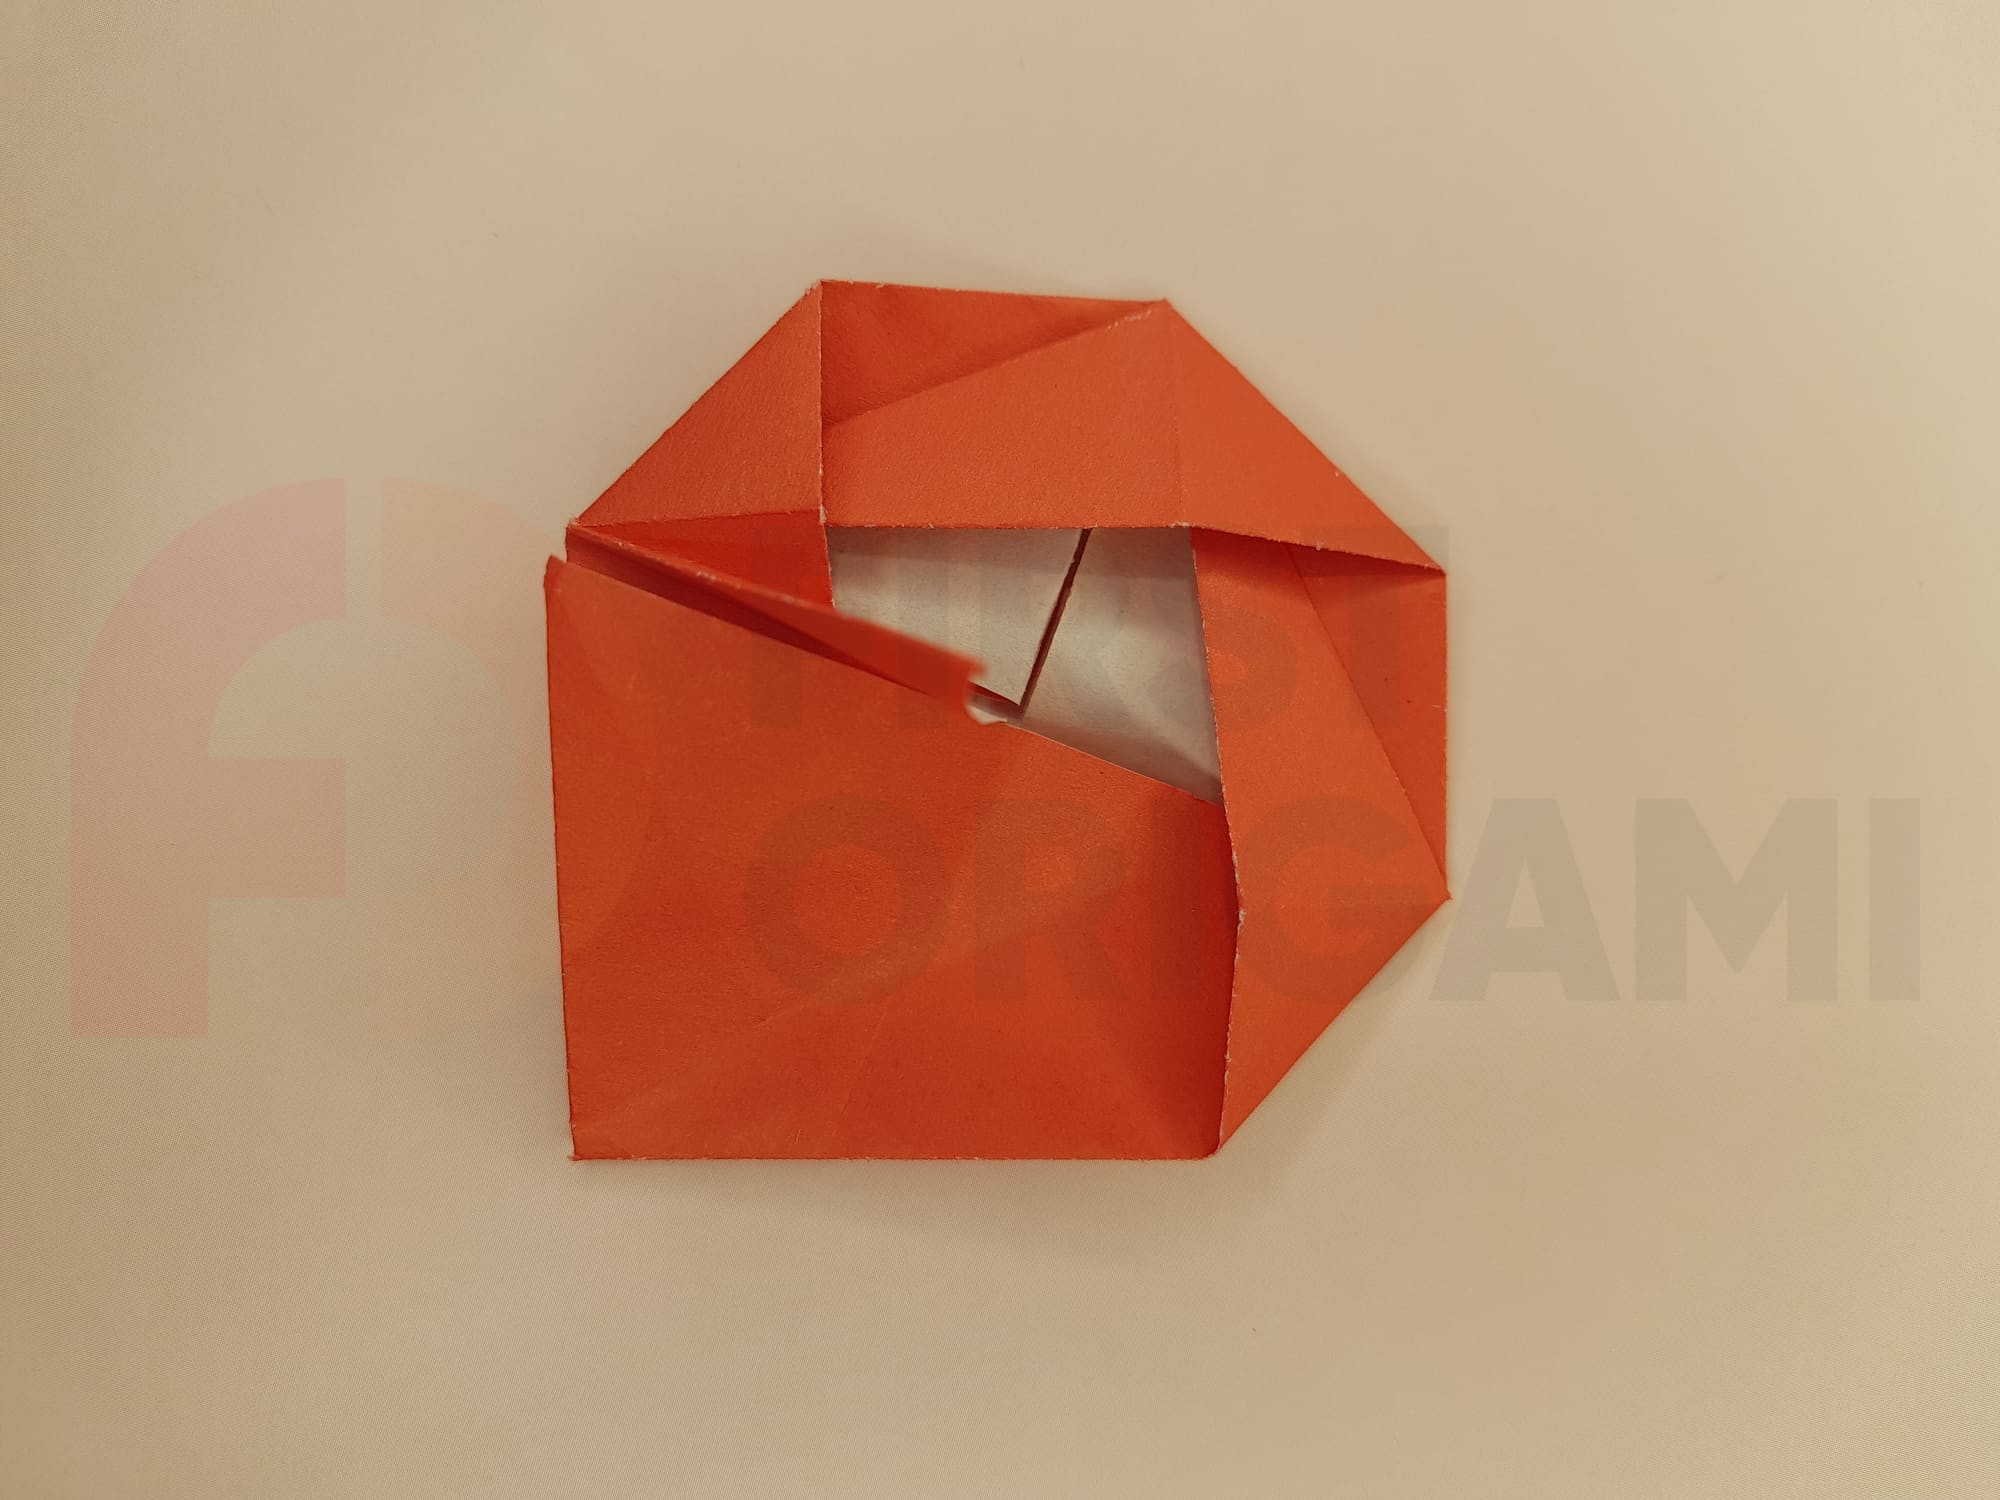
Bend the corner in the direction of the arrow (next step) and hide its edge in the “pocket”.


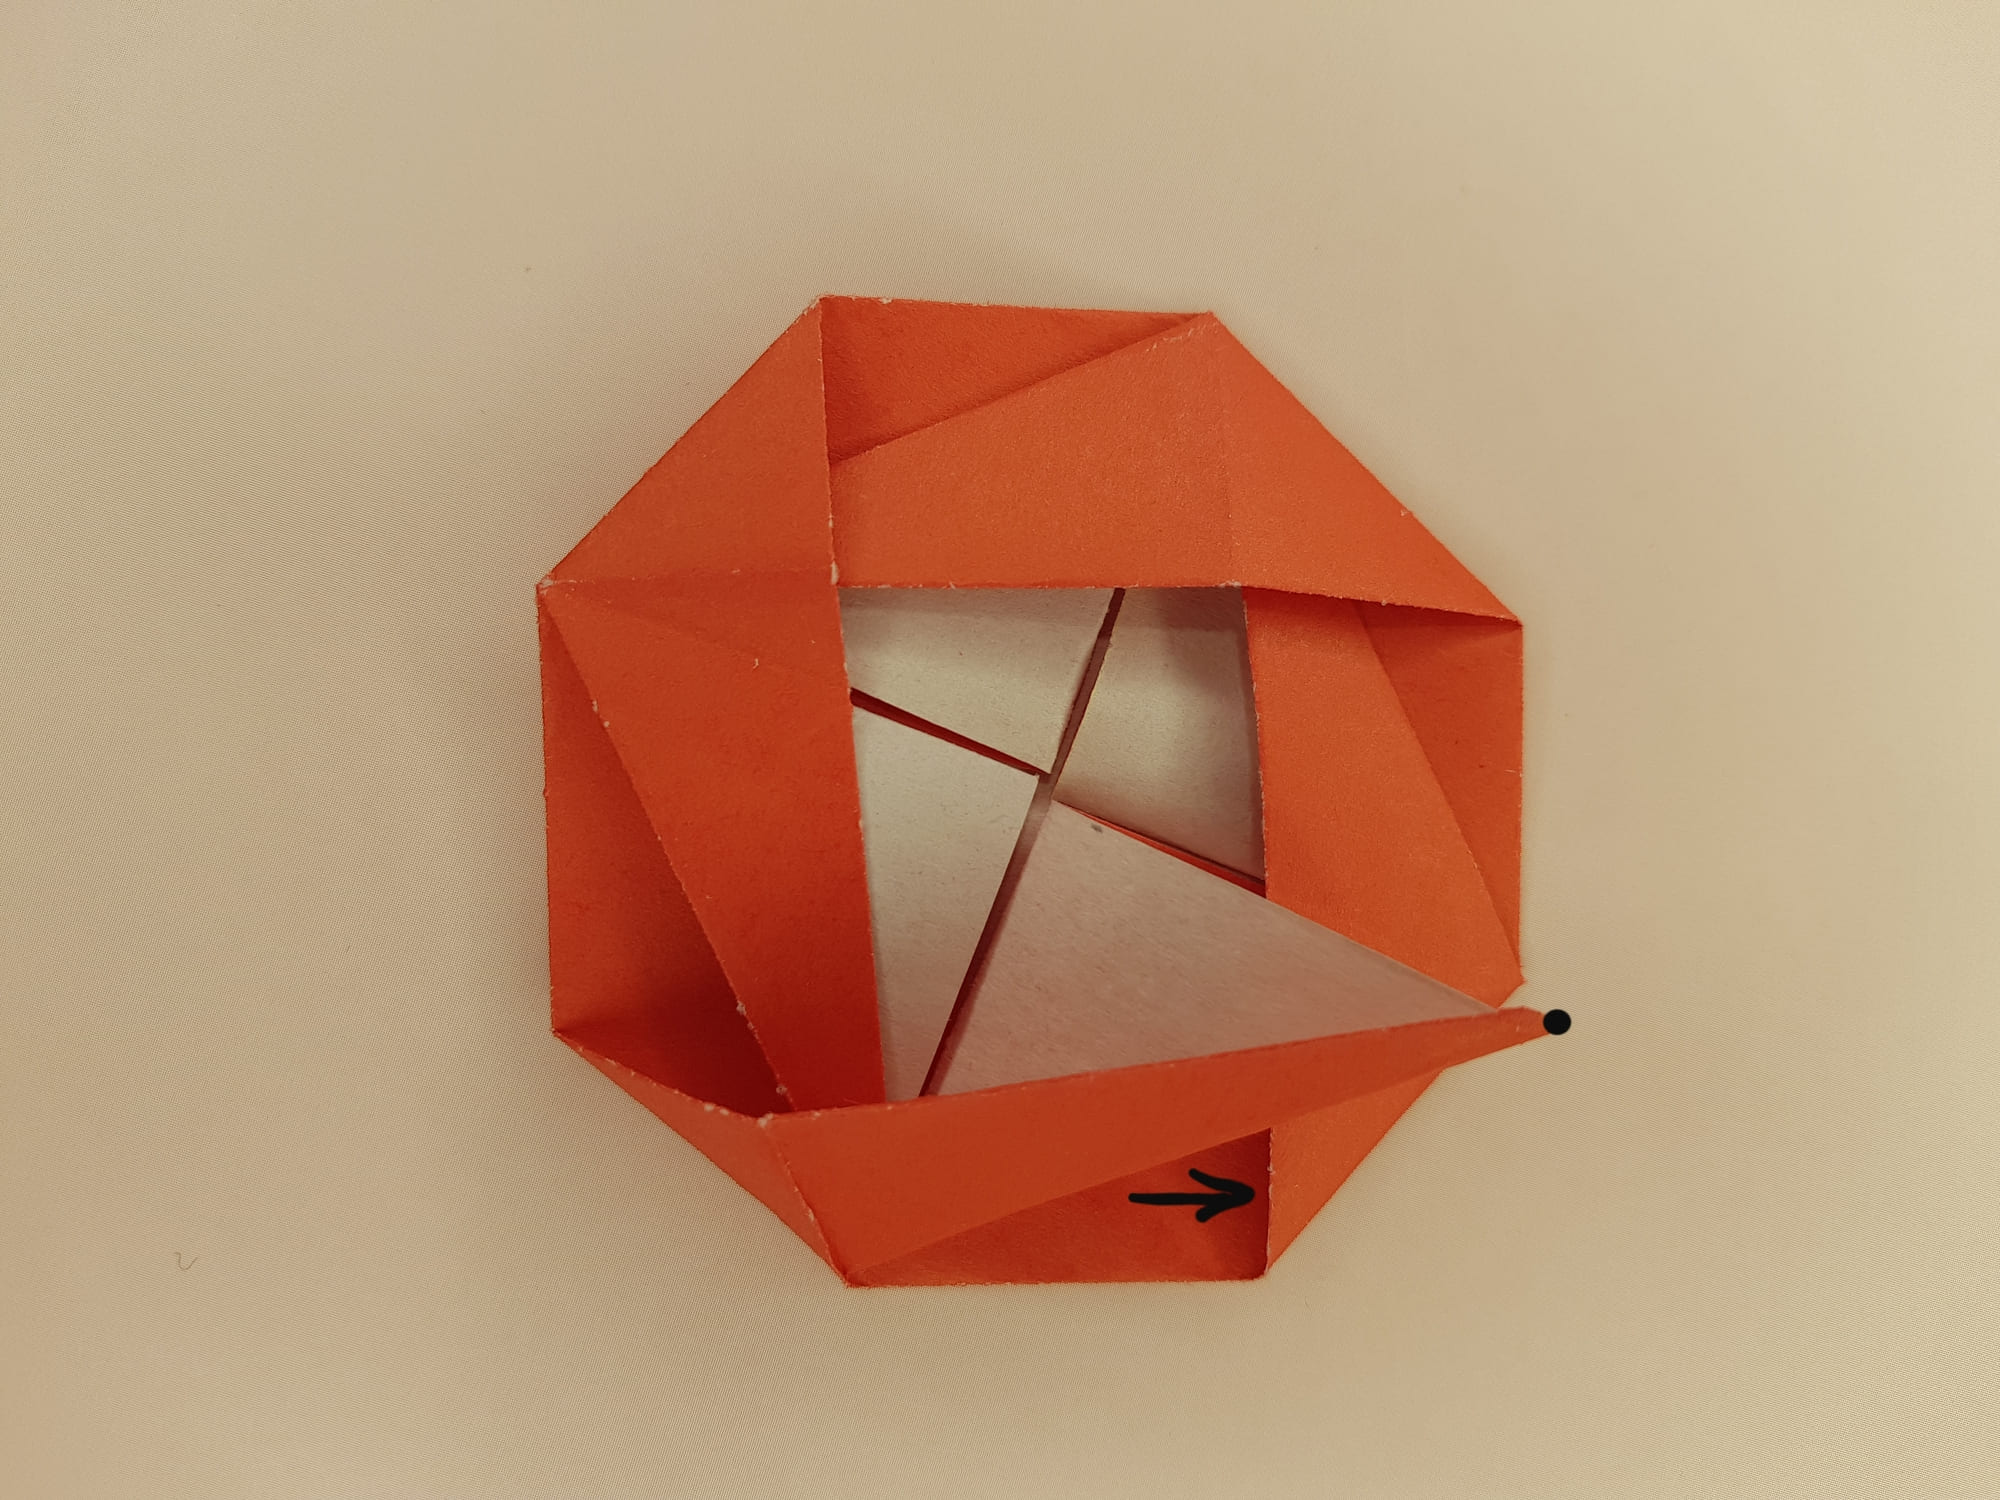
Hide the corner indicated by the dot in the “pocket” in the direction of the arrow.
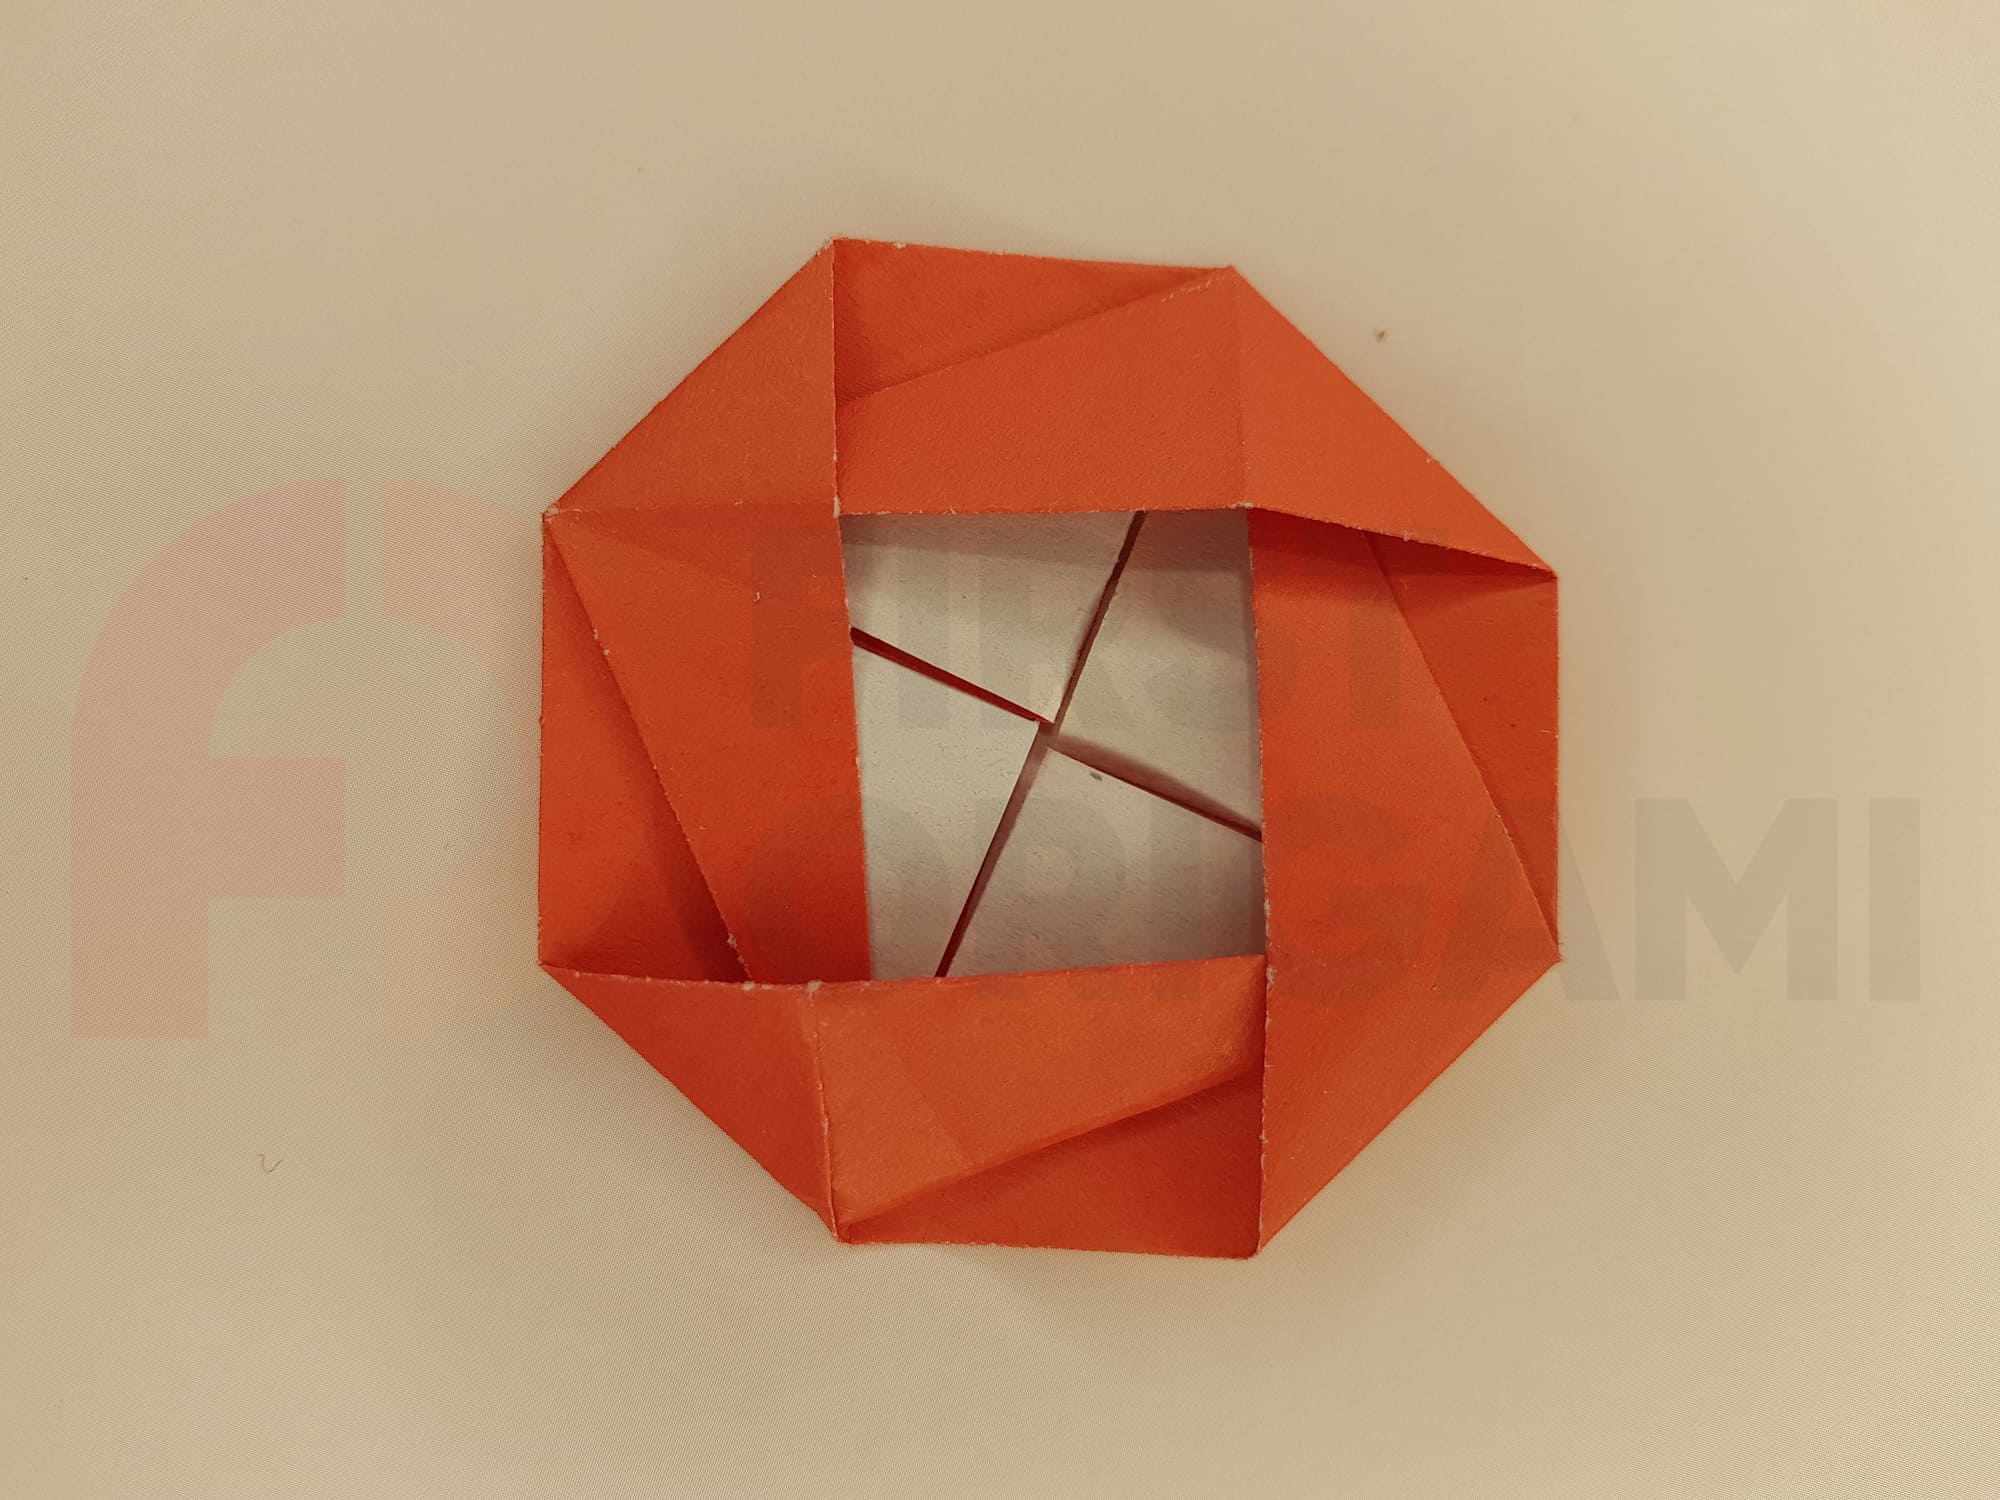
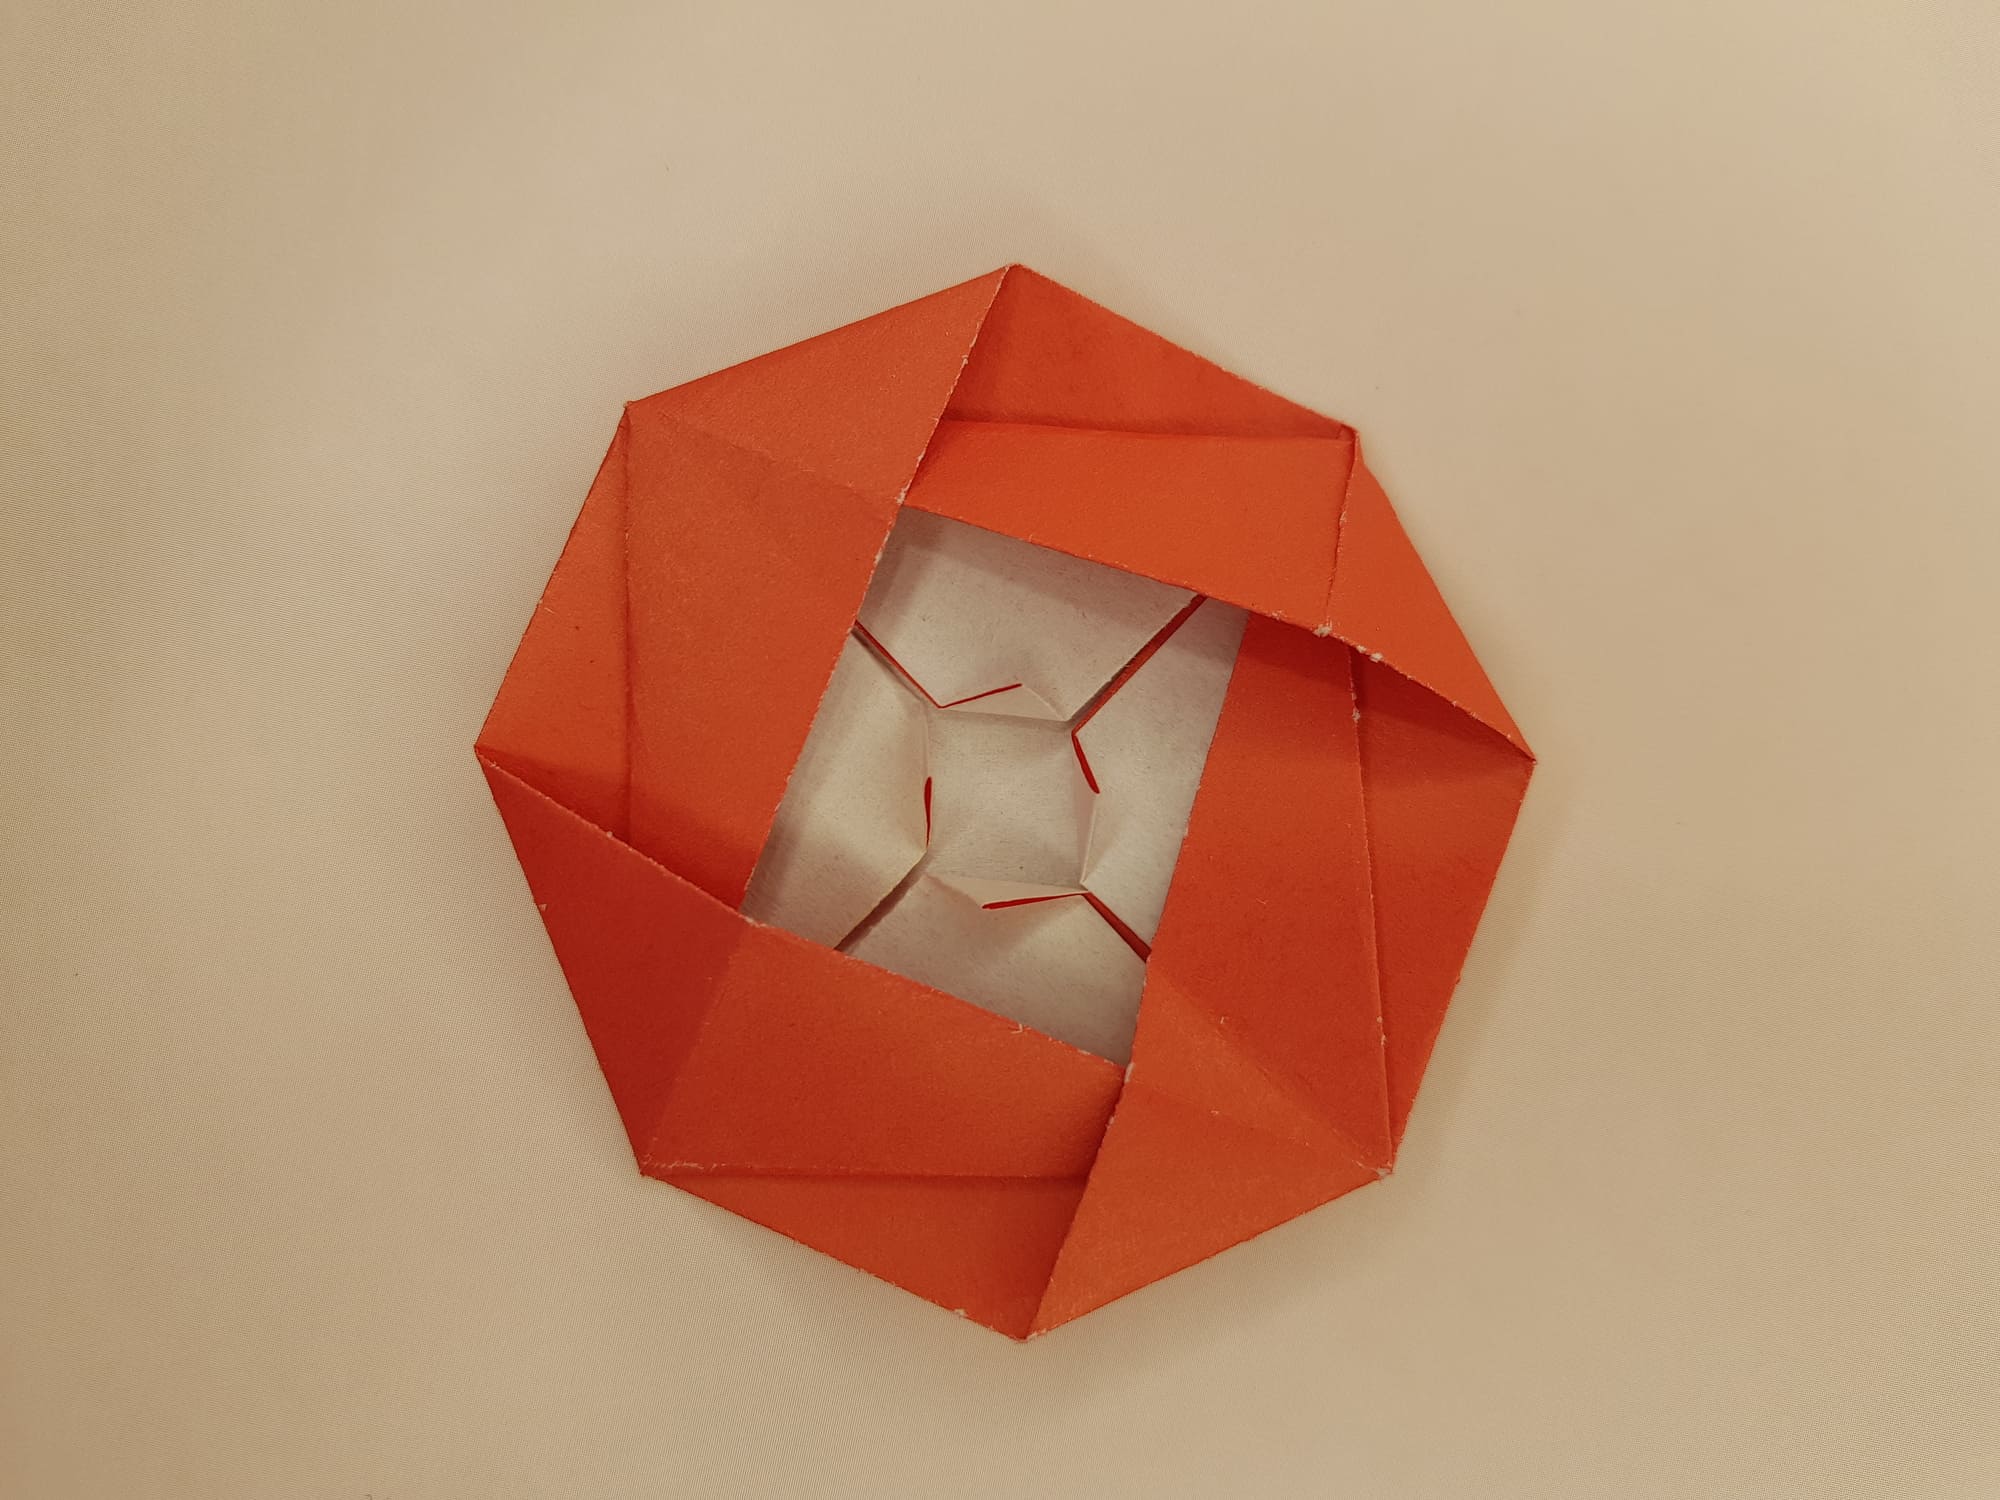
Camellia is ready!
Some of the steps required to make it may seem complicated, but with practice, you will definitely learn how to perform them accurately and quickly. Make a flower bouquet, adding green leaves to it – you will get a very beautiful gift.