Origami Eagle Eye Airplane
Among the main characteristics of an airplane made according to the following instructions is its flight altitude. The model is similar to the fighter jet of the same name. When launched correctly, the figure flies up like a bird and quickly descends, making rolls, rotations, and loops.
You can fly the Hawk even in a small room because it does not need space for its flight range. The conditions are like those of a real fighter, performing an important mission in difficult conditions.
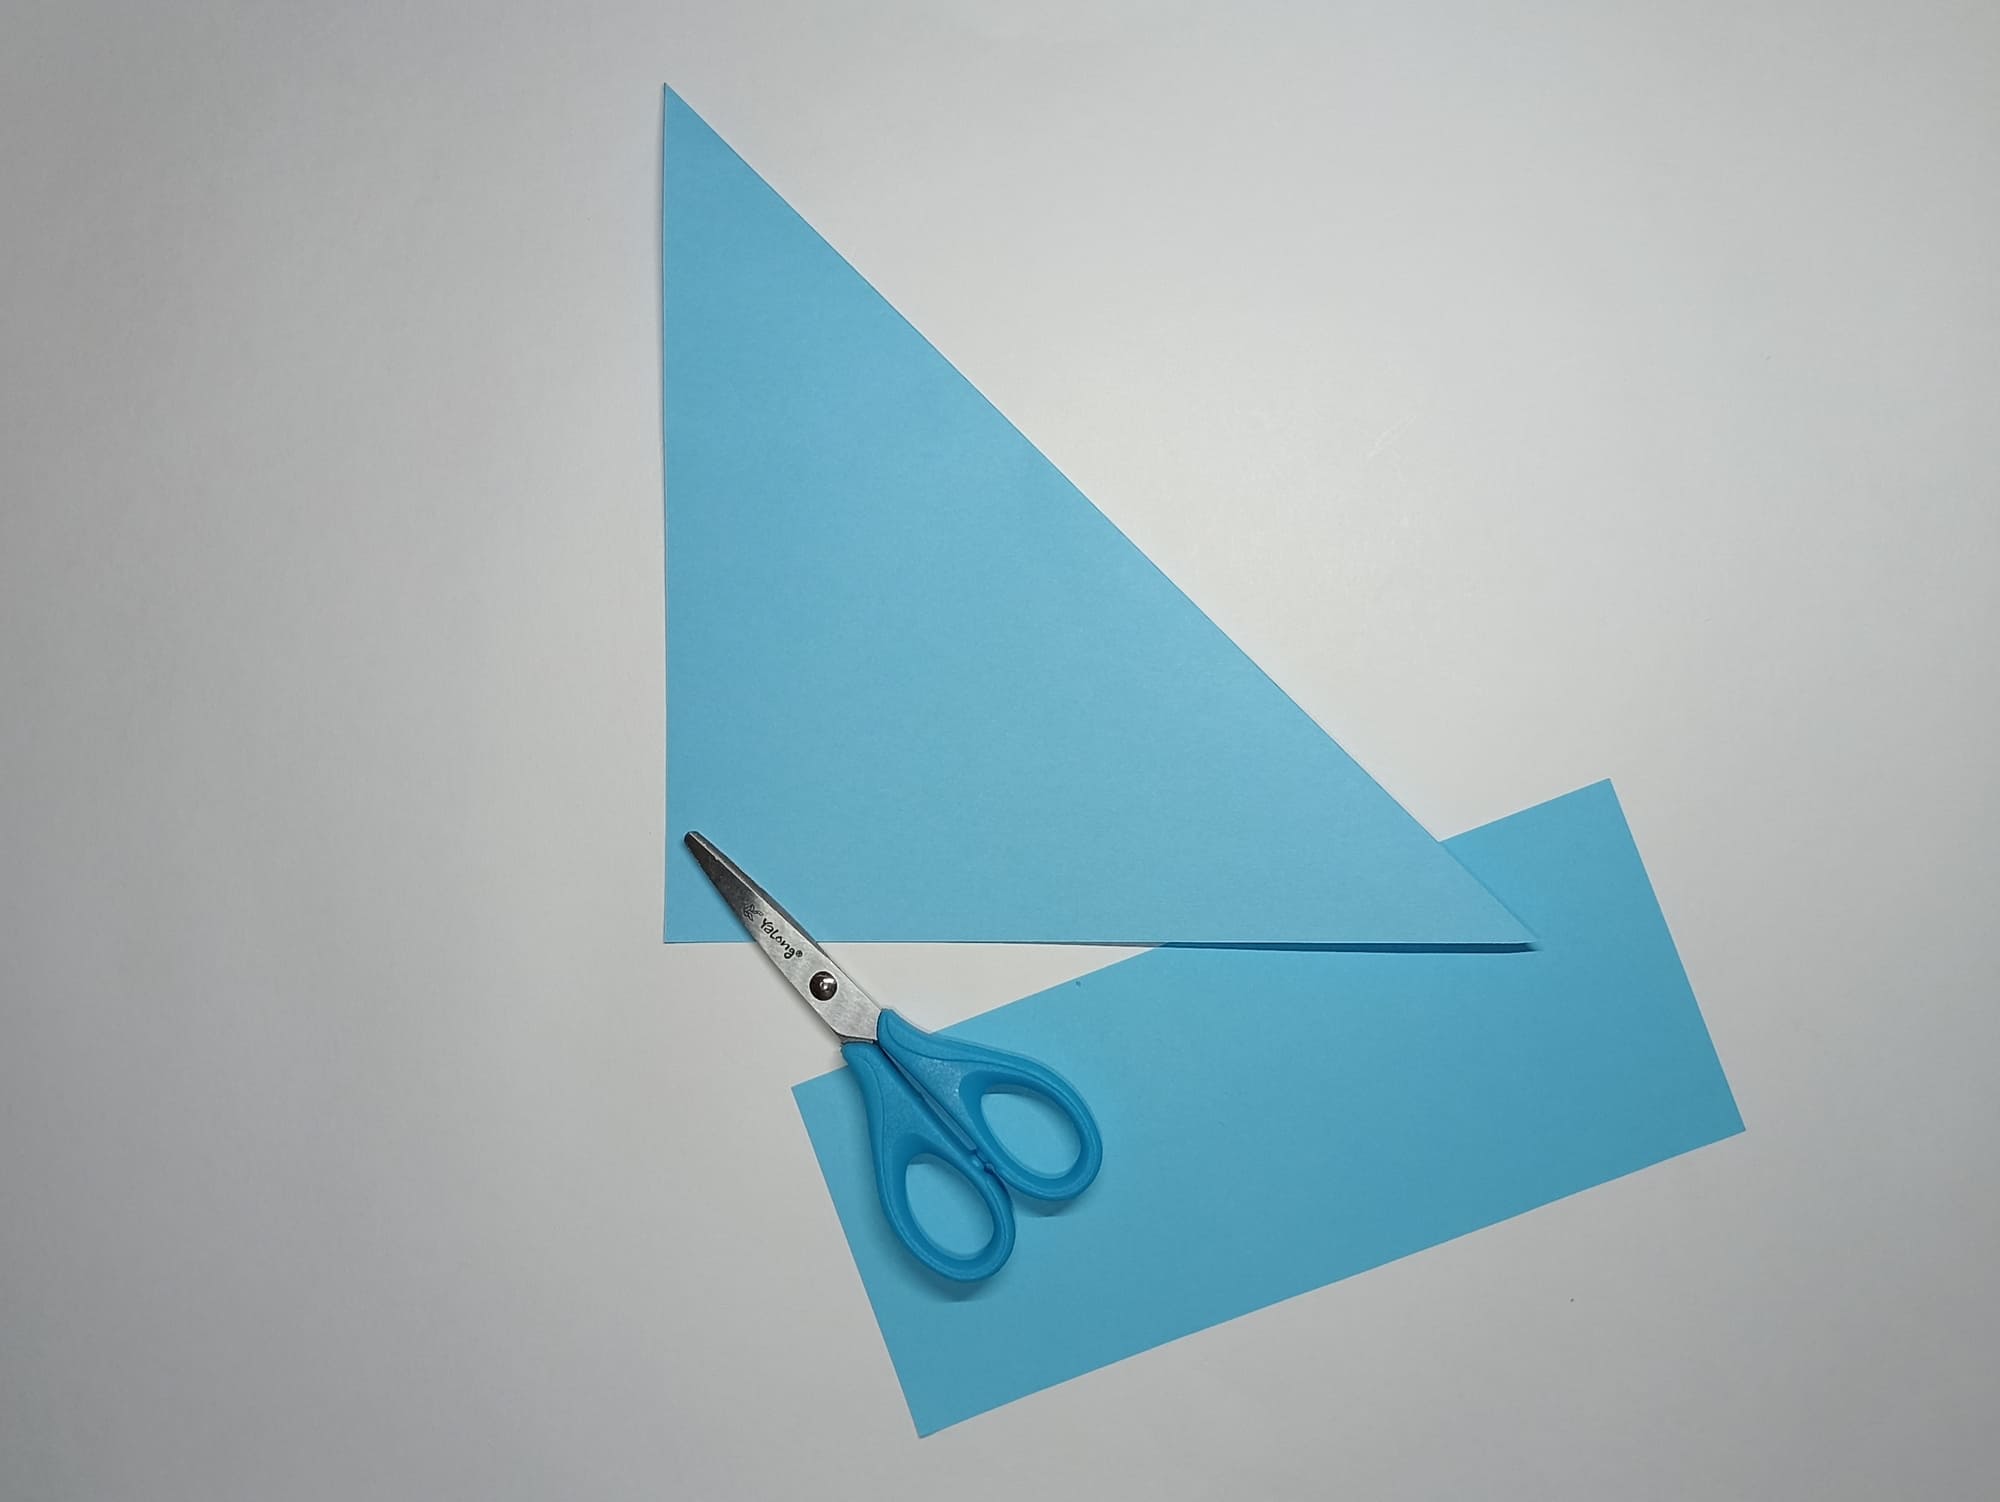
To assemble the model, you need a square.
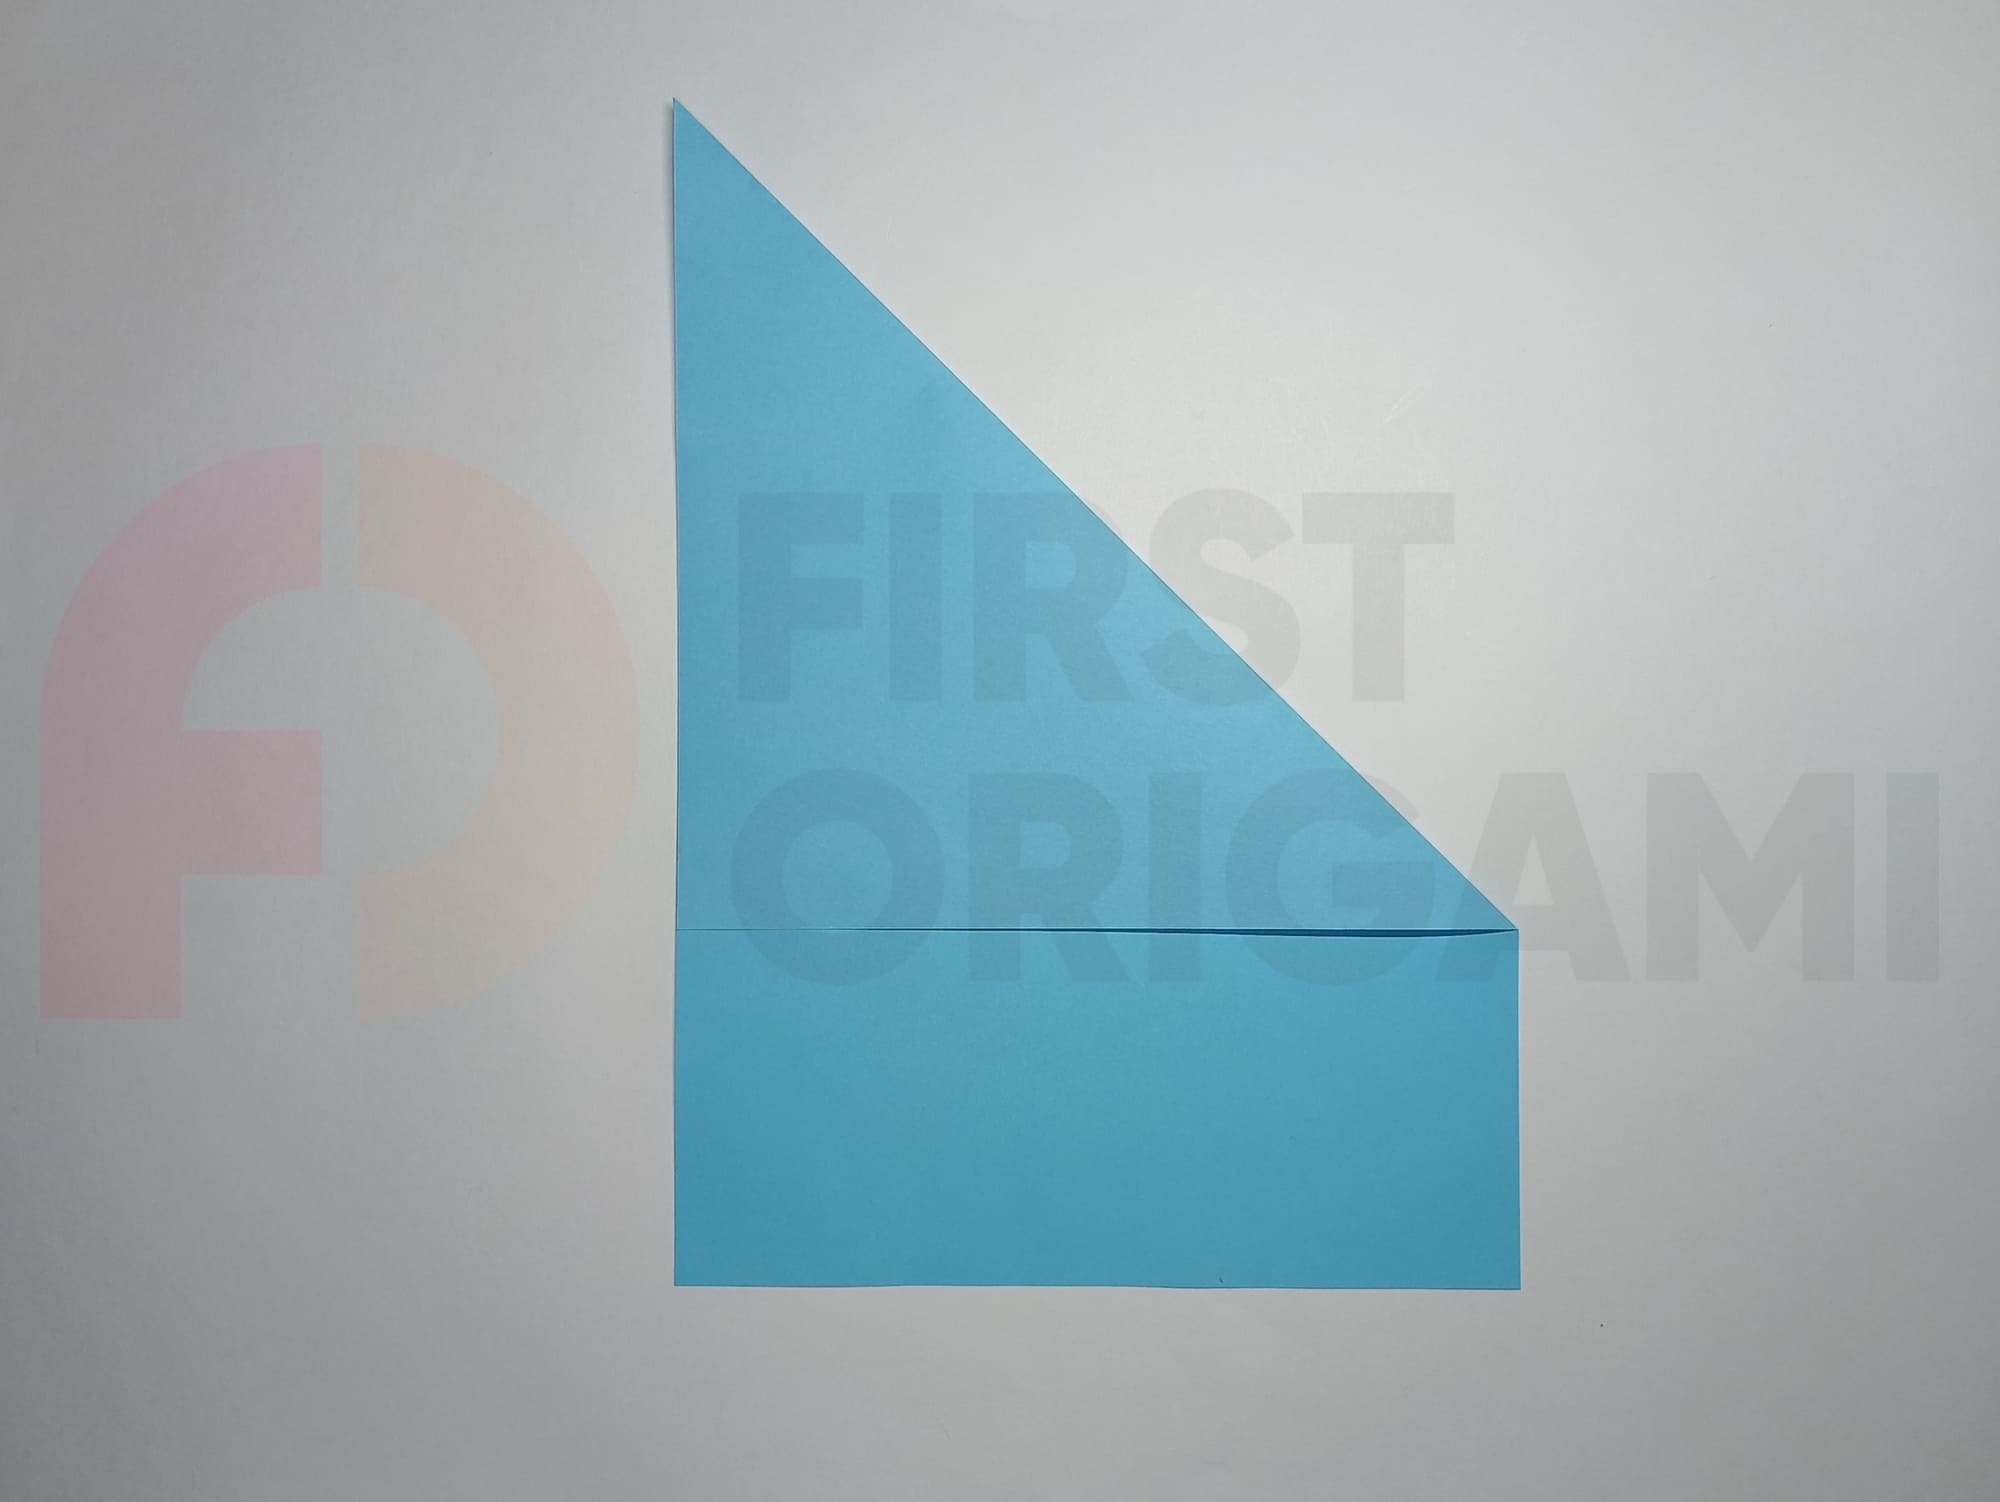
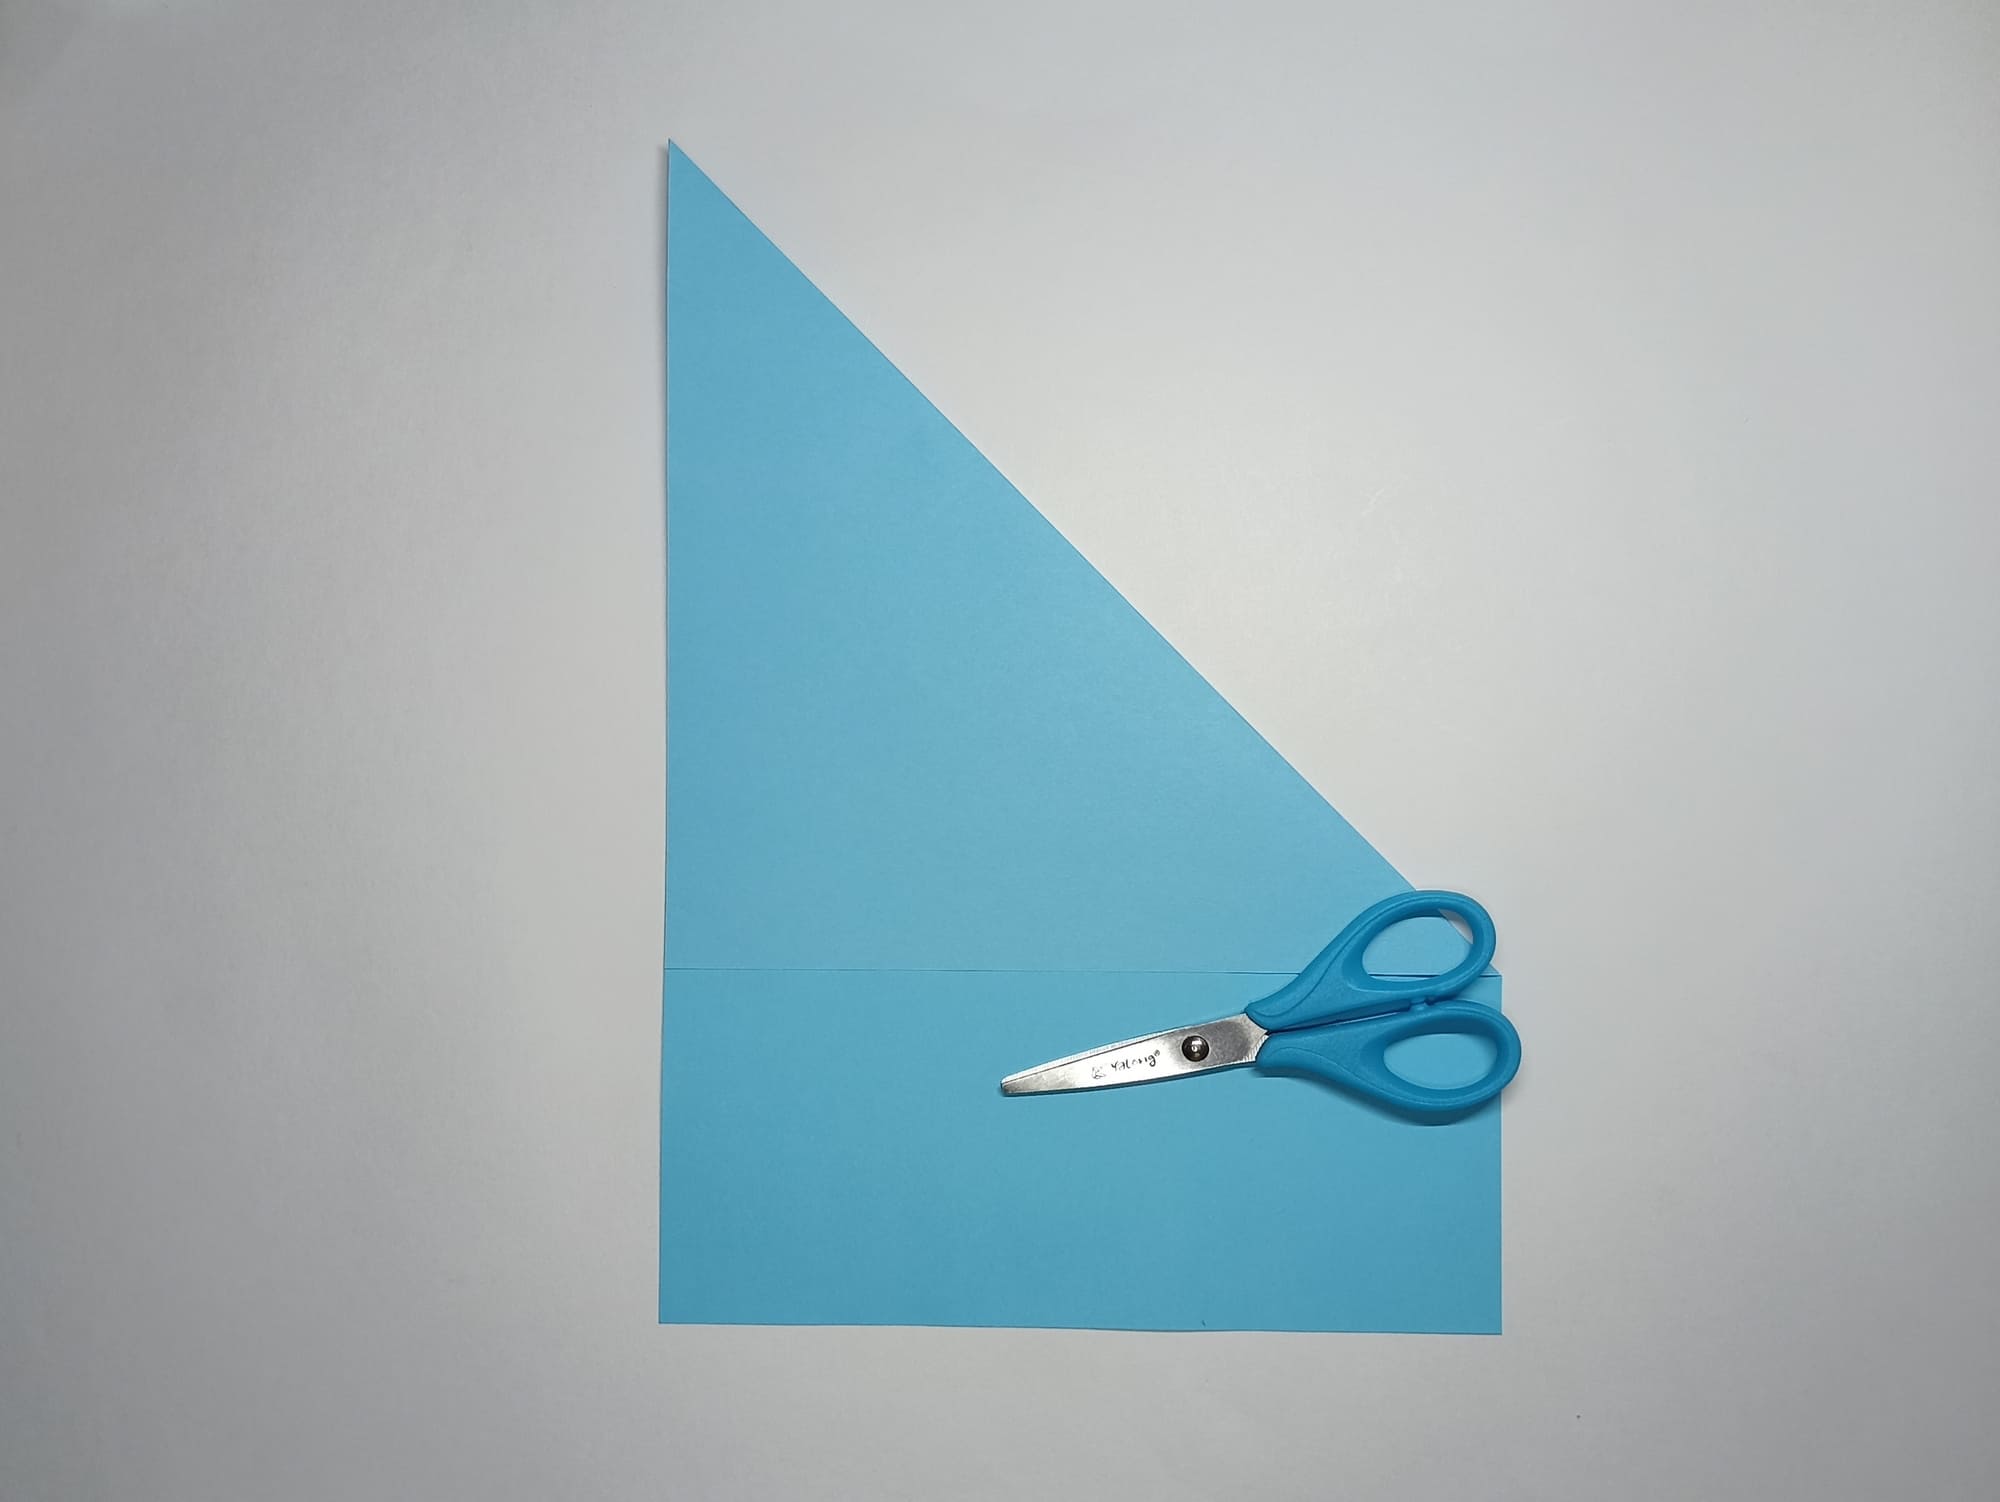
Take a ready-made origami sheet or align the top line with the left side of a rectangular sheet of paper and cut off the protruding part.
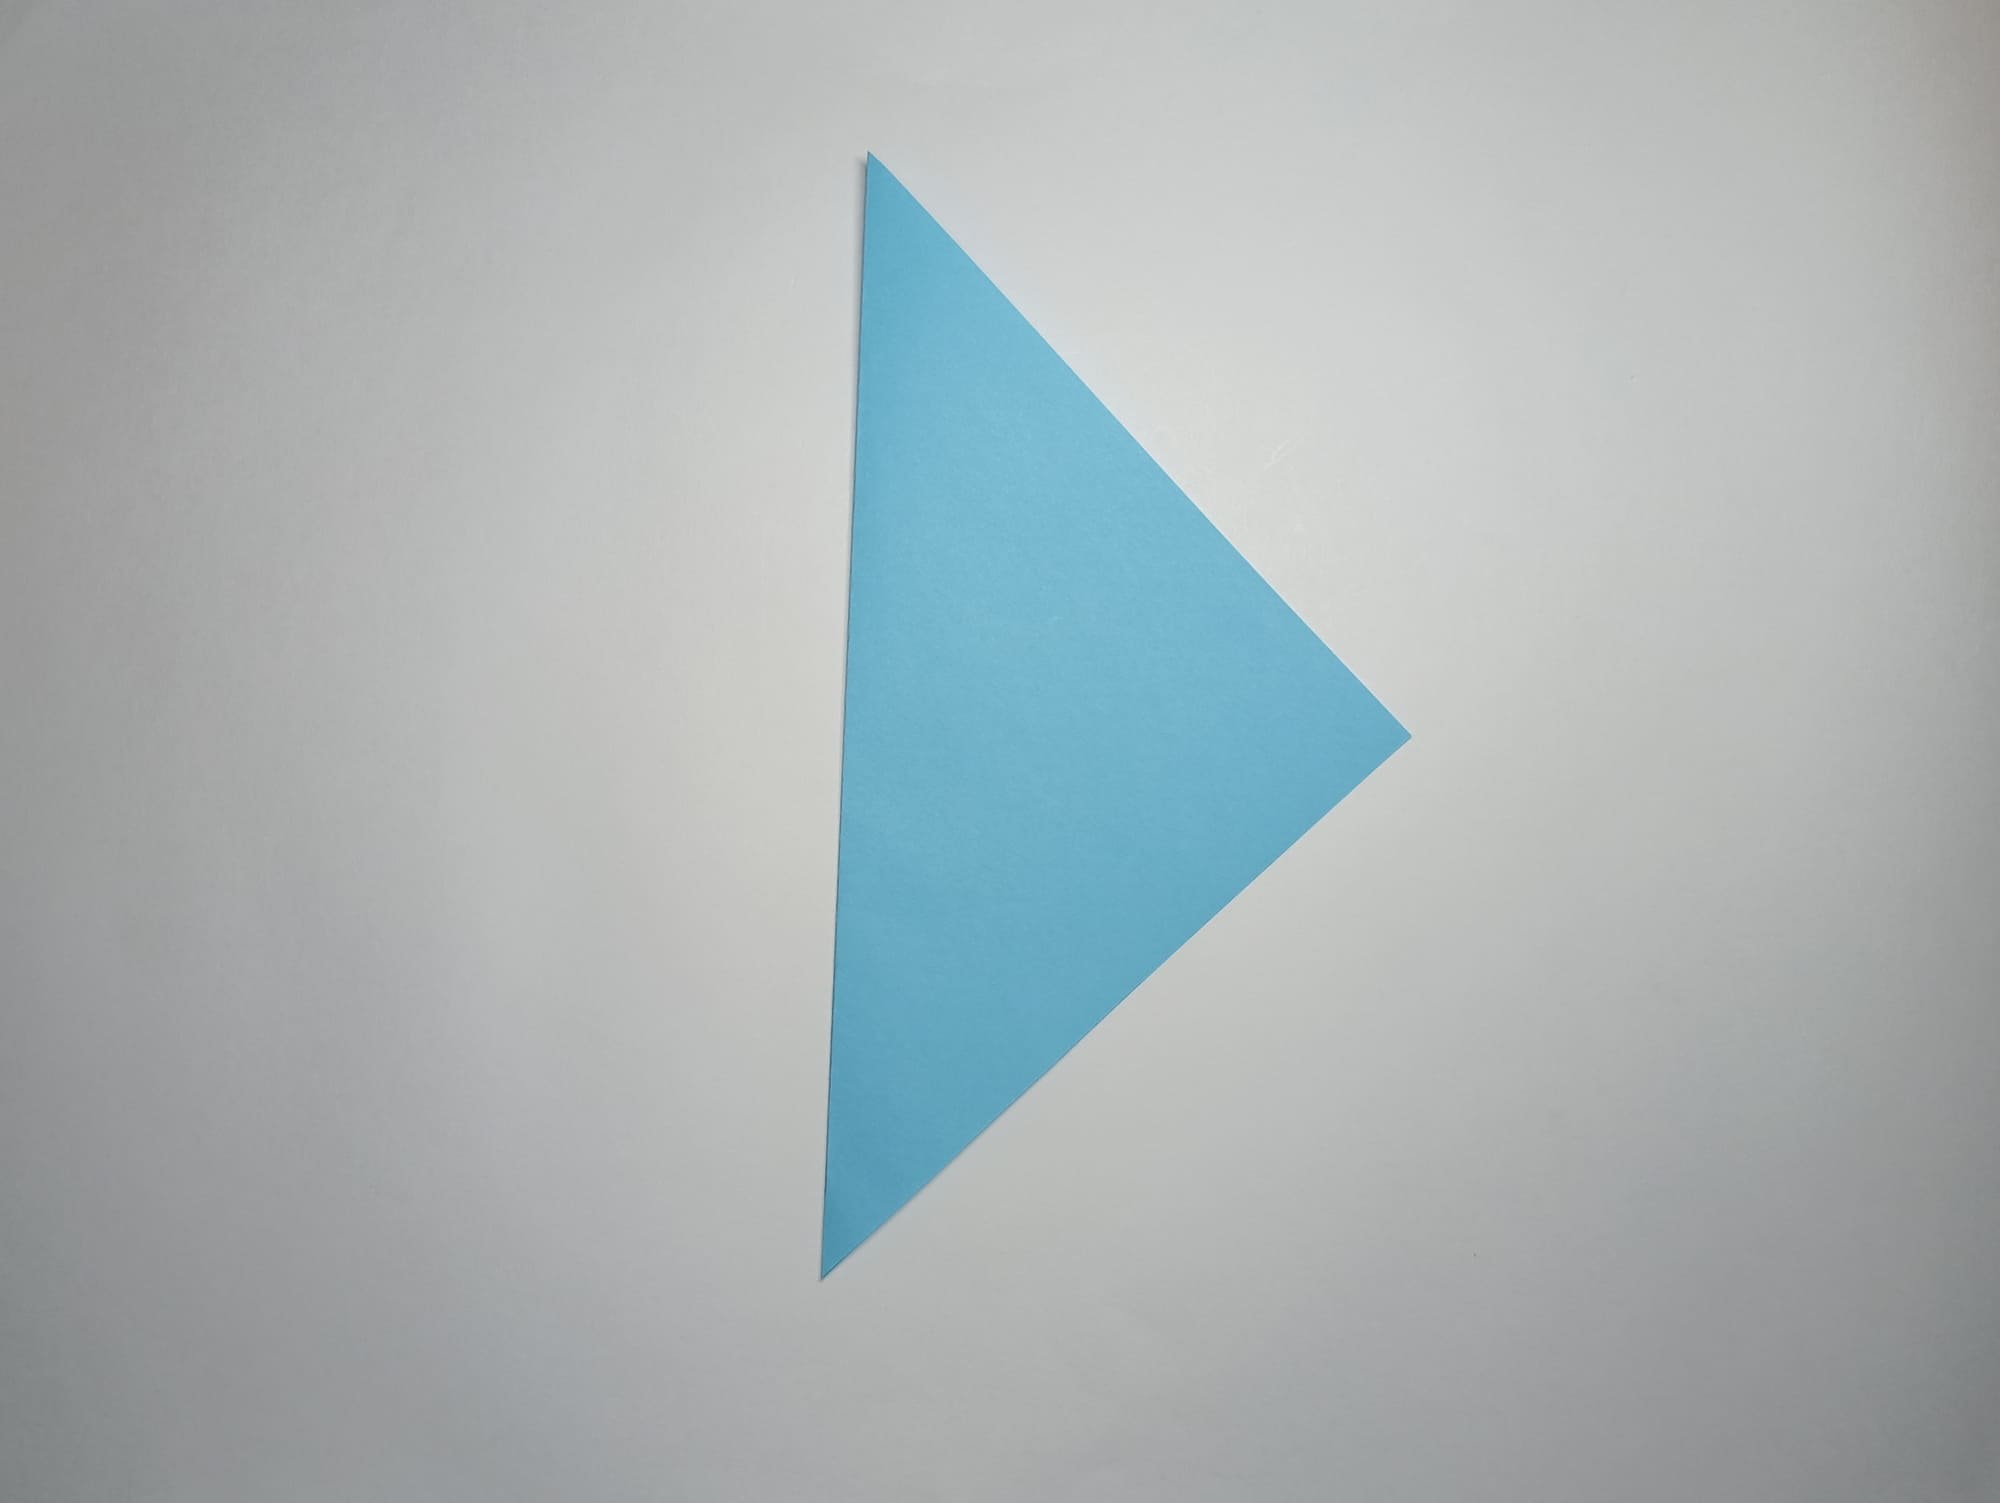
Position the fold line vertically and bring the corner of the figure towards the right hand.
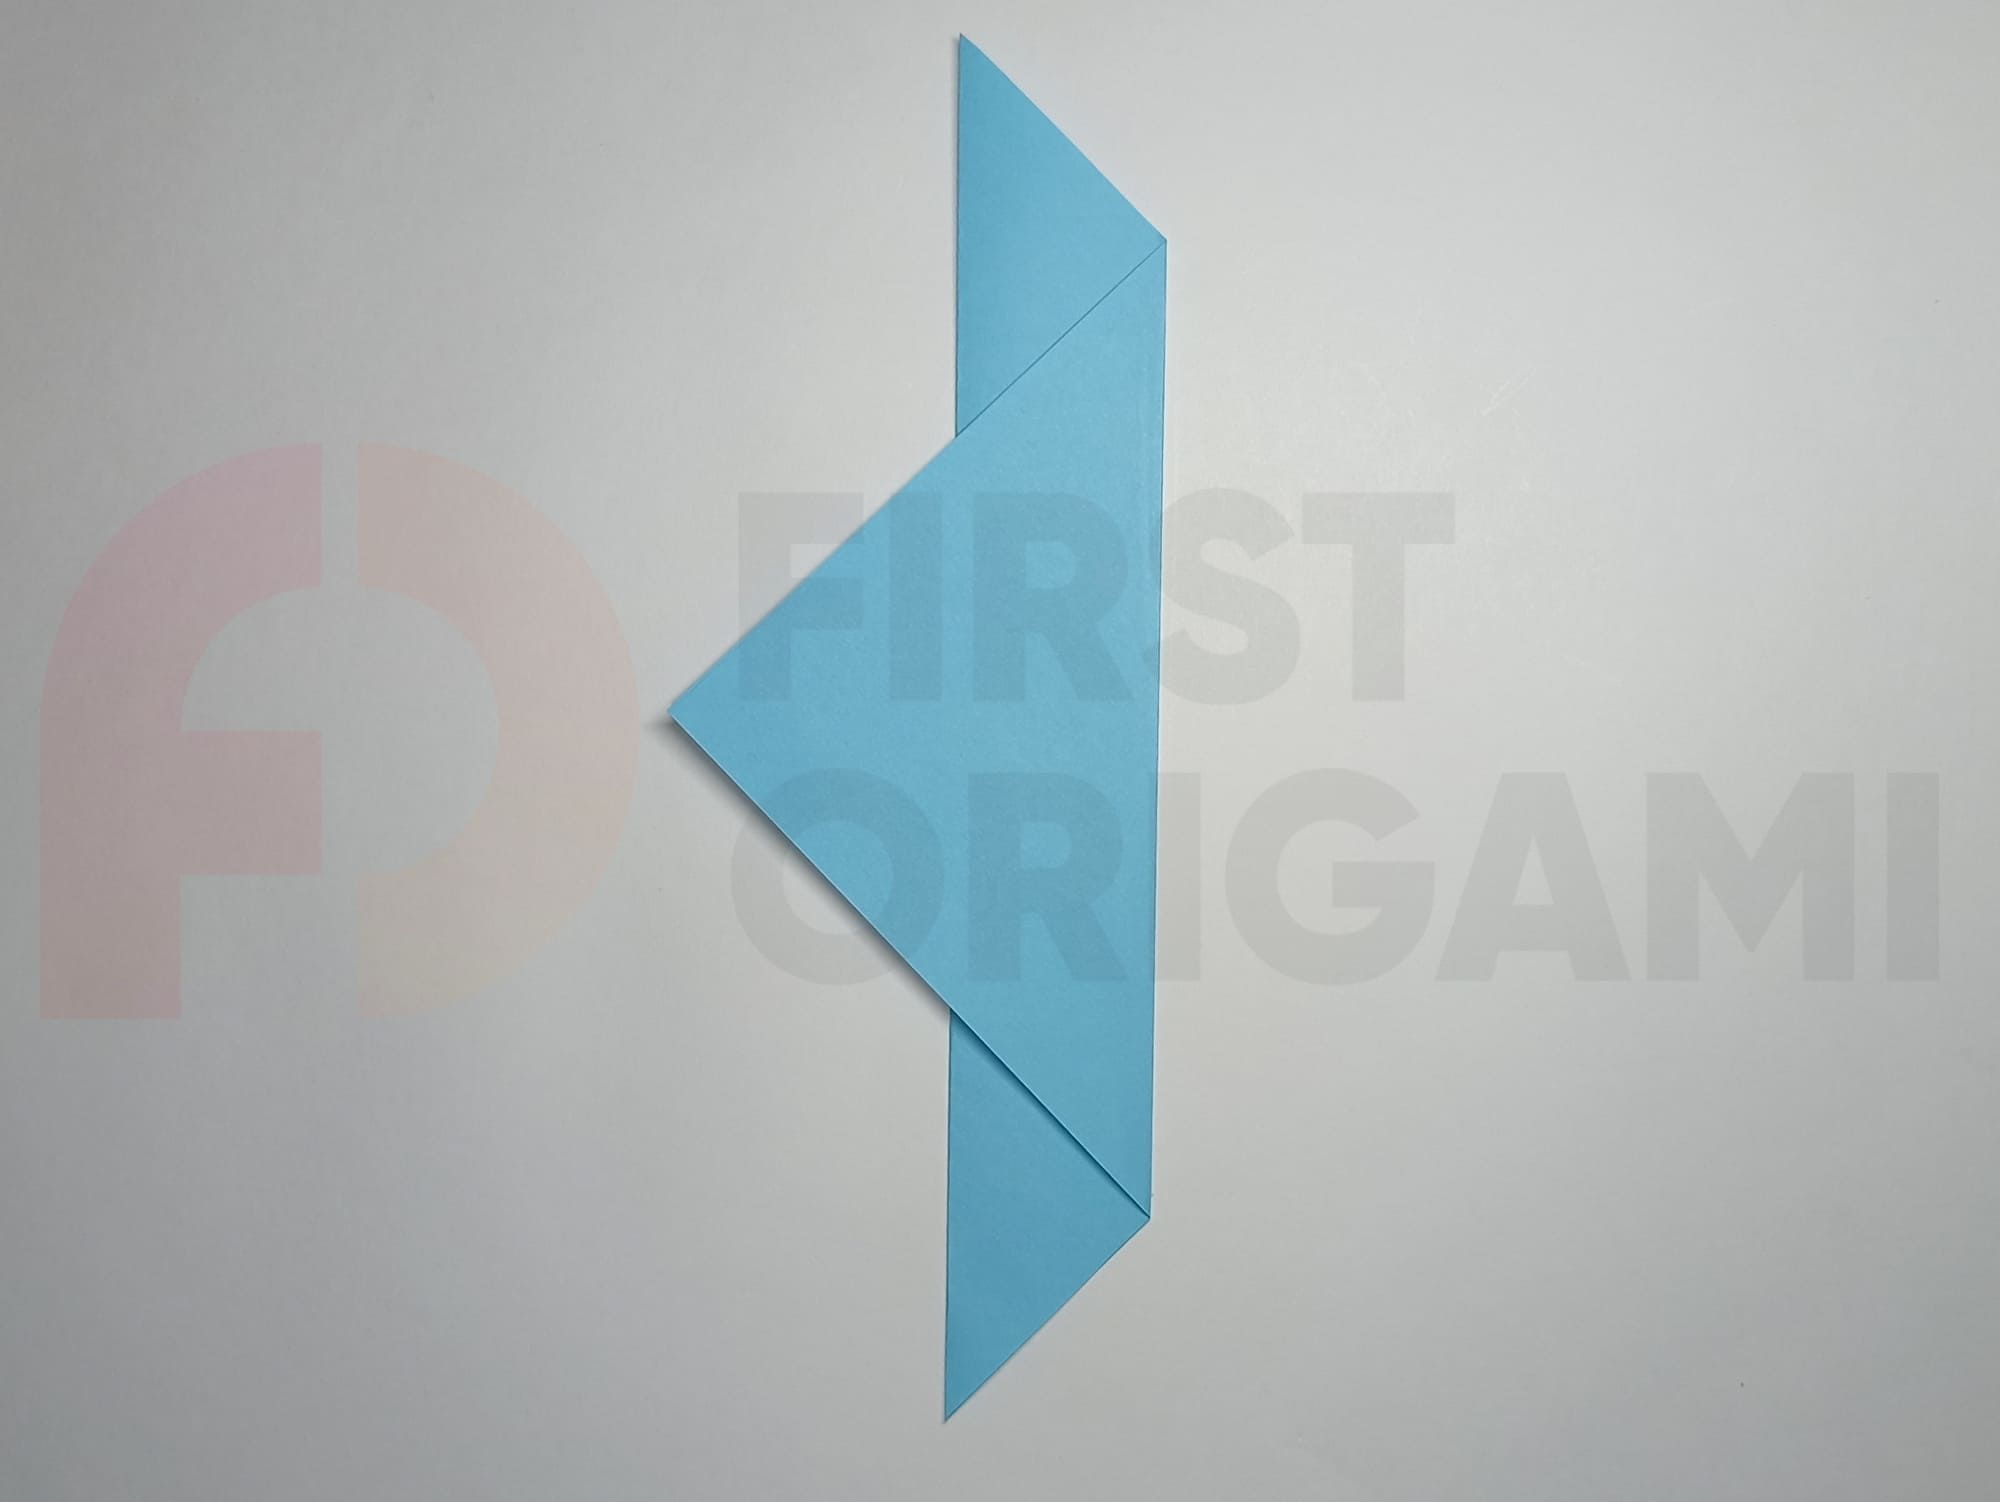
Visually divide the width into three parts and bend both parts to the left by two-thirds.
Bend the upper part of the free edge in the other direction at a distance of your choice. The fold should be located between two parallel long folds.
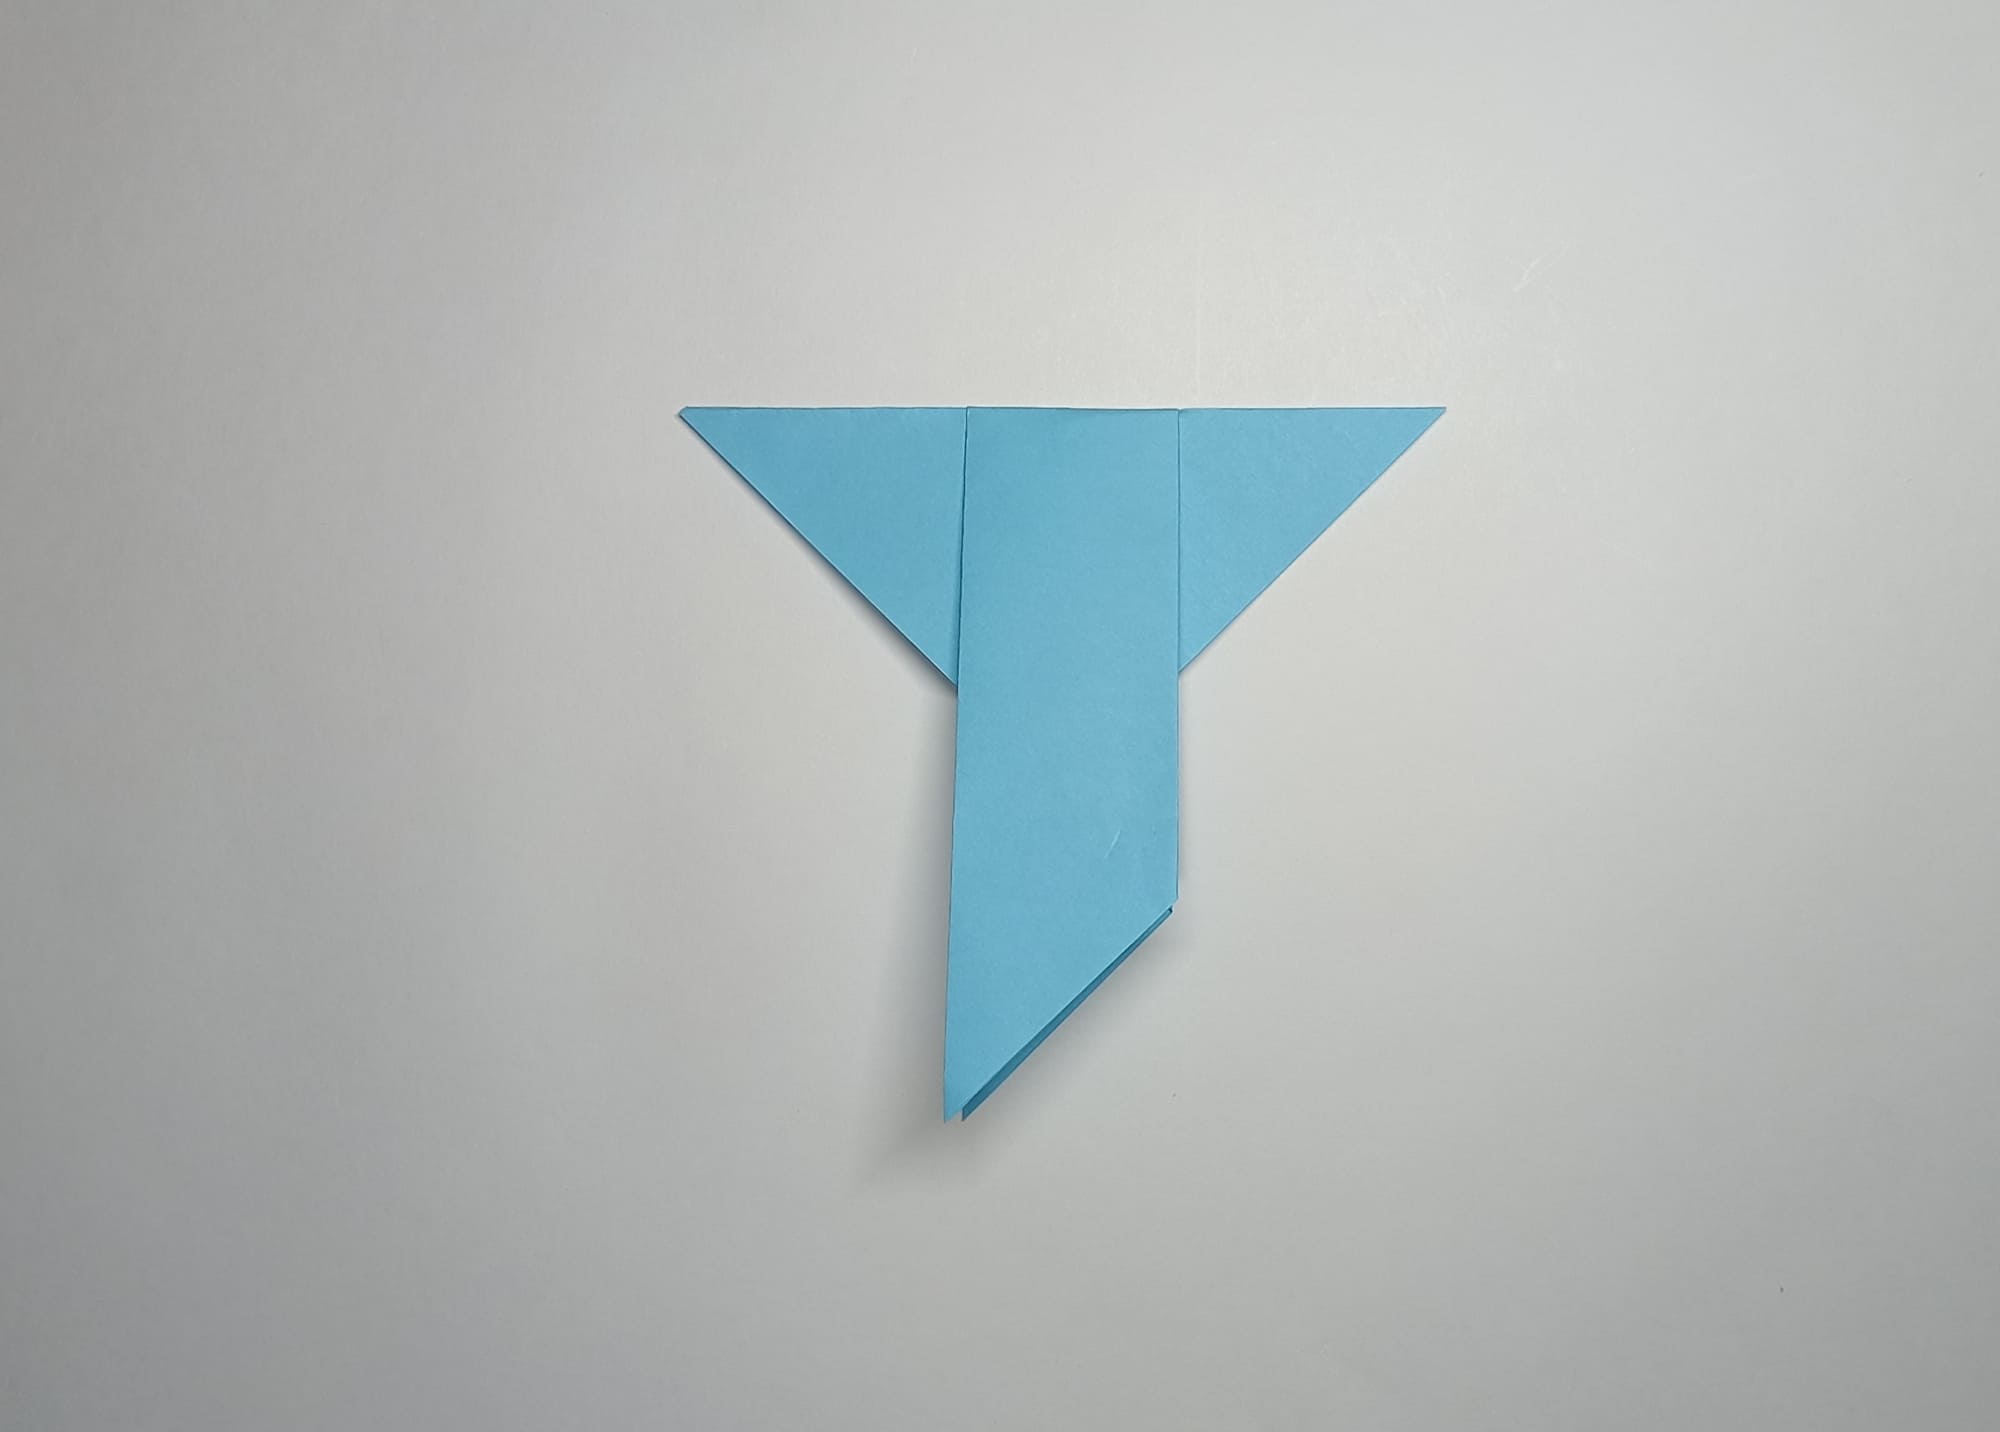
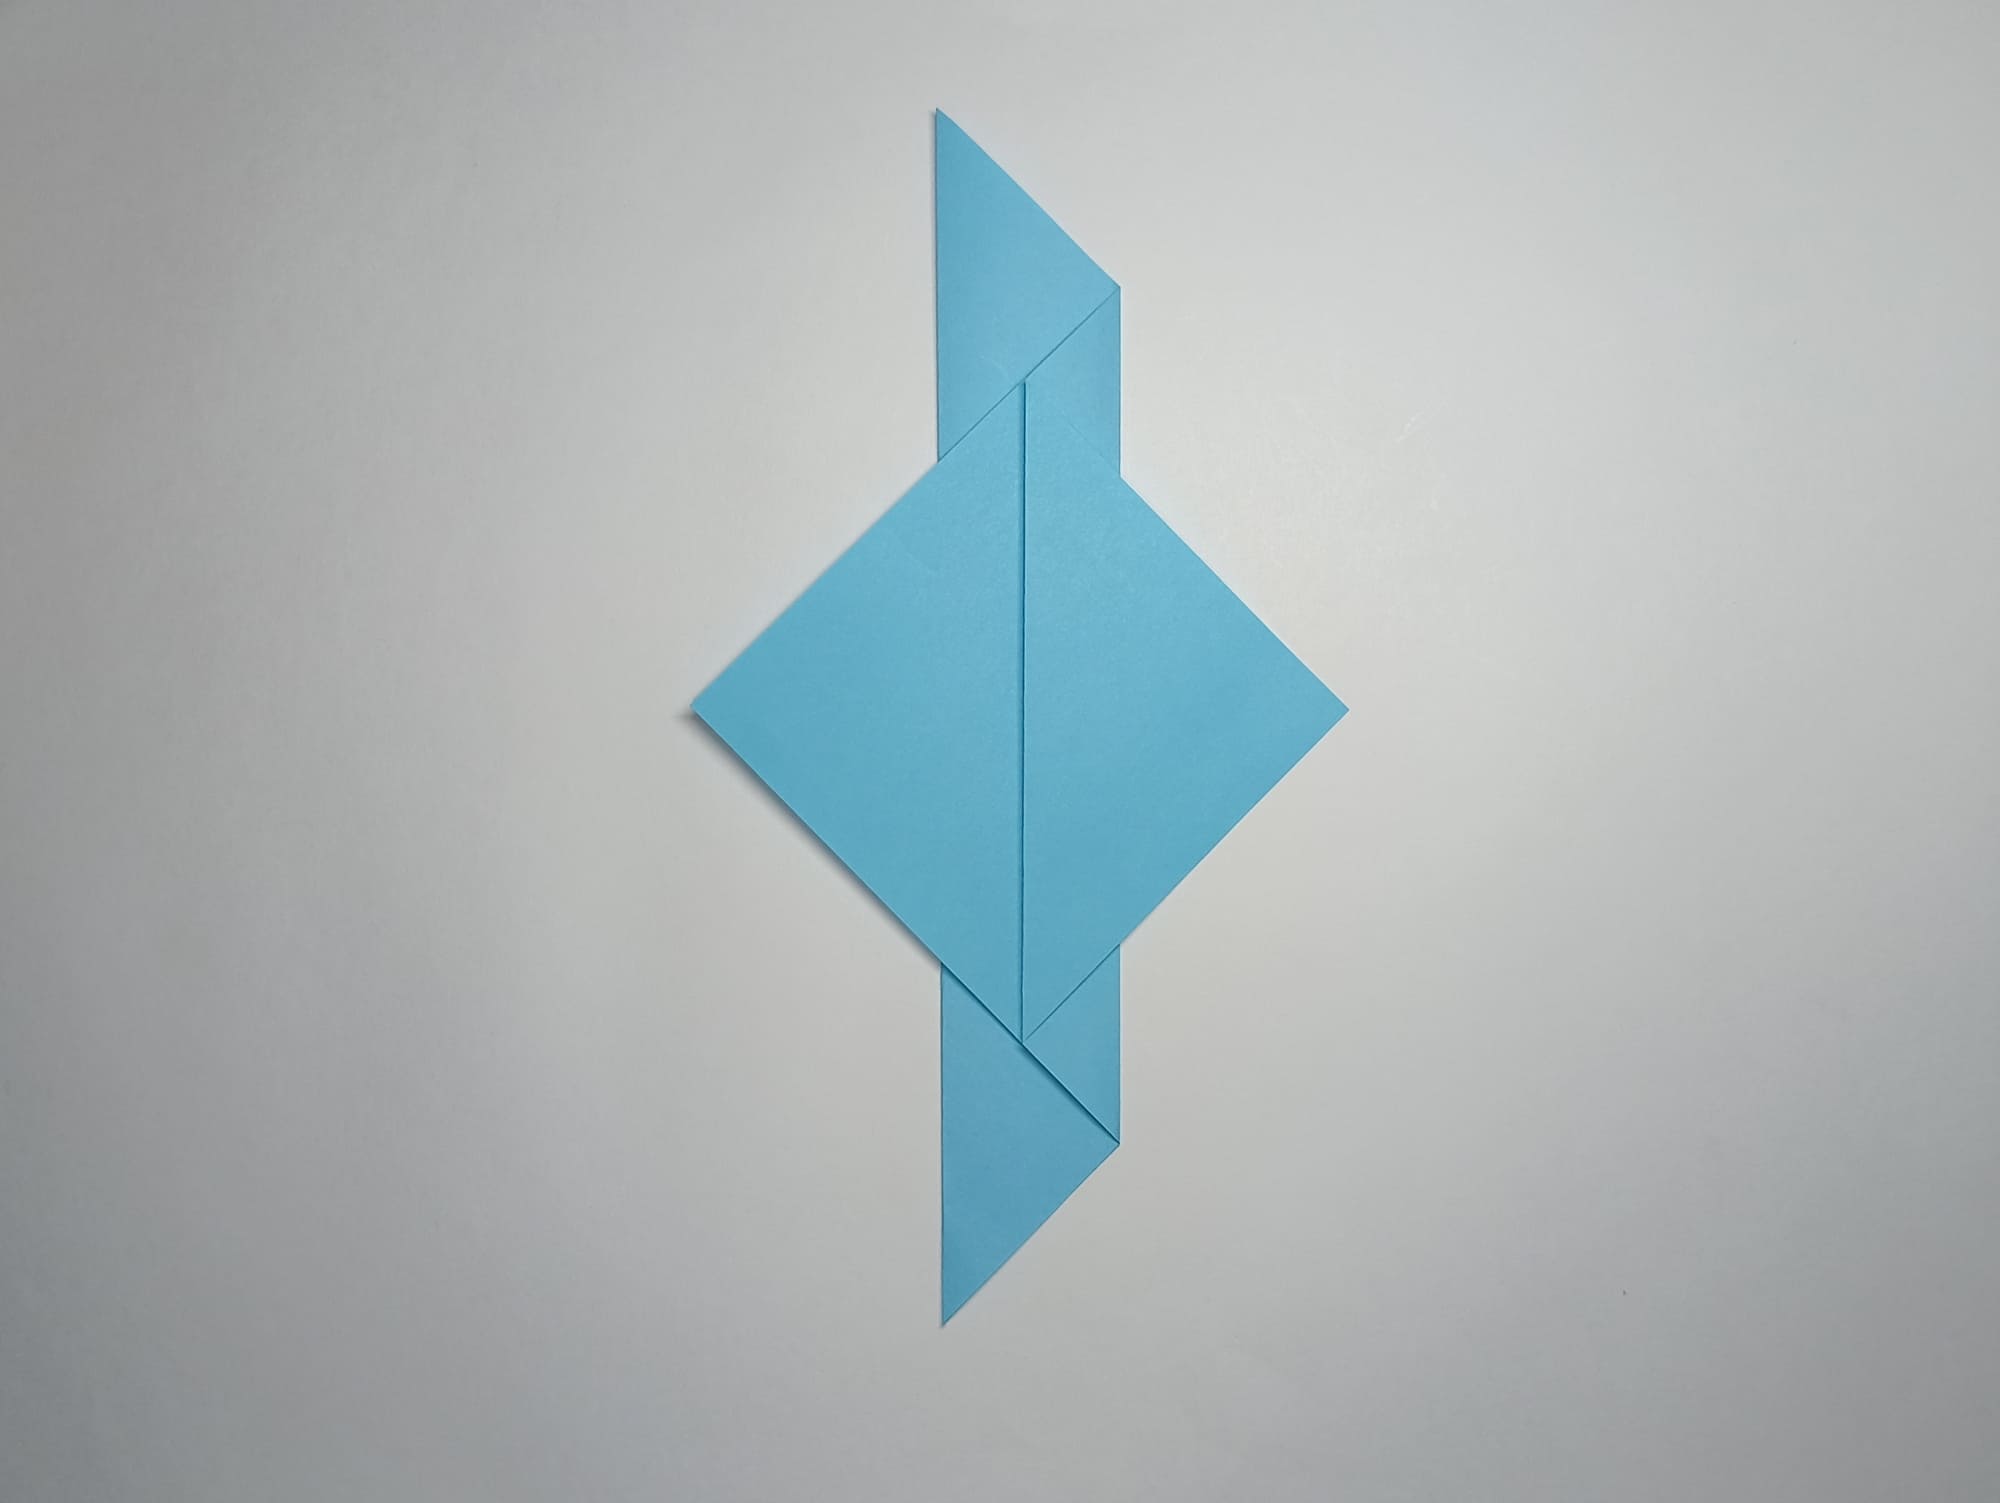
Fold your future fighter in half towards yourself along a horizontal line.
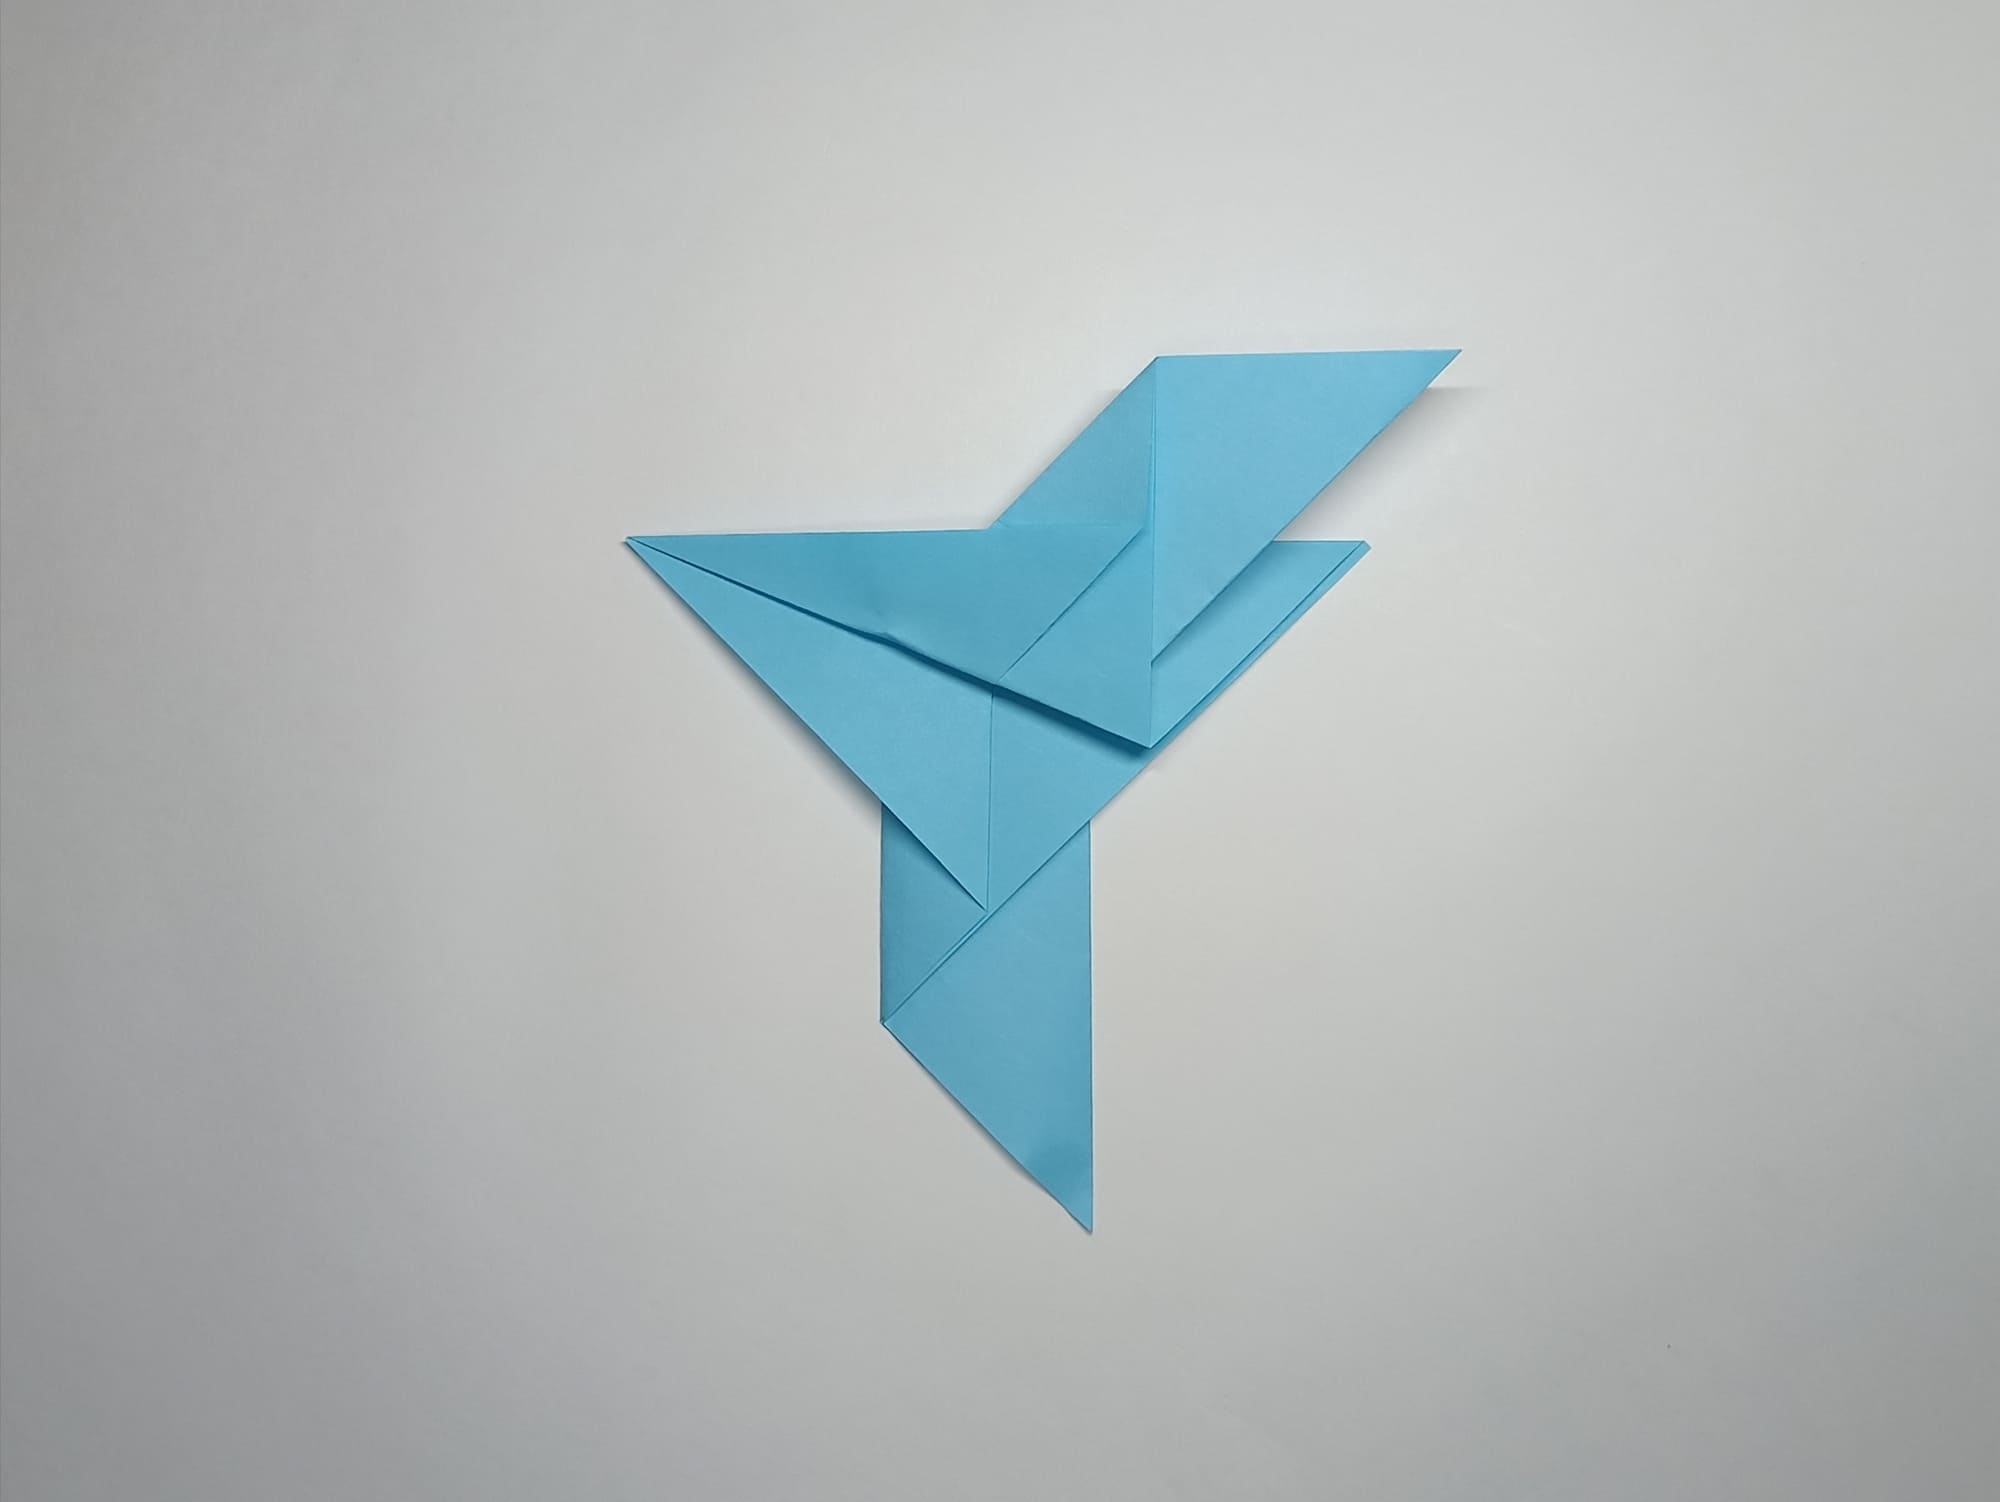
Turn the figure sideways. Bend the left edge of the large triangle upward, aligning the side with the upper main fold. This is one of the wings.

Turn over the paper and repeat the steps. This is the second wing.
Bend the edge of the main fold inward at an angle and shape the tail of the plane. Compare the result with the illustration.
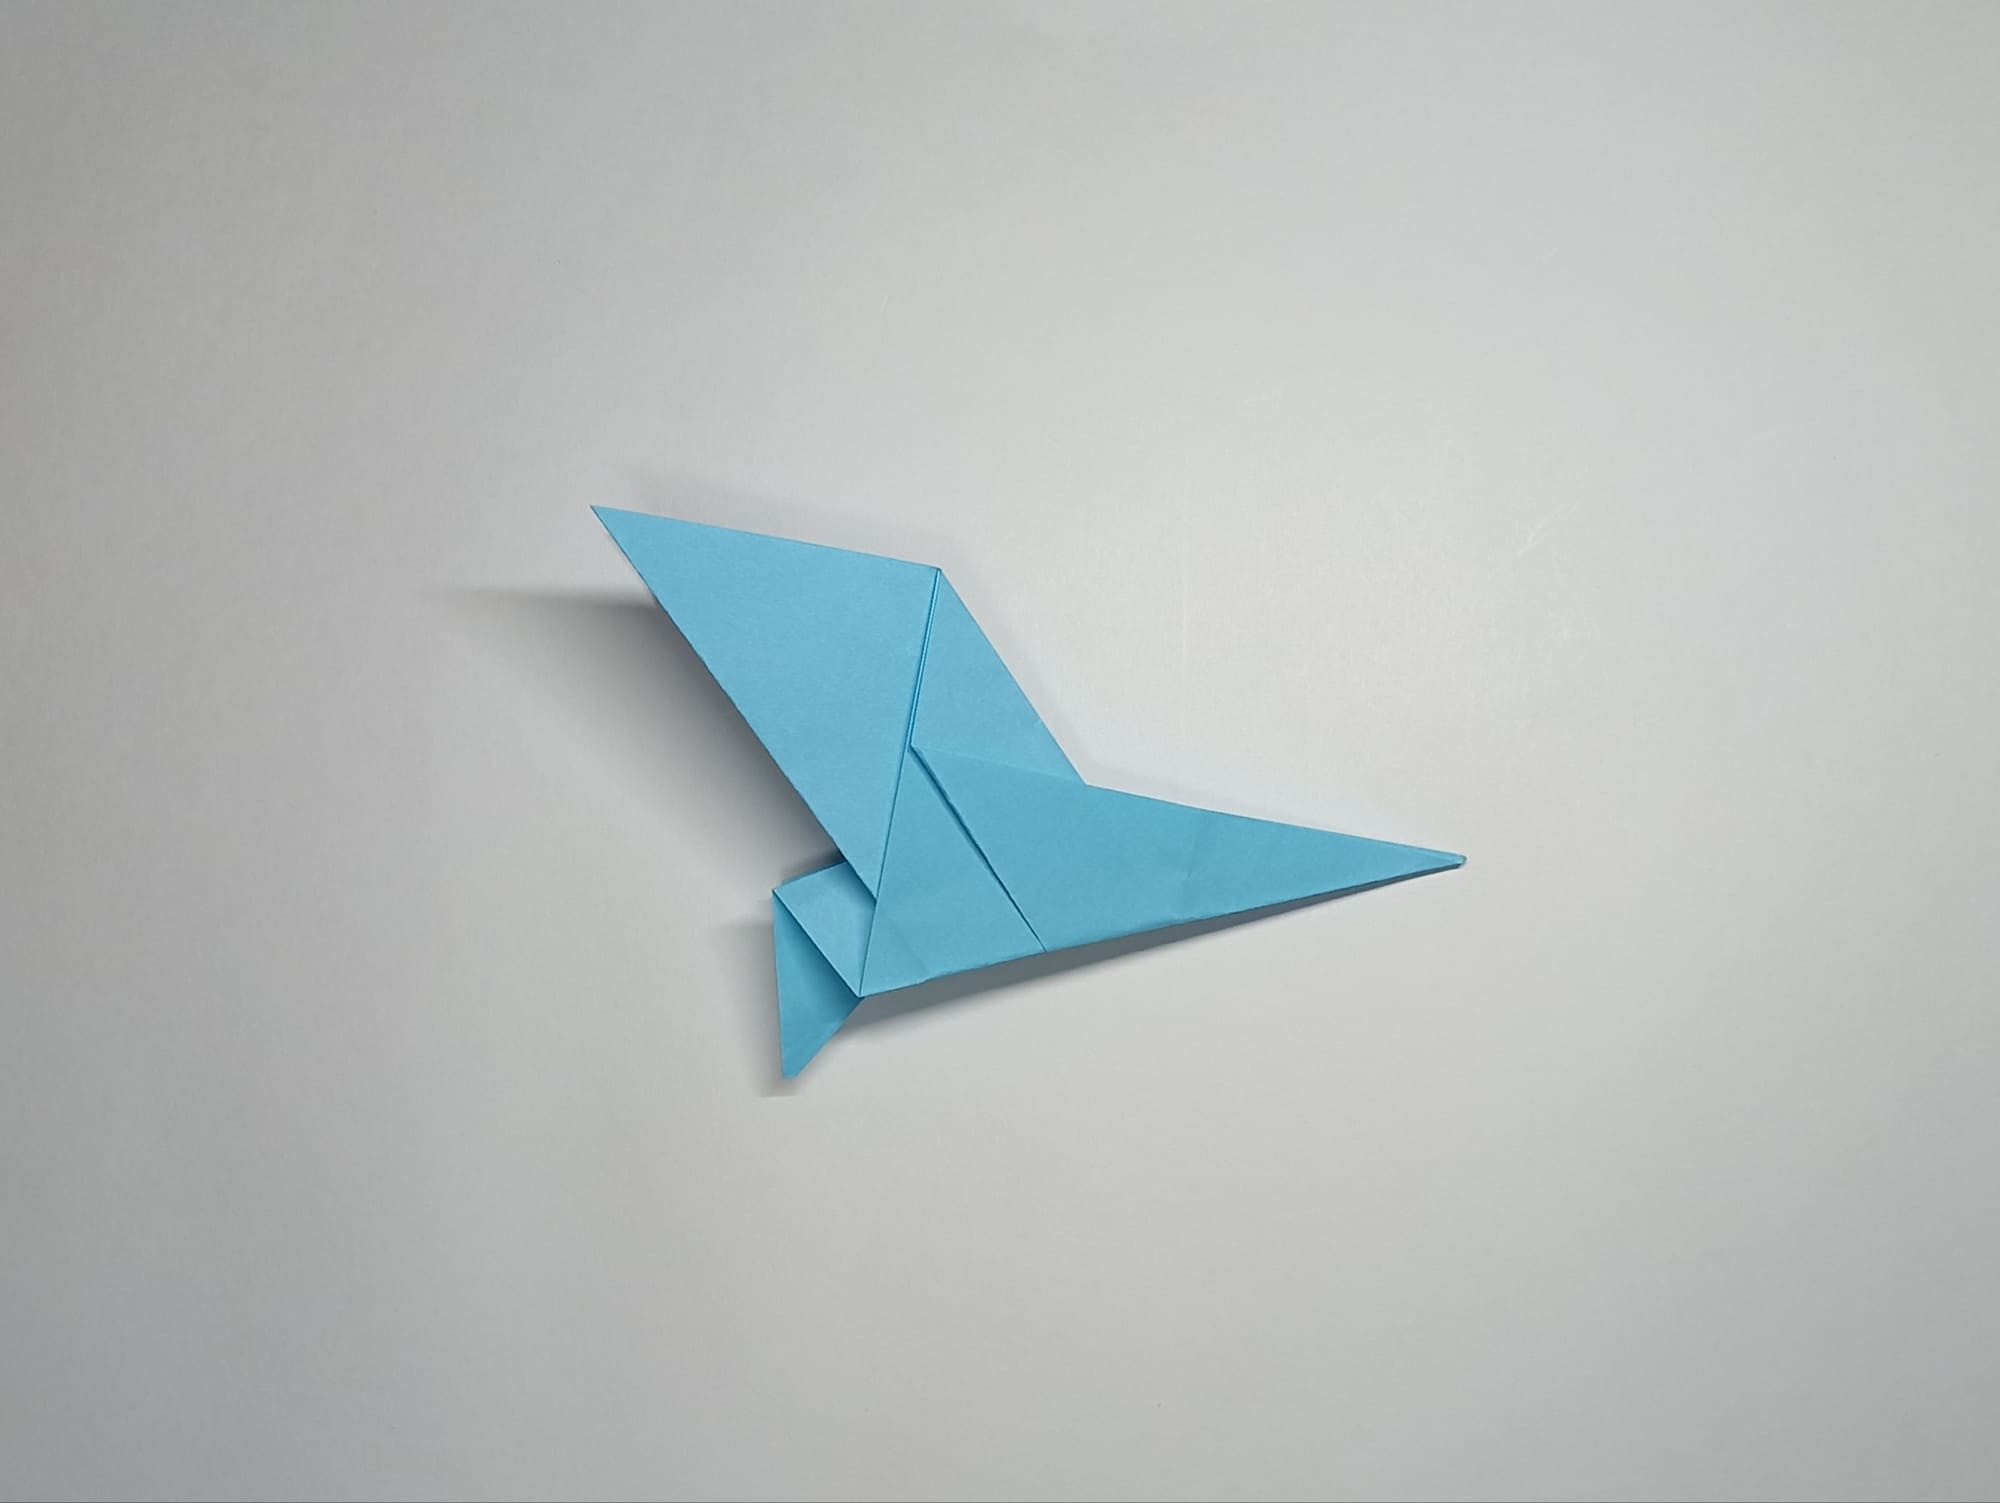
Bend the wing down, parallel to the main fold or at a slight angle.
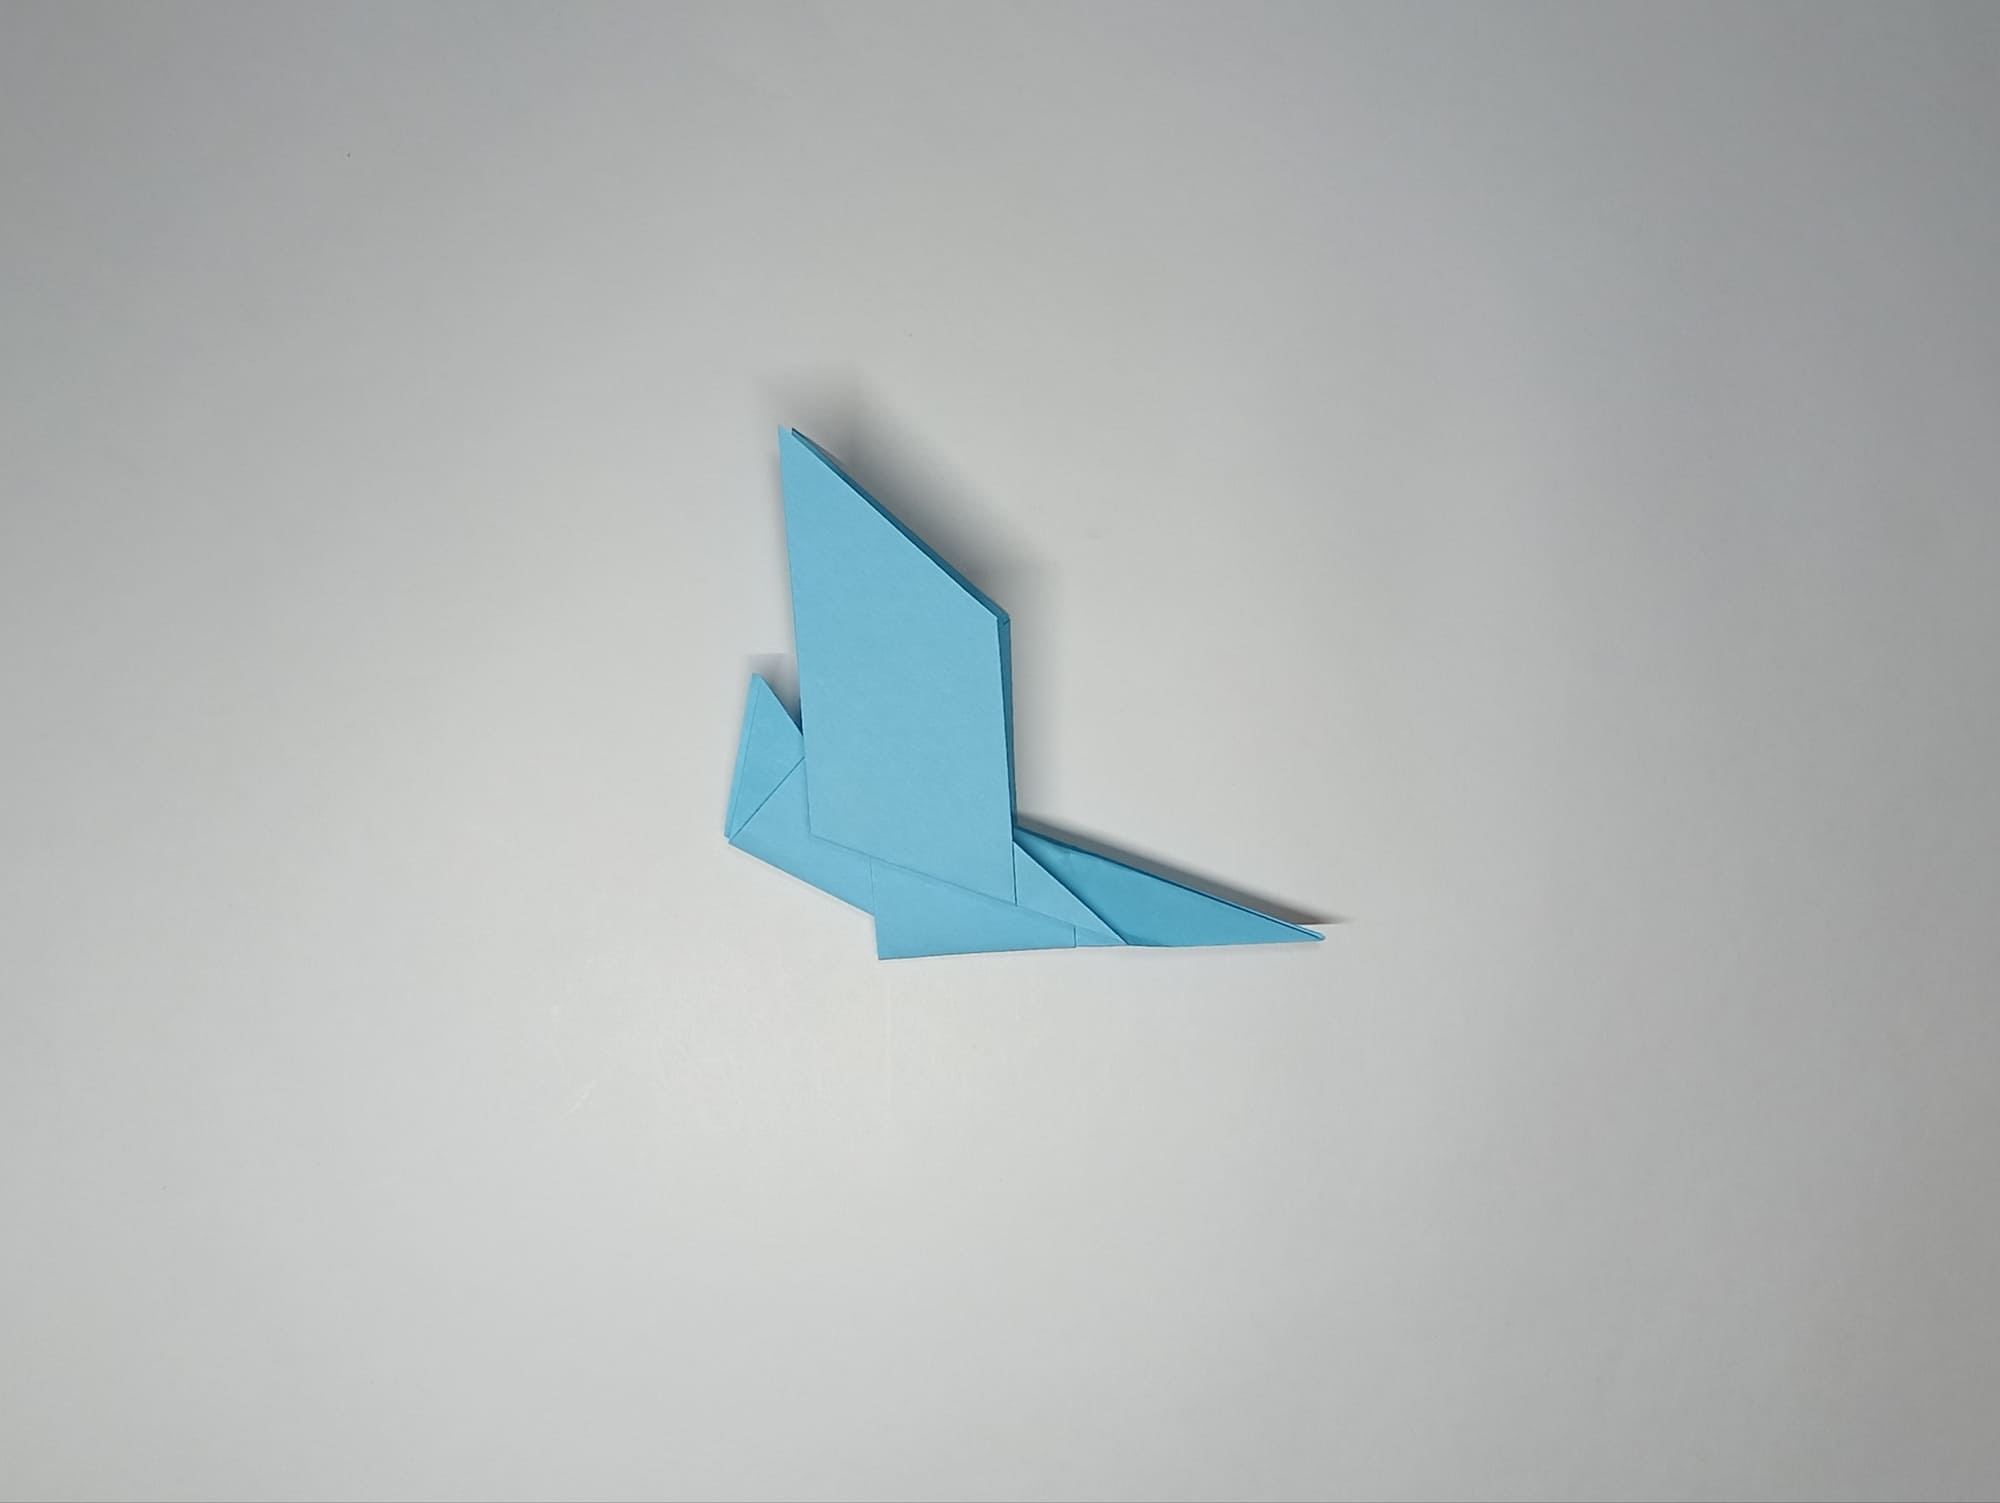
Do the same on the other side.
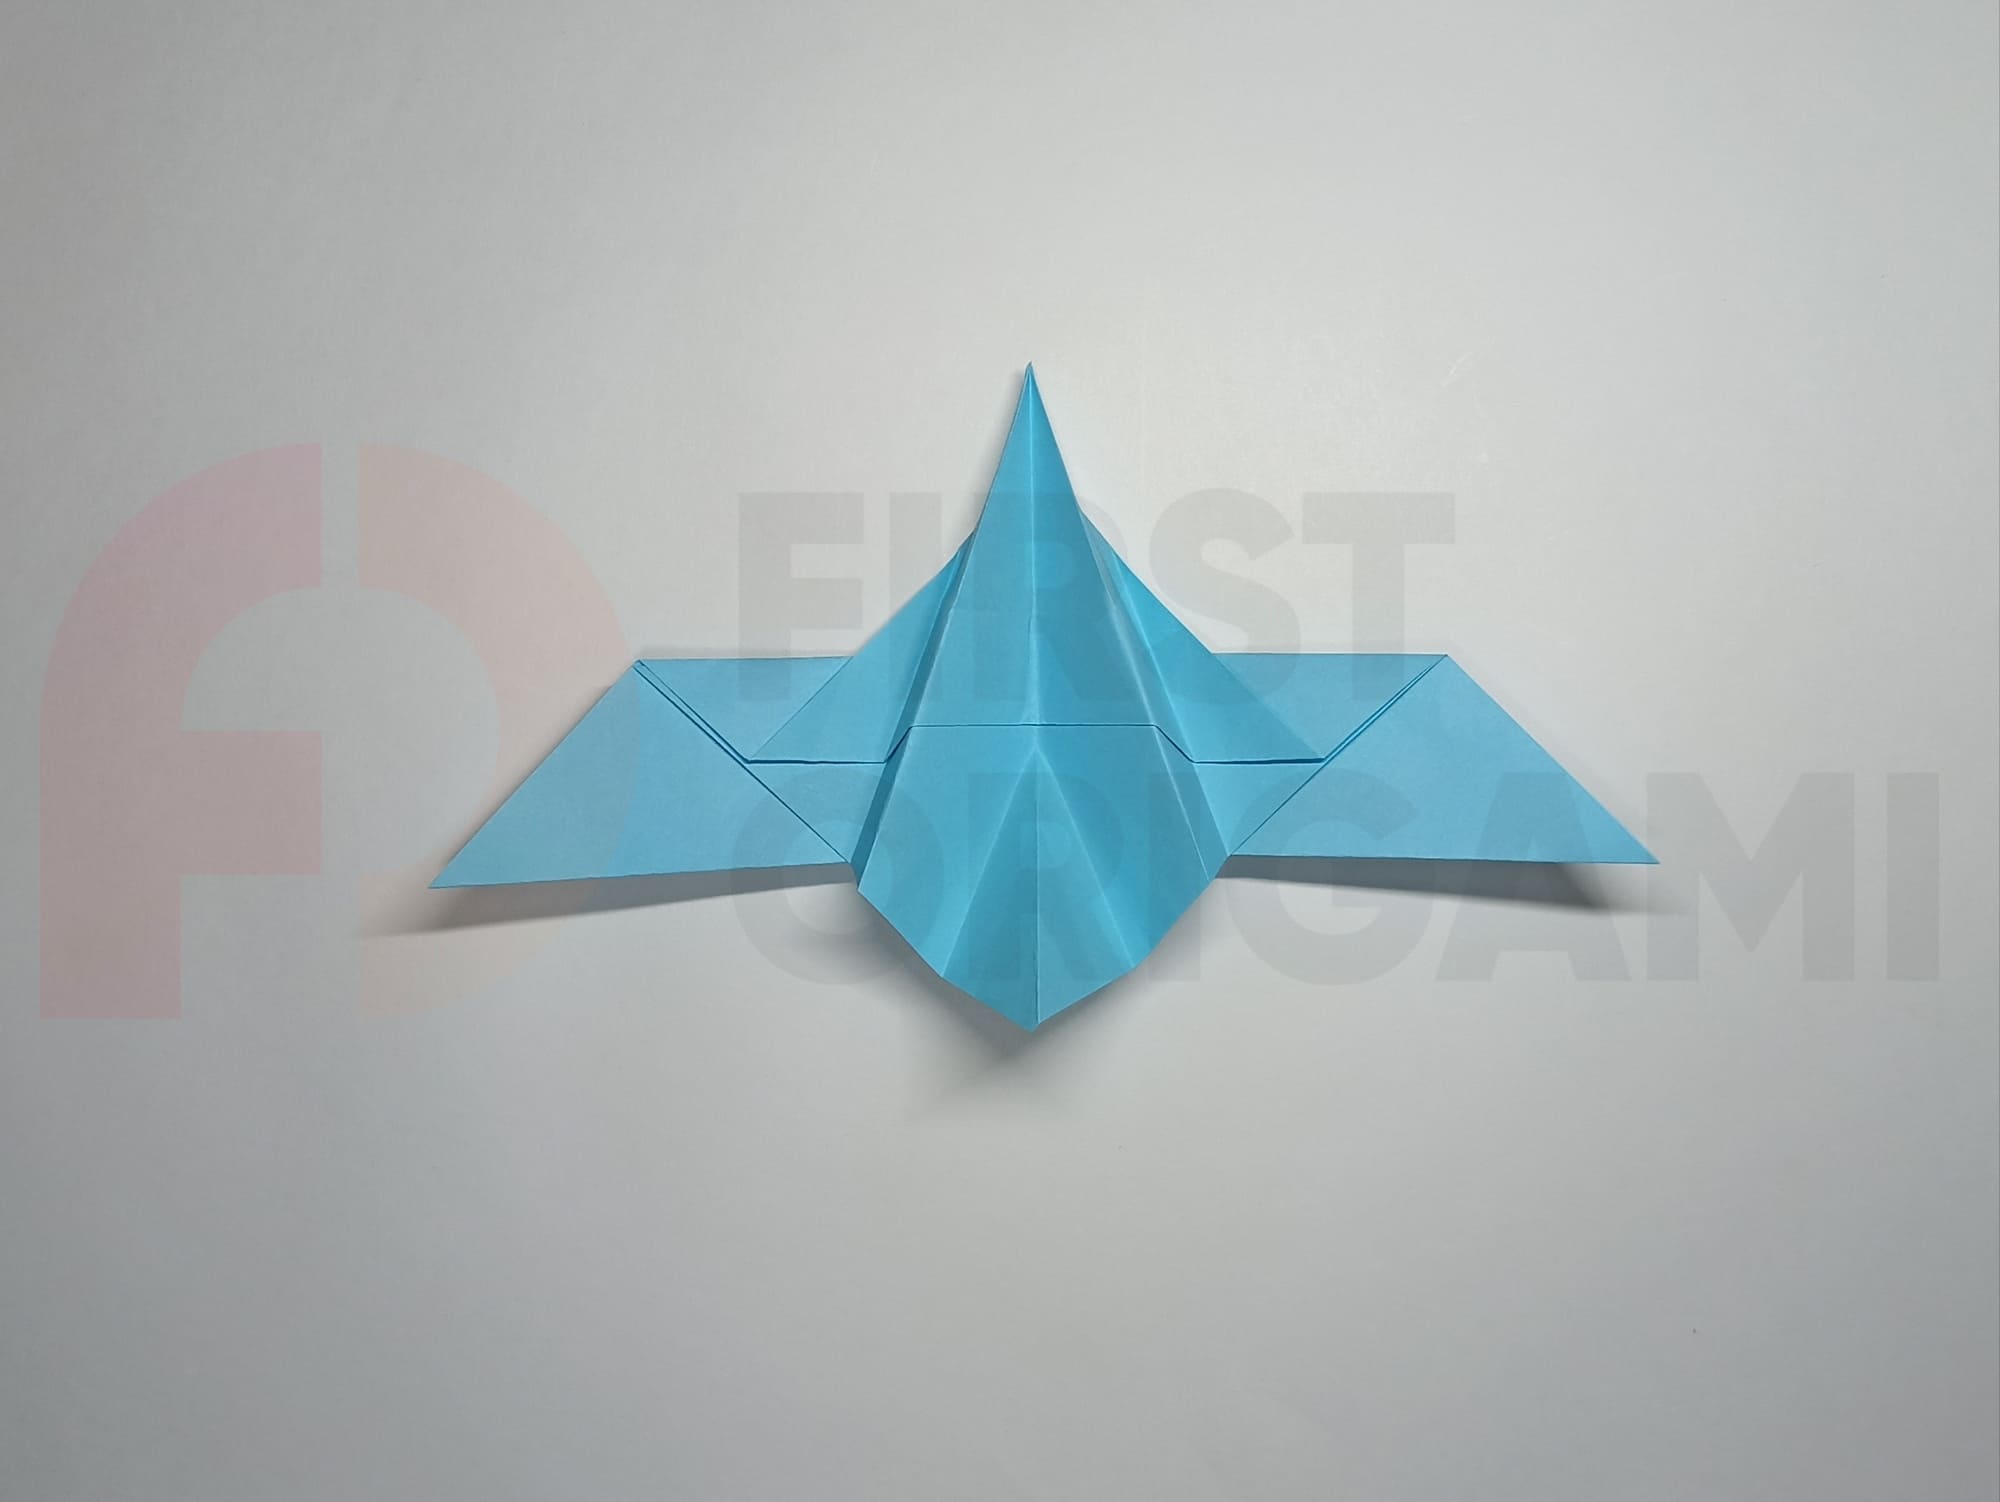
Turn the figure so that the curved side of the main fold is on the table and bend the top of the triangle towards yourself by three to four centimeters.

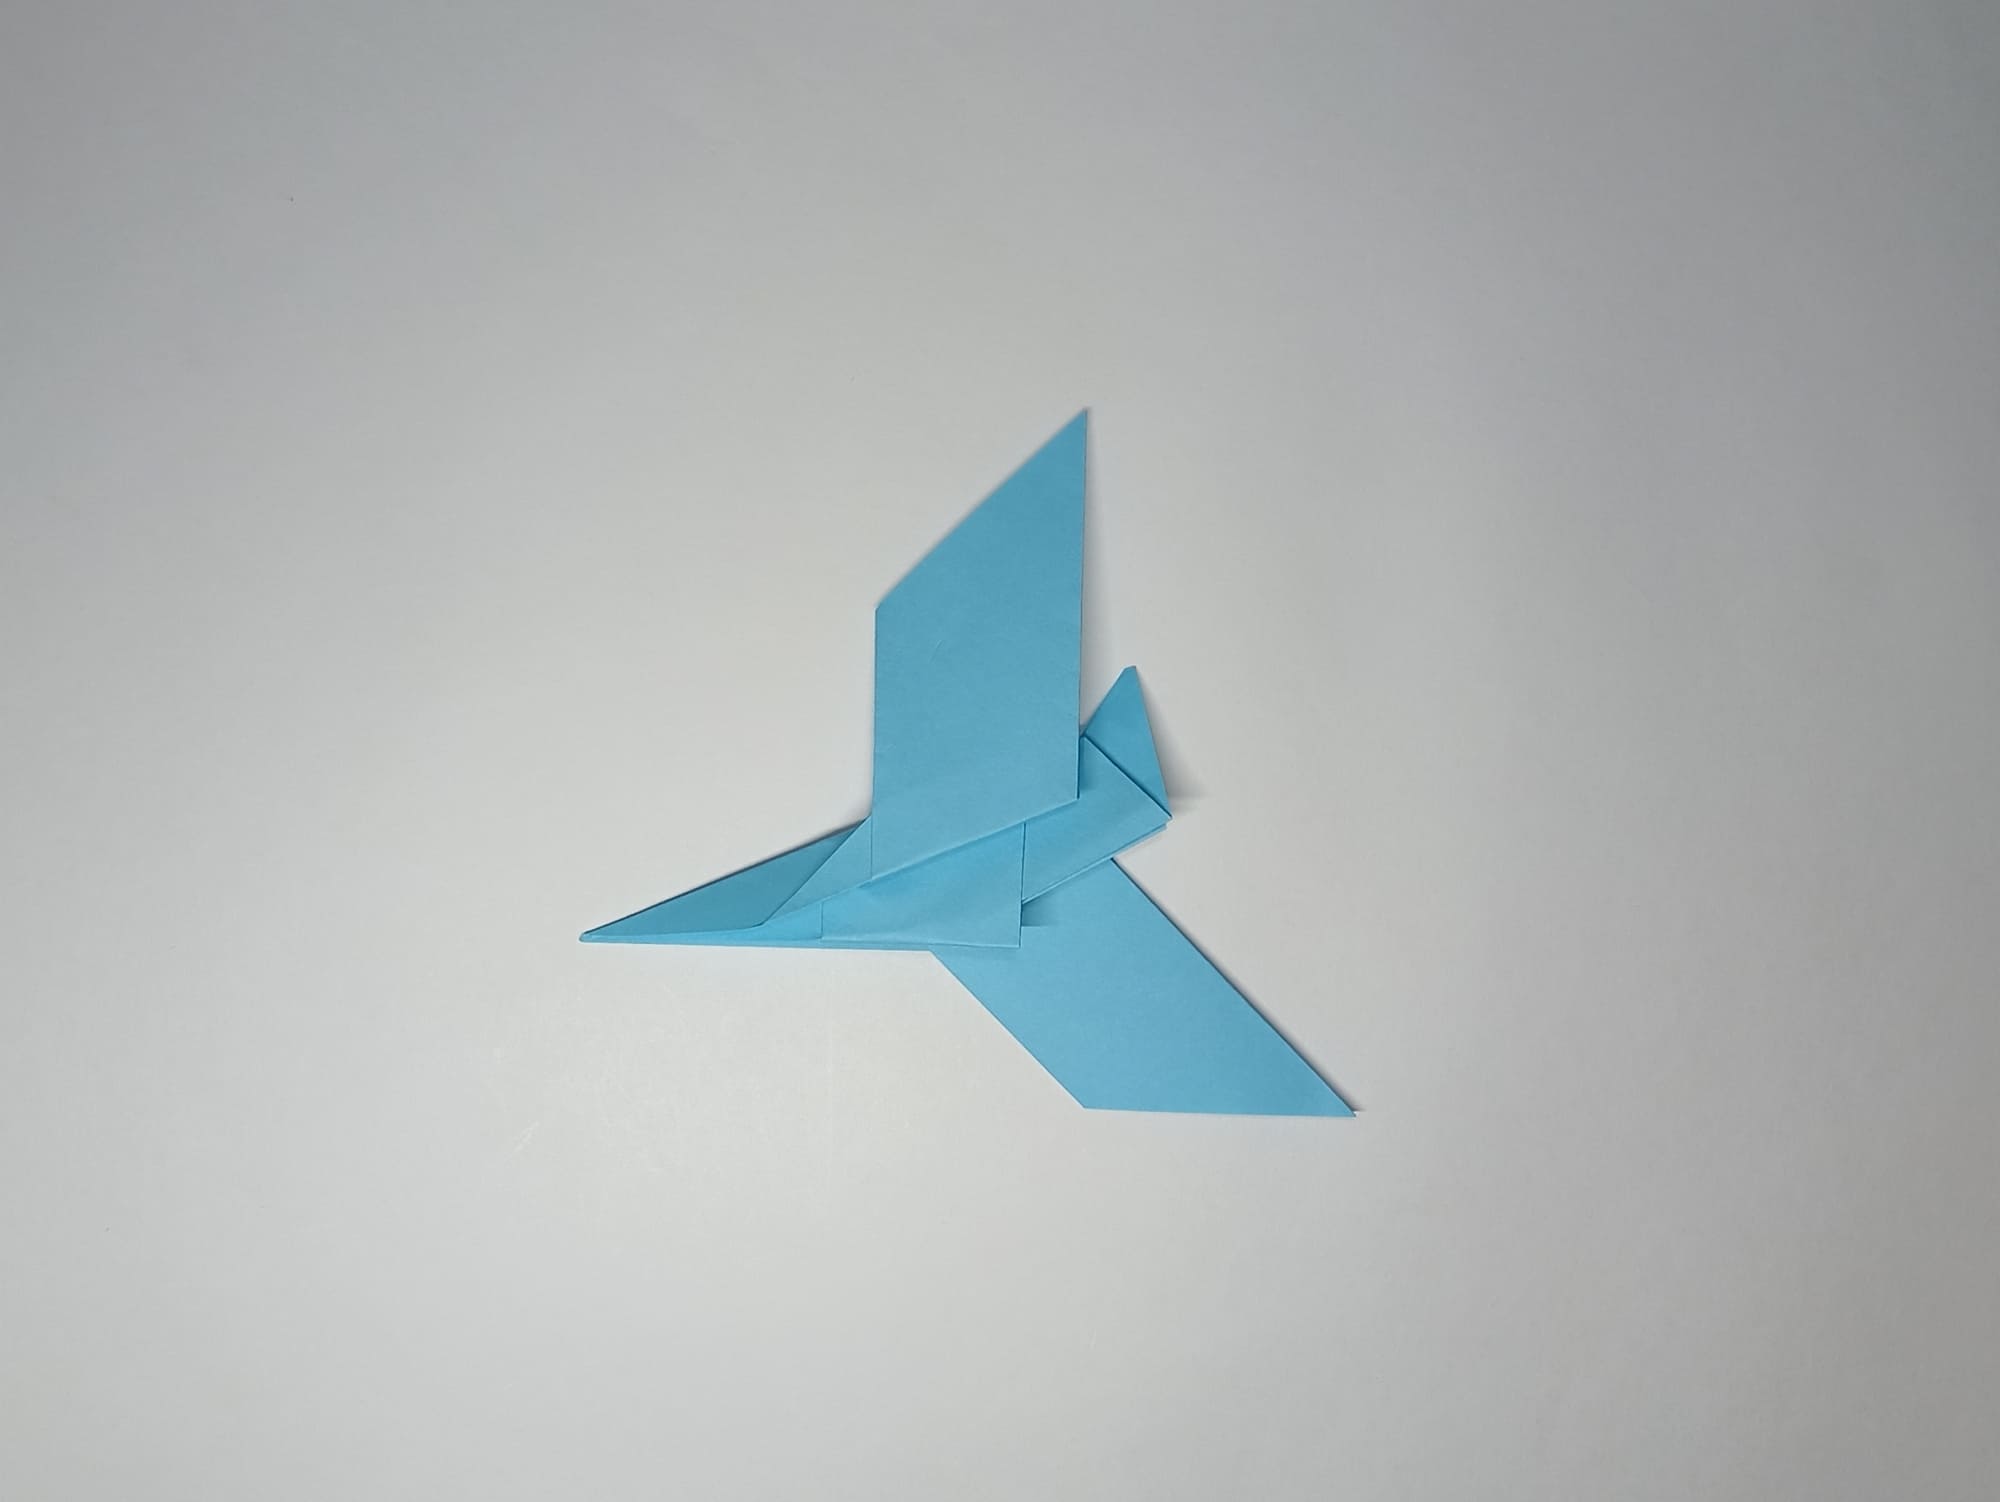
Make an accordion fold, returning the top of the triangle up so that it protrudes. This is the nose of the plane.

Gather all the folds and crease the folds.
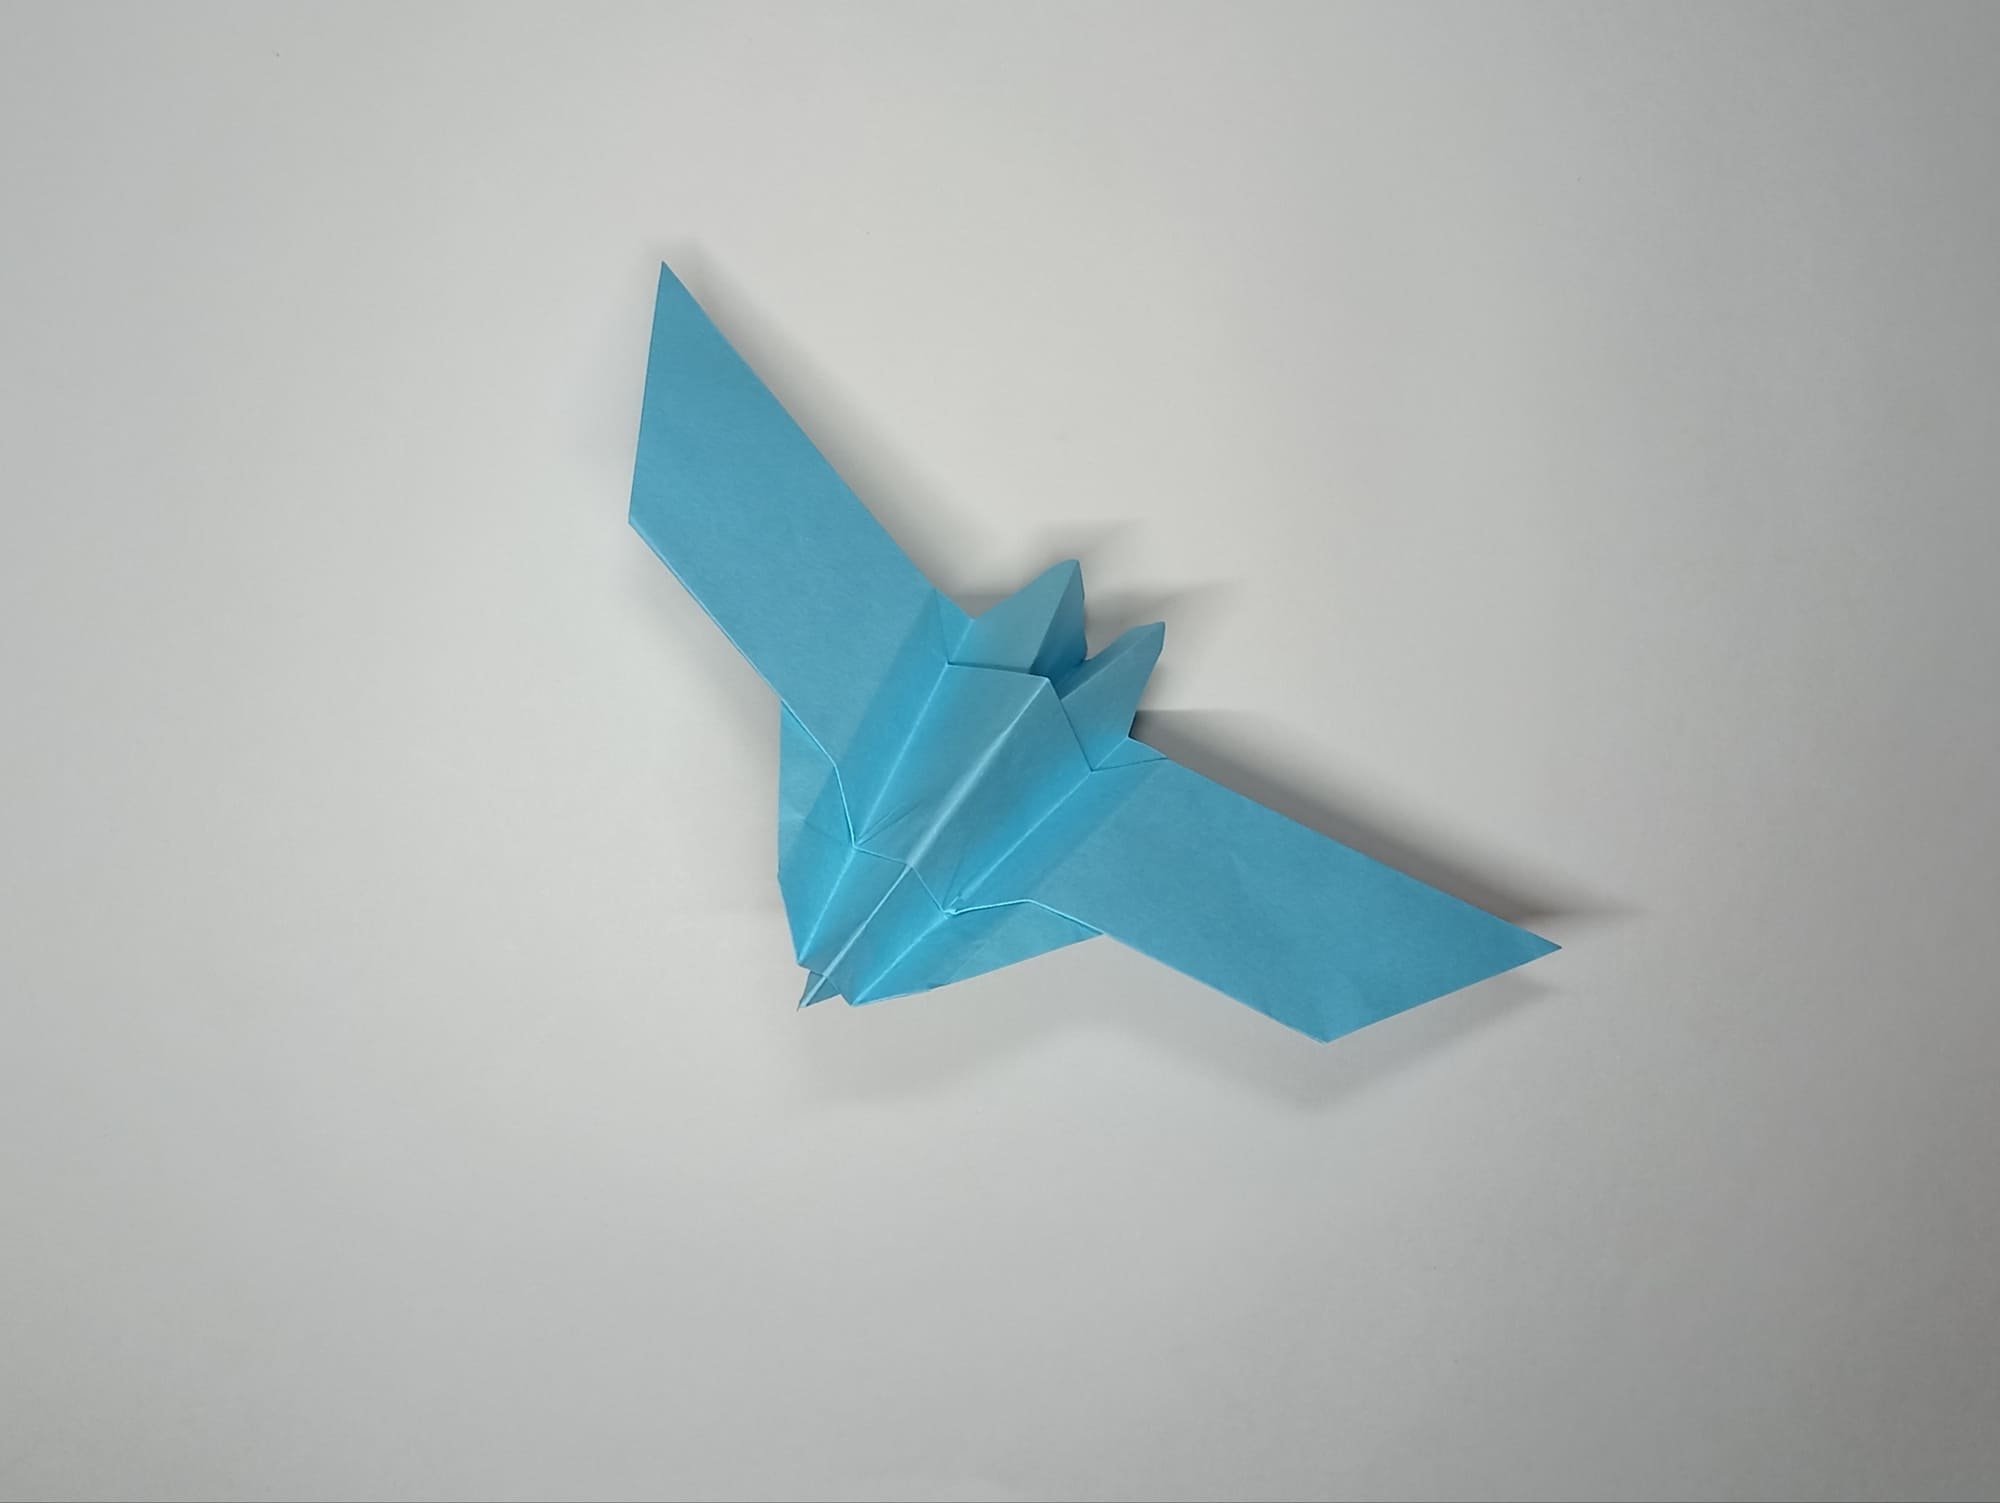
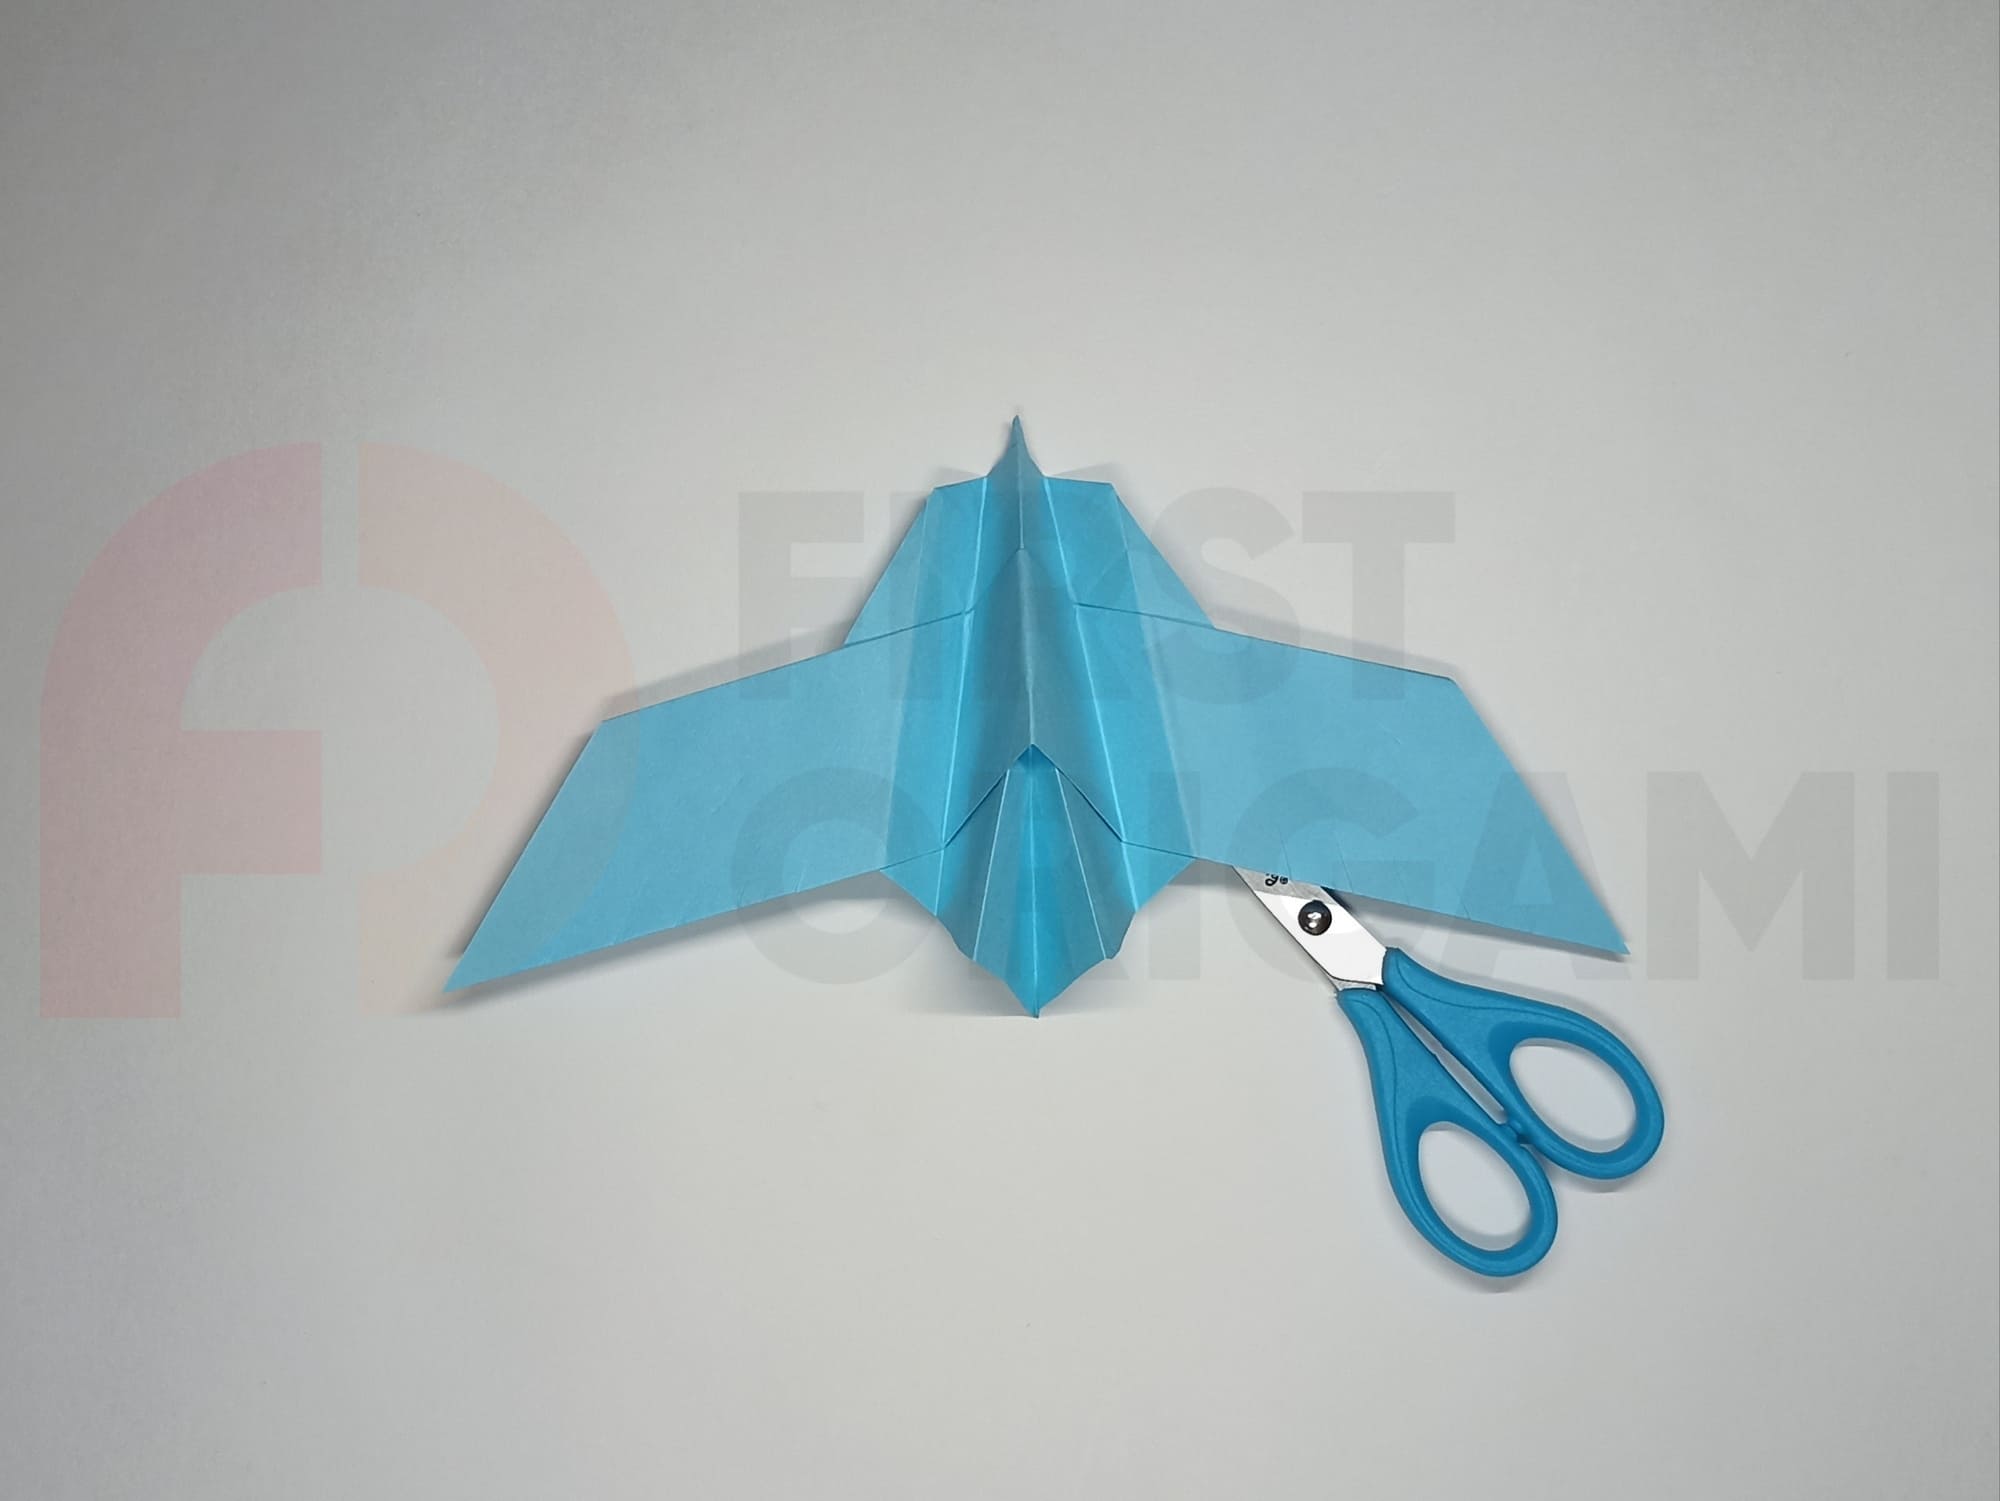
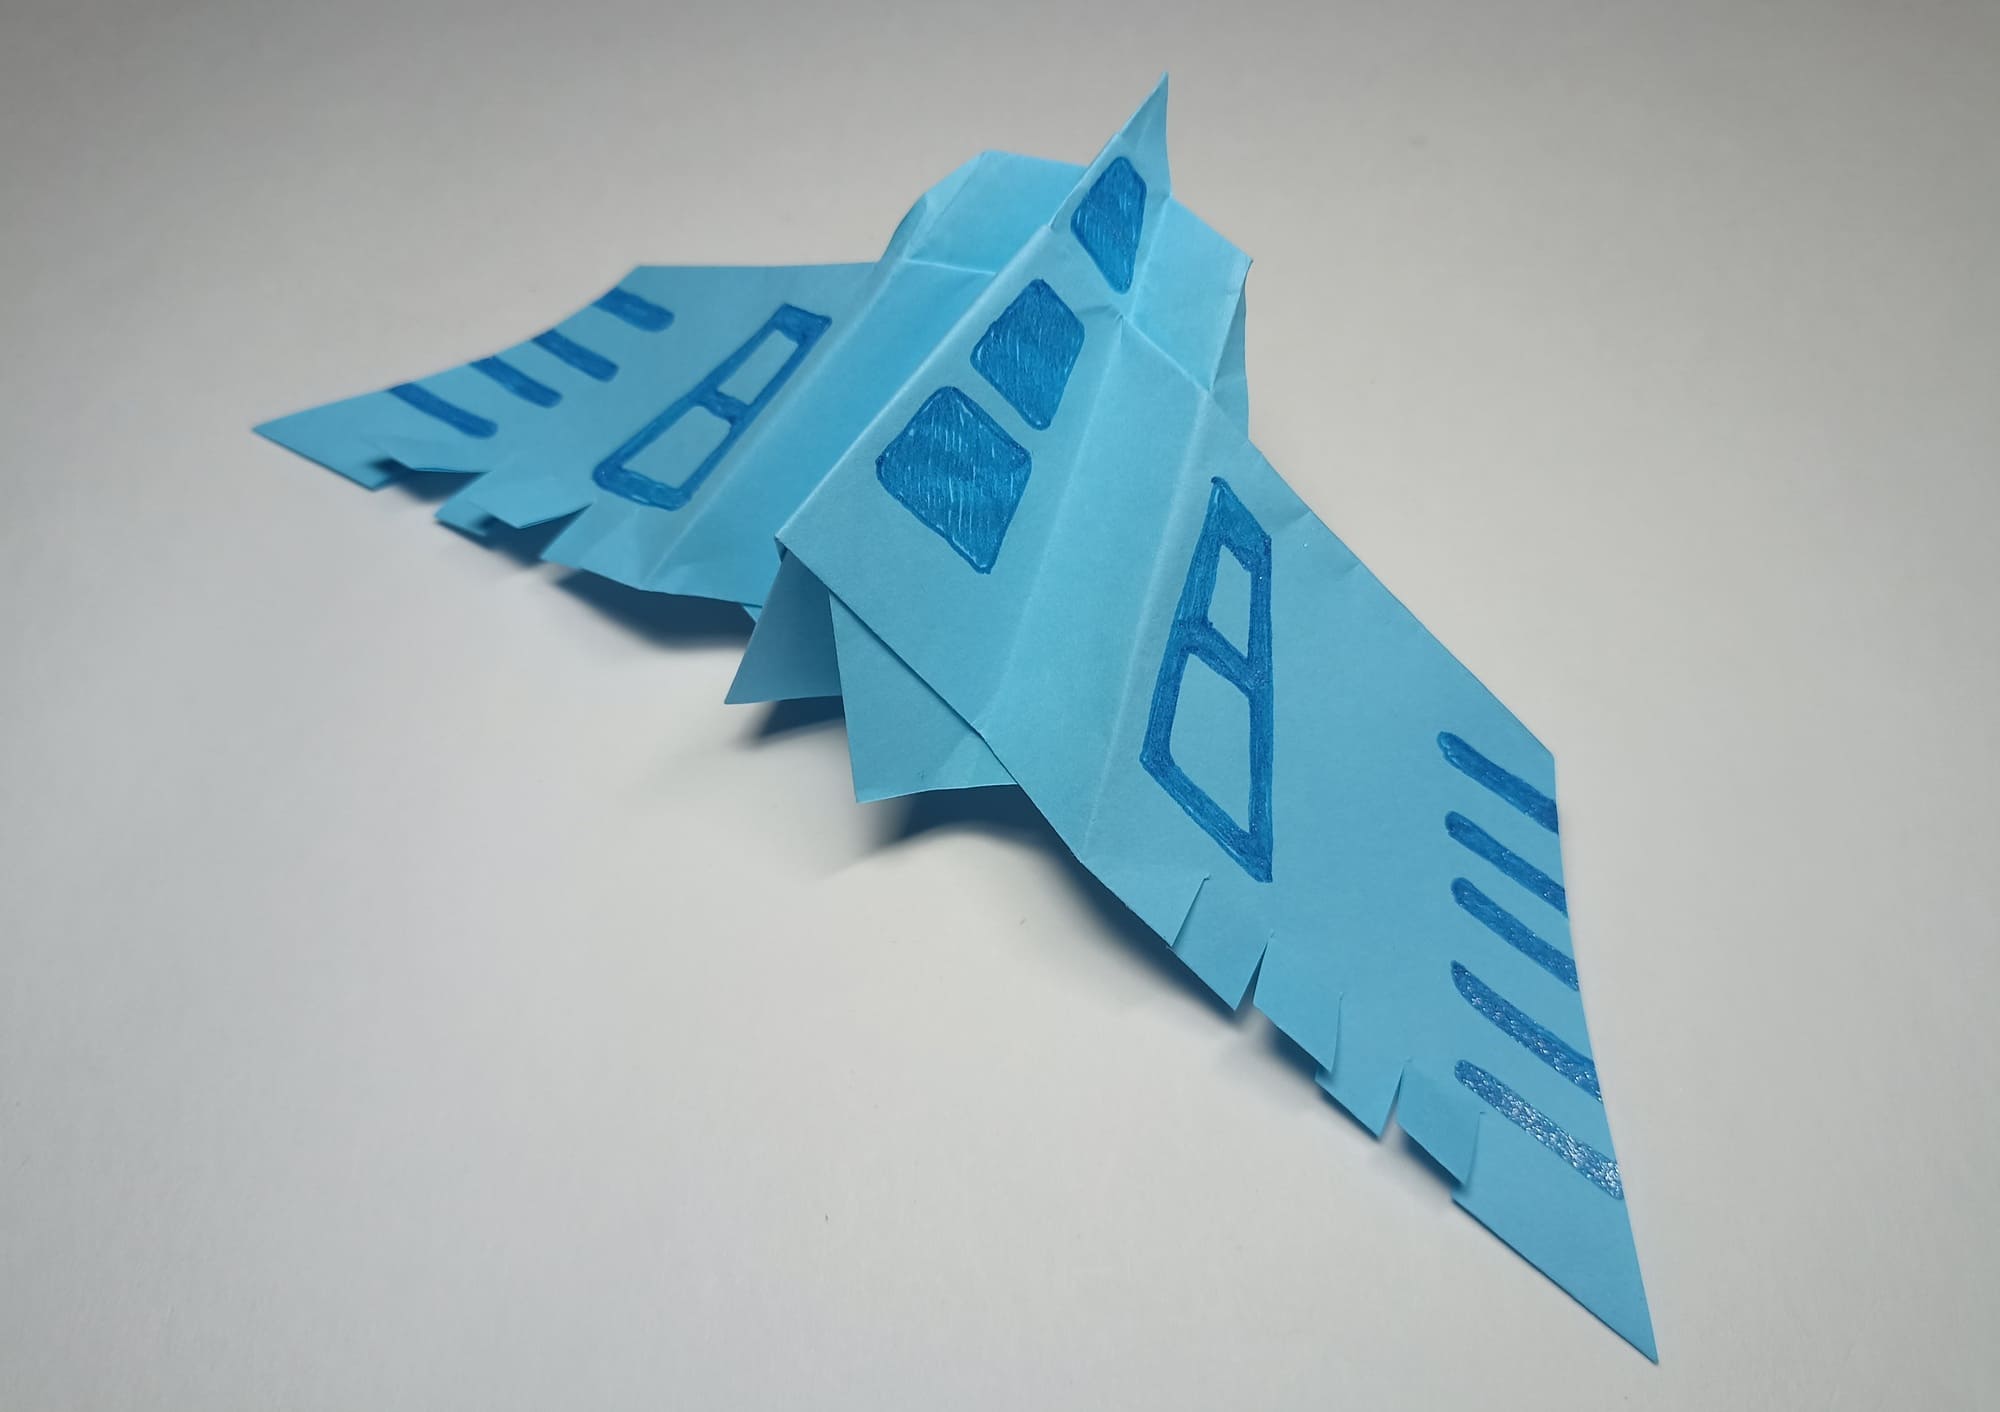
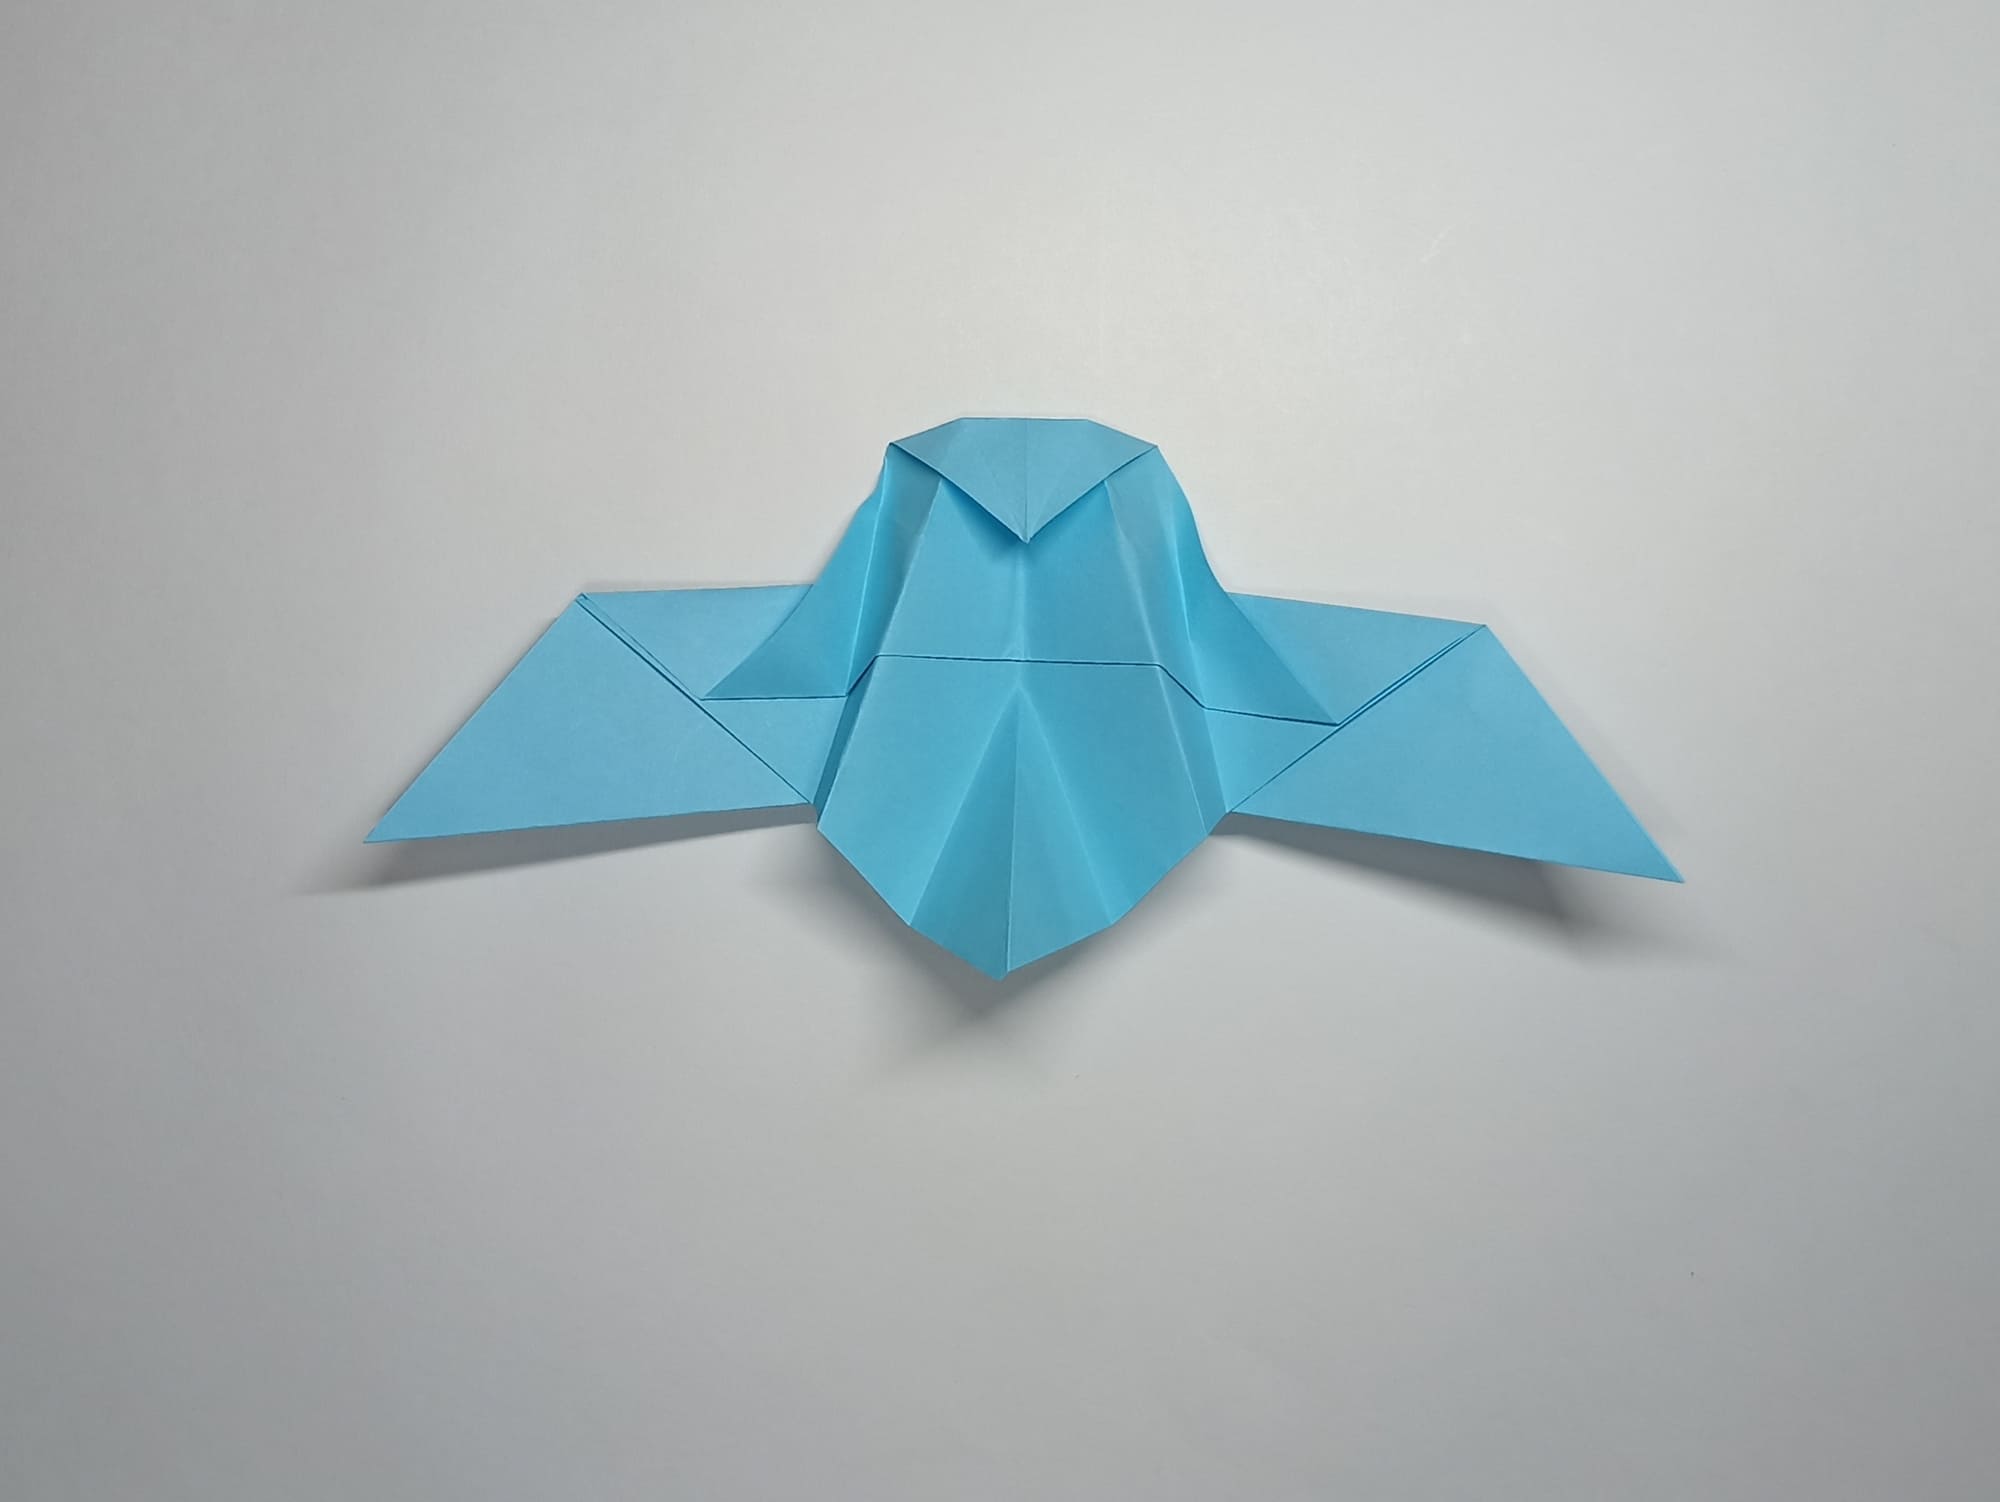
Make four cuts on each wing.
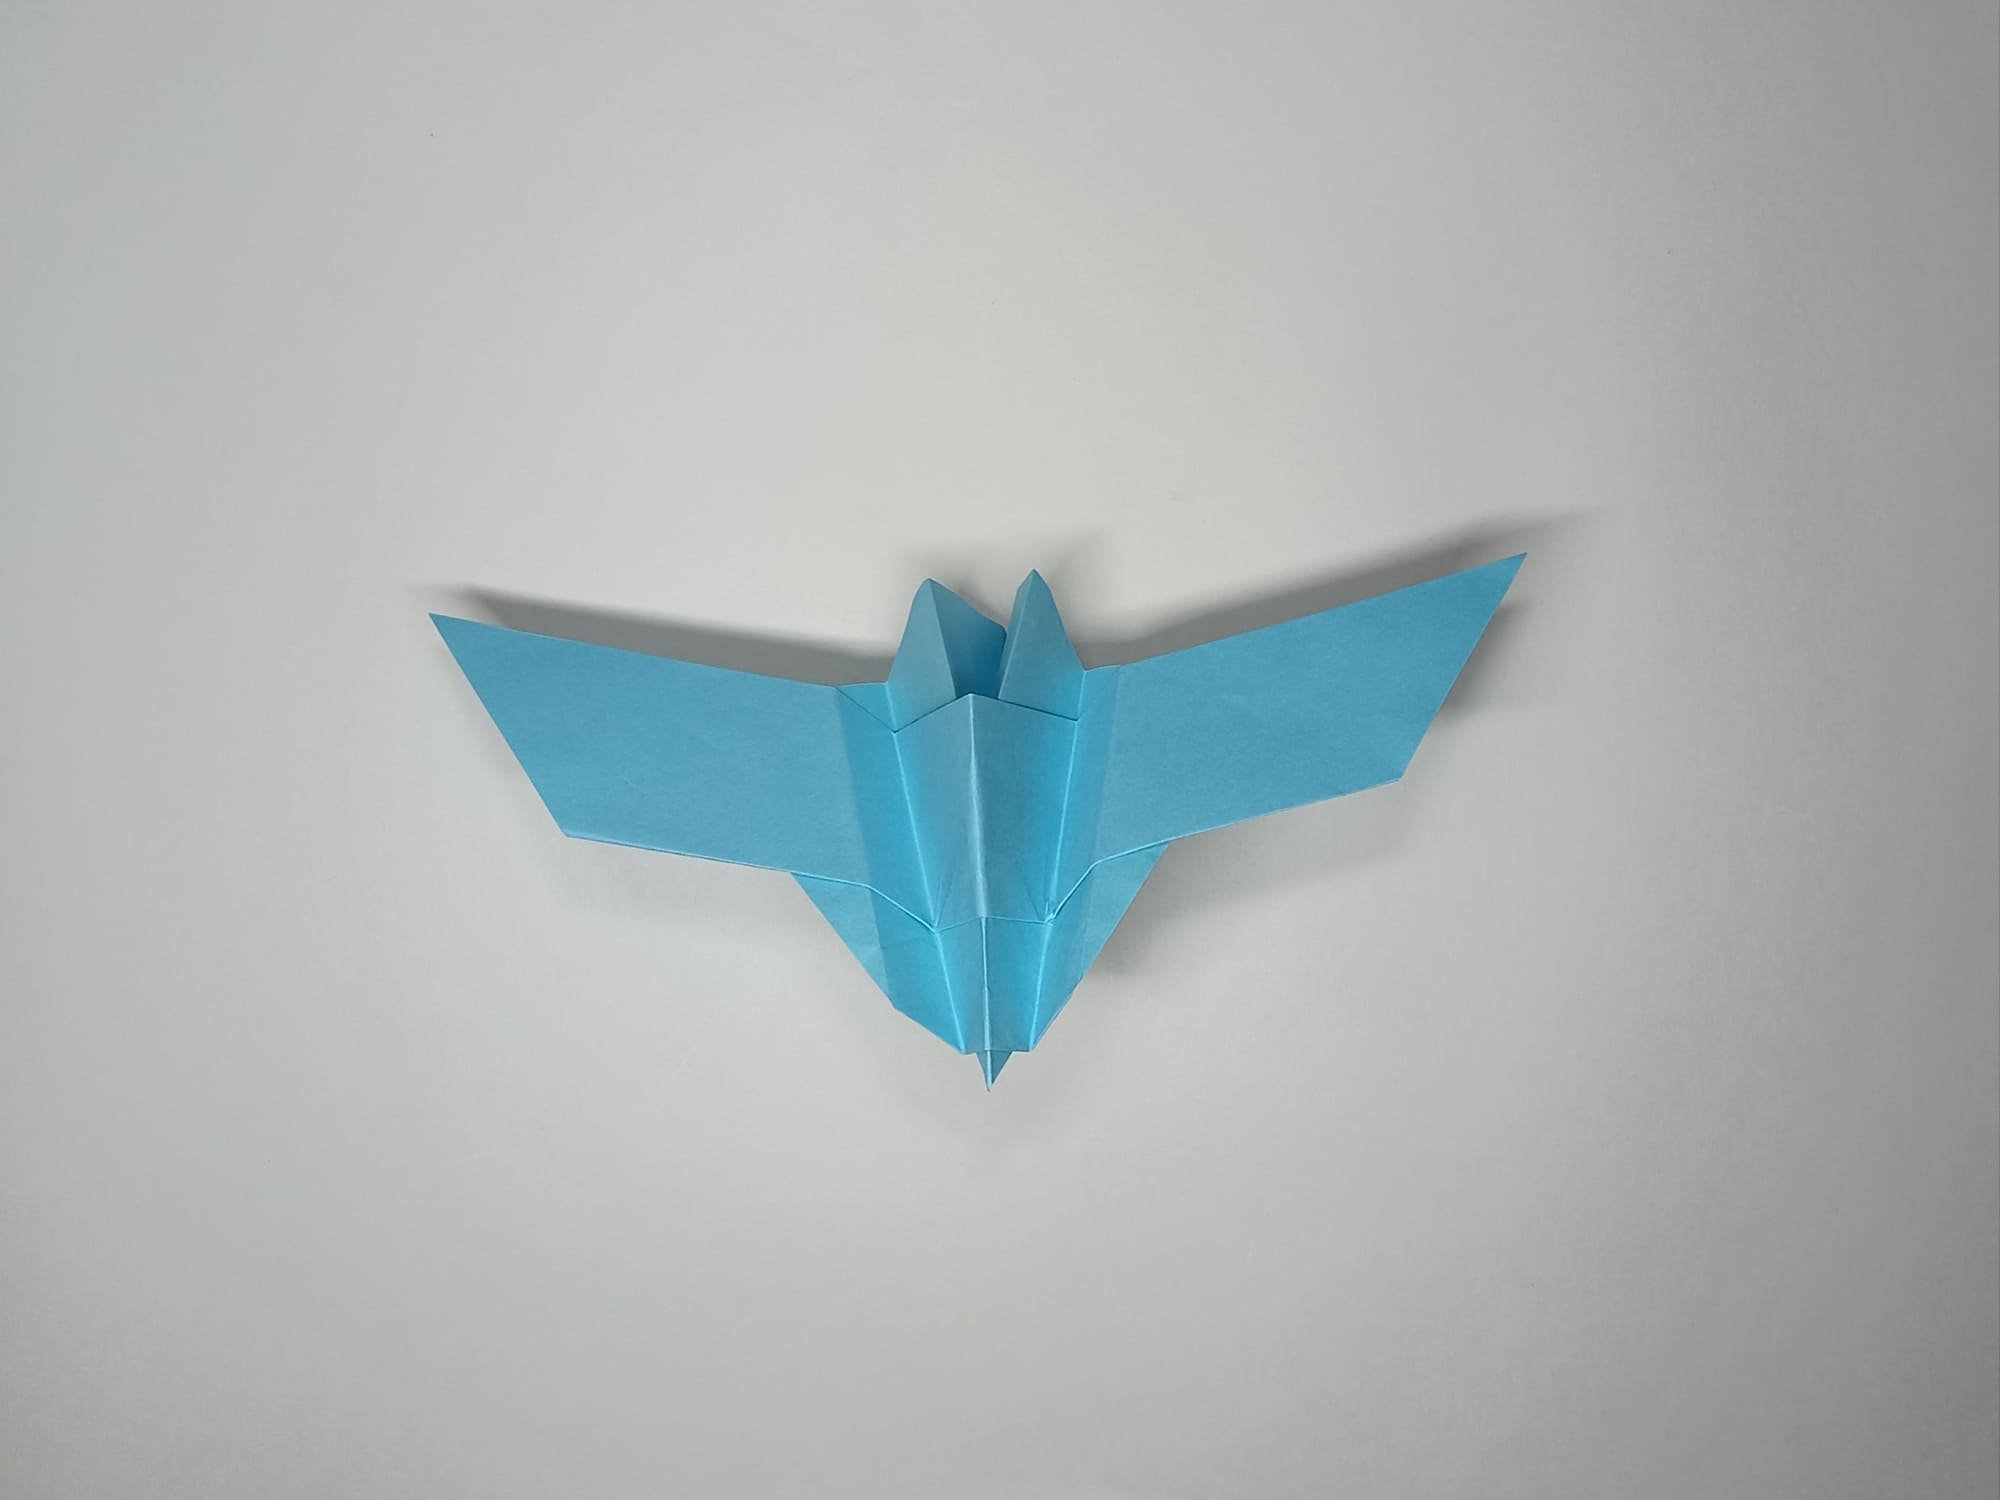
There you go!
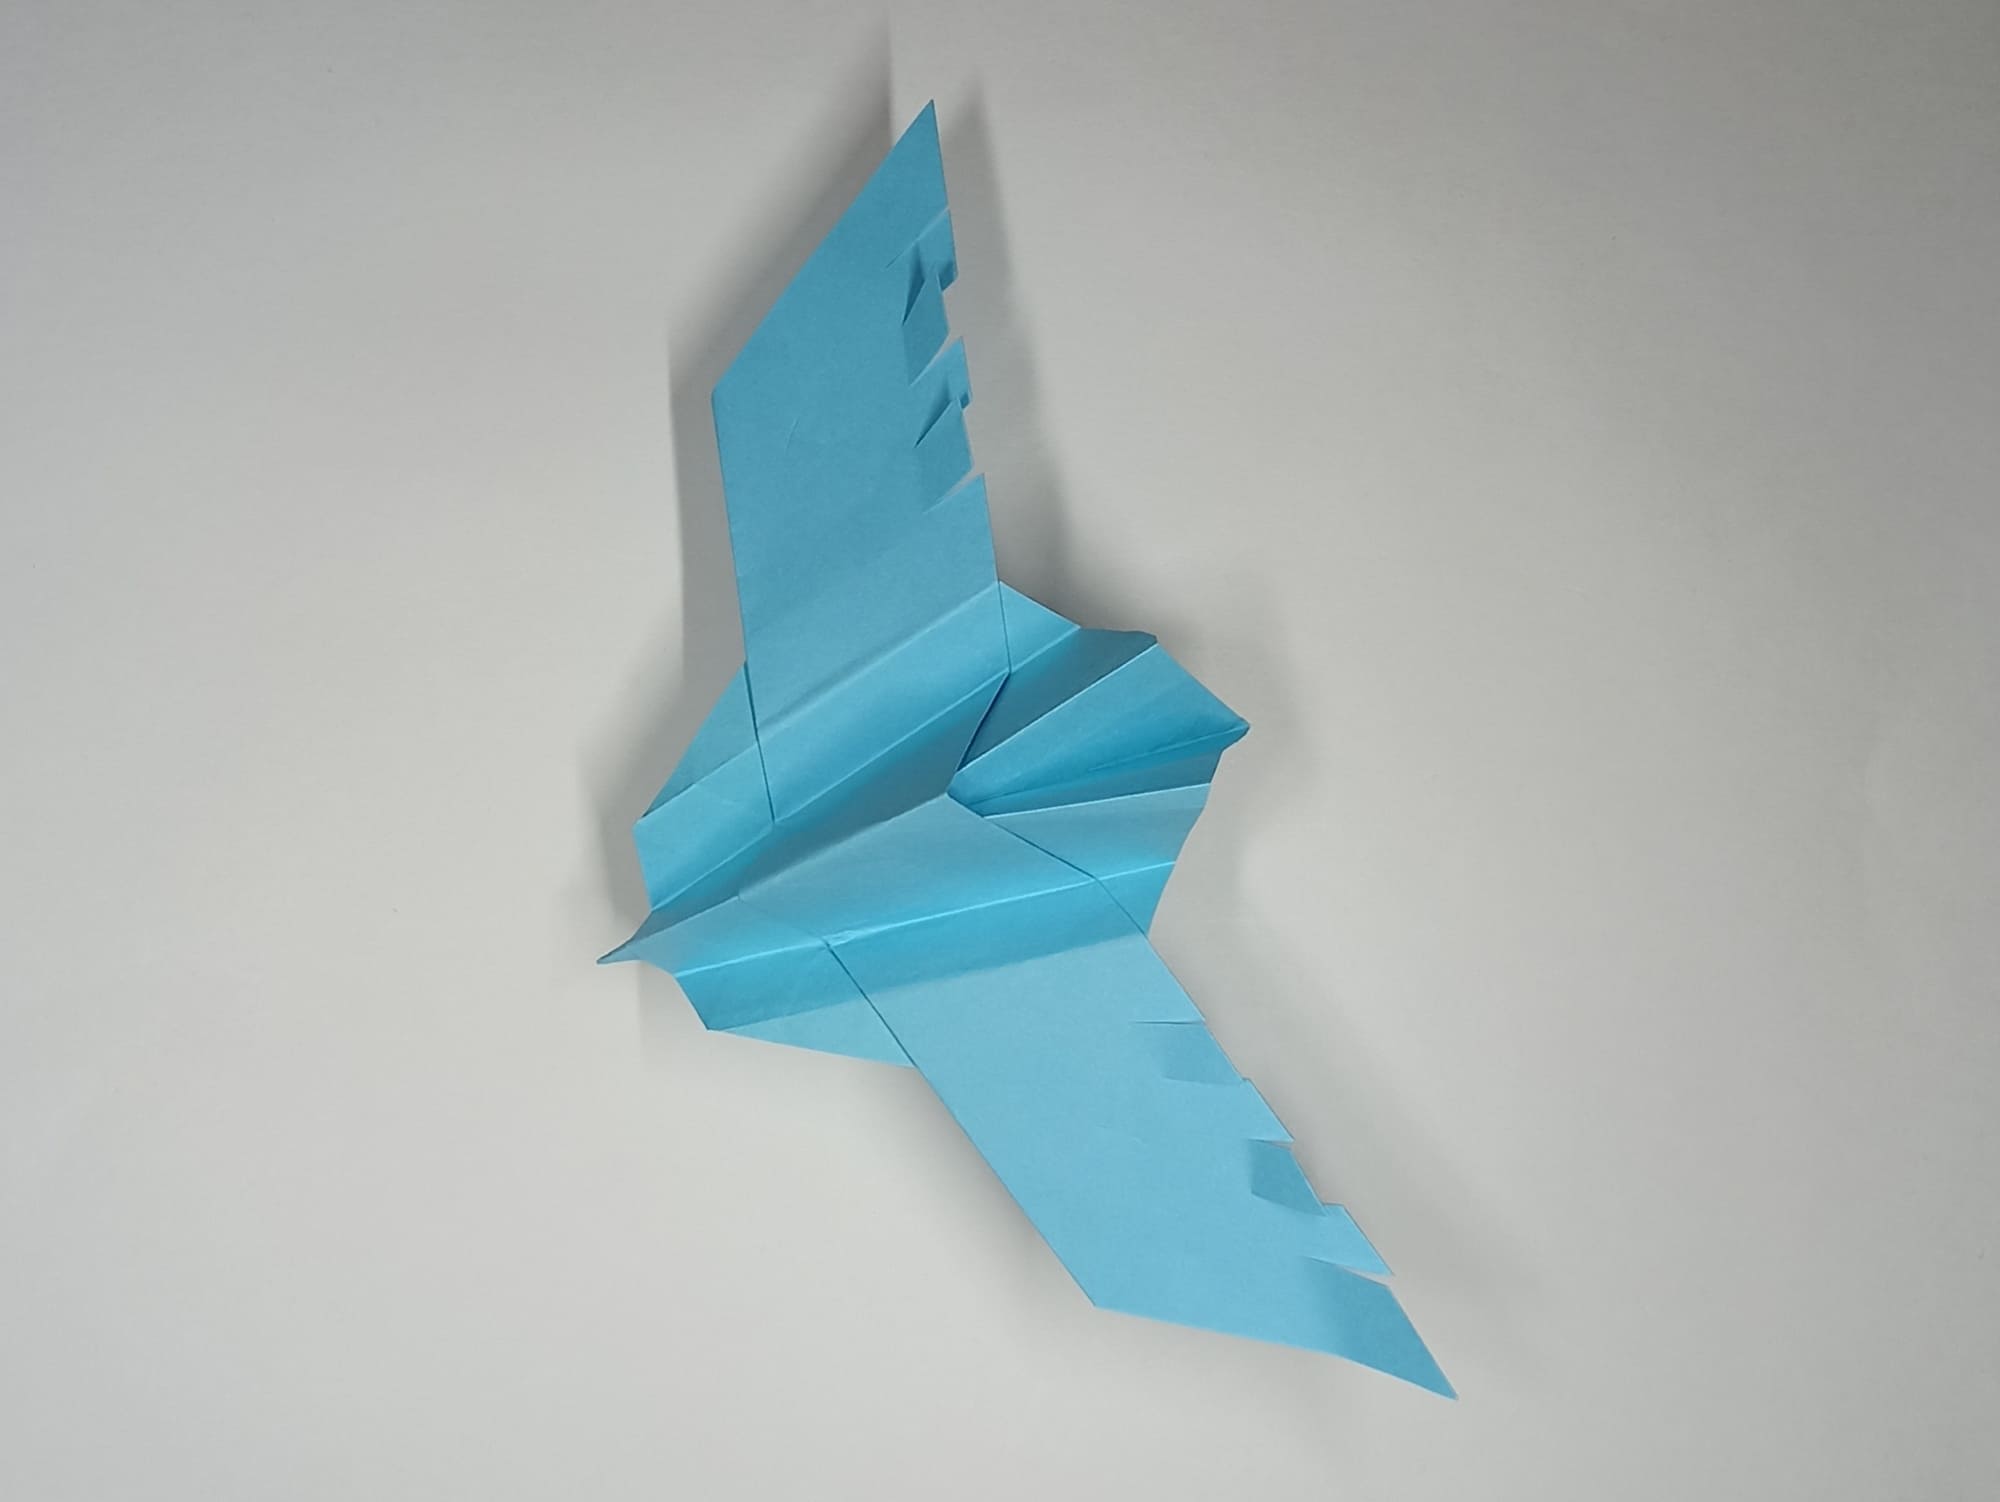
All that remains is to draw the details.
By changing the angle of the tail section, you can control the direction of flight. The cuts on the wings are similar to the feathers of a bird and the flaps of a real fighter. Adjusting them will help the figure stay in the air more confidently and not fall for longer. This model cannot travel long distances, but it has impressive take-off and landing speeds and looks very cool.
Launching airplanes, it turns out, is not just fun, but a whole science. In the paper aircraft industry, twenty seconds of flight is considered an excellent result. During this time, the model covers a distance of forty meters. You can measure the flight performance of your fleet and see if it is on par with other planes.


