Origami Helmet Base
In origami, there is such a concept as “basic shapes”. These are simple and clear constructions, from which you begin to fold more complex figures. For example, you can fold a crane, a dinosaur, and even a fish from the basic Bird figure. But below you will find an instruction for a different basic shape, the Helmet Base.
Following the instructions below, you will learn how to make the basic Helmet detail. From that, you can move on to folding a Viking helm or a hat, so we recommend you be very attentive and really master this basic fold, as the final result of a more complex figure will depend significantly on it.
Try practicing all basic folds on a regular paper first, and proceed with the colored paper when you are confident in your skills.
Origami Helmet Base is quite easy to make, and with our step-by-step instructions, you will manage to master this fold in just several minutes. Just pay attention to Steps 3 and 4, as the folds in them are what matters most. If you have any doubts about the correctness of how you do the folds, watch the video instructions at the bottom of the page, as it makes everything super clear.
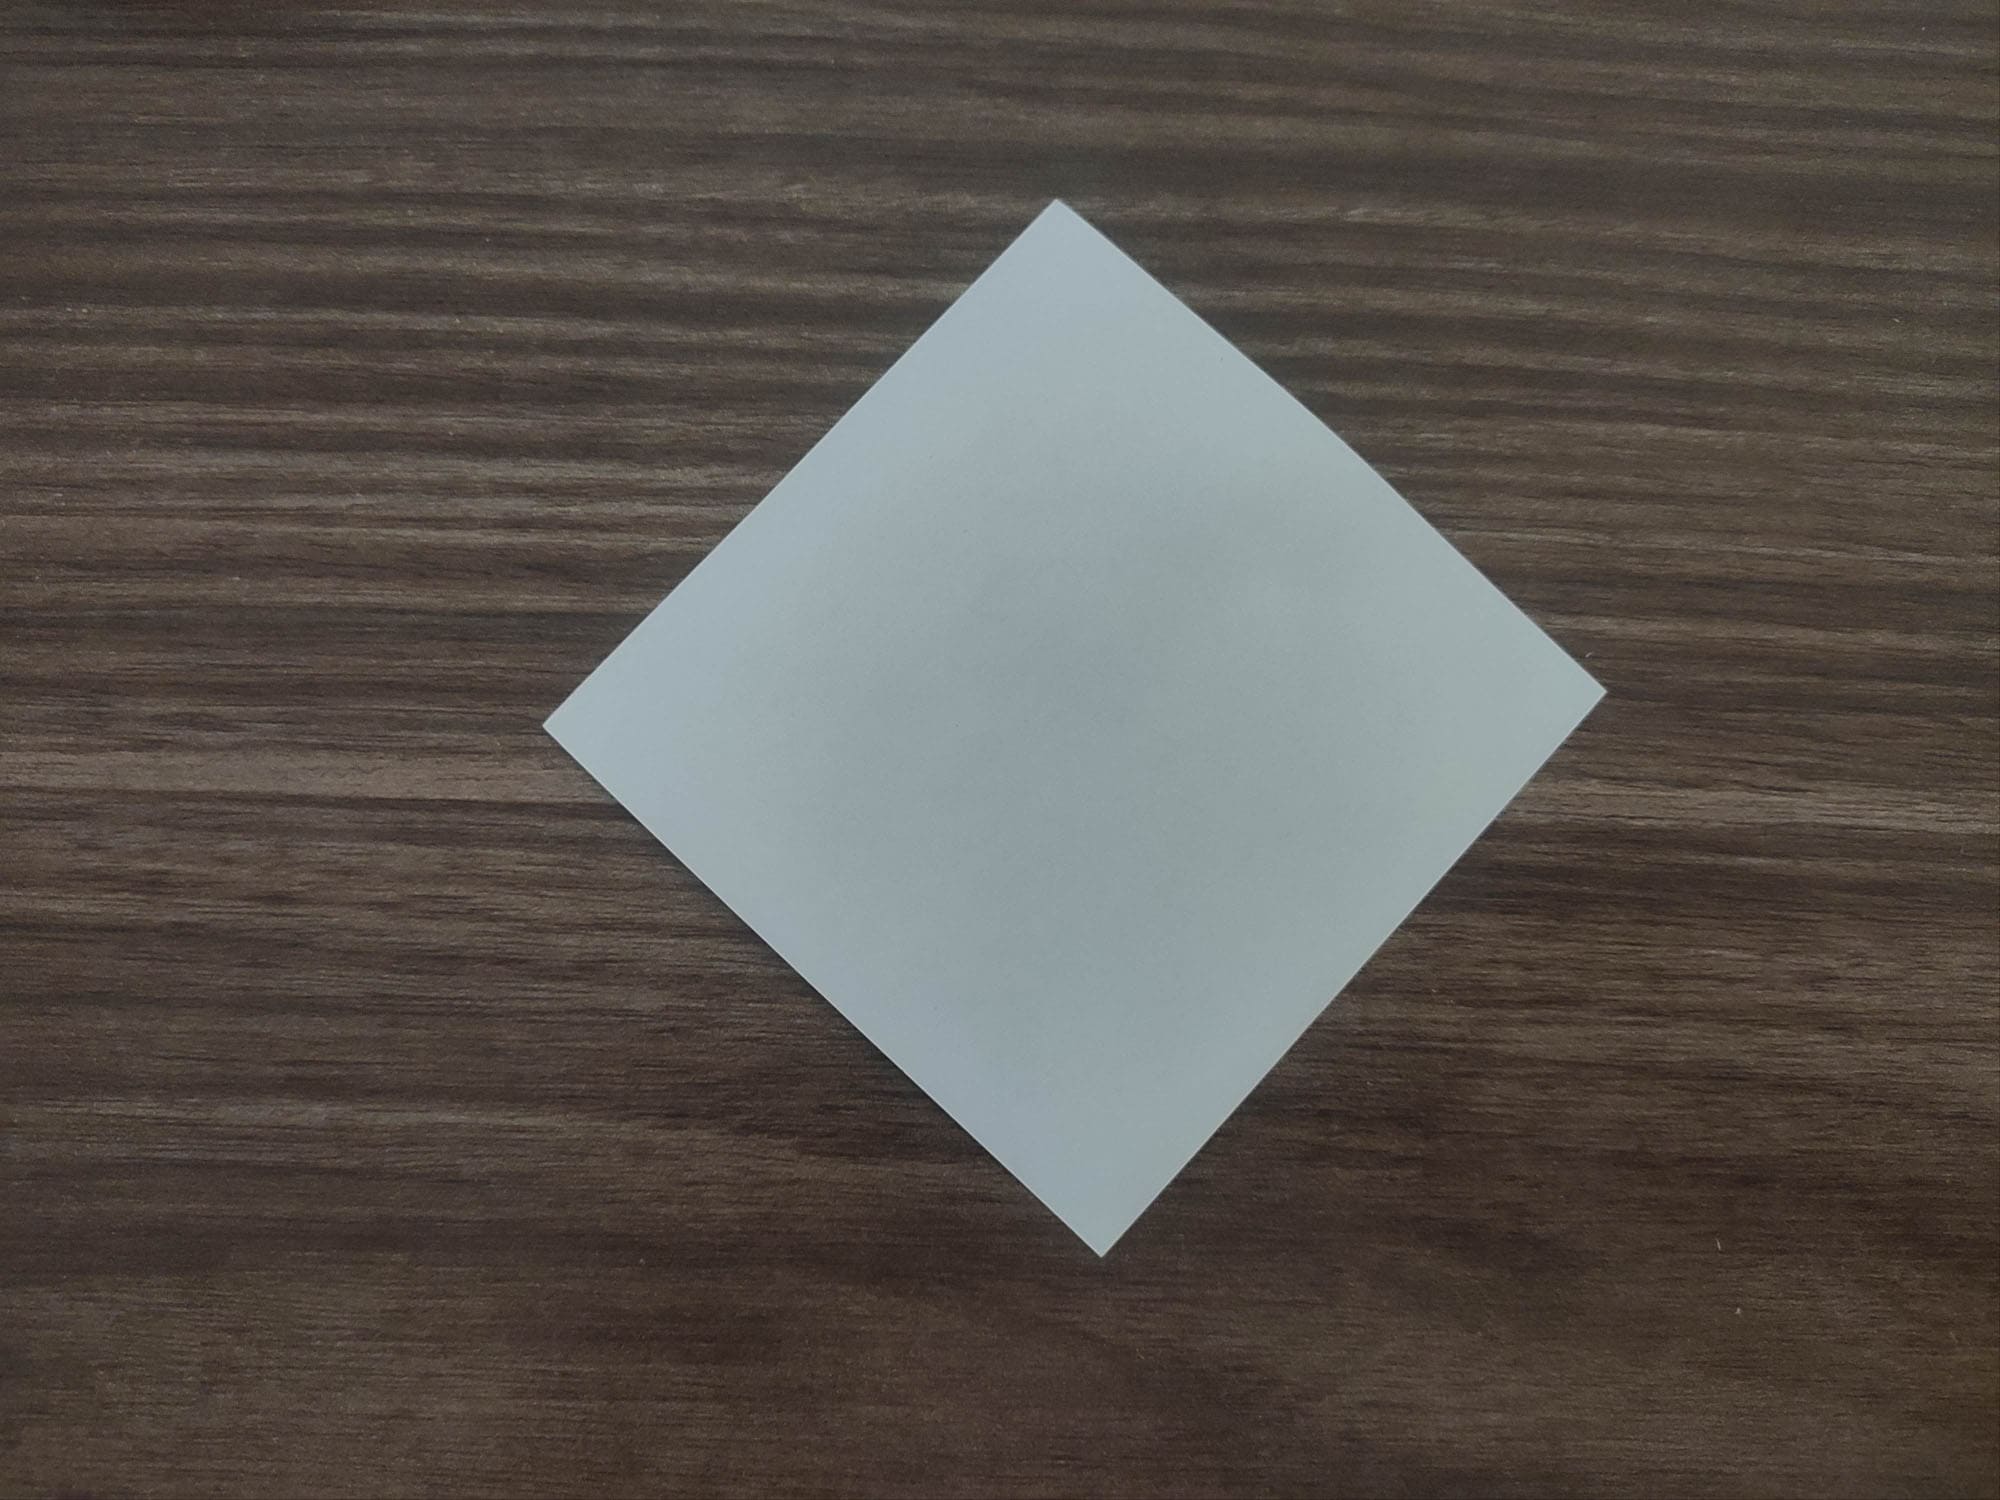
Take a 15×15 cm rectangular piece of paper. Put it with the colored side down.
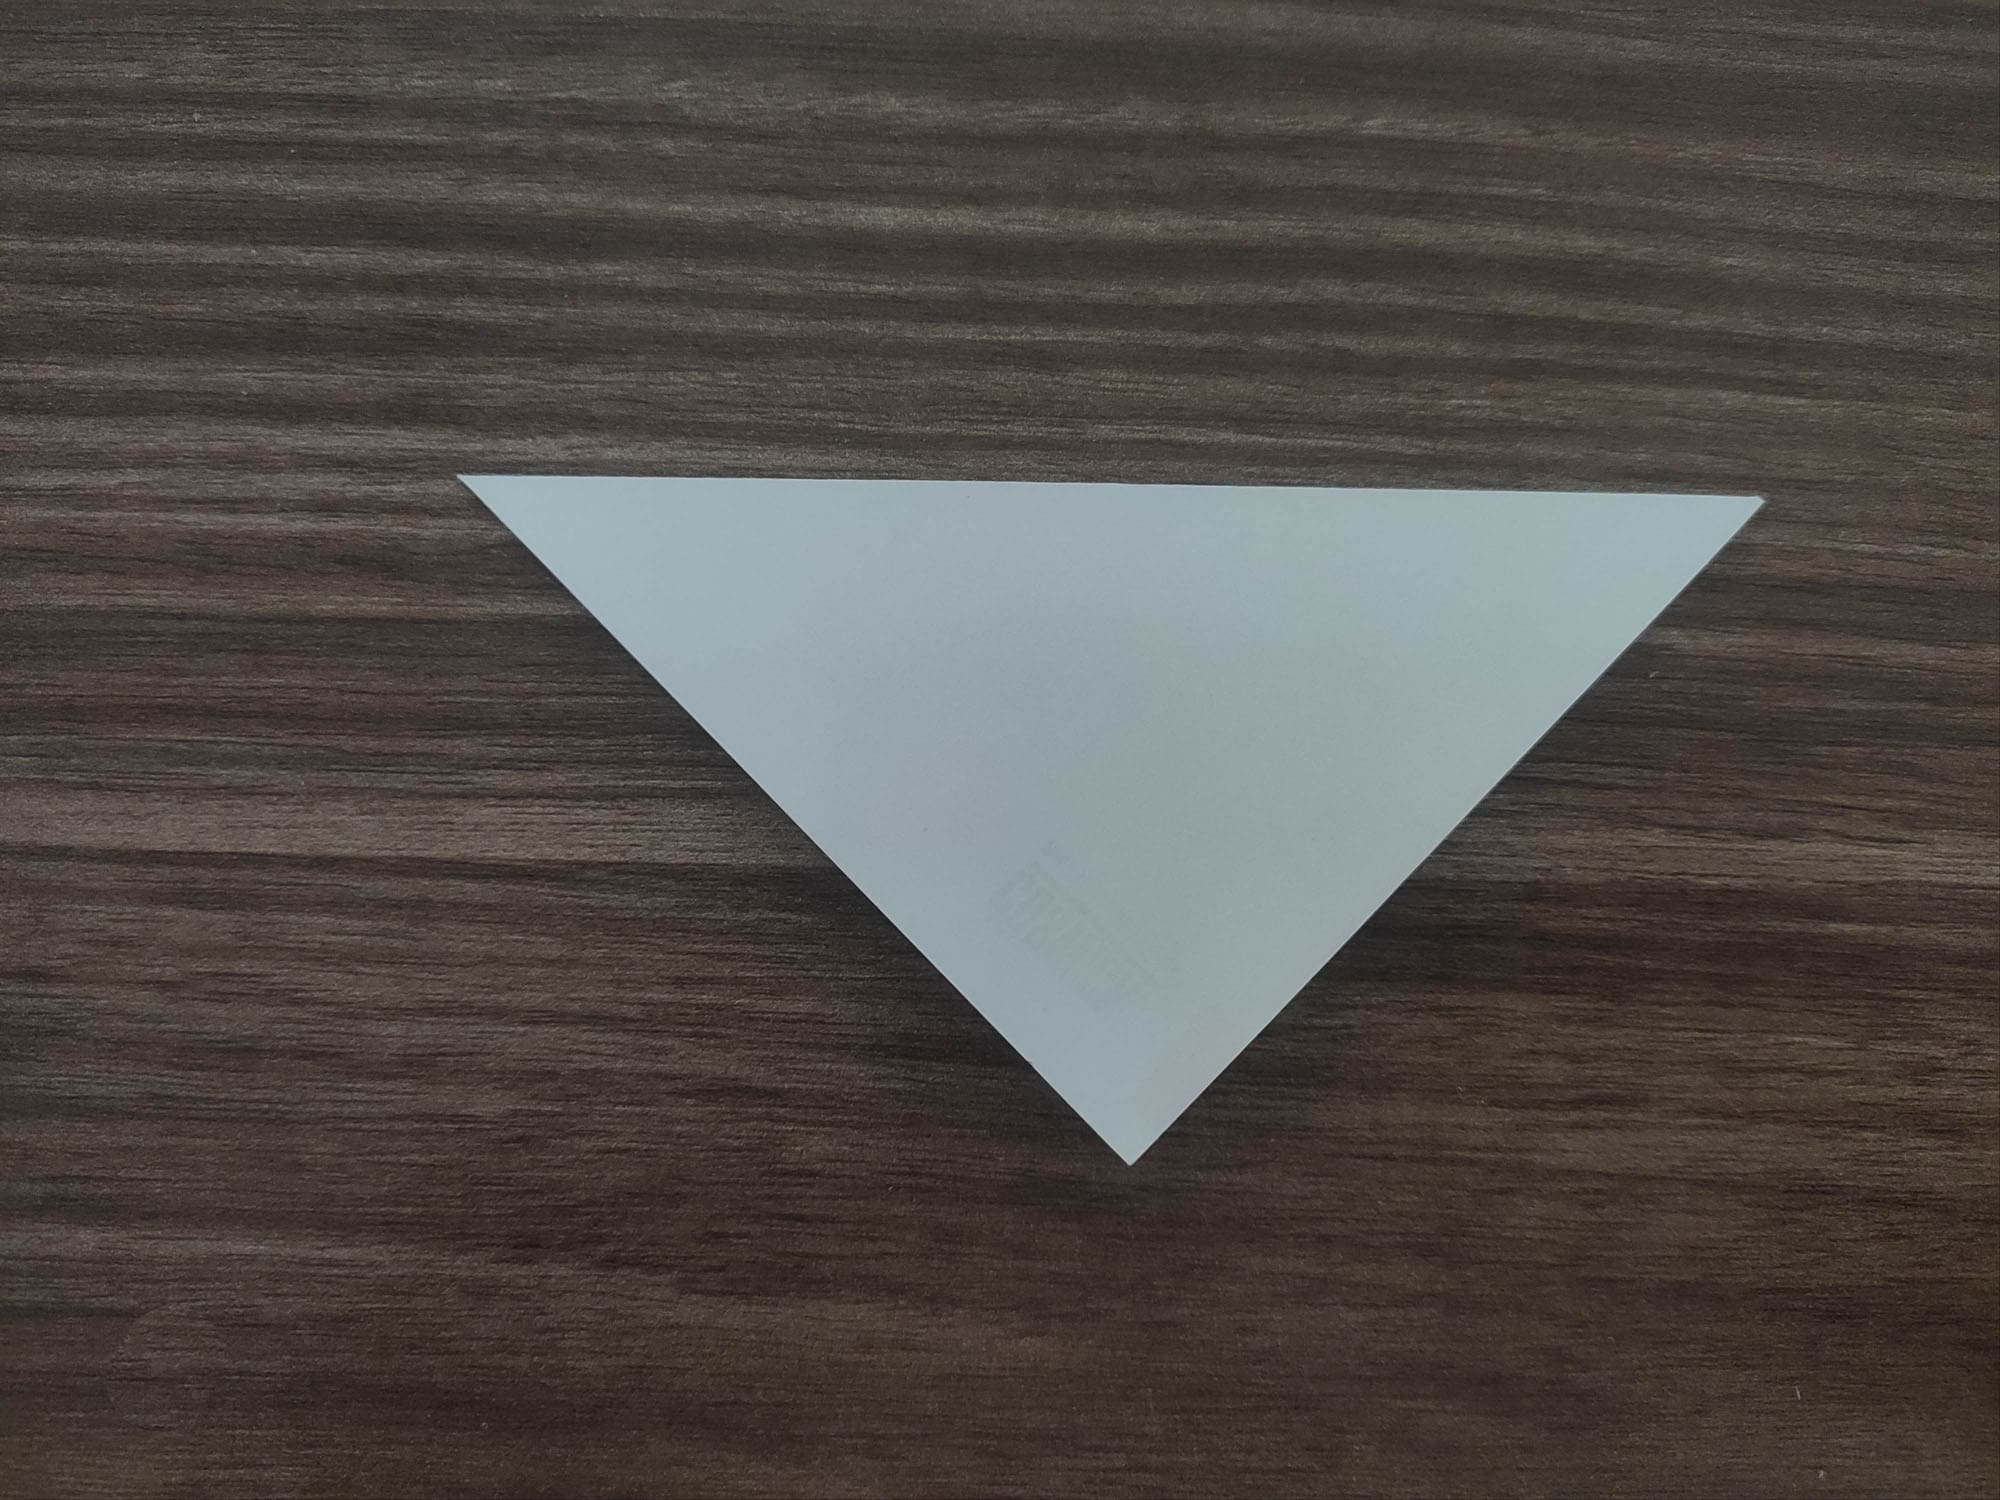
Gently fold the square diagonally so that the opposite corners meet each other exactly. Iron the fold.
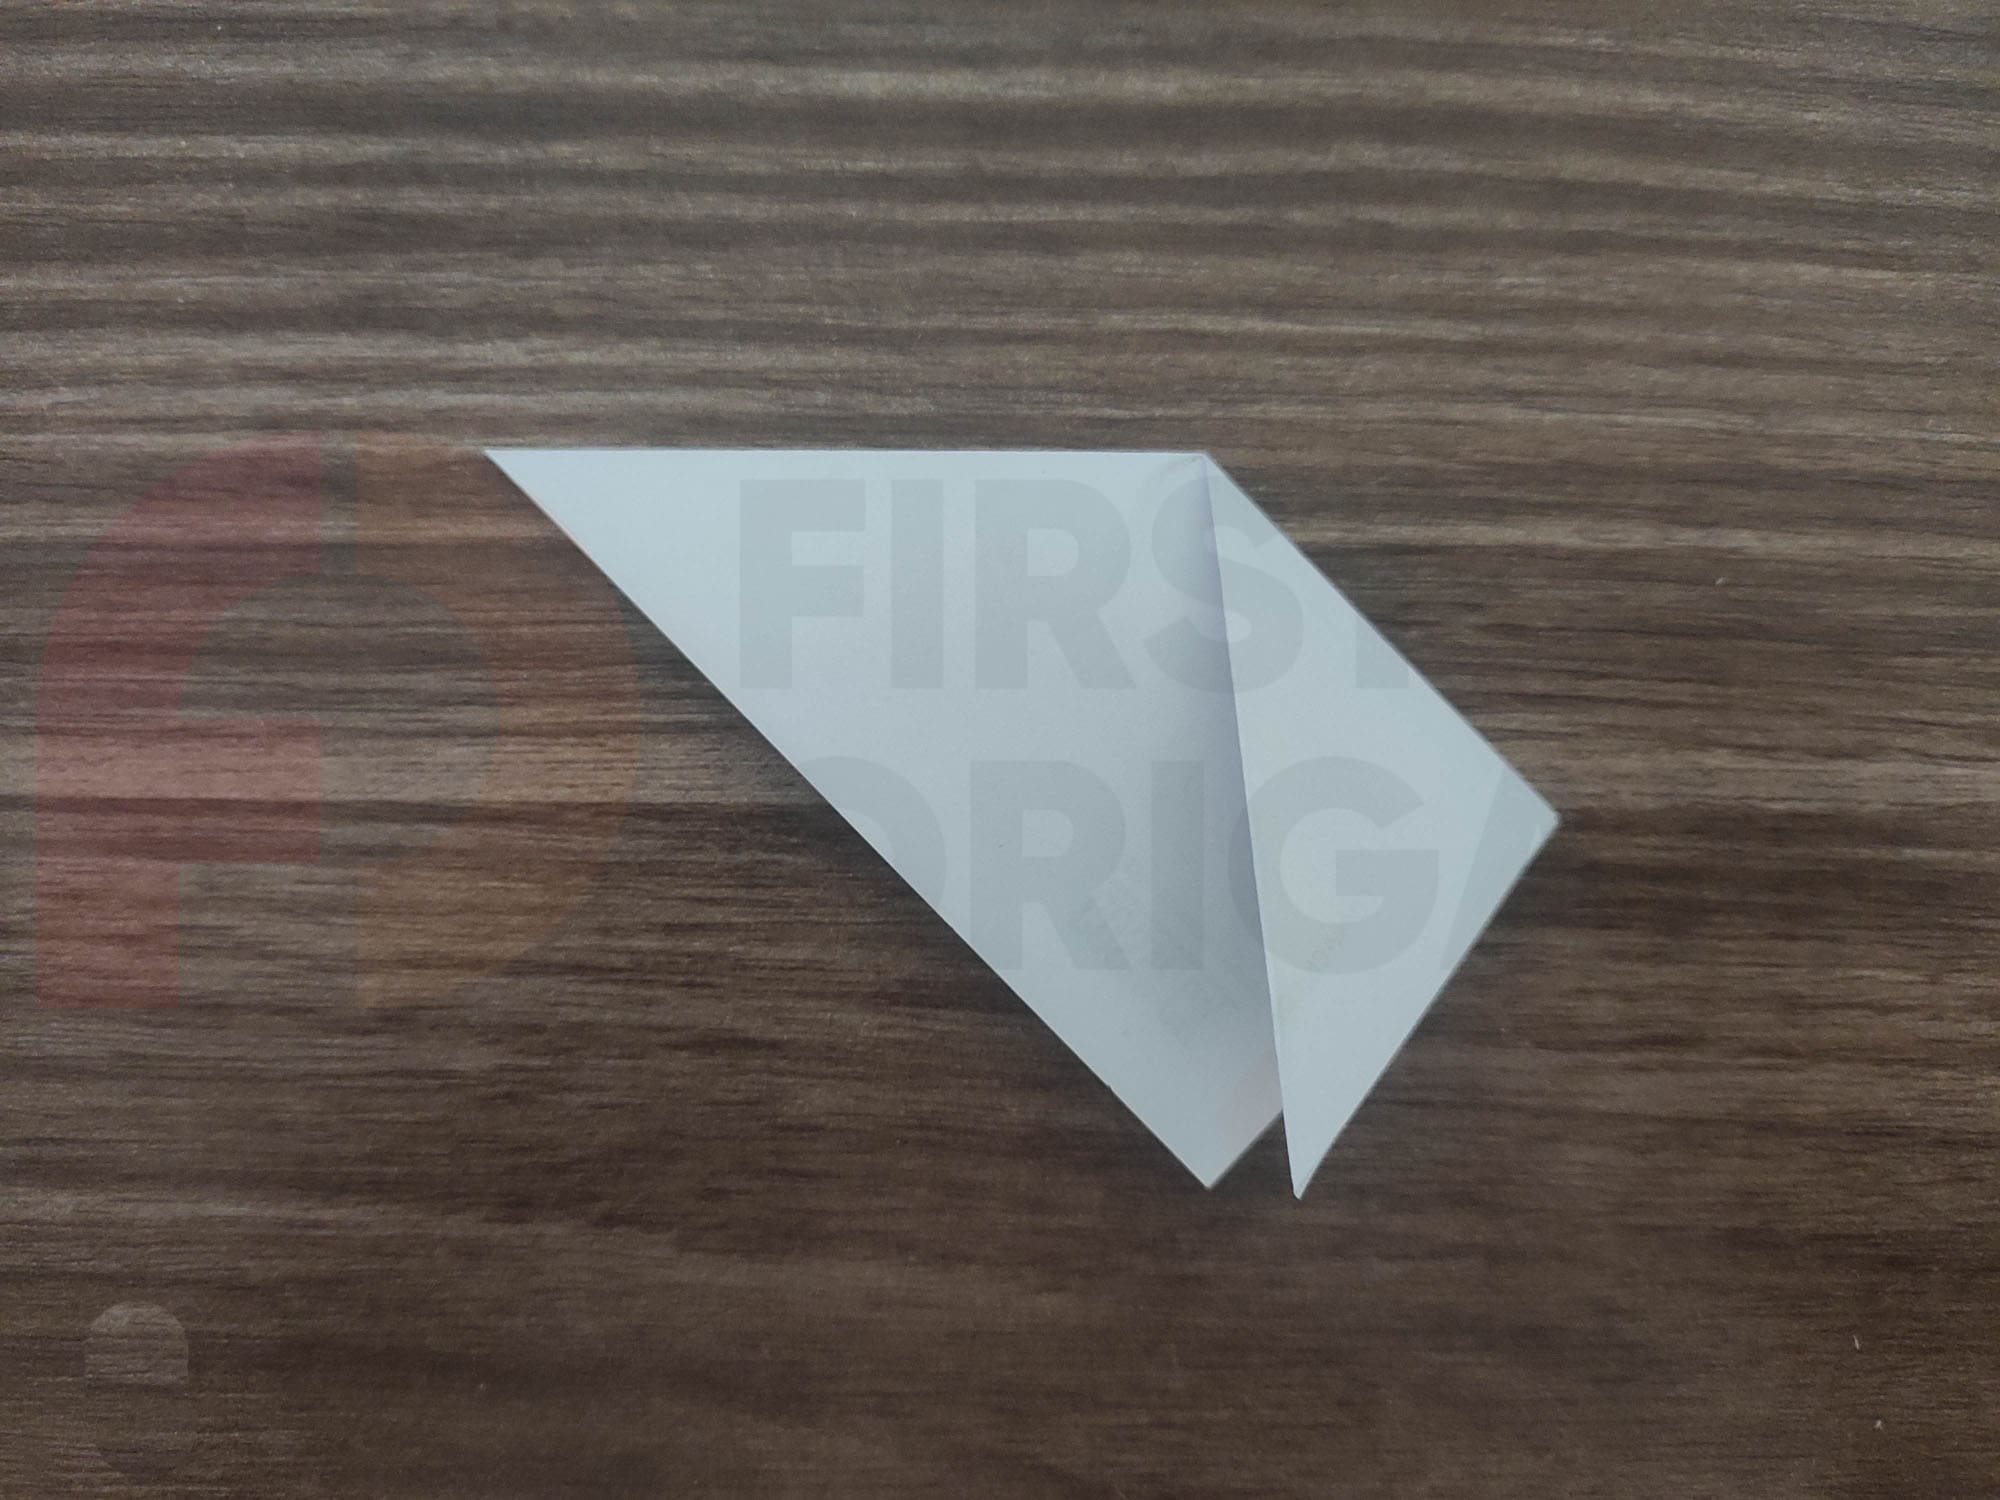
Fold the right corner down so that it joins the bottom corner.
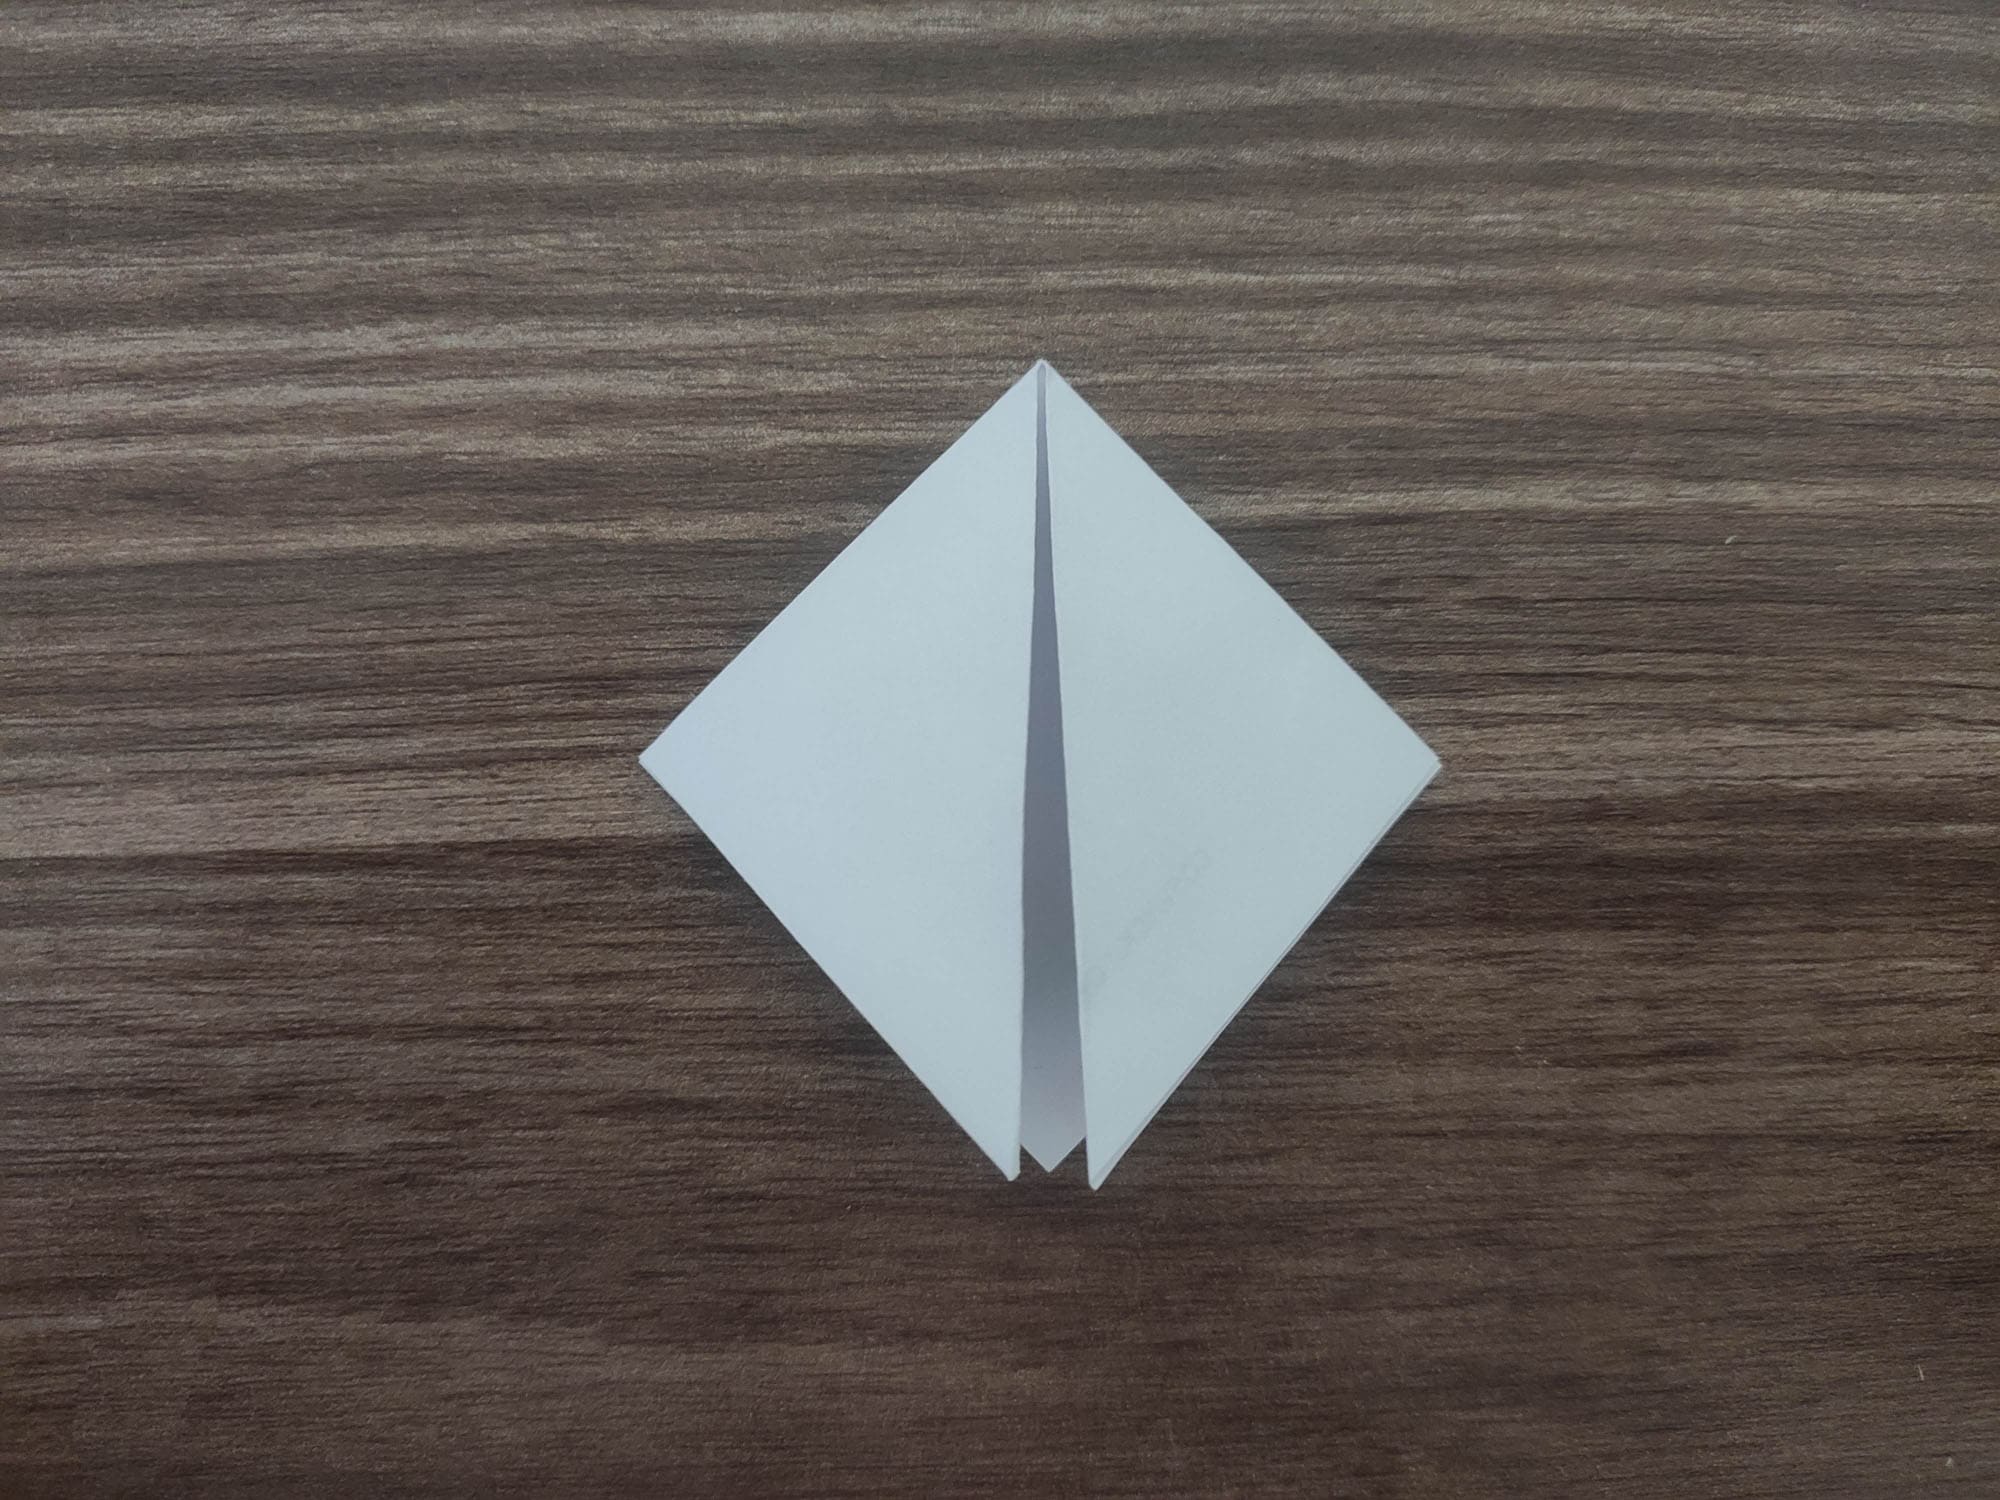
Fold the left corner down so that the sides of the triangles meet in the middle. Done!
A beginner origamist should definitely learn the basic shapes and learn how to fold them. This will help to master the folding of more complex and interesting origami figures faster. Good luck!


