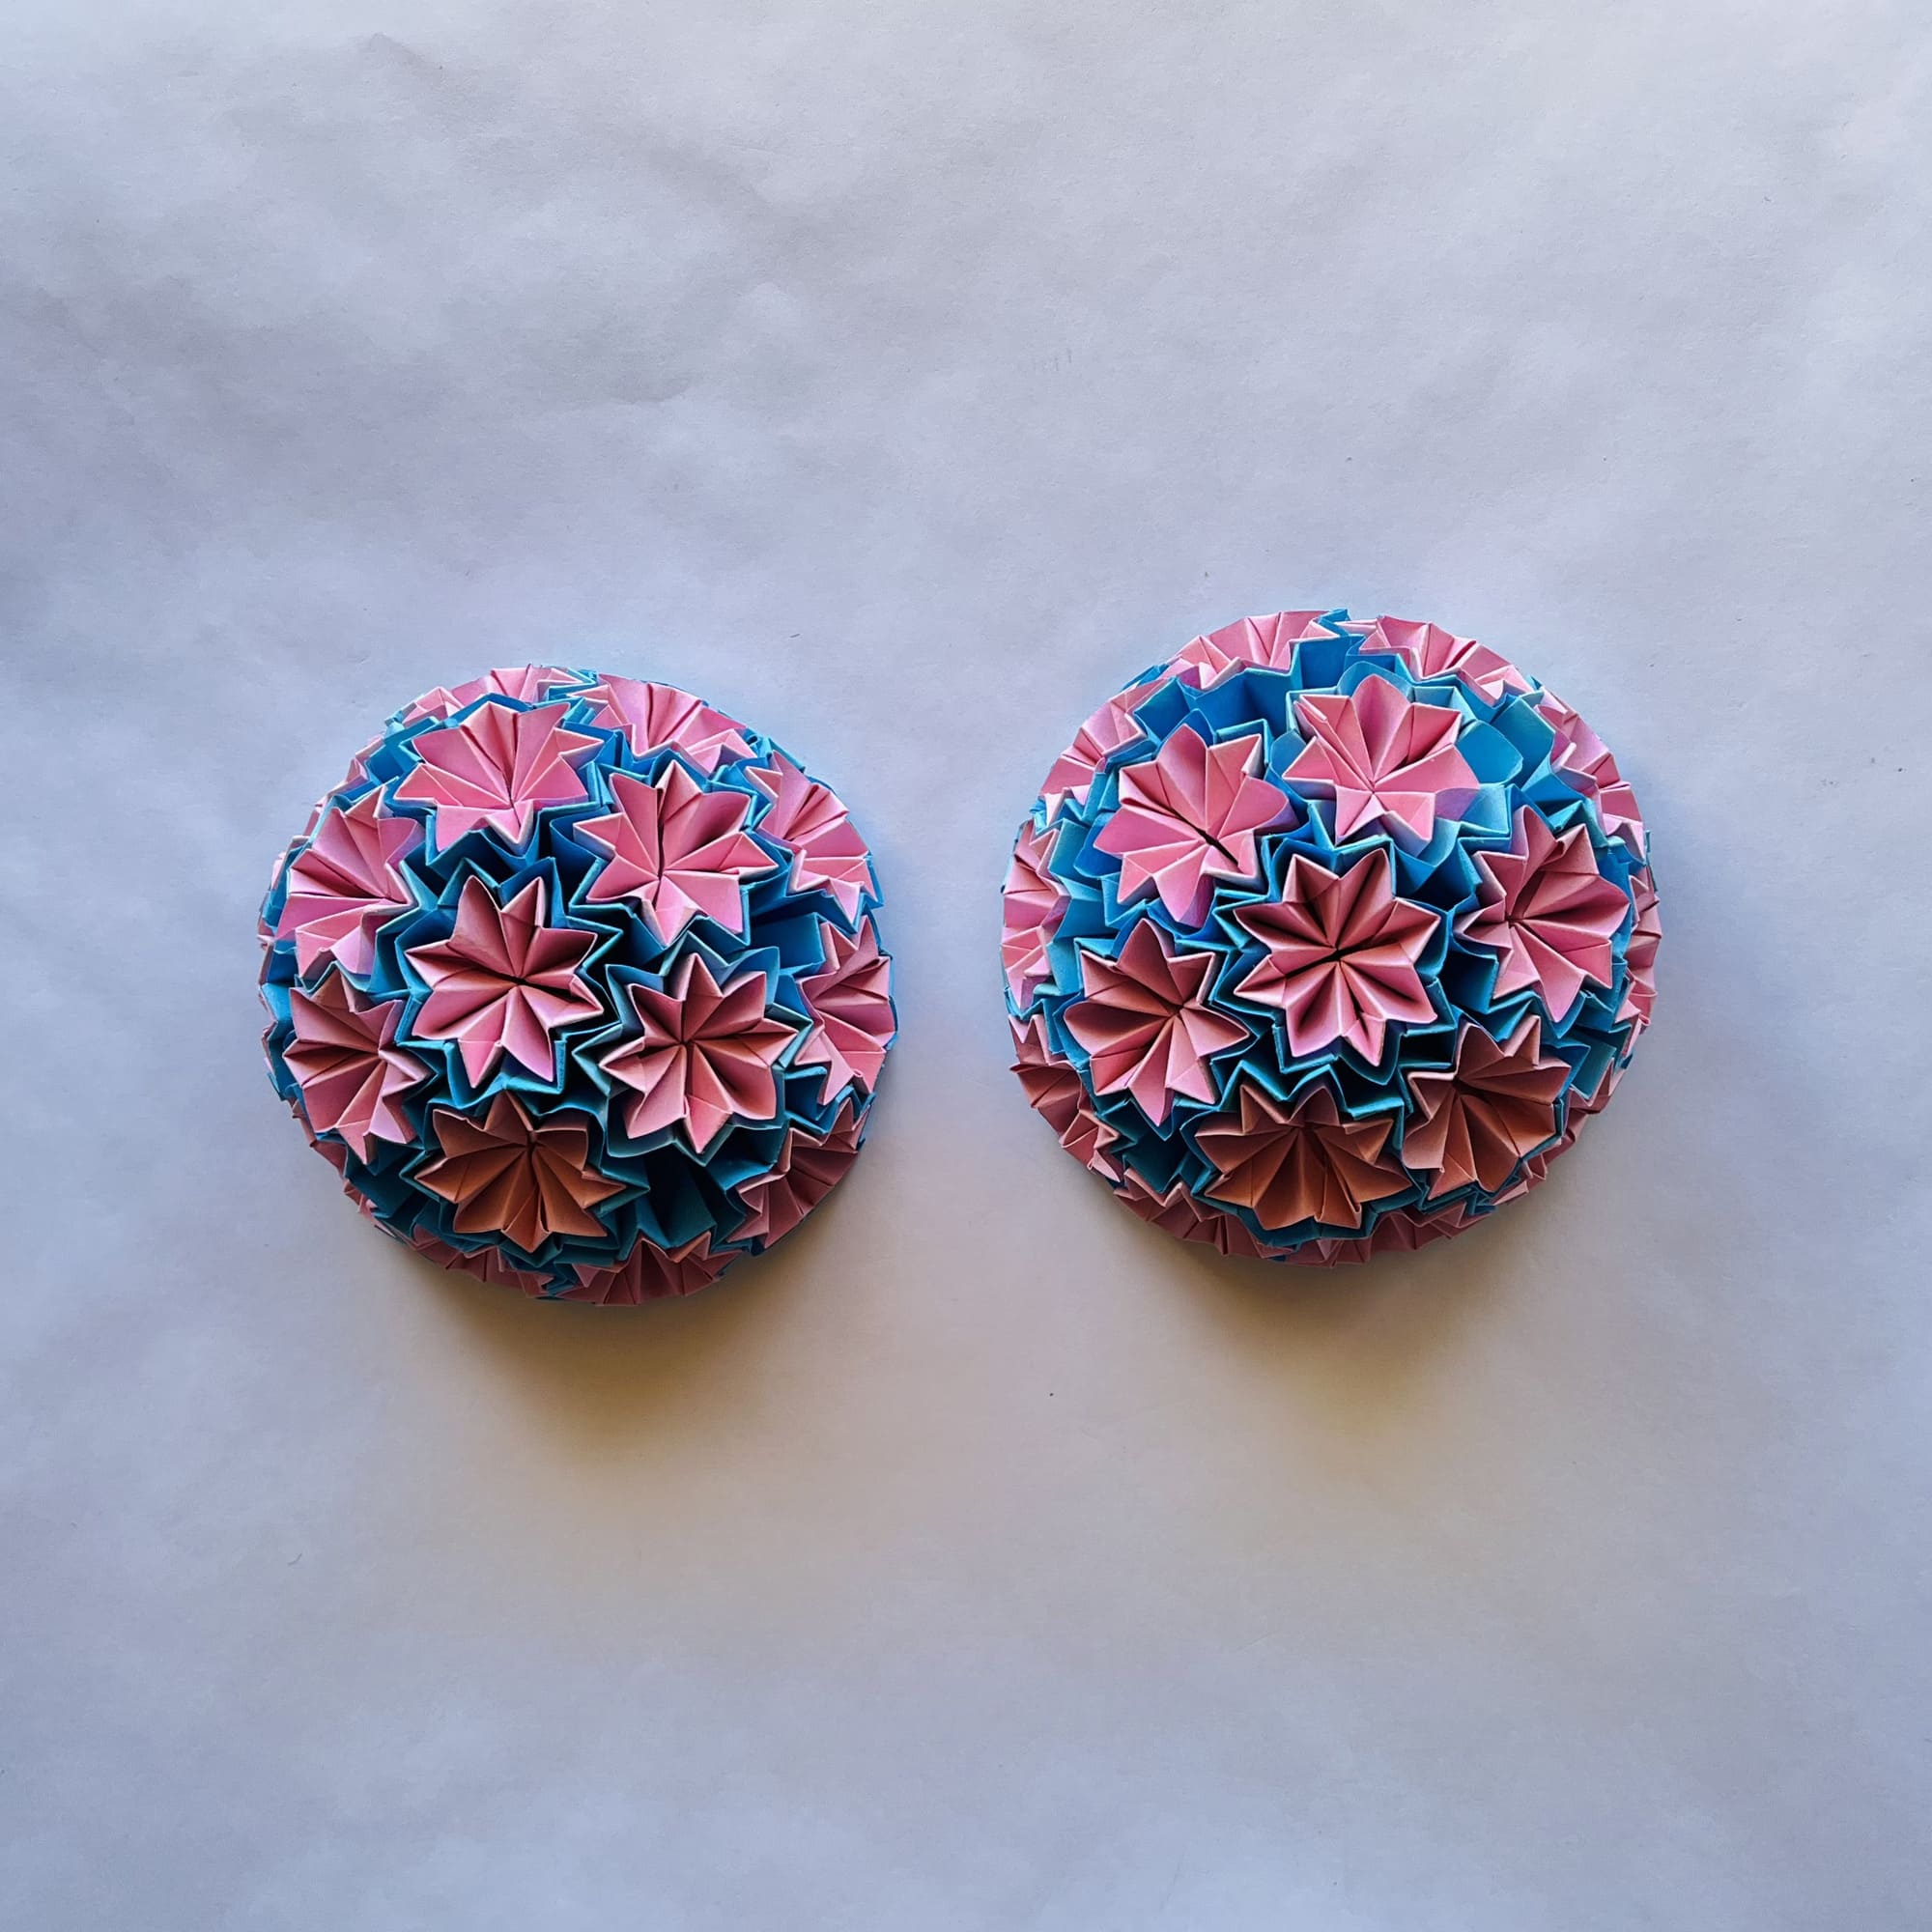
Origami Kusudama Venus
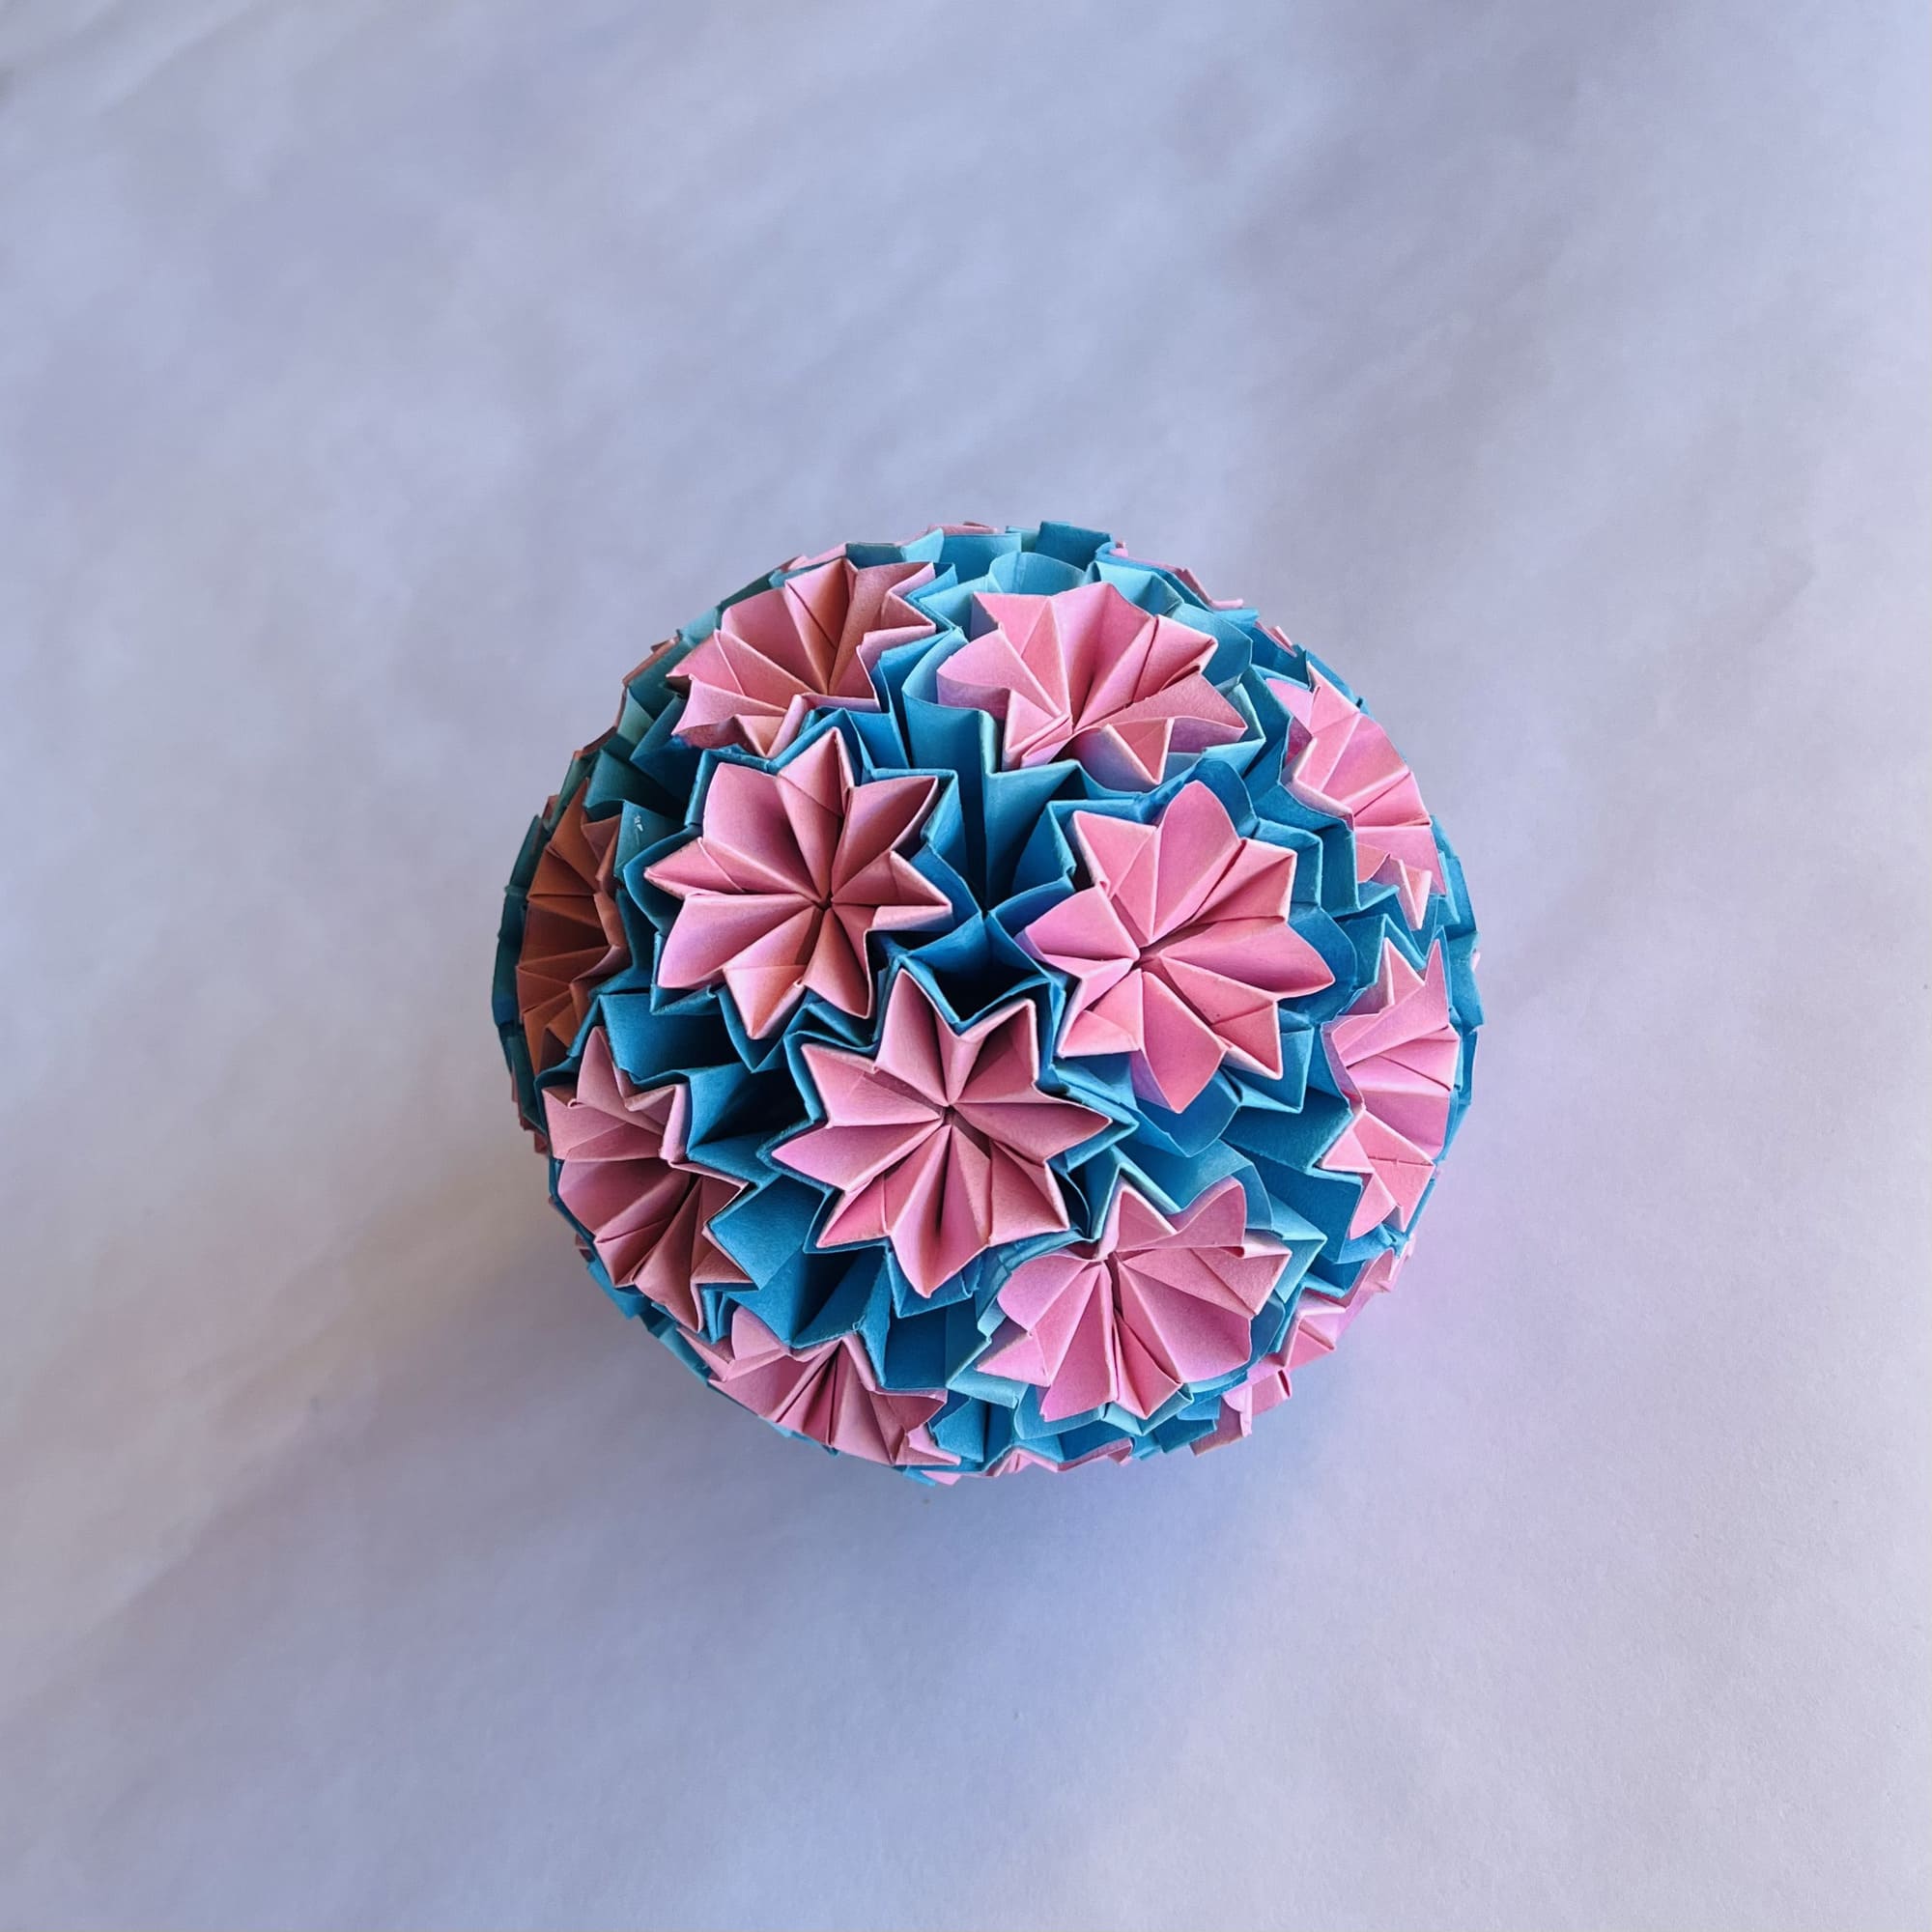
Kusudama is an origami technique in which a ball shape is glued together from many identical parts of a pyramidal shape. In our case, specifically, these are beautiful flowers, each of which consists of two parts. The result is a stunningly beautiful miniature planet Venus, which will become a wonderful decoration for your interior.
It is worth noting that this origami refers to complex figures, so it is more suitable for adults. Keep in mind that you will need more sheets of paper and more time than for simple shapes. However, the result is undoubtedly worth it!
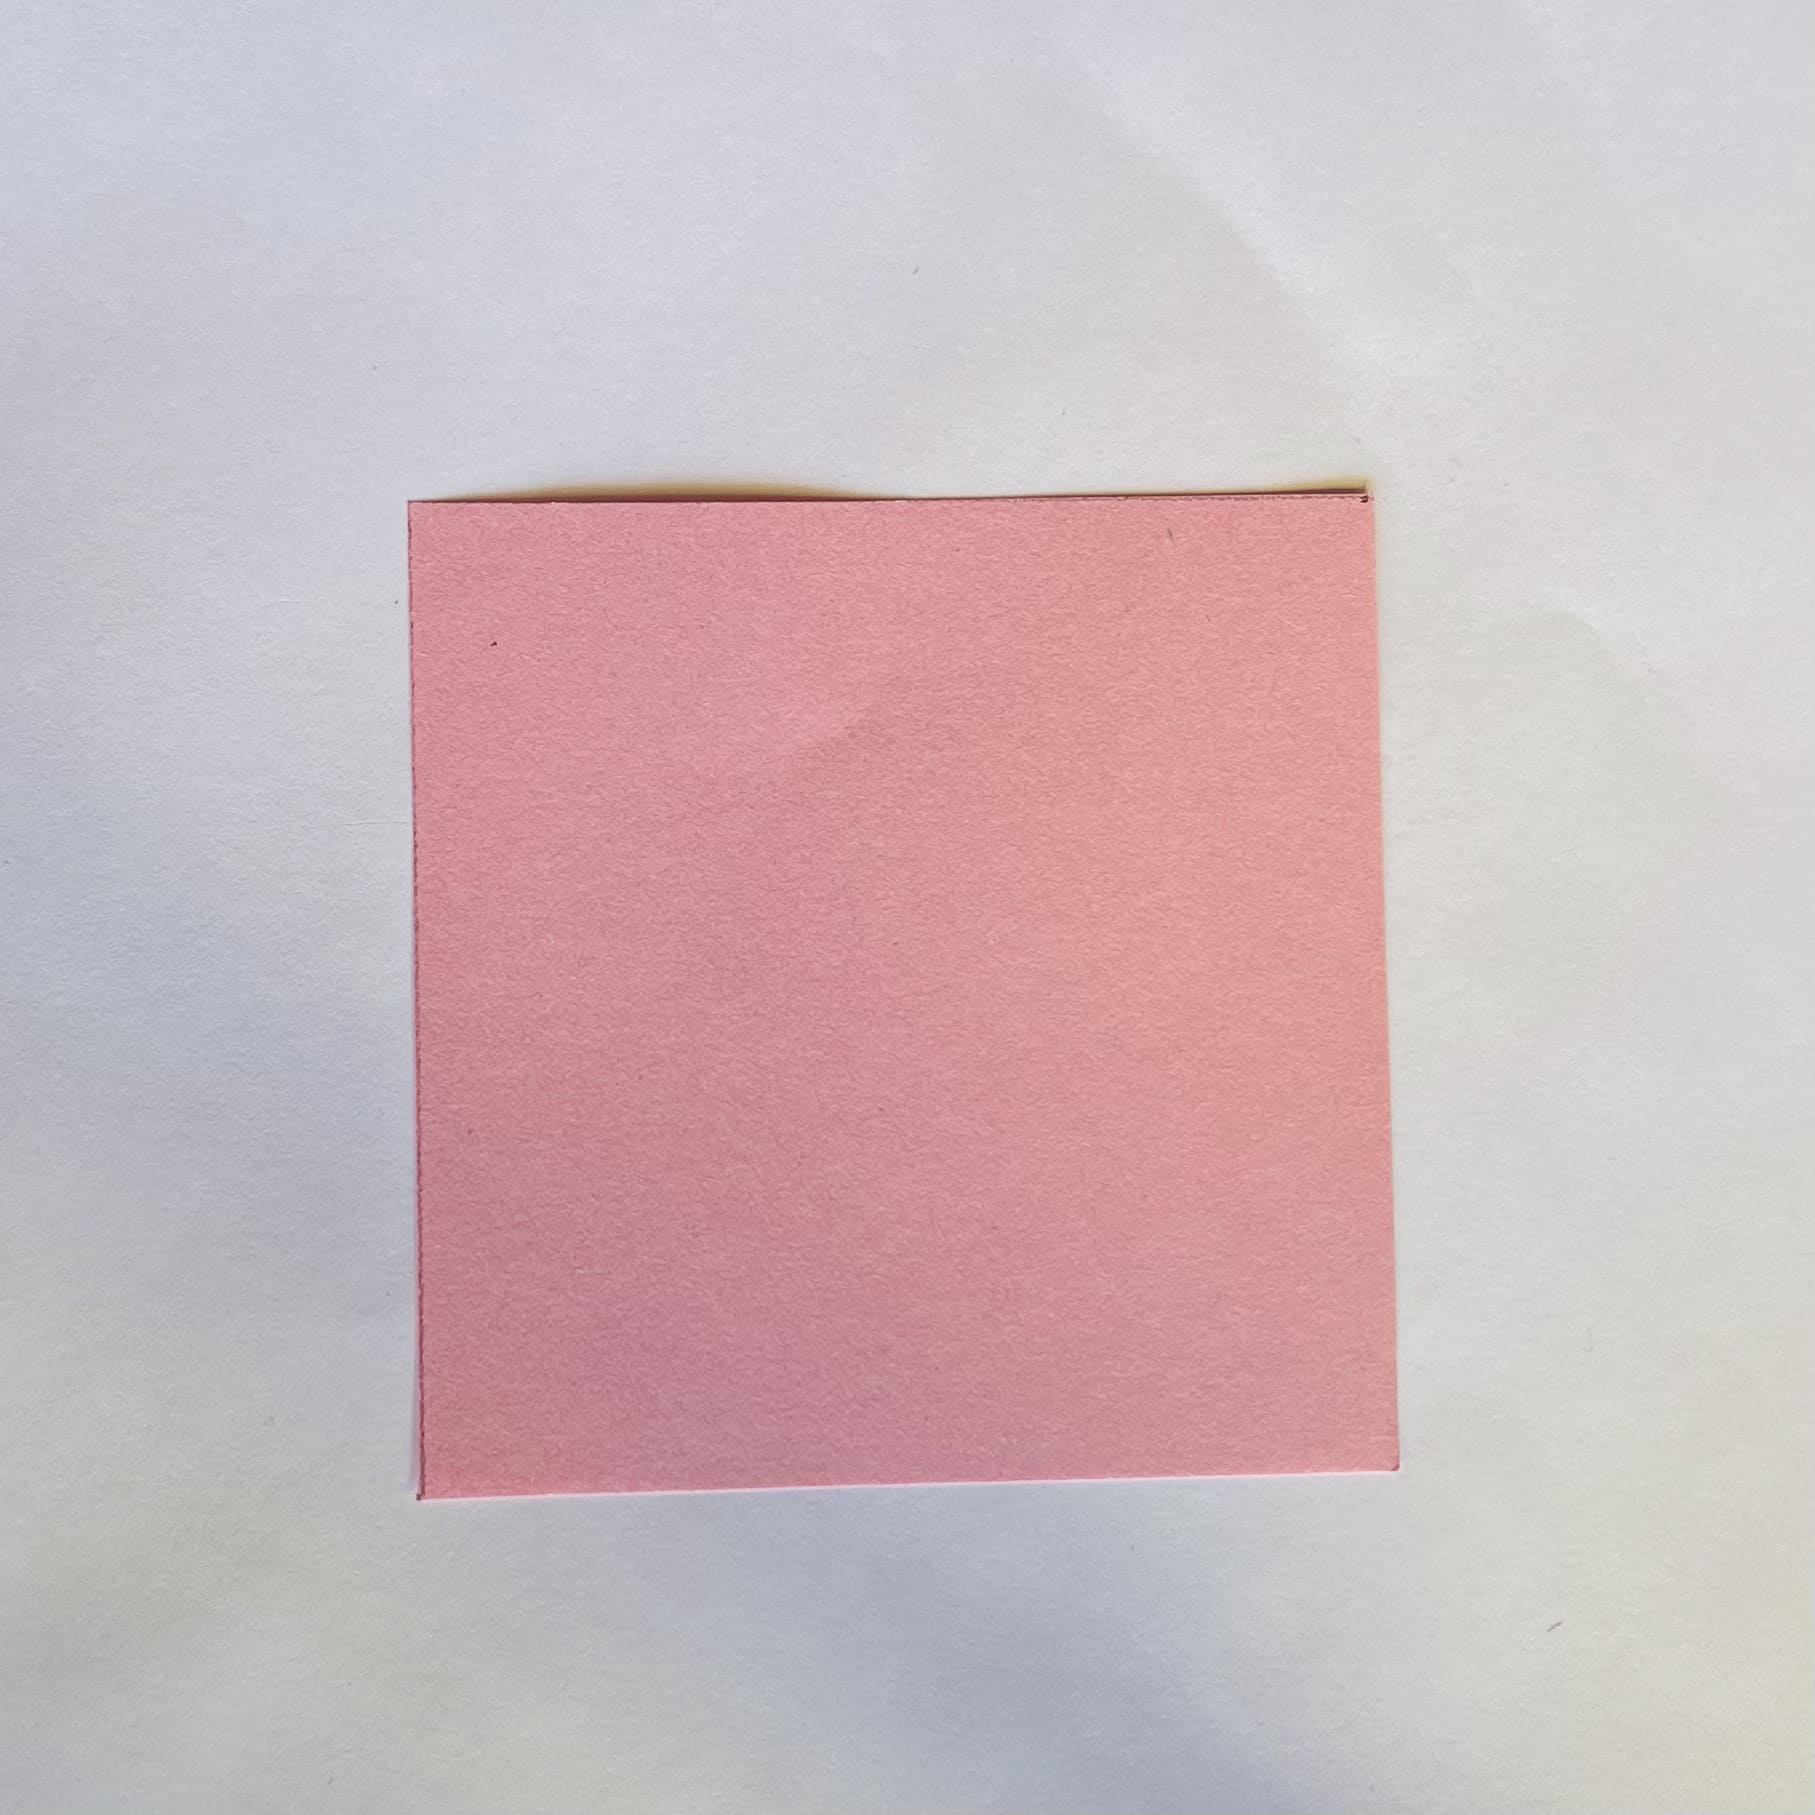
You will need 34 sheets 9×9 cm blue, 34 sheets 8.5×8.5 cm pink, glue, and a little patience.
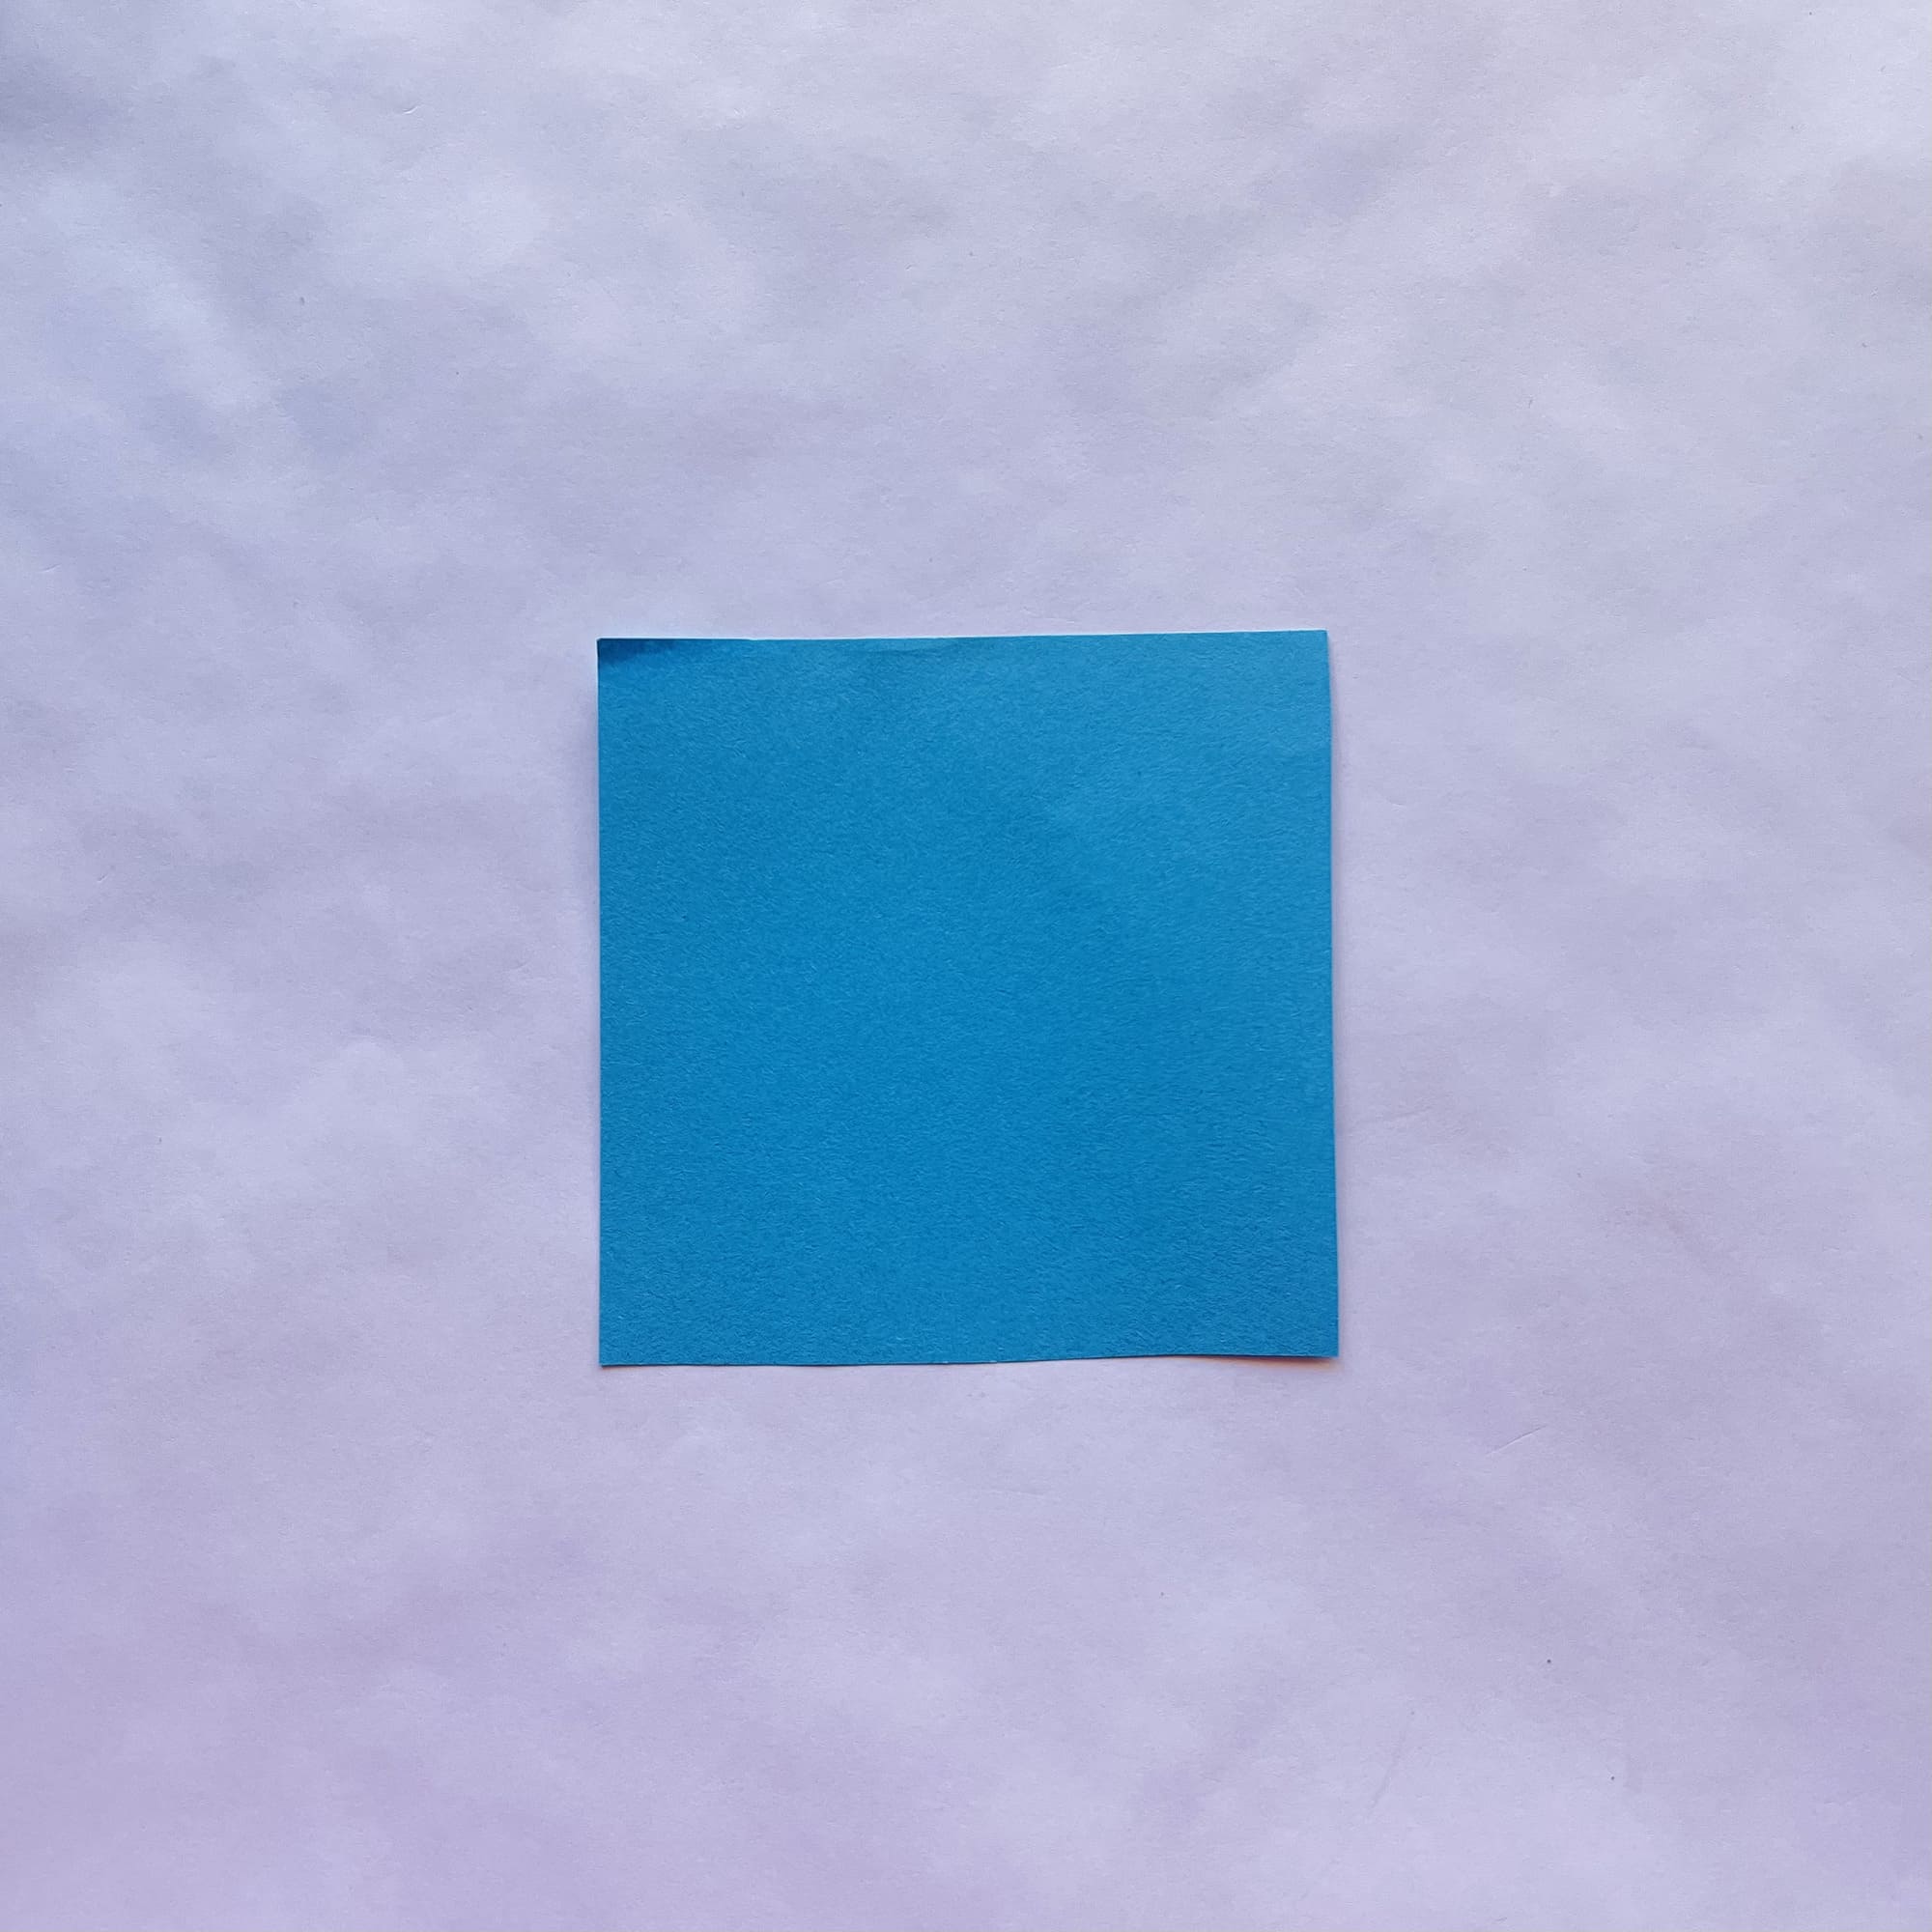
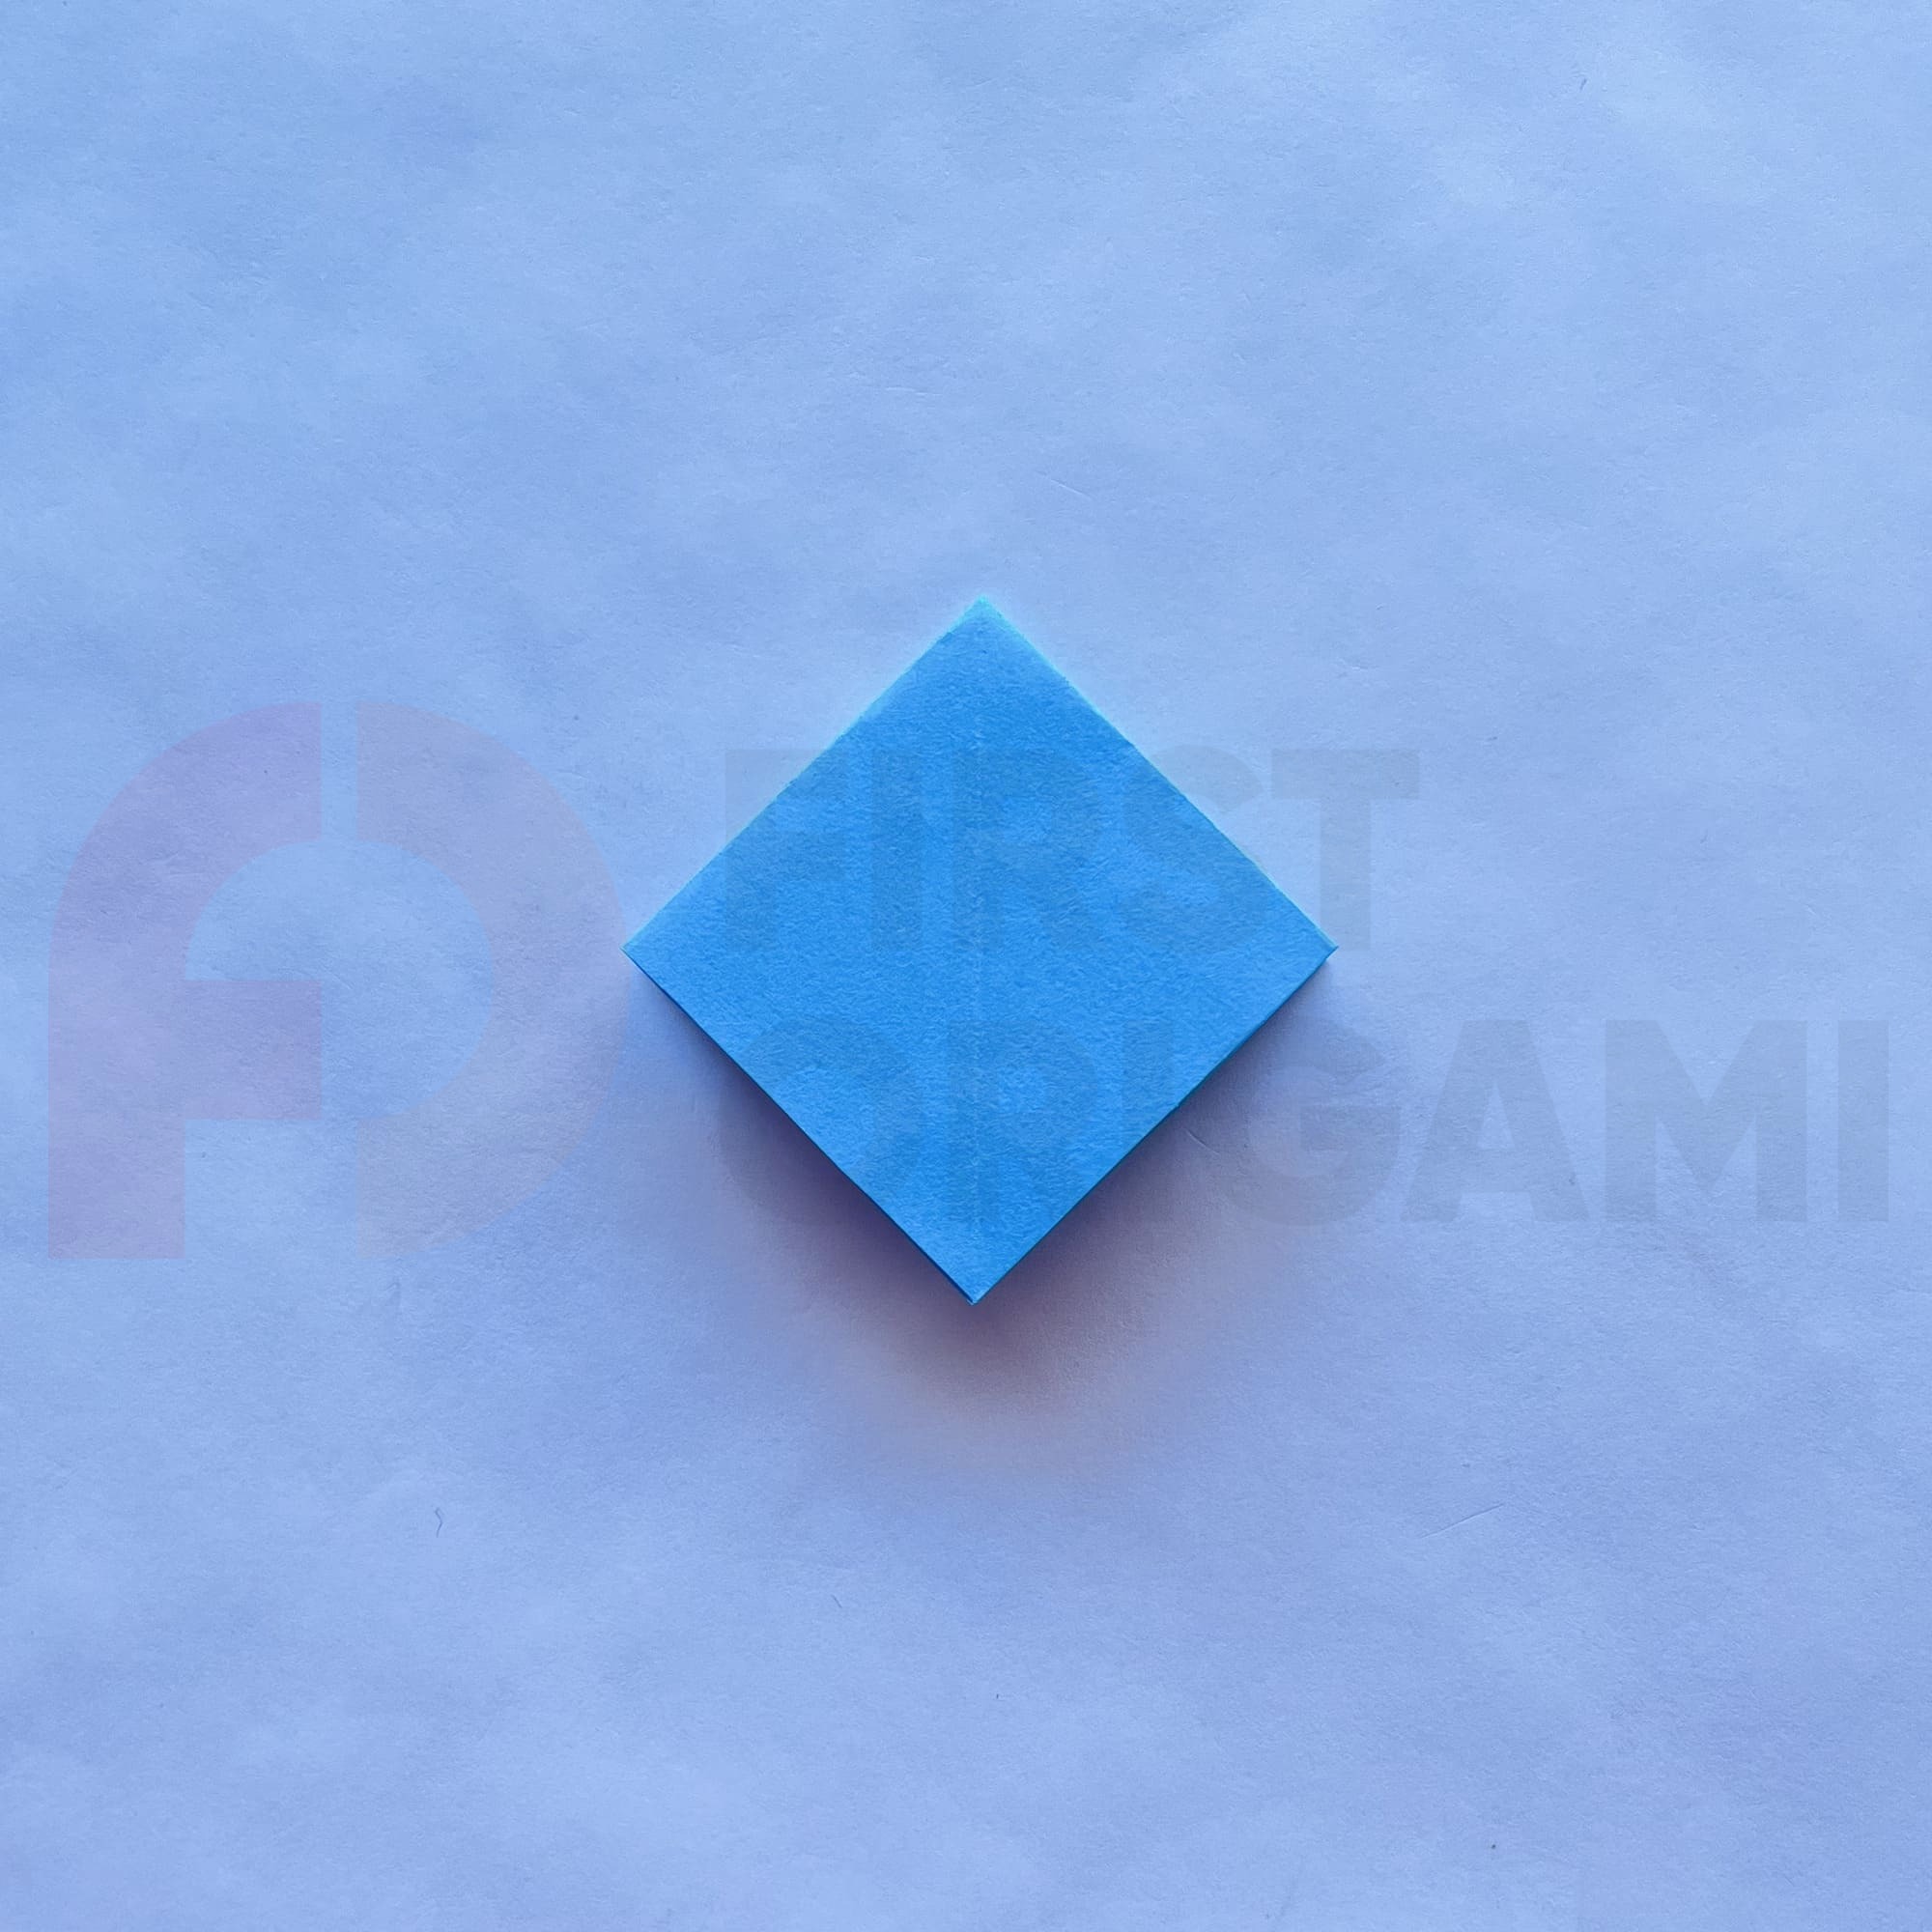
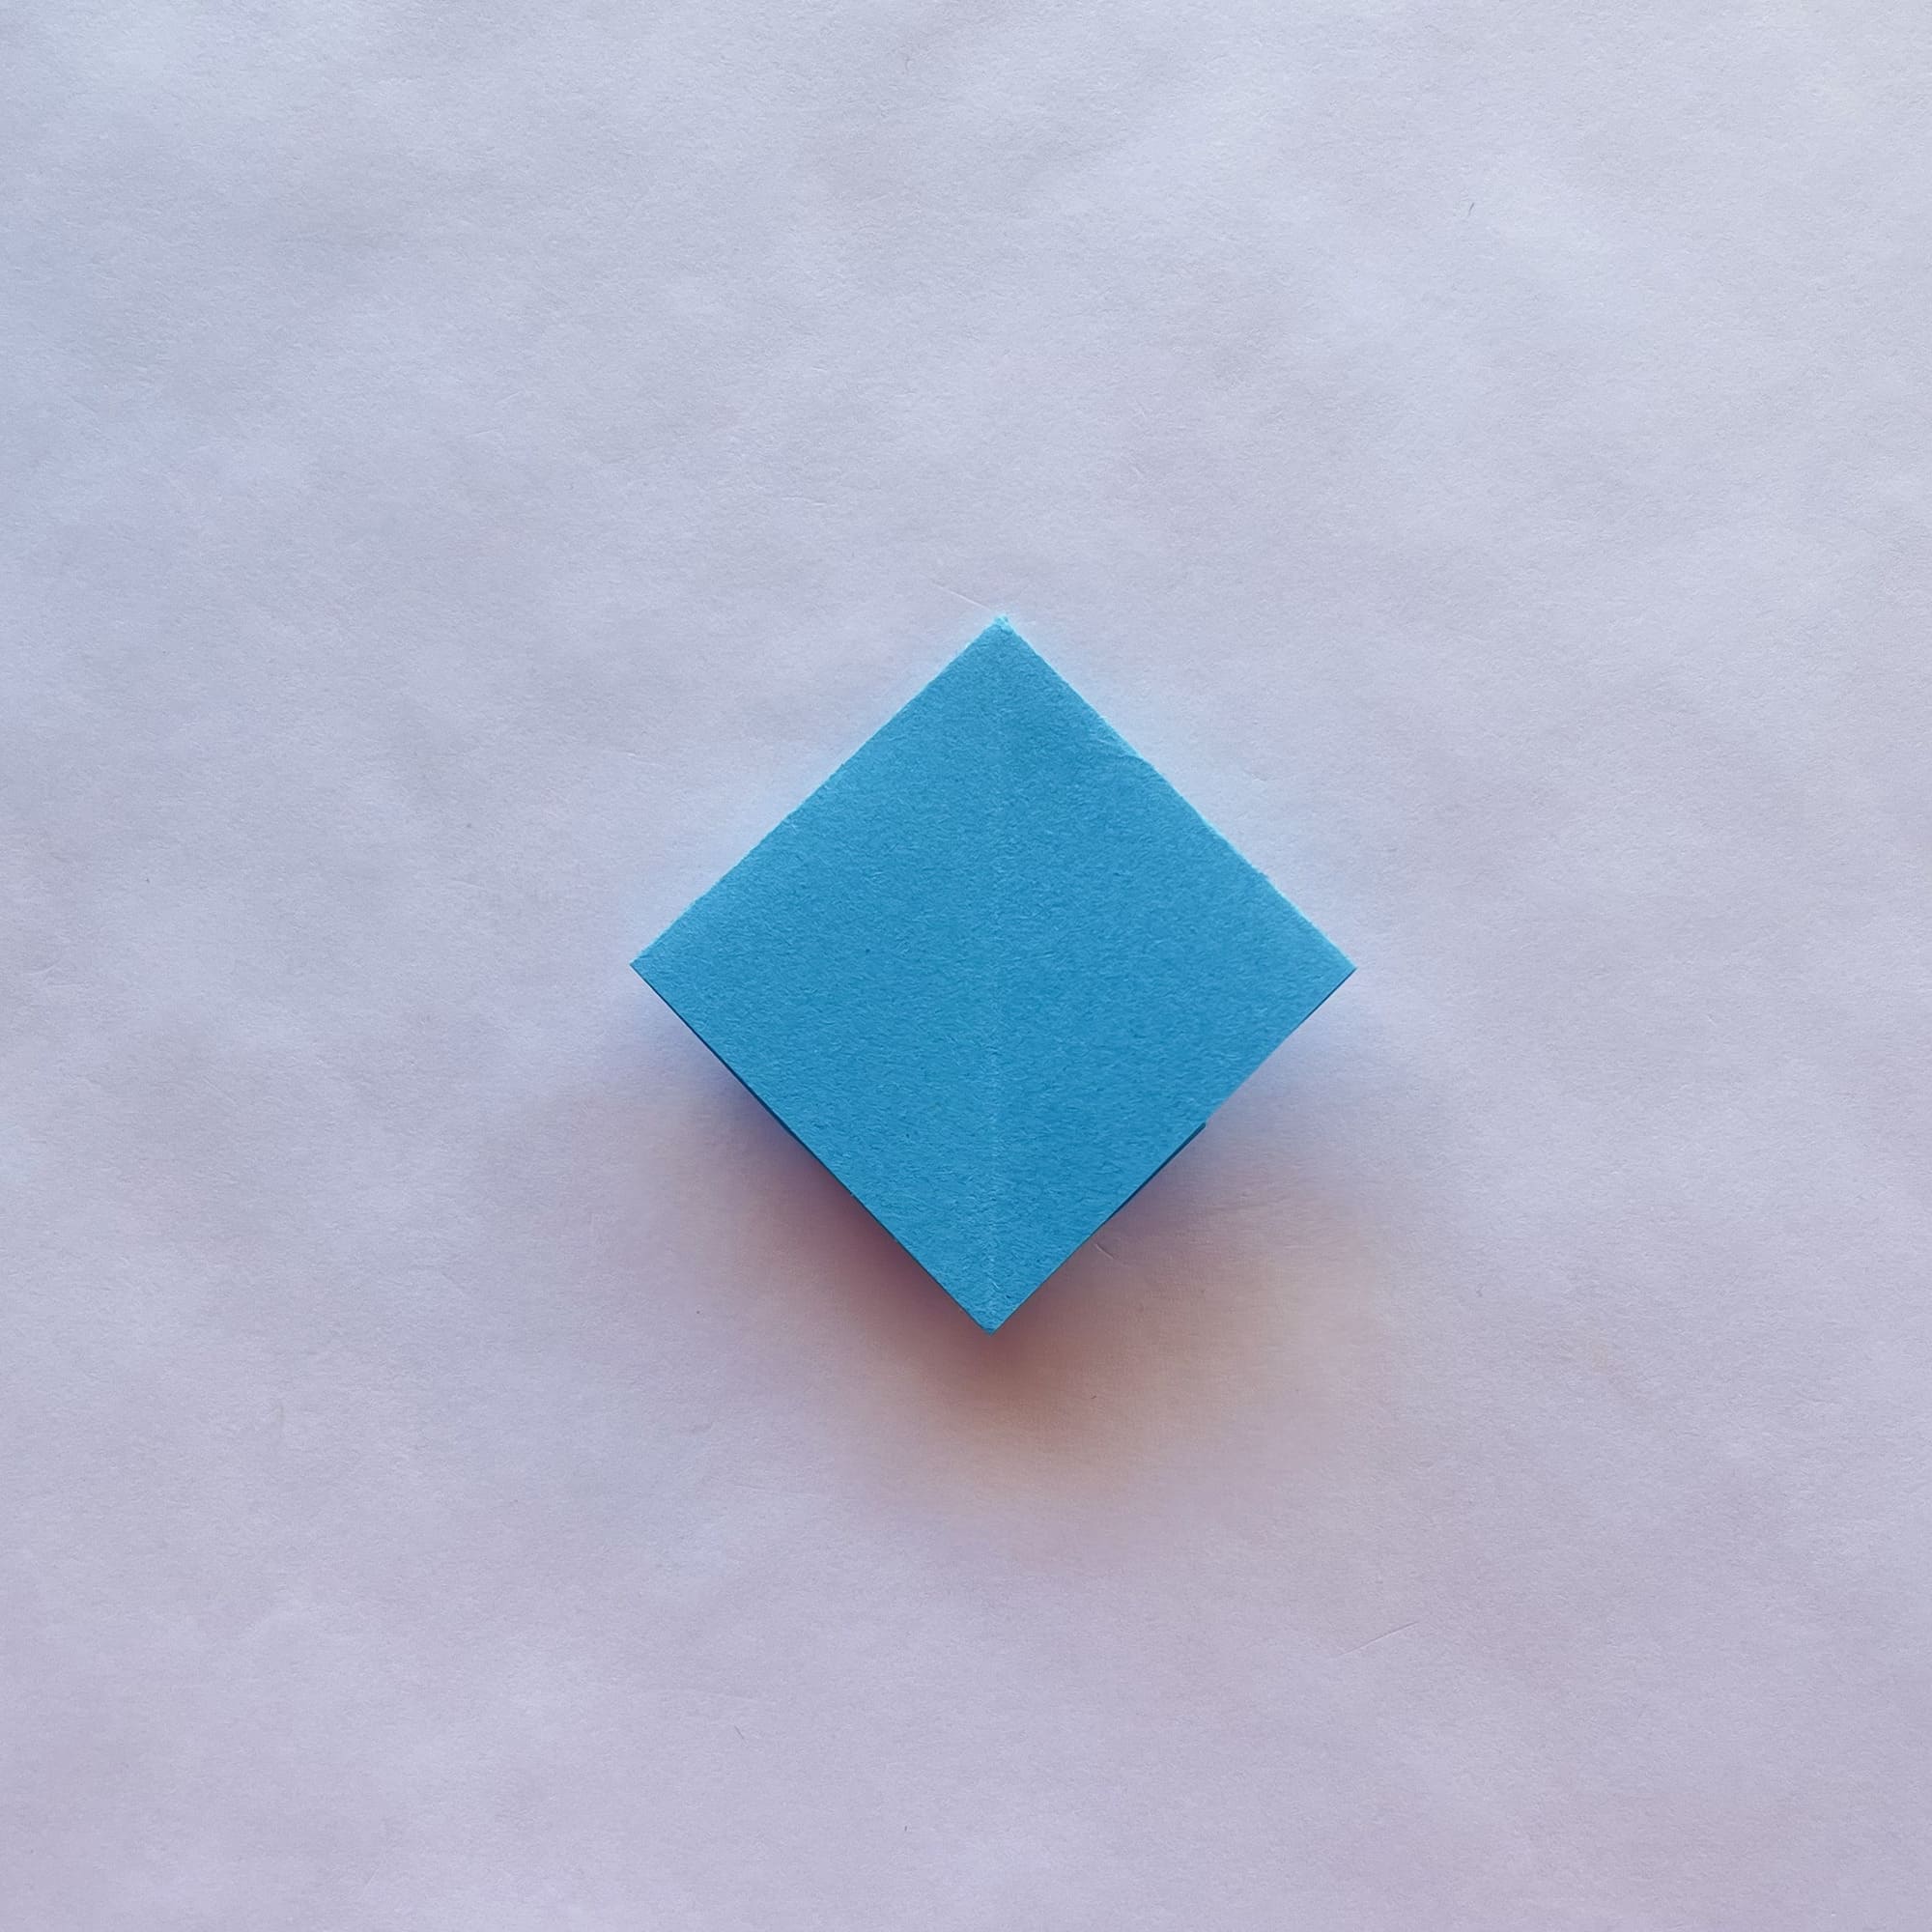
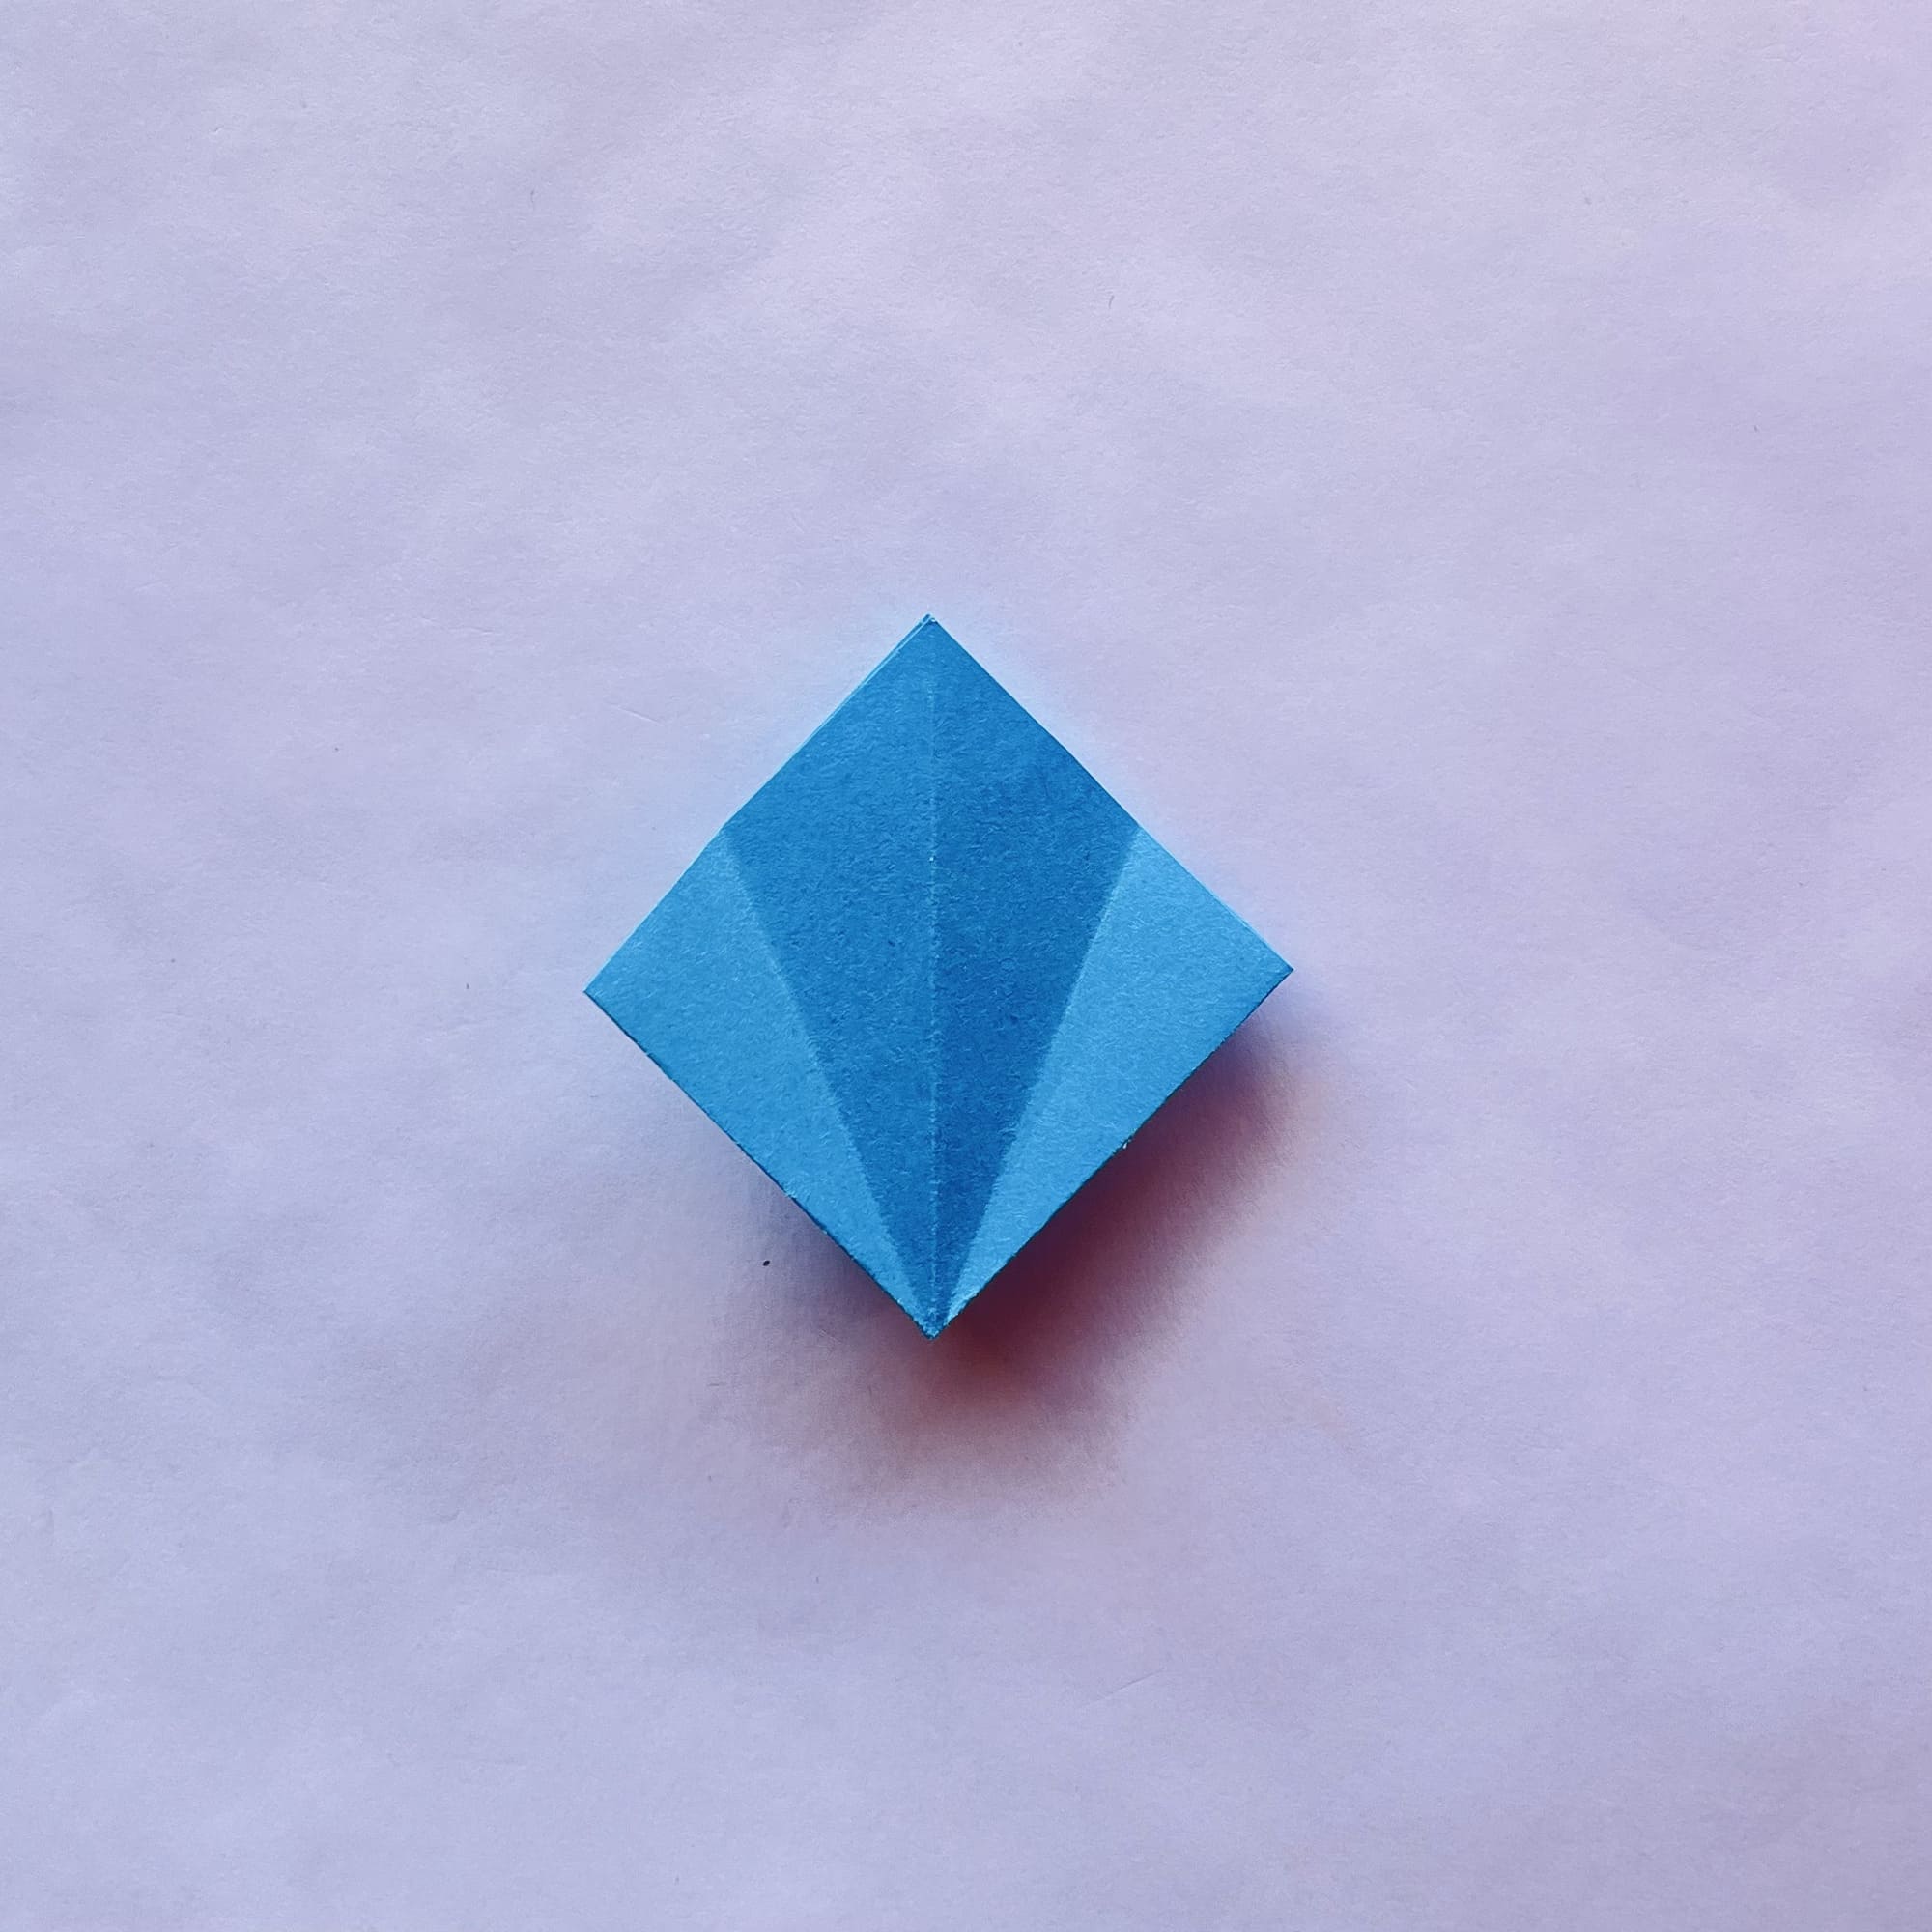
Take a blue sheet of paper 9×9 cm.

Fold it alternately along two diagonals.

Crease the folds, and unfold.
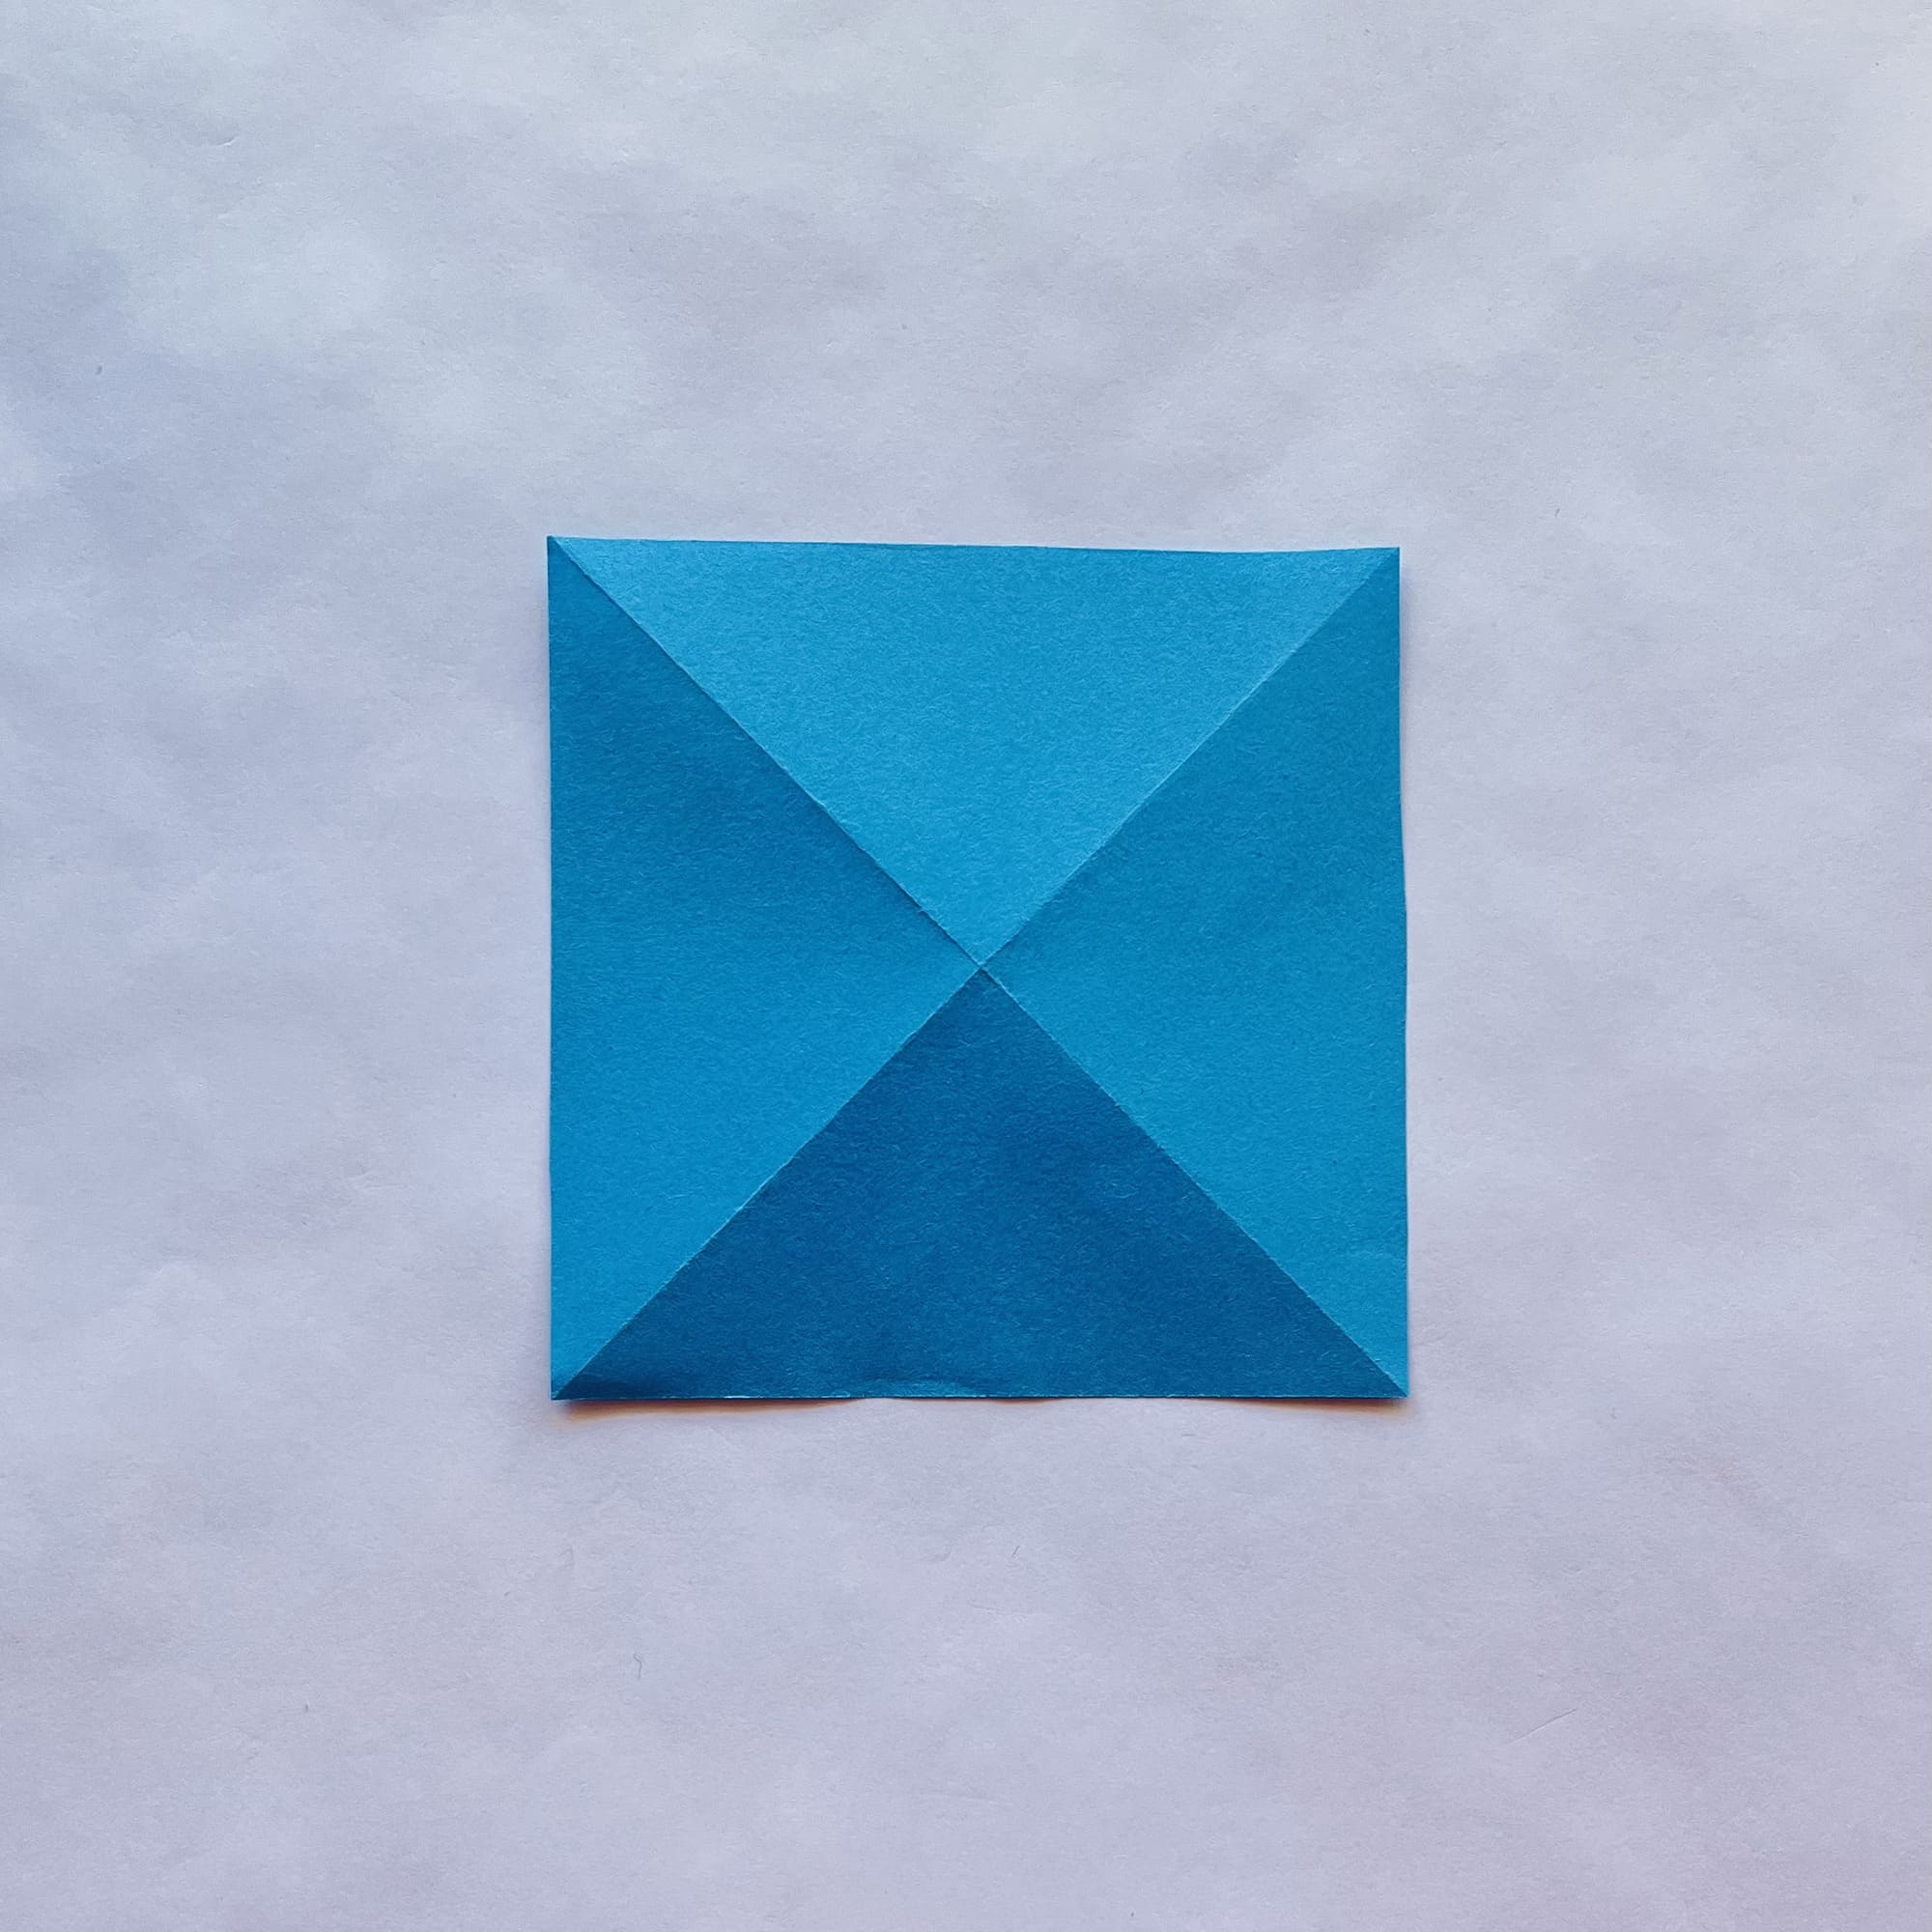
Turn the paper over so that the marked folds are convex.
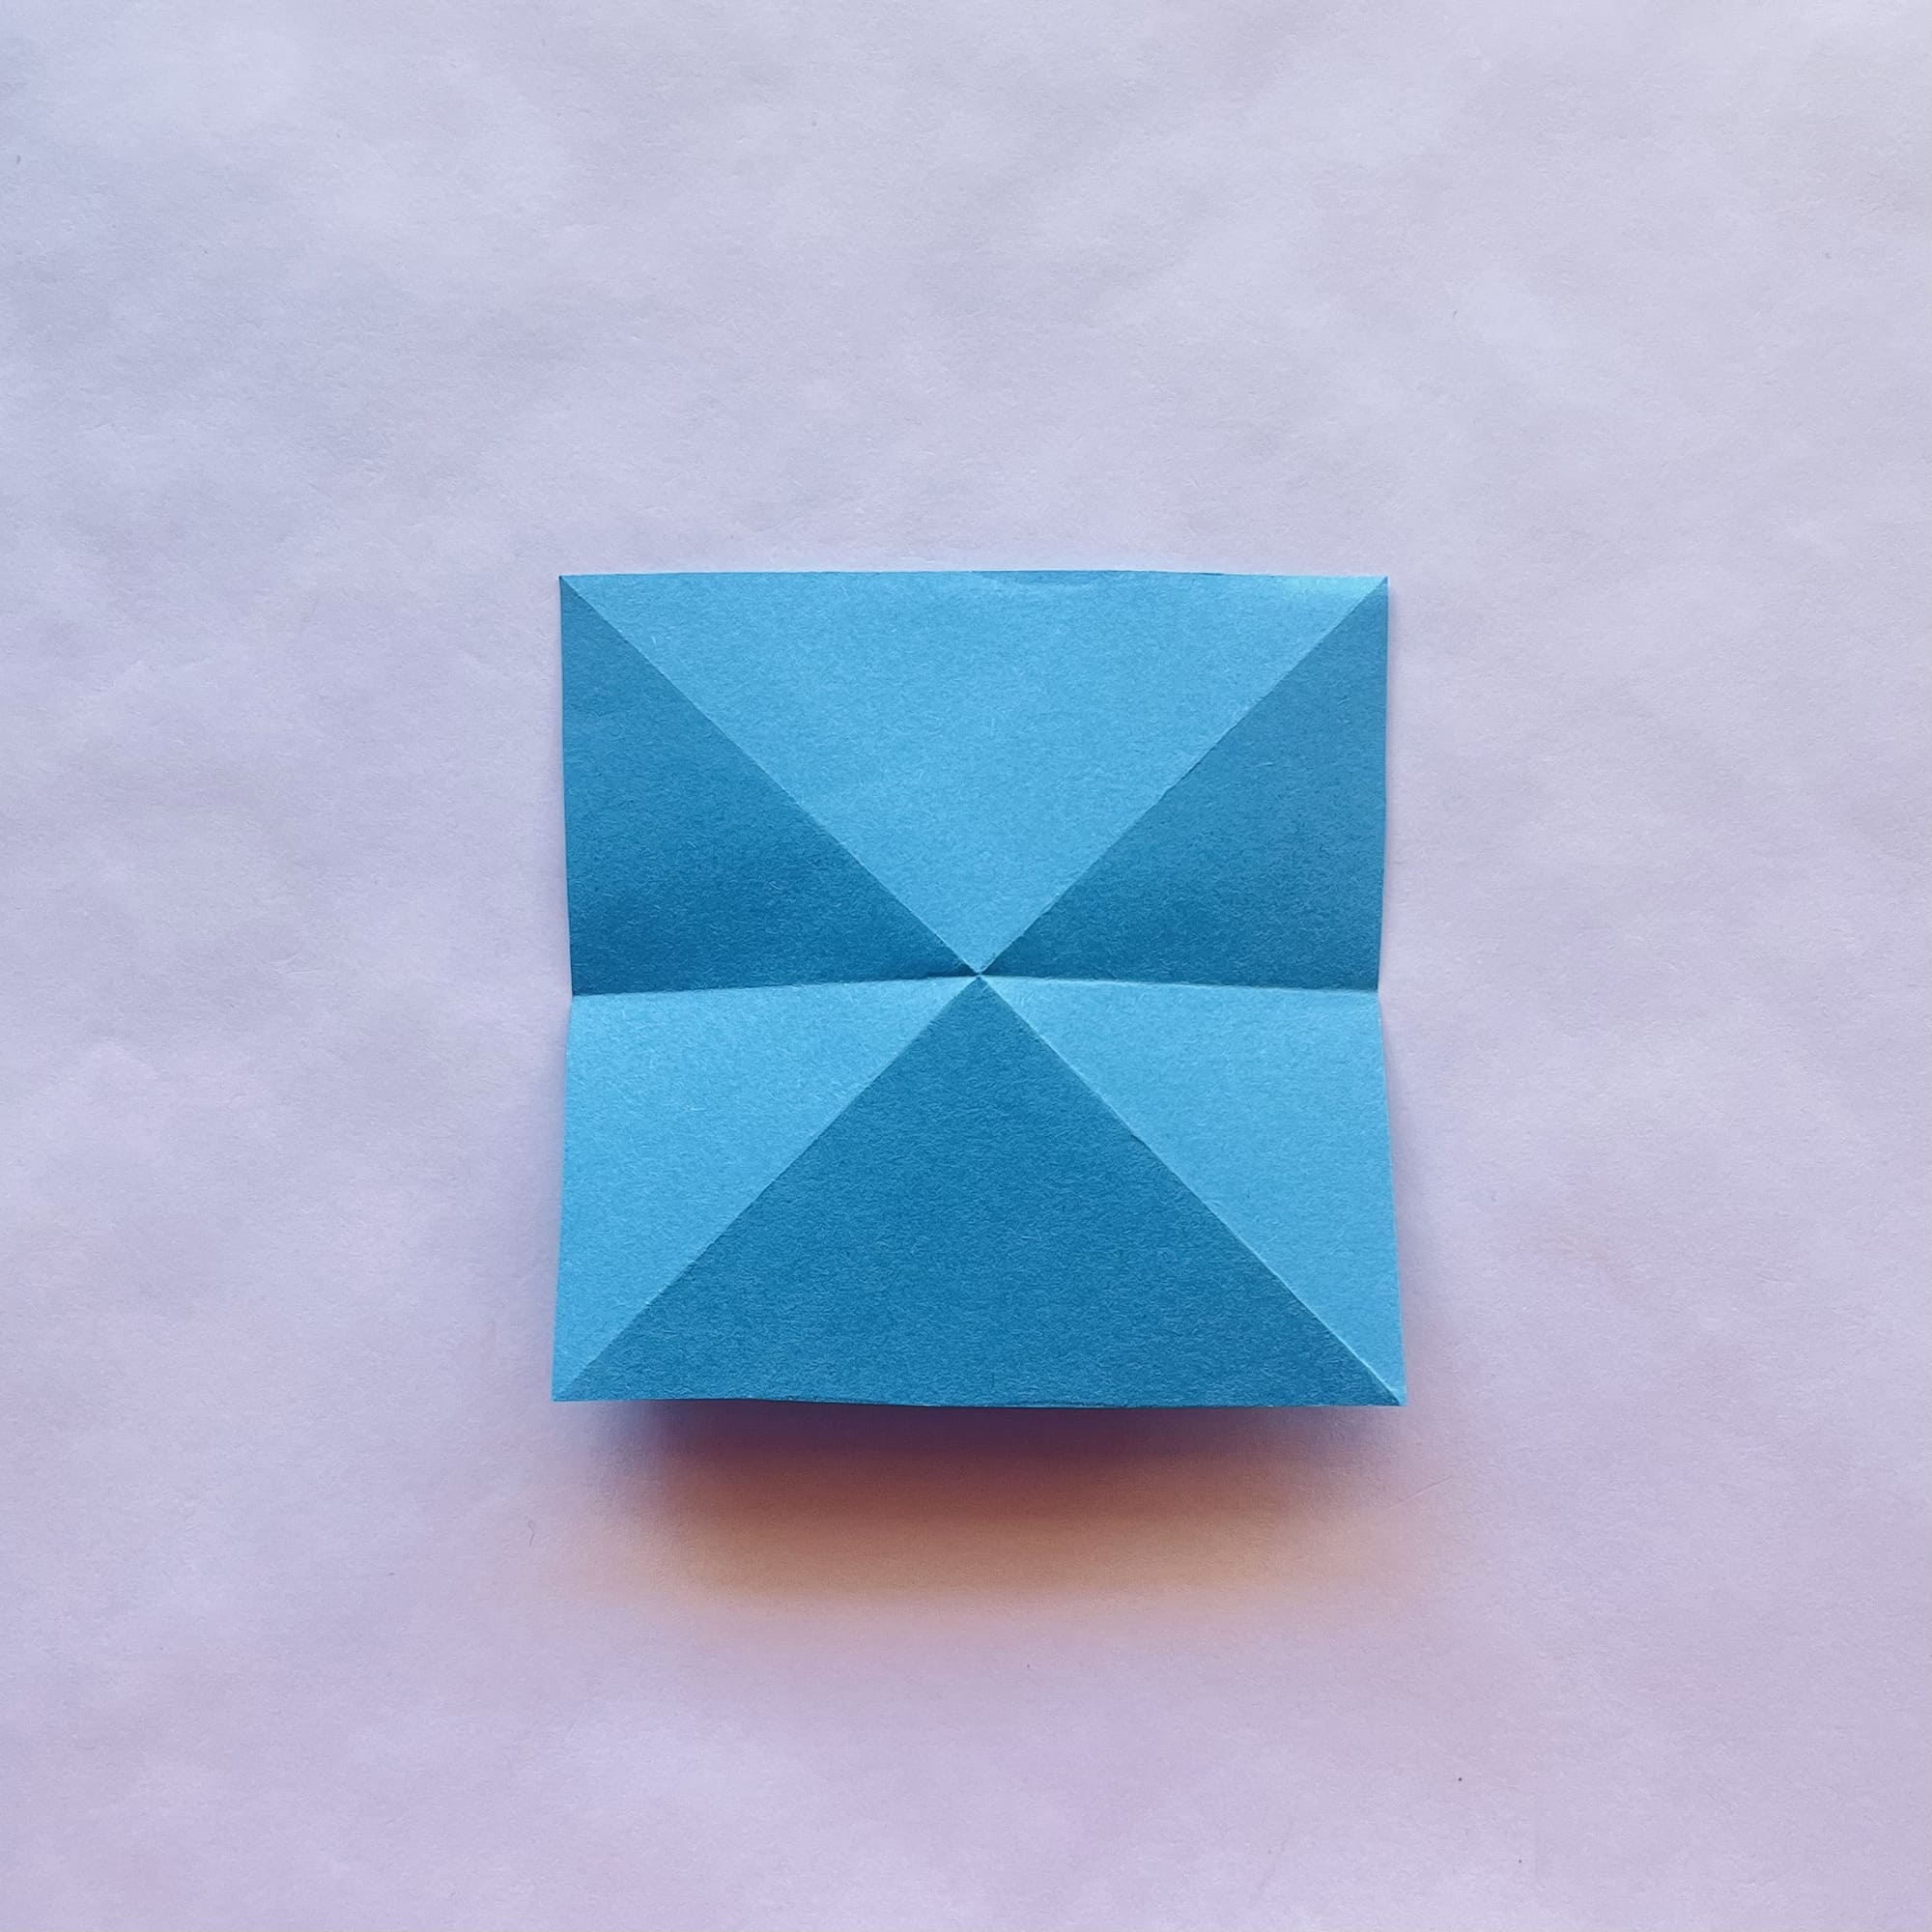
Fold the sheet of paper alternately along two axes: horizontal and vertical.

Carefully crease the folds and unfold.
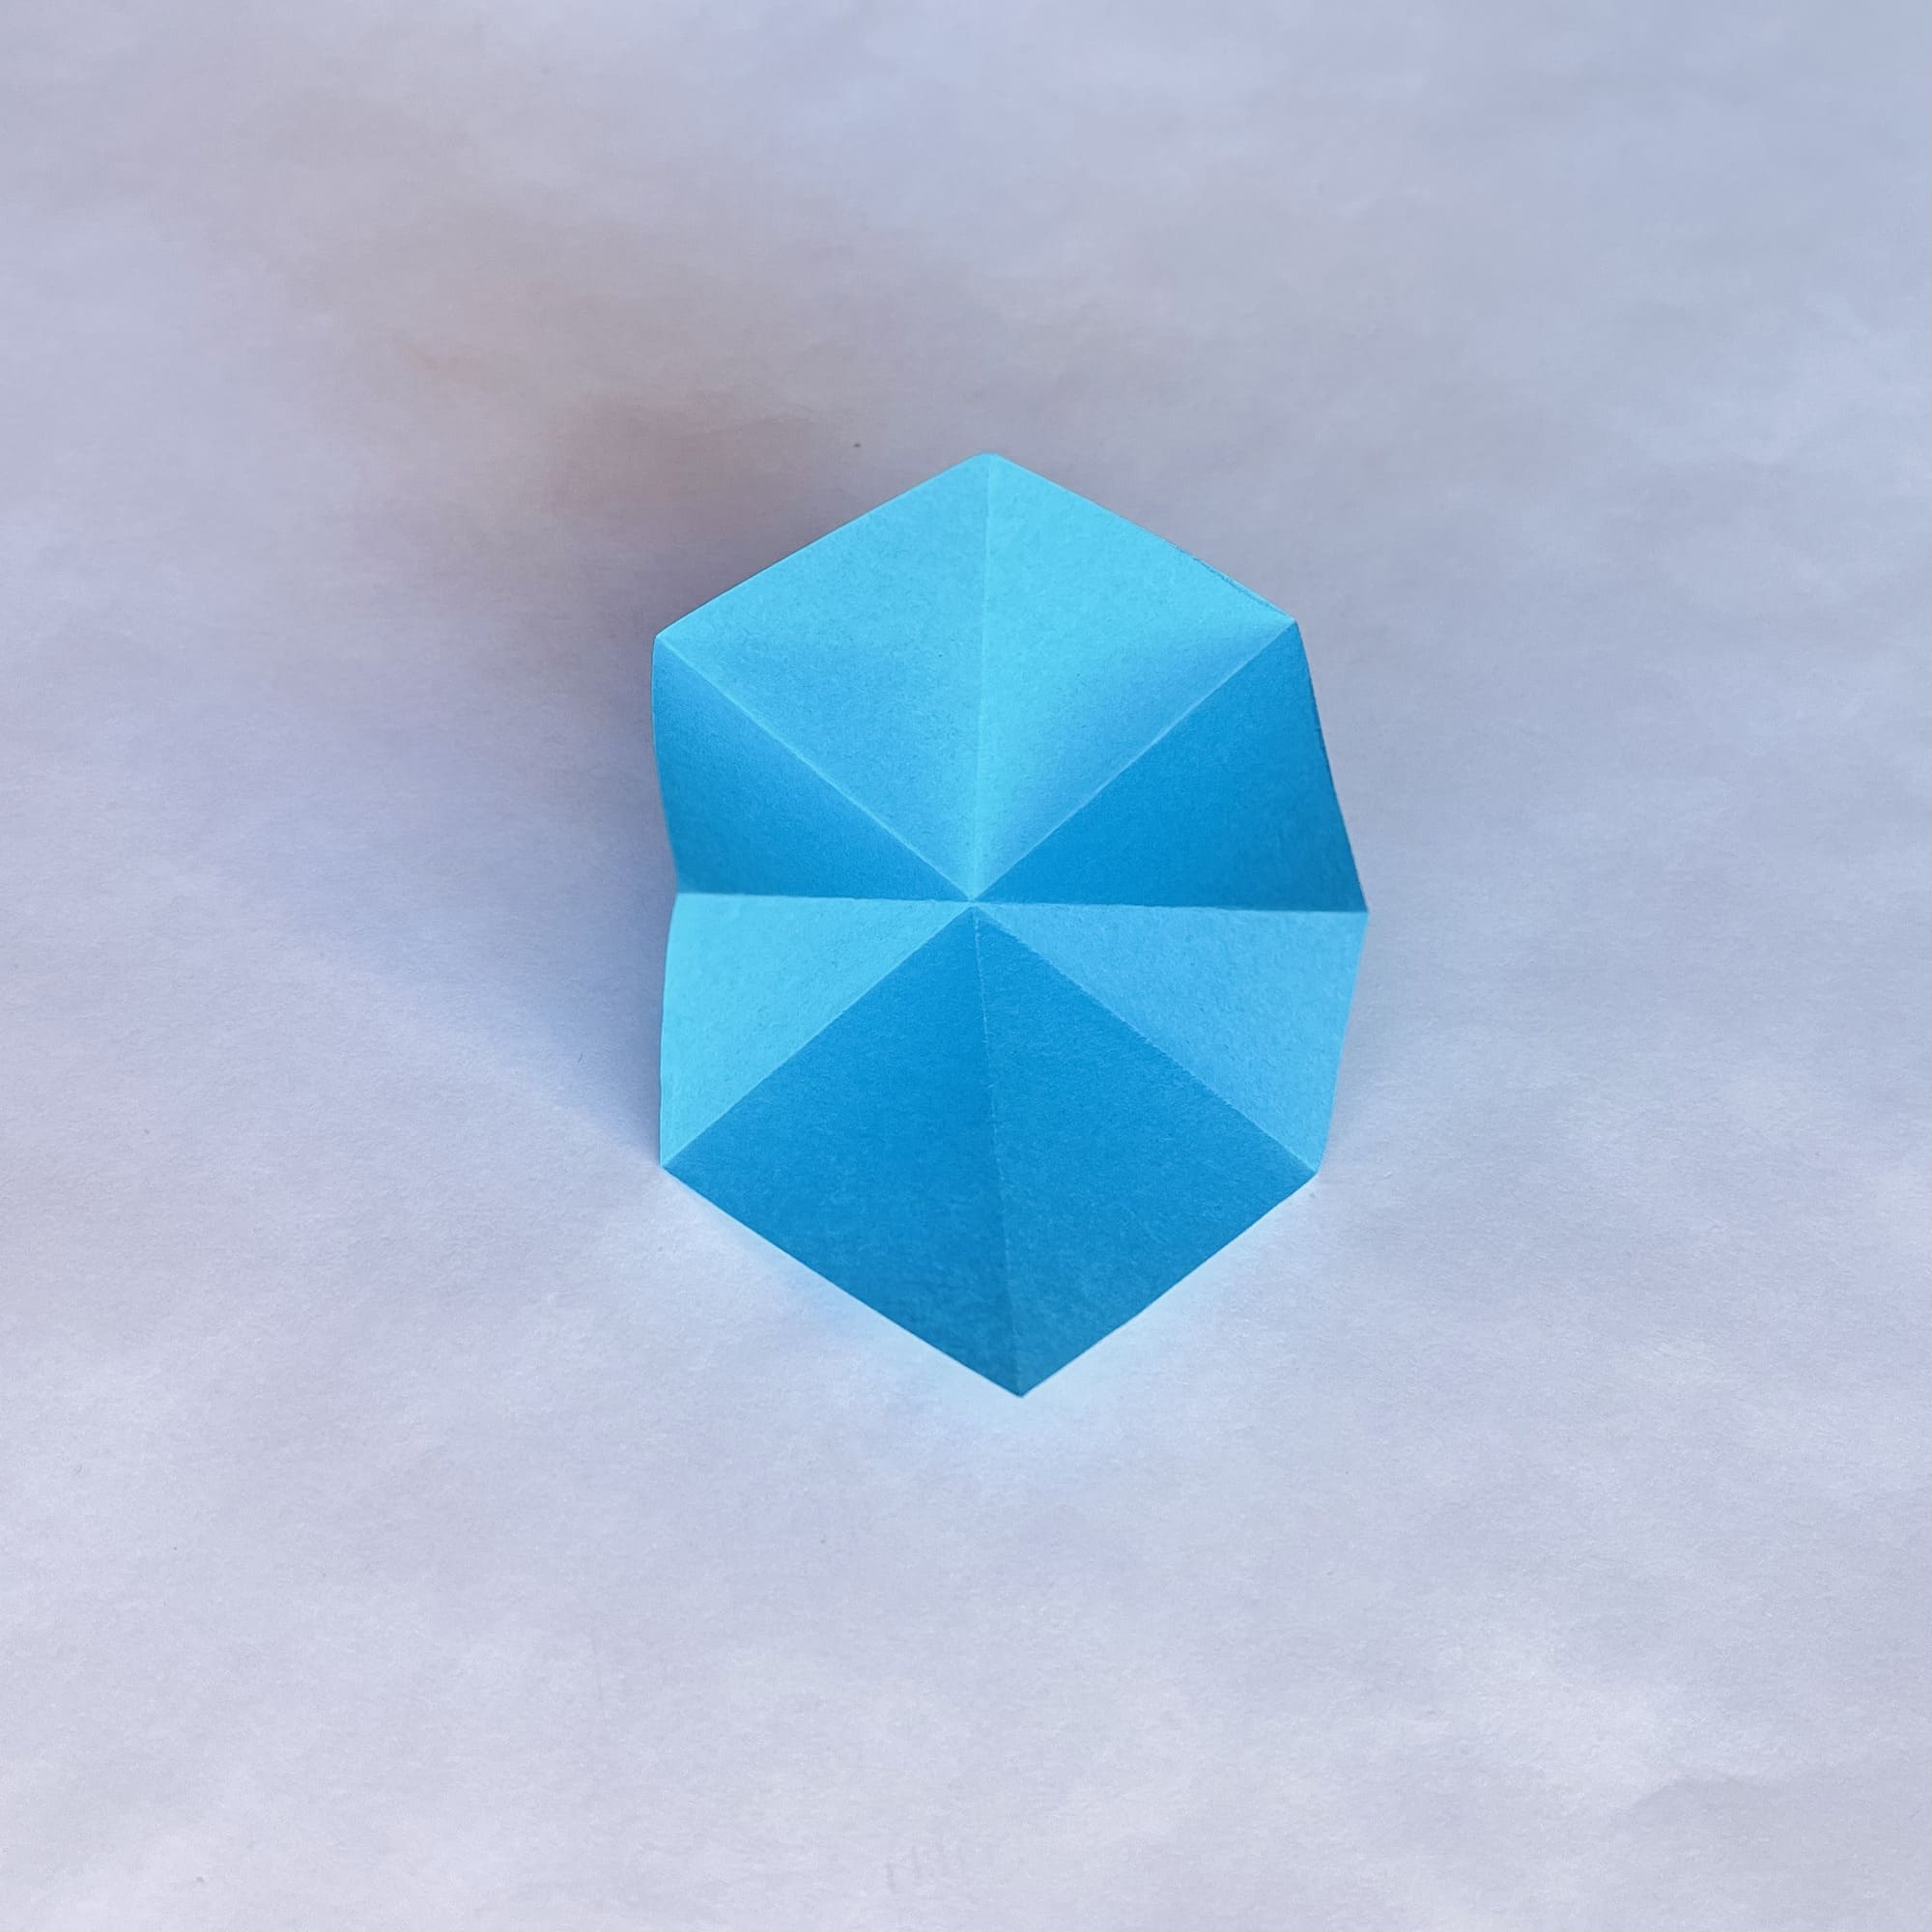
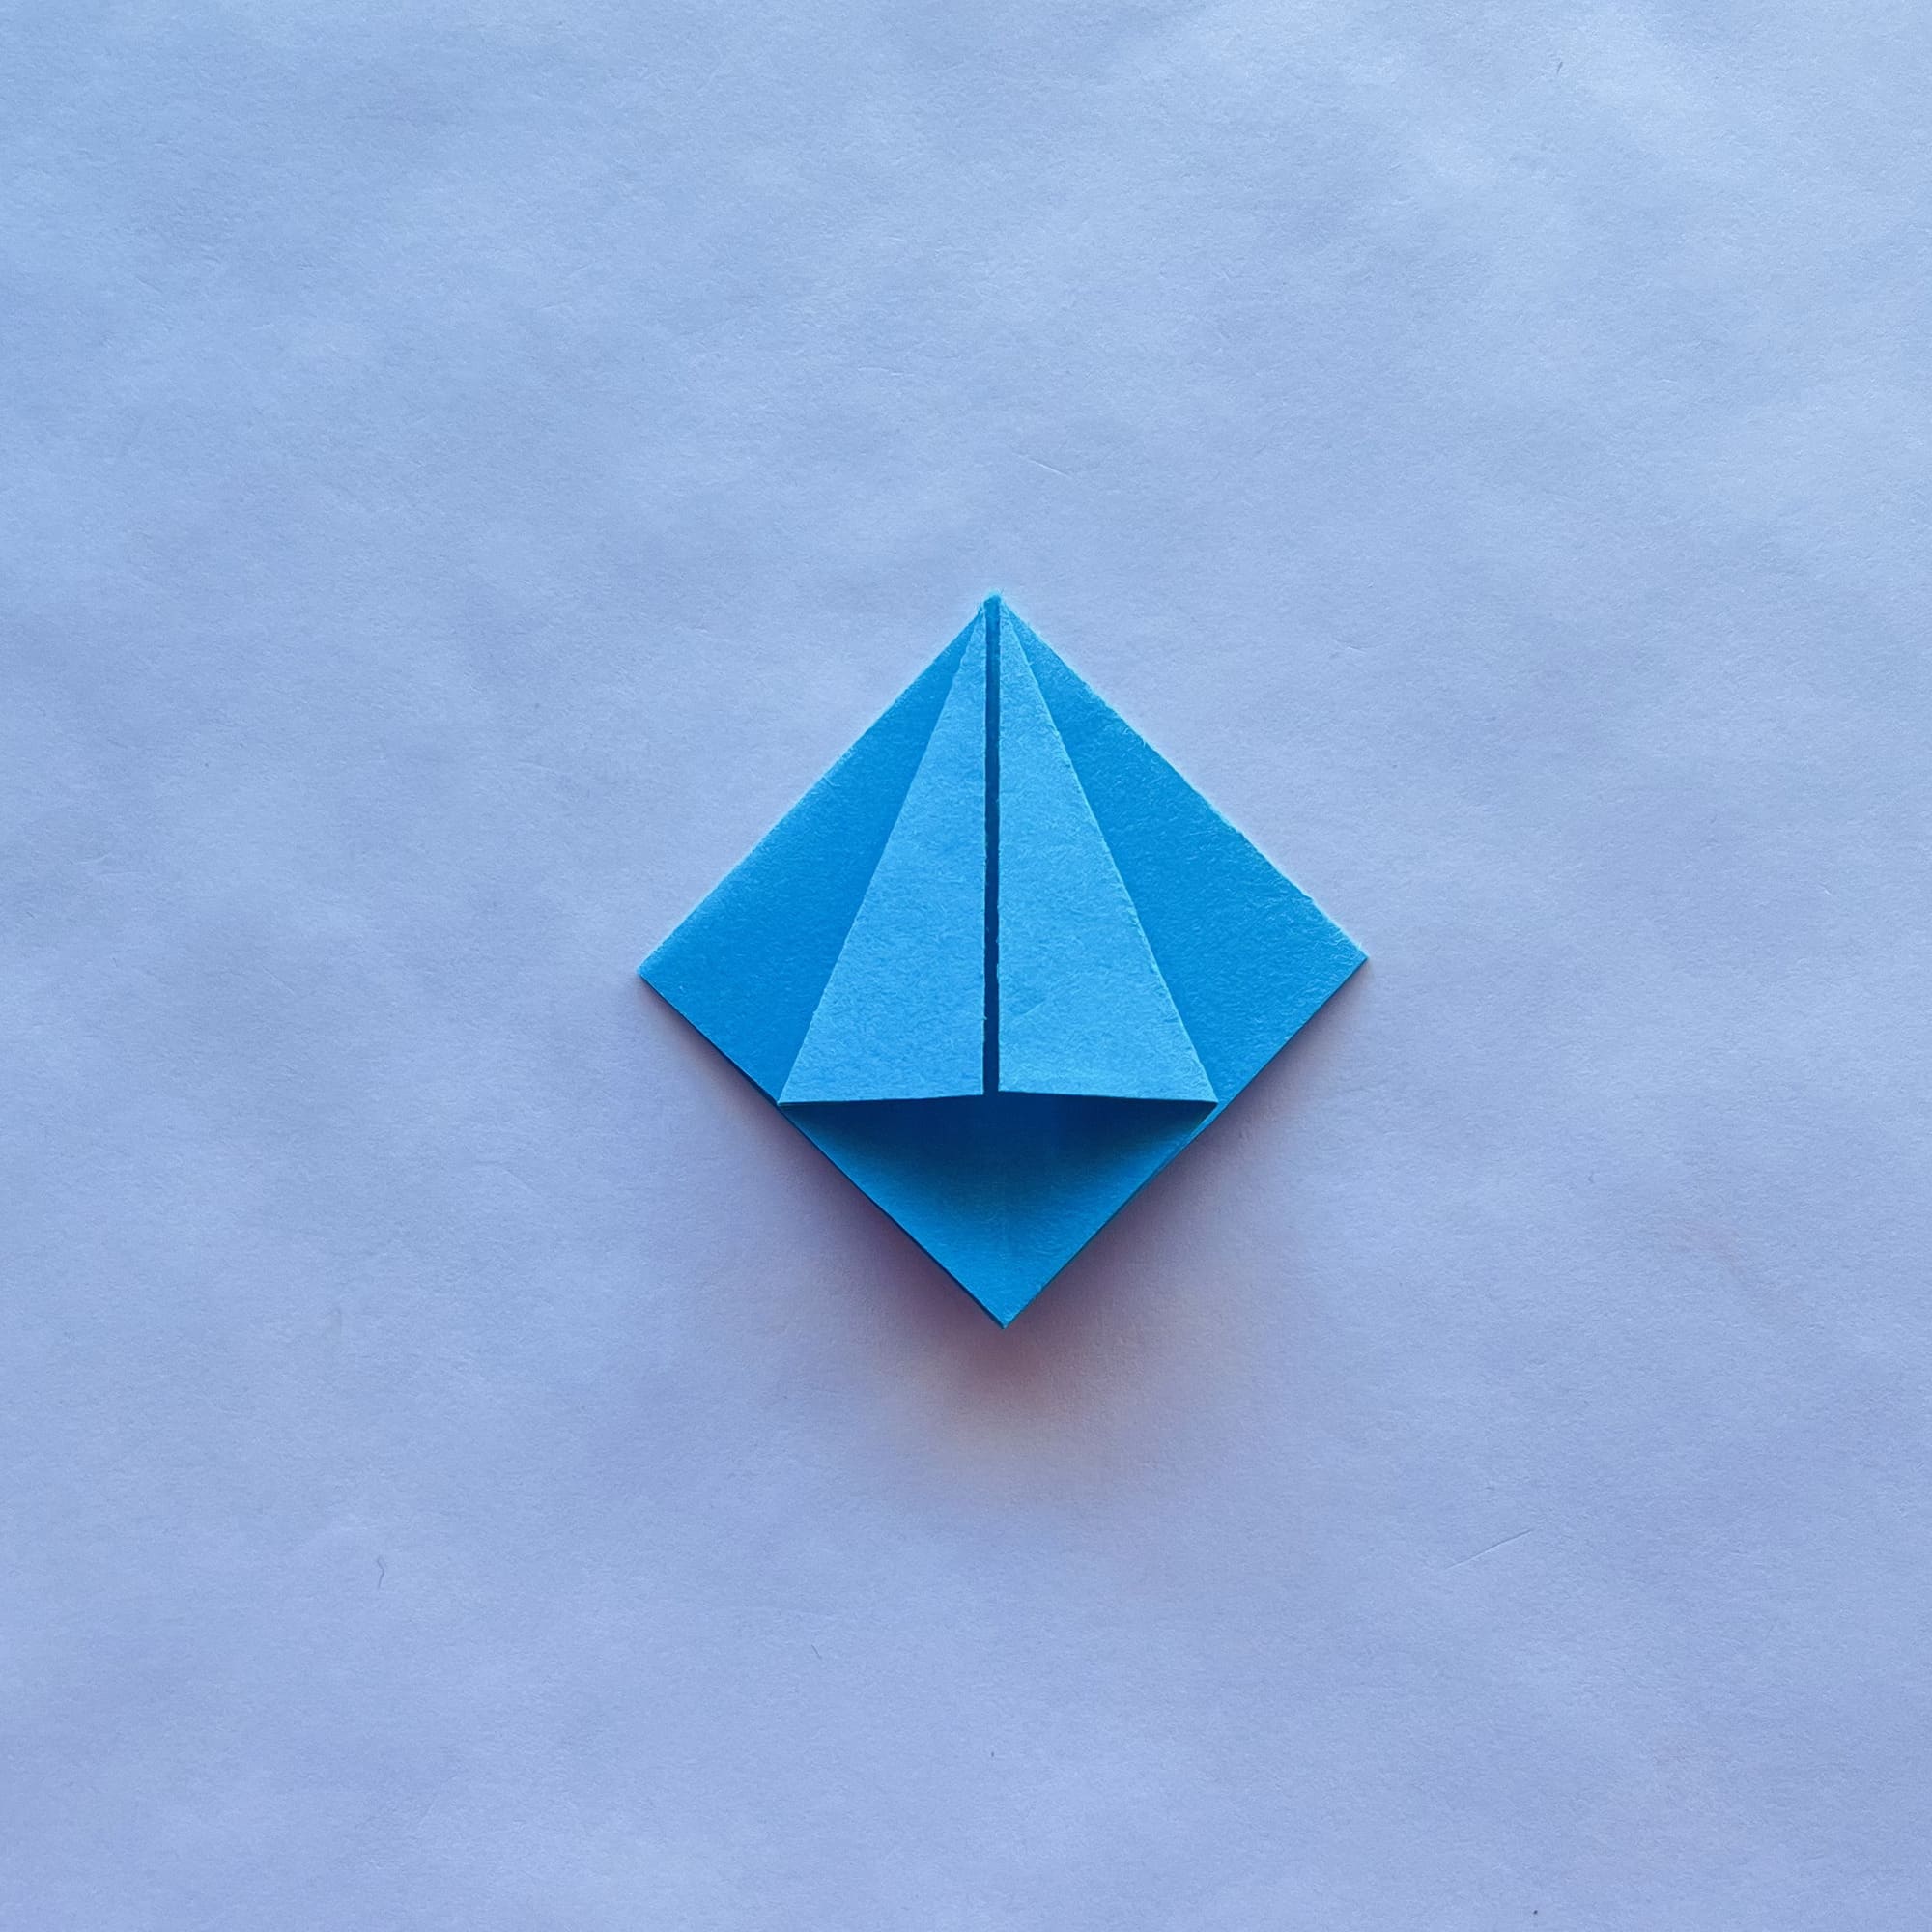
Focusing on the marked fold lines, fold the paper into a square, as shown in the photo.
Now, you need to fold the top pieces towards the center line, touching only the top layer.
Turn the paper over and fold the top parts to the center in the same way.
After carefully creasing all the folds, unfold them on both sides.
Next, fold the lower parts of the figure towards the center line – again only the top layer.
Turn the paper over and fold the bottom parts on this side as well.
Crease the folds and unfold.

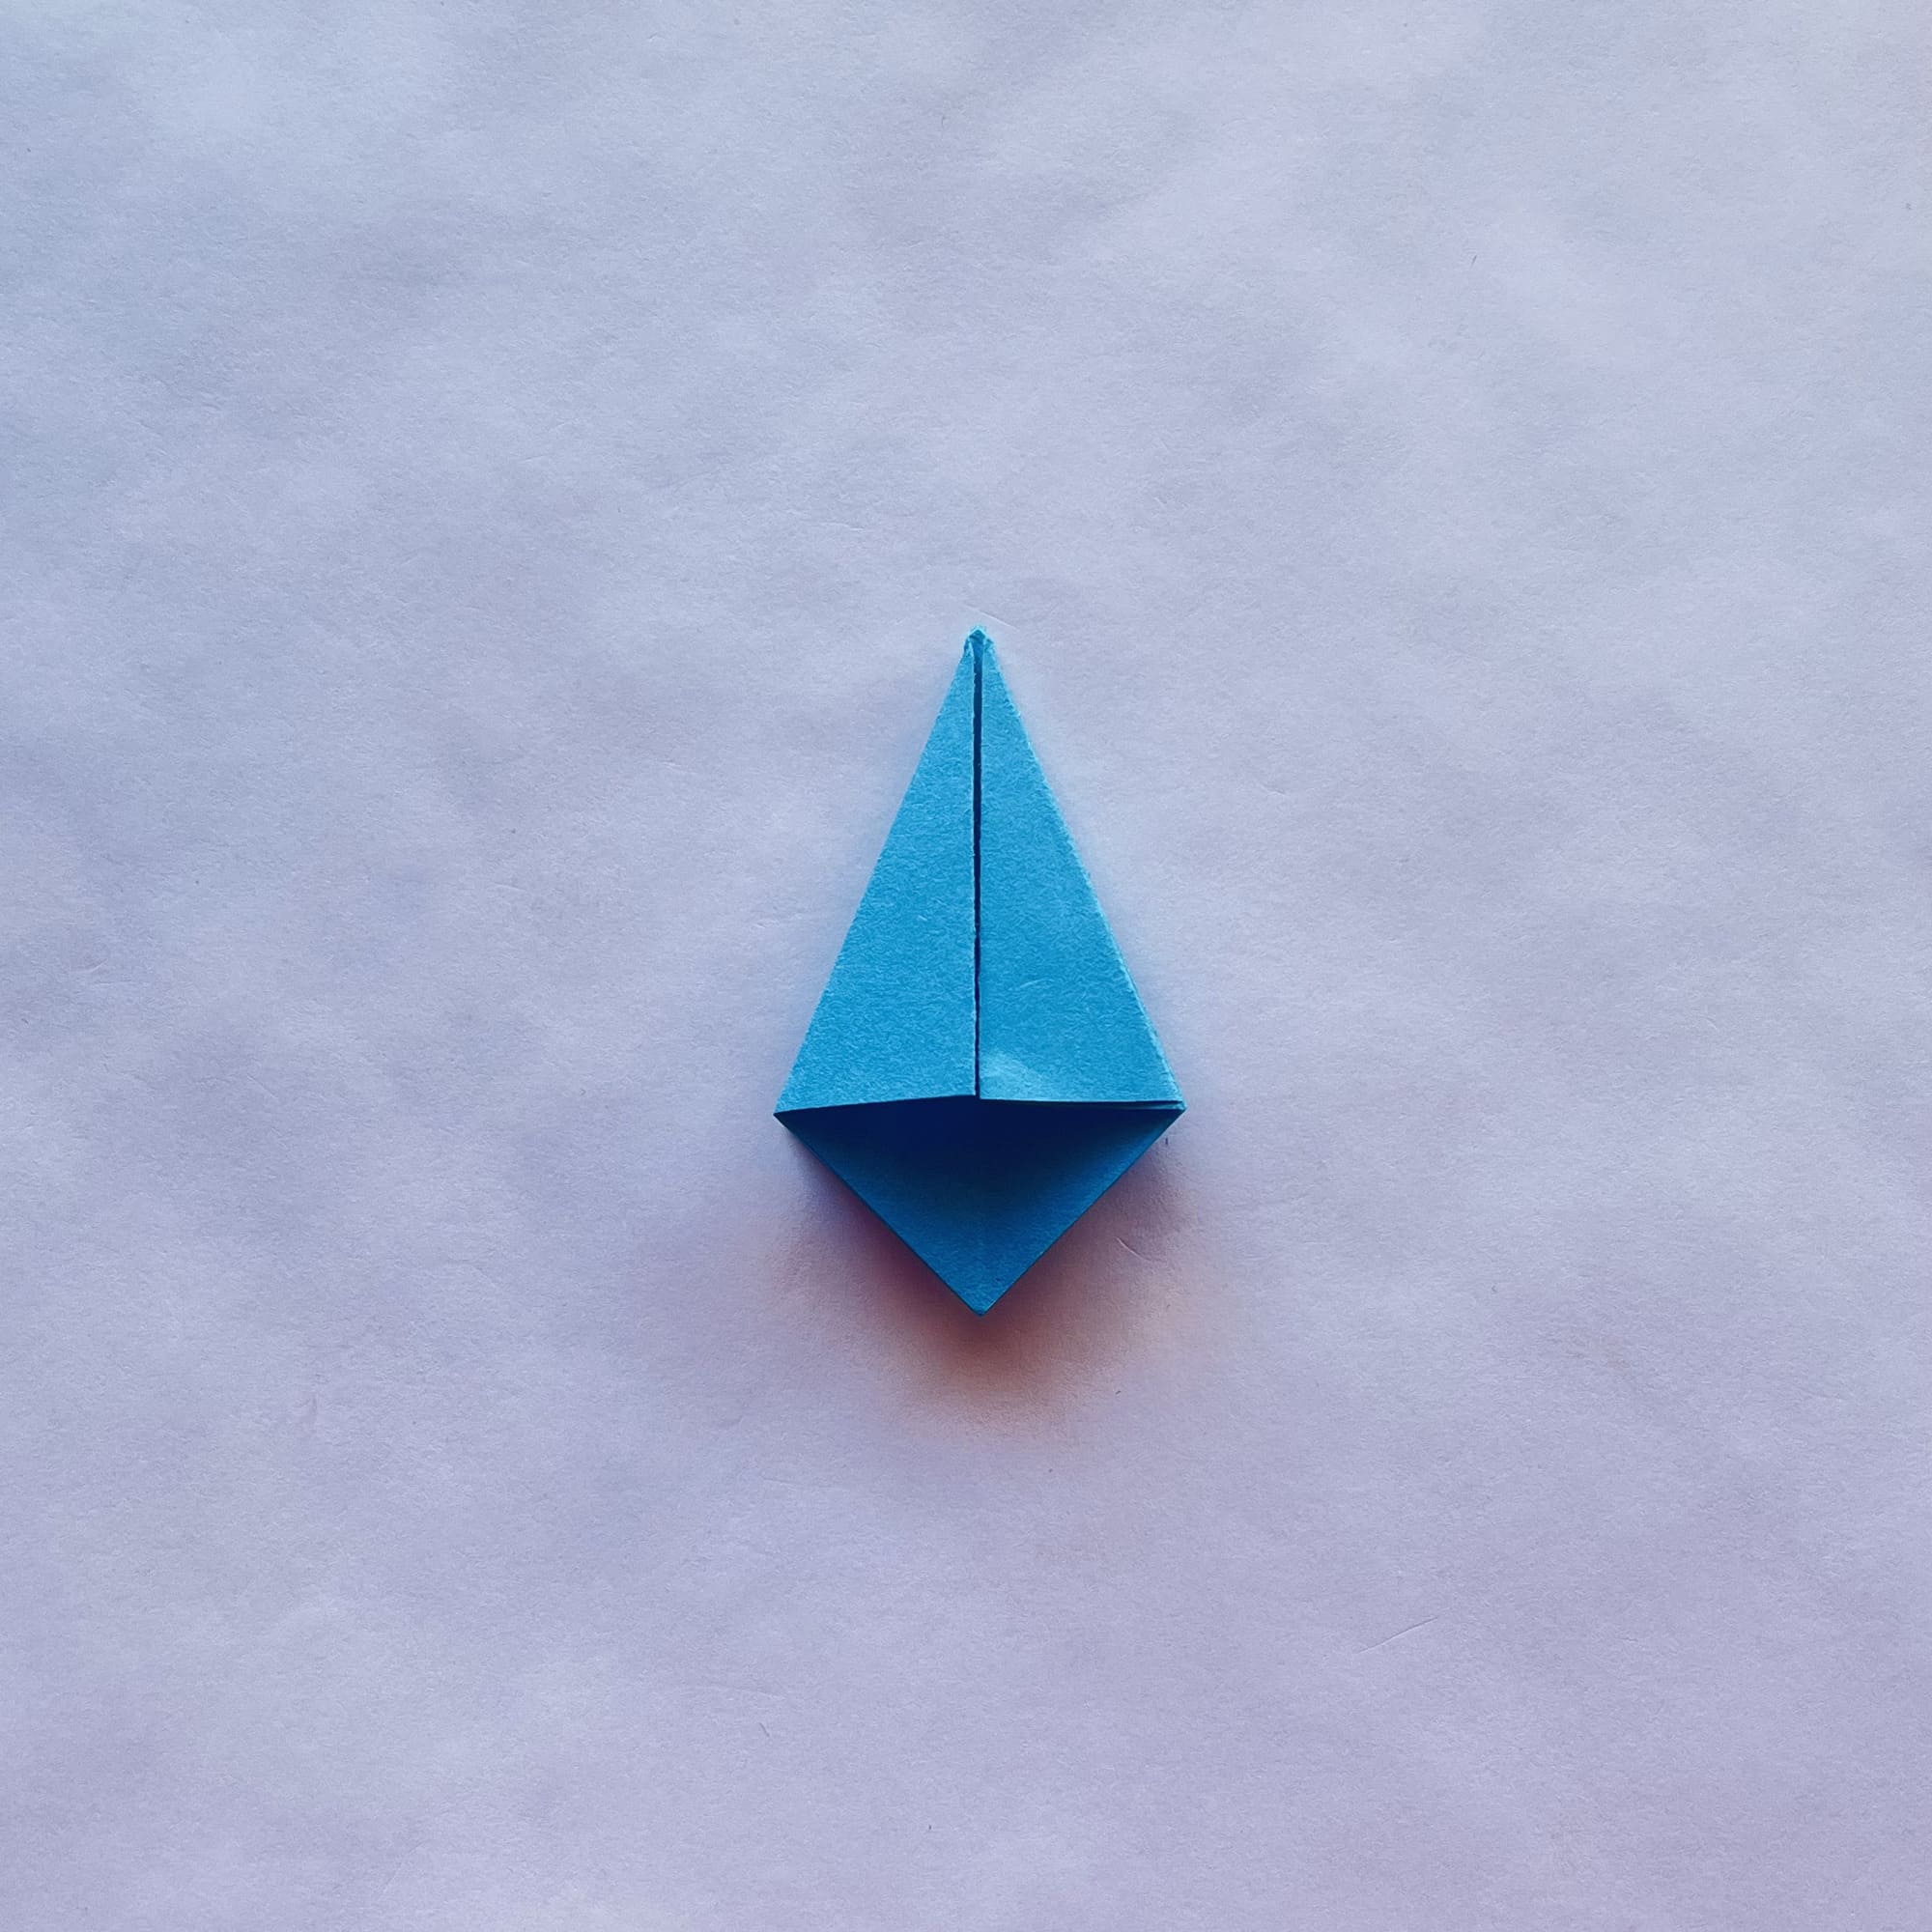
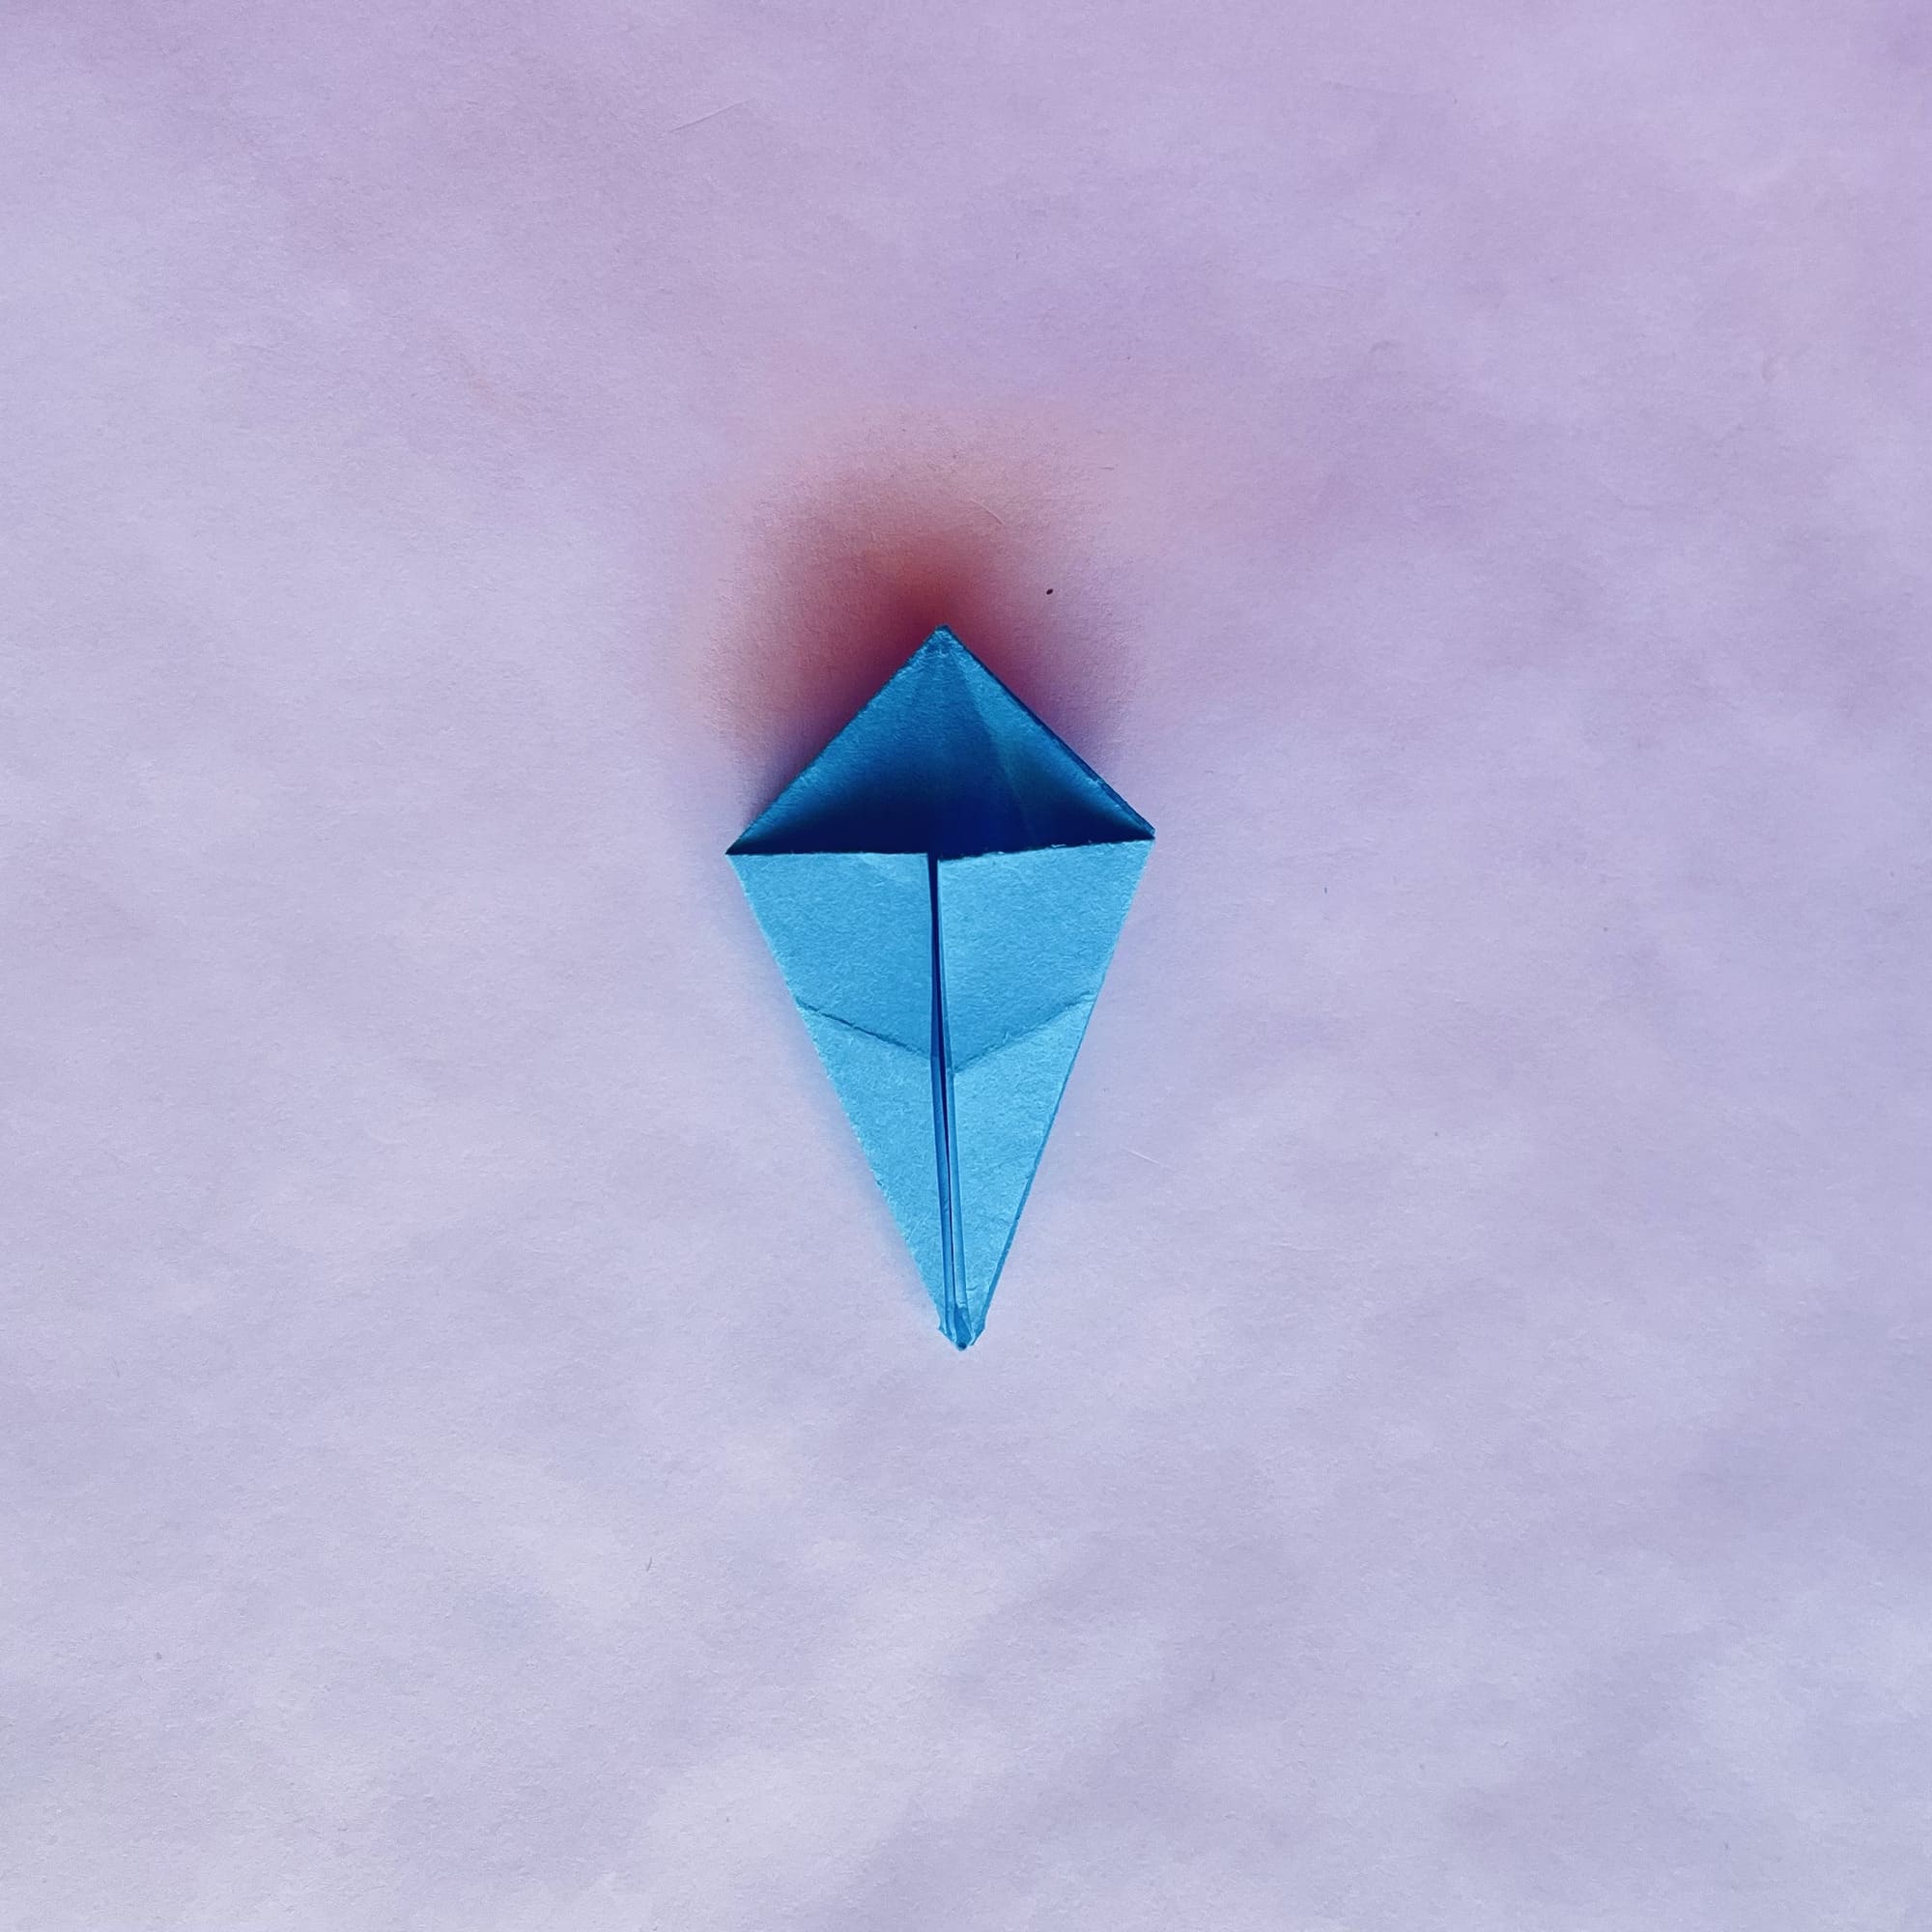
Using the fold lines as a guide, make a flattening fold using one layer as shown in the photo.

“Flip” the resulting fold and make the same on the next layer.
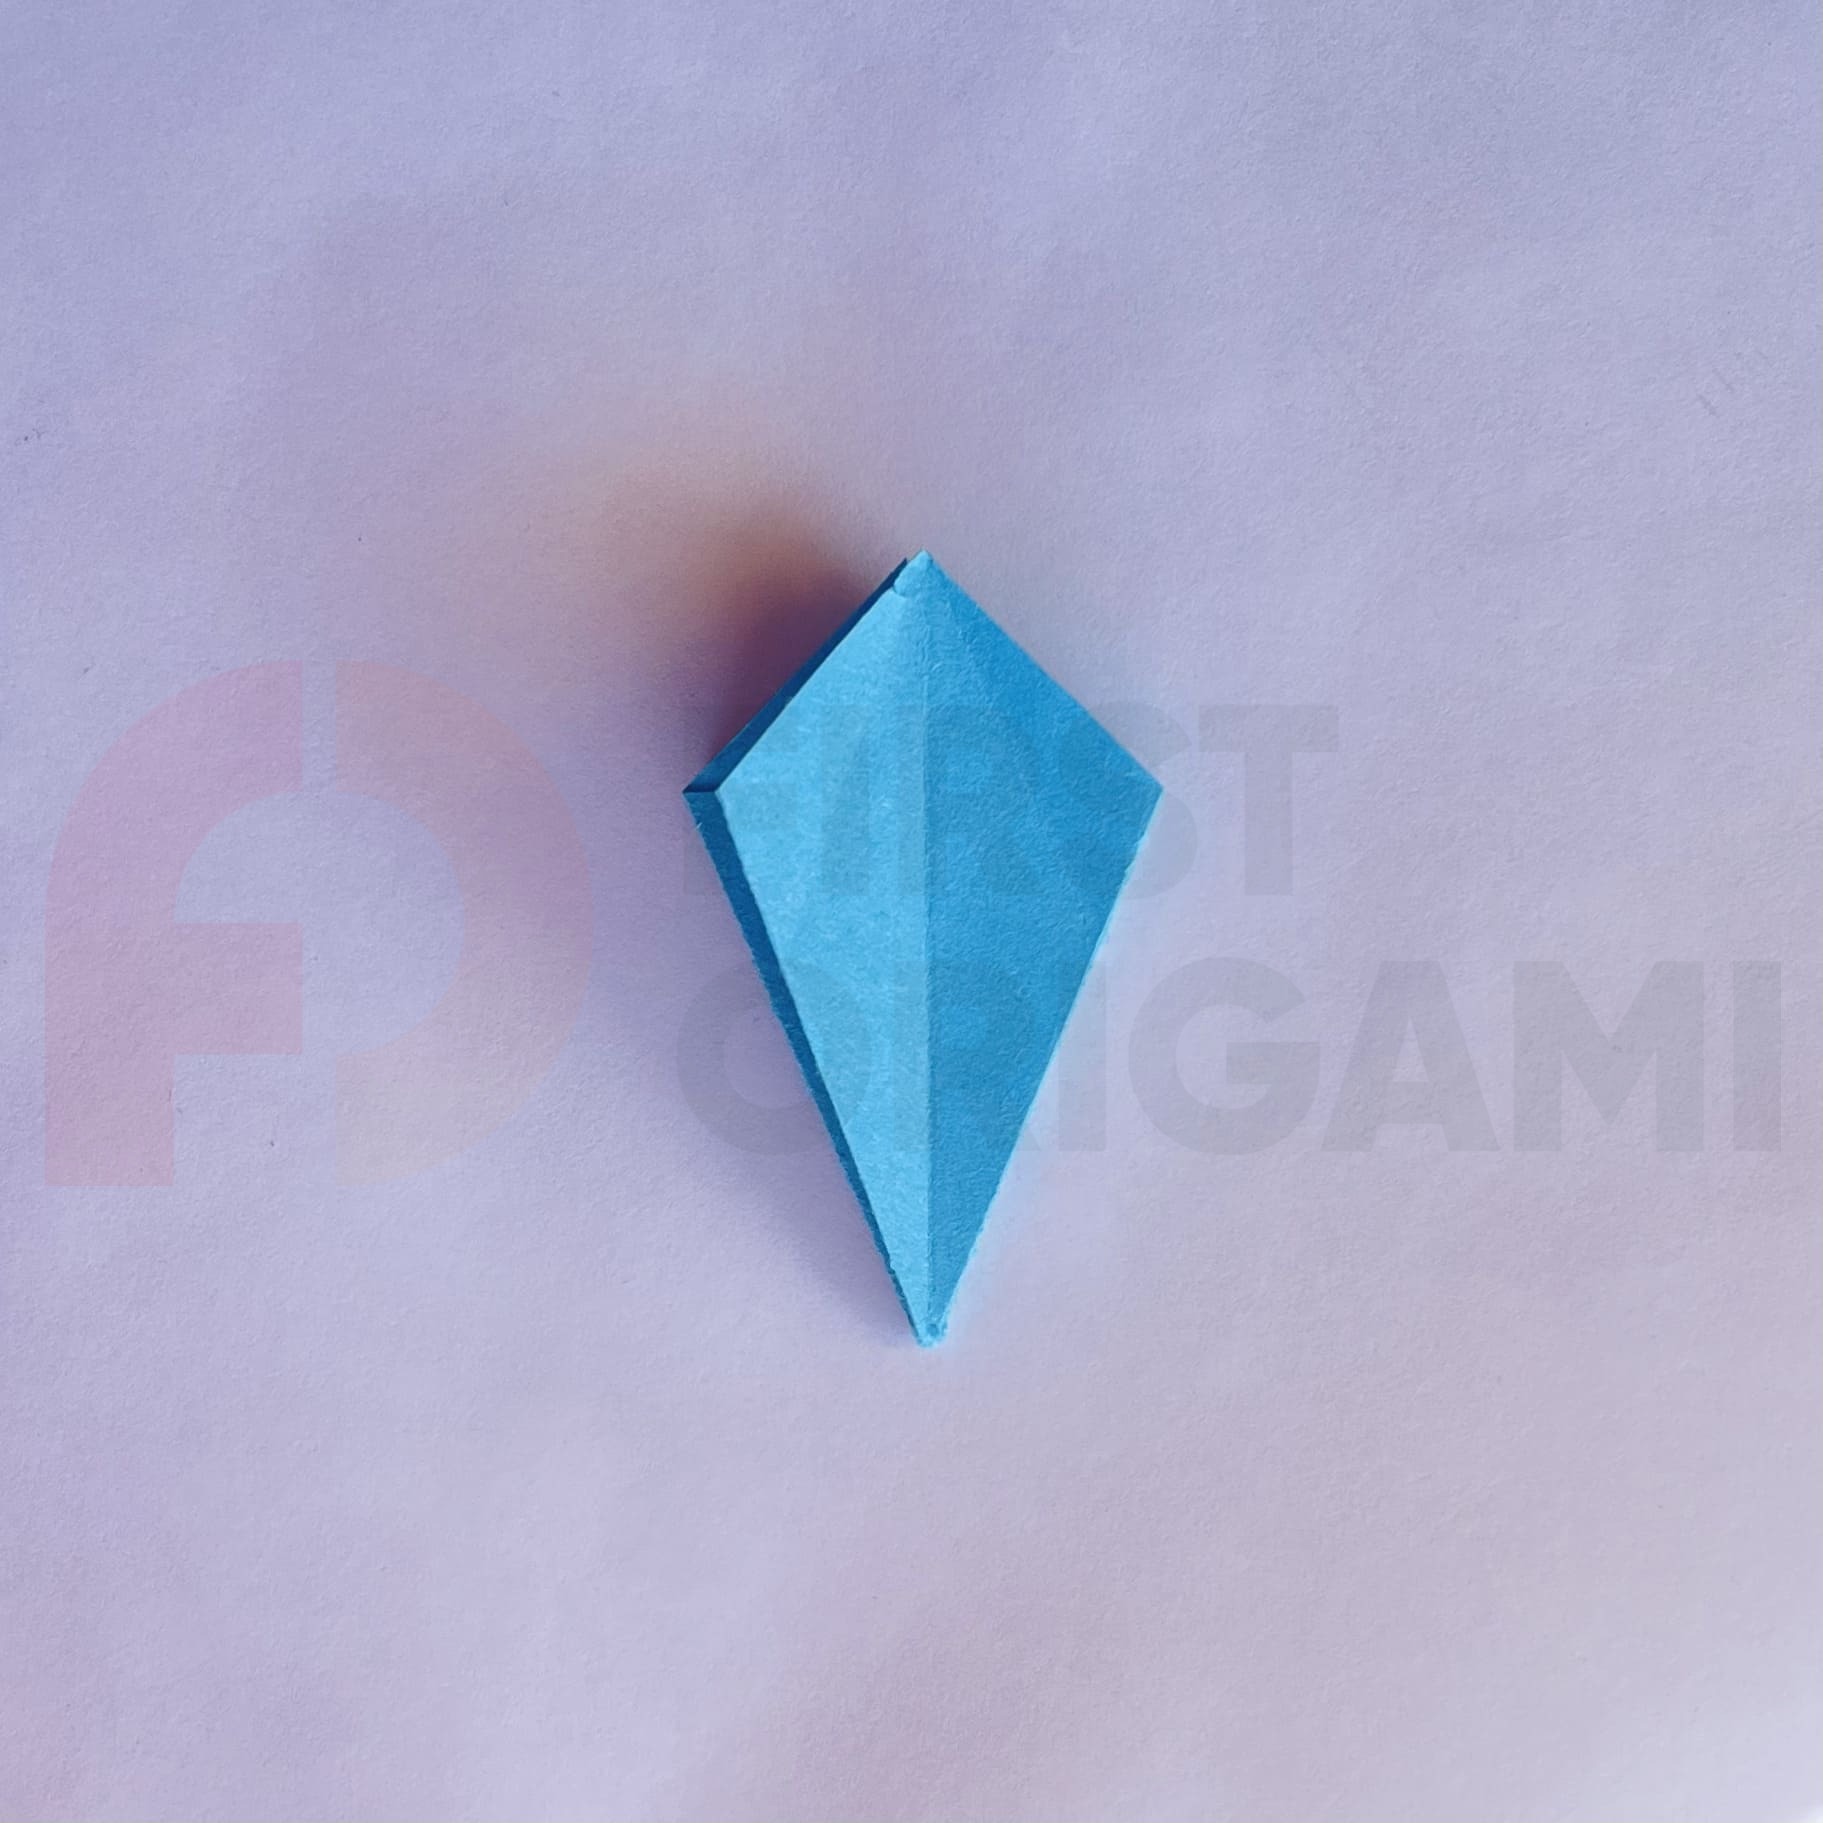
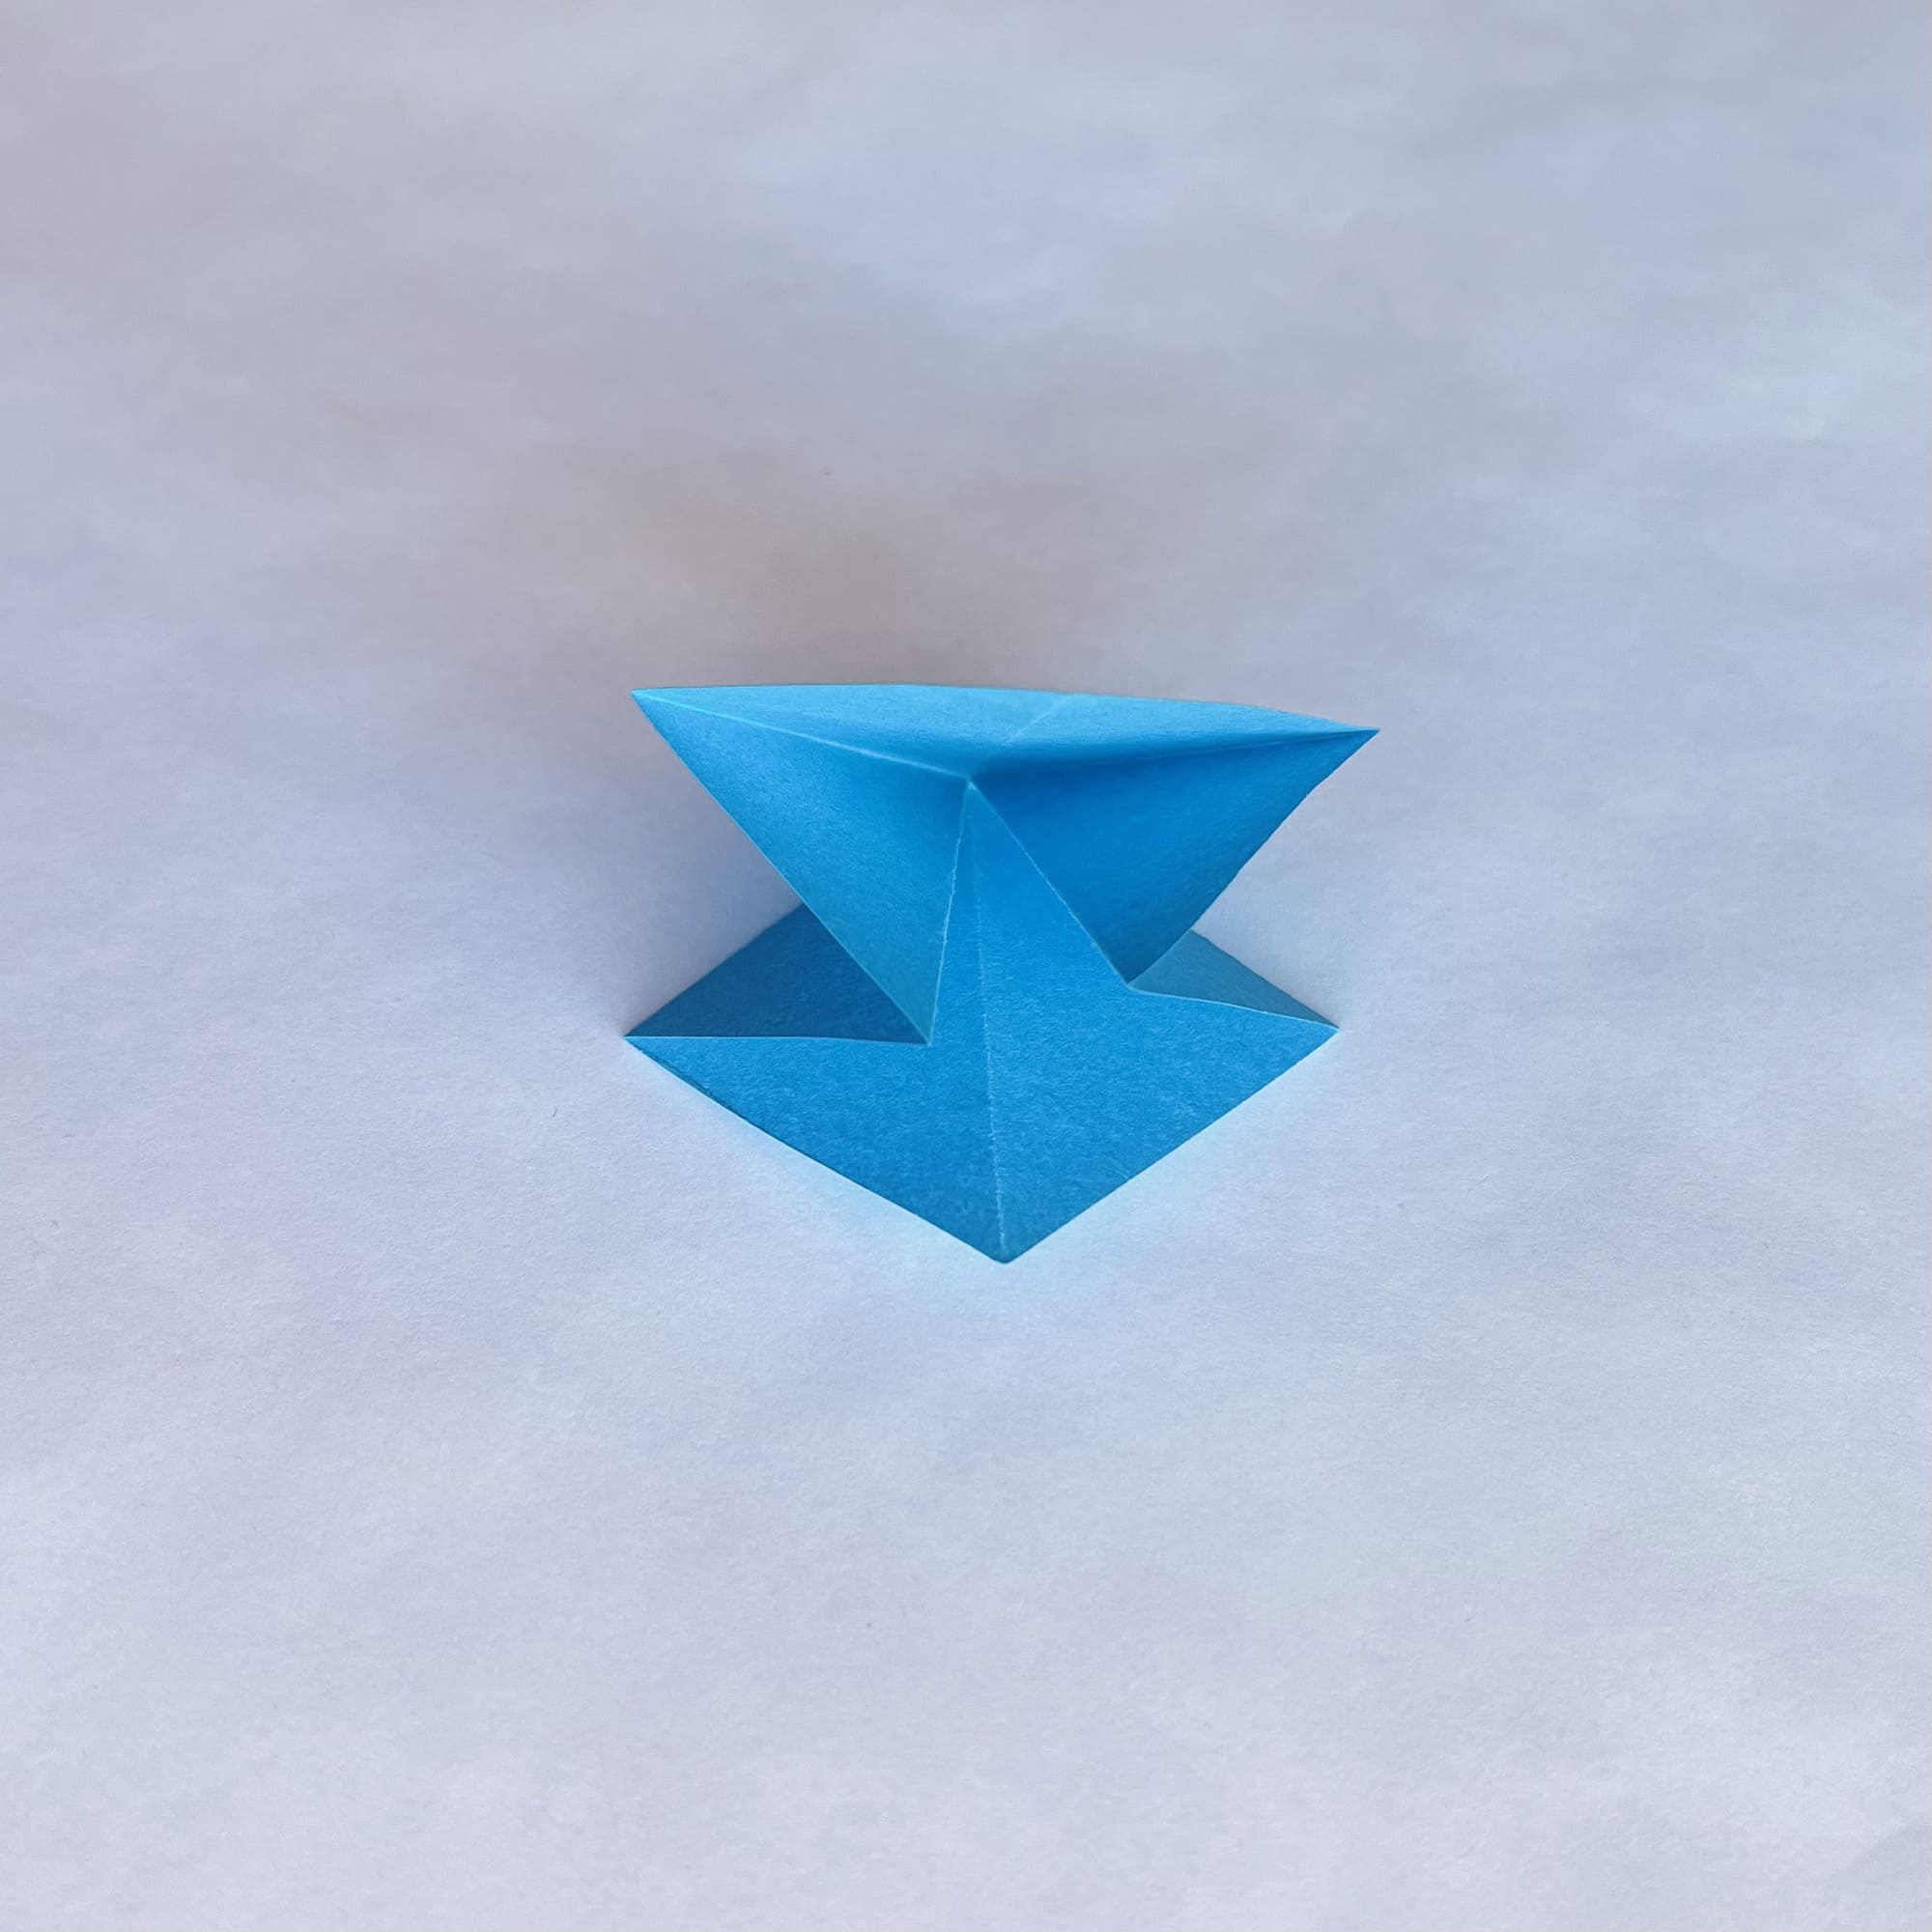
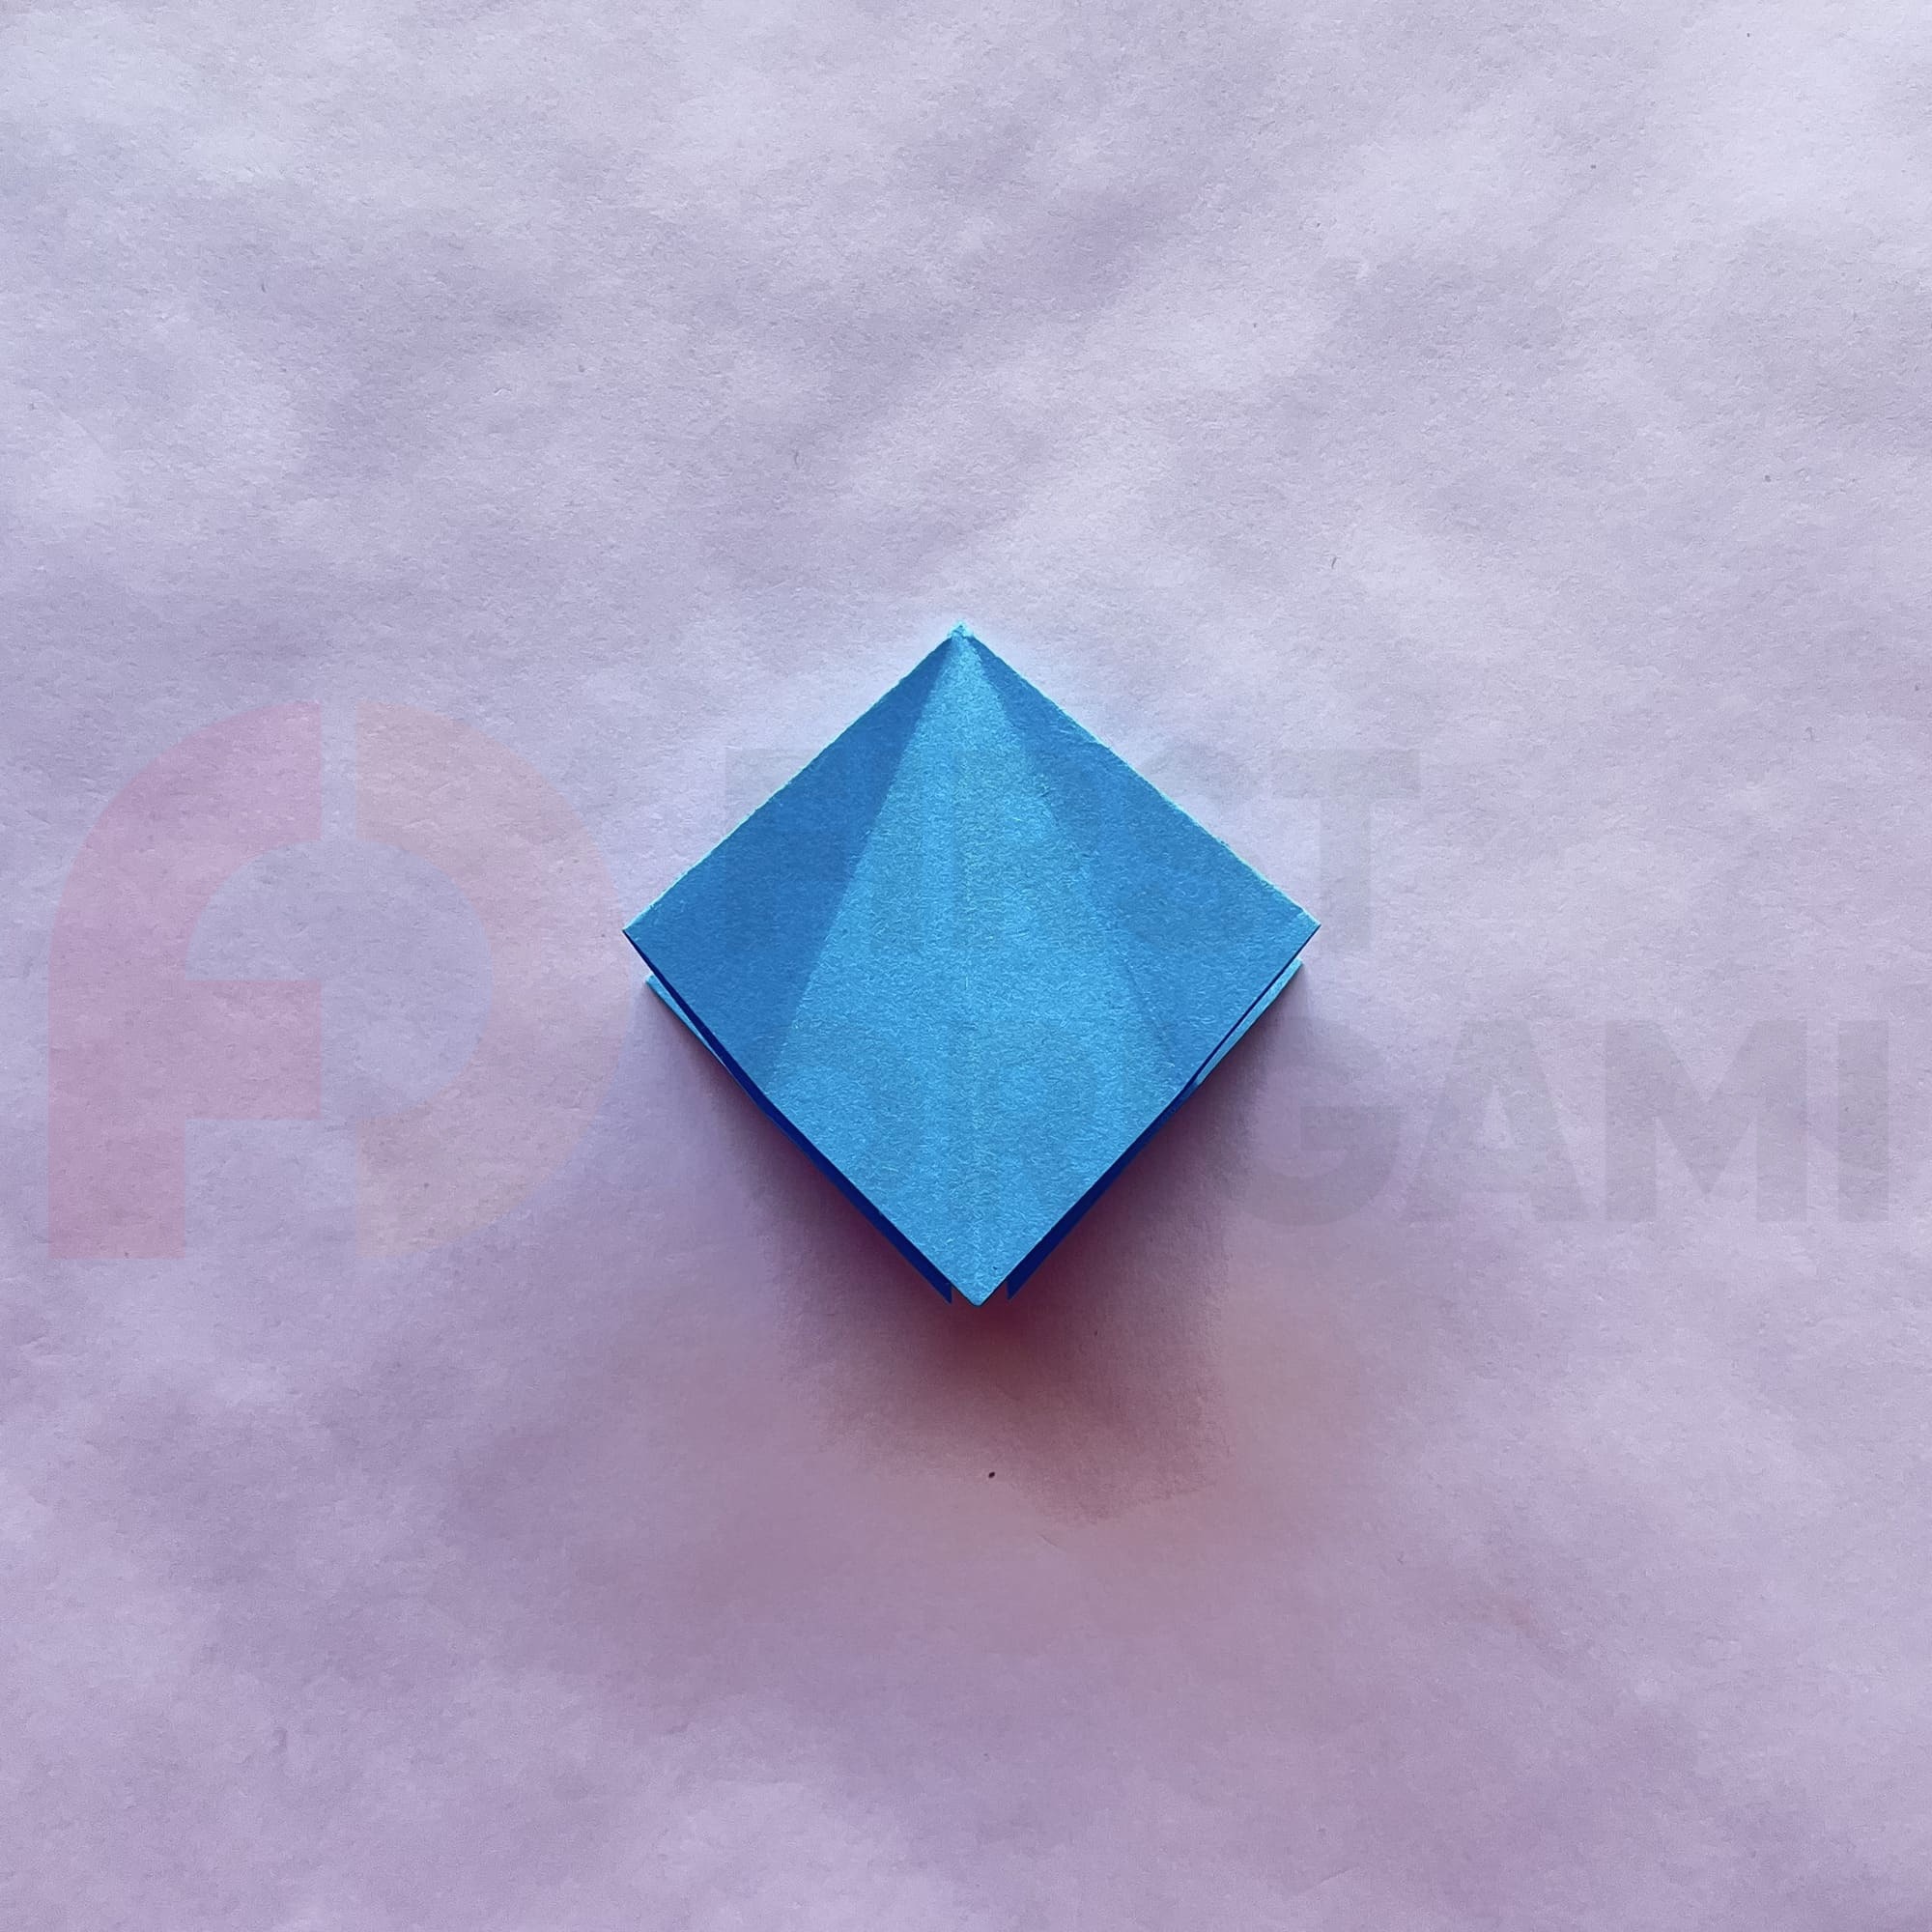
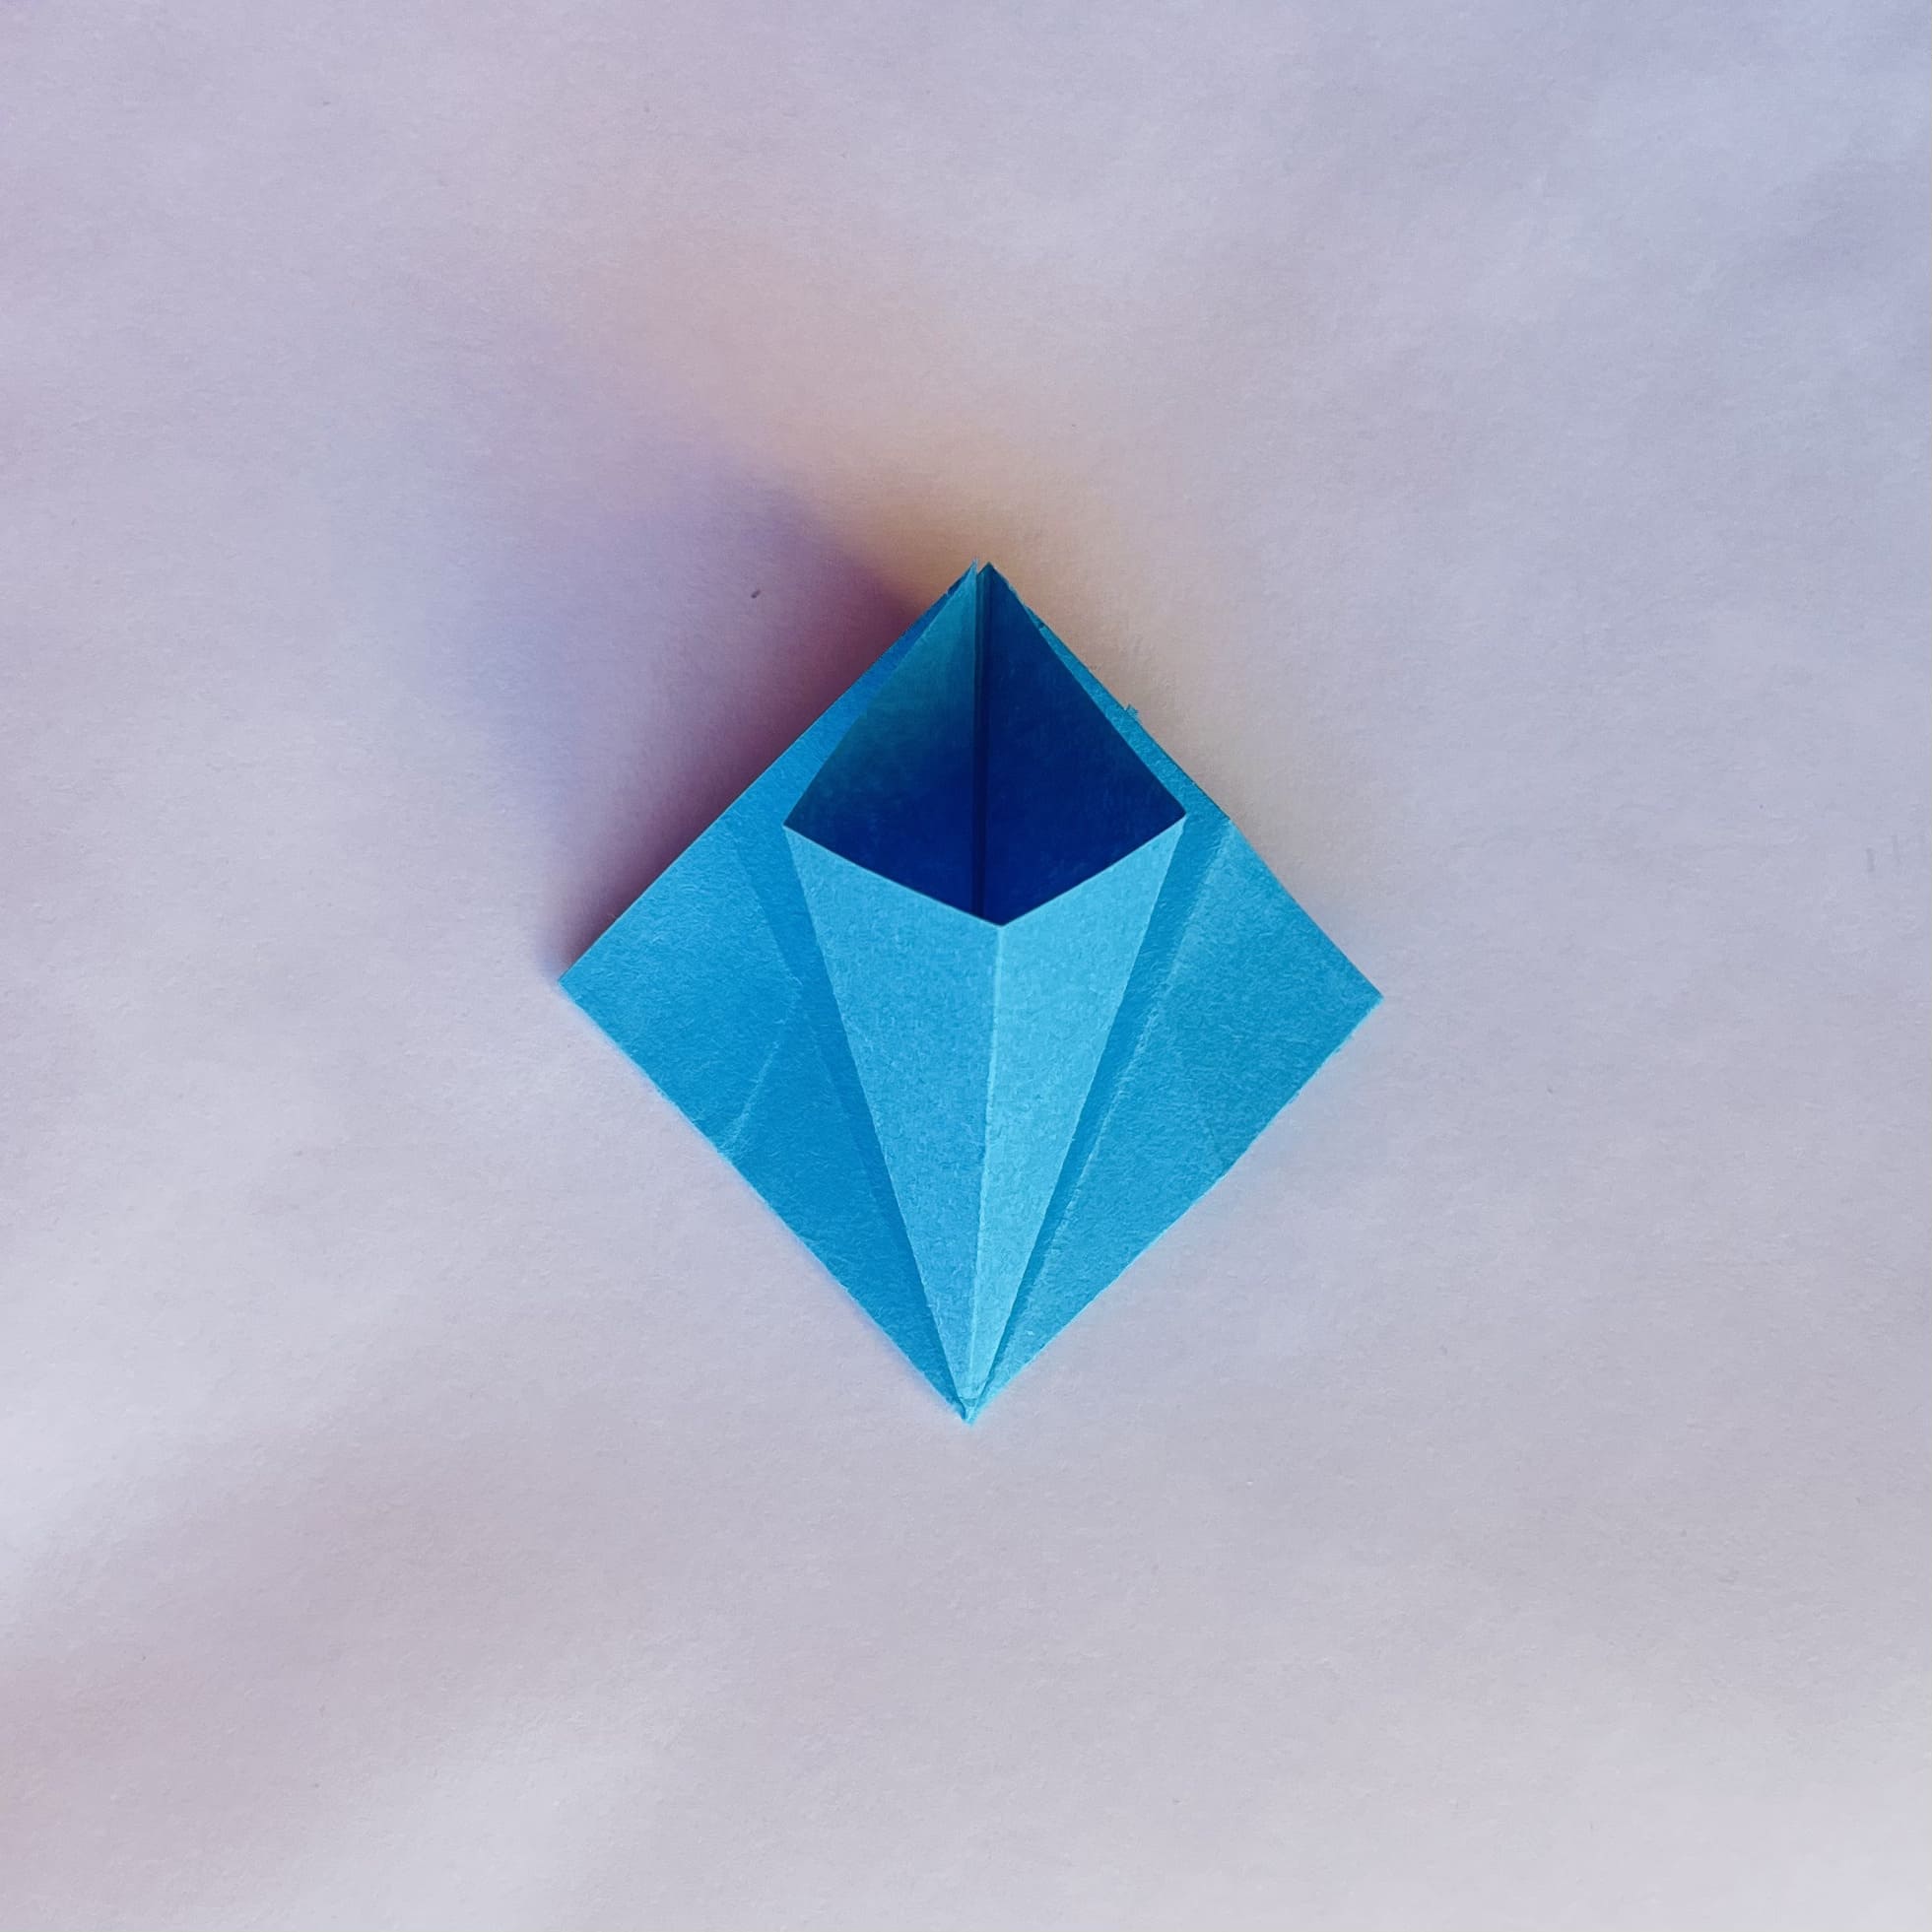
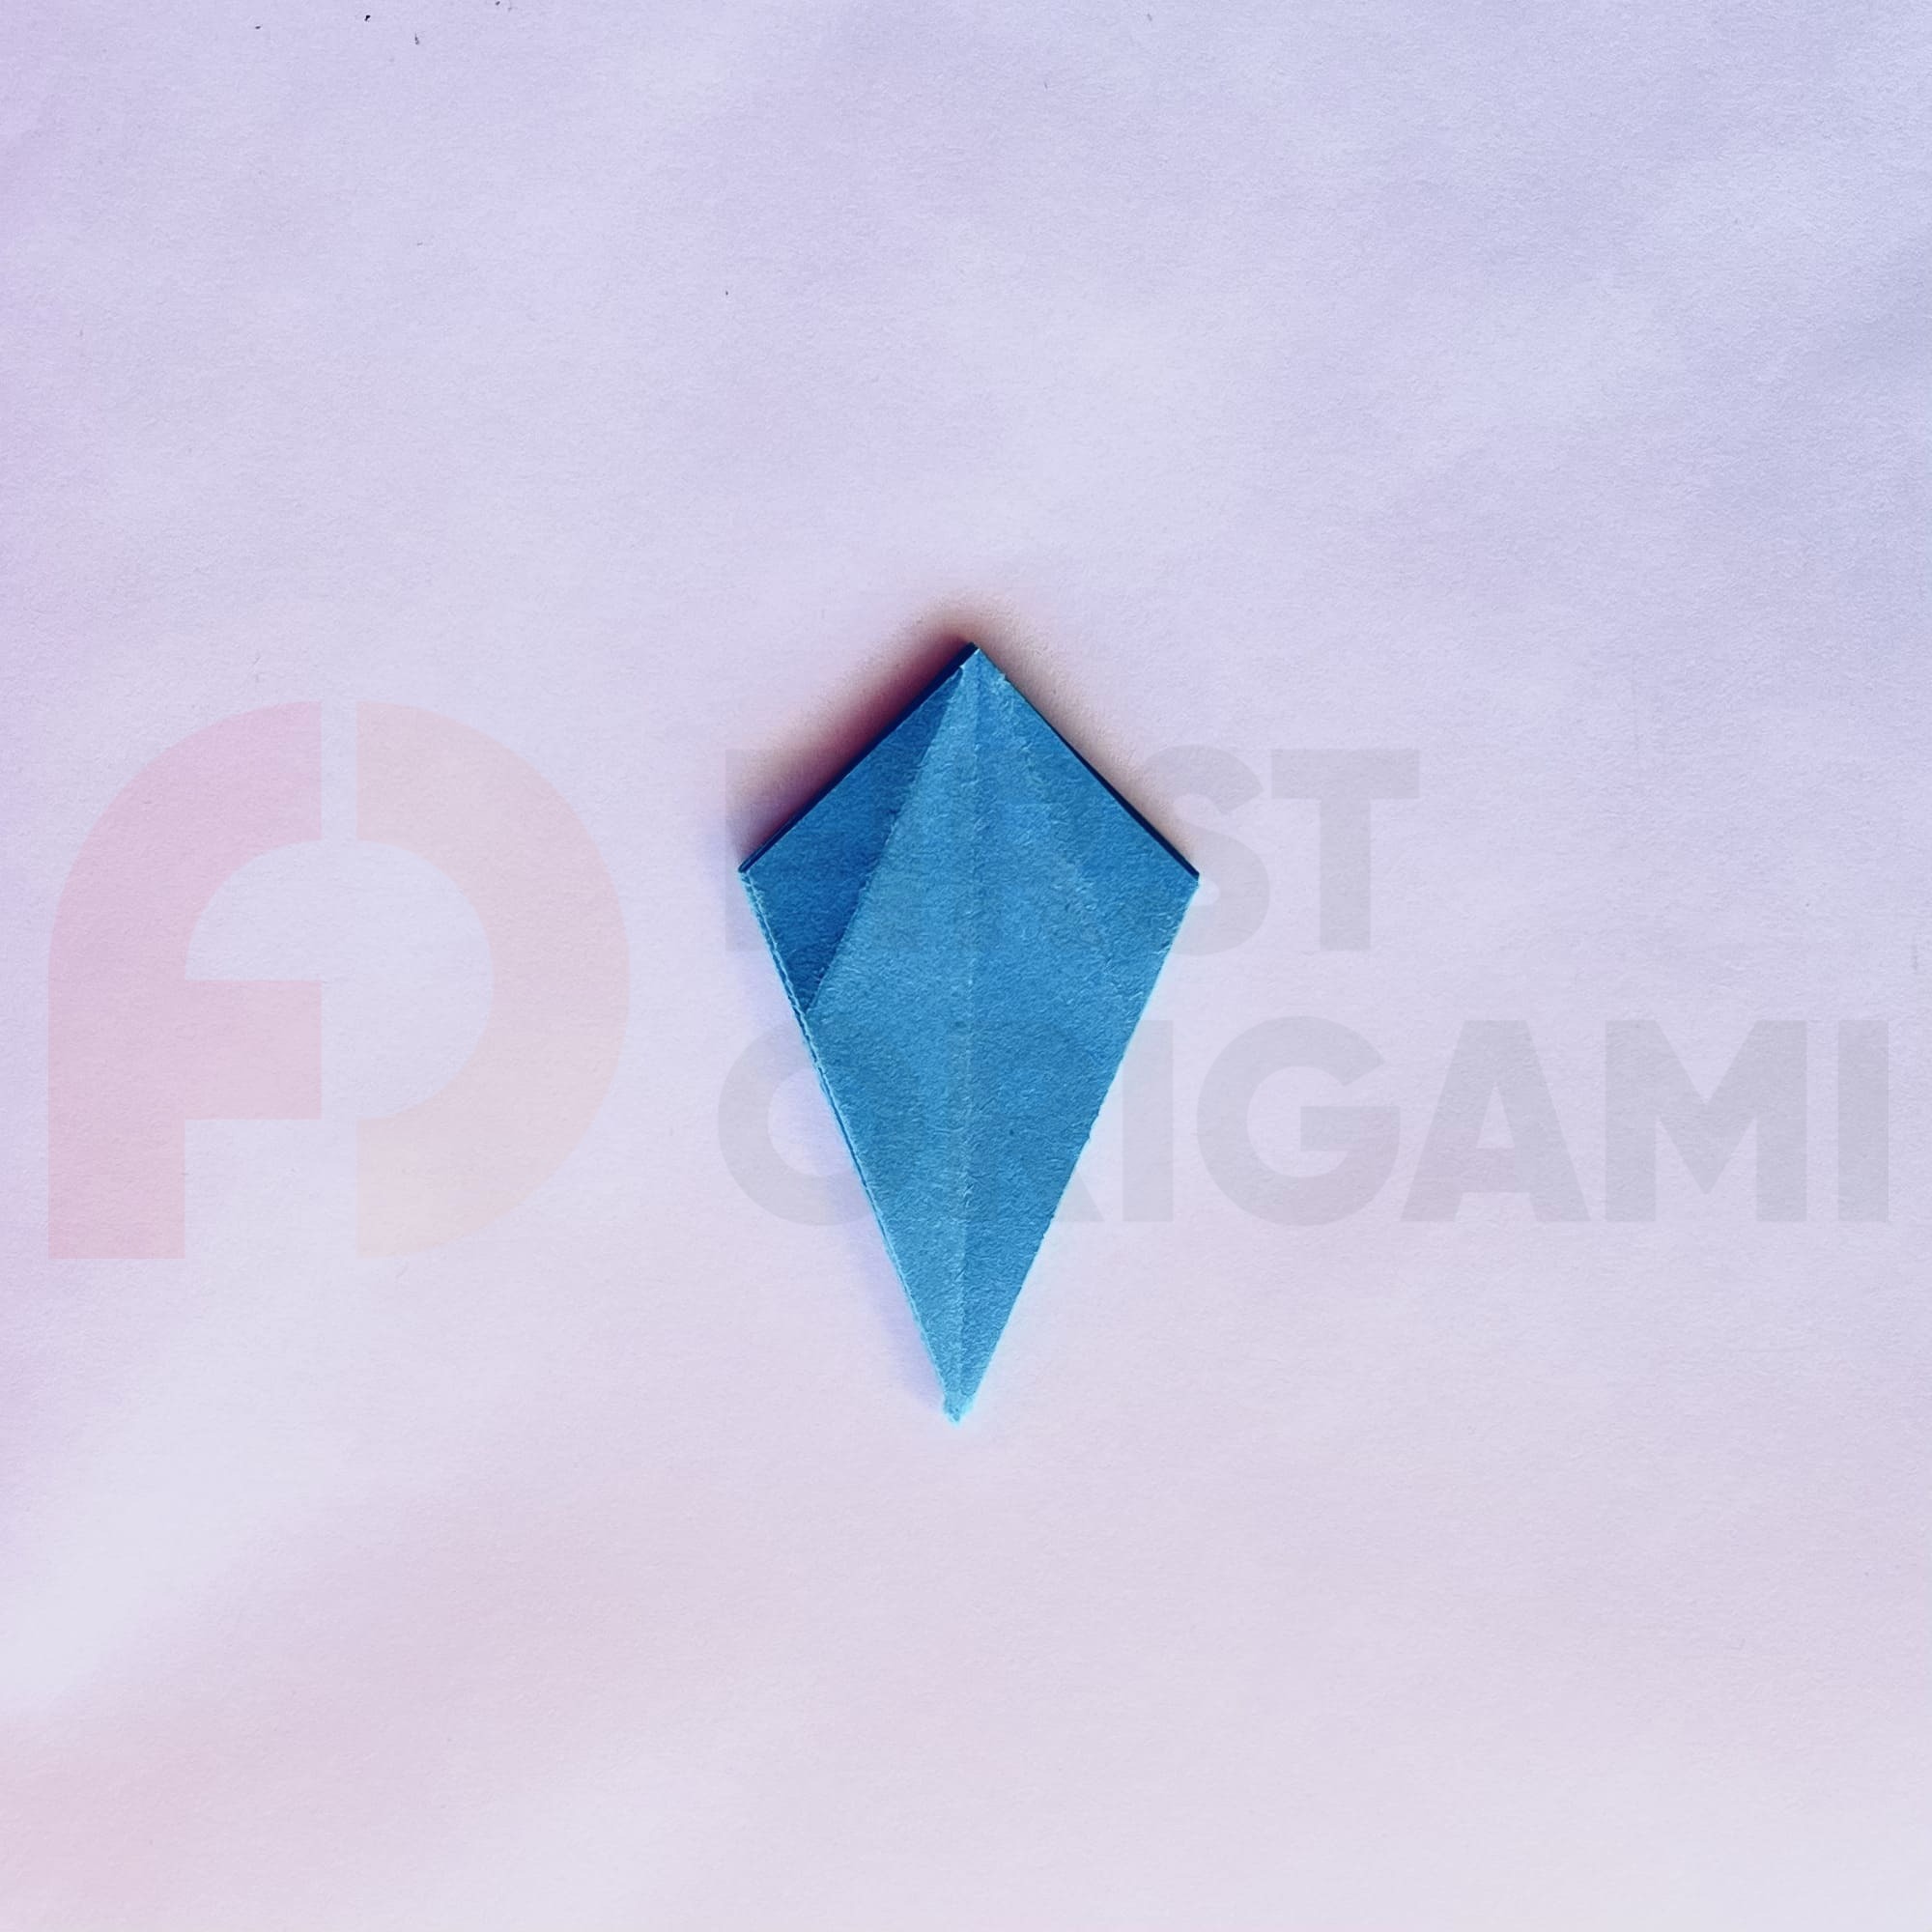
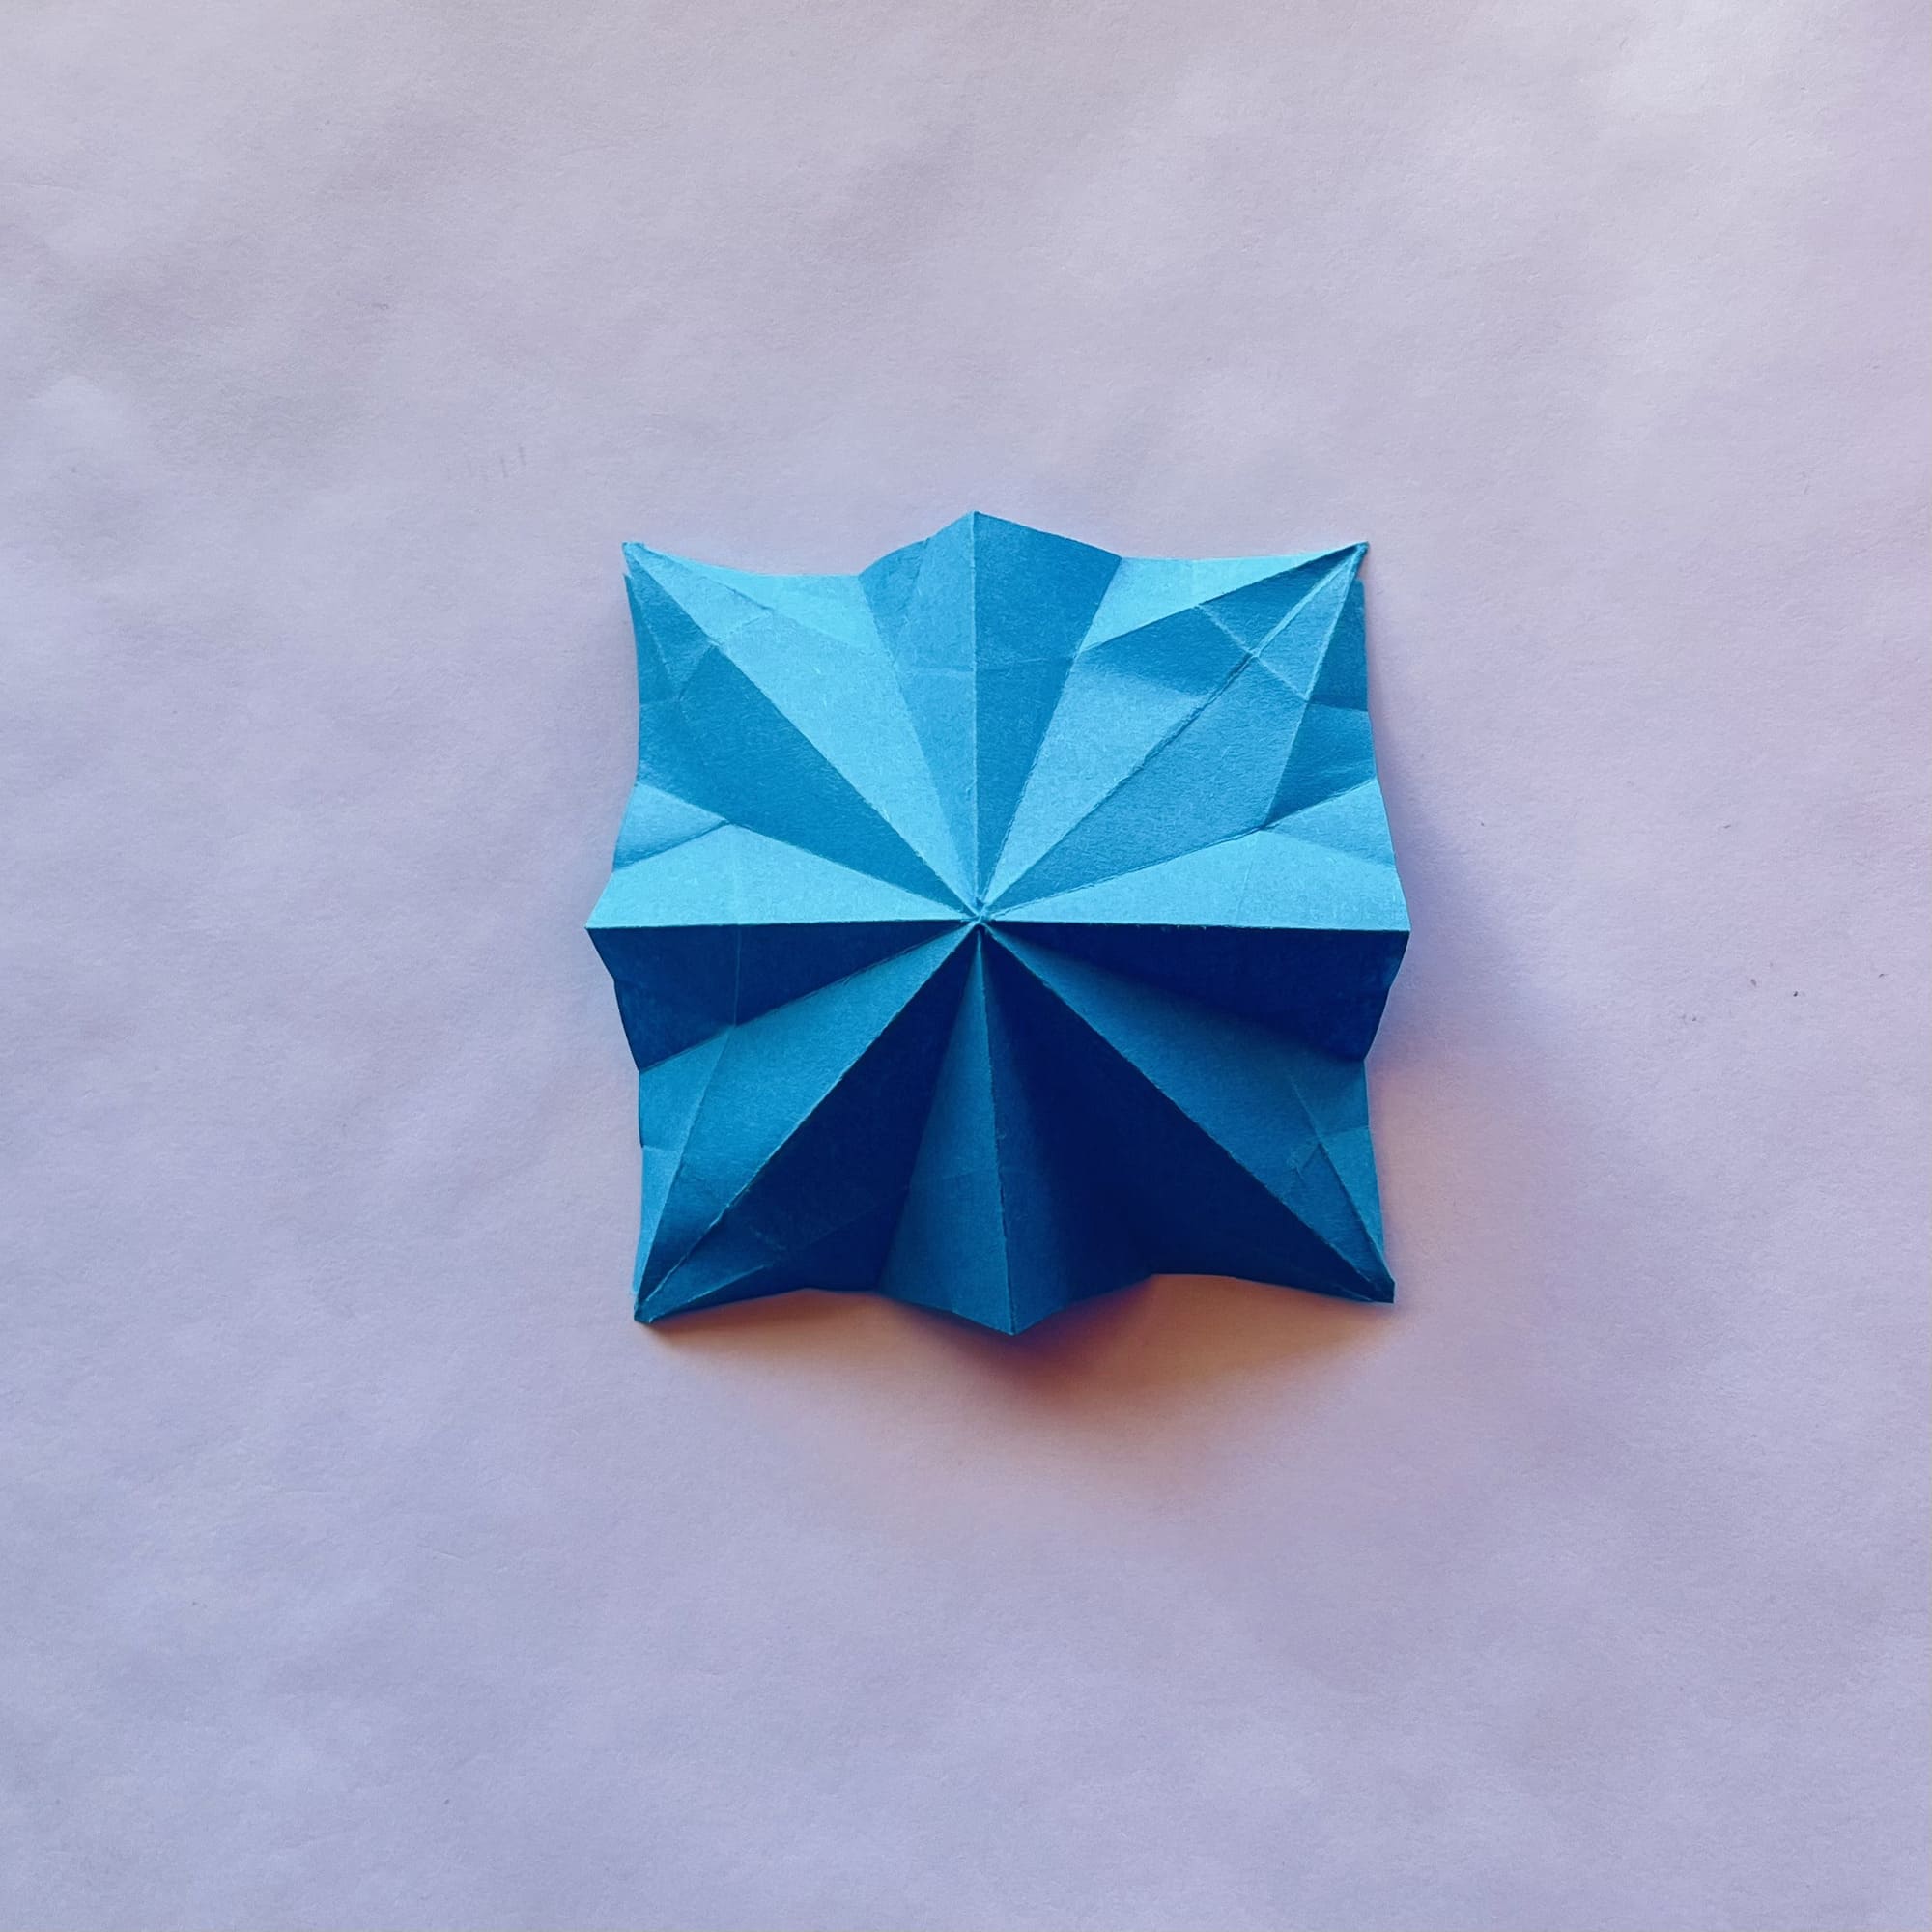
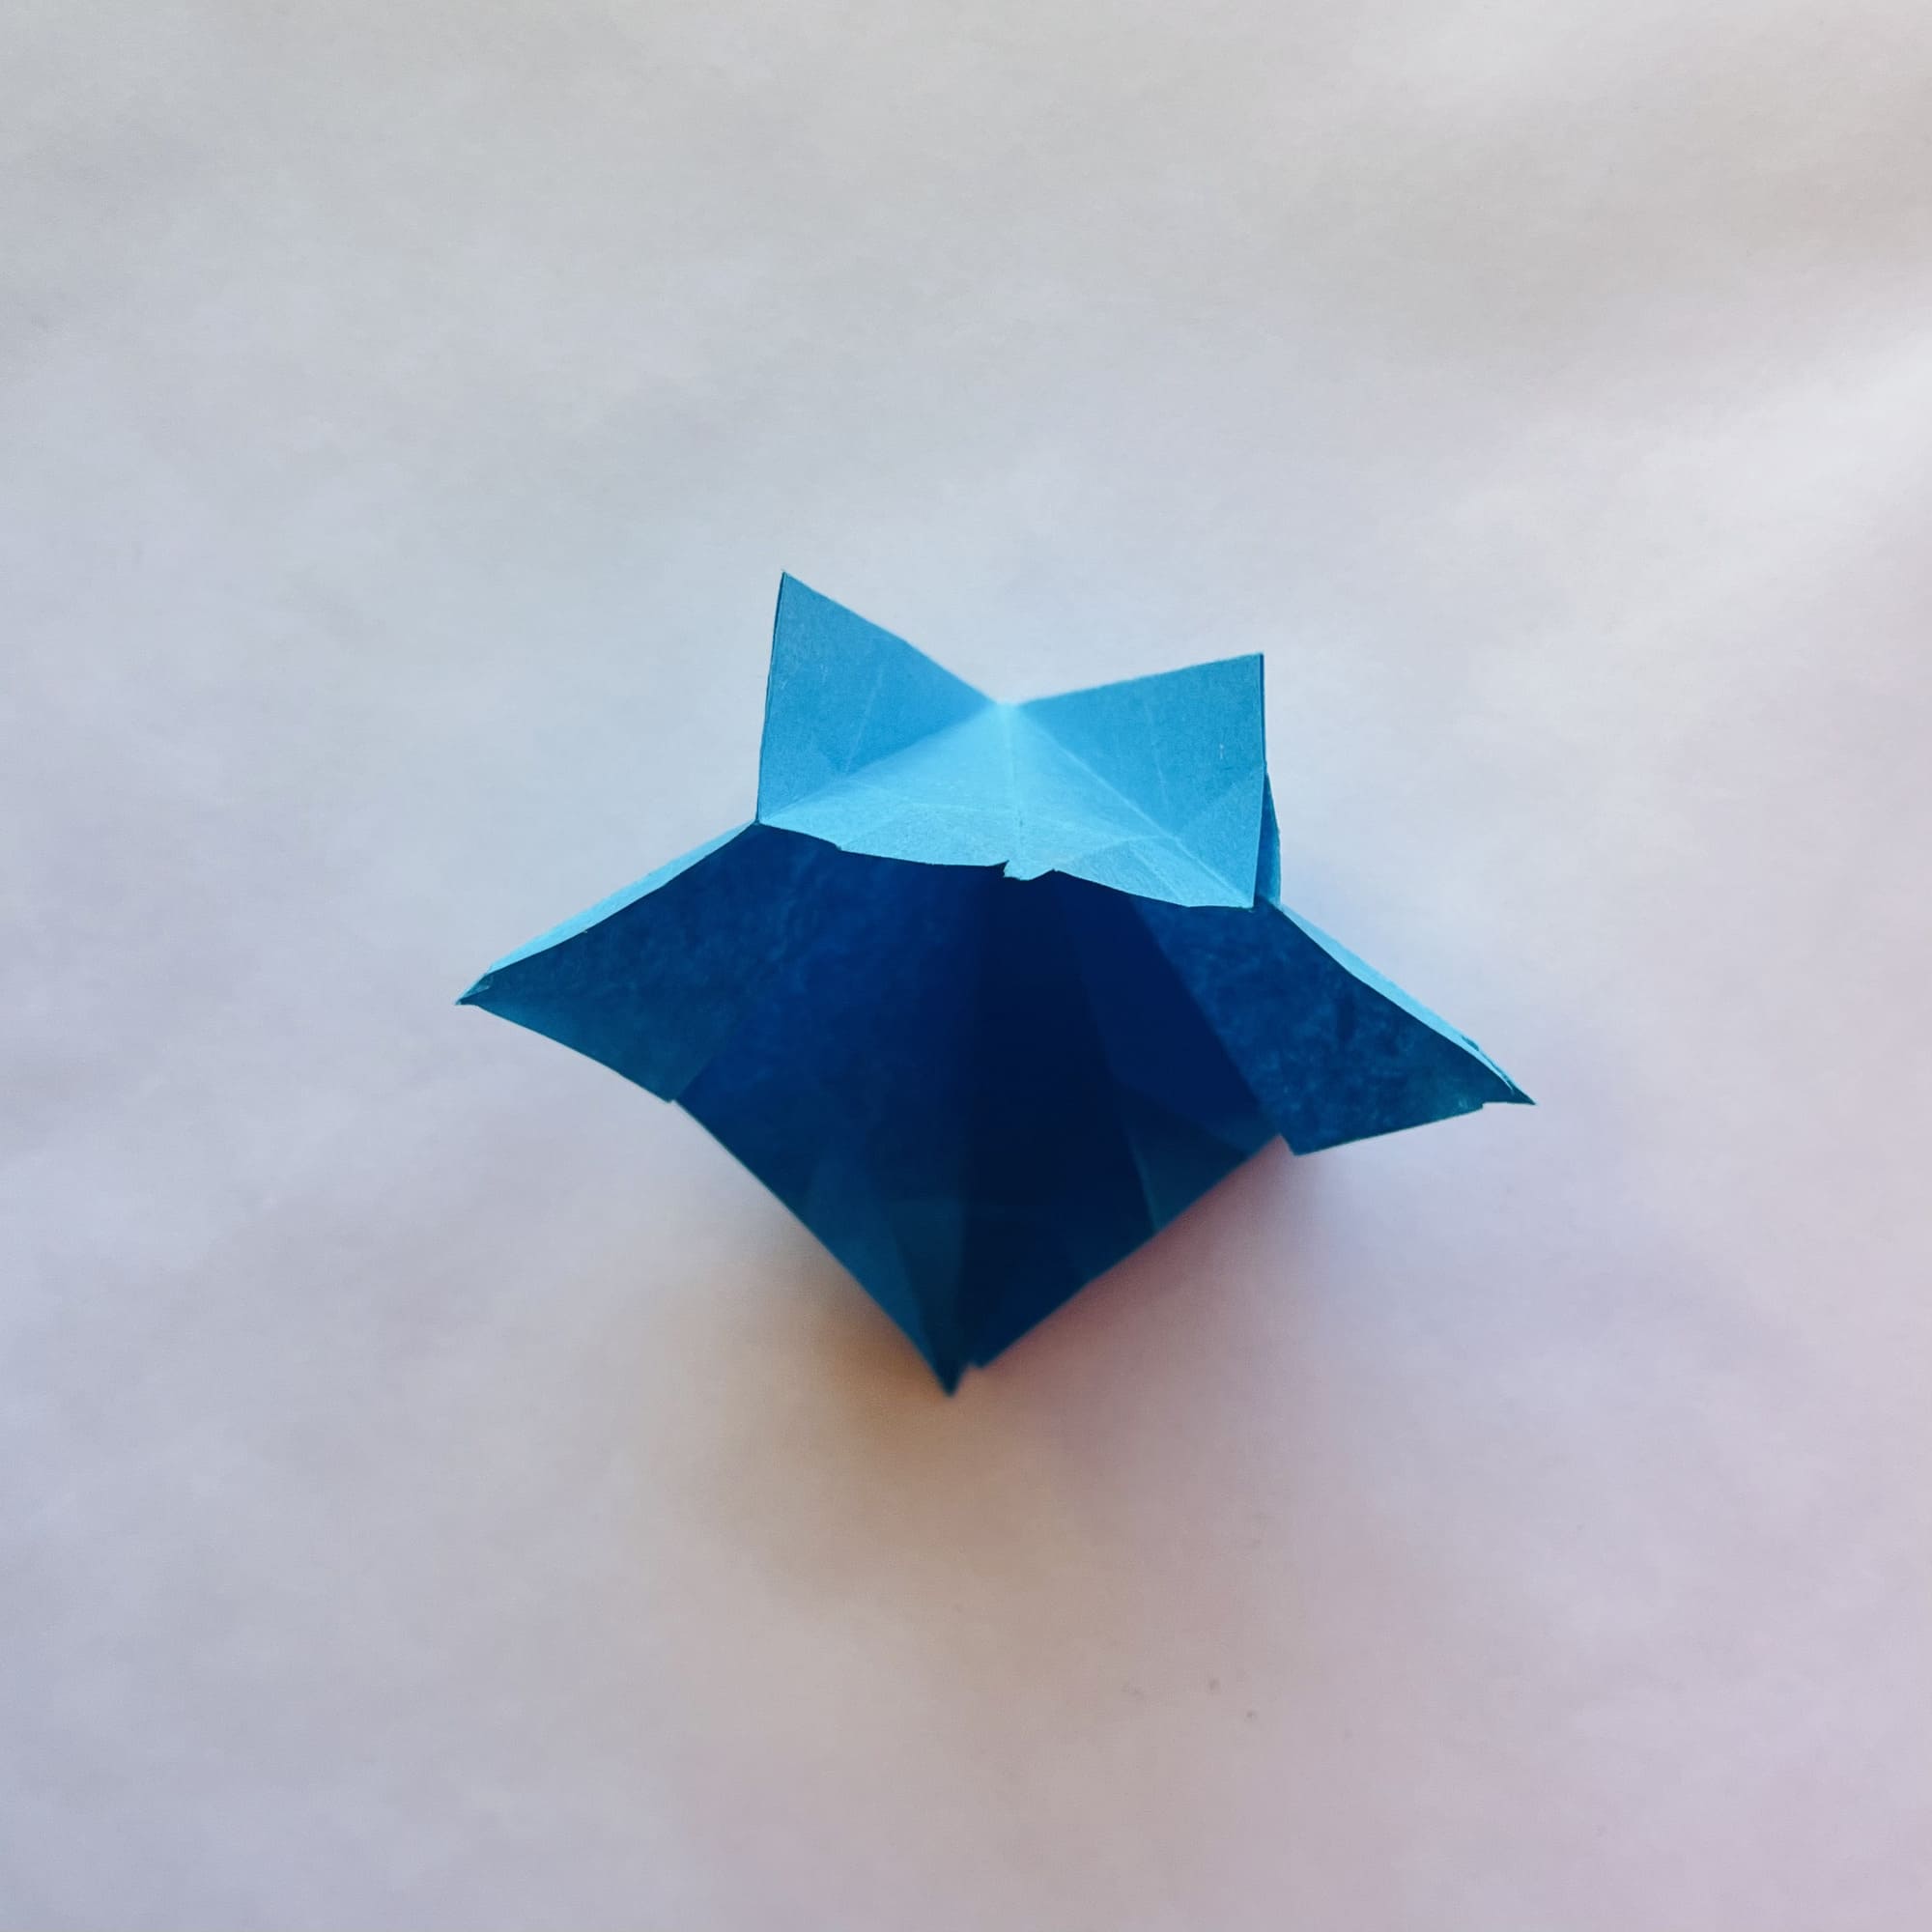
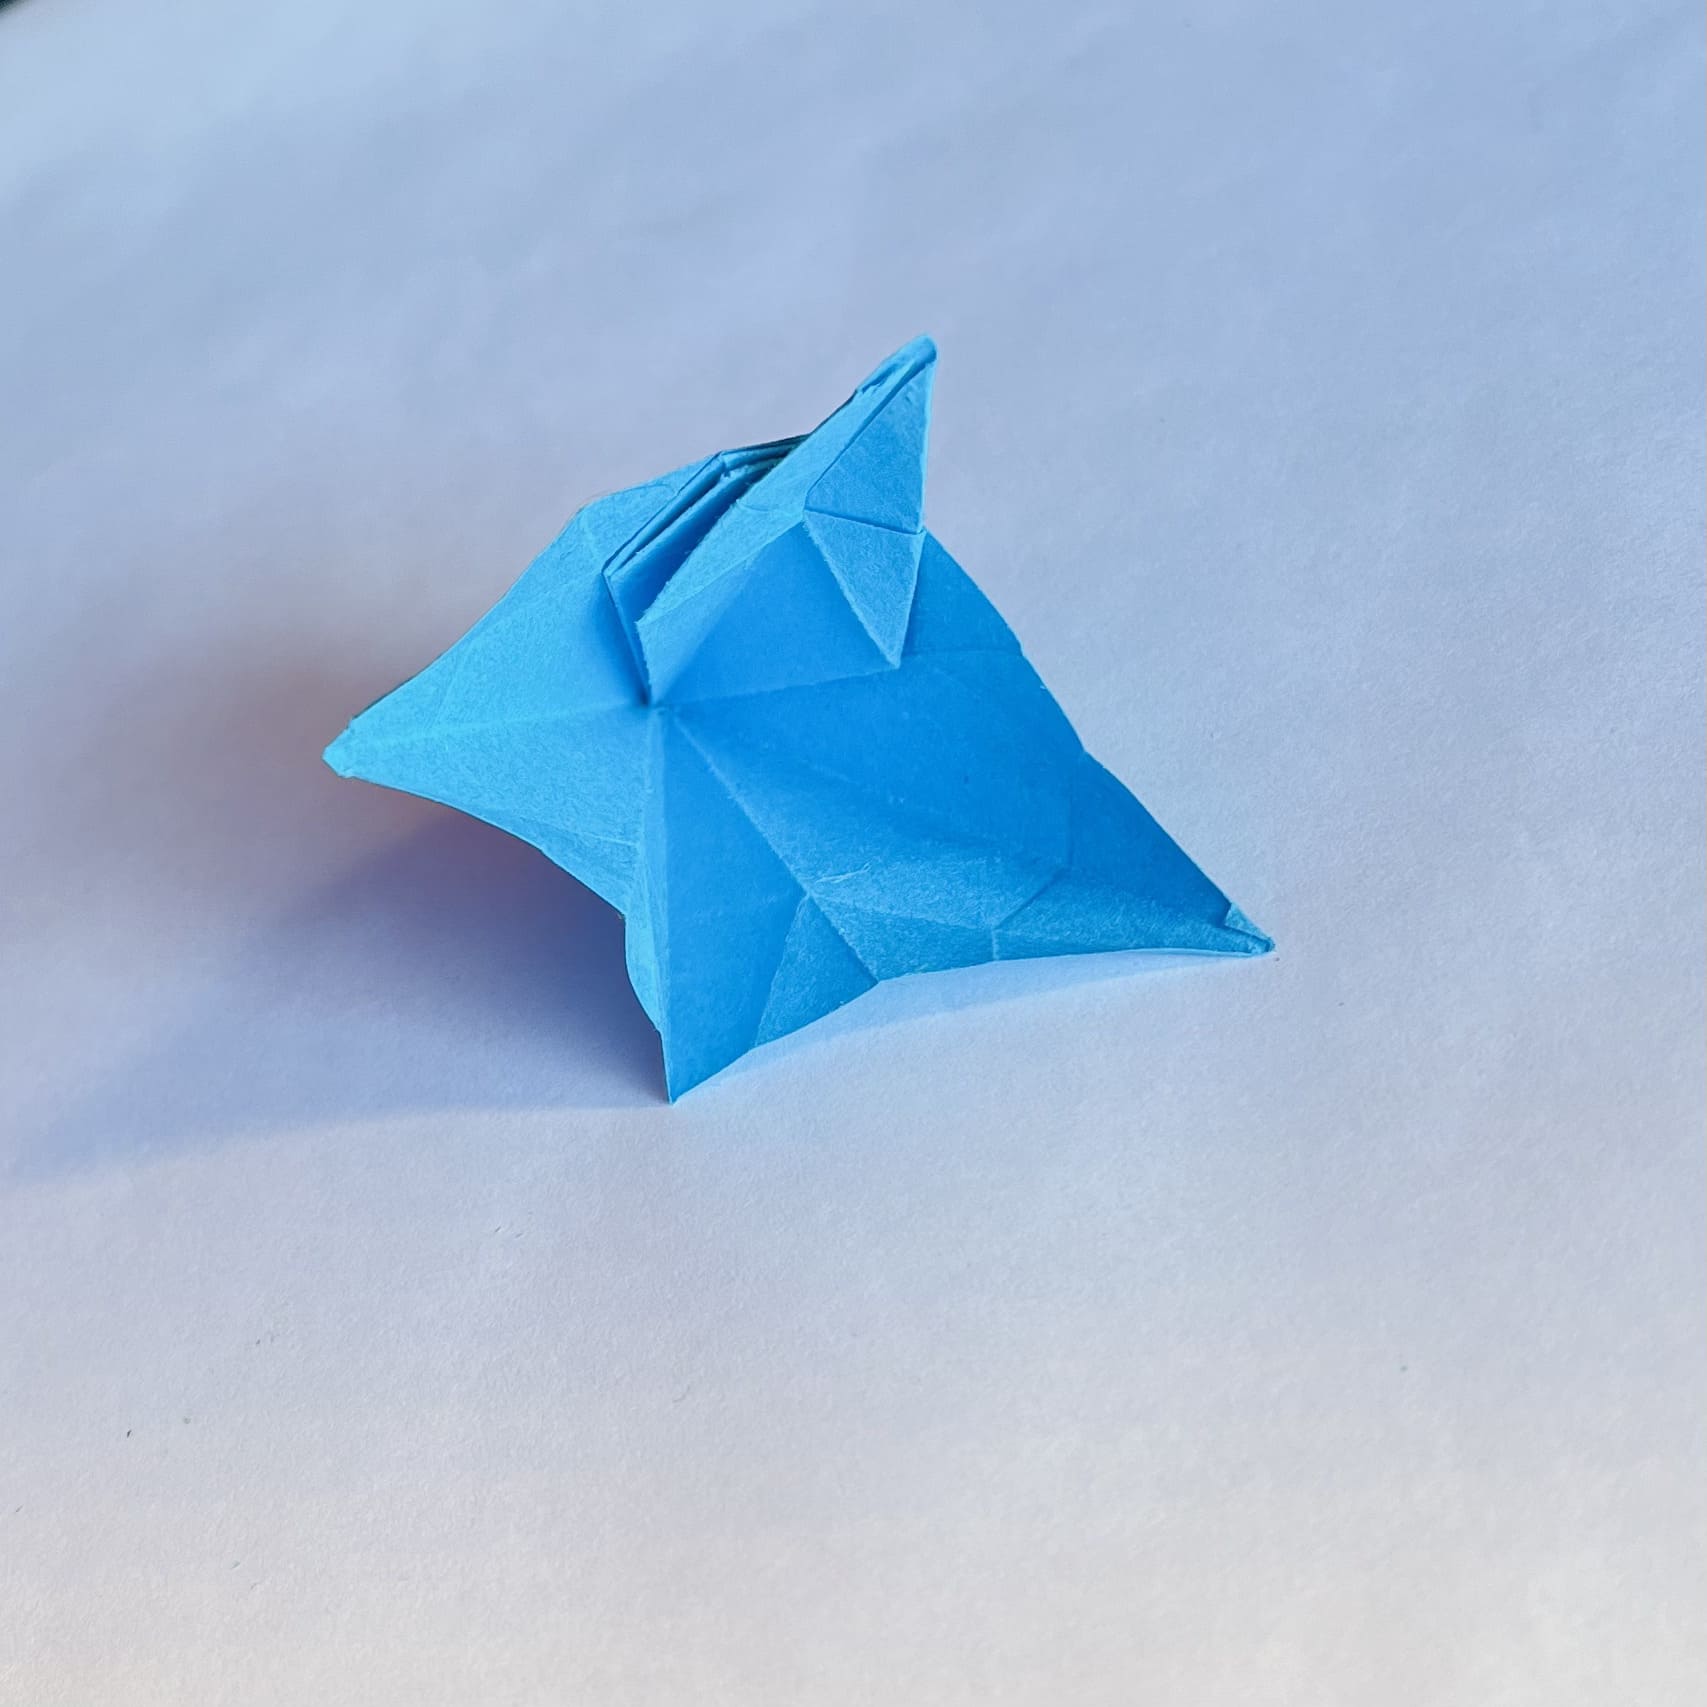
Continue in the same manner: make flattening folds on the remaining two layers. You will end up with a diamond-like shape. Flip one layer over to reveal the layer shown in the photo.
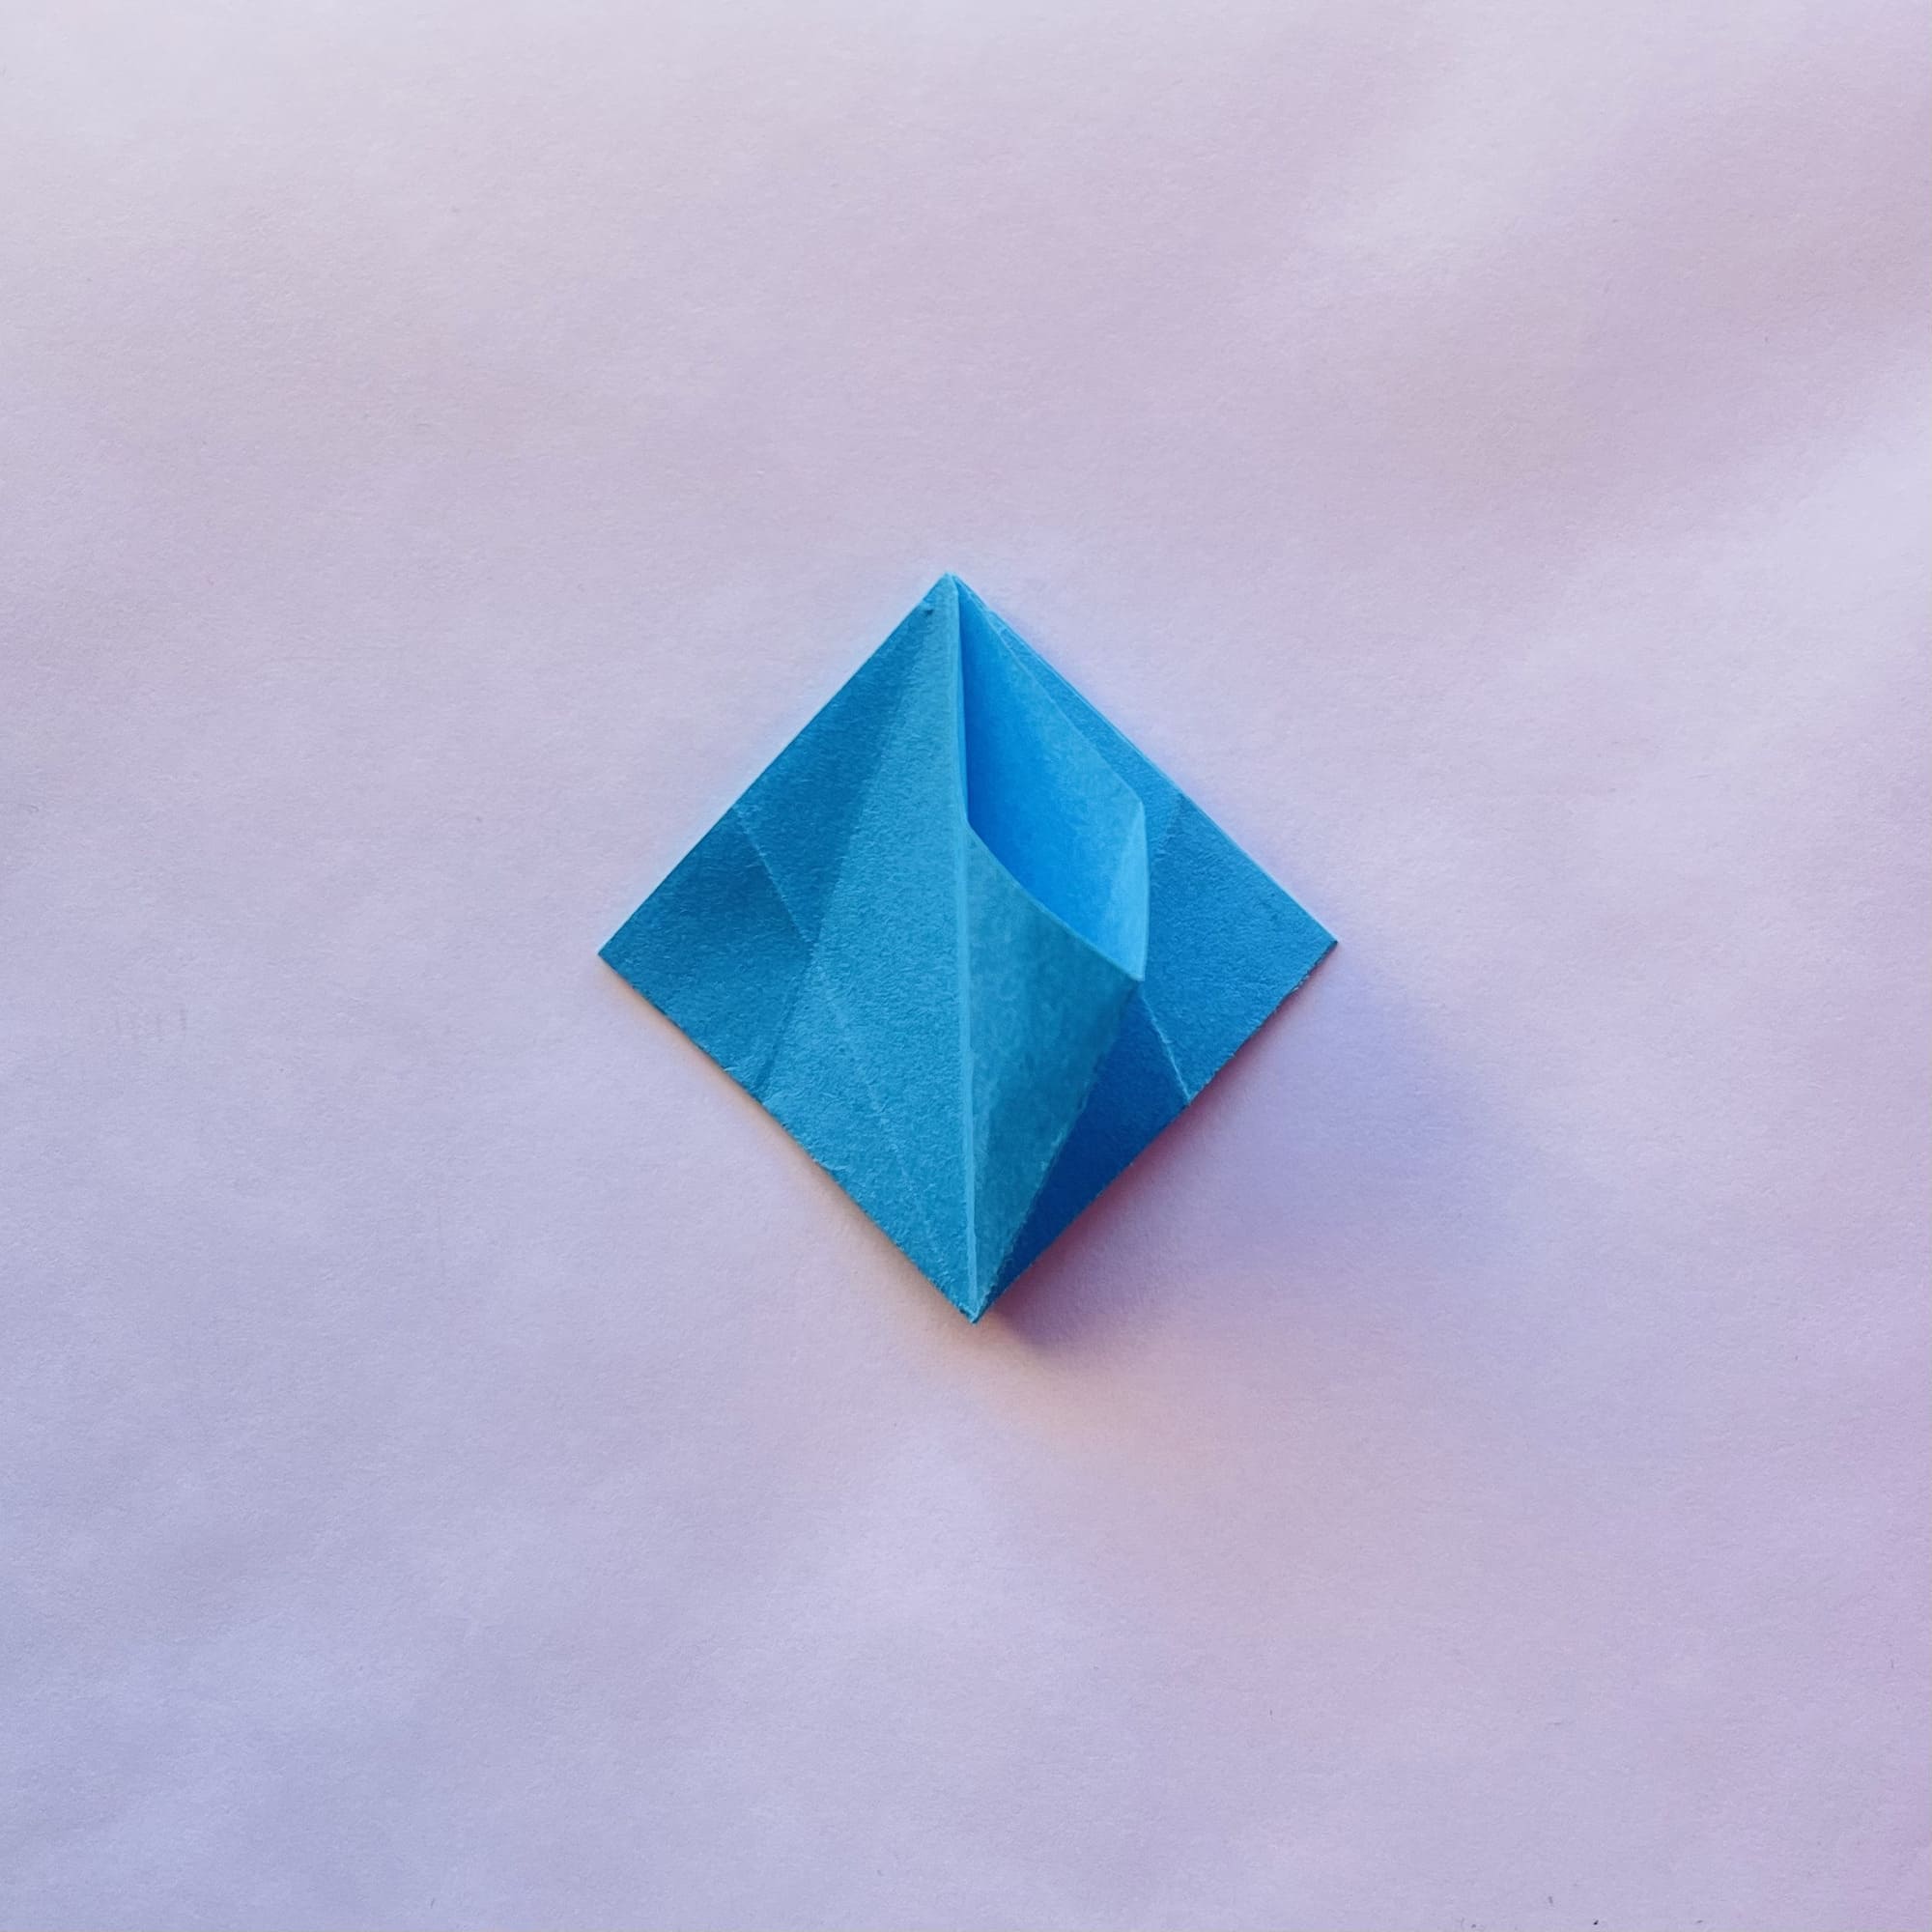
The side corners on it are separated by folds. Bend them inward.
Bend the top sharp corner inward. Crease the folds well. This will help you in the final assembly of the figure.
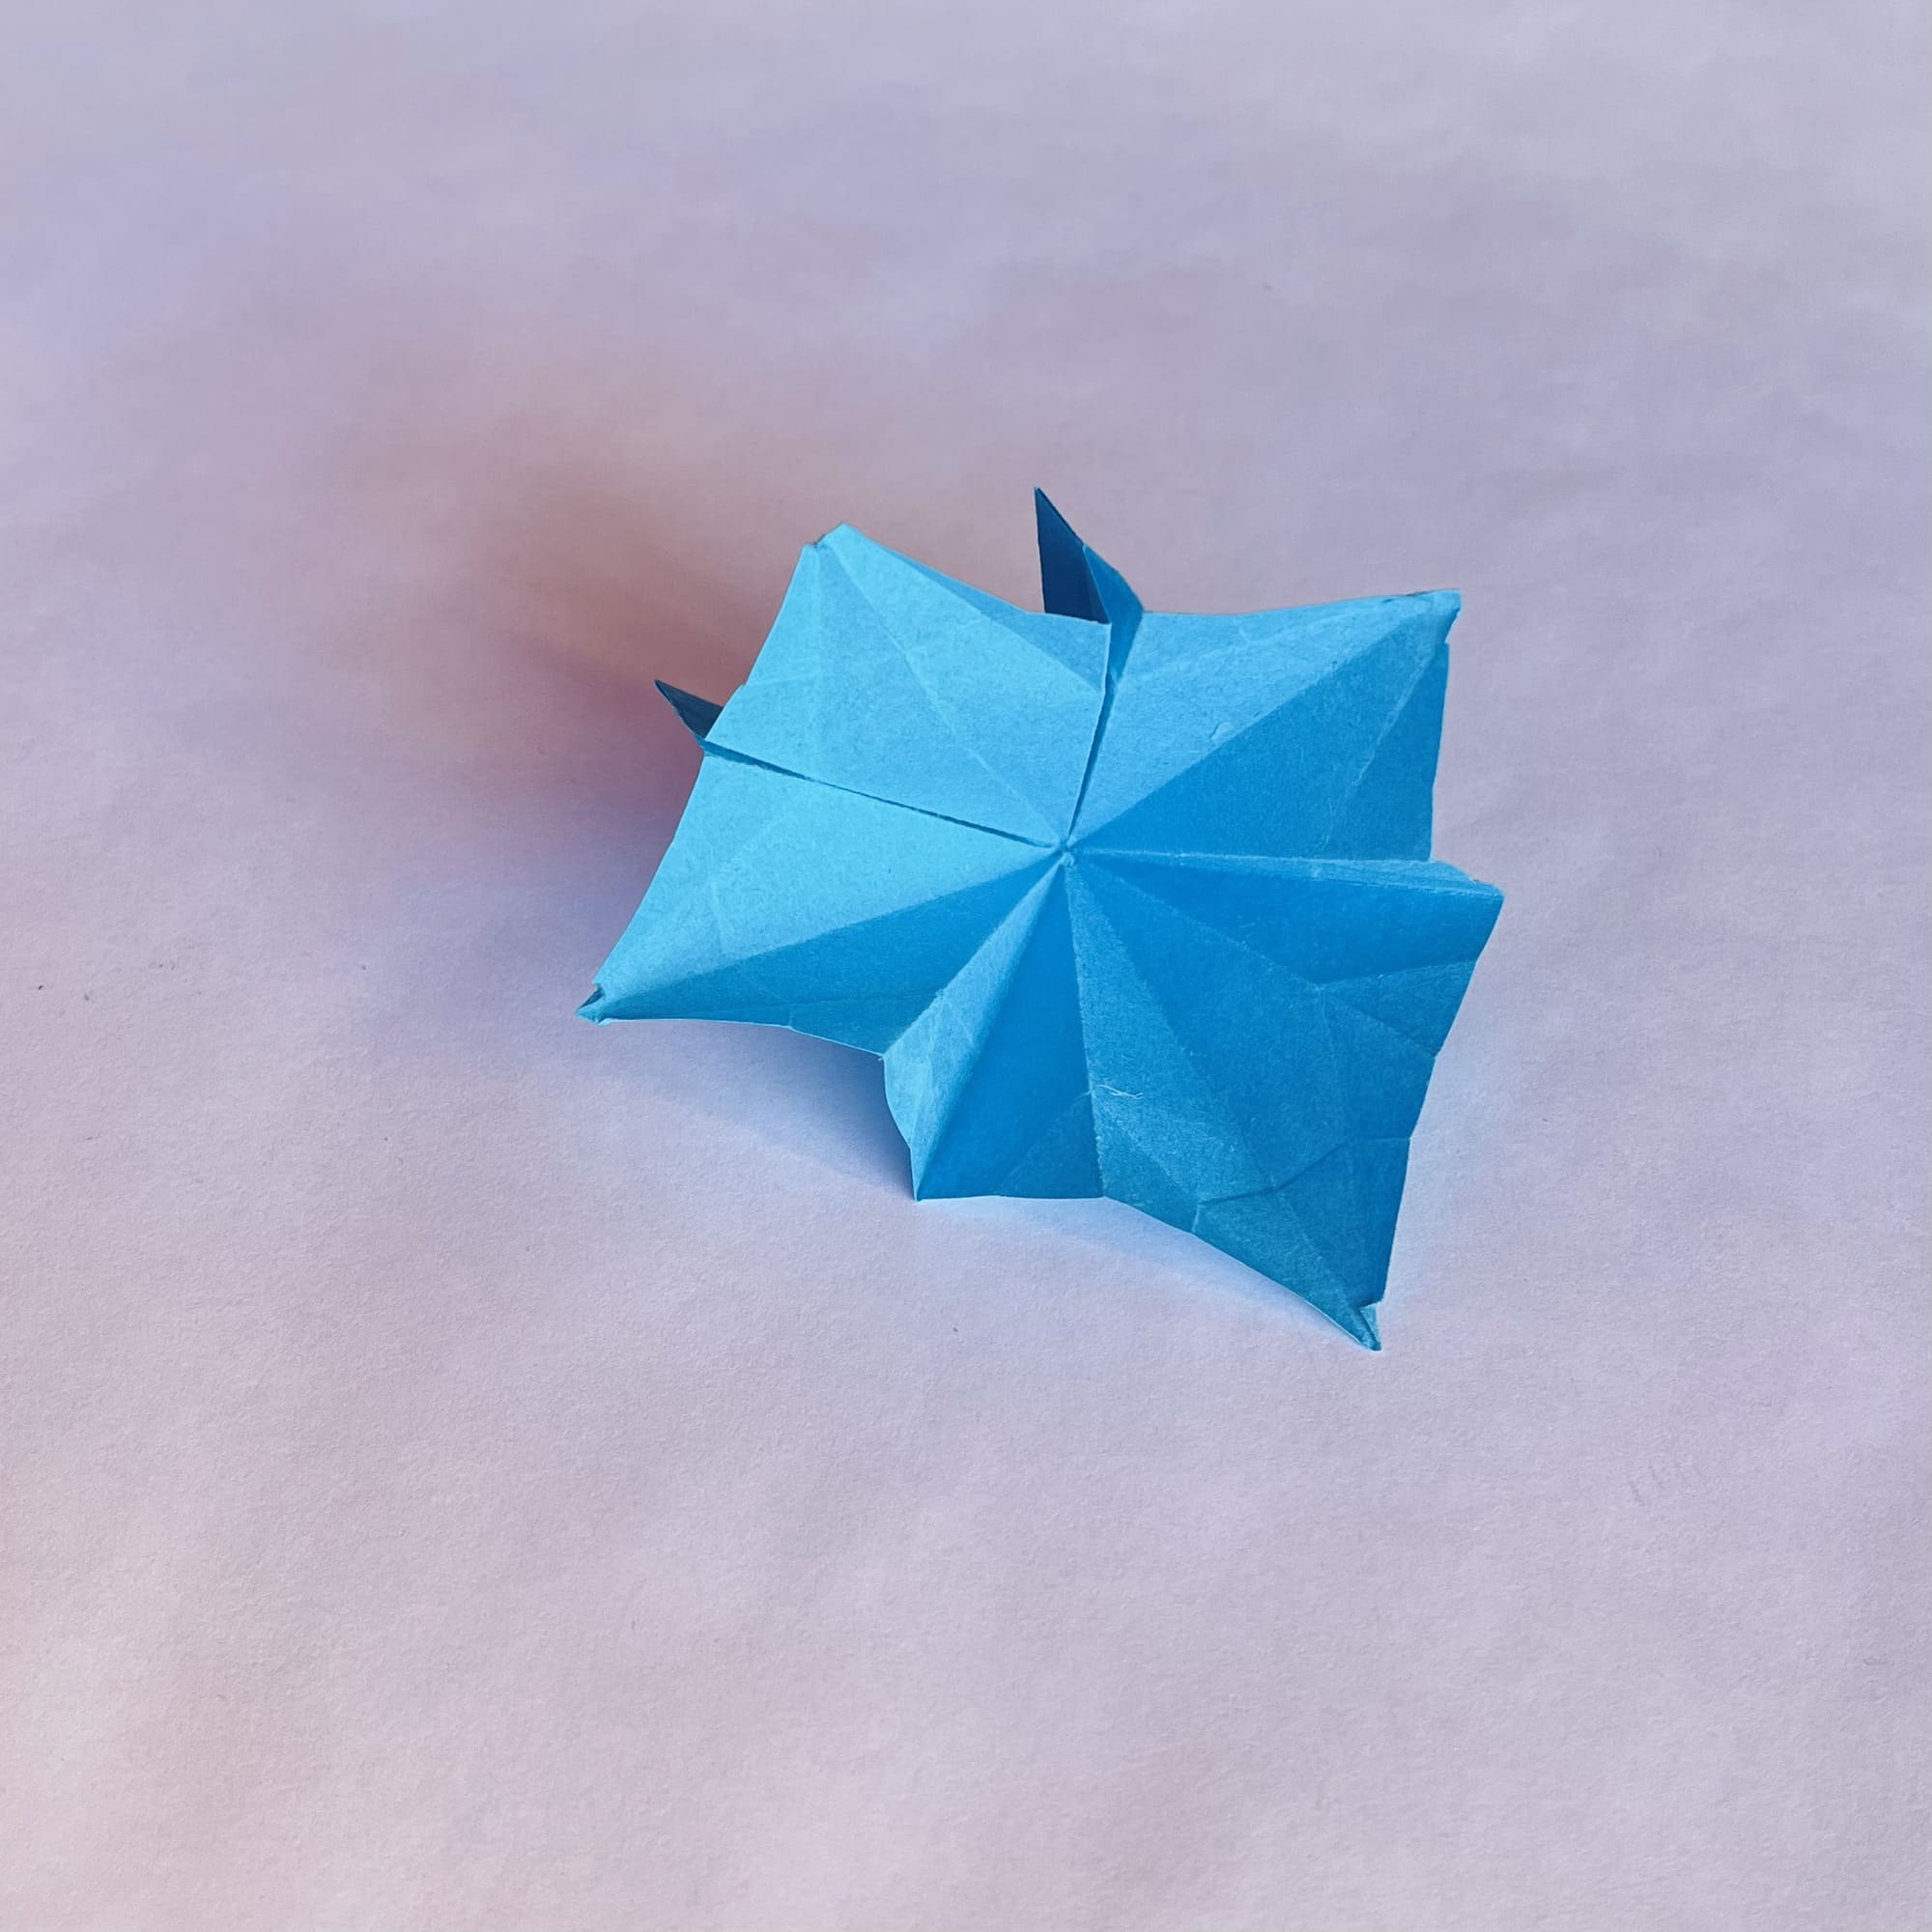
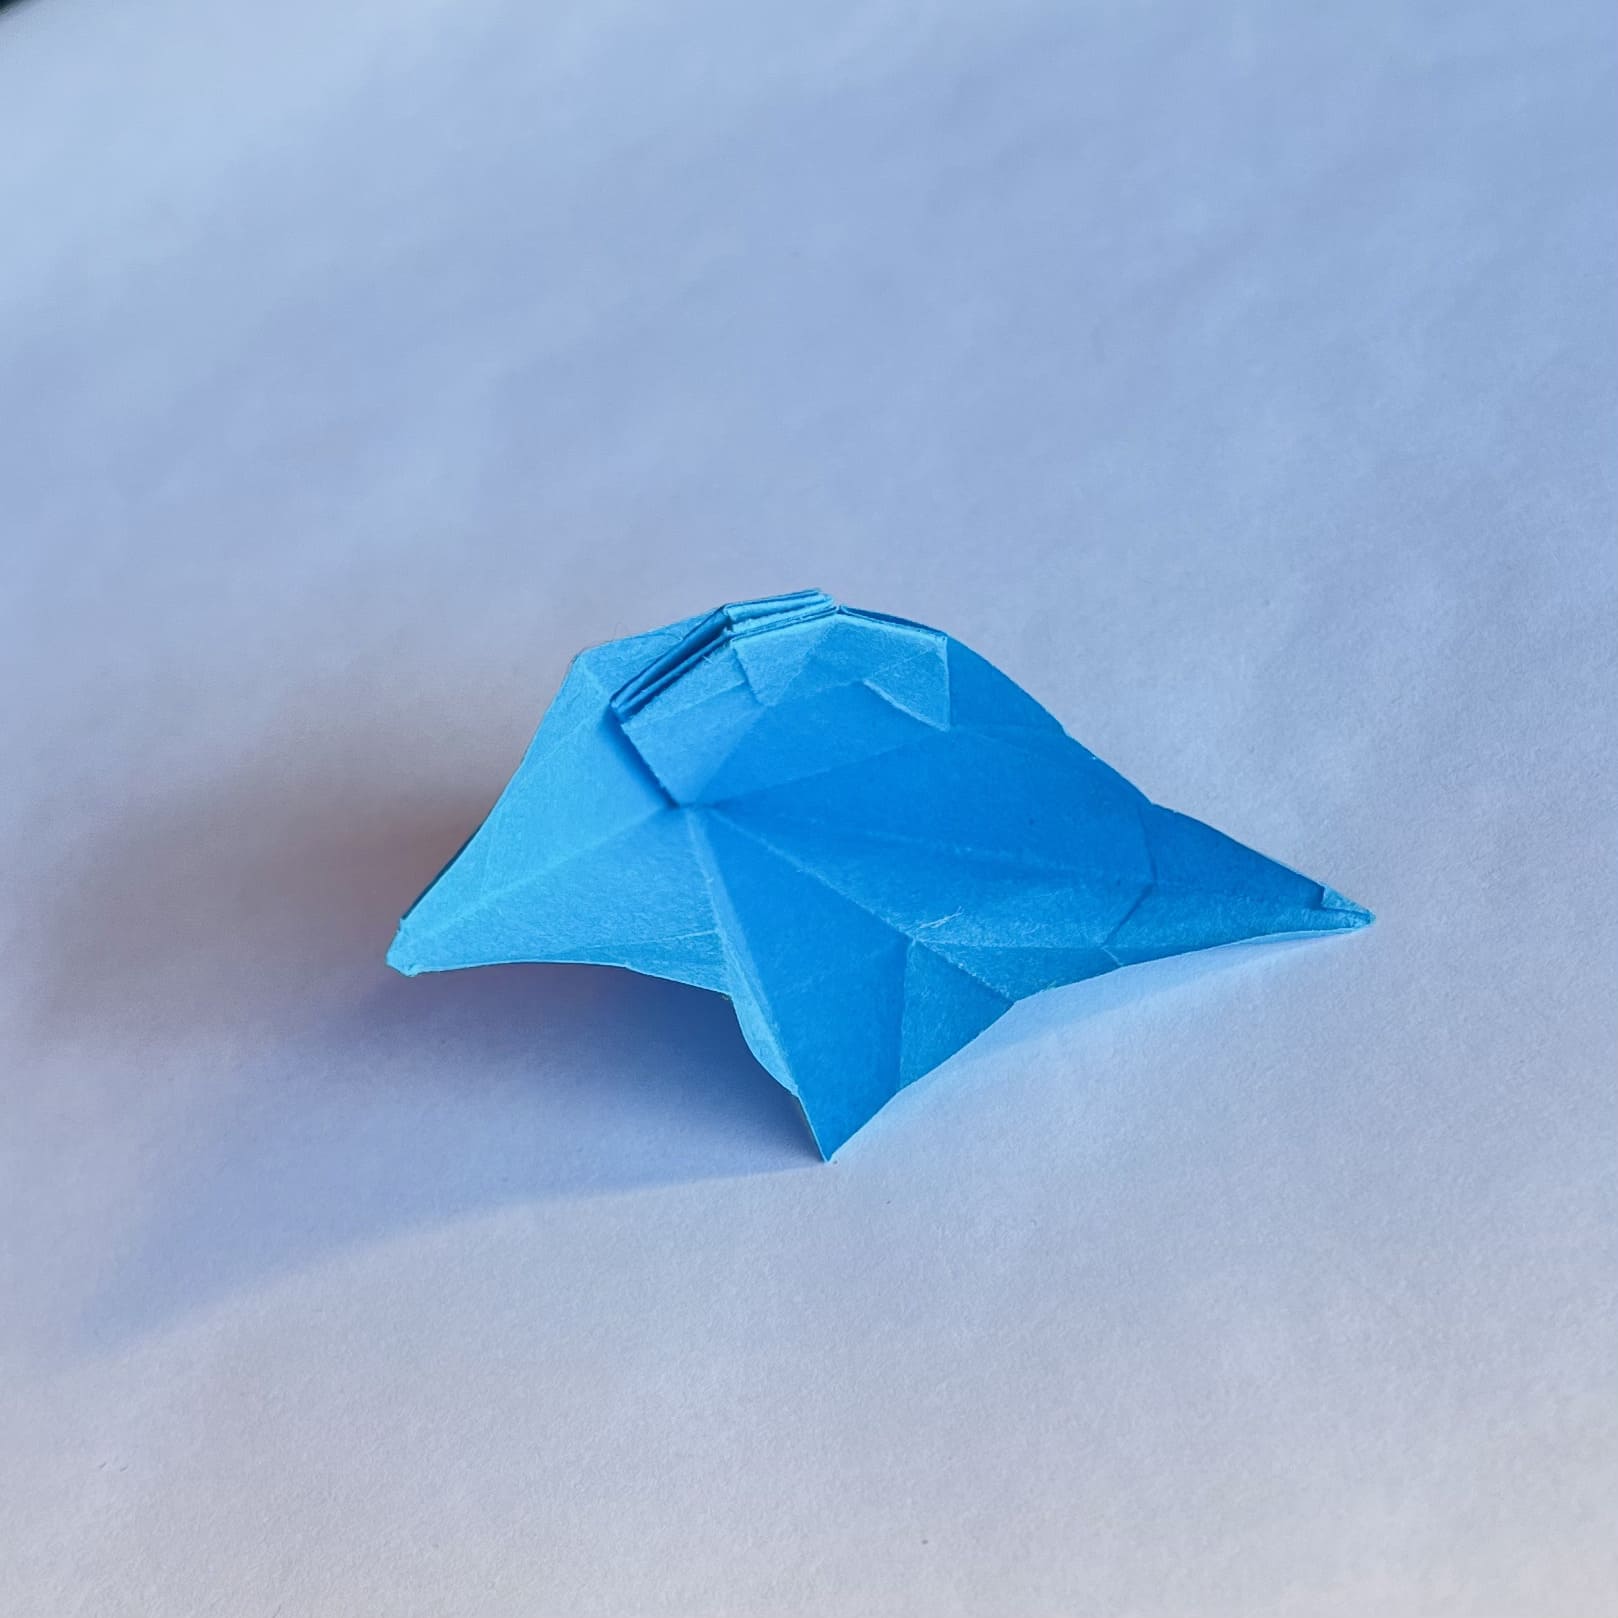
Fold this layer to the left, then open the next one and repeat steps 27 and 28.
Carefully completely unfold the resulting figure.
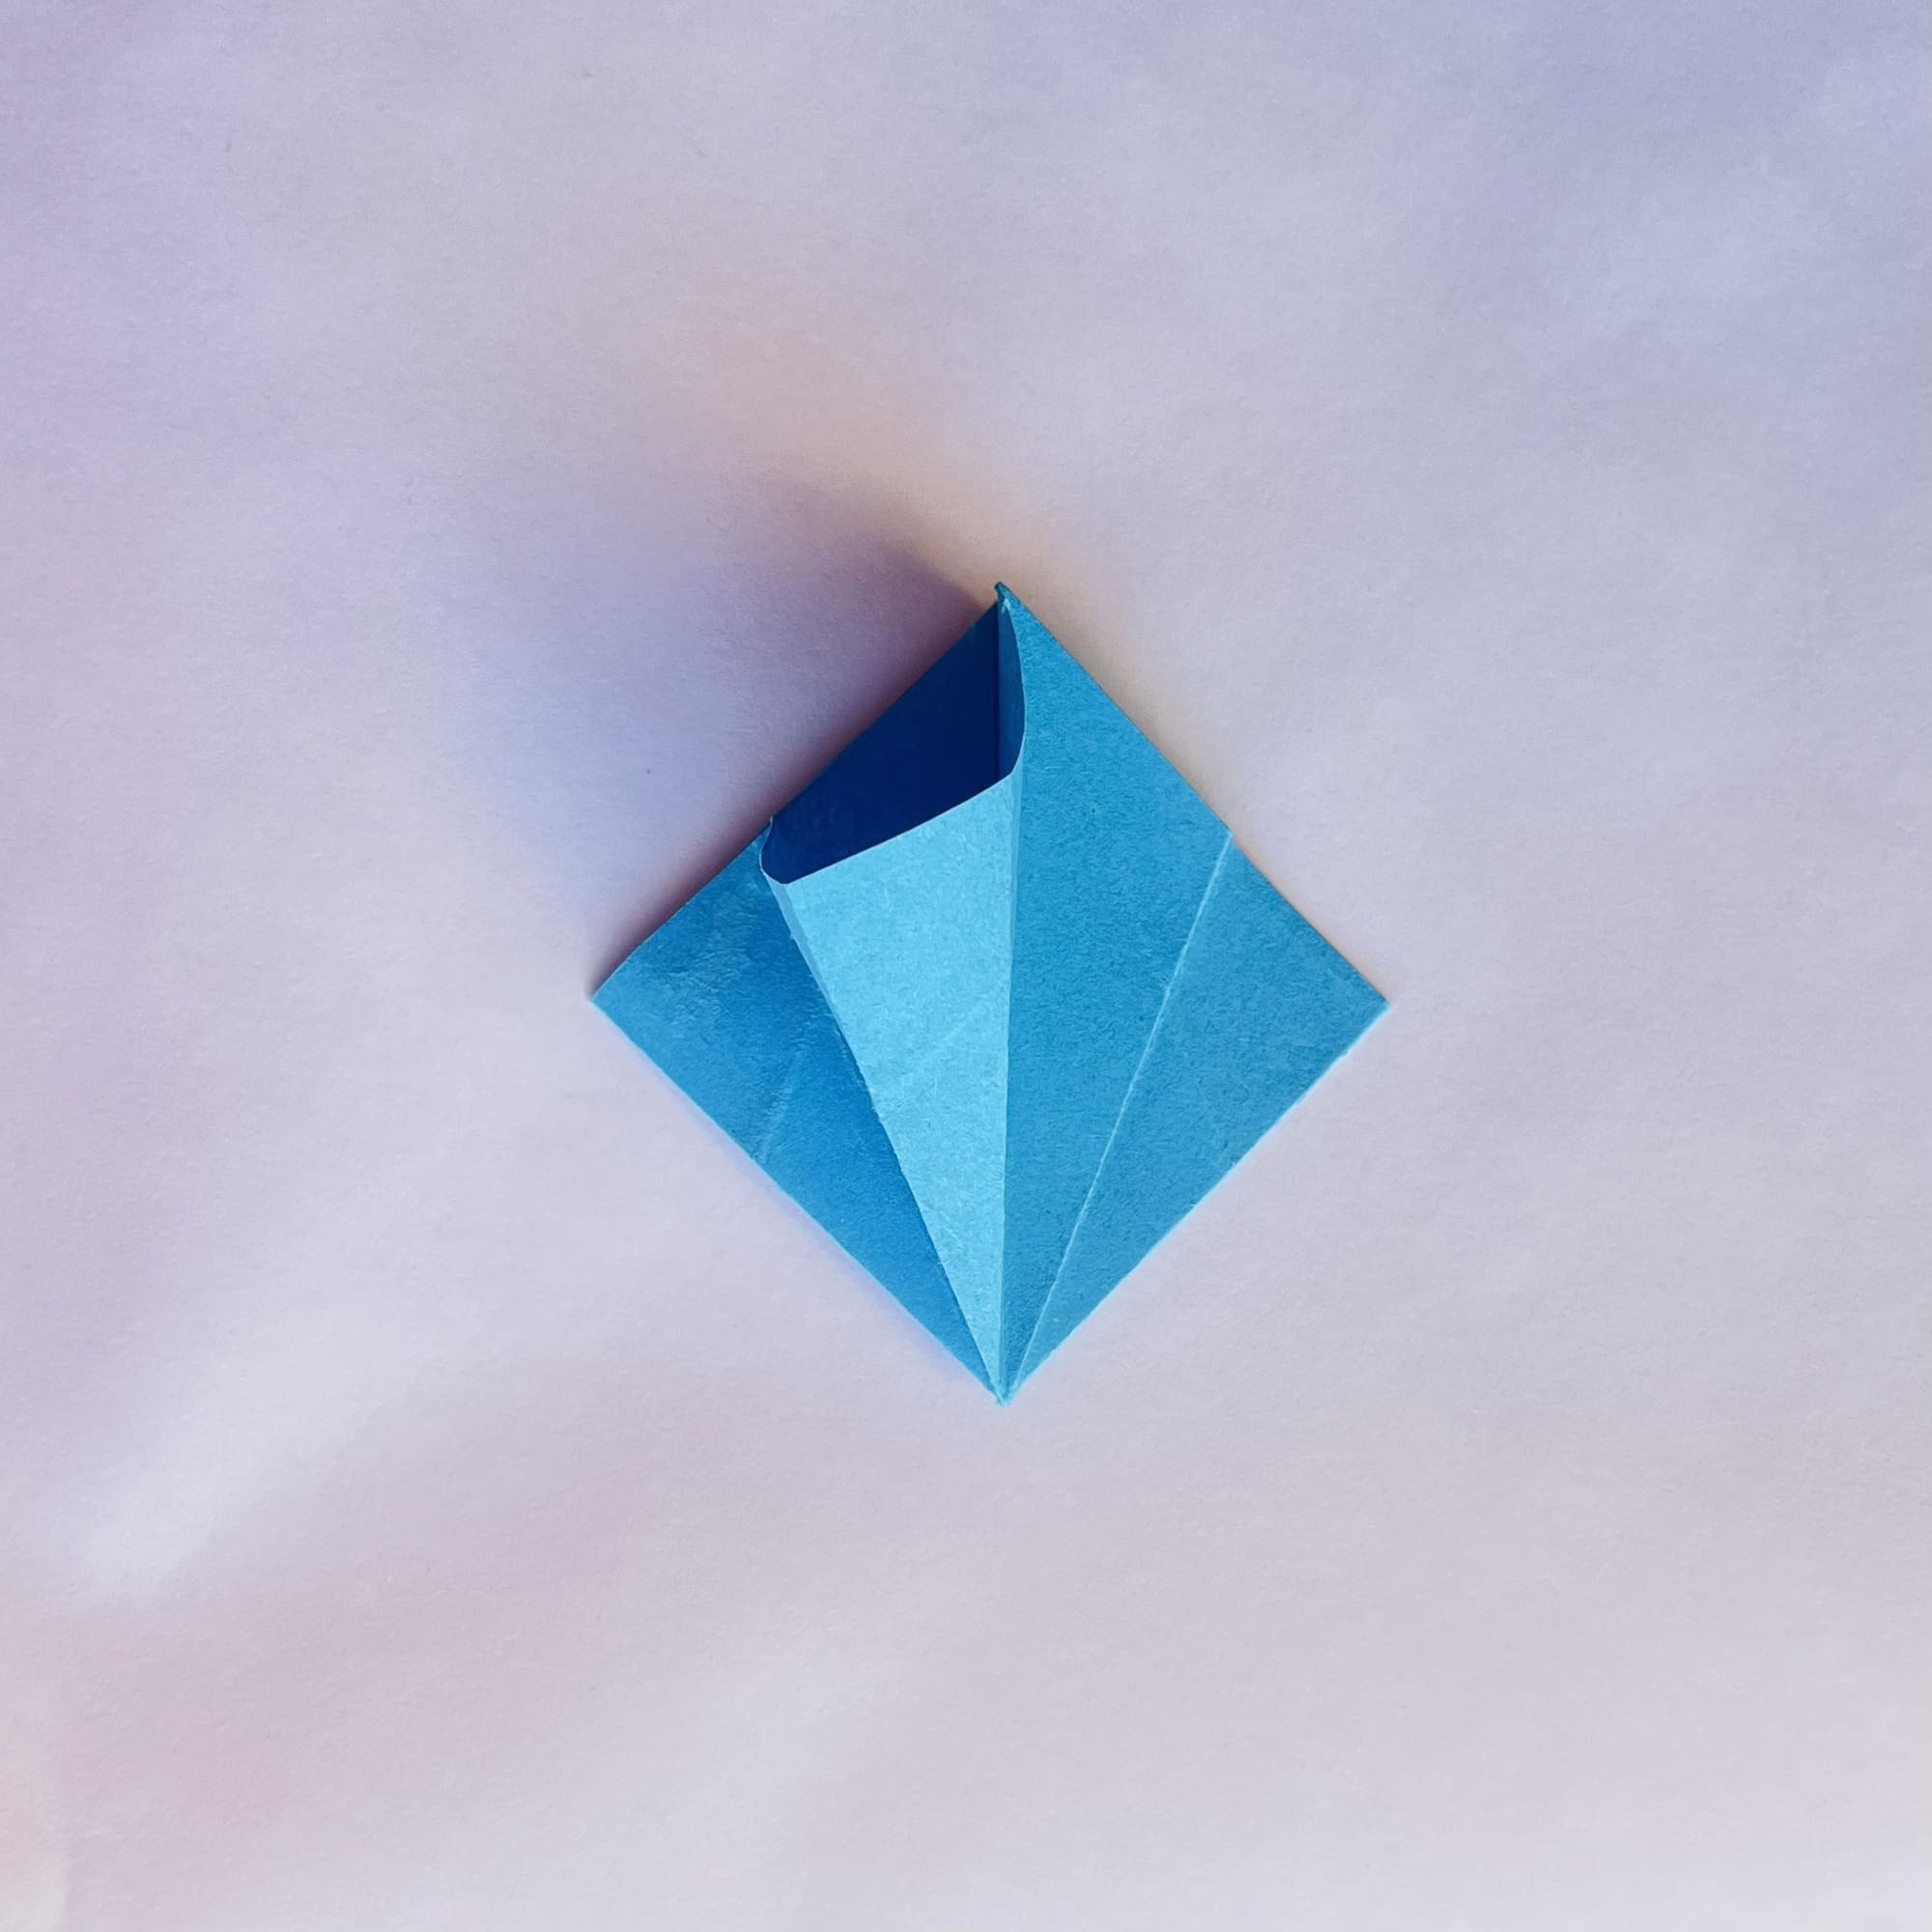
Bend it in the opposite direction, using the photo as your guide. Turn the figure over.
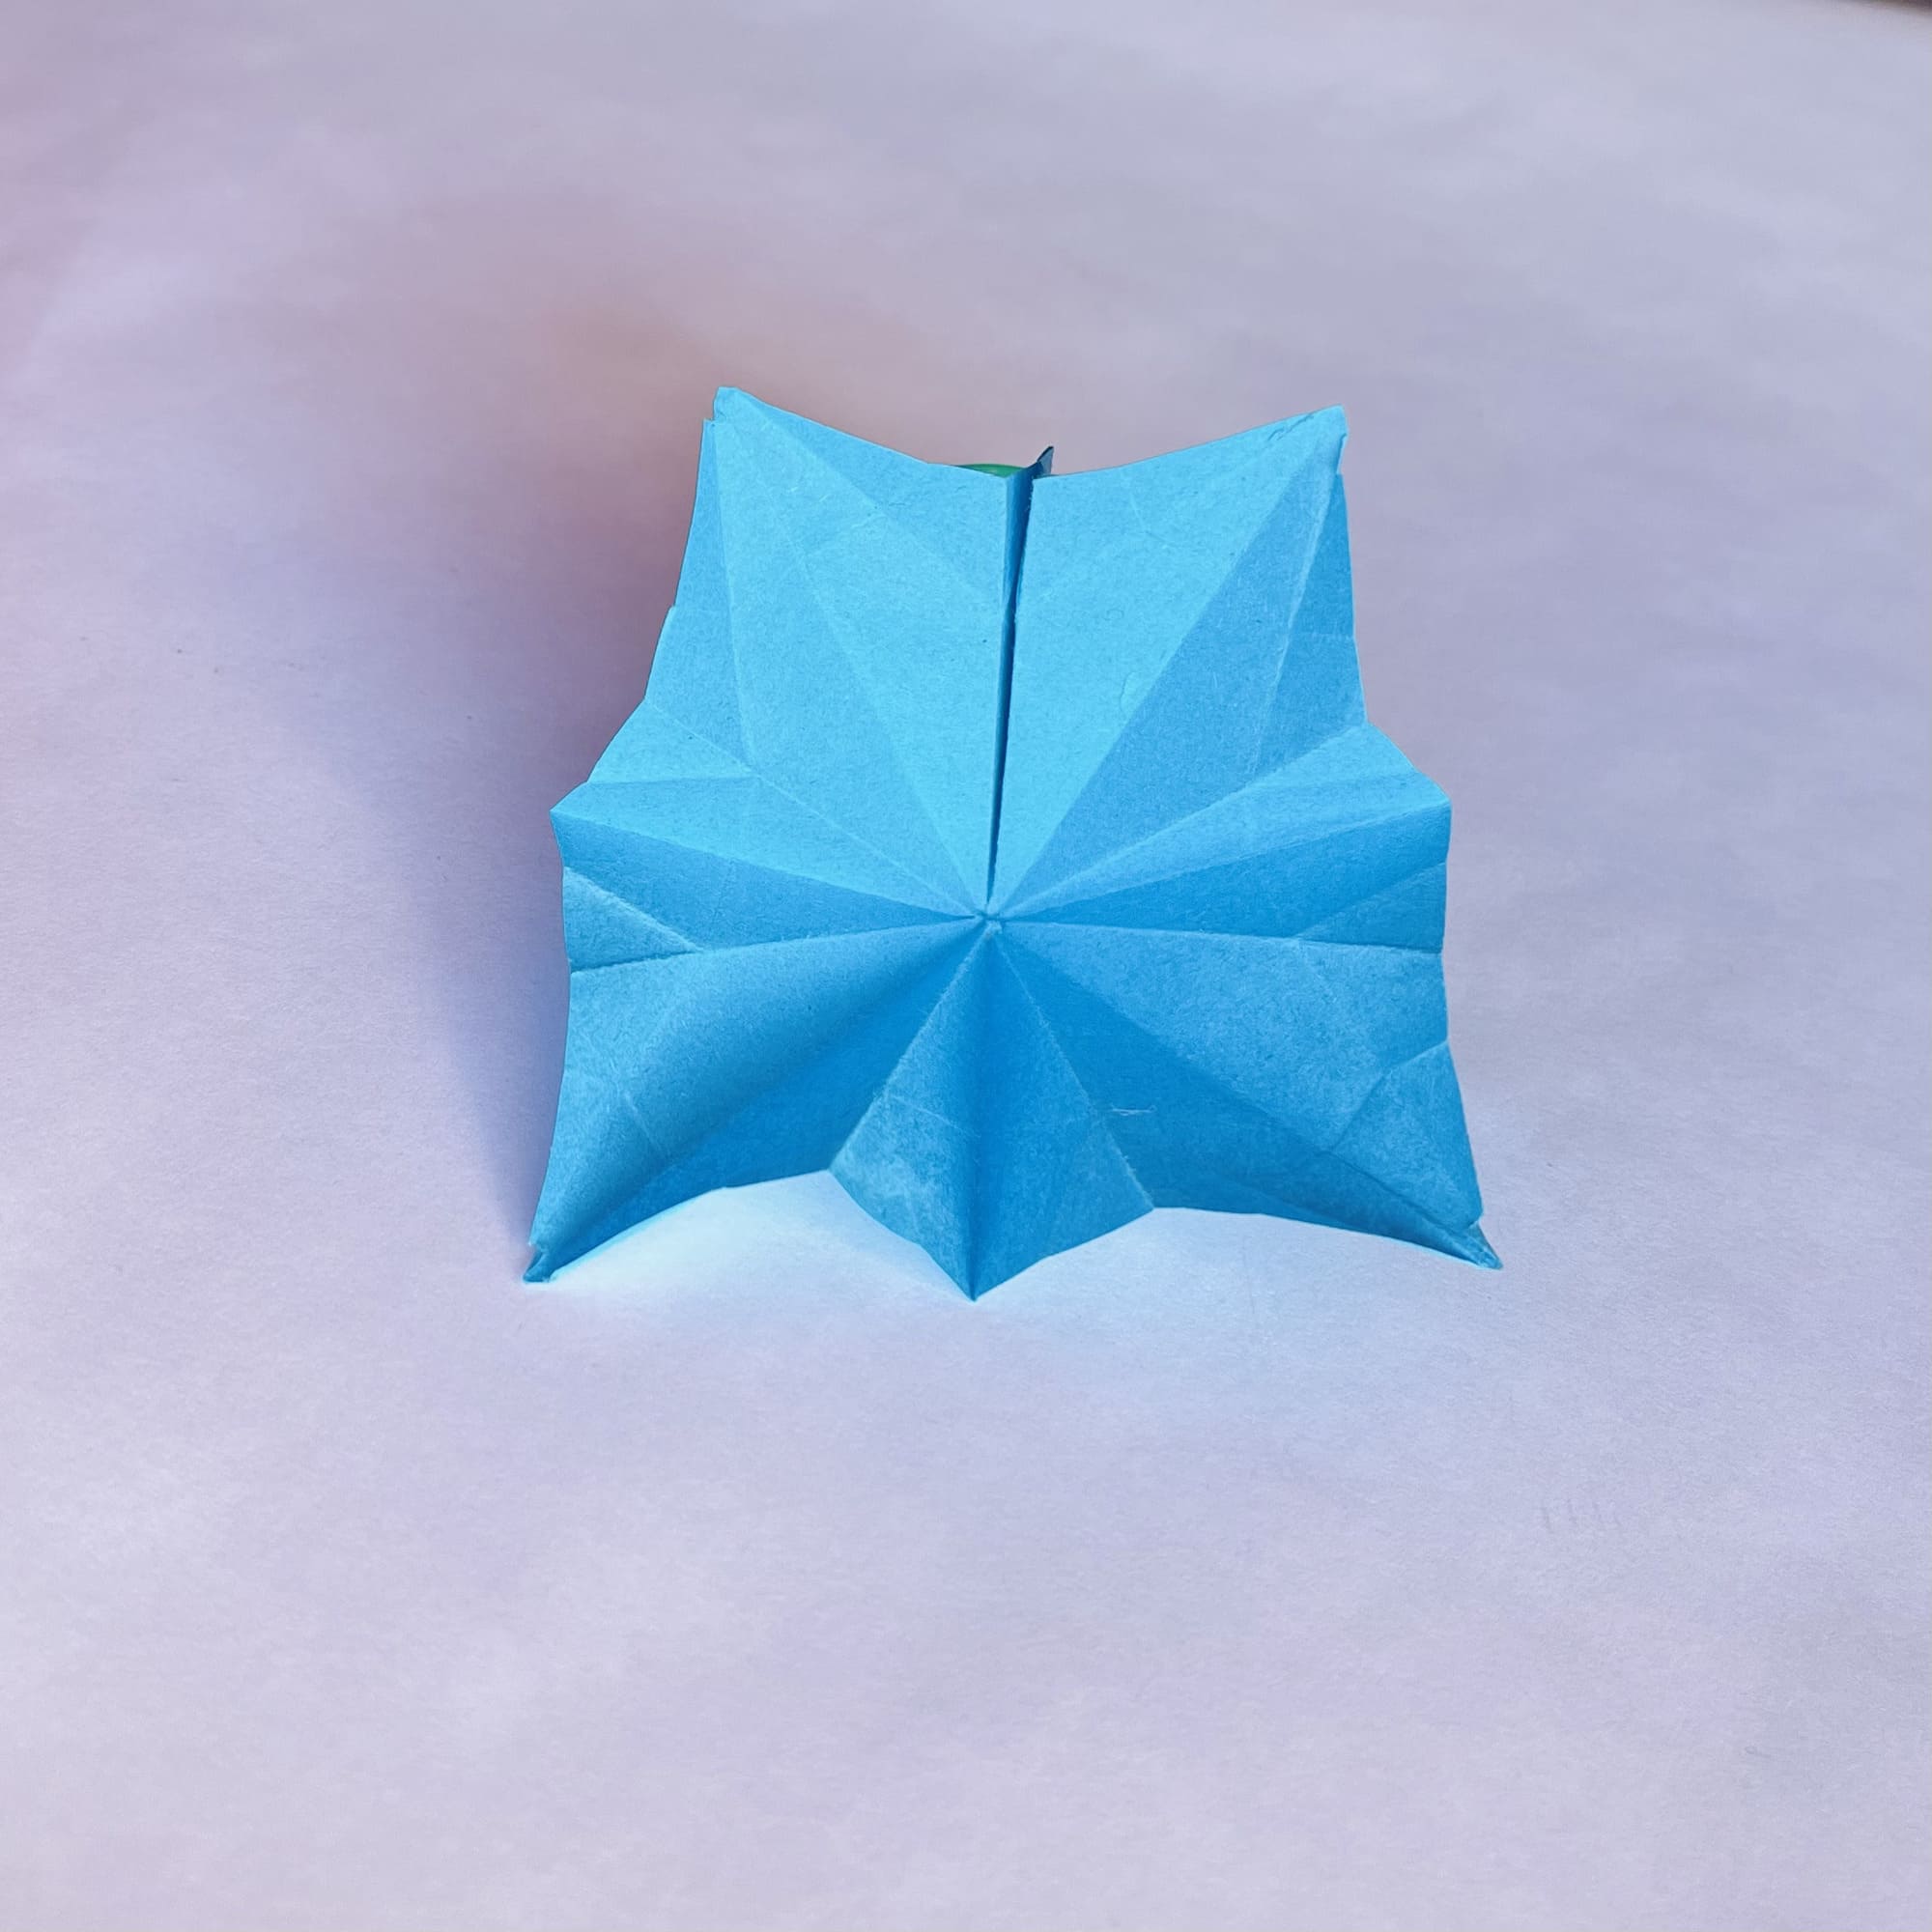
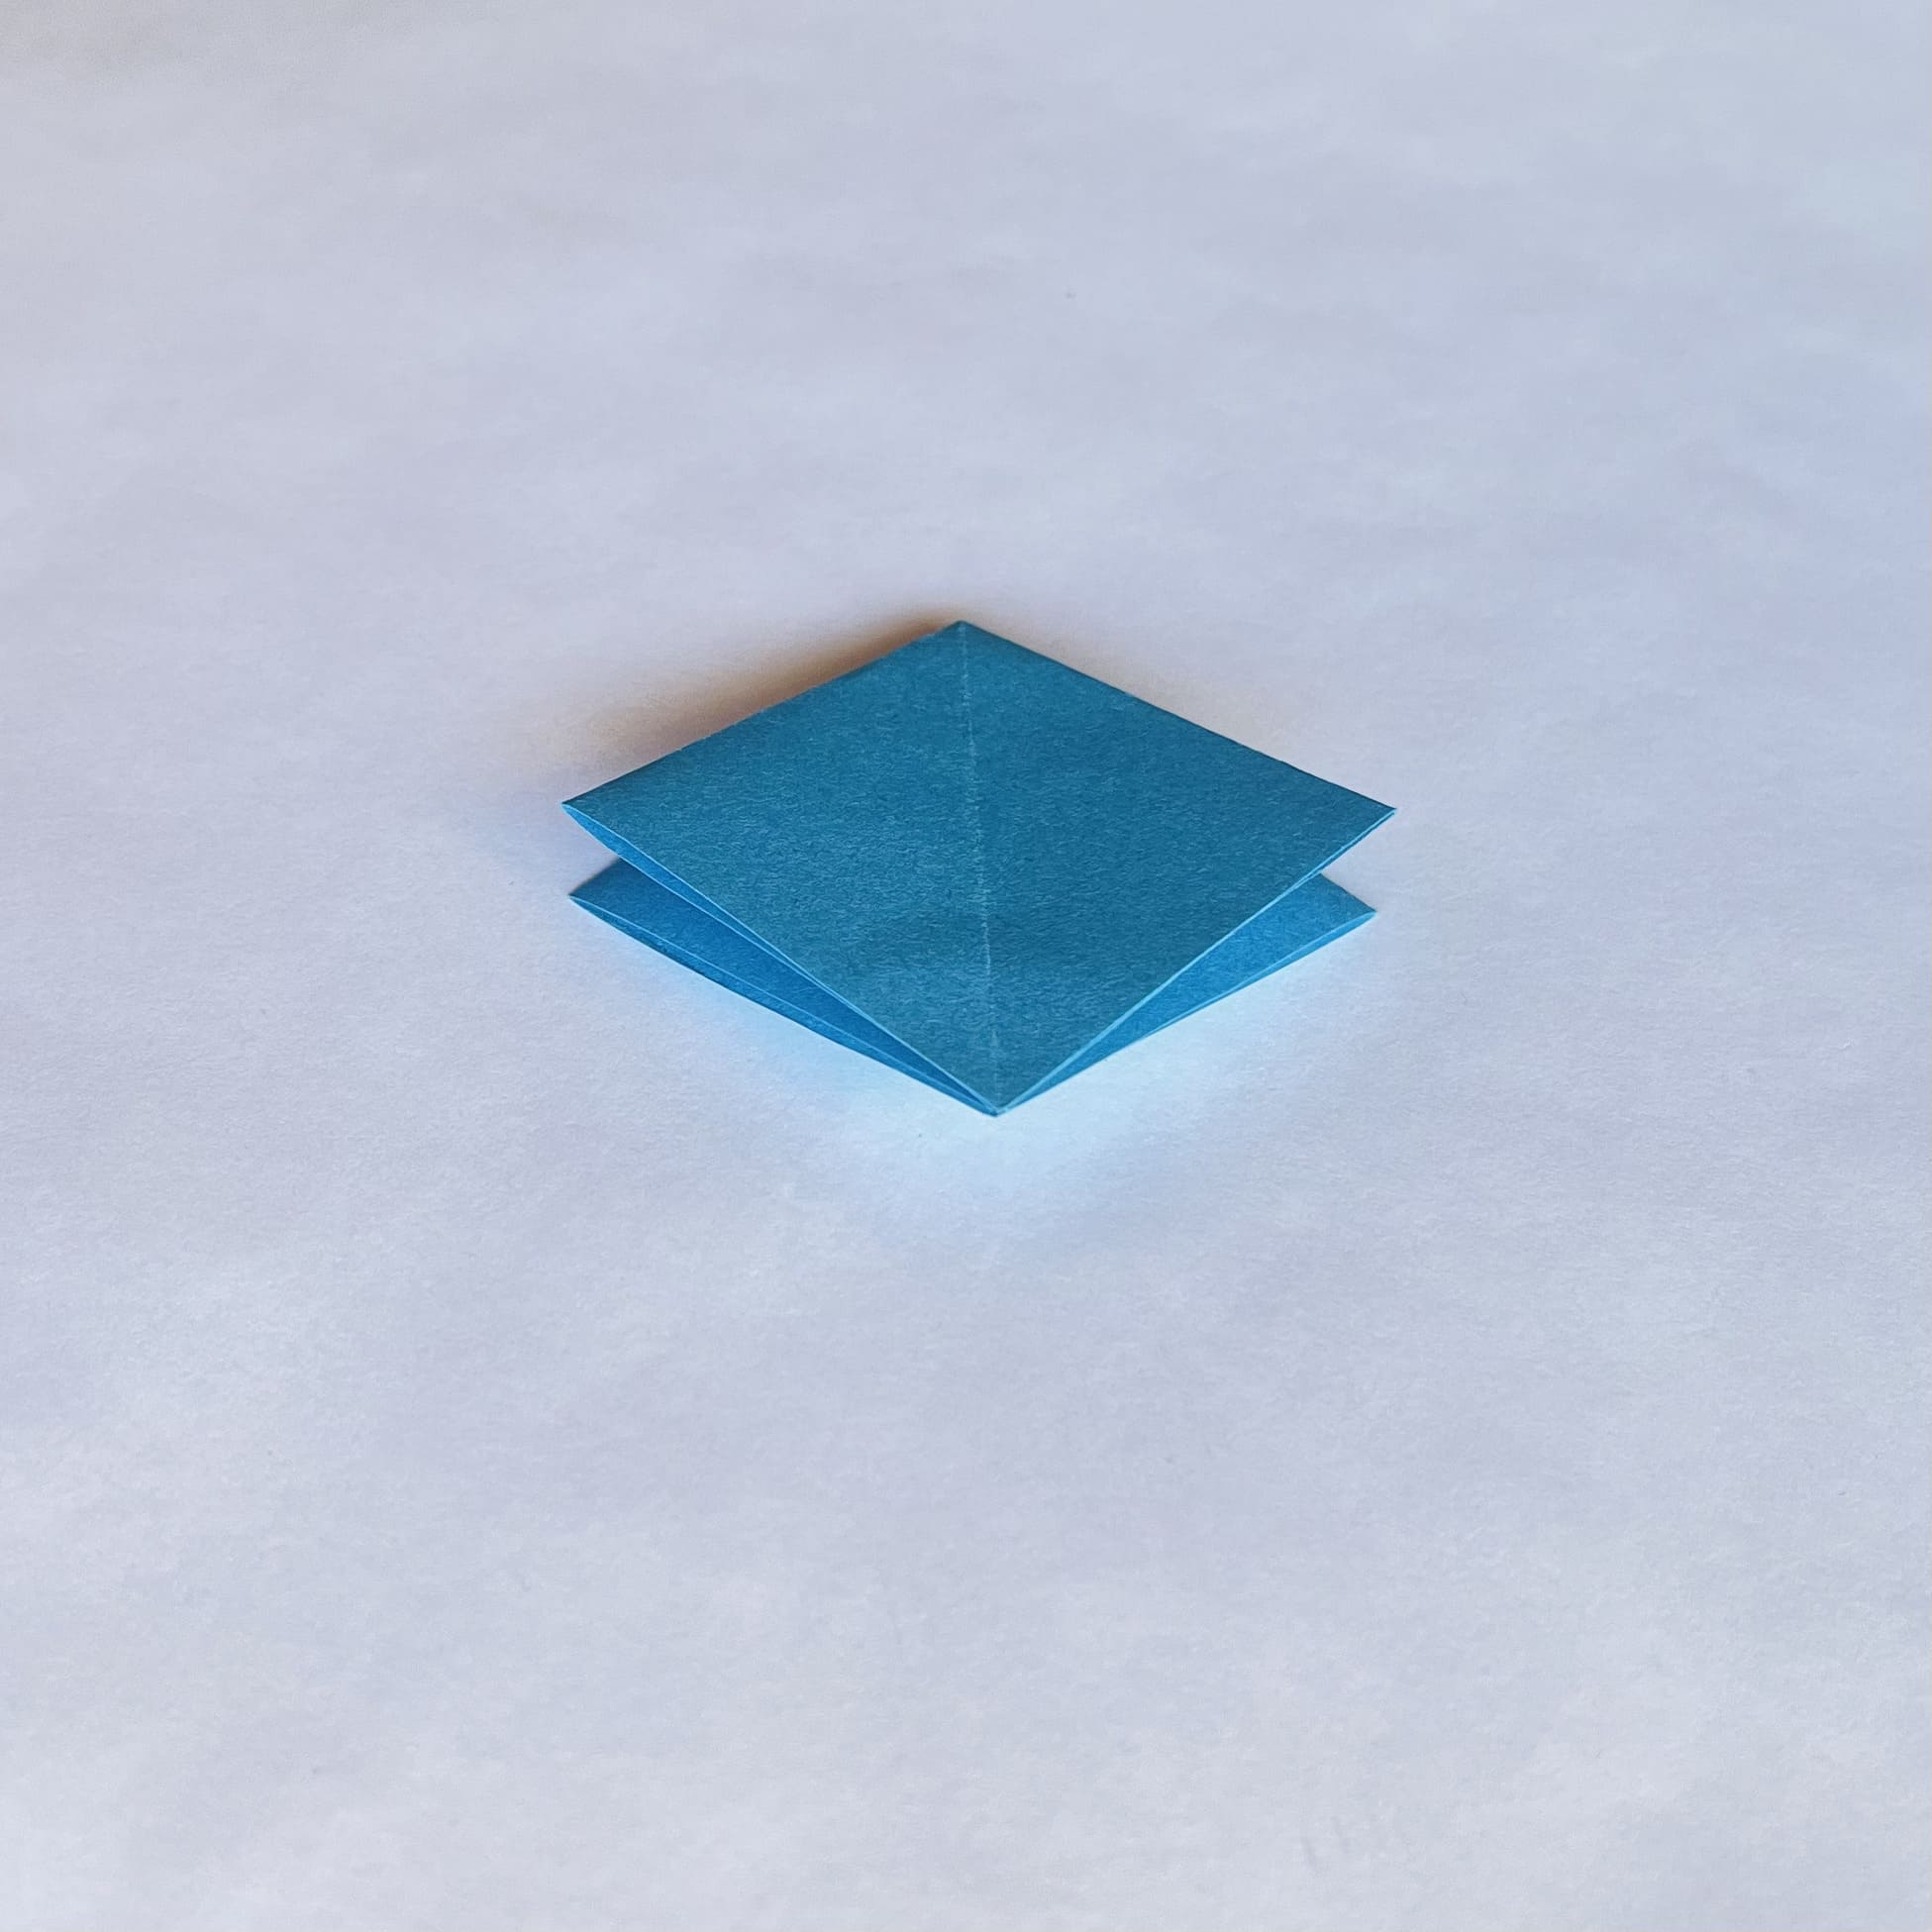
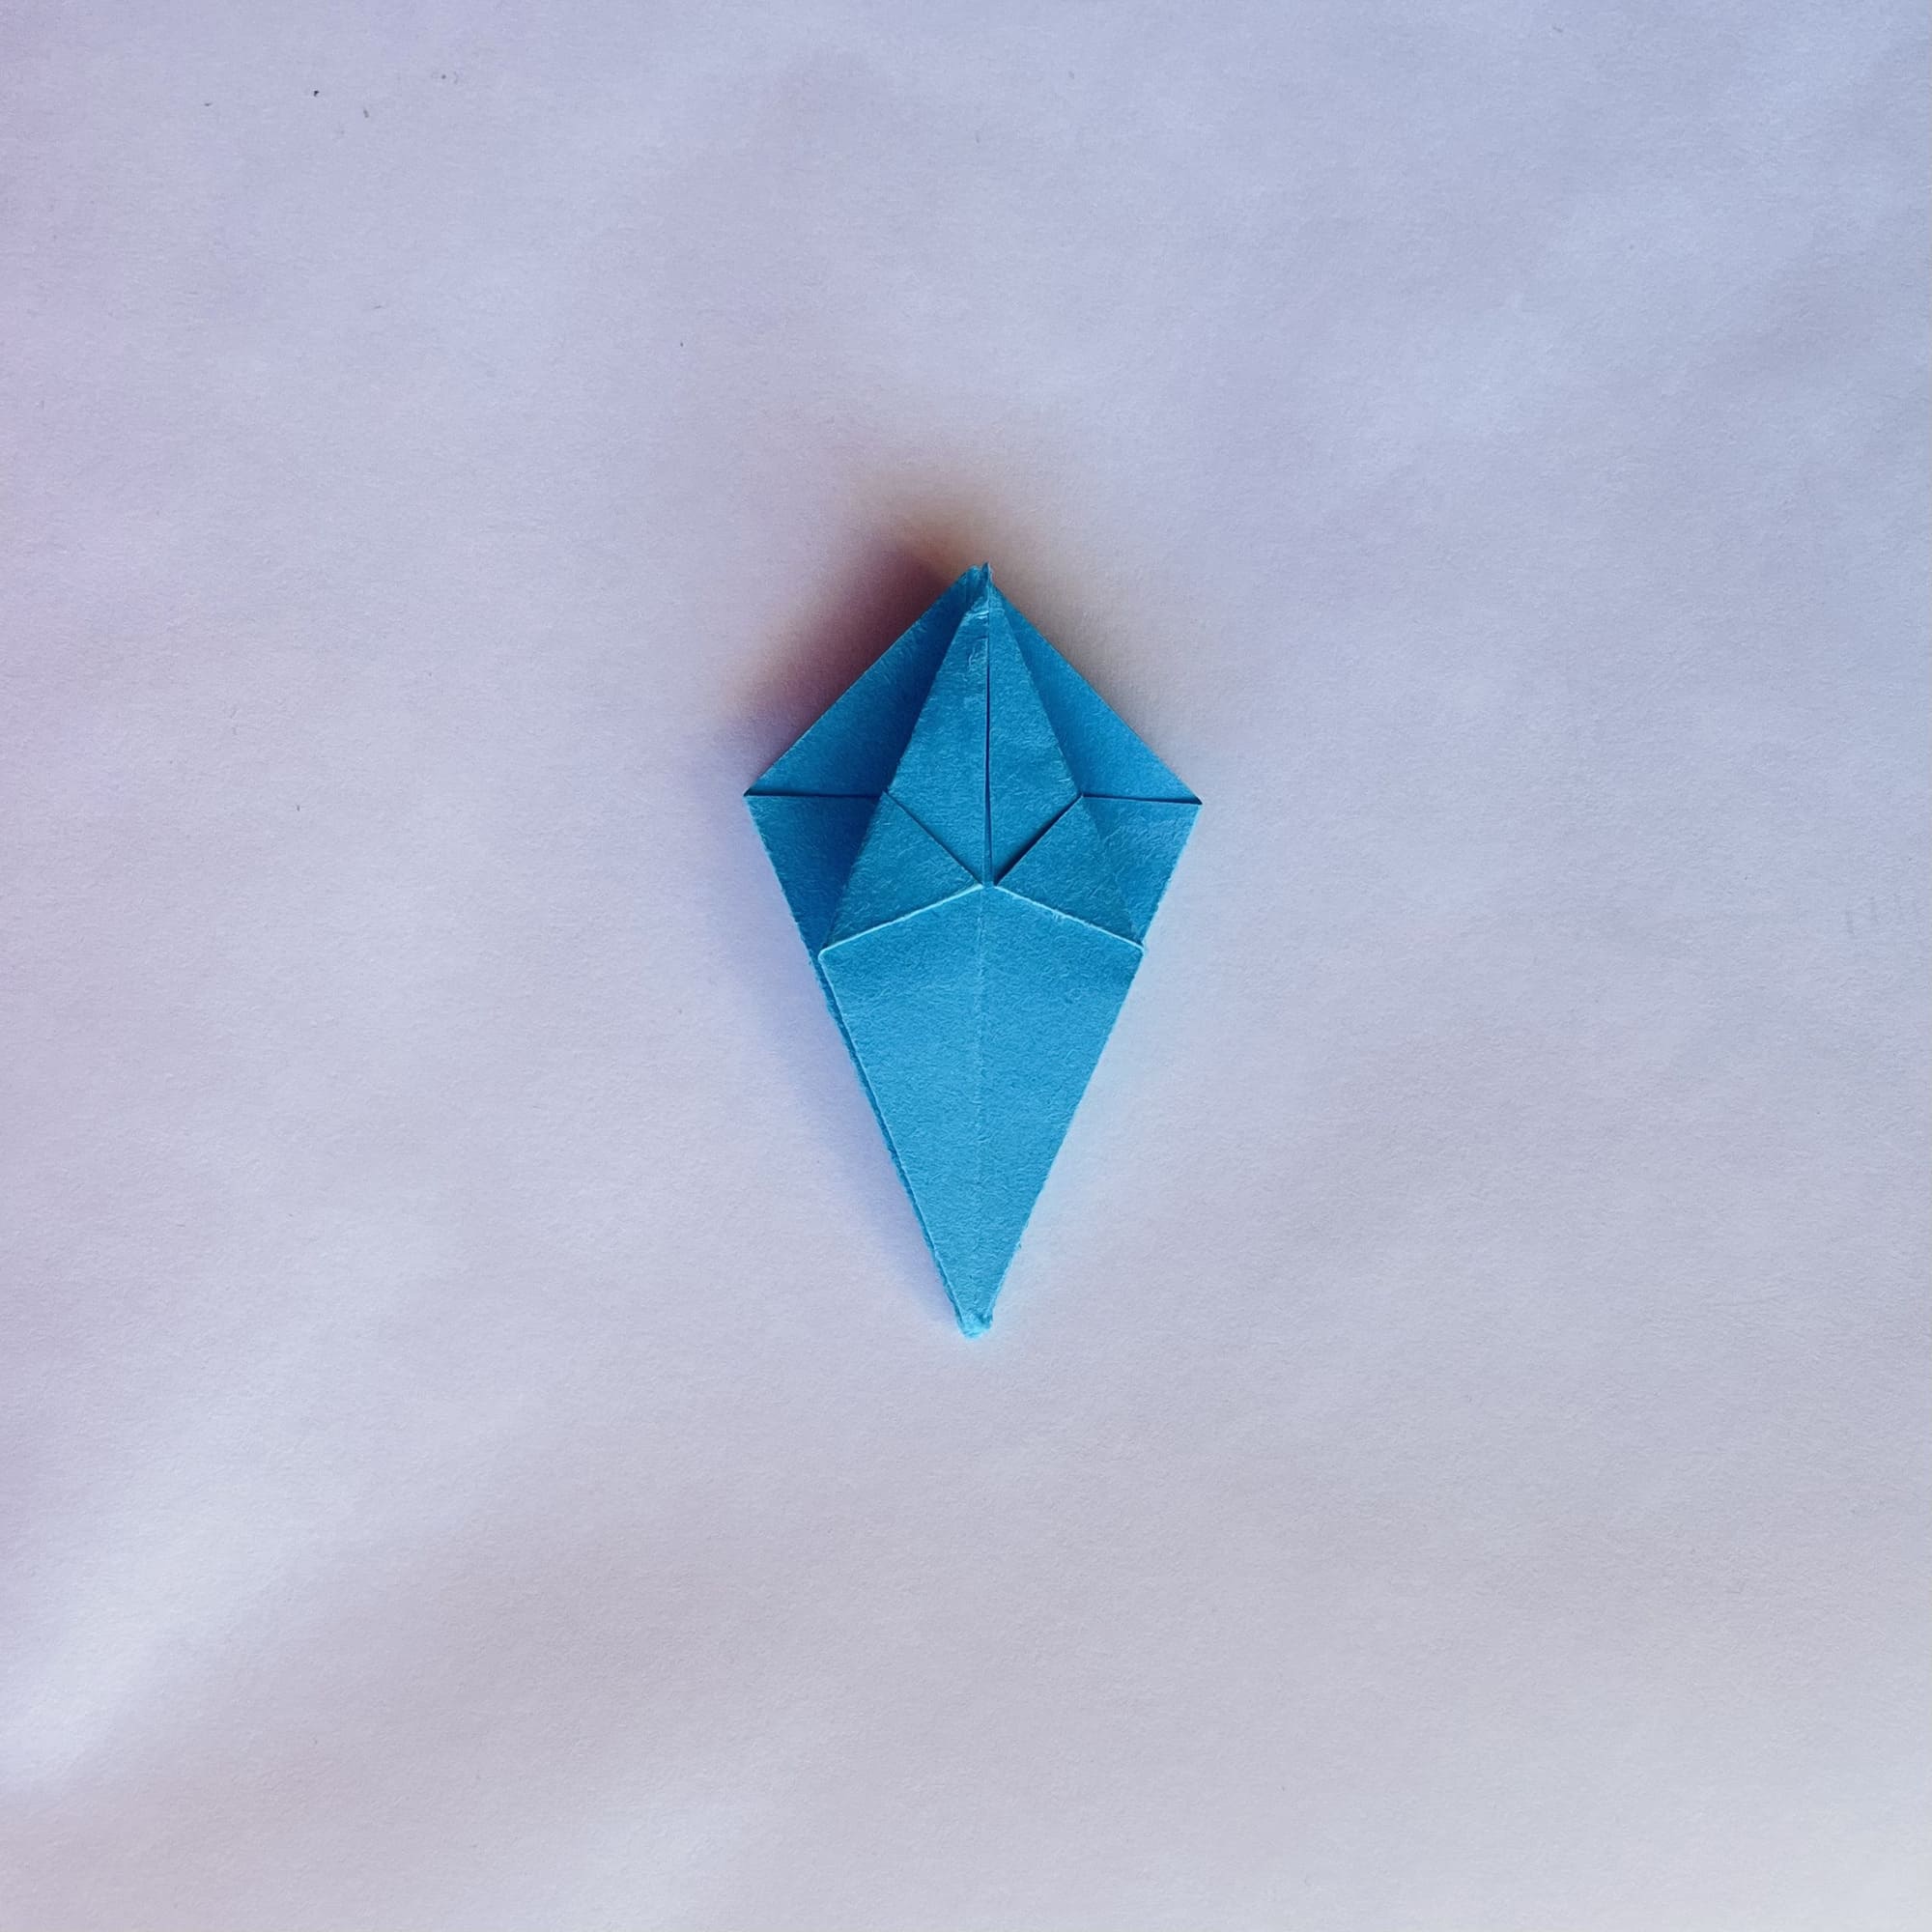
Alternately fold the paper along two folds and bend them back, as shown in the photo.


Now, look at the paper “from the inside”.
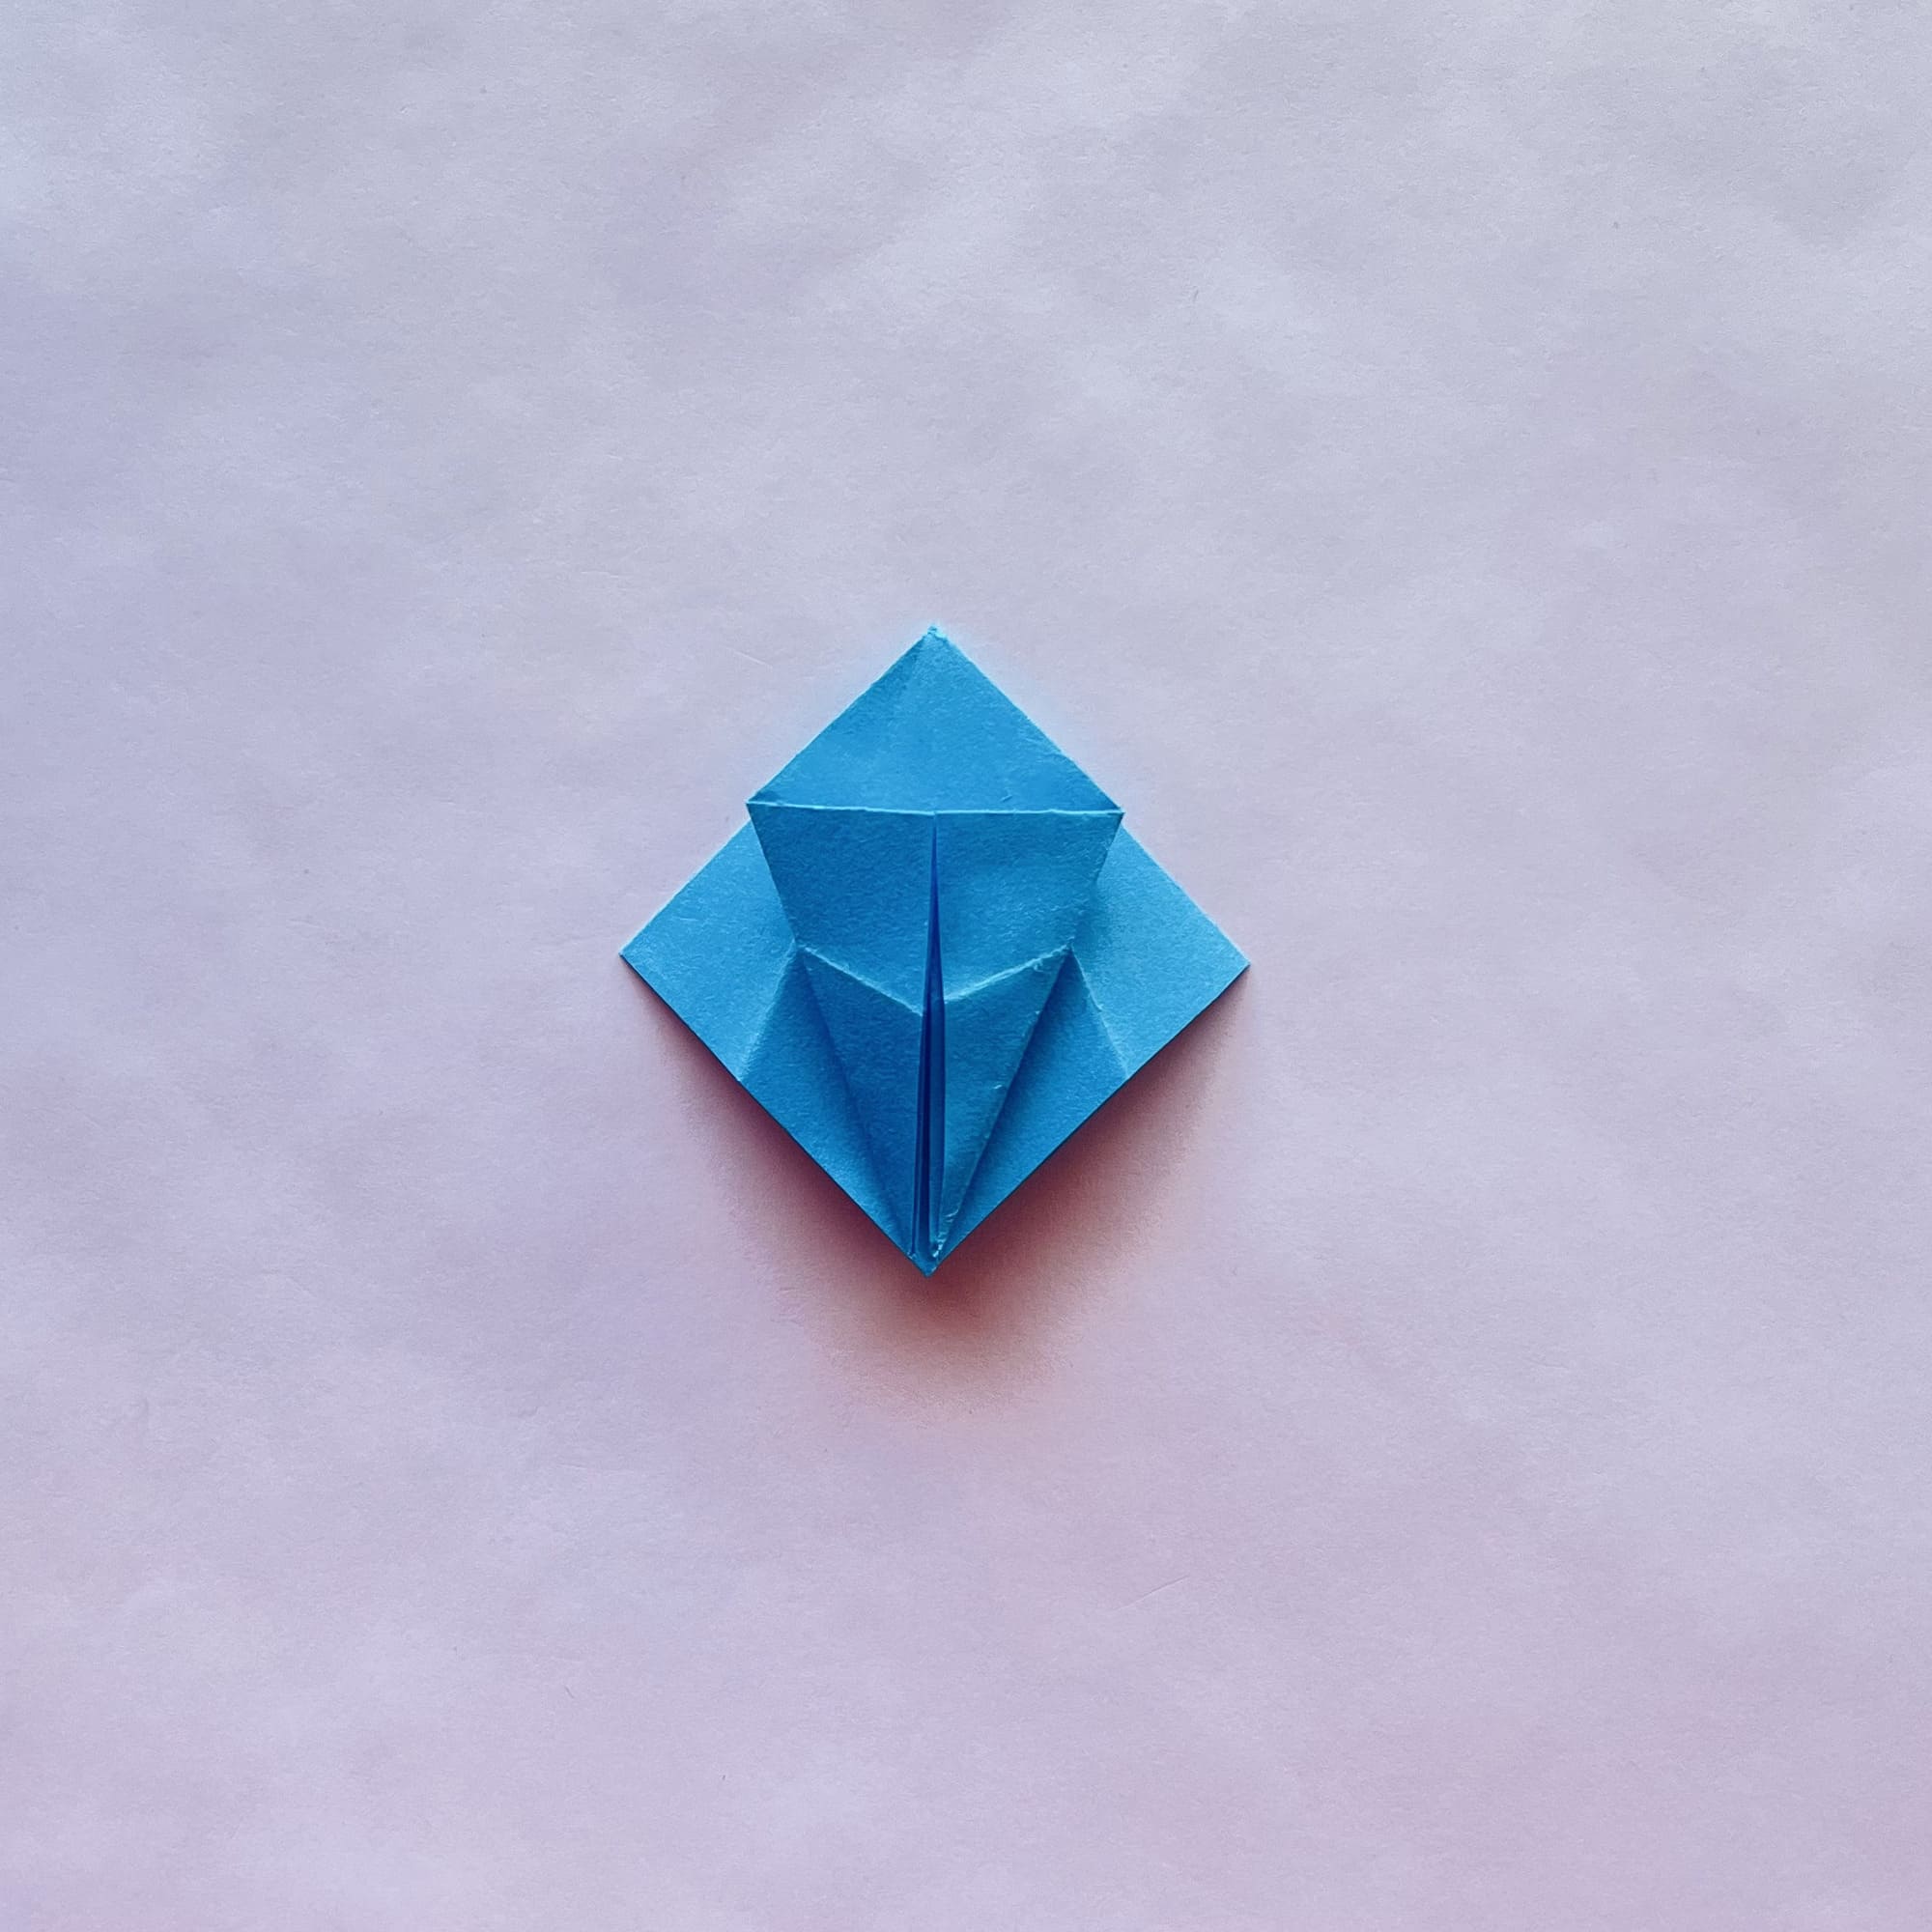
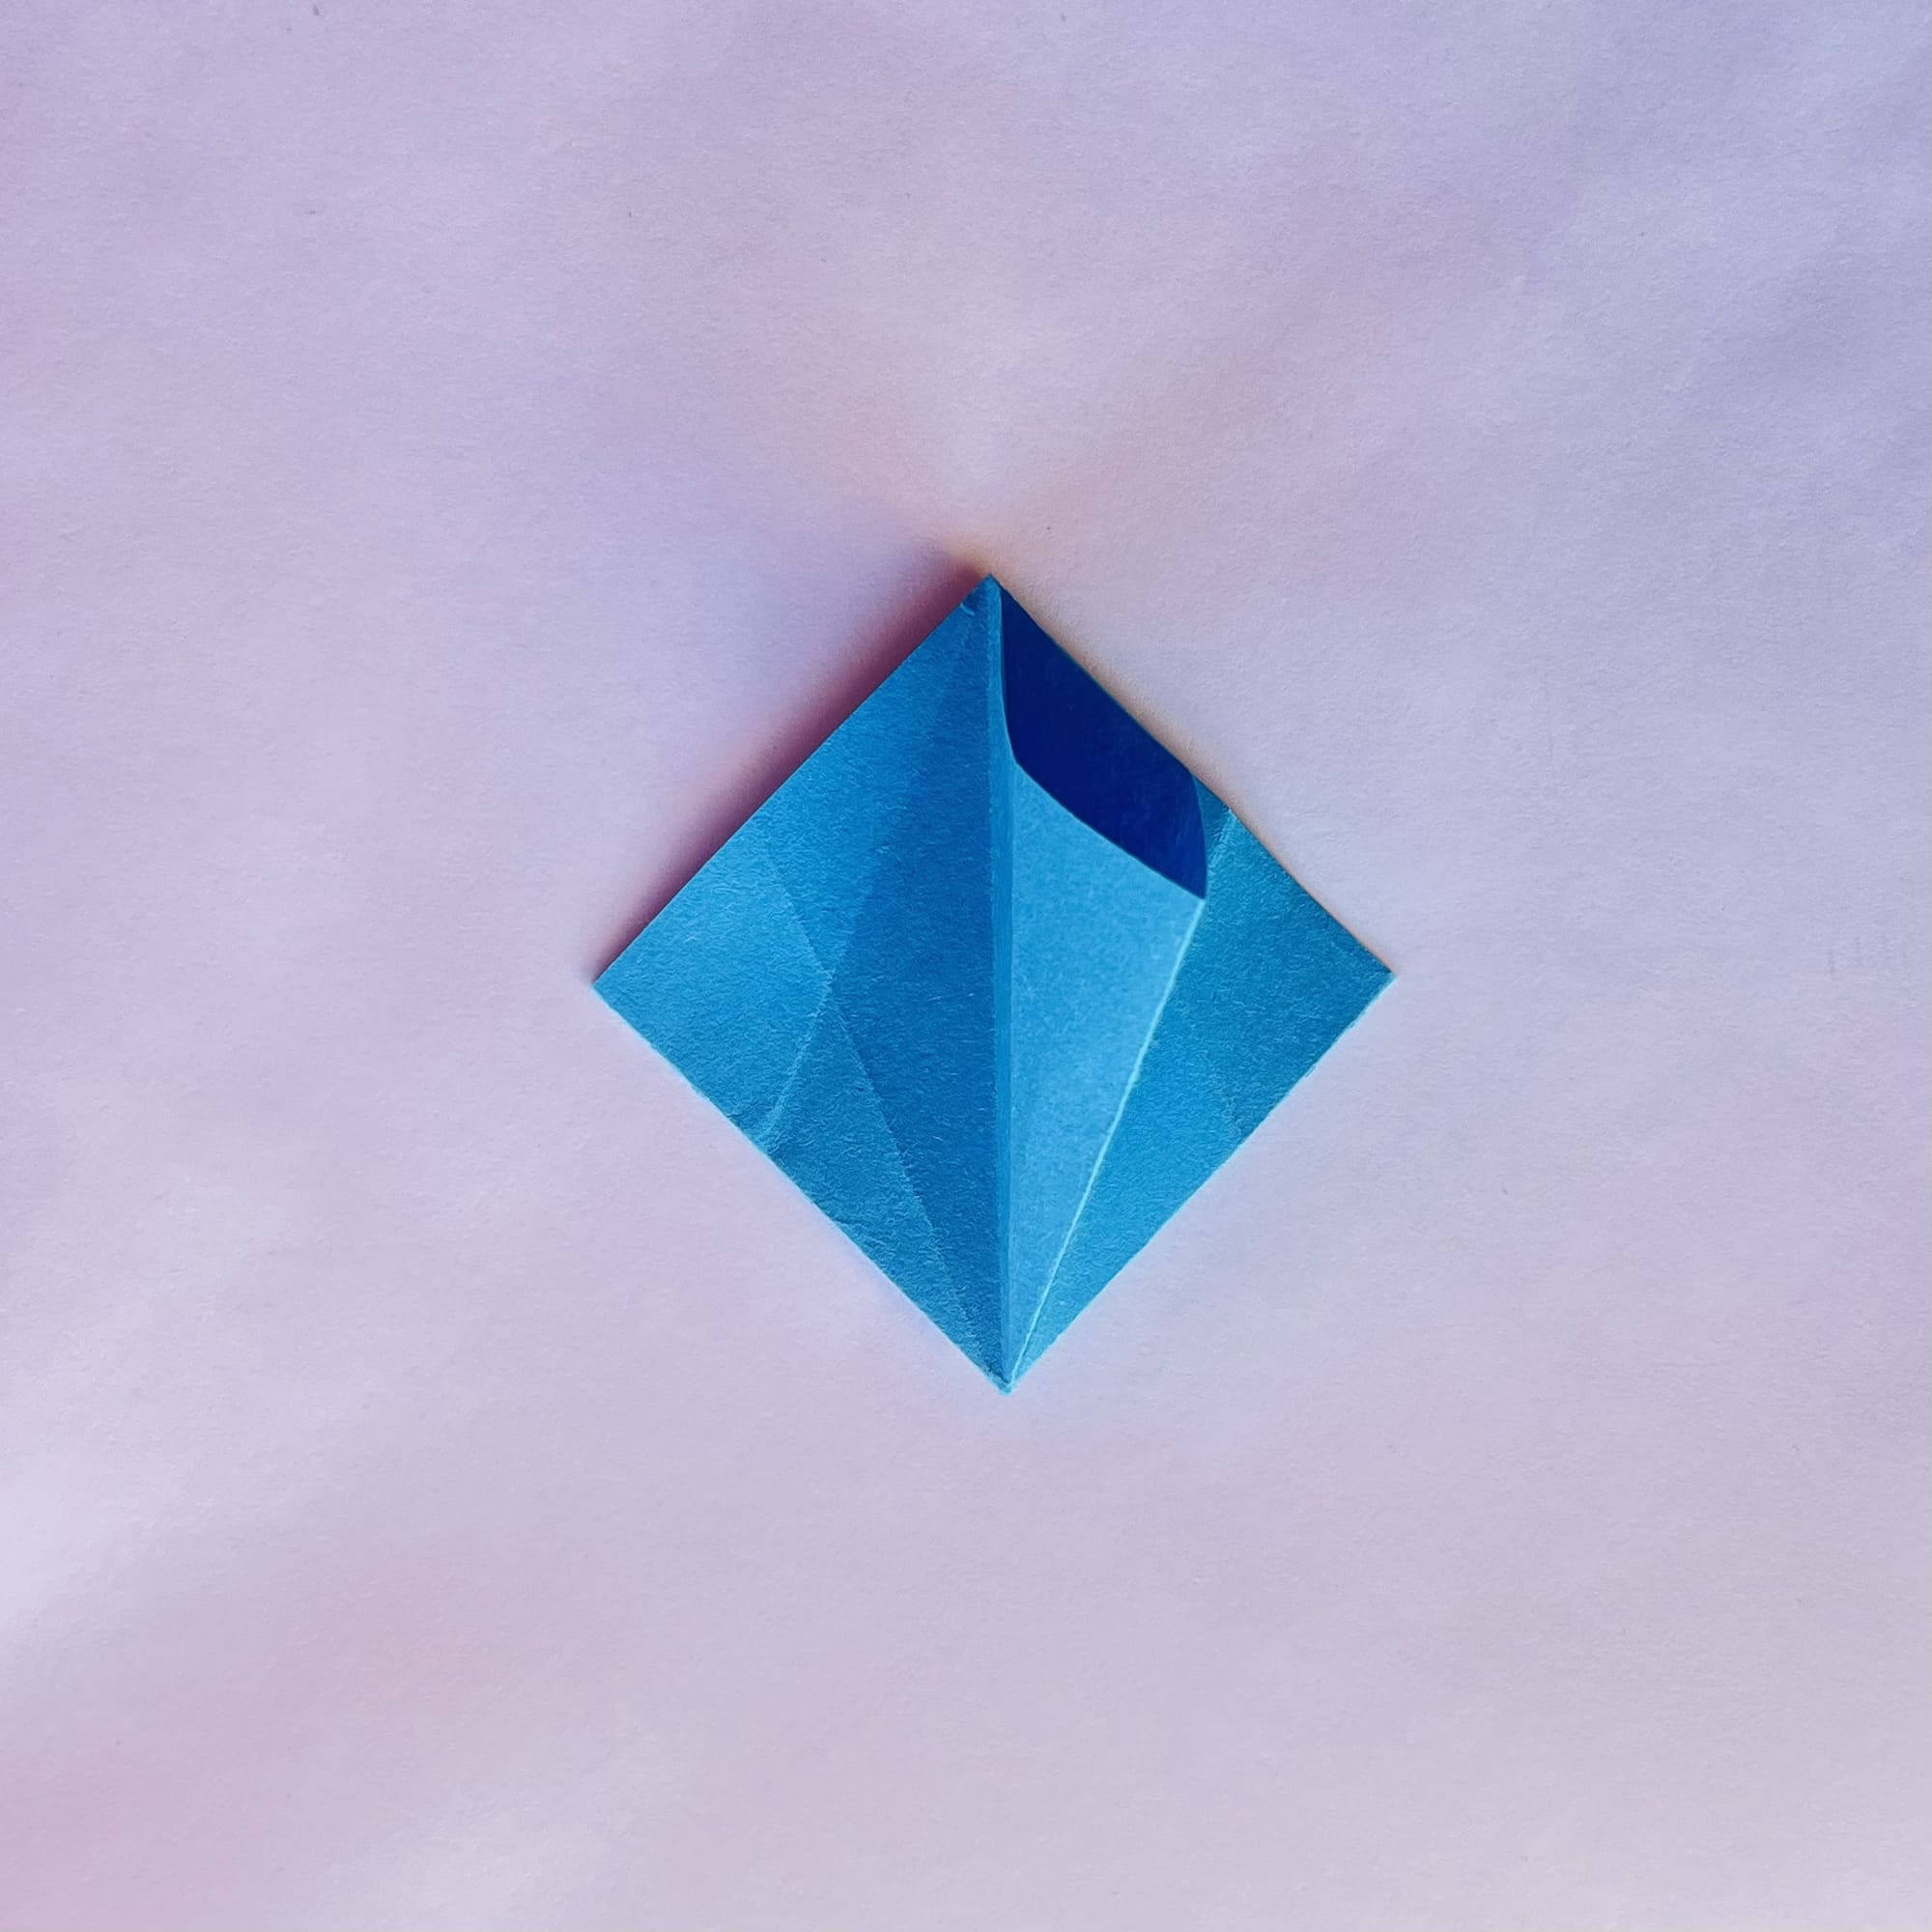
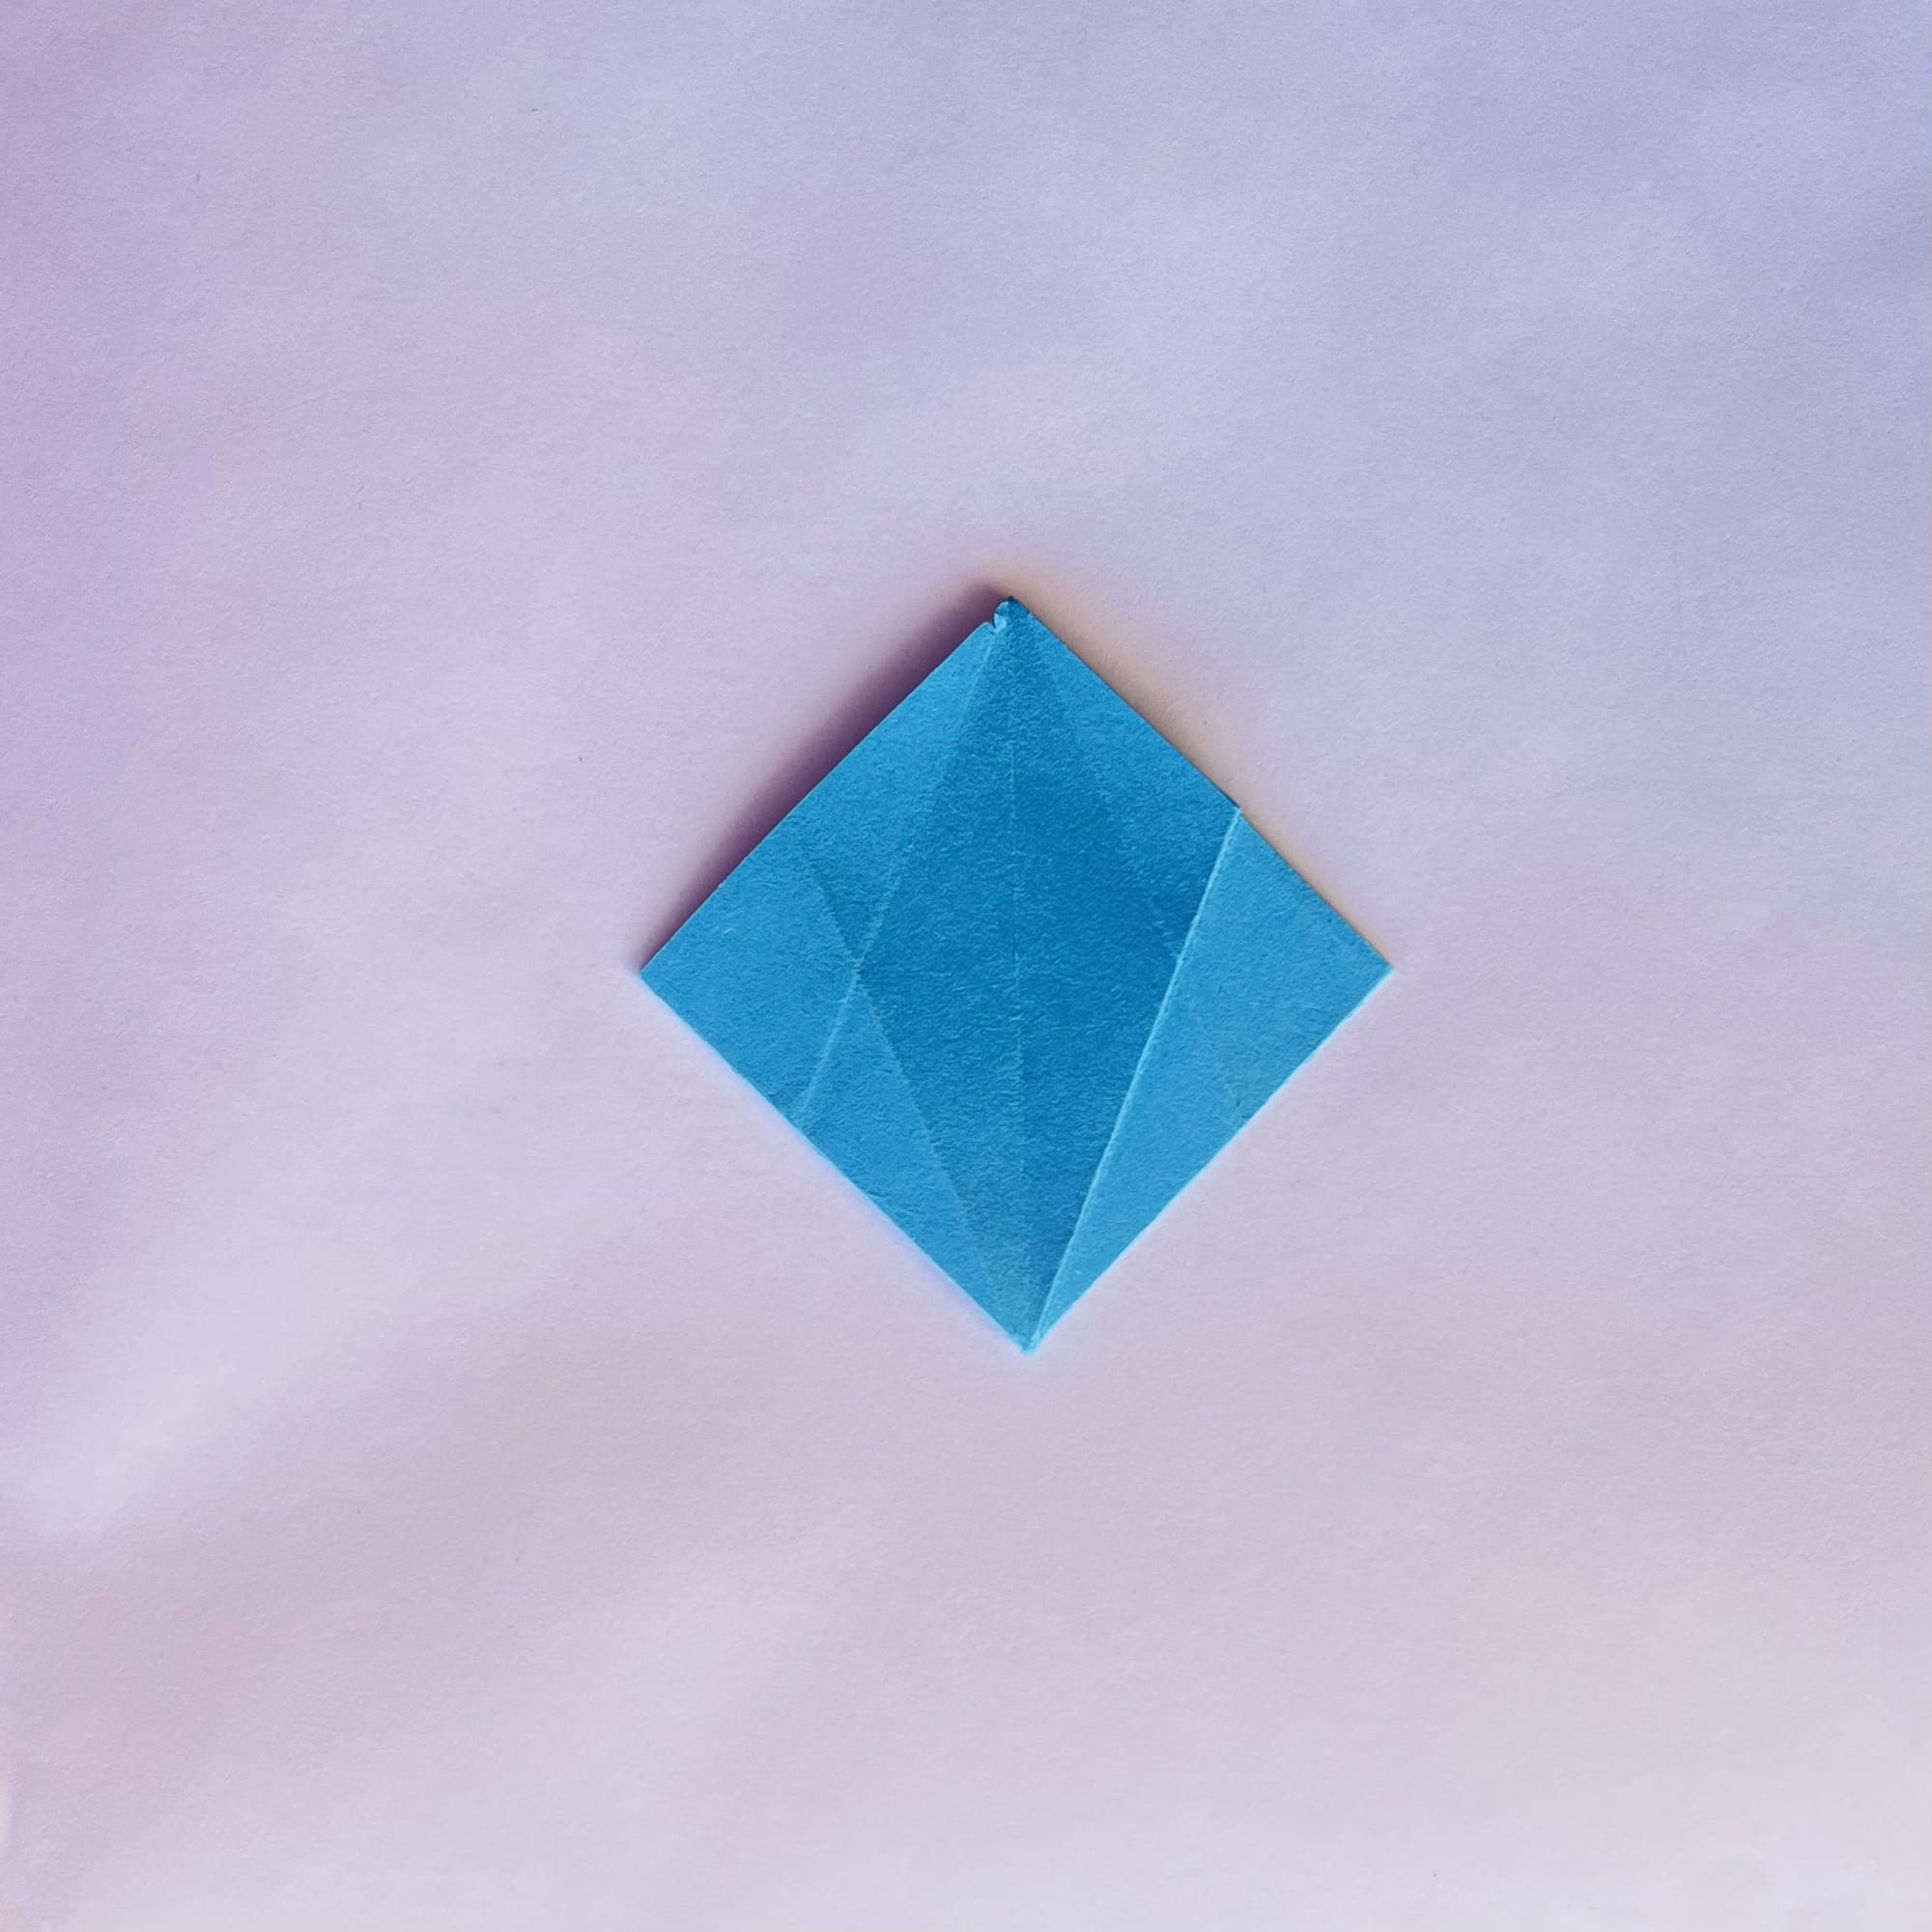
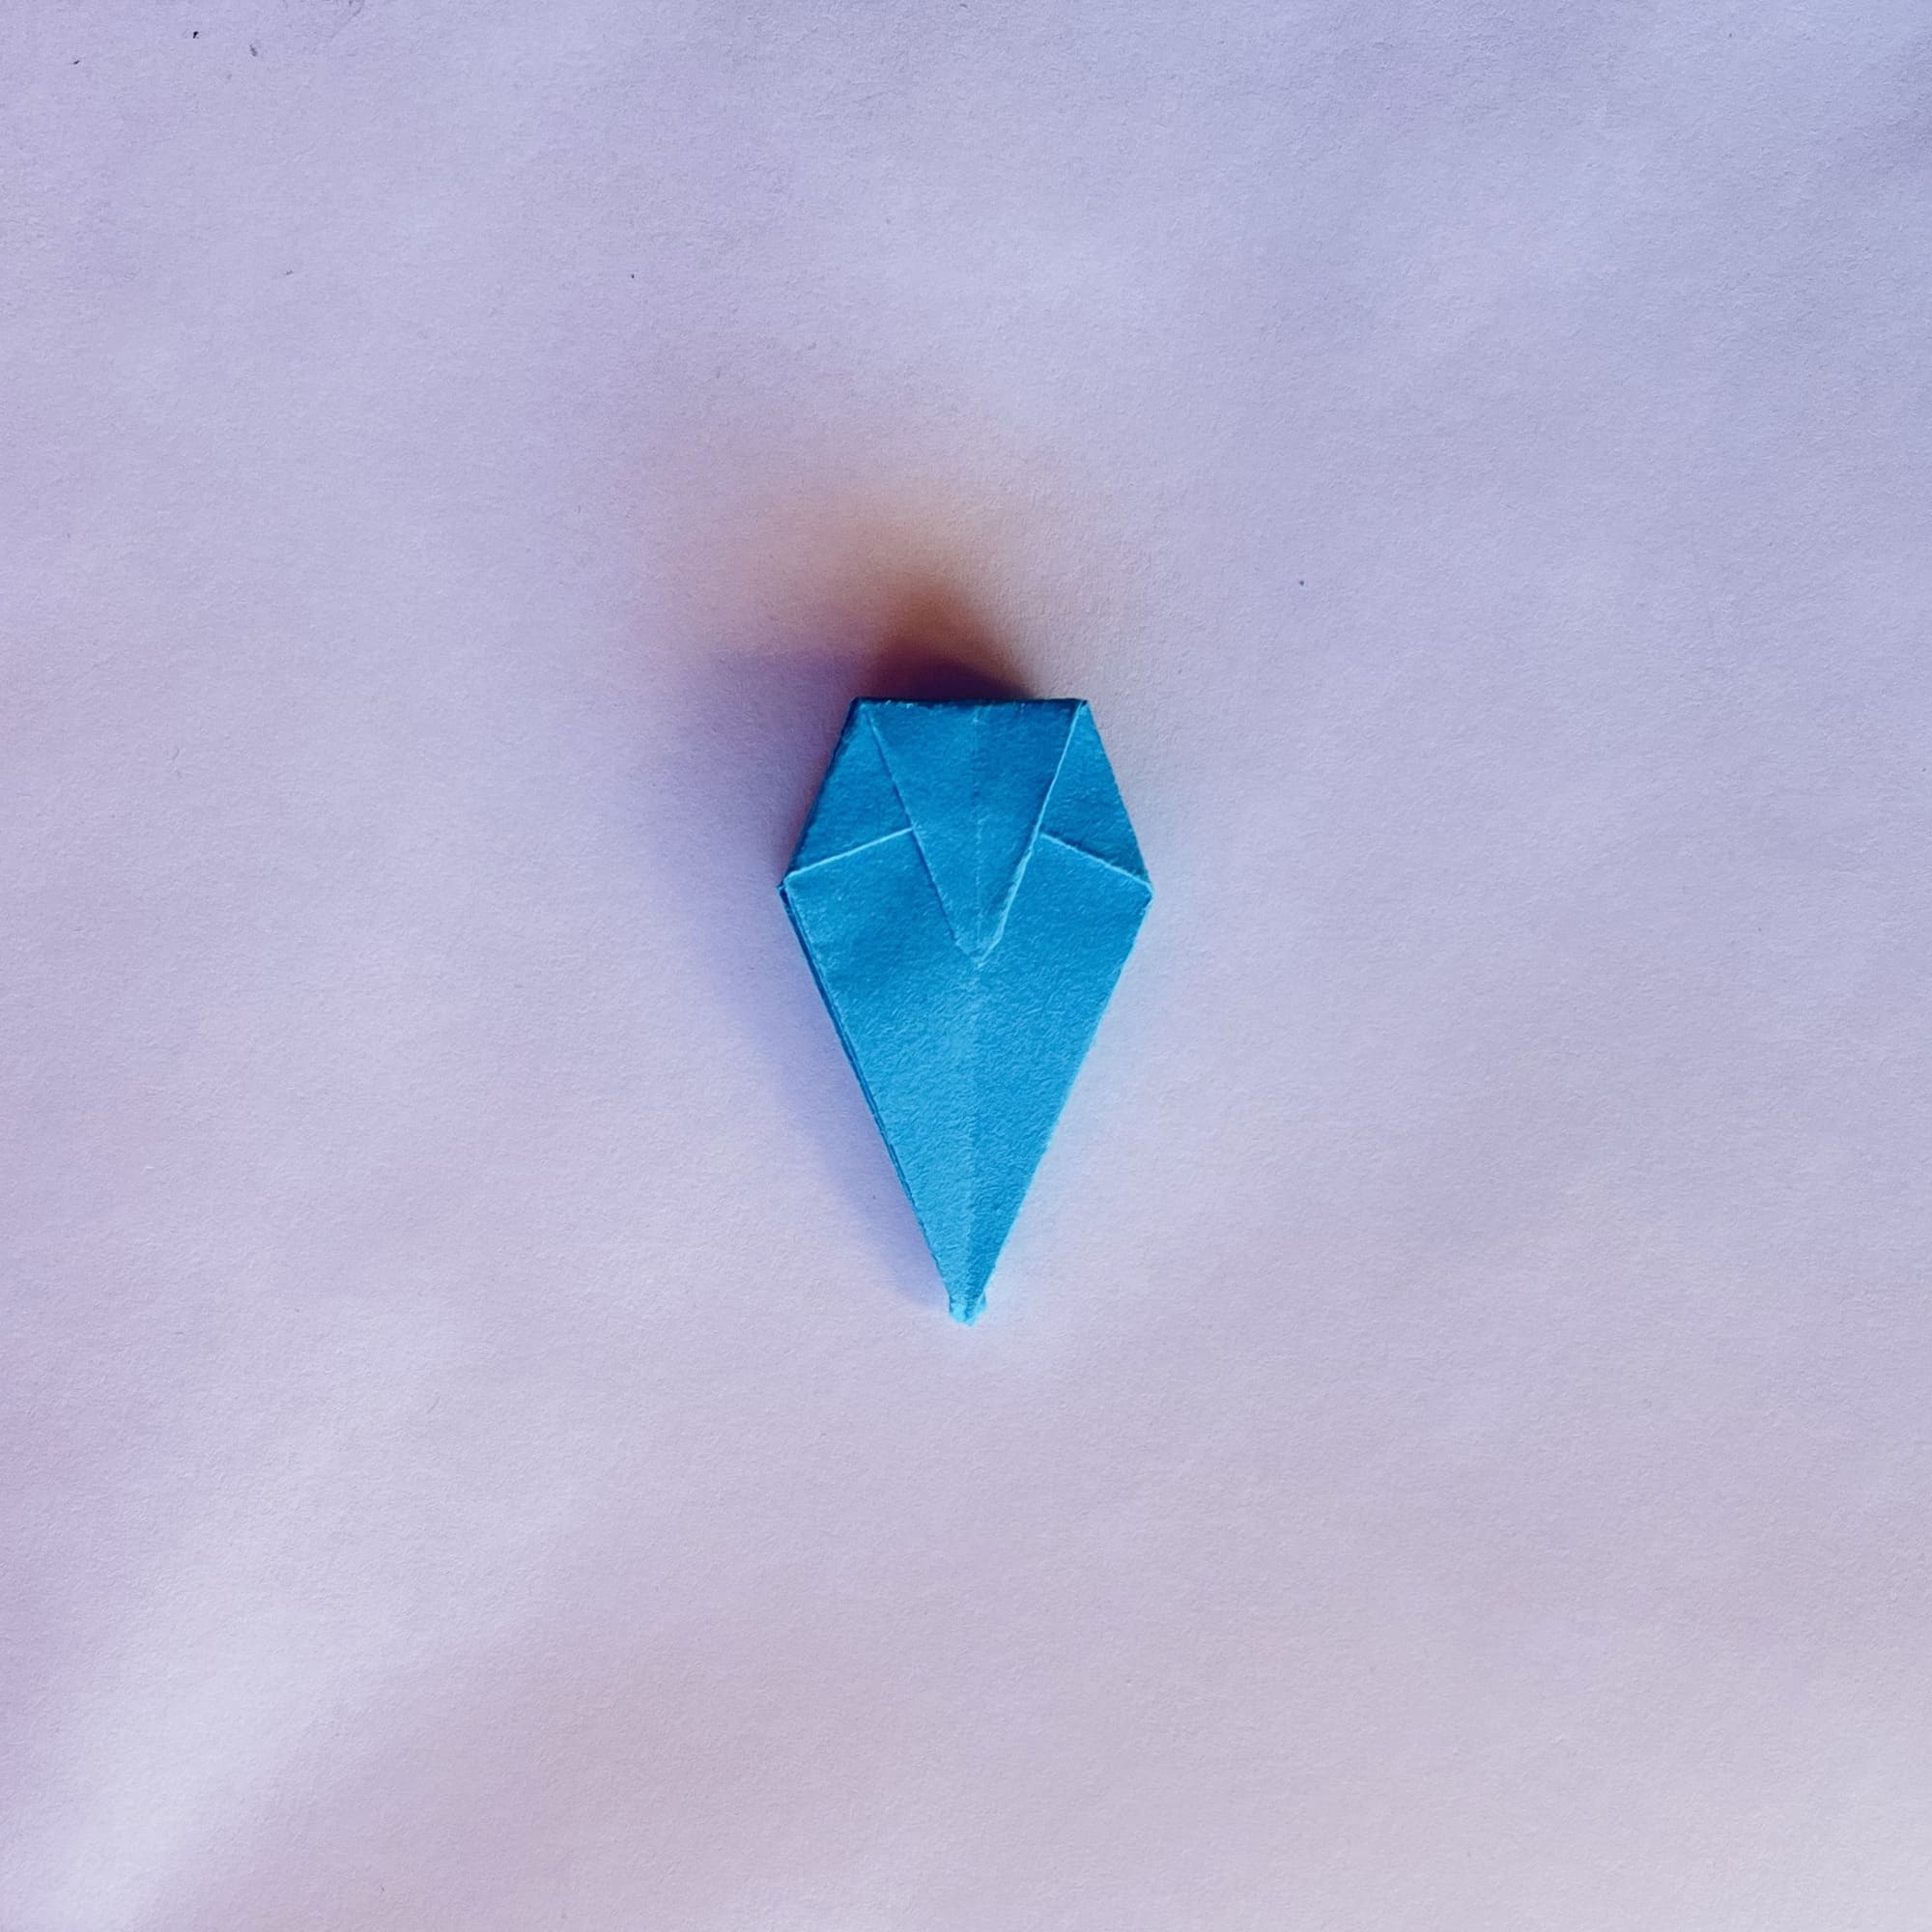
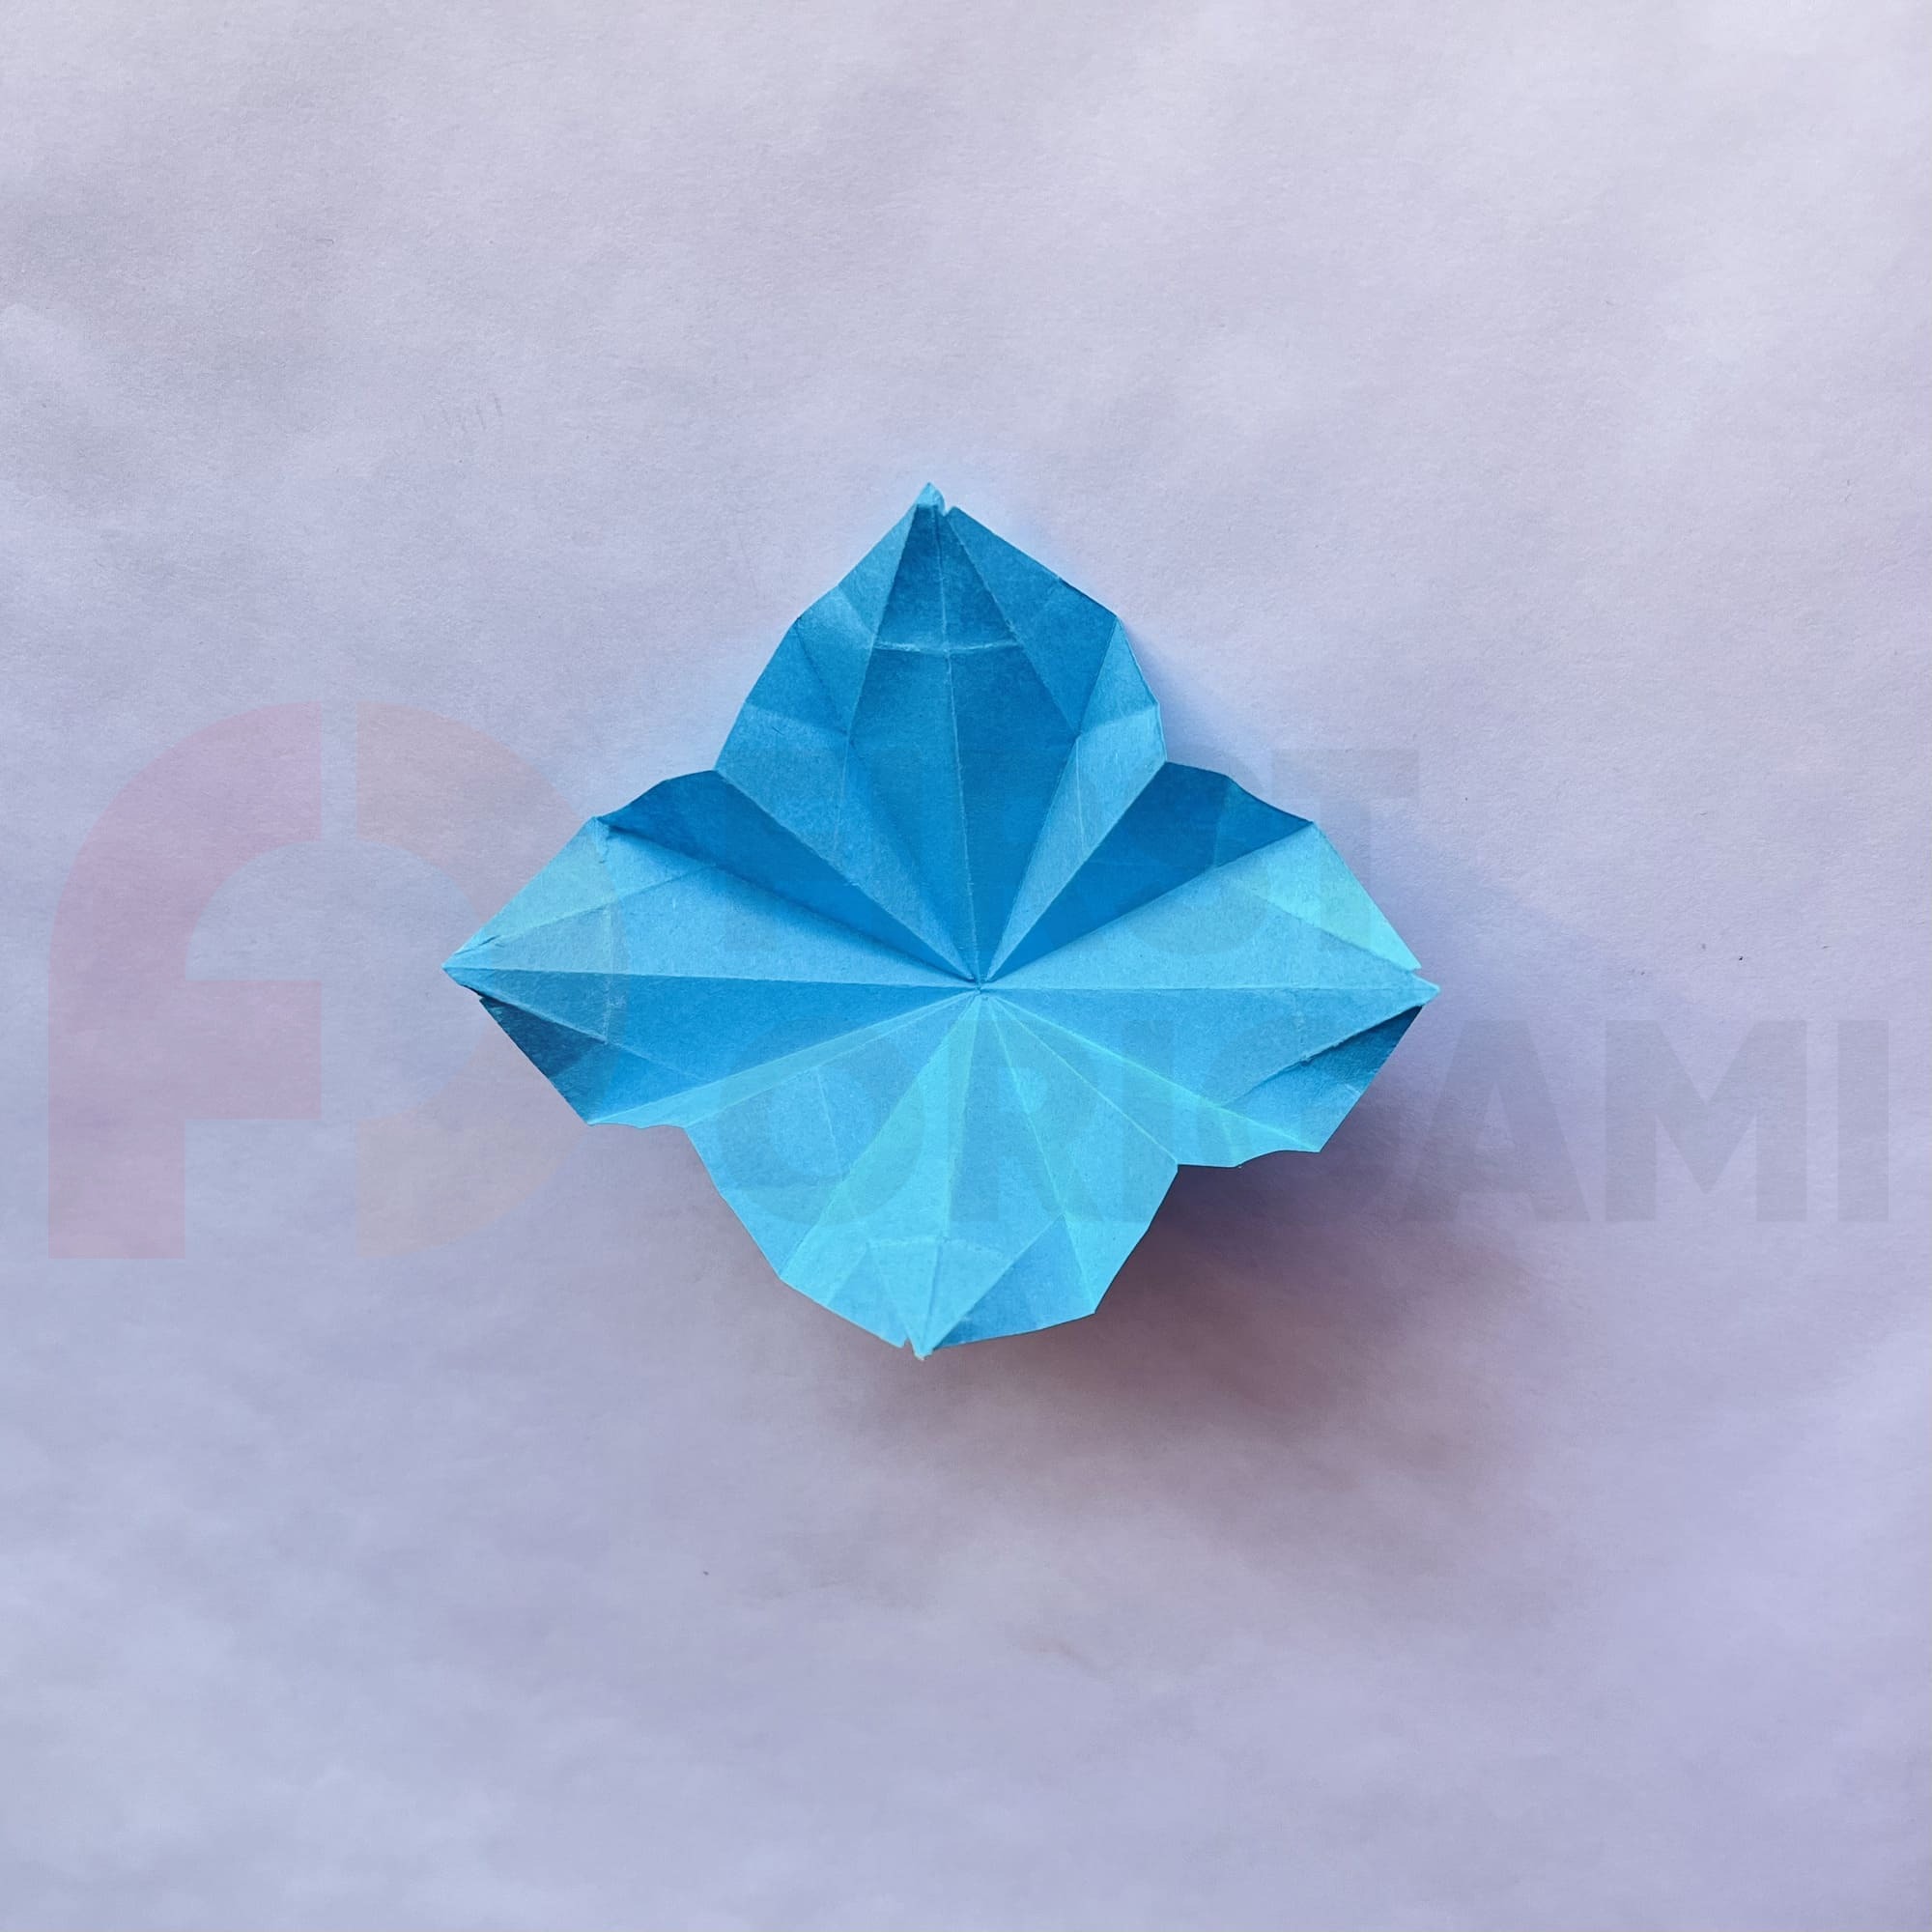
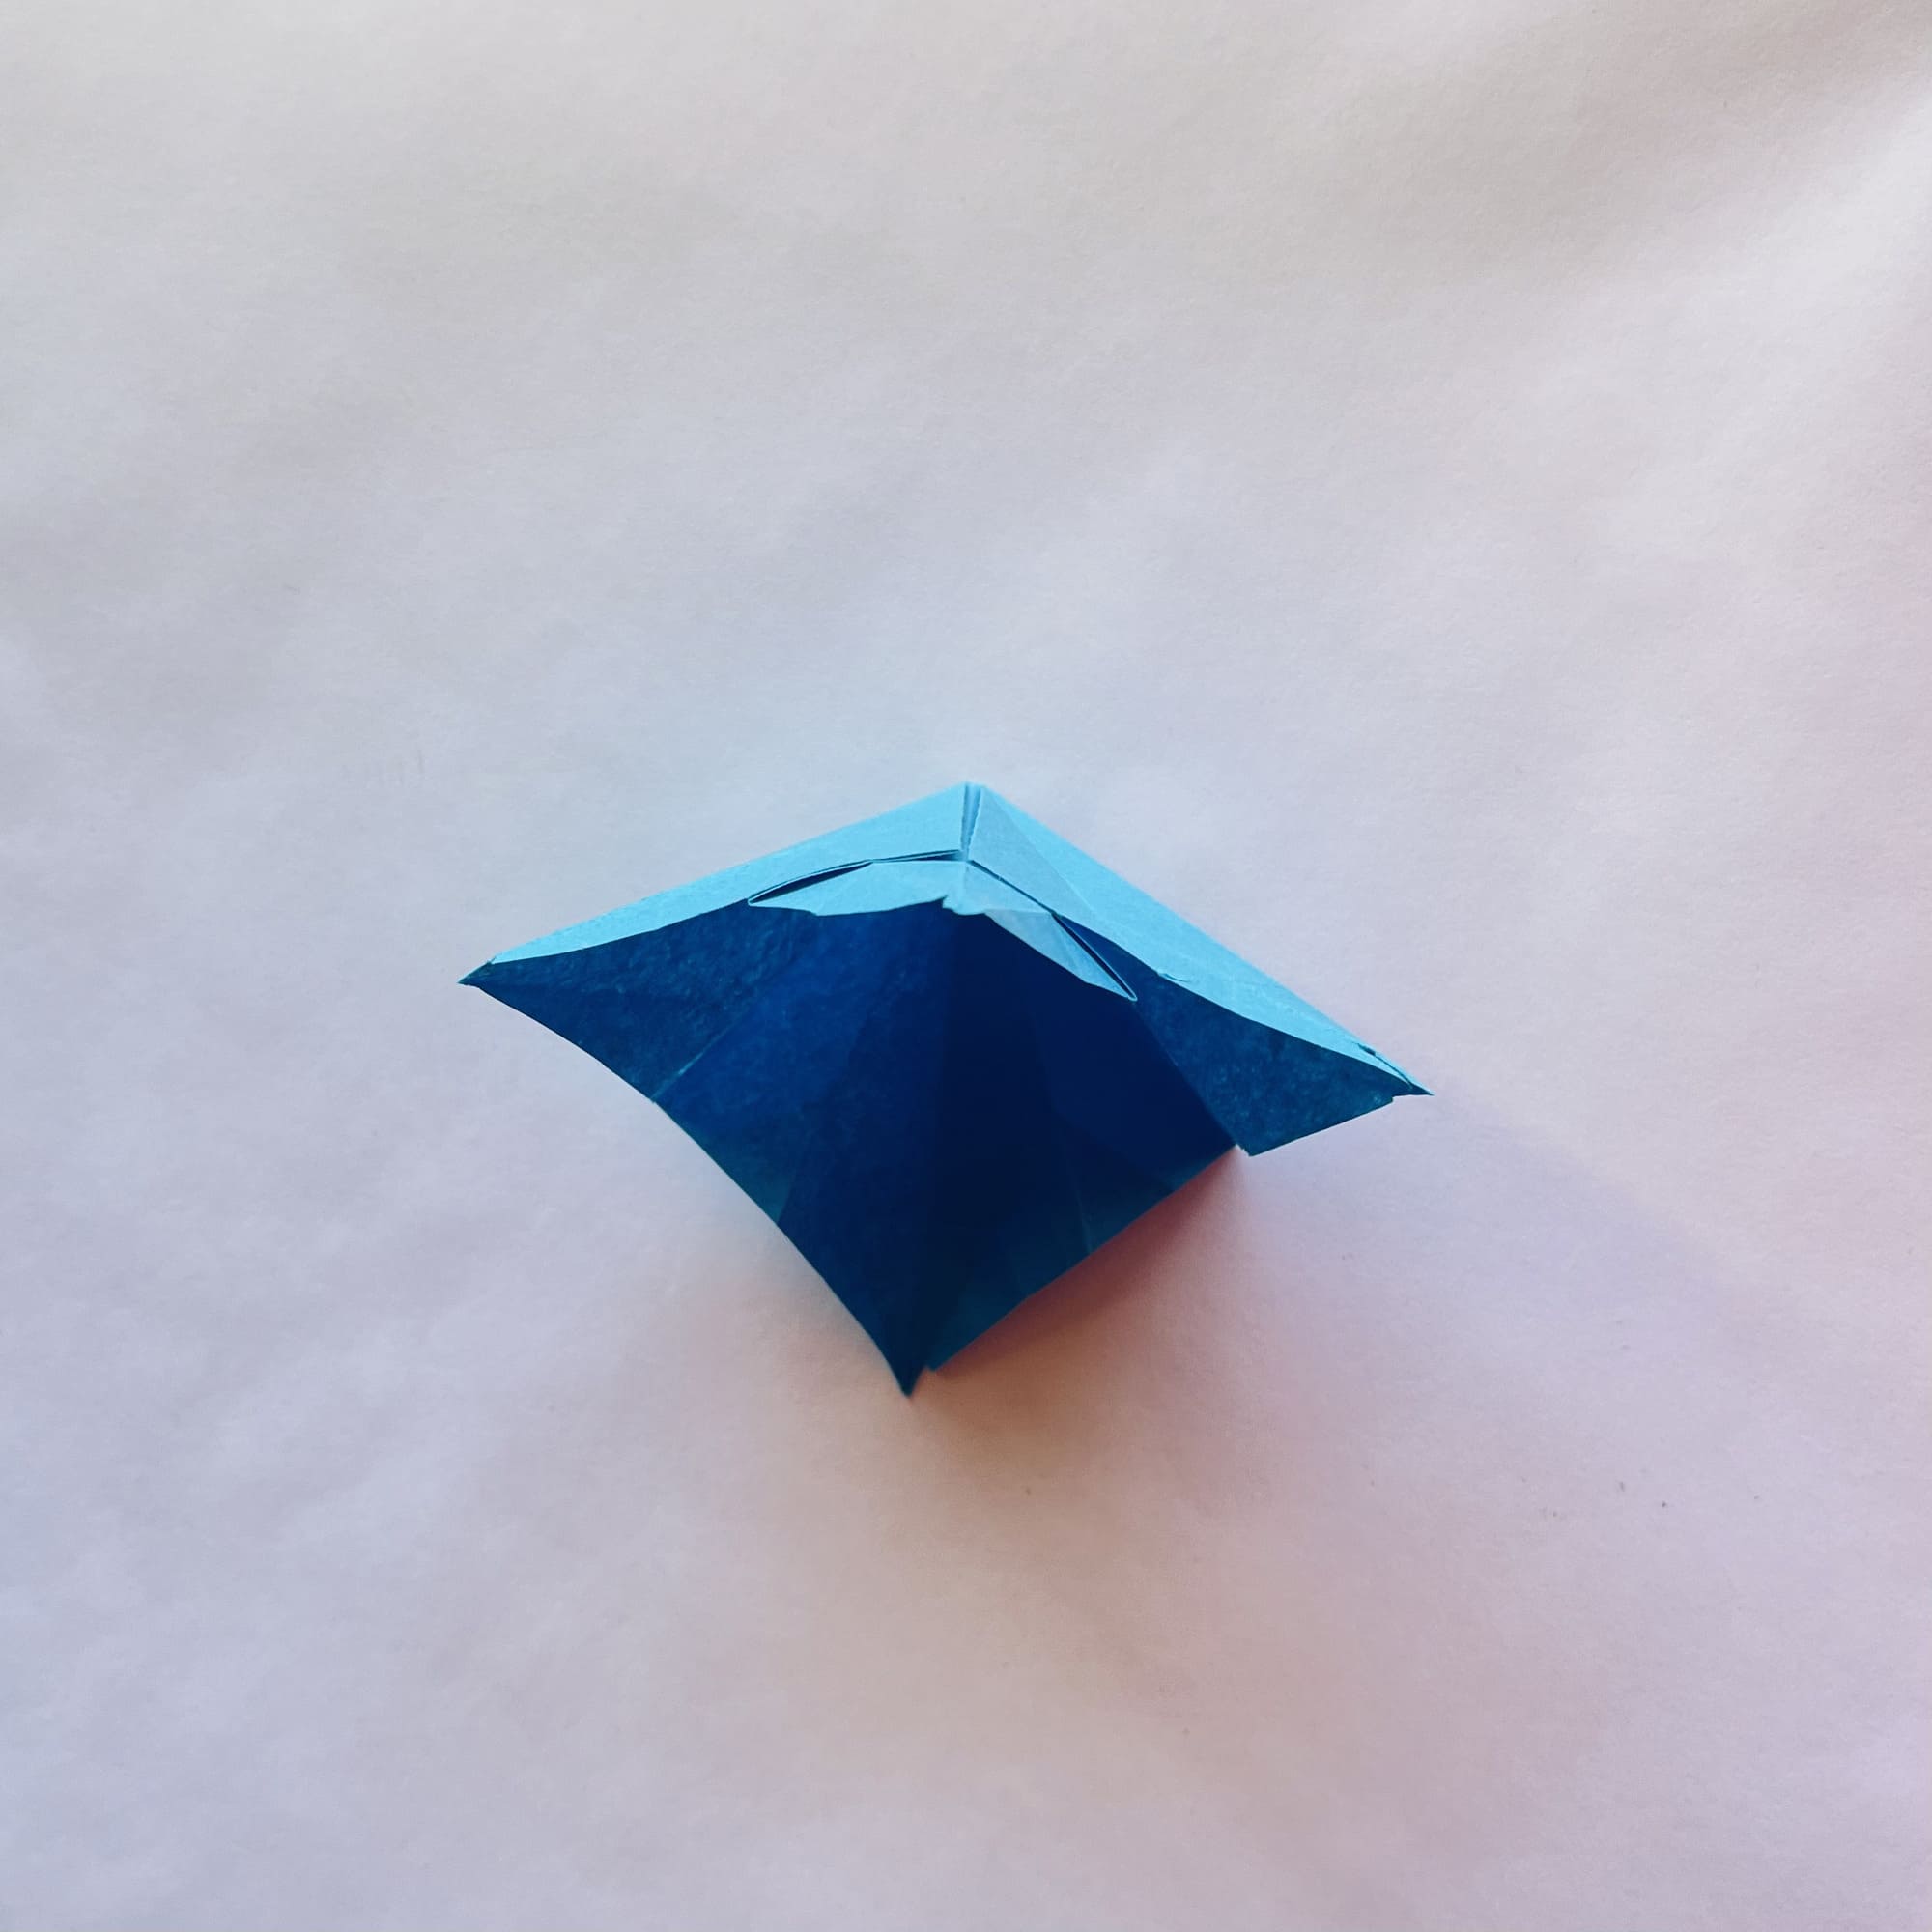
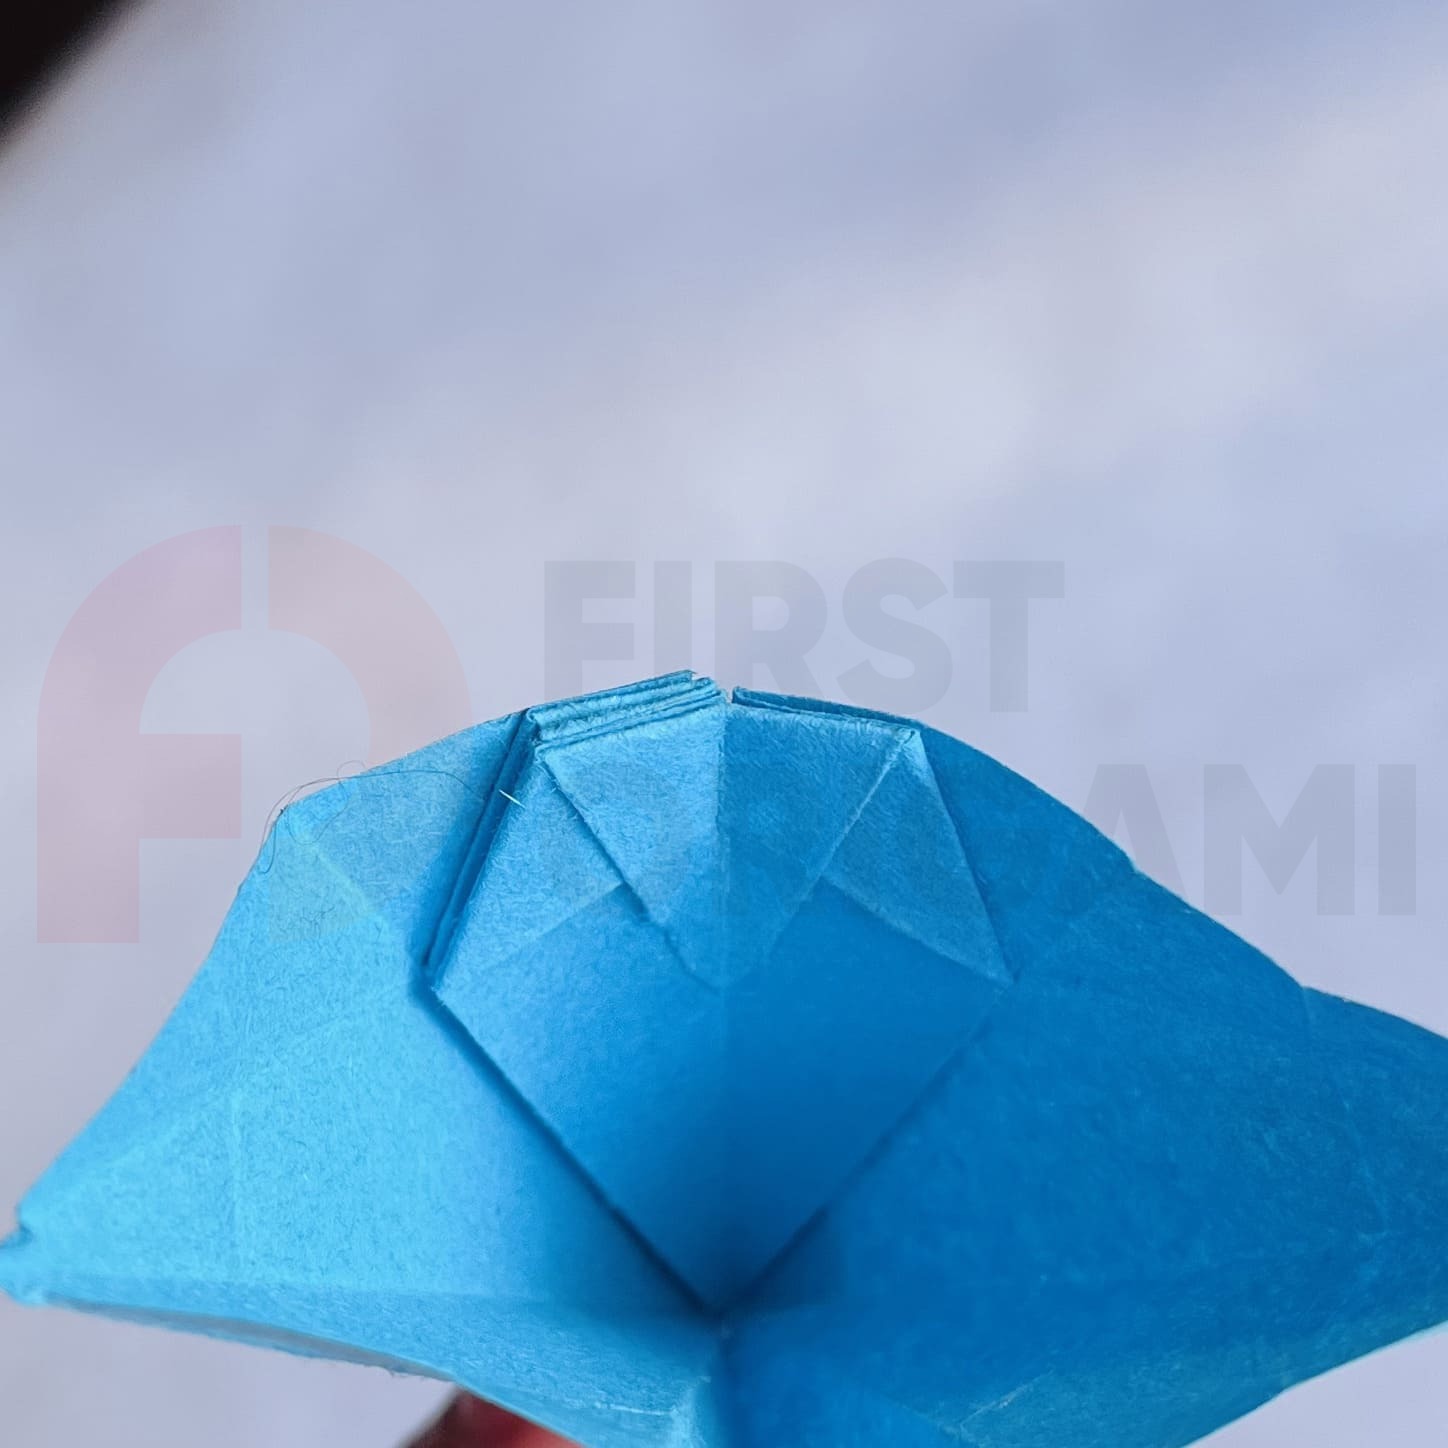
You should have a diamond shape. Bend its side corners inward.
Bend the top corner of the diamond inward, as you did earlier.
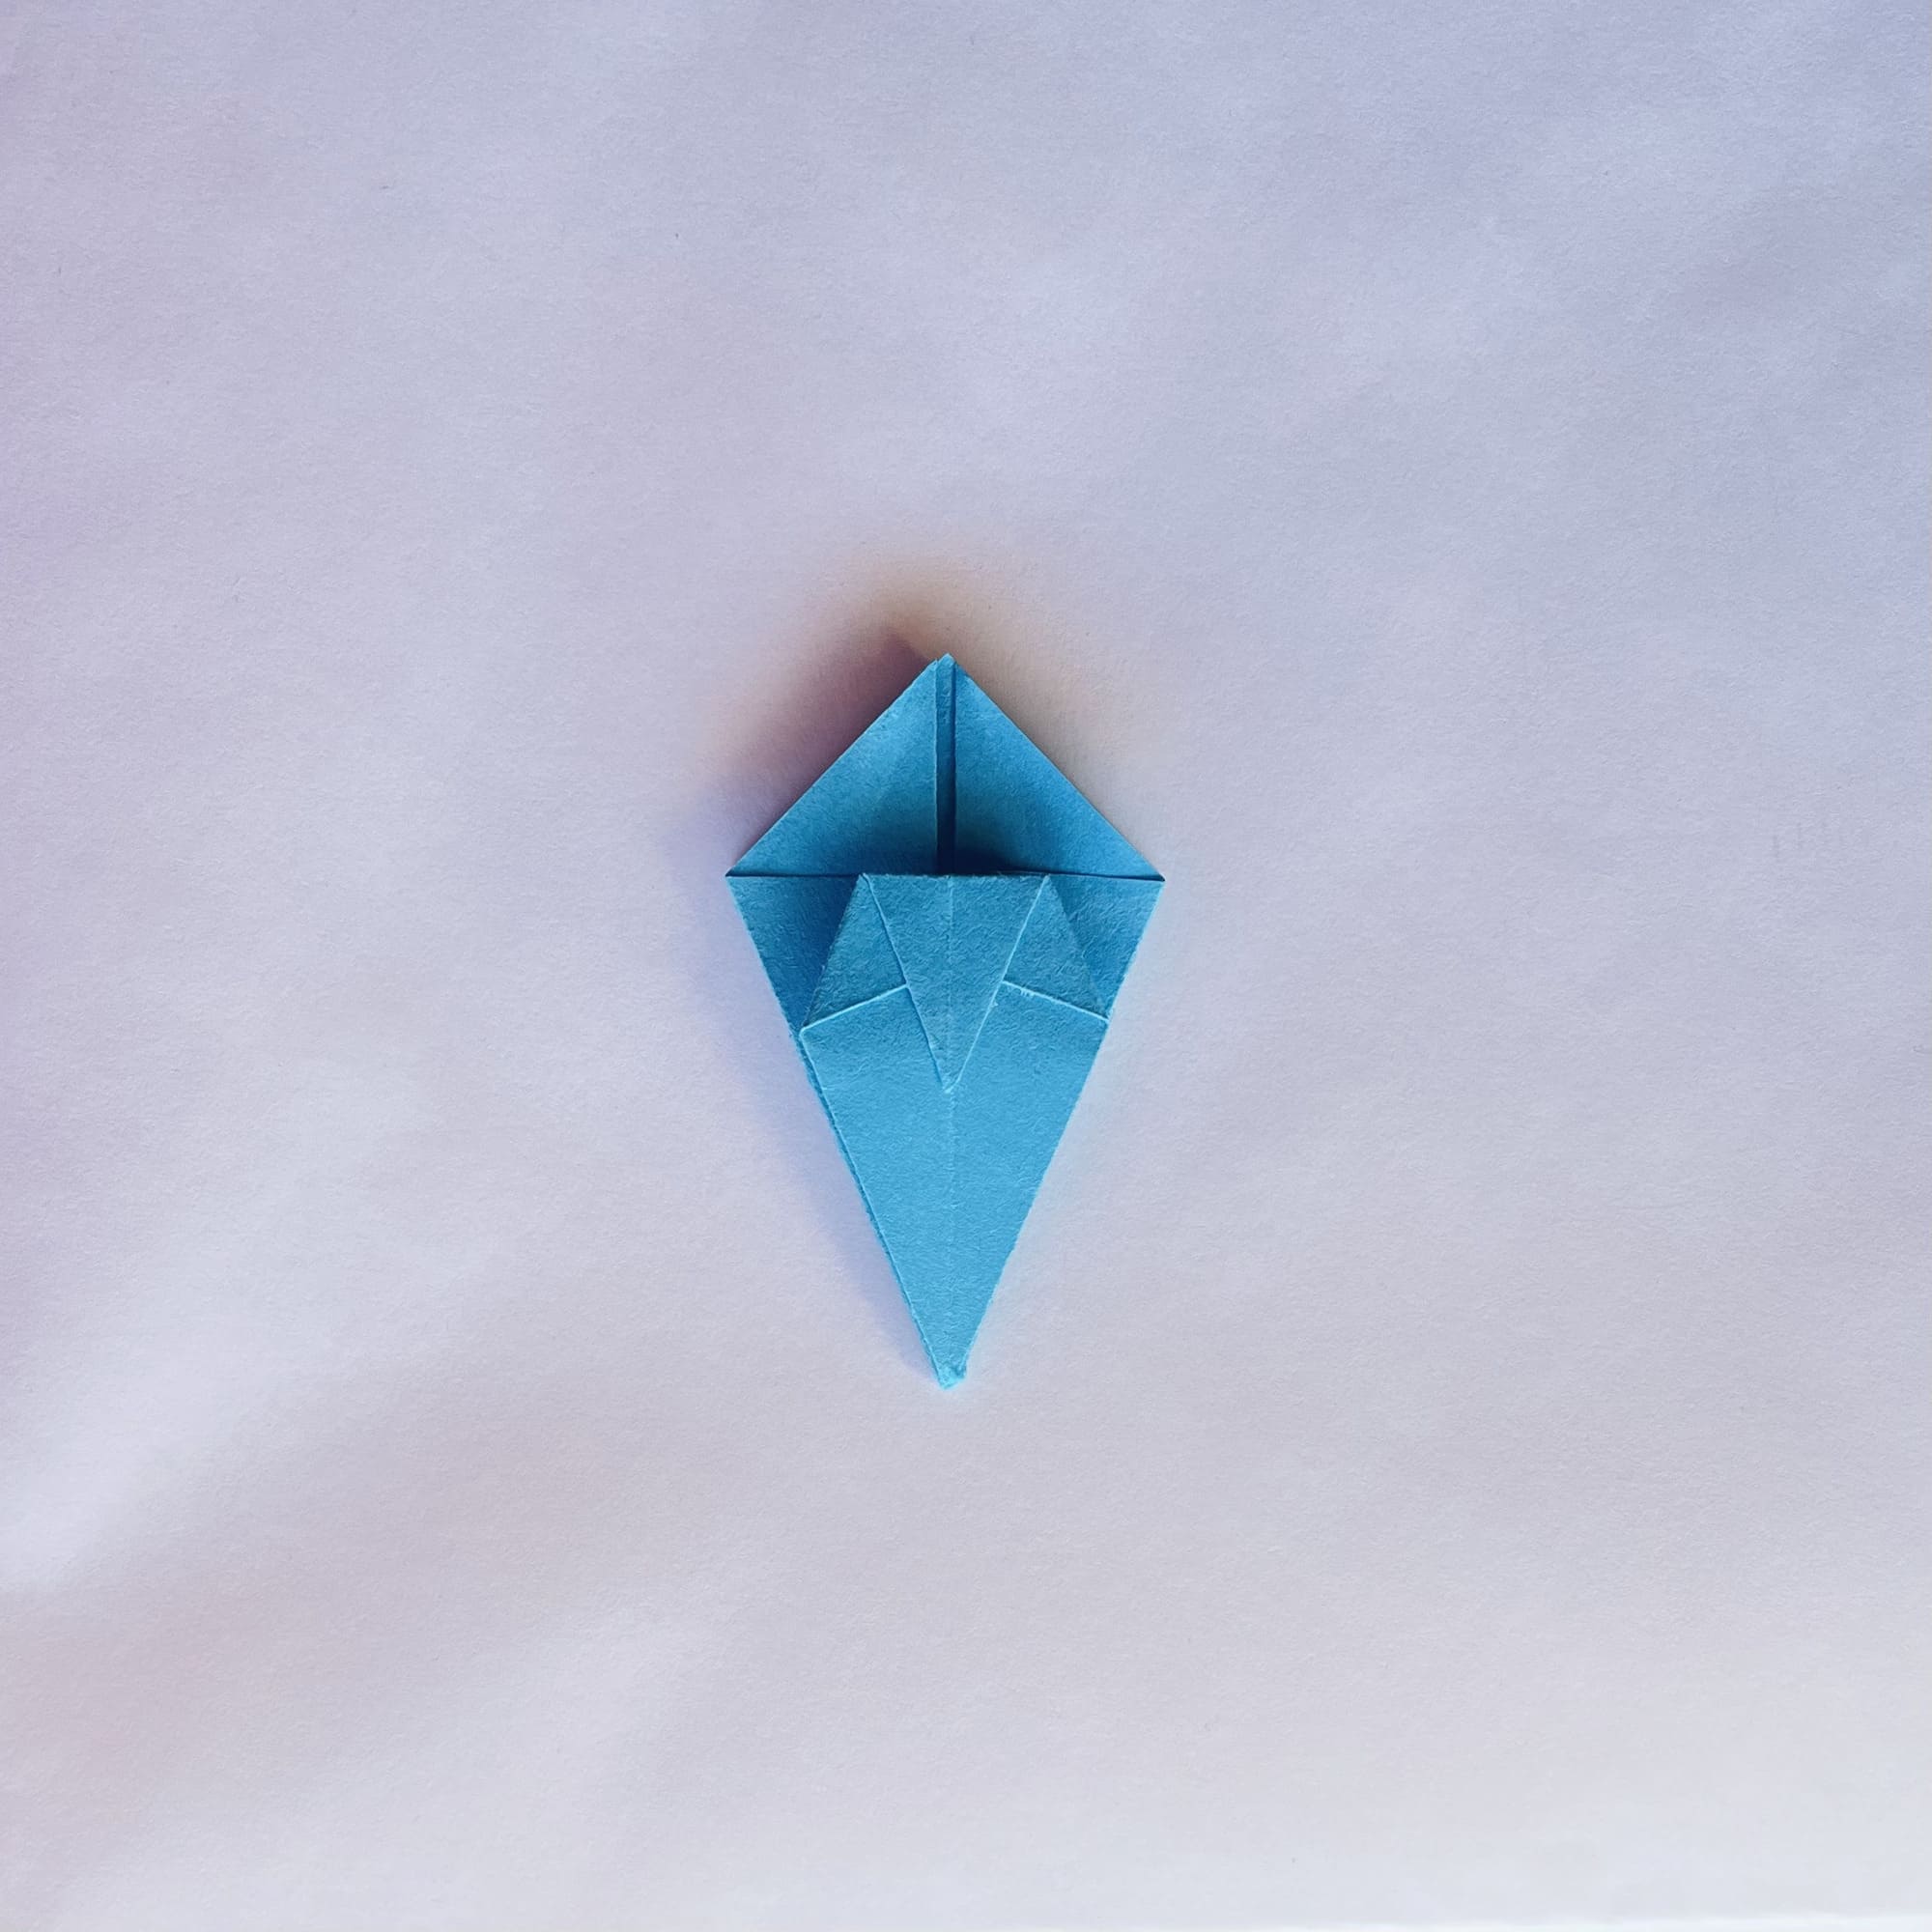
Flip this layer to the left and repeat steps 36-43 for the next three diamond sections.
If you have any difficulties, you can use the video instructions.
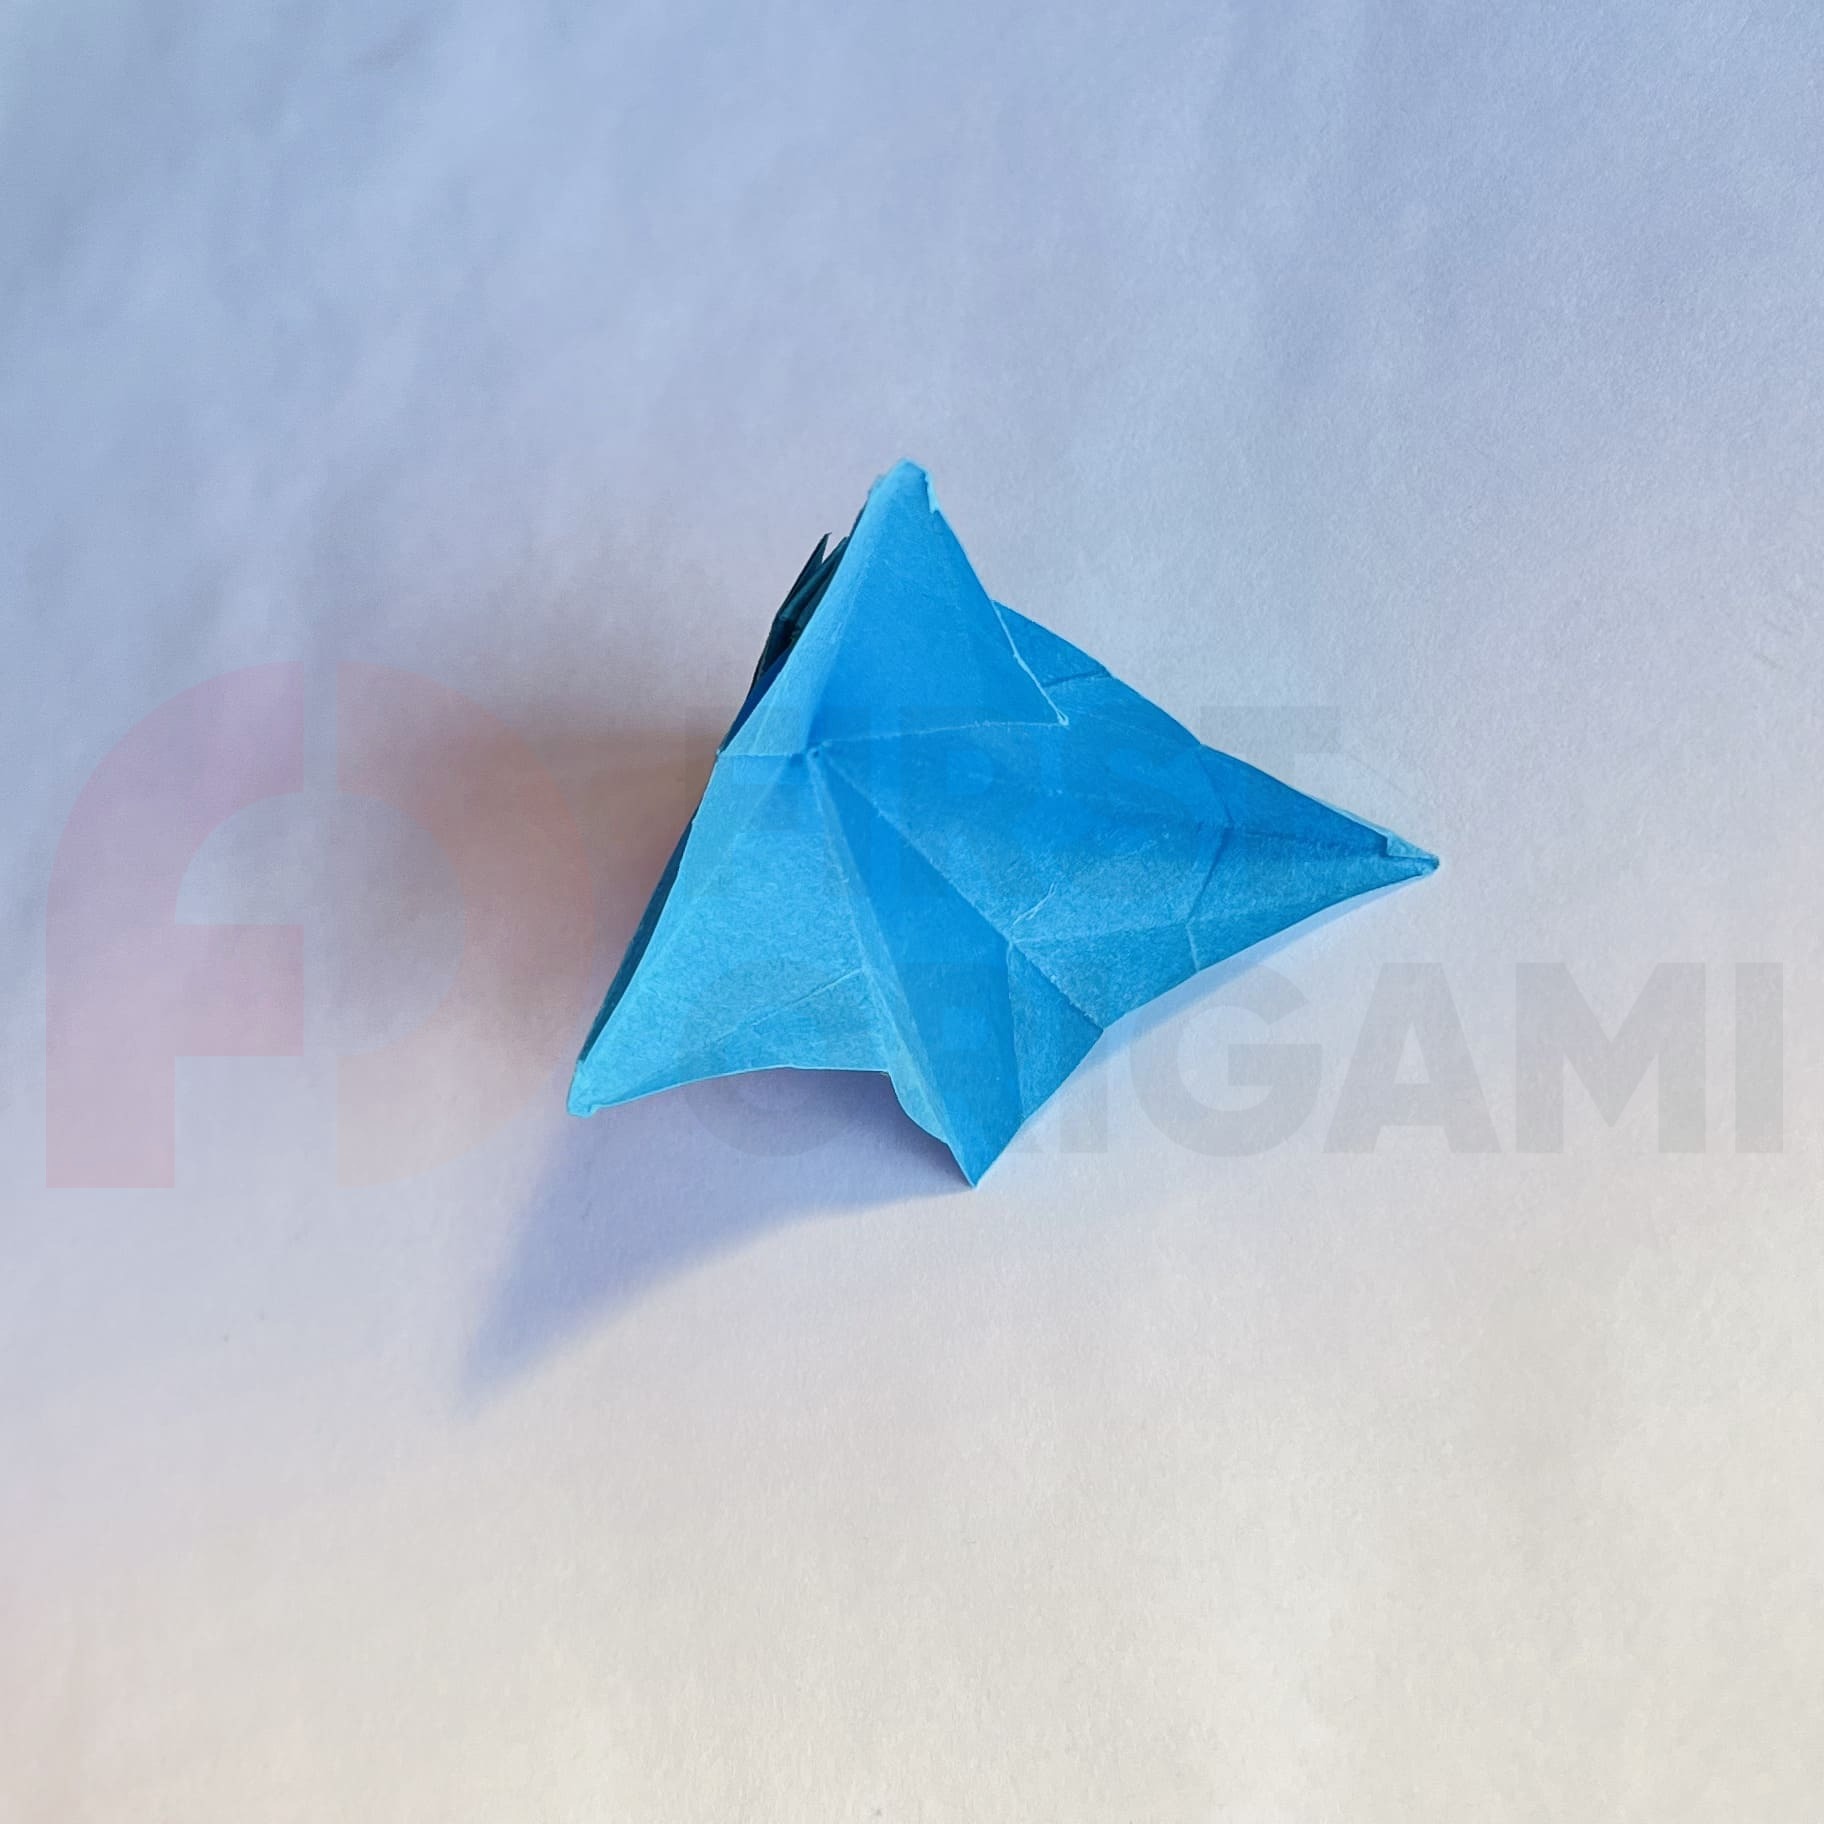
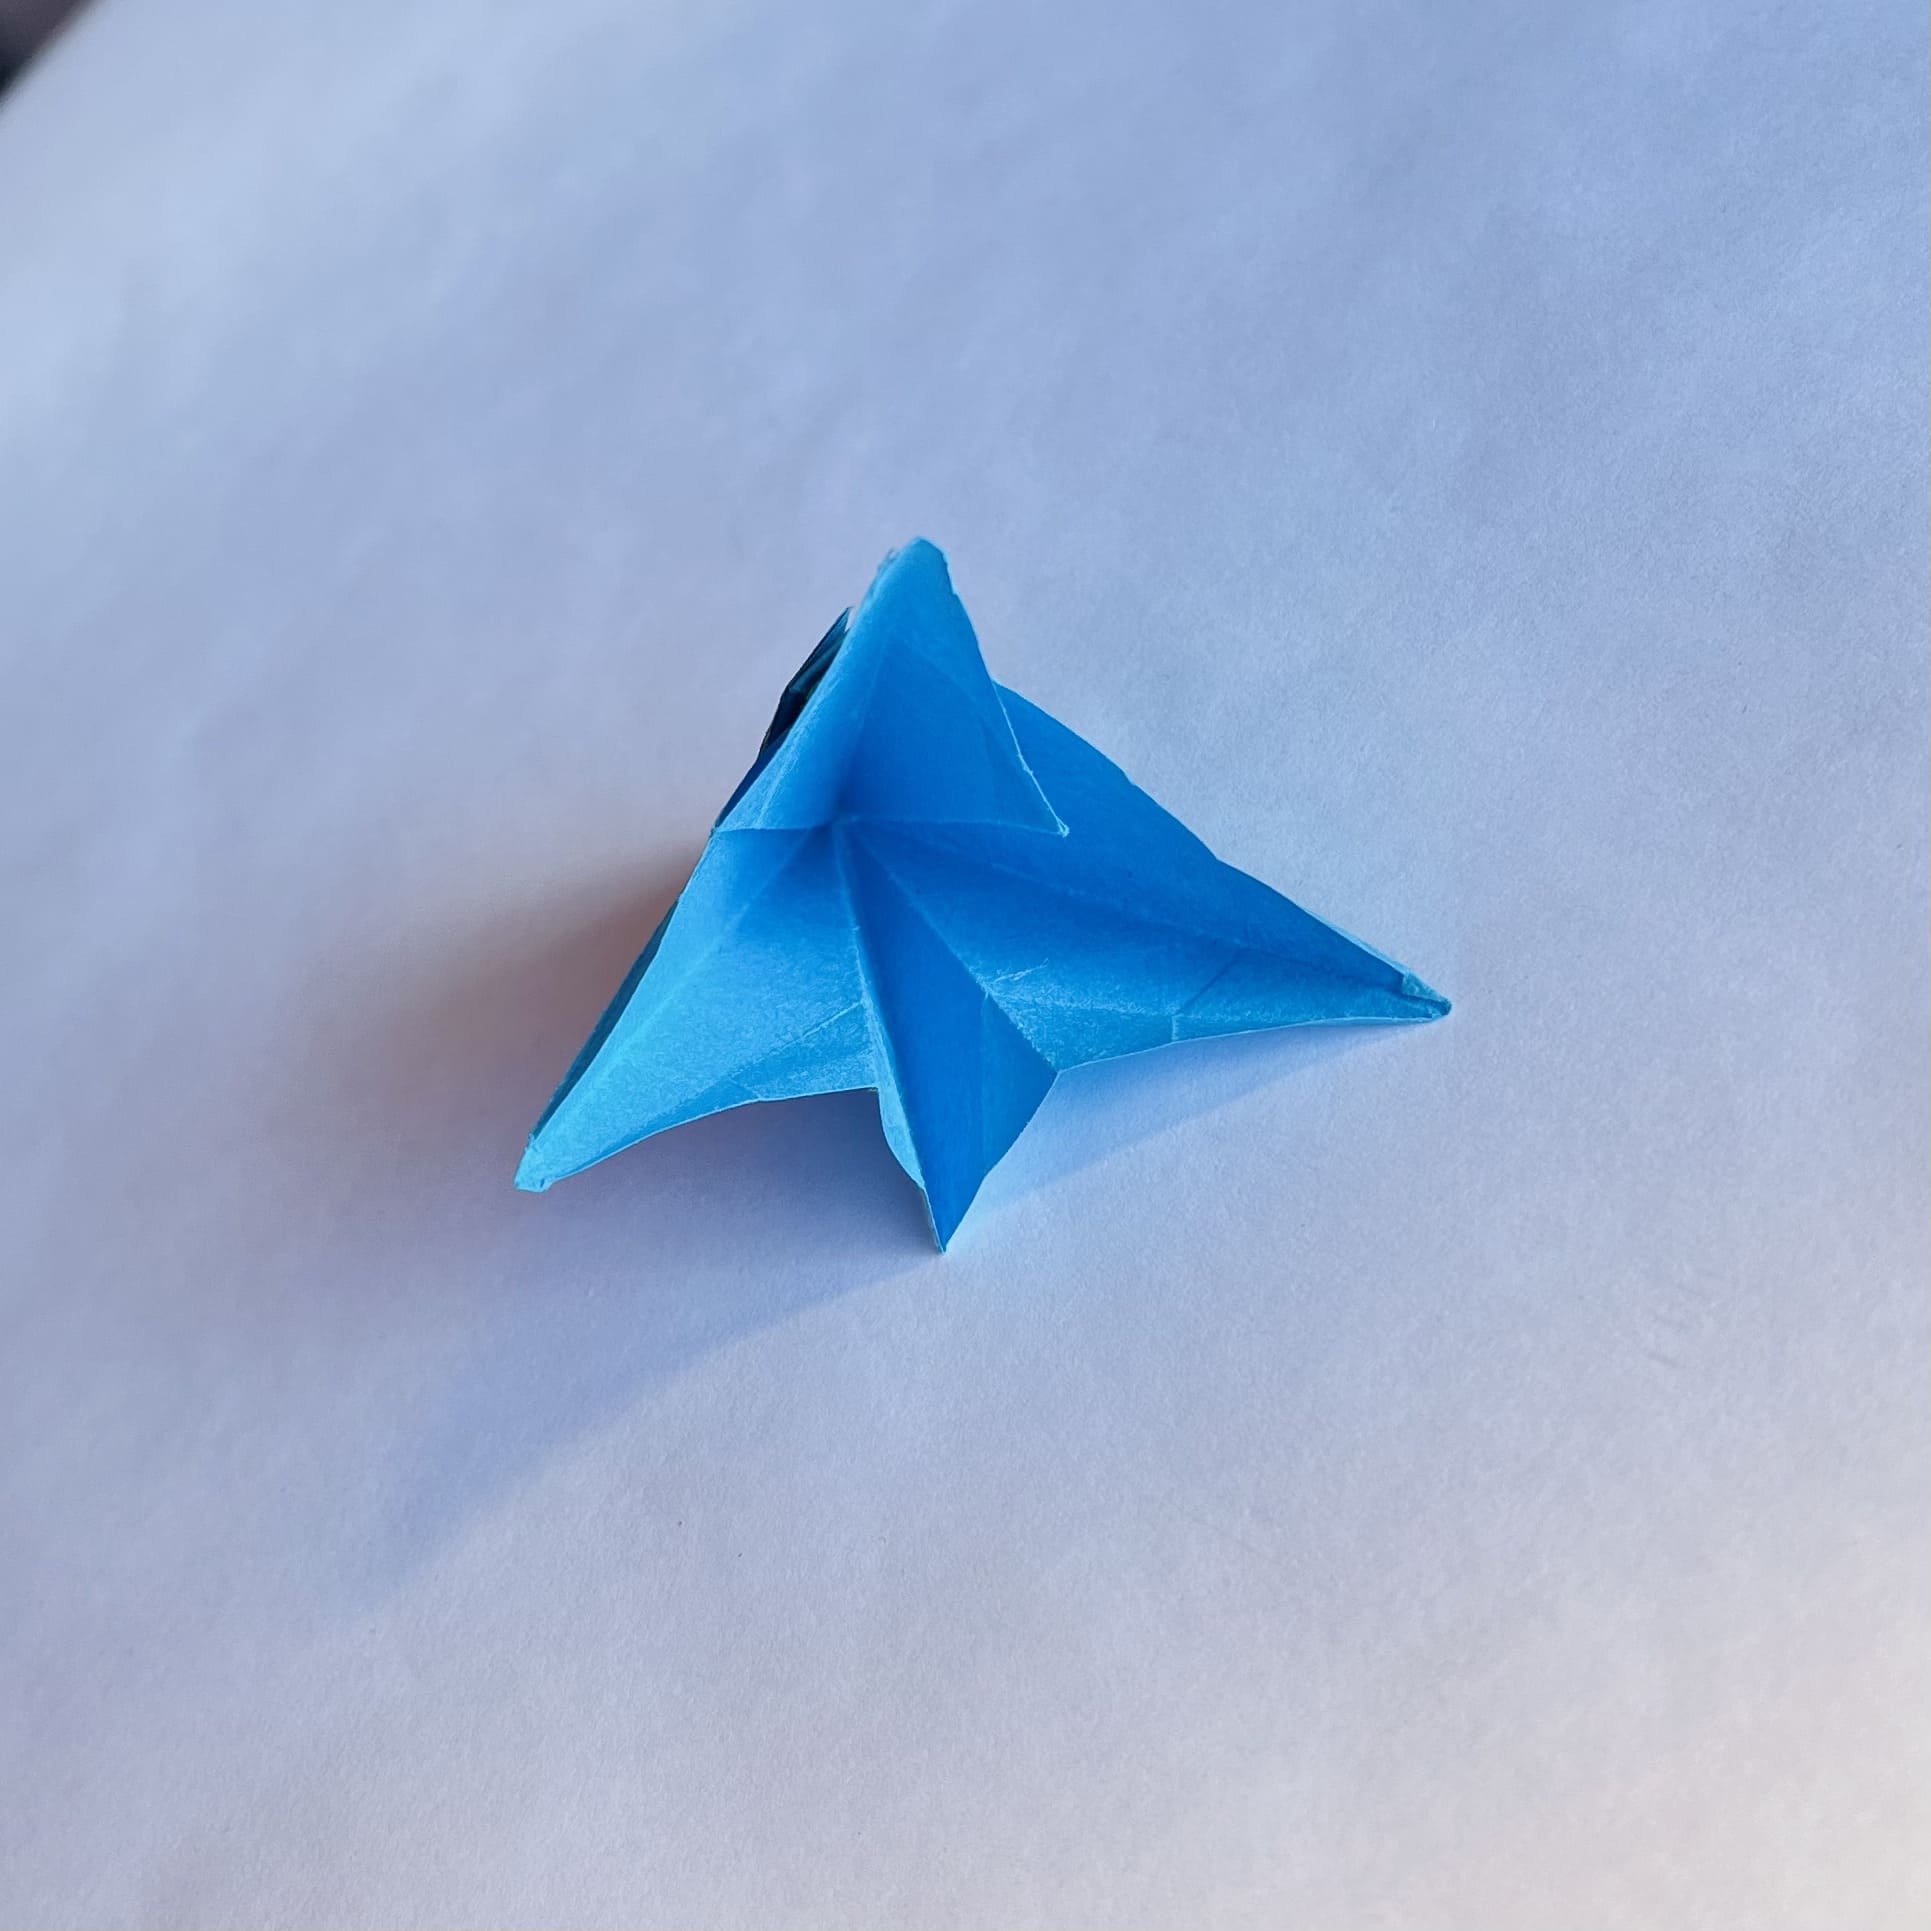
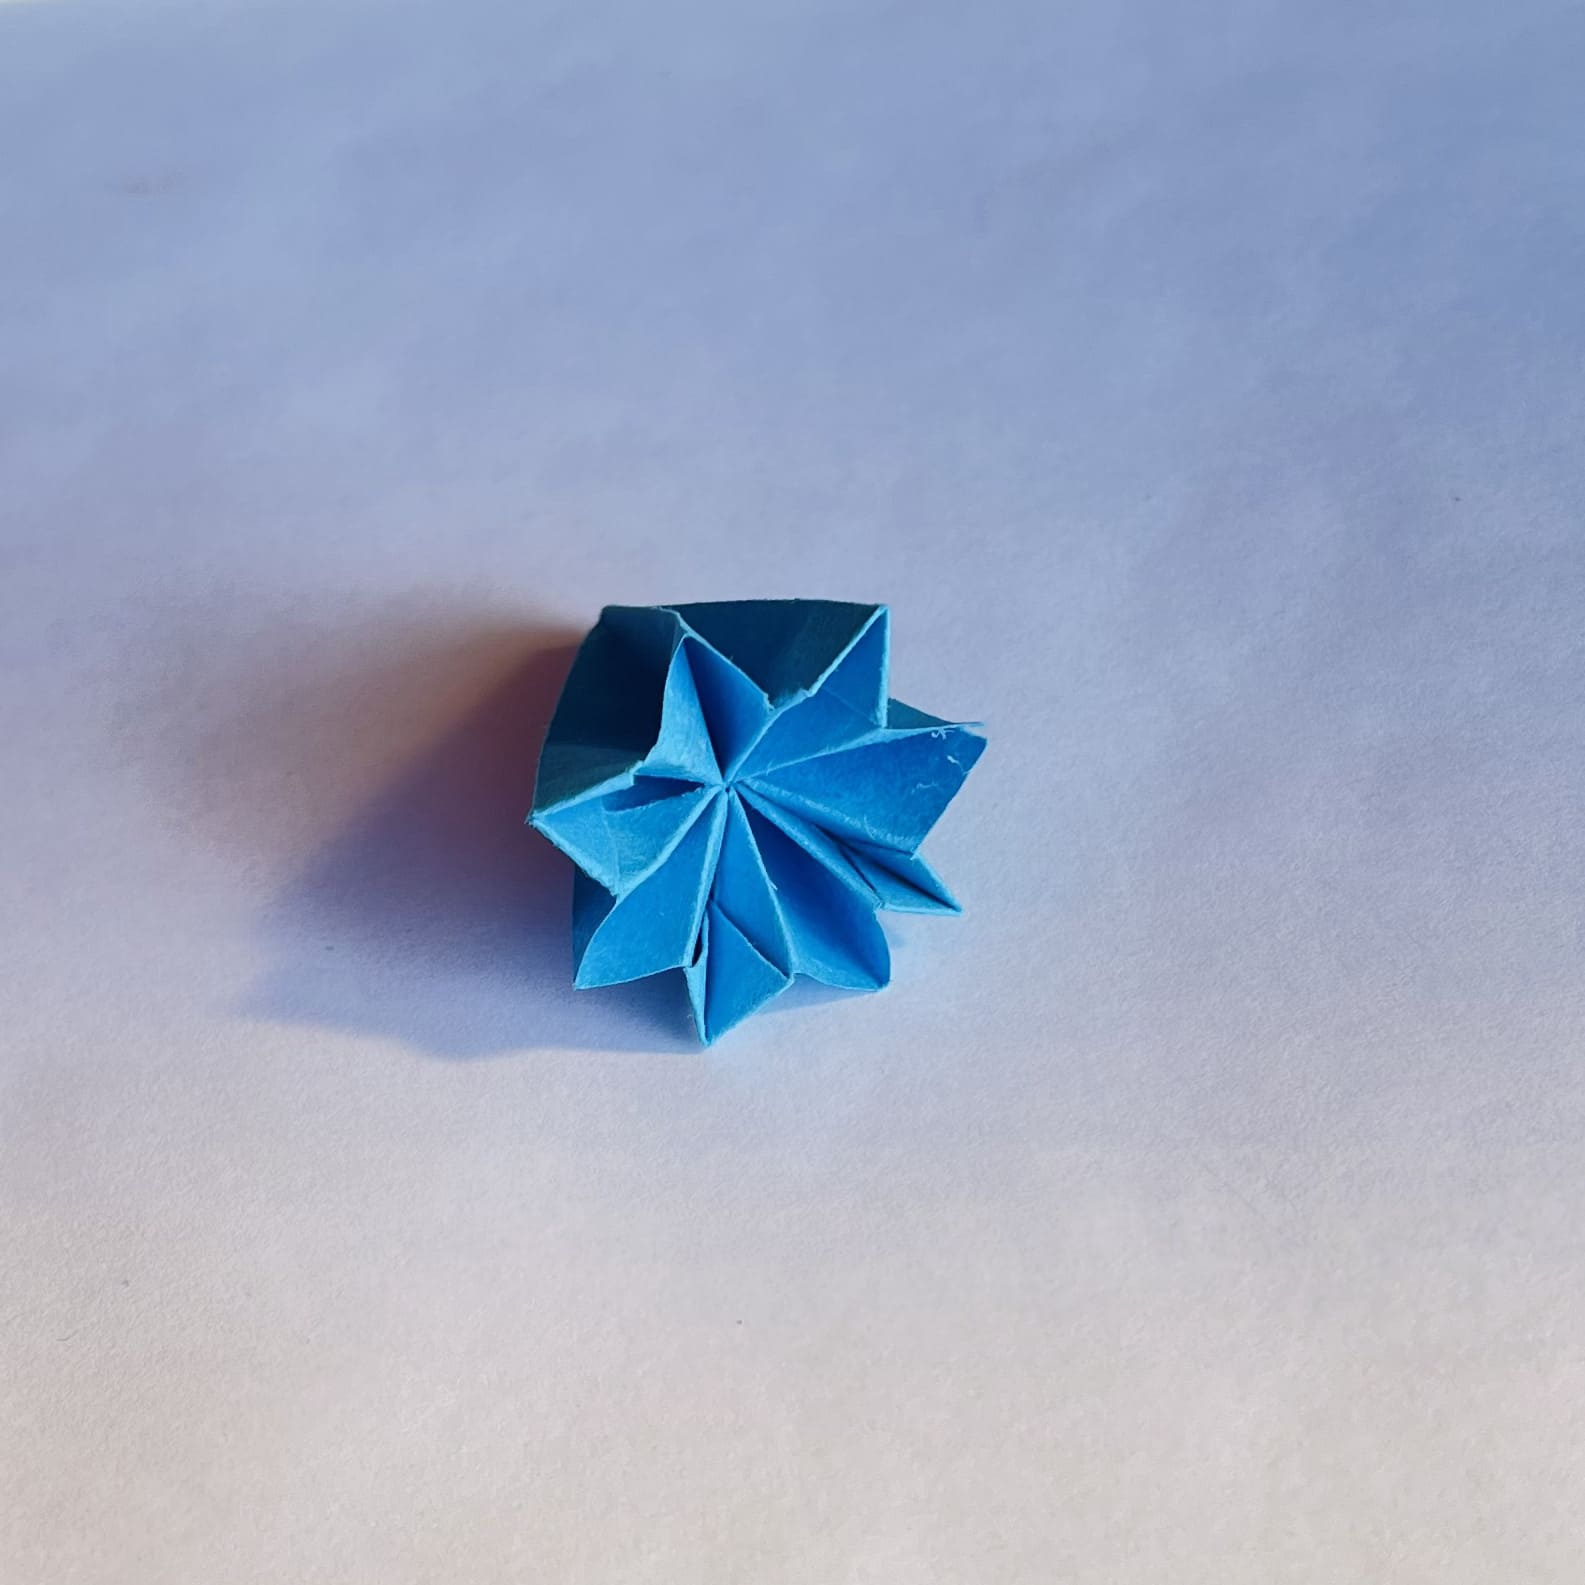
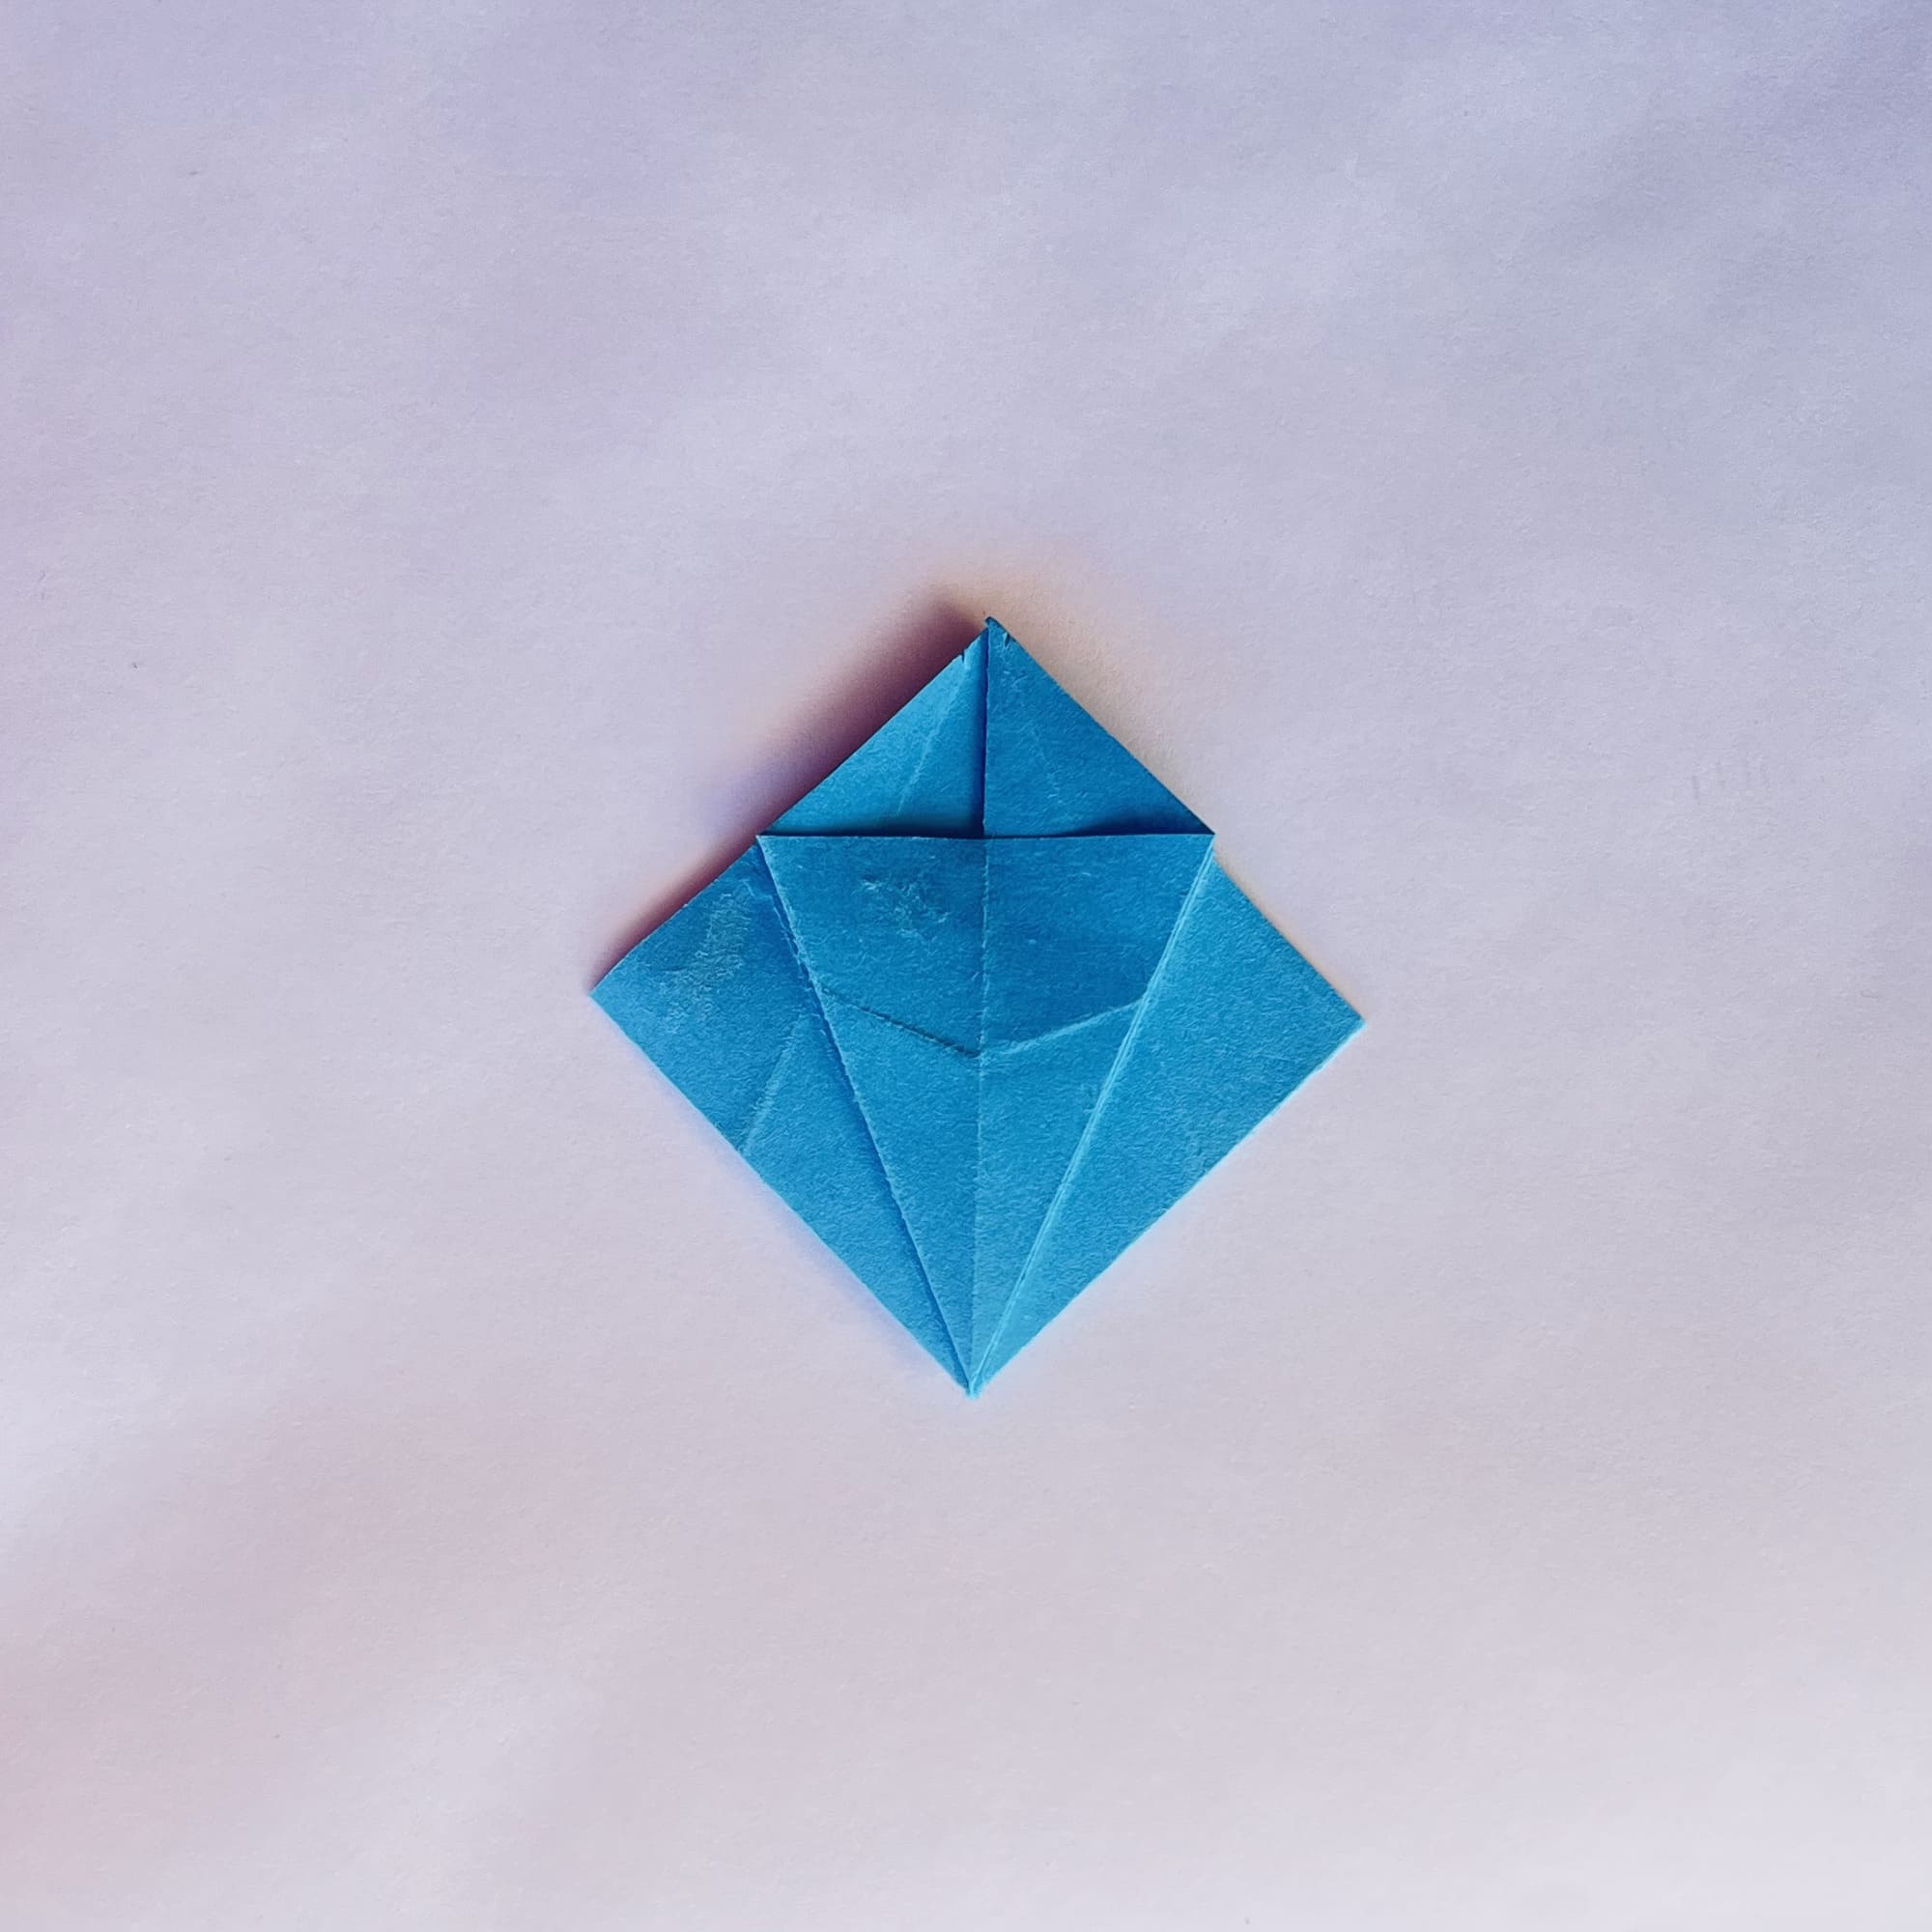
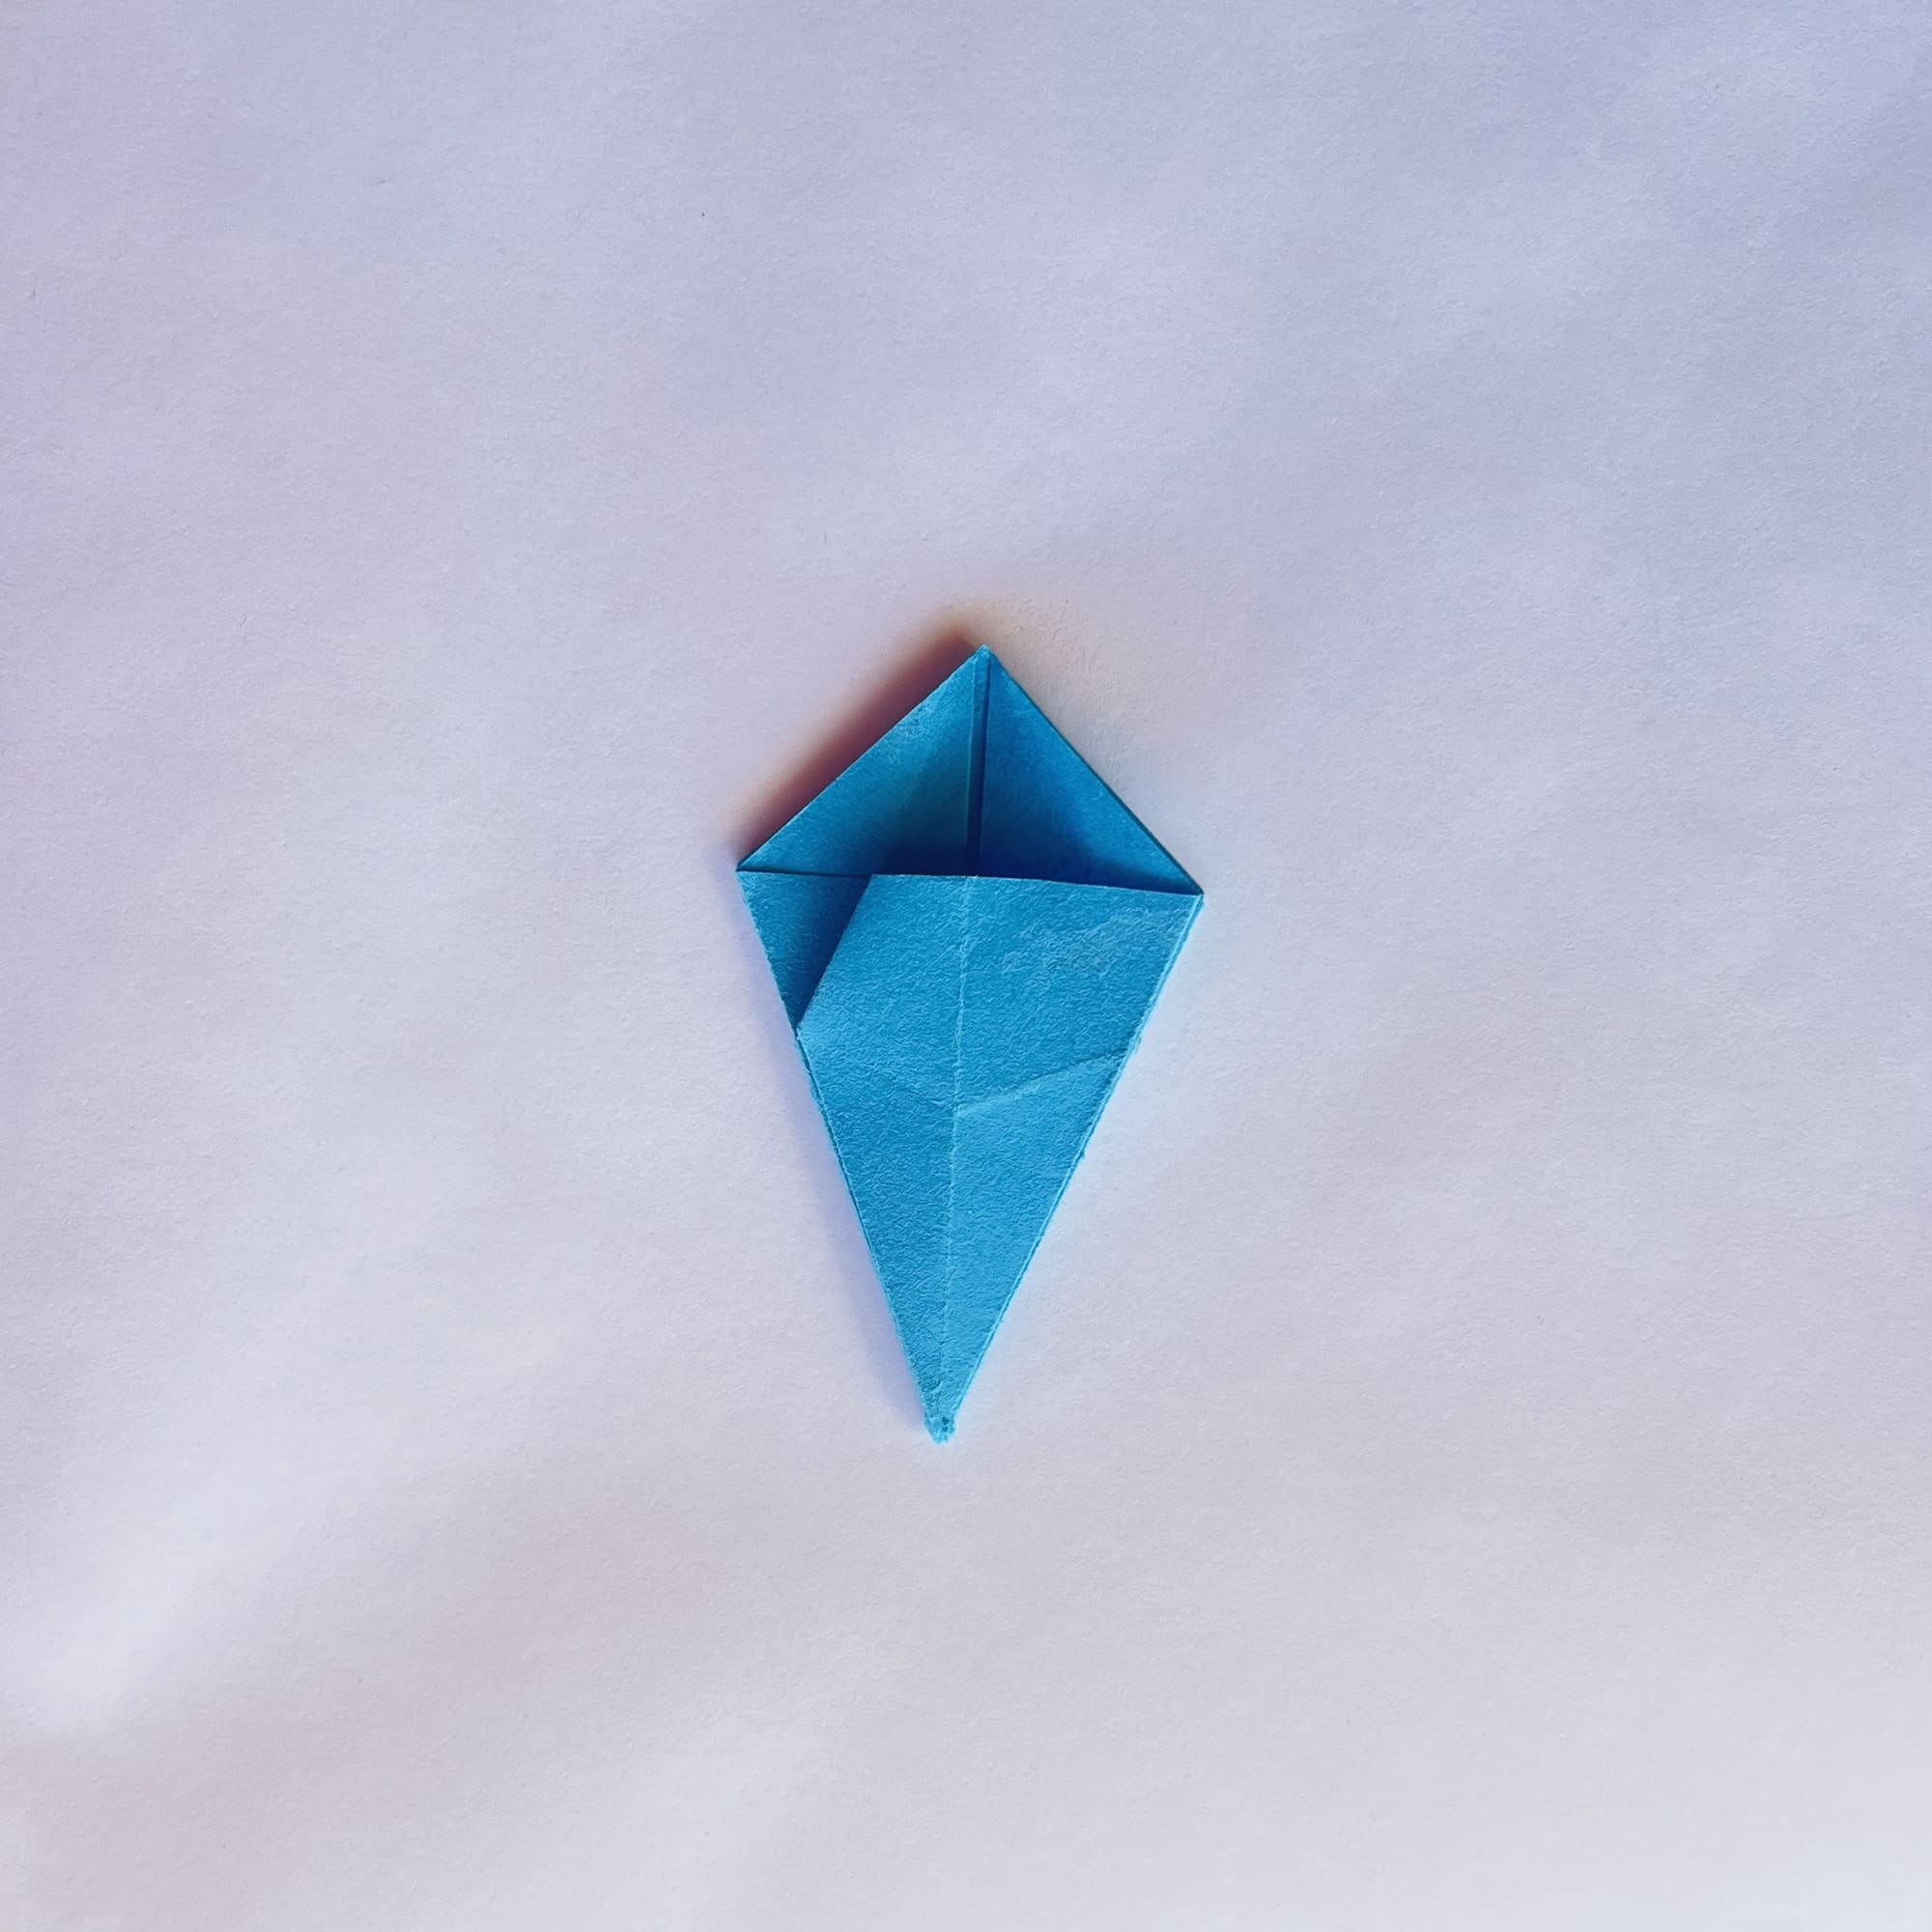
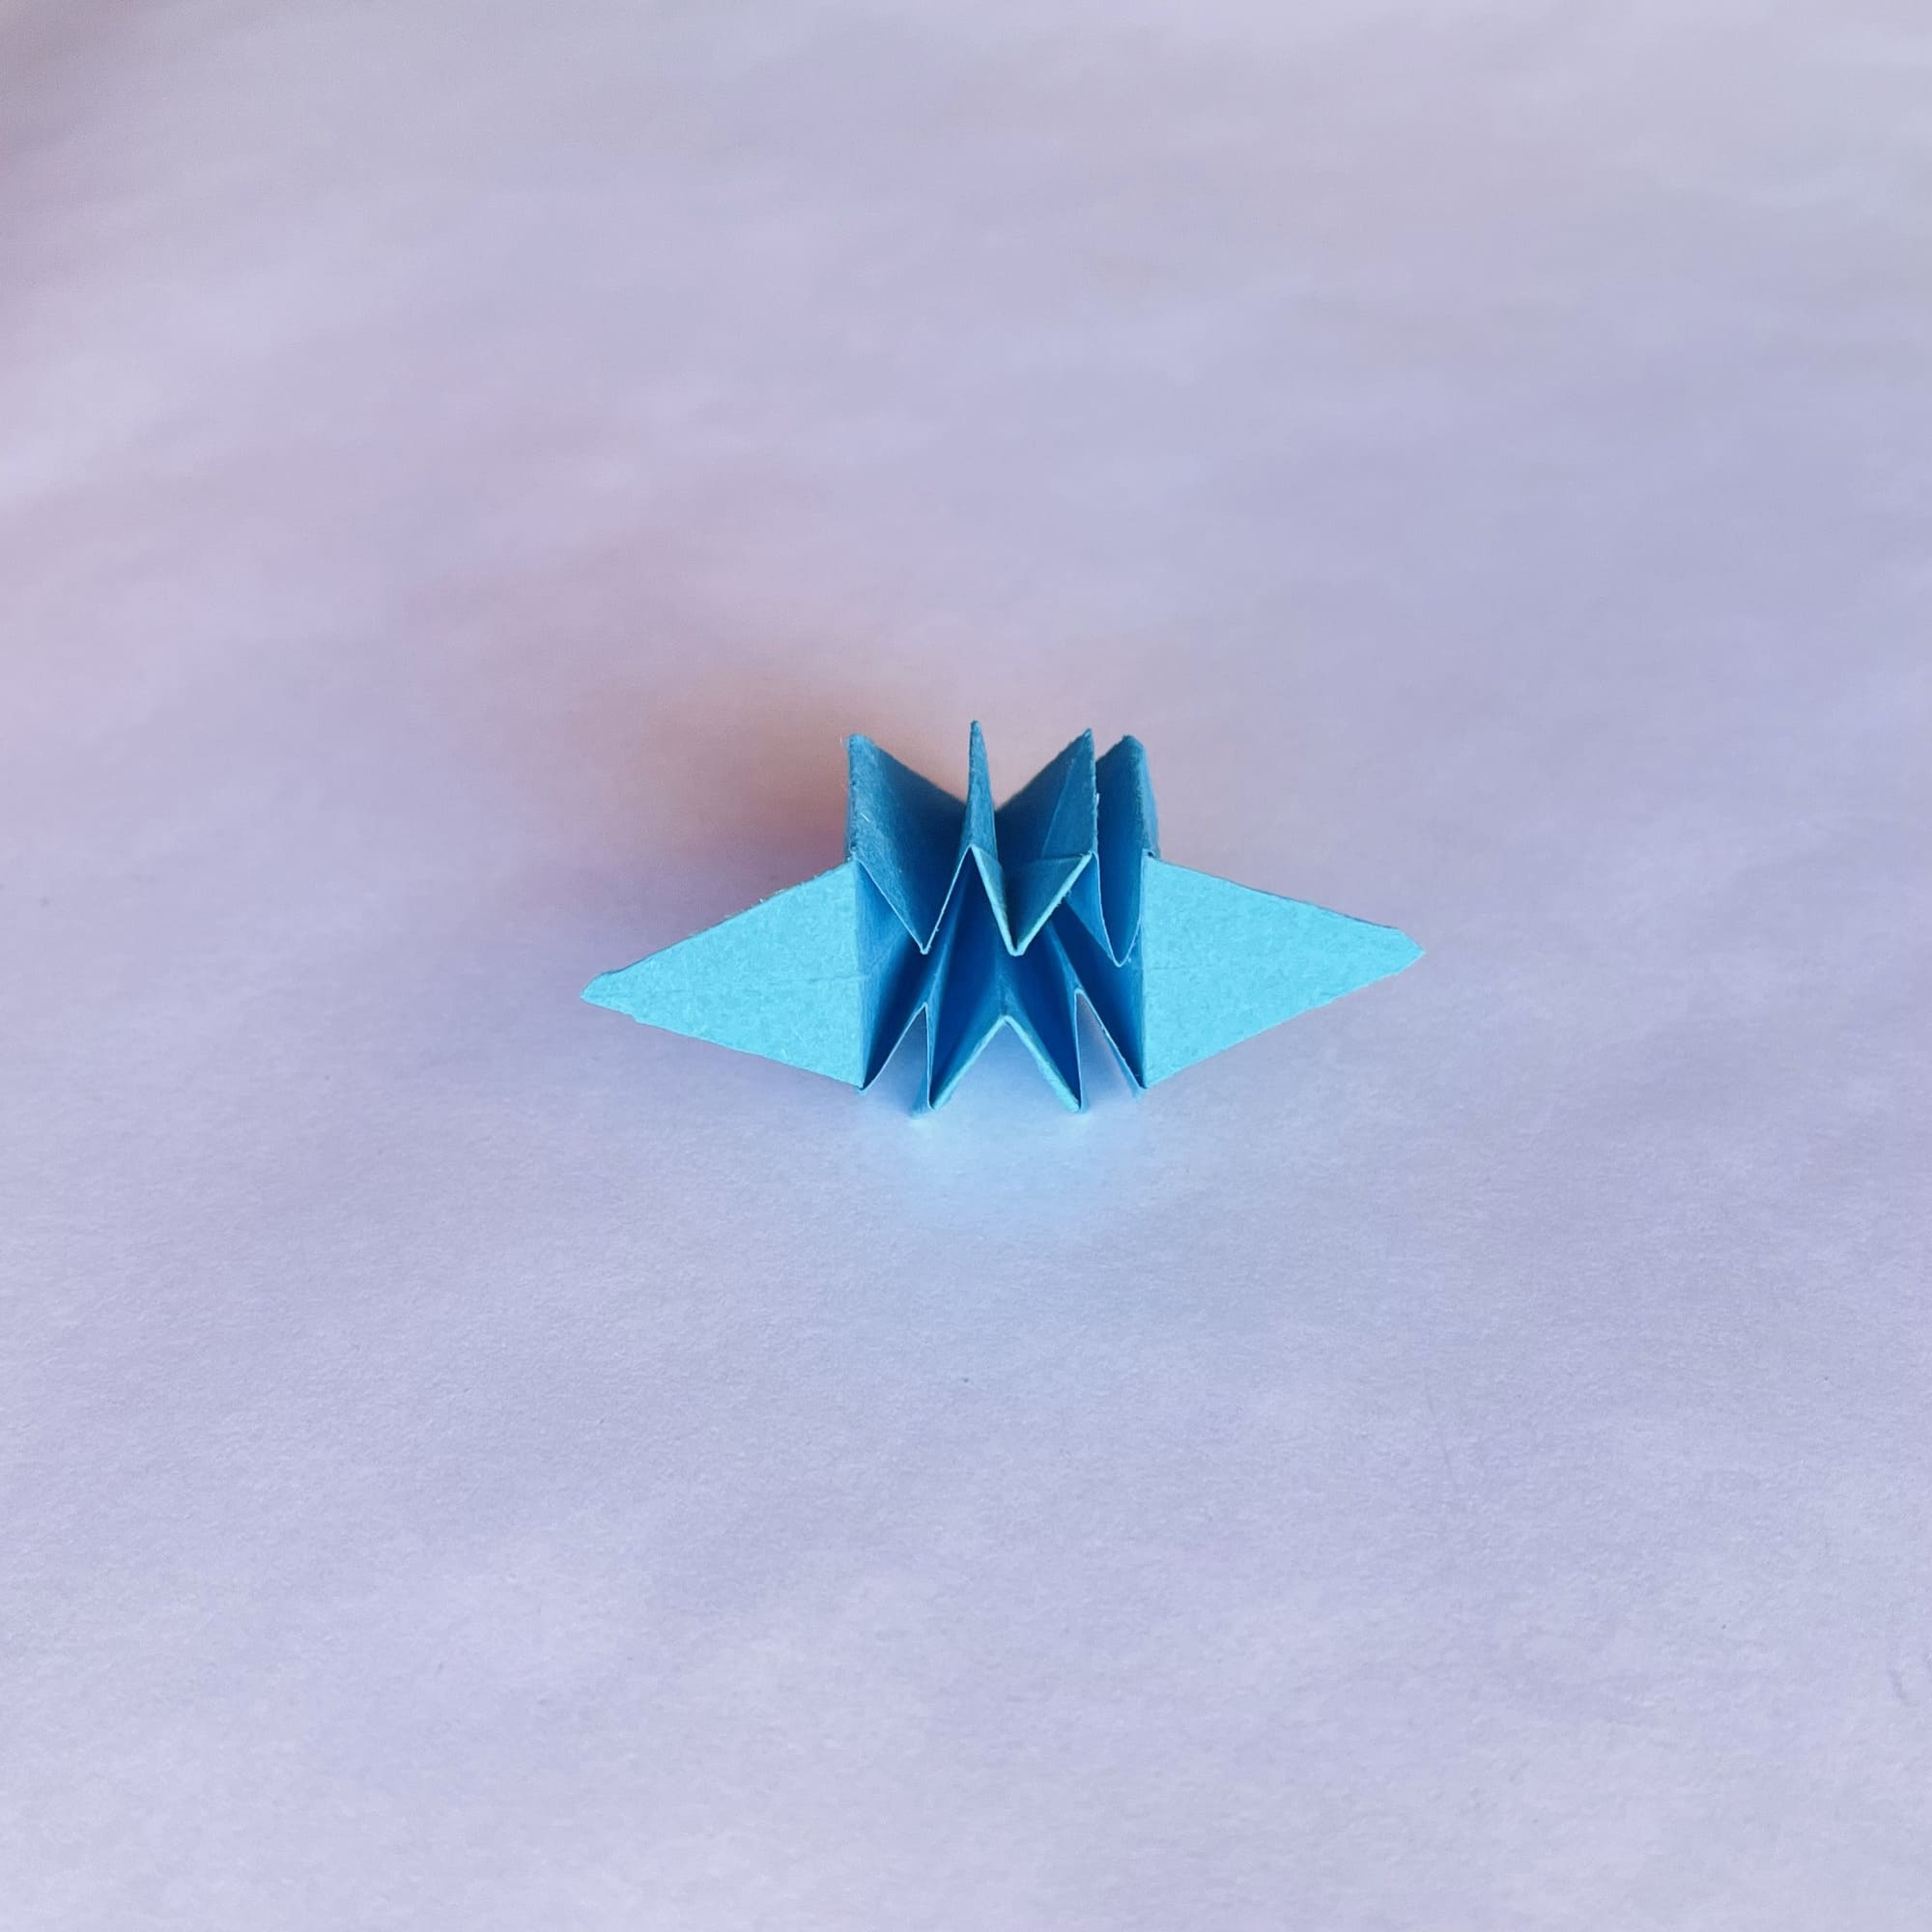
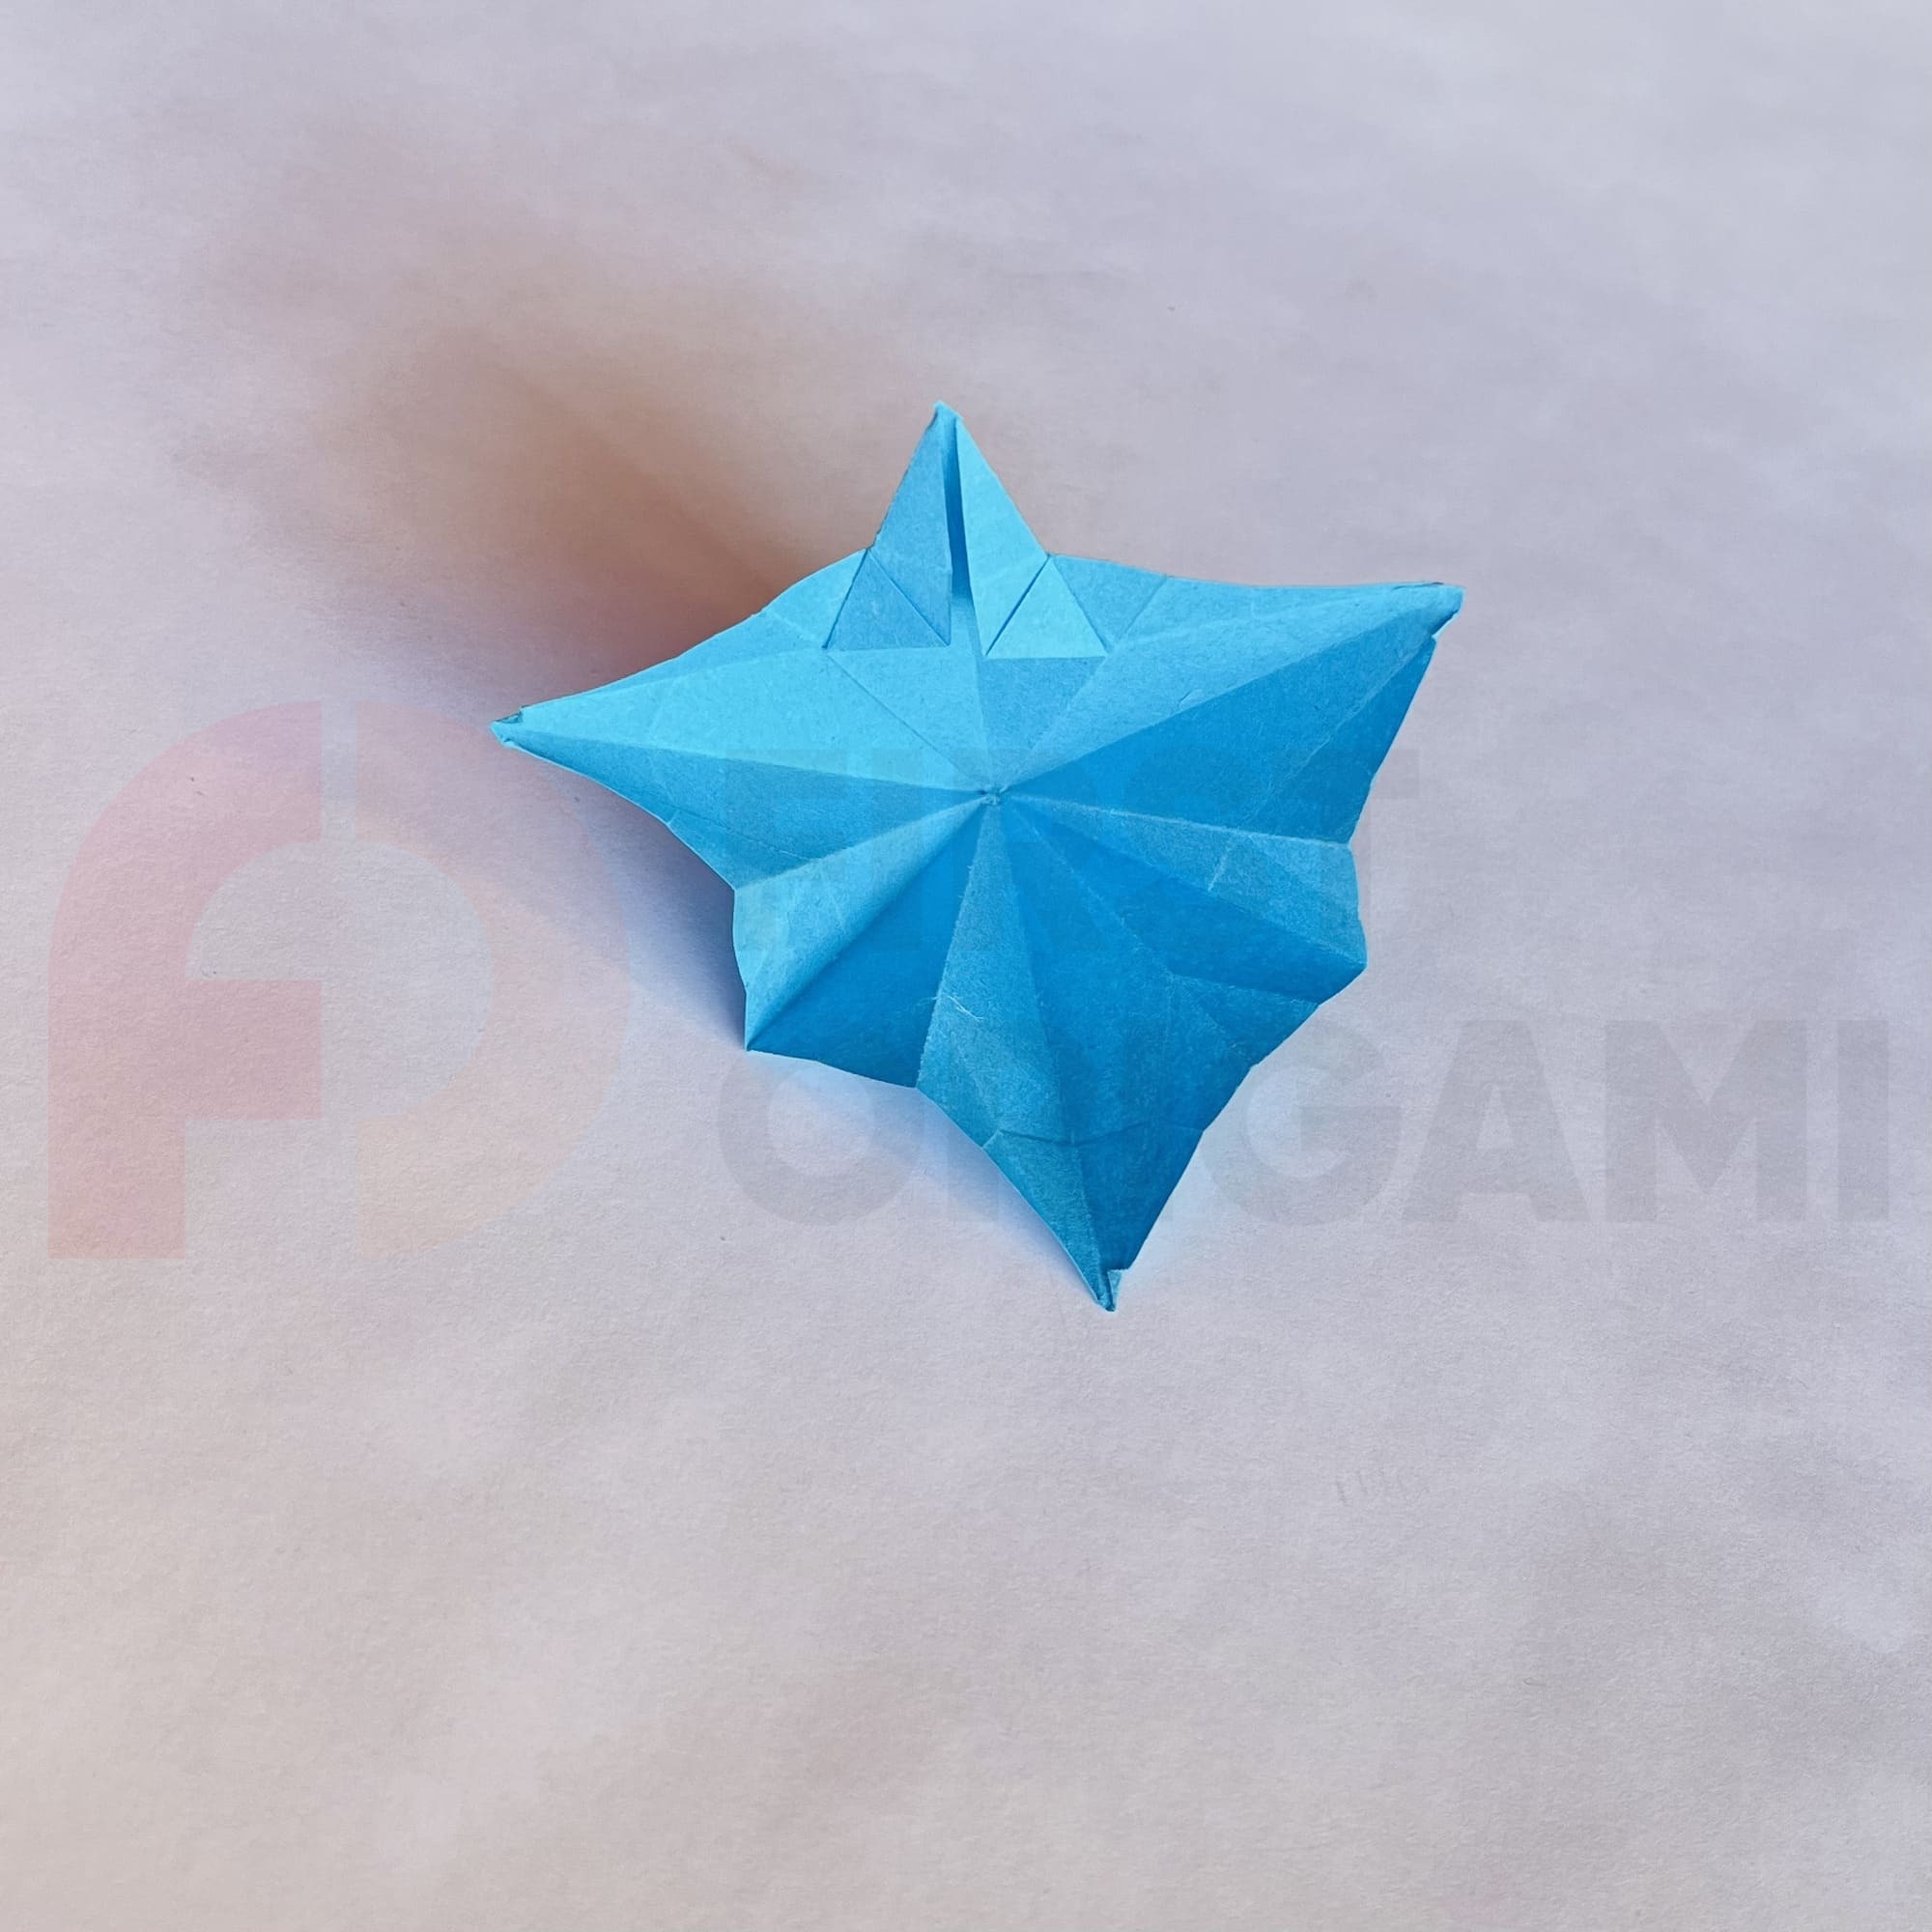
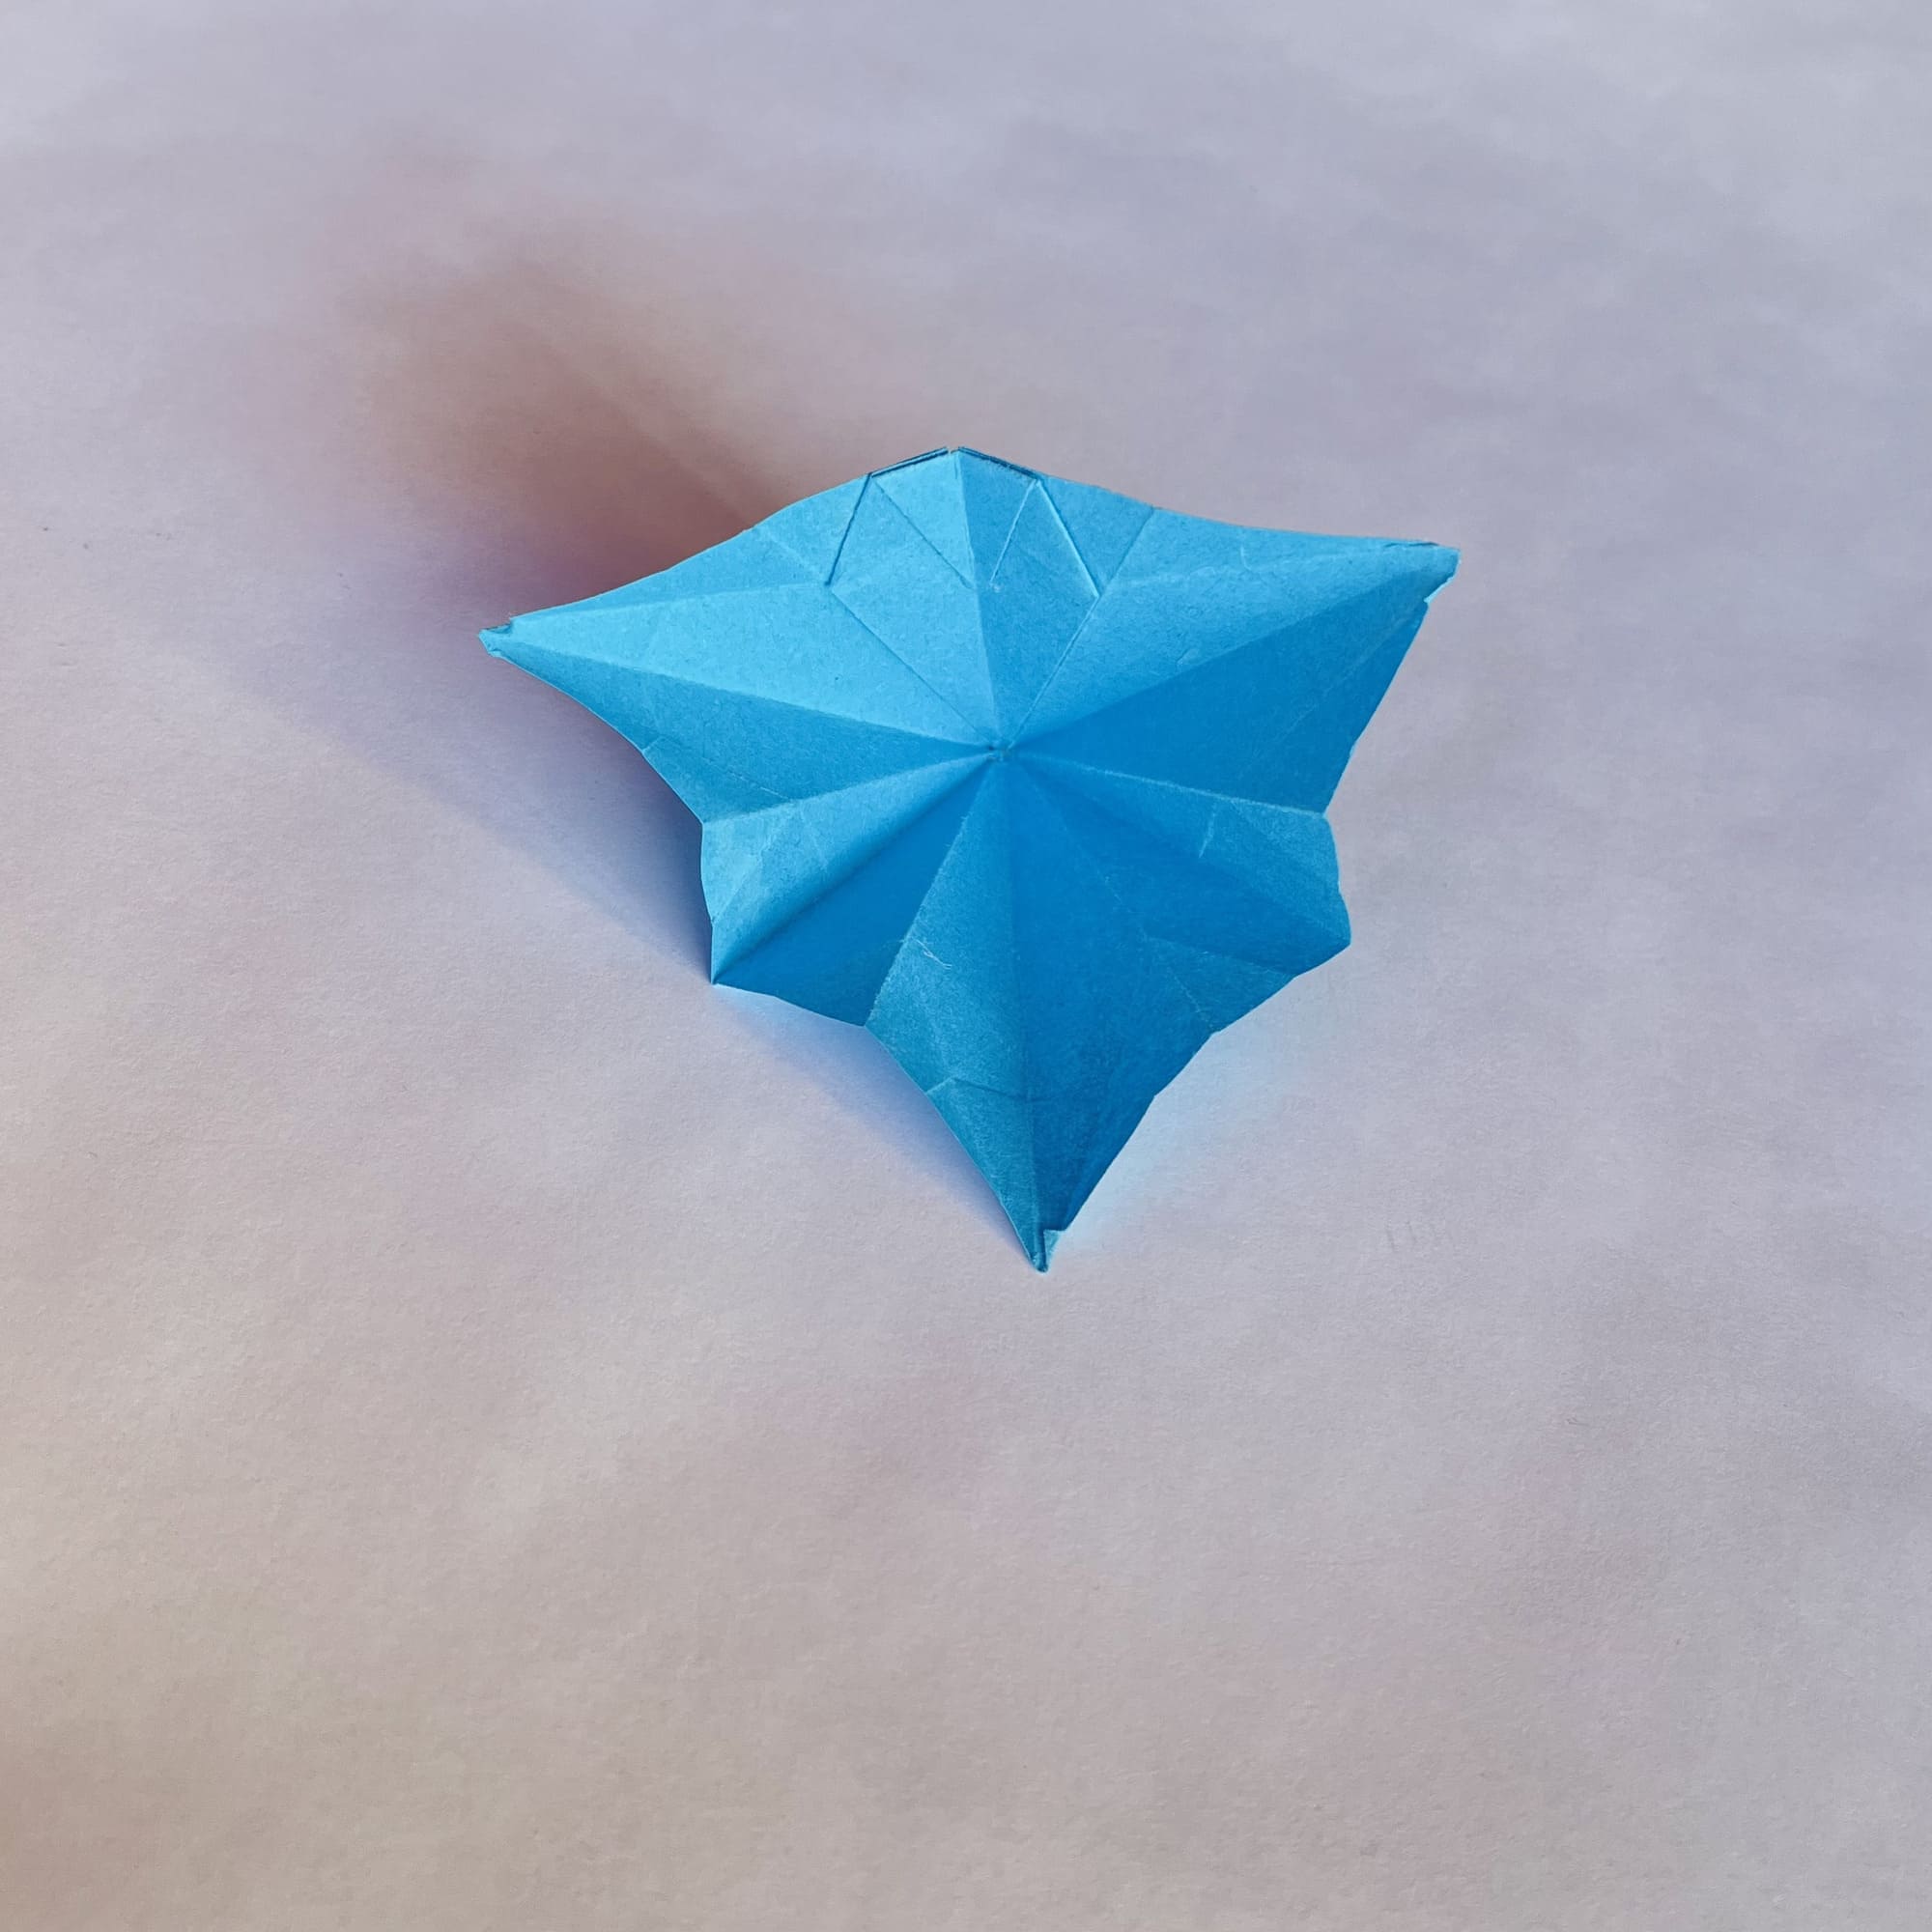
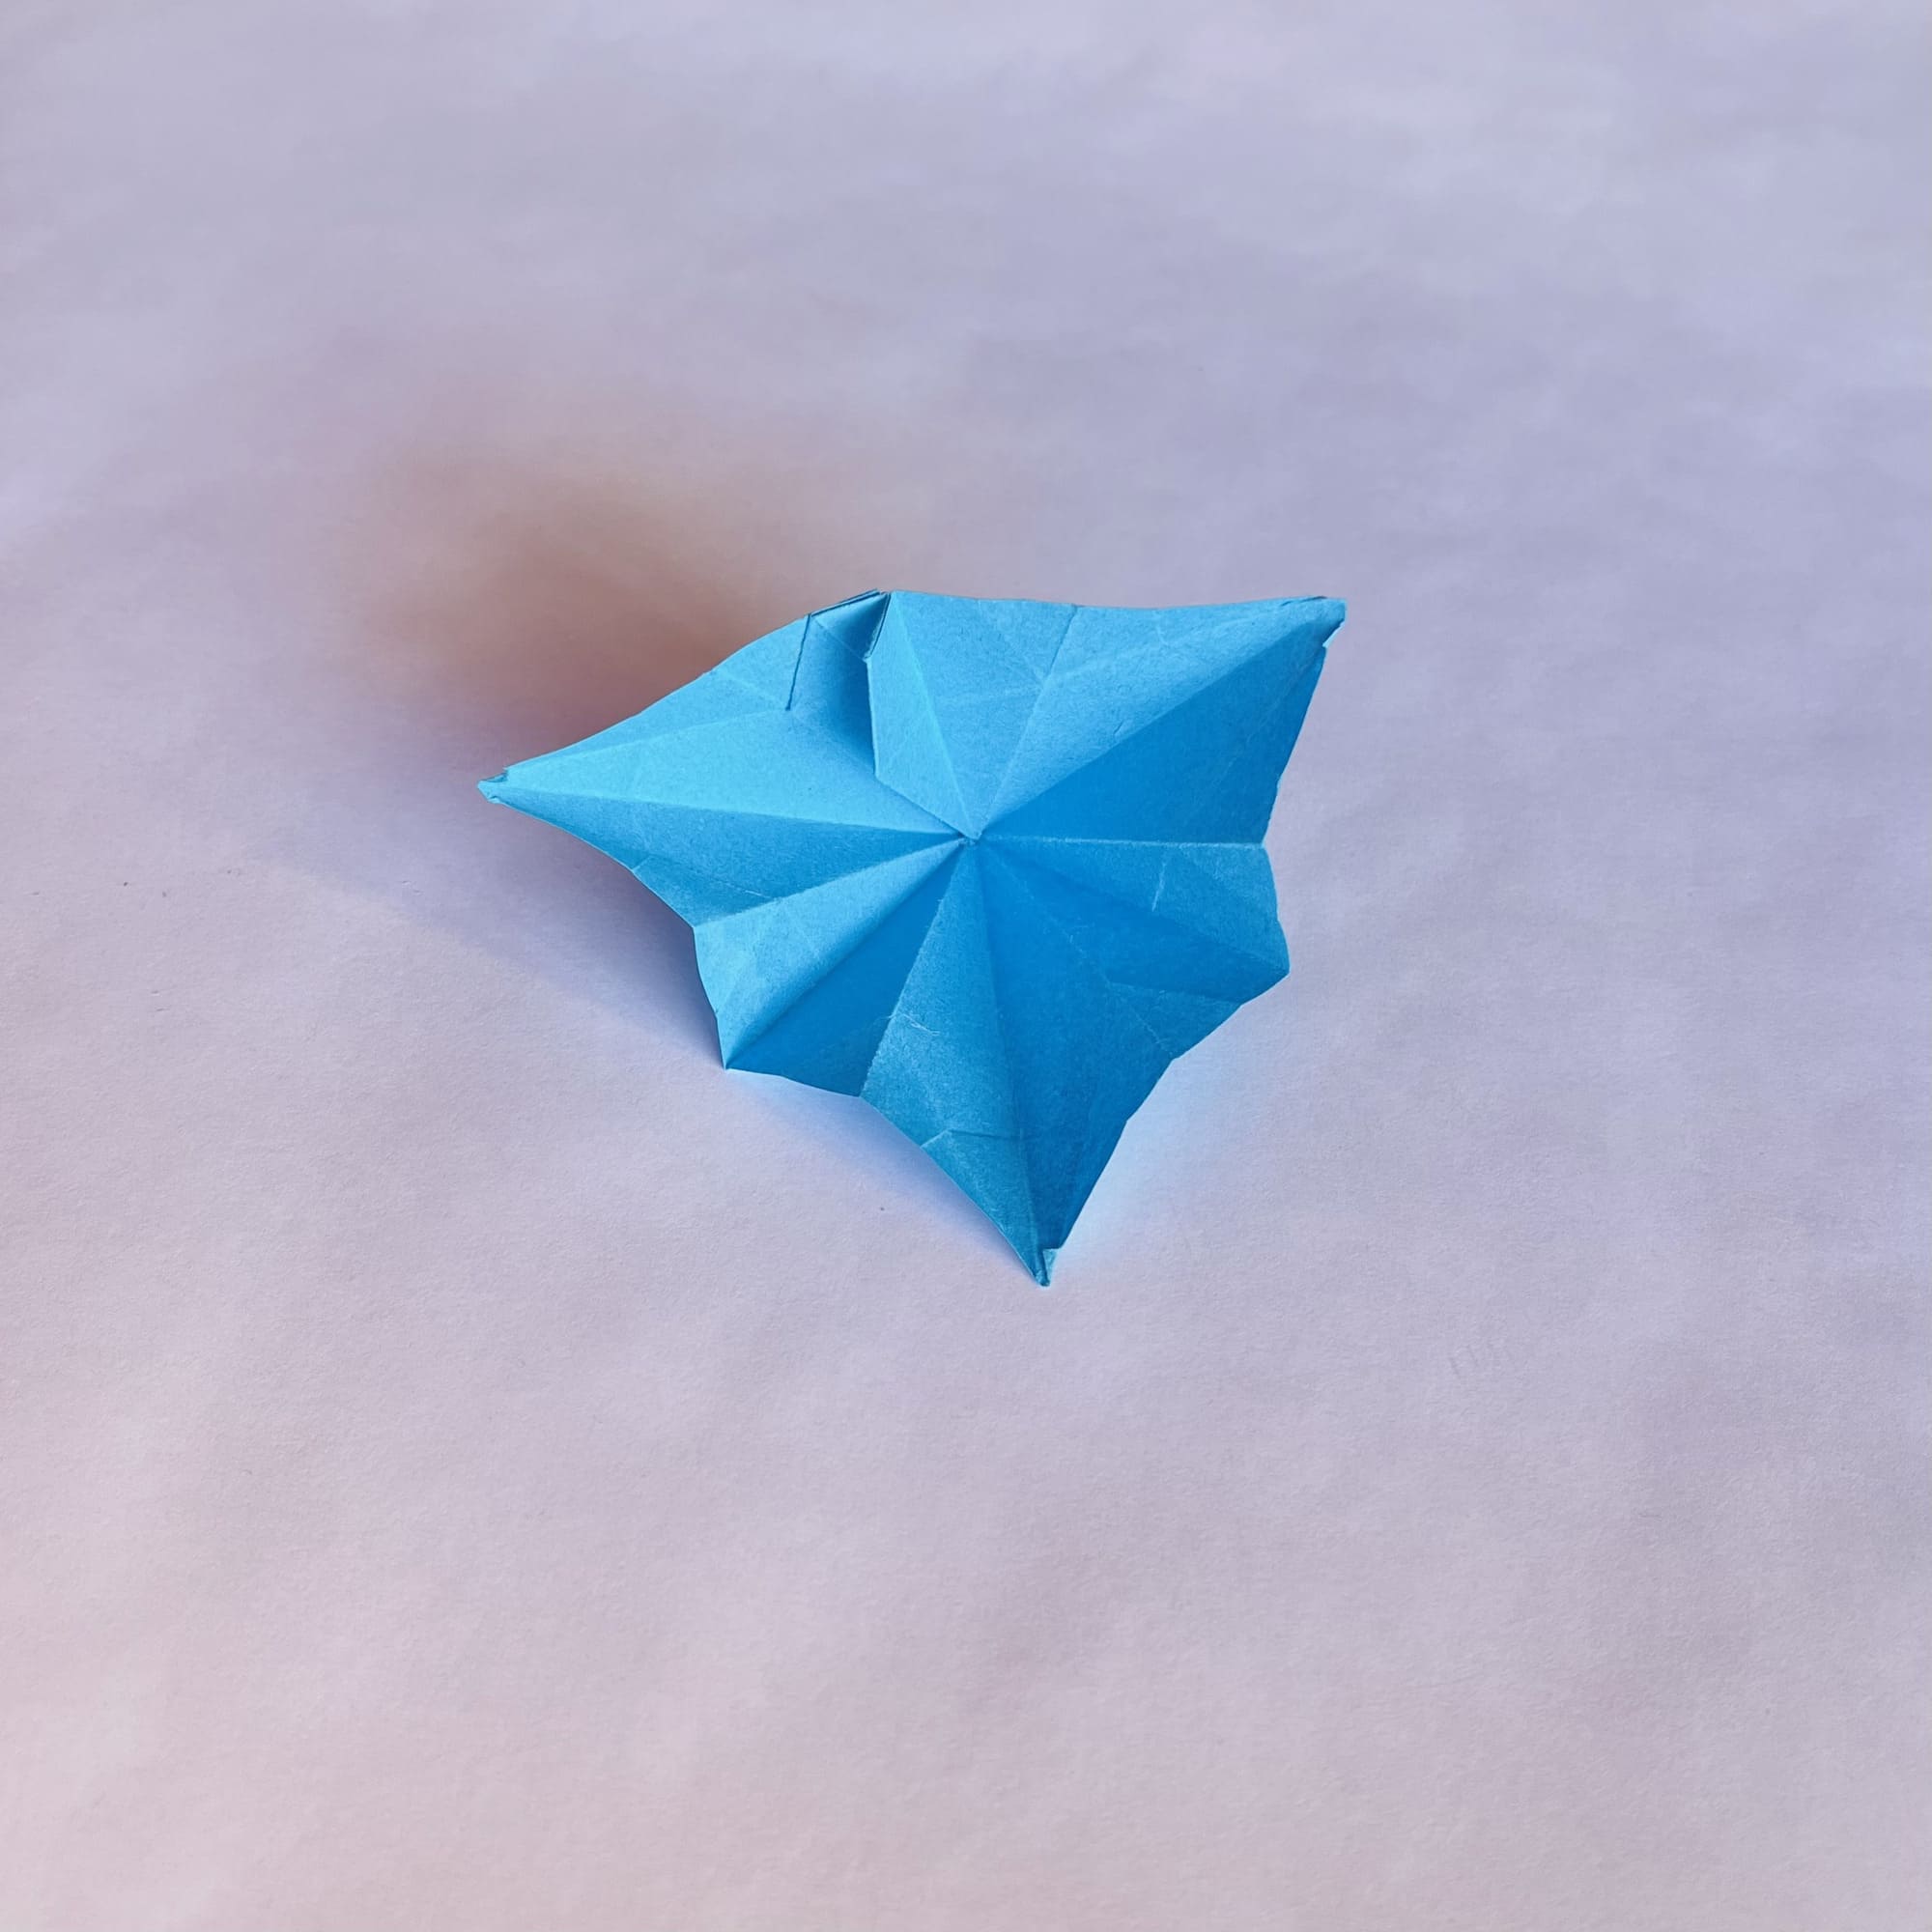
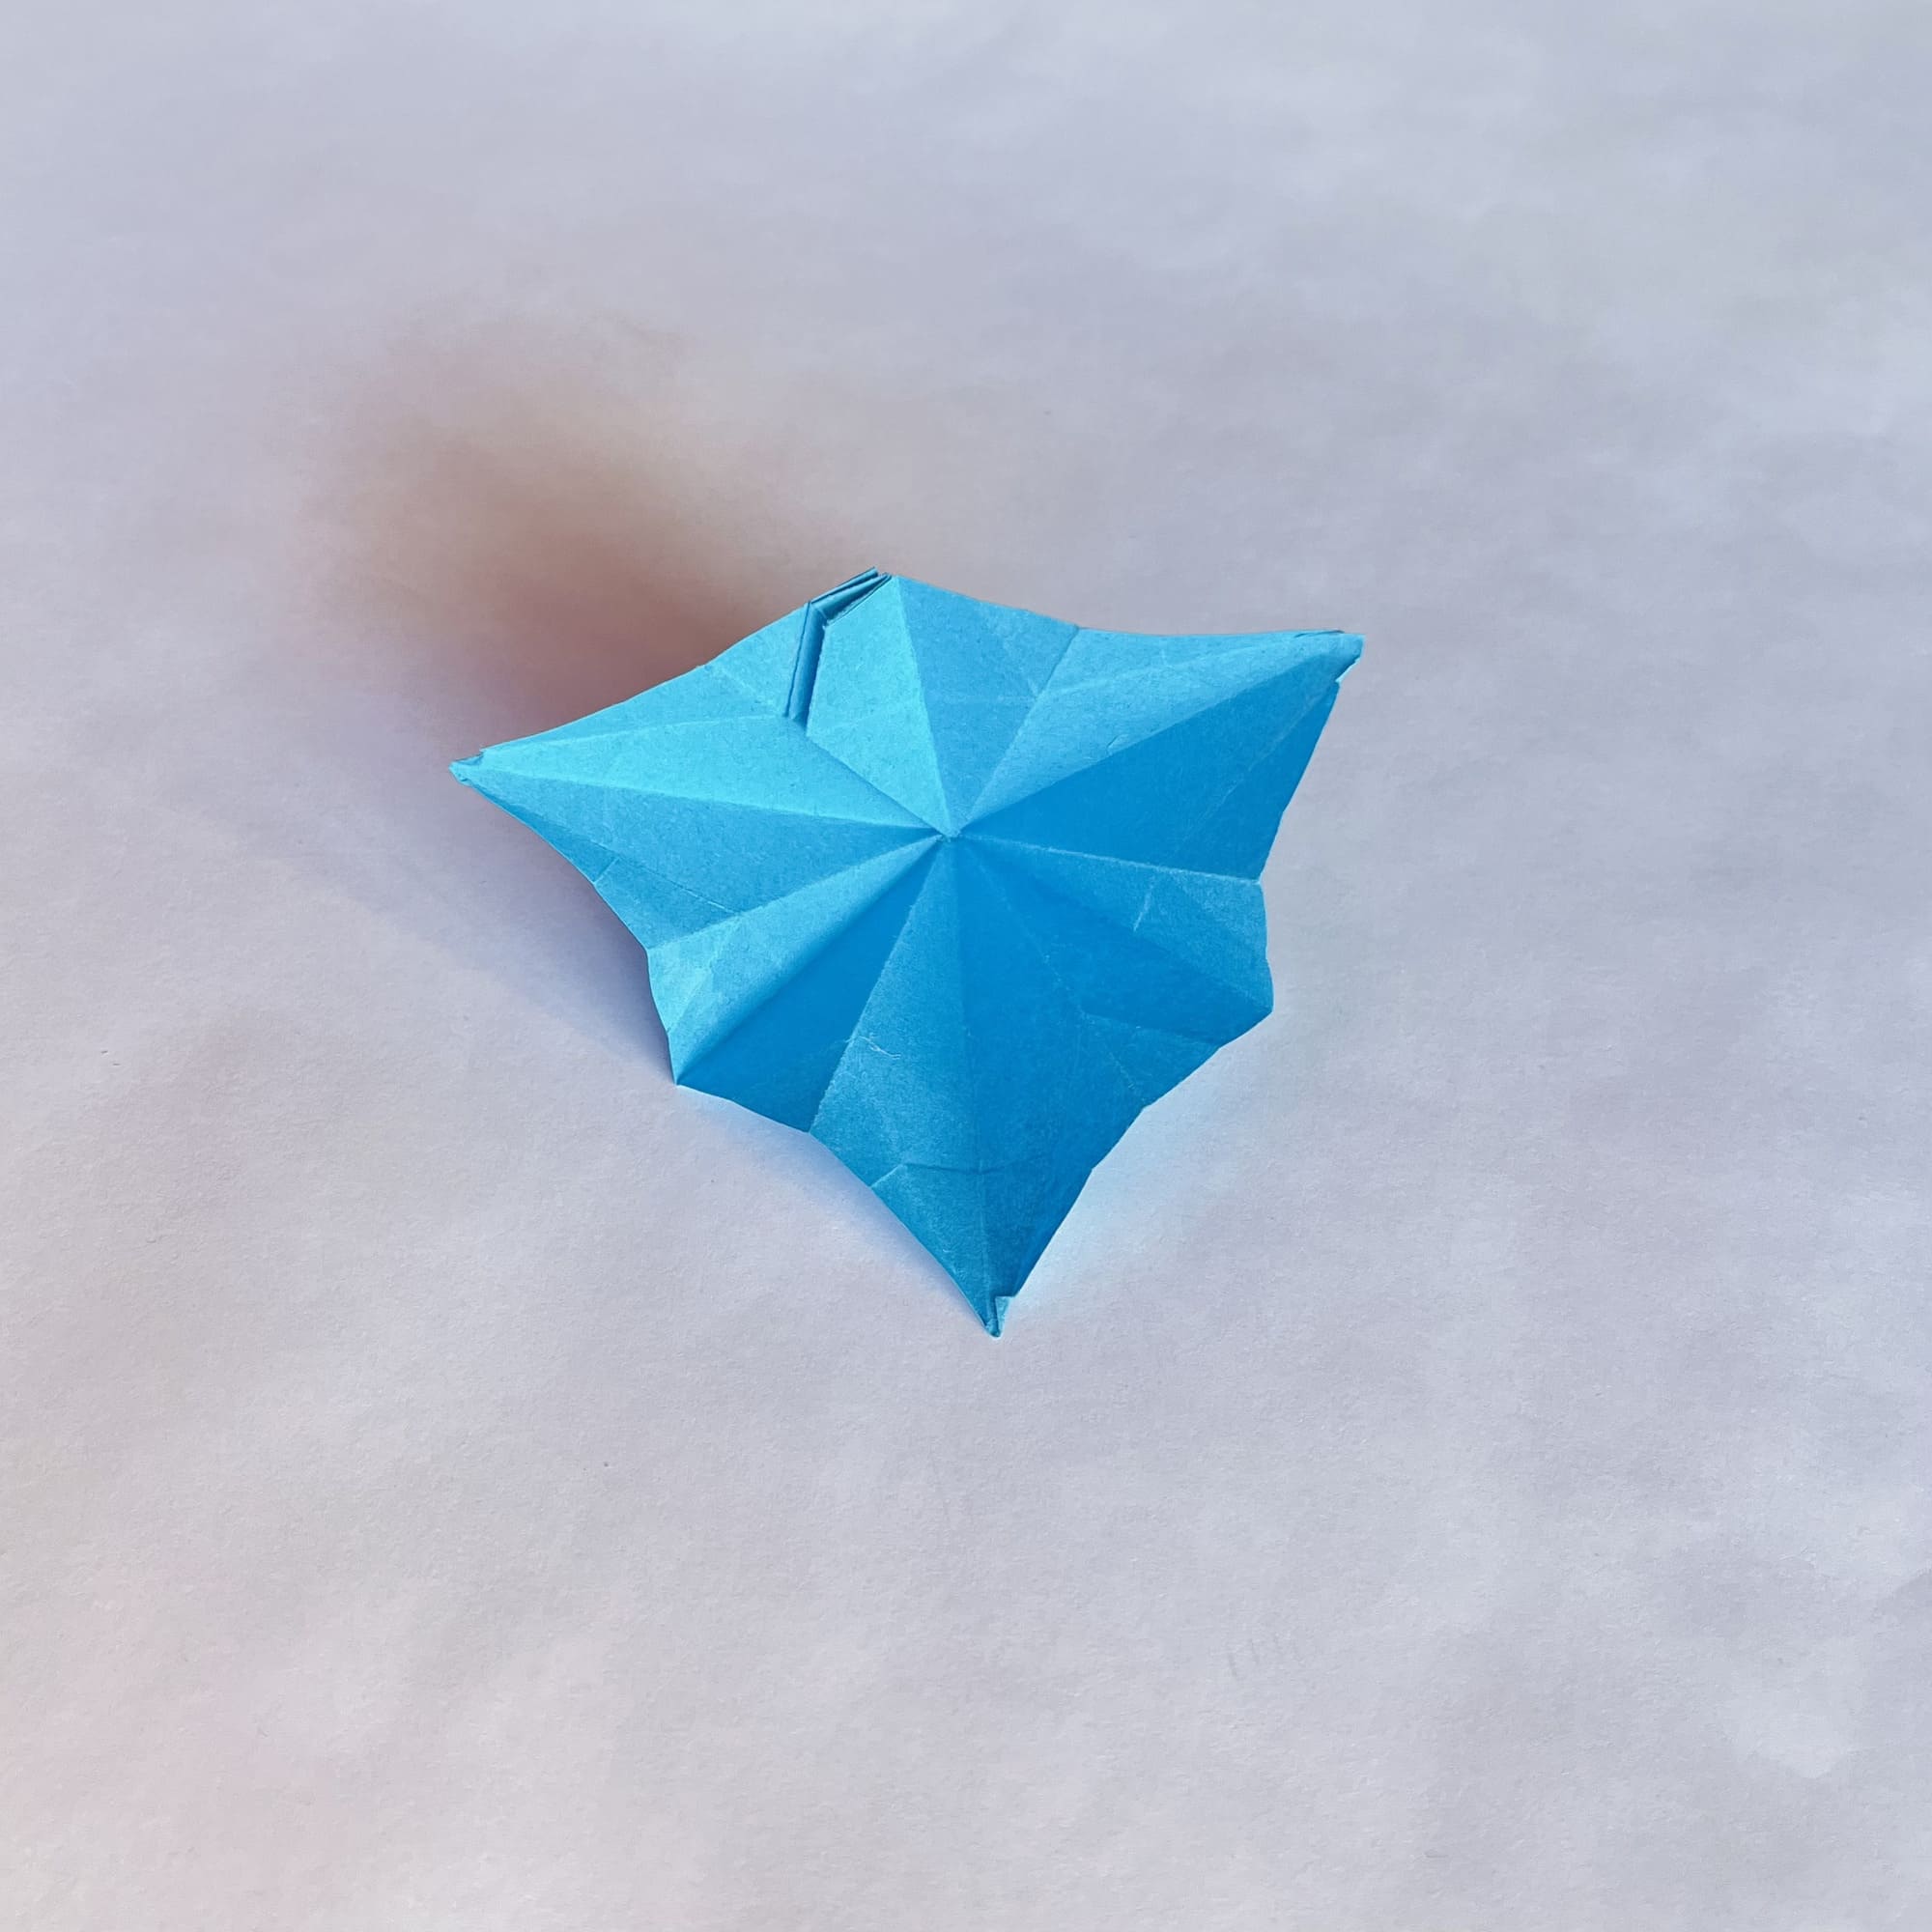
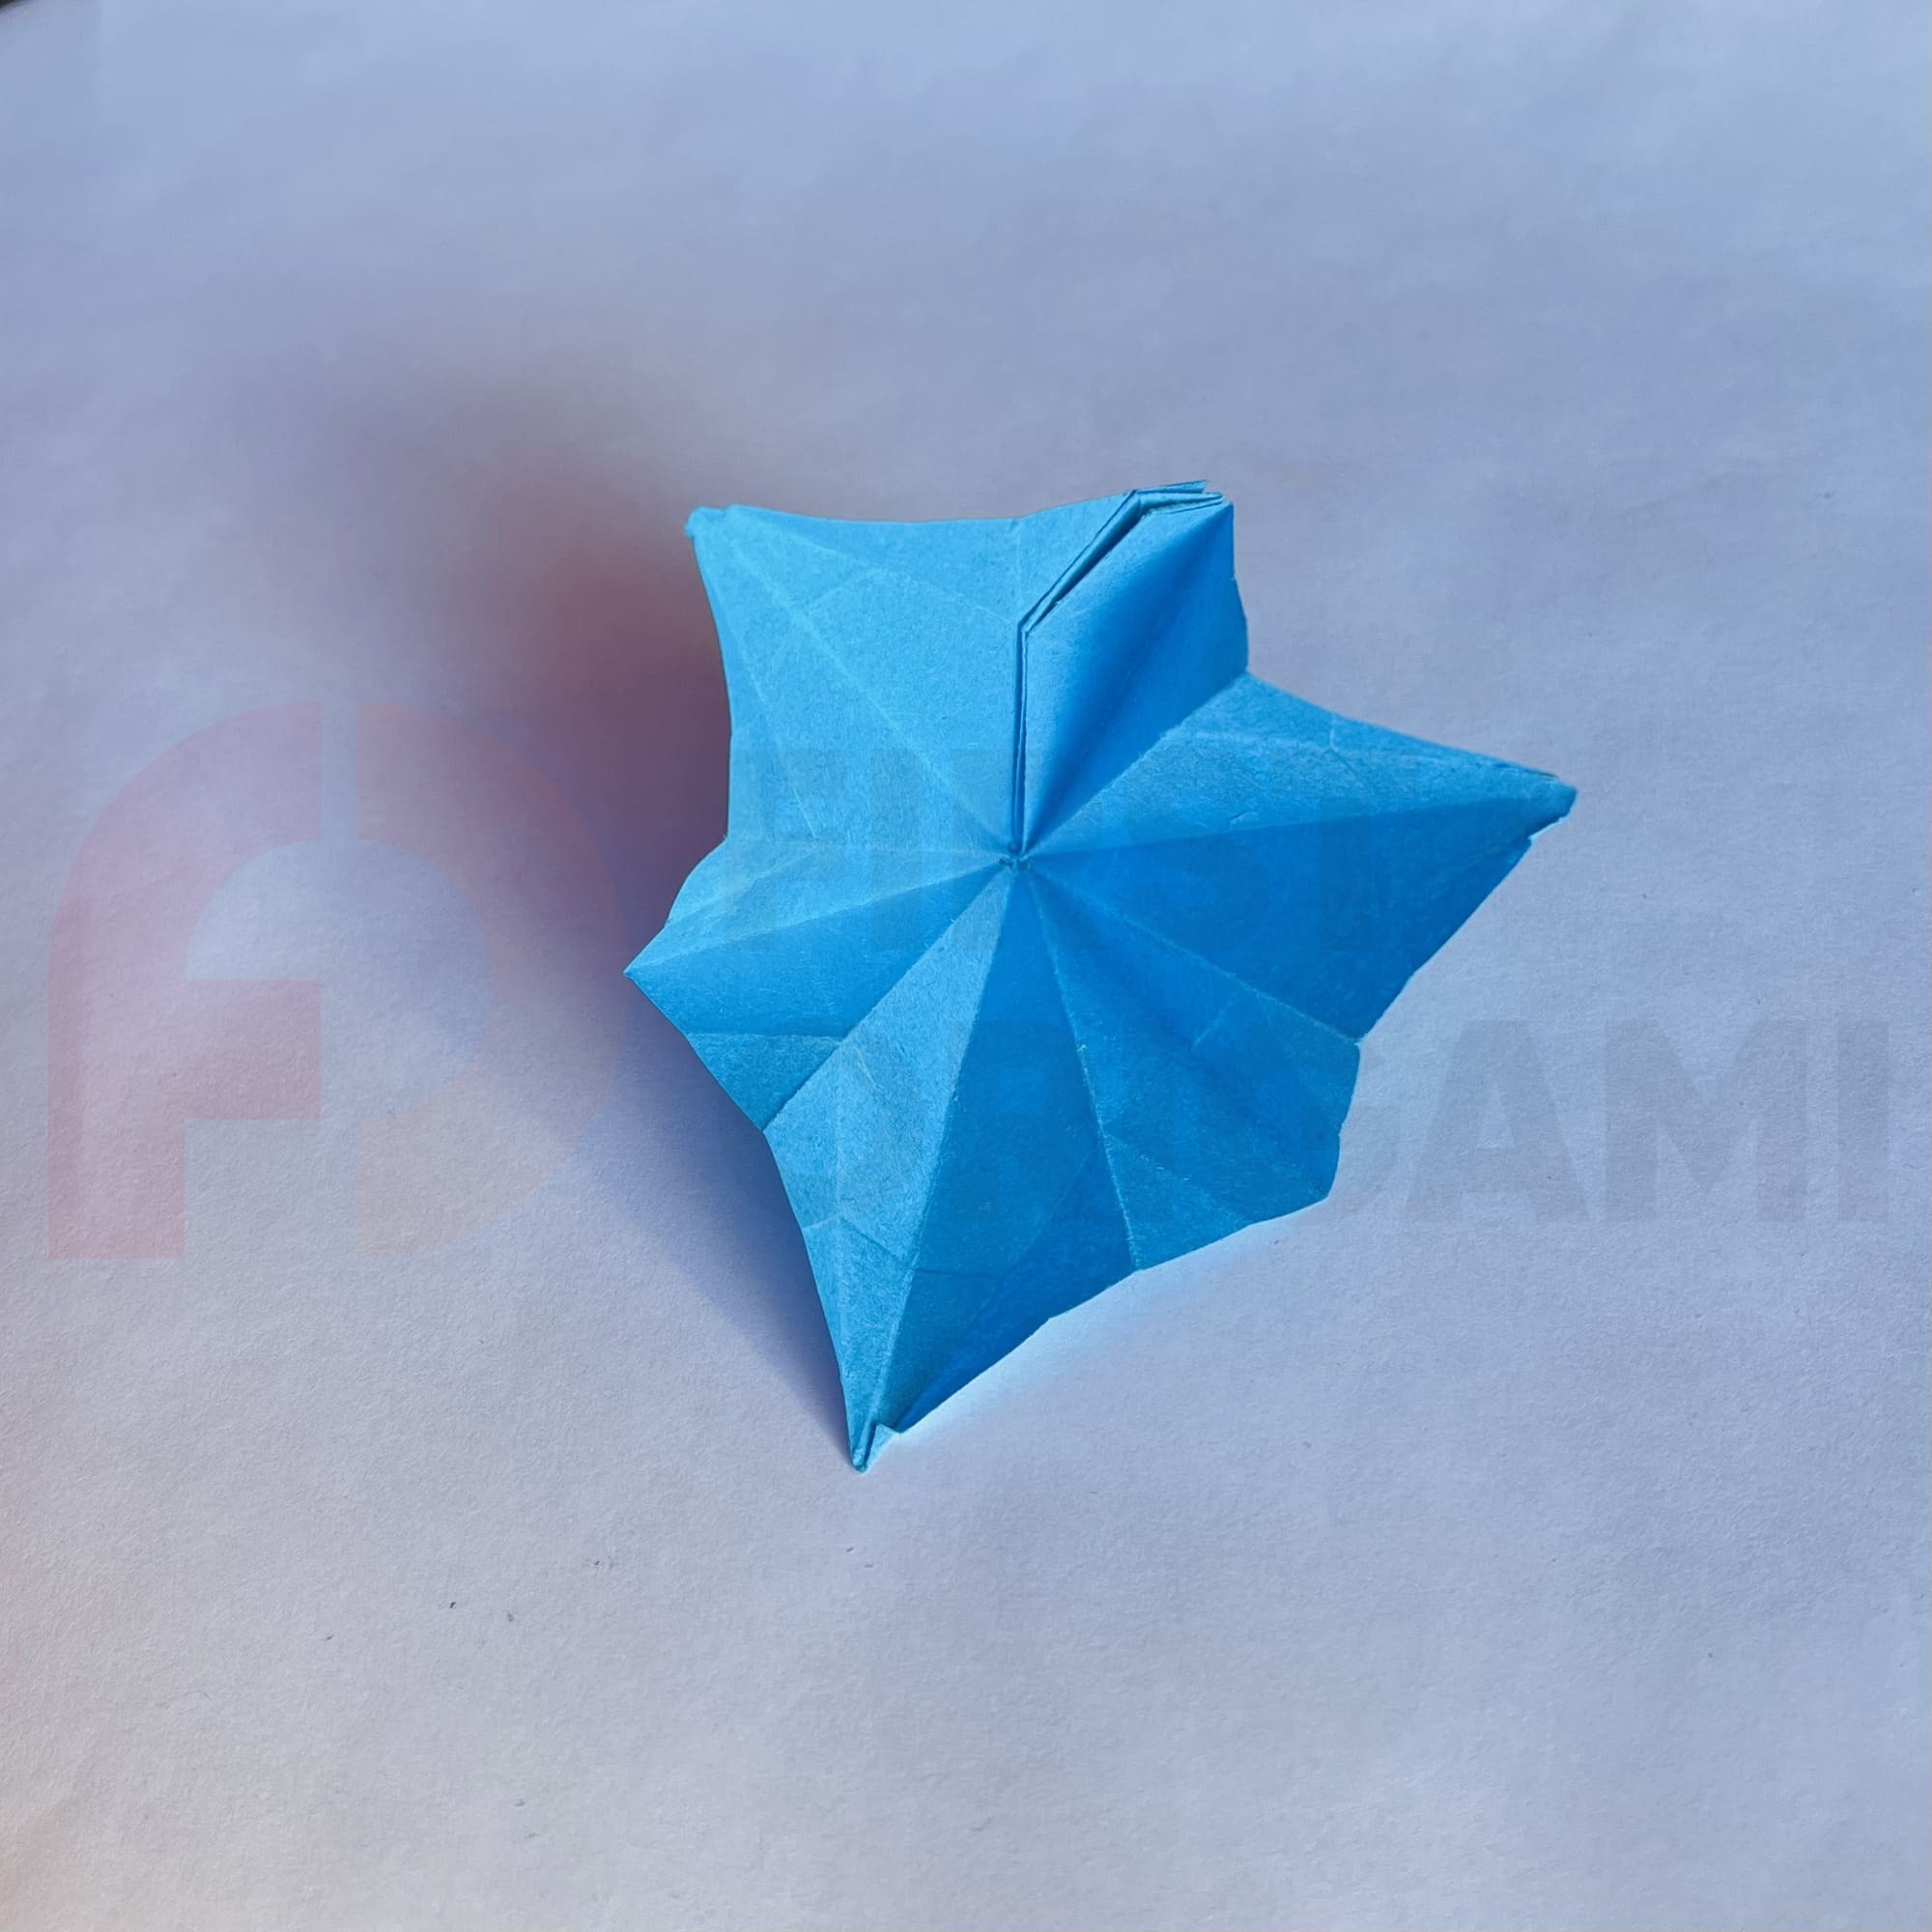
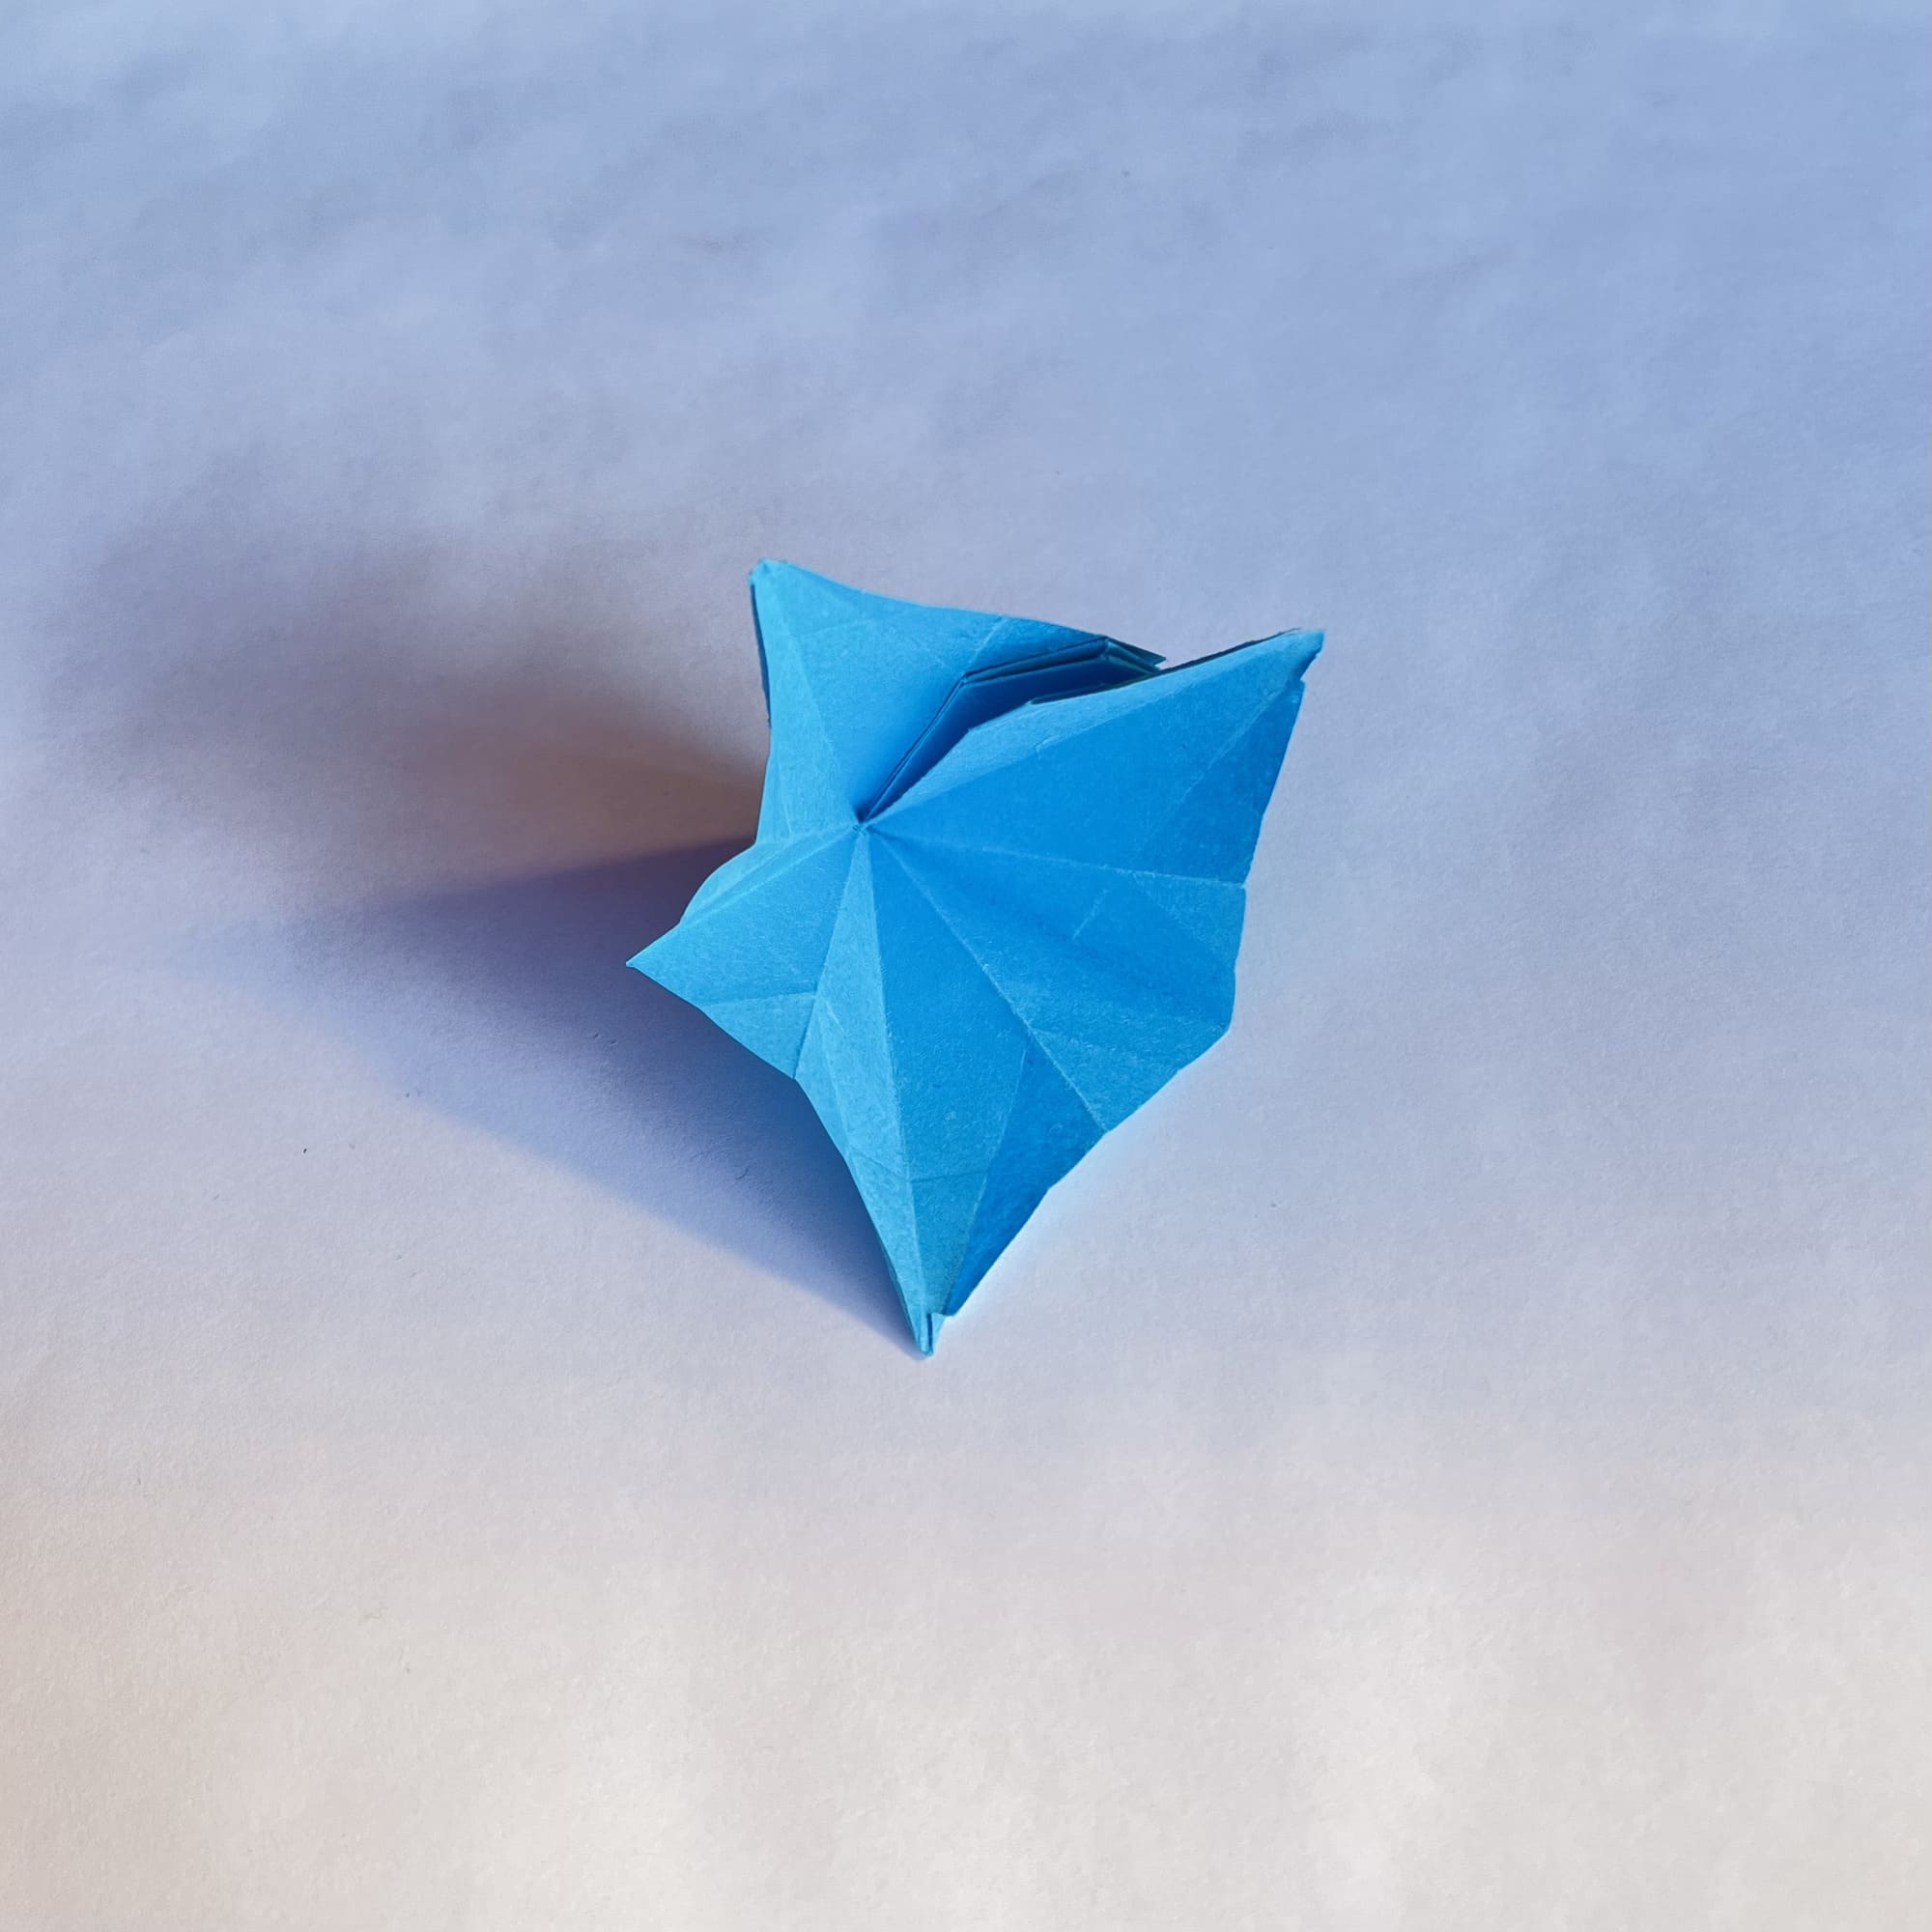
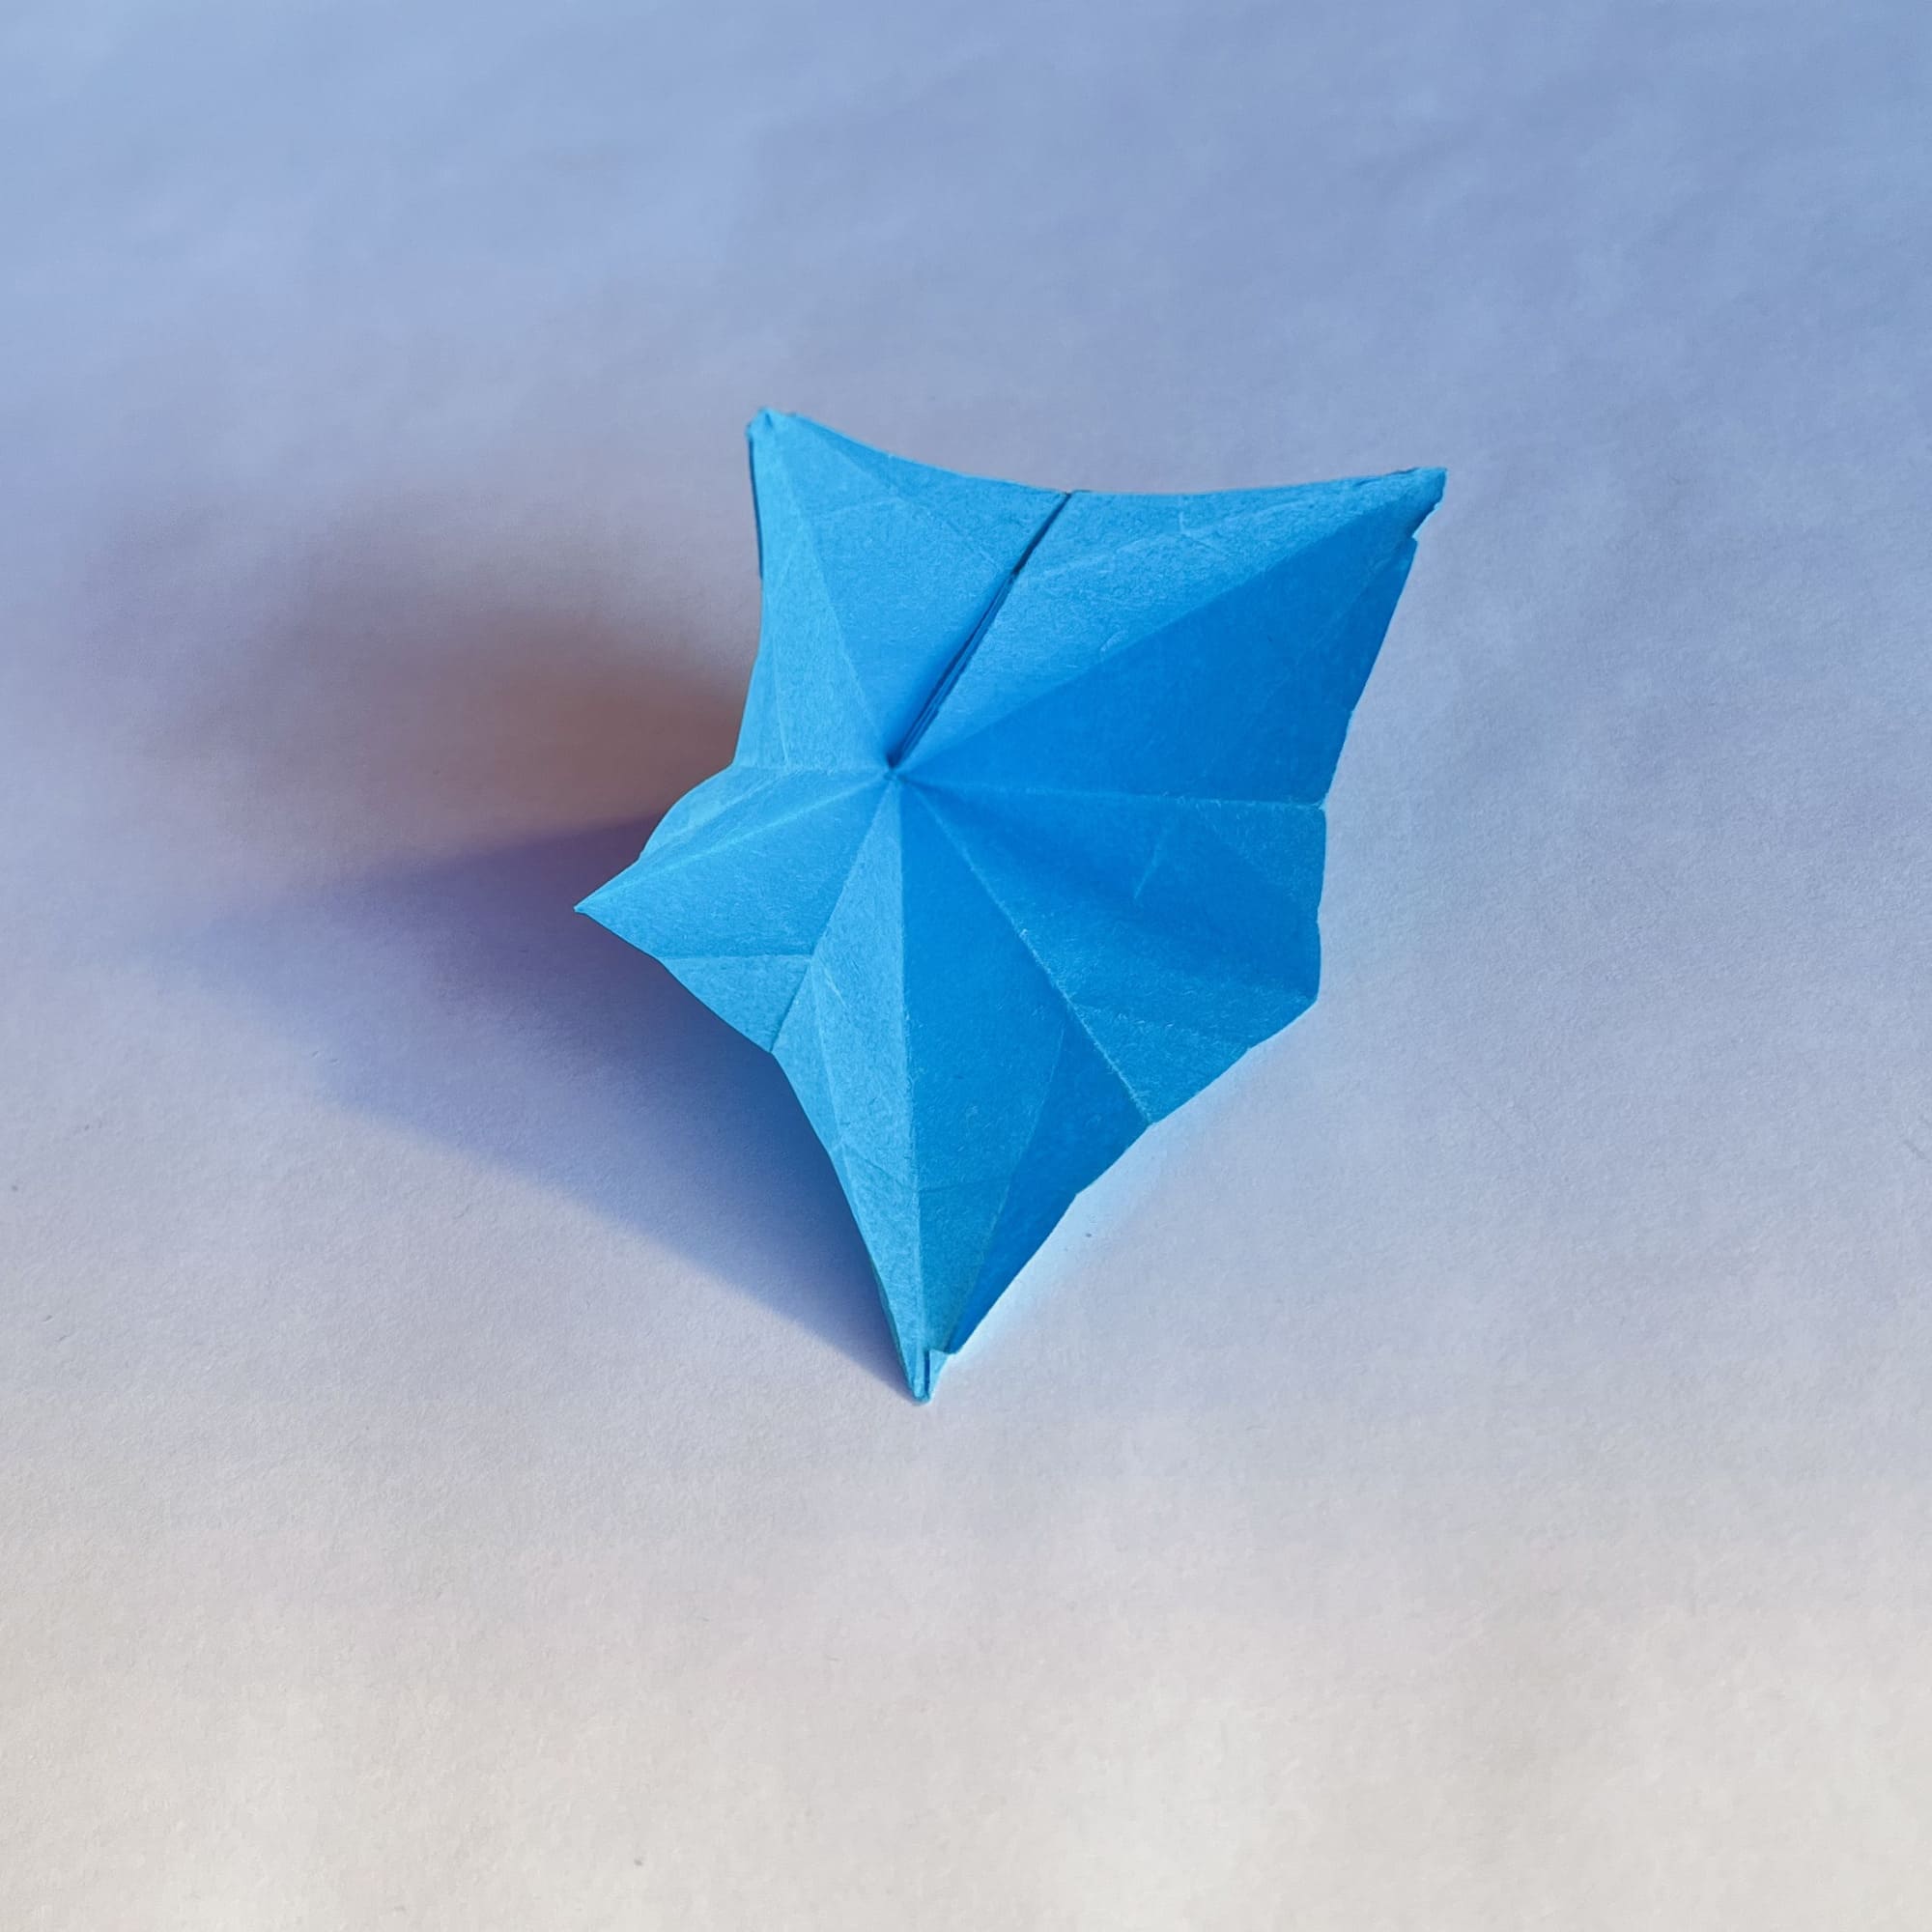
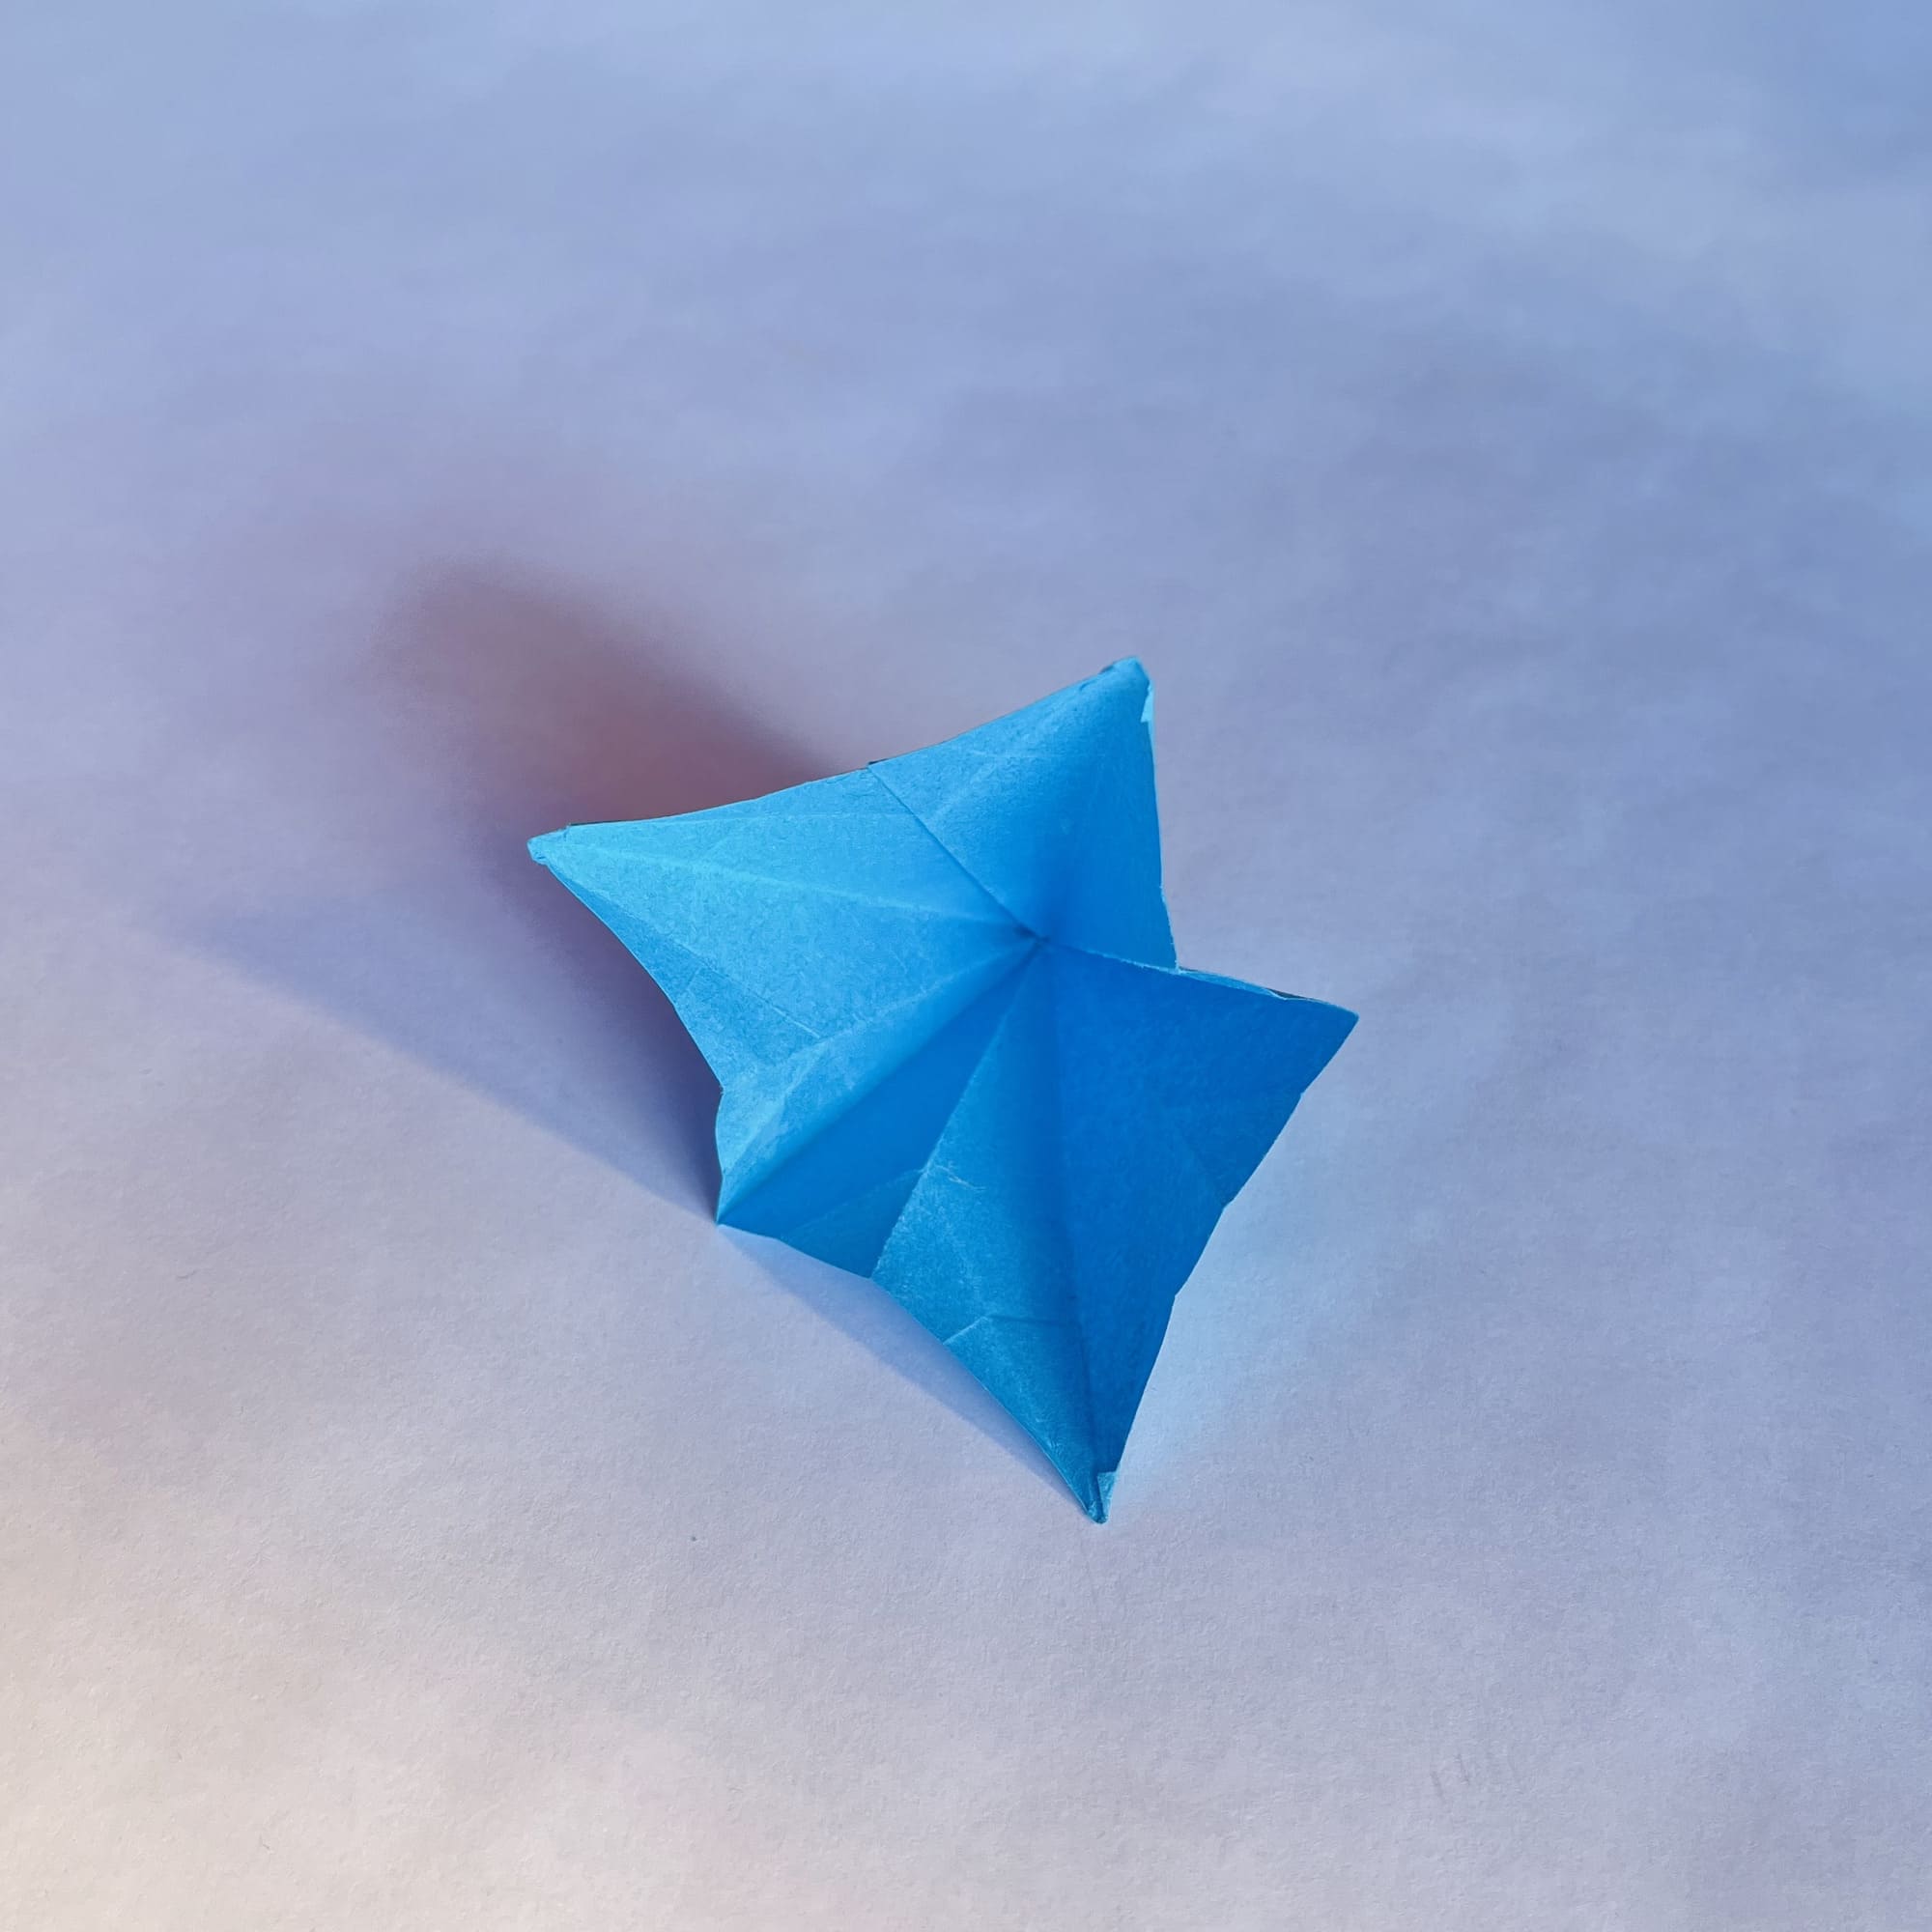
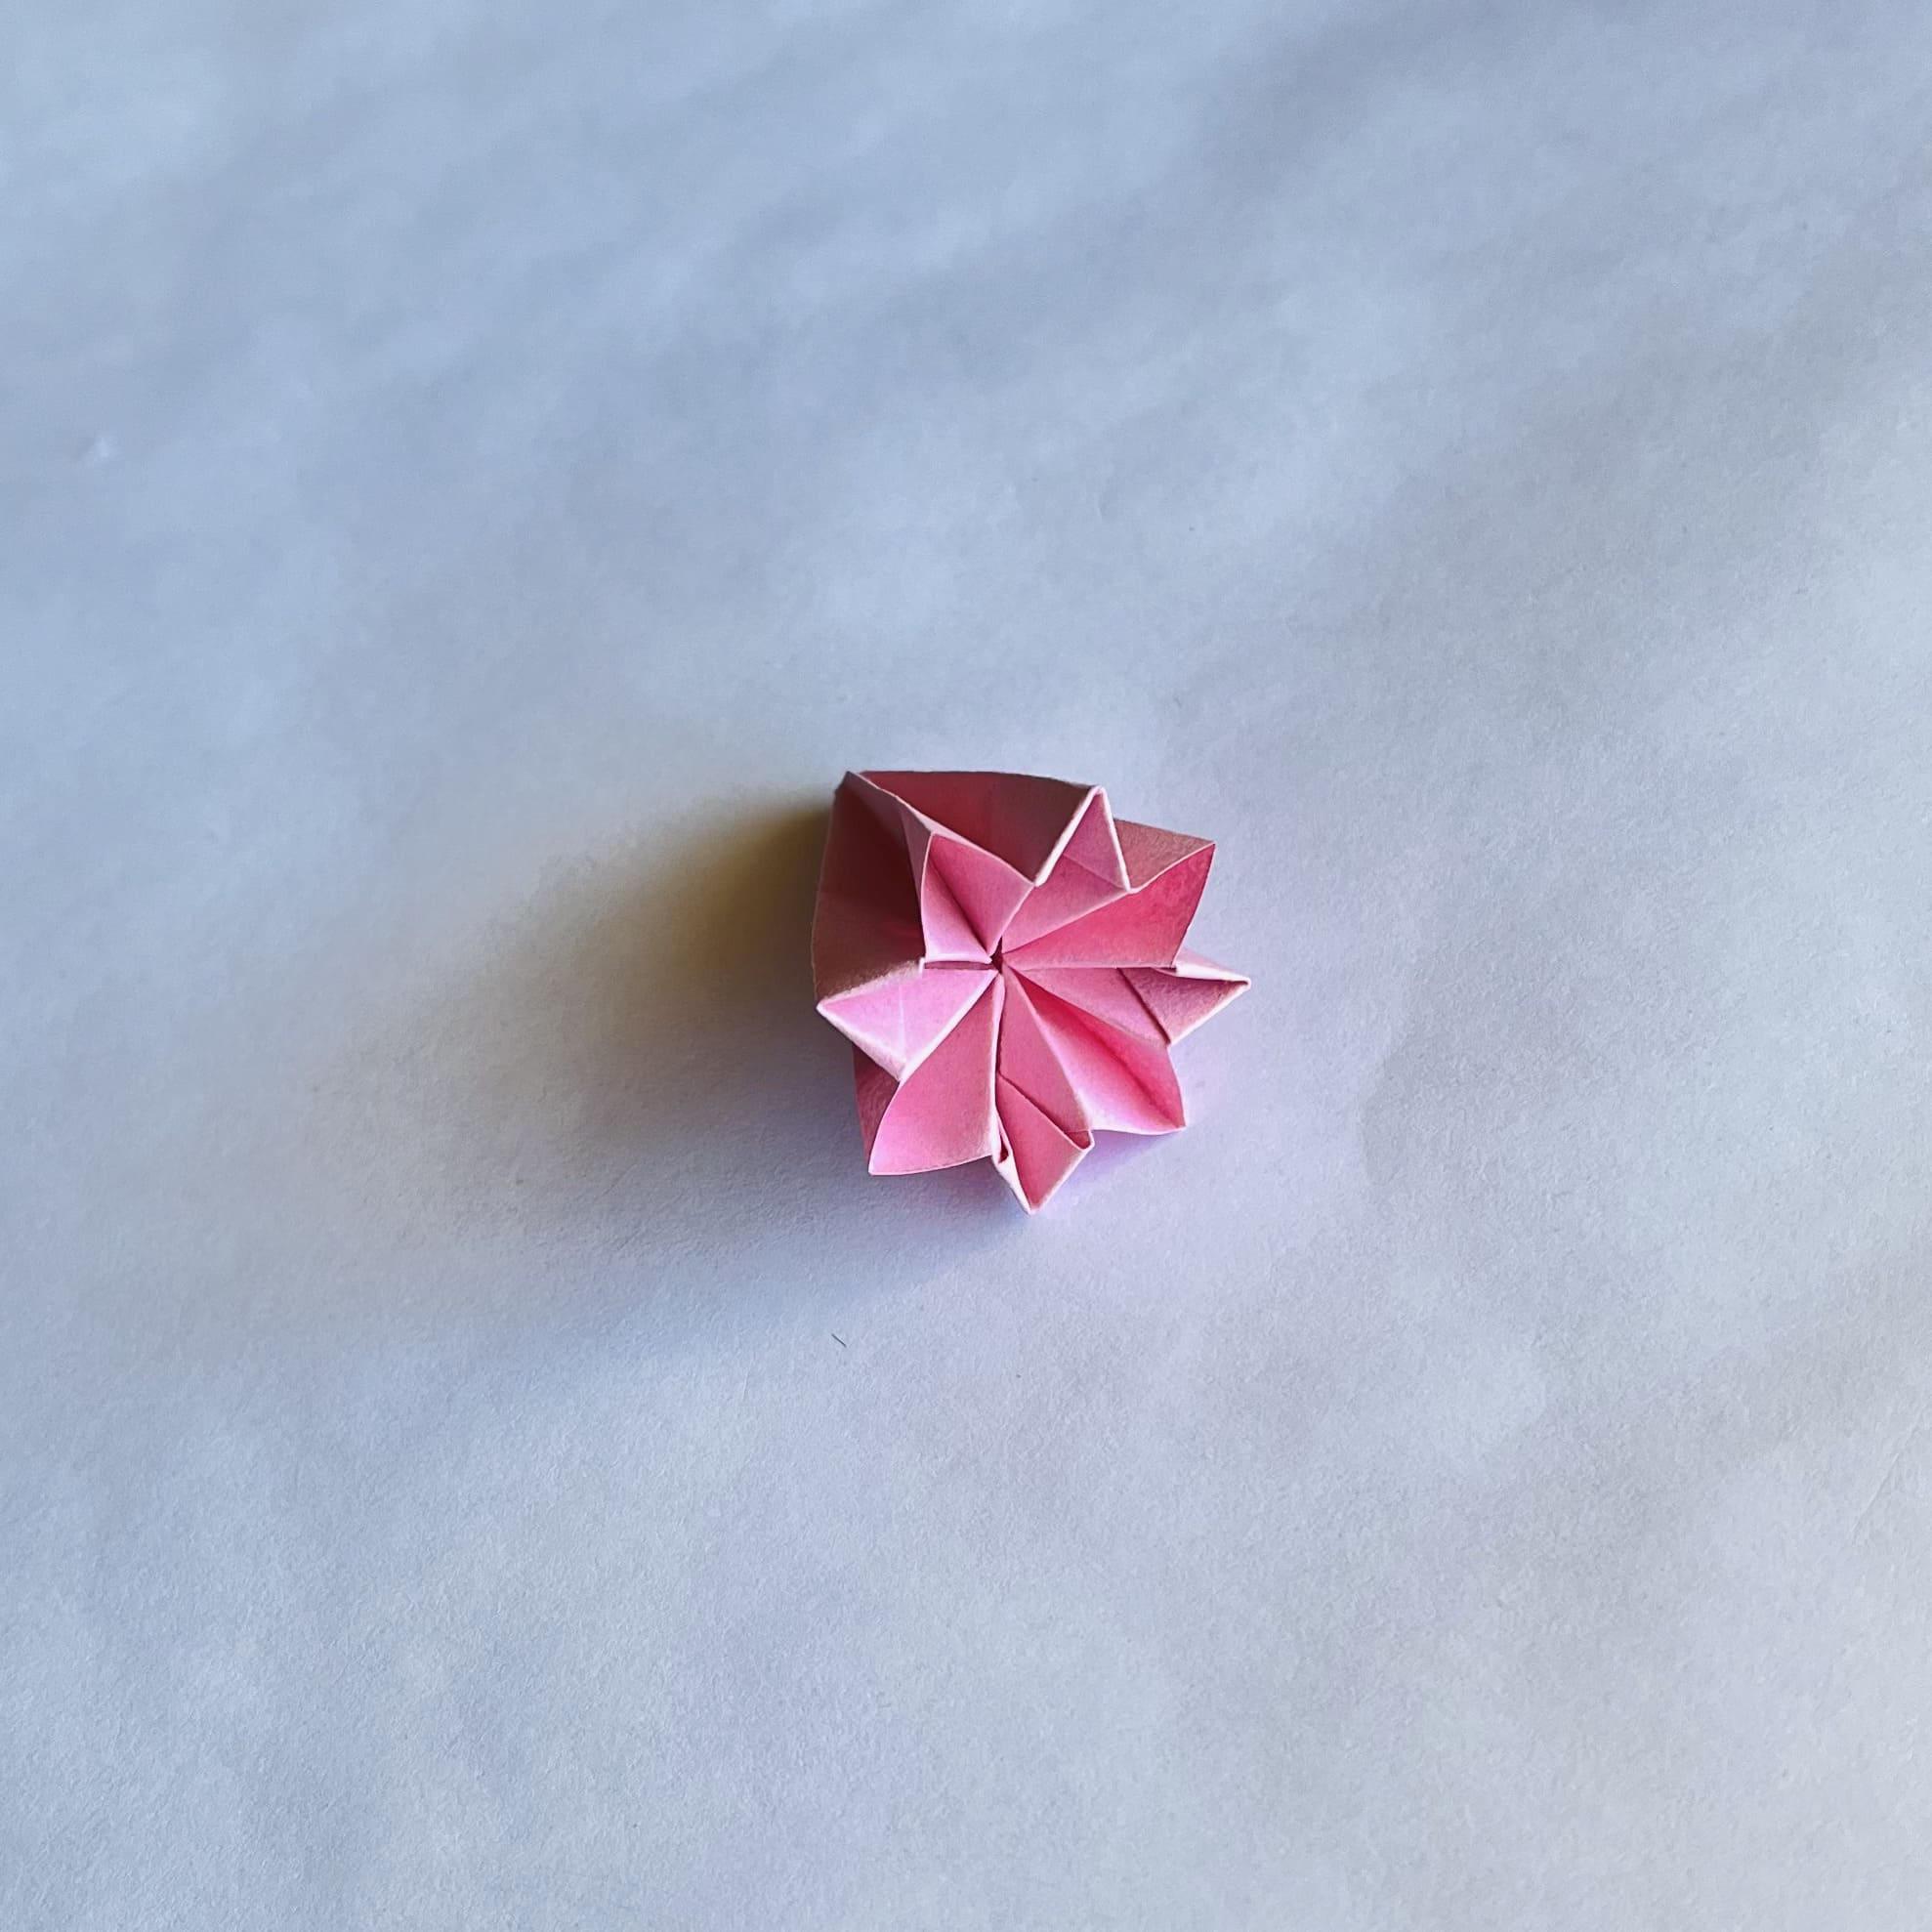
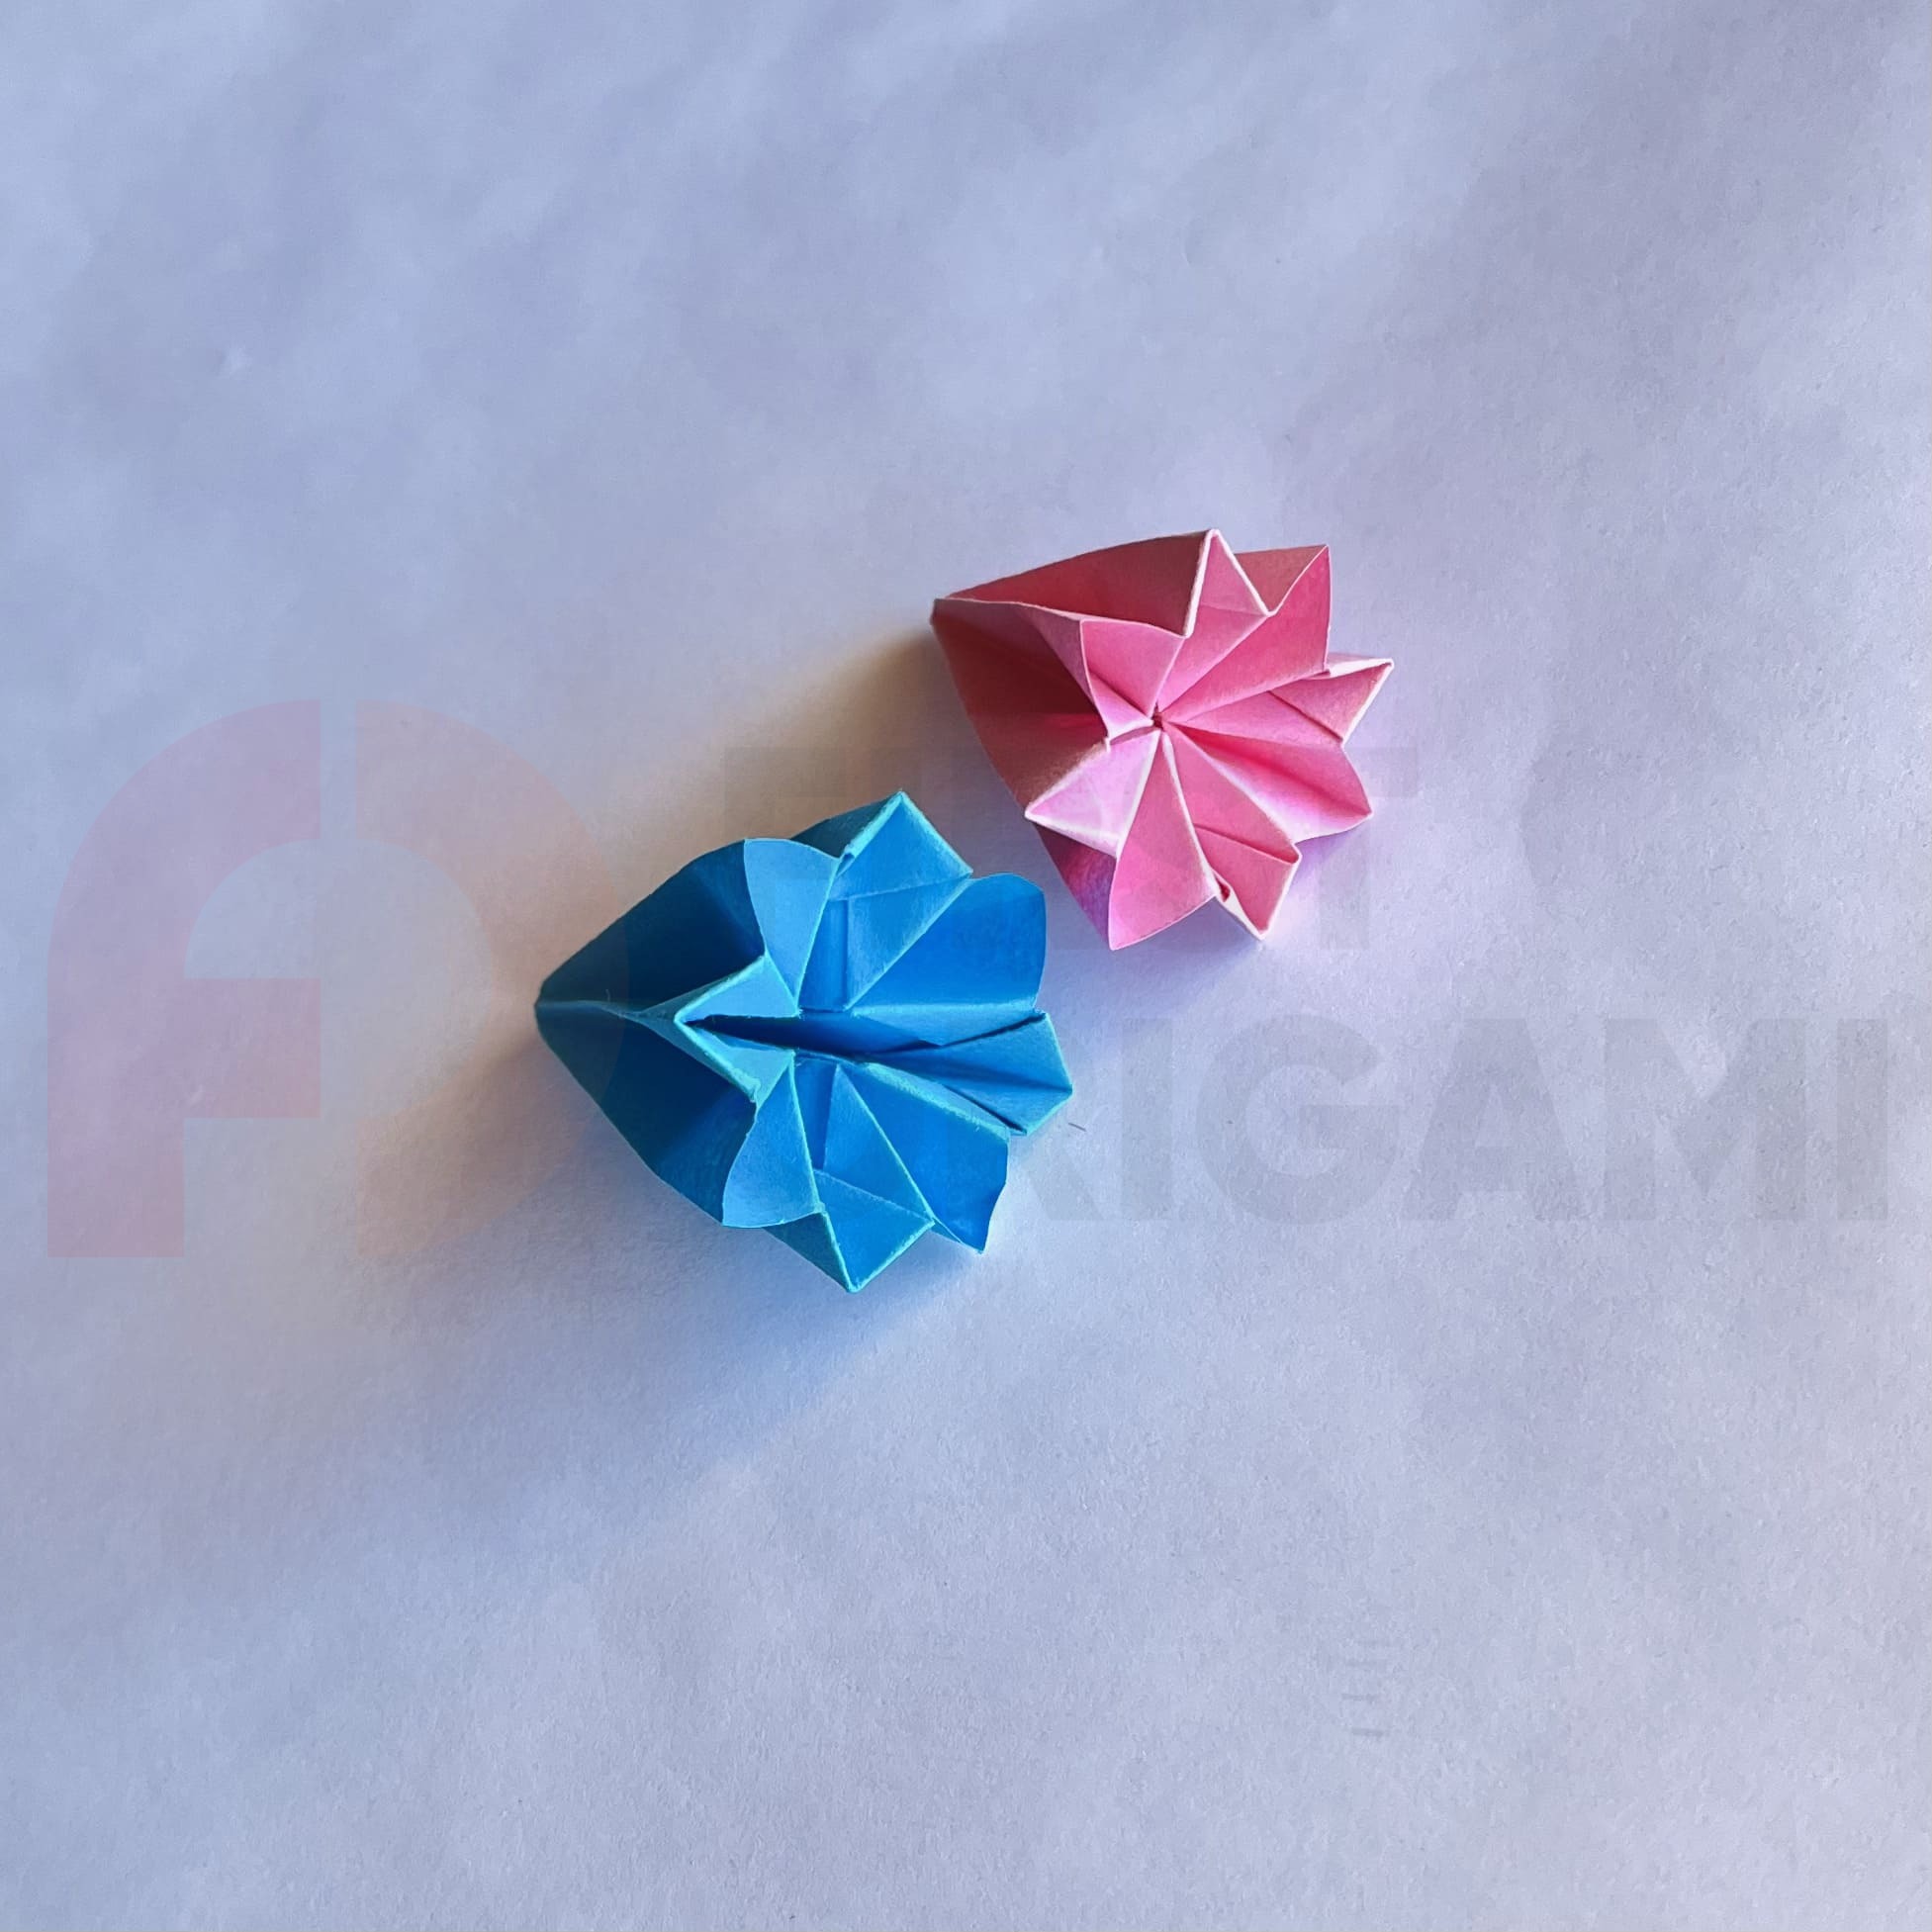
You should end up with a blue flower like this.
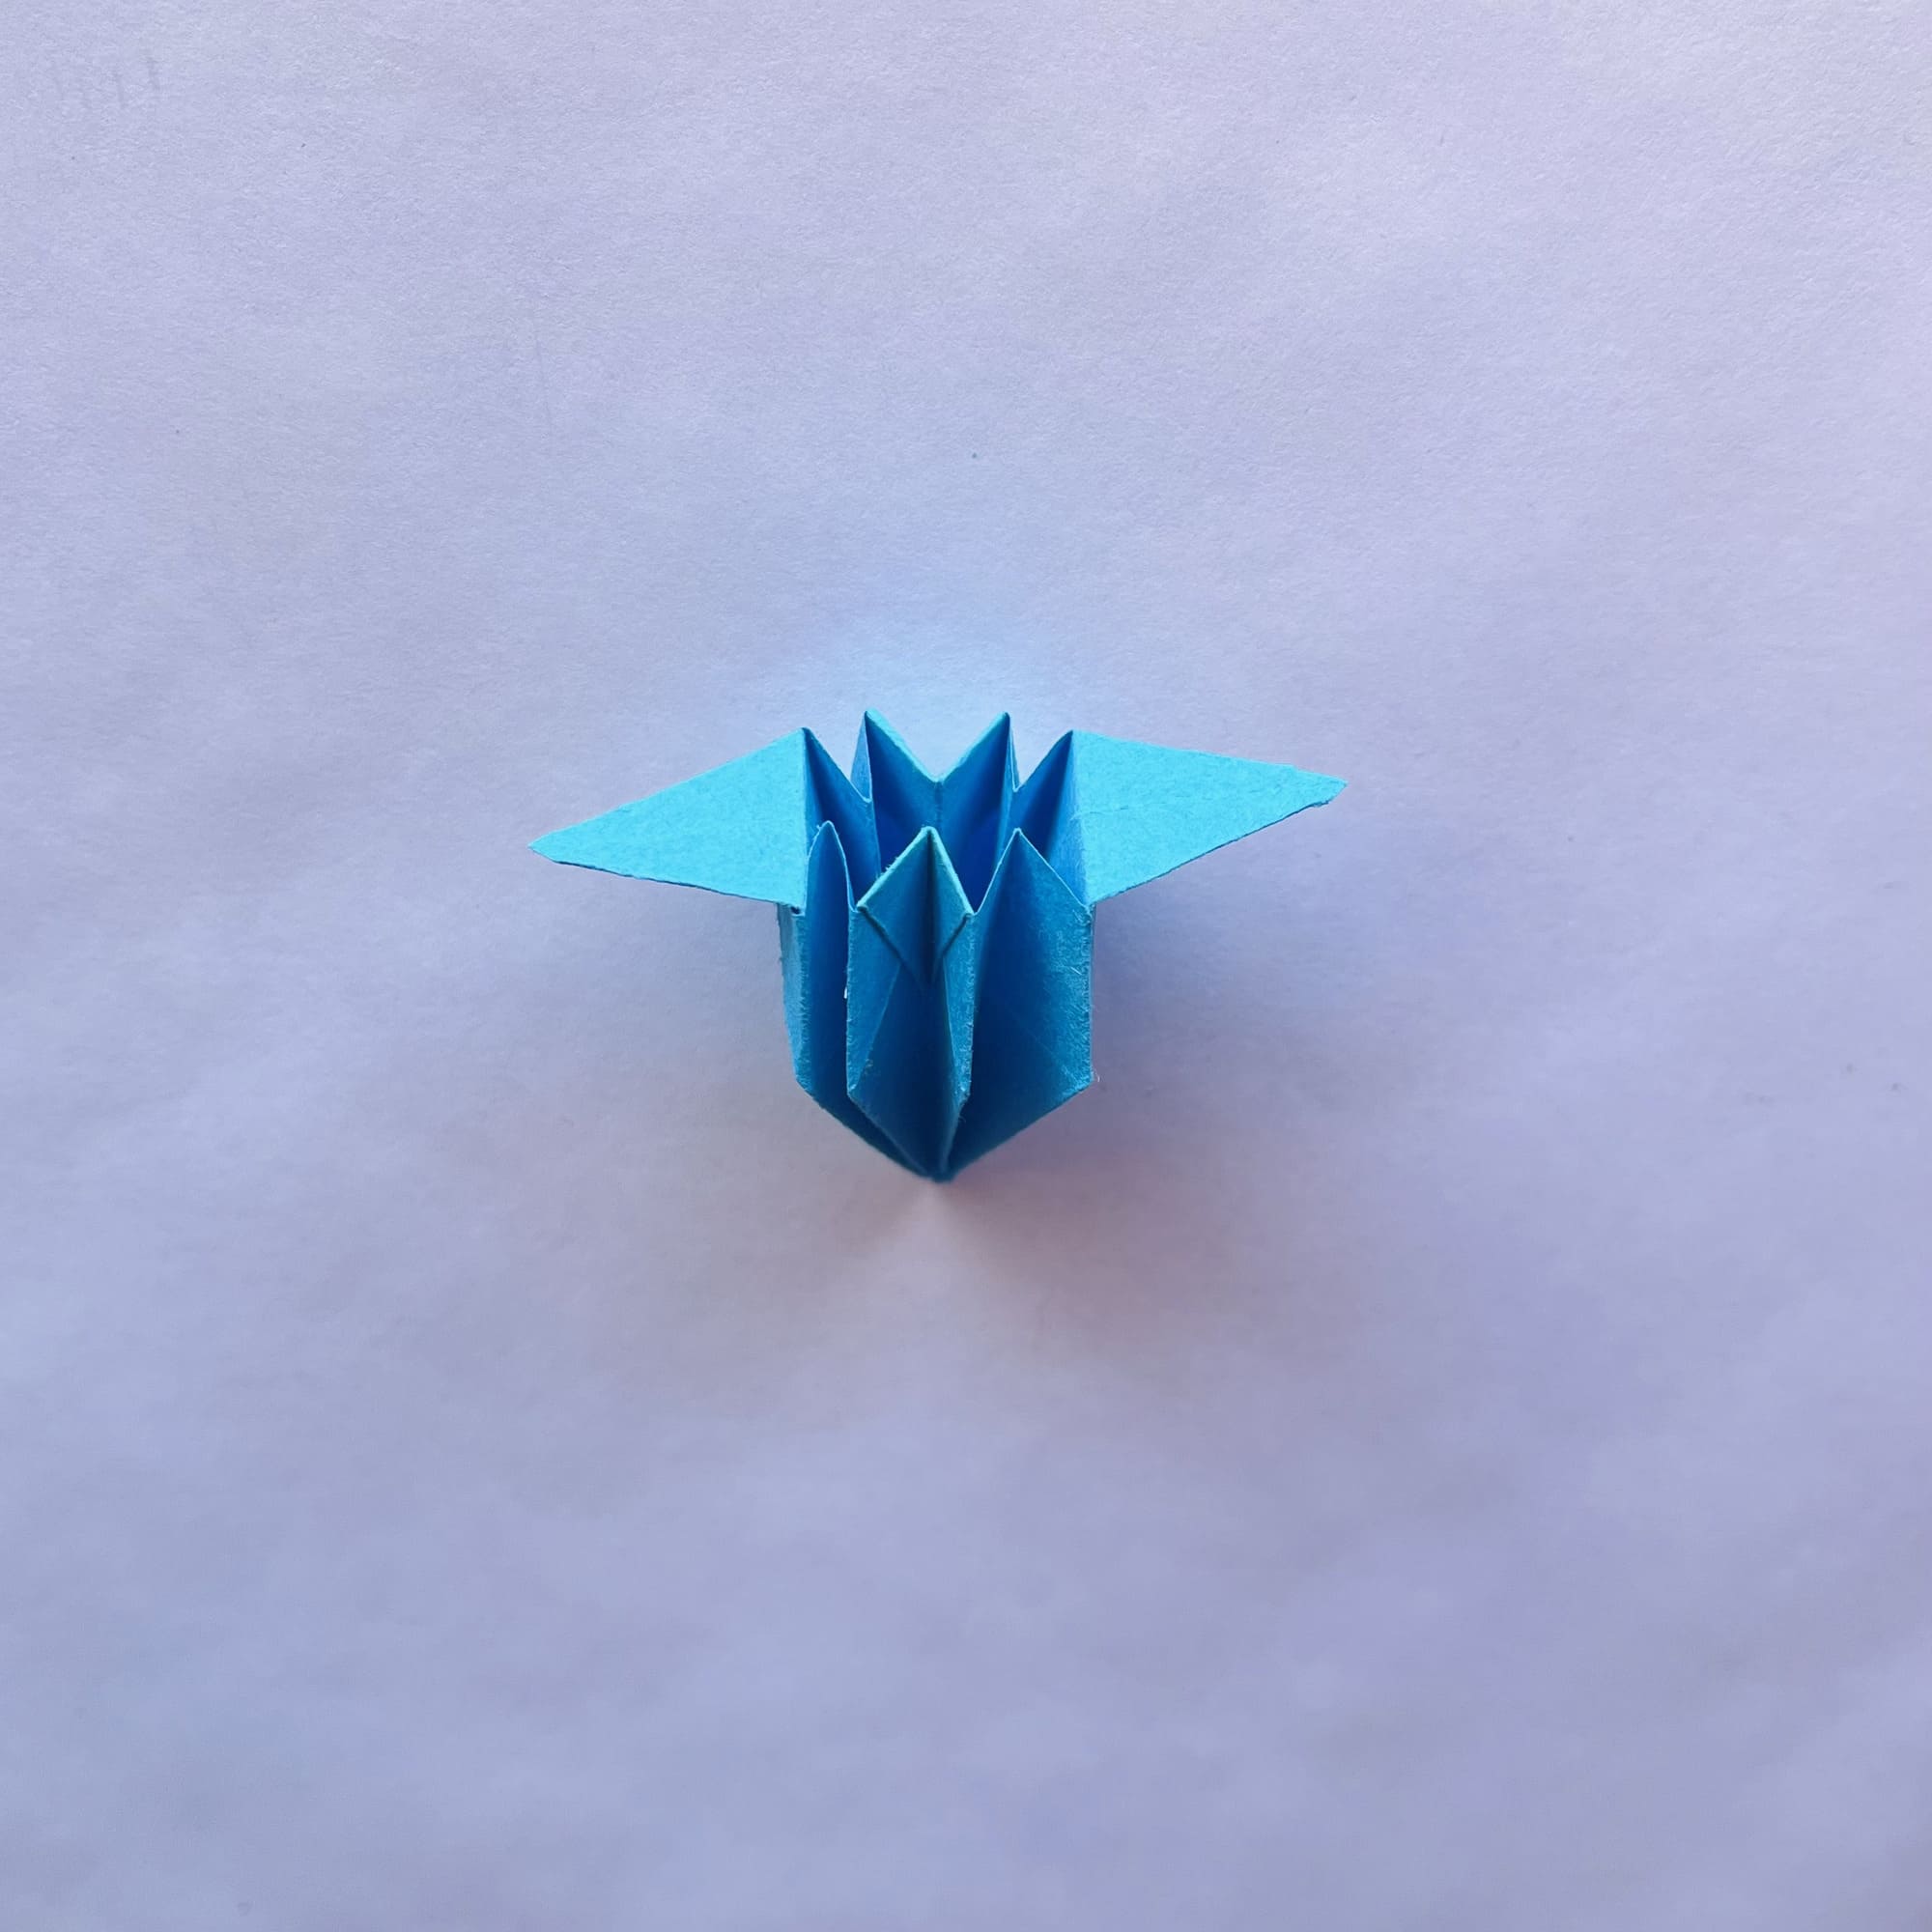
Now, take 8.5 x 8.5 cm paper and fold the pink flower in the same way.
Carefully insert the pink flower into the blue one.
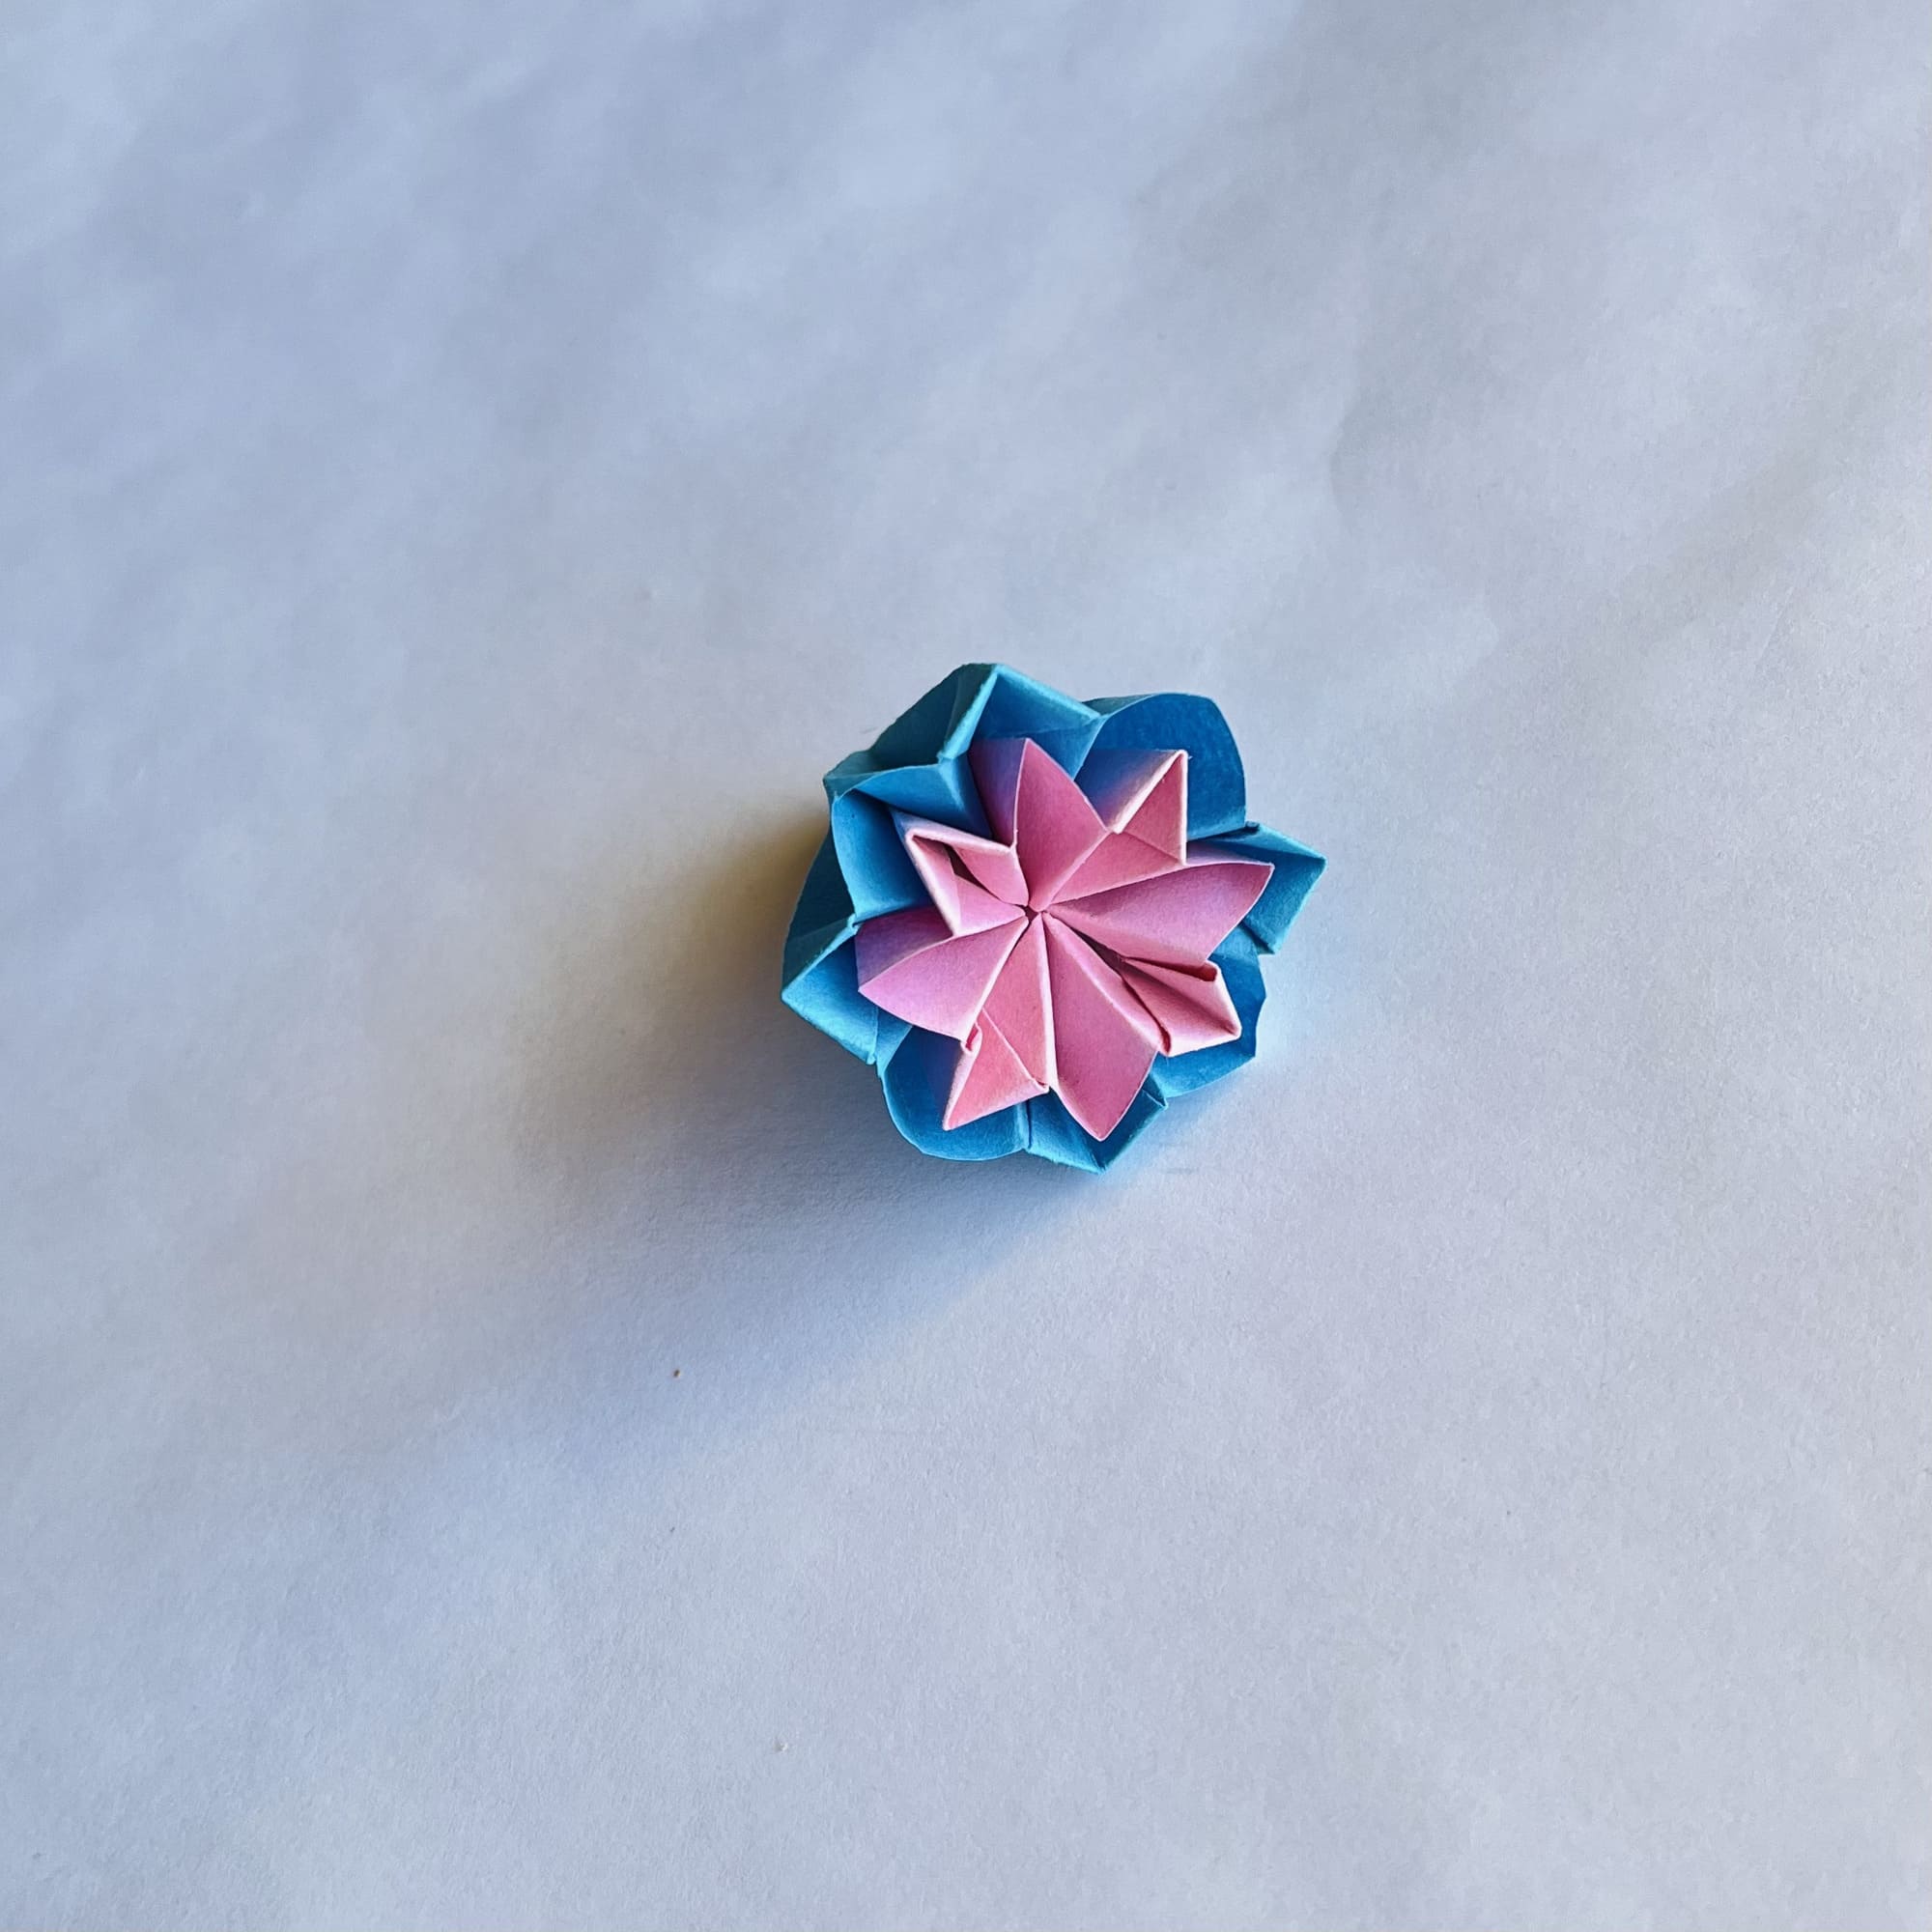
Next, you will need to create 34 double flowers. This is the most time-consuming part, but you can do it!
Let’s proceed to the final assembly.
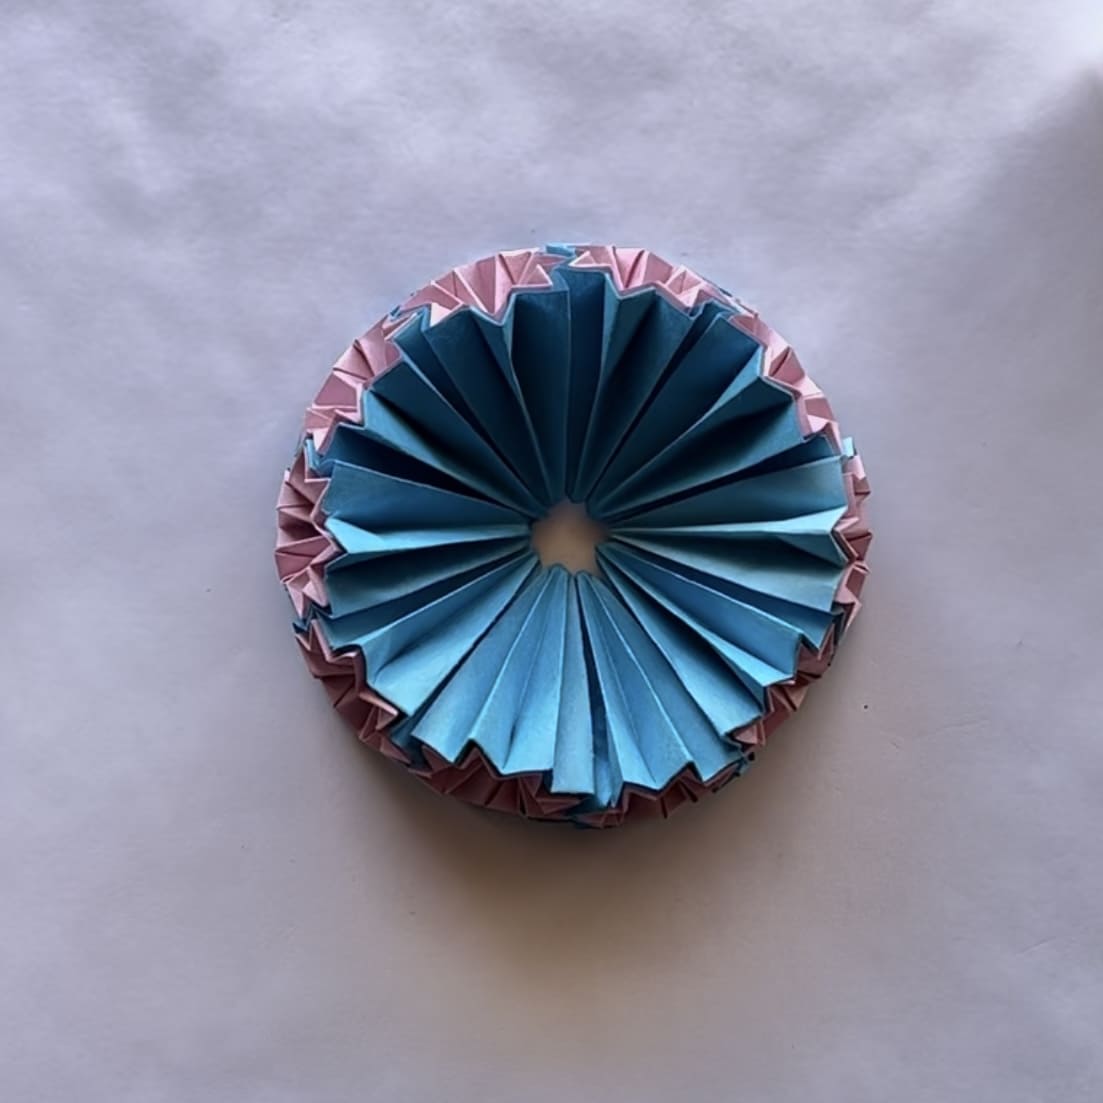
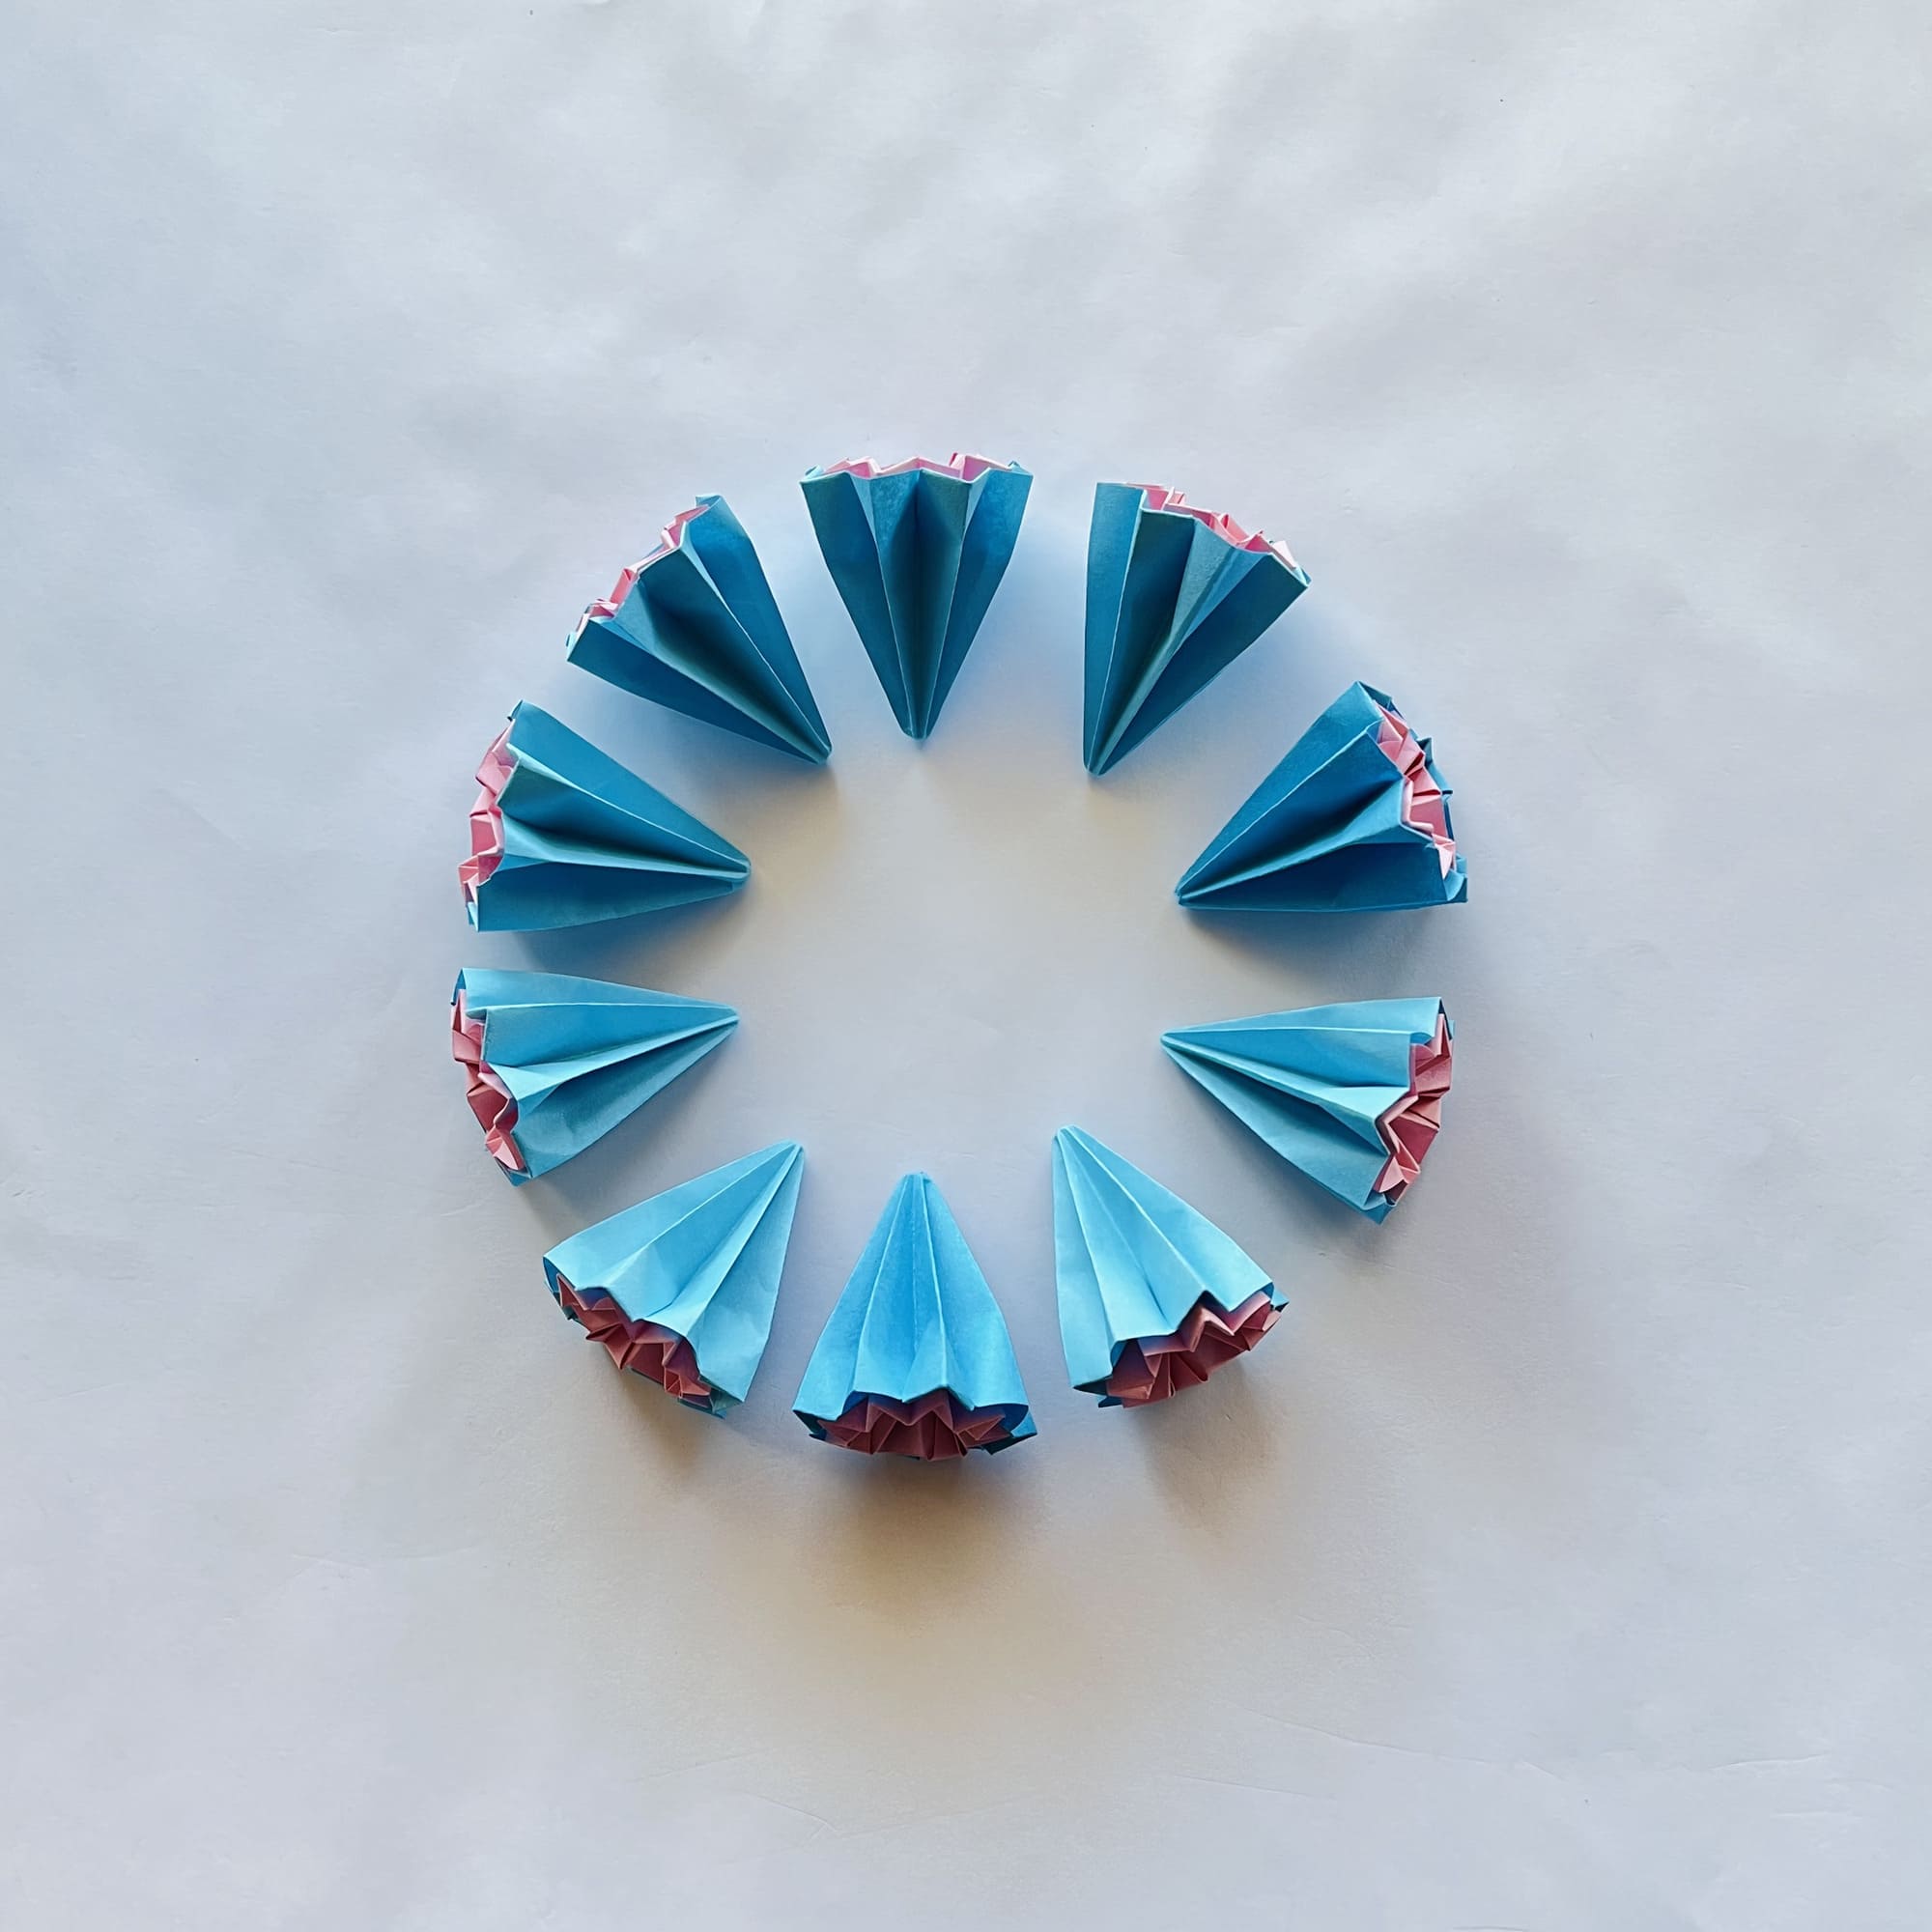
Take 10 flowers and glue them together into a circle.
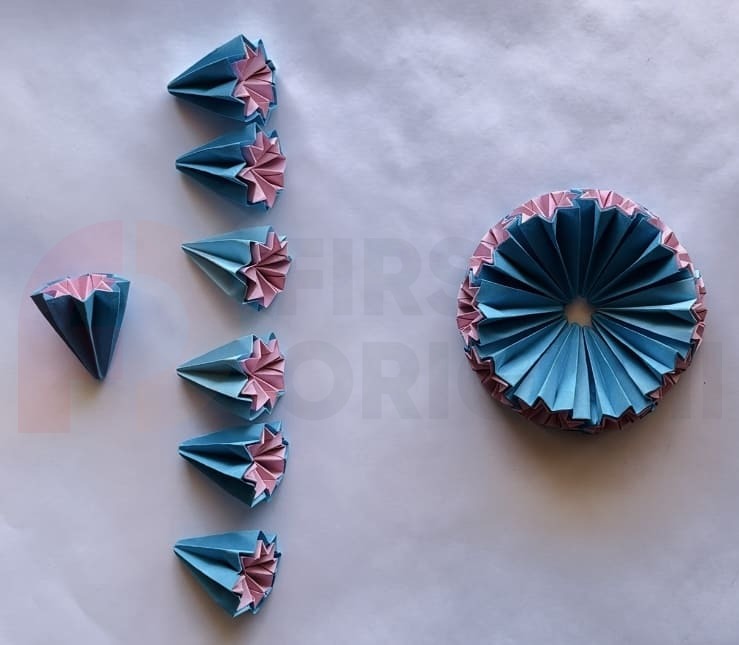
Next, take 7 flowers: 6 of them you will need for the next layer, which you will place on a circle of 10 flowers, and one will cover the last hole on the top.
Repeat steps 60-63 to glue the second half of the origami.
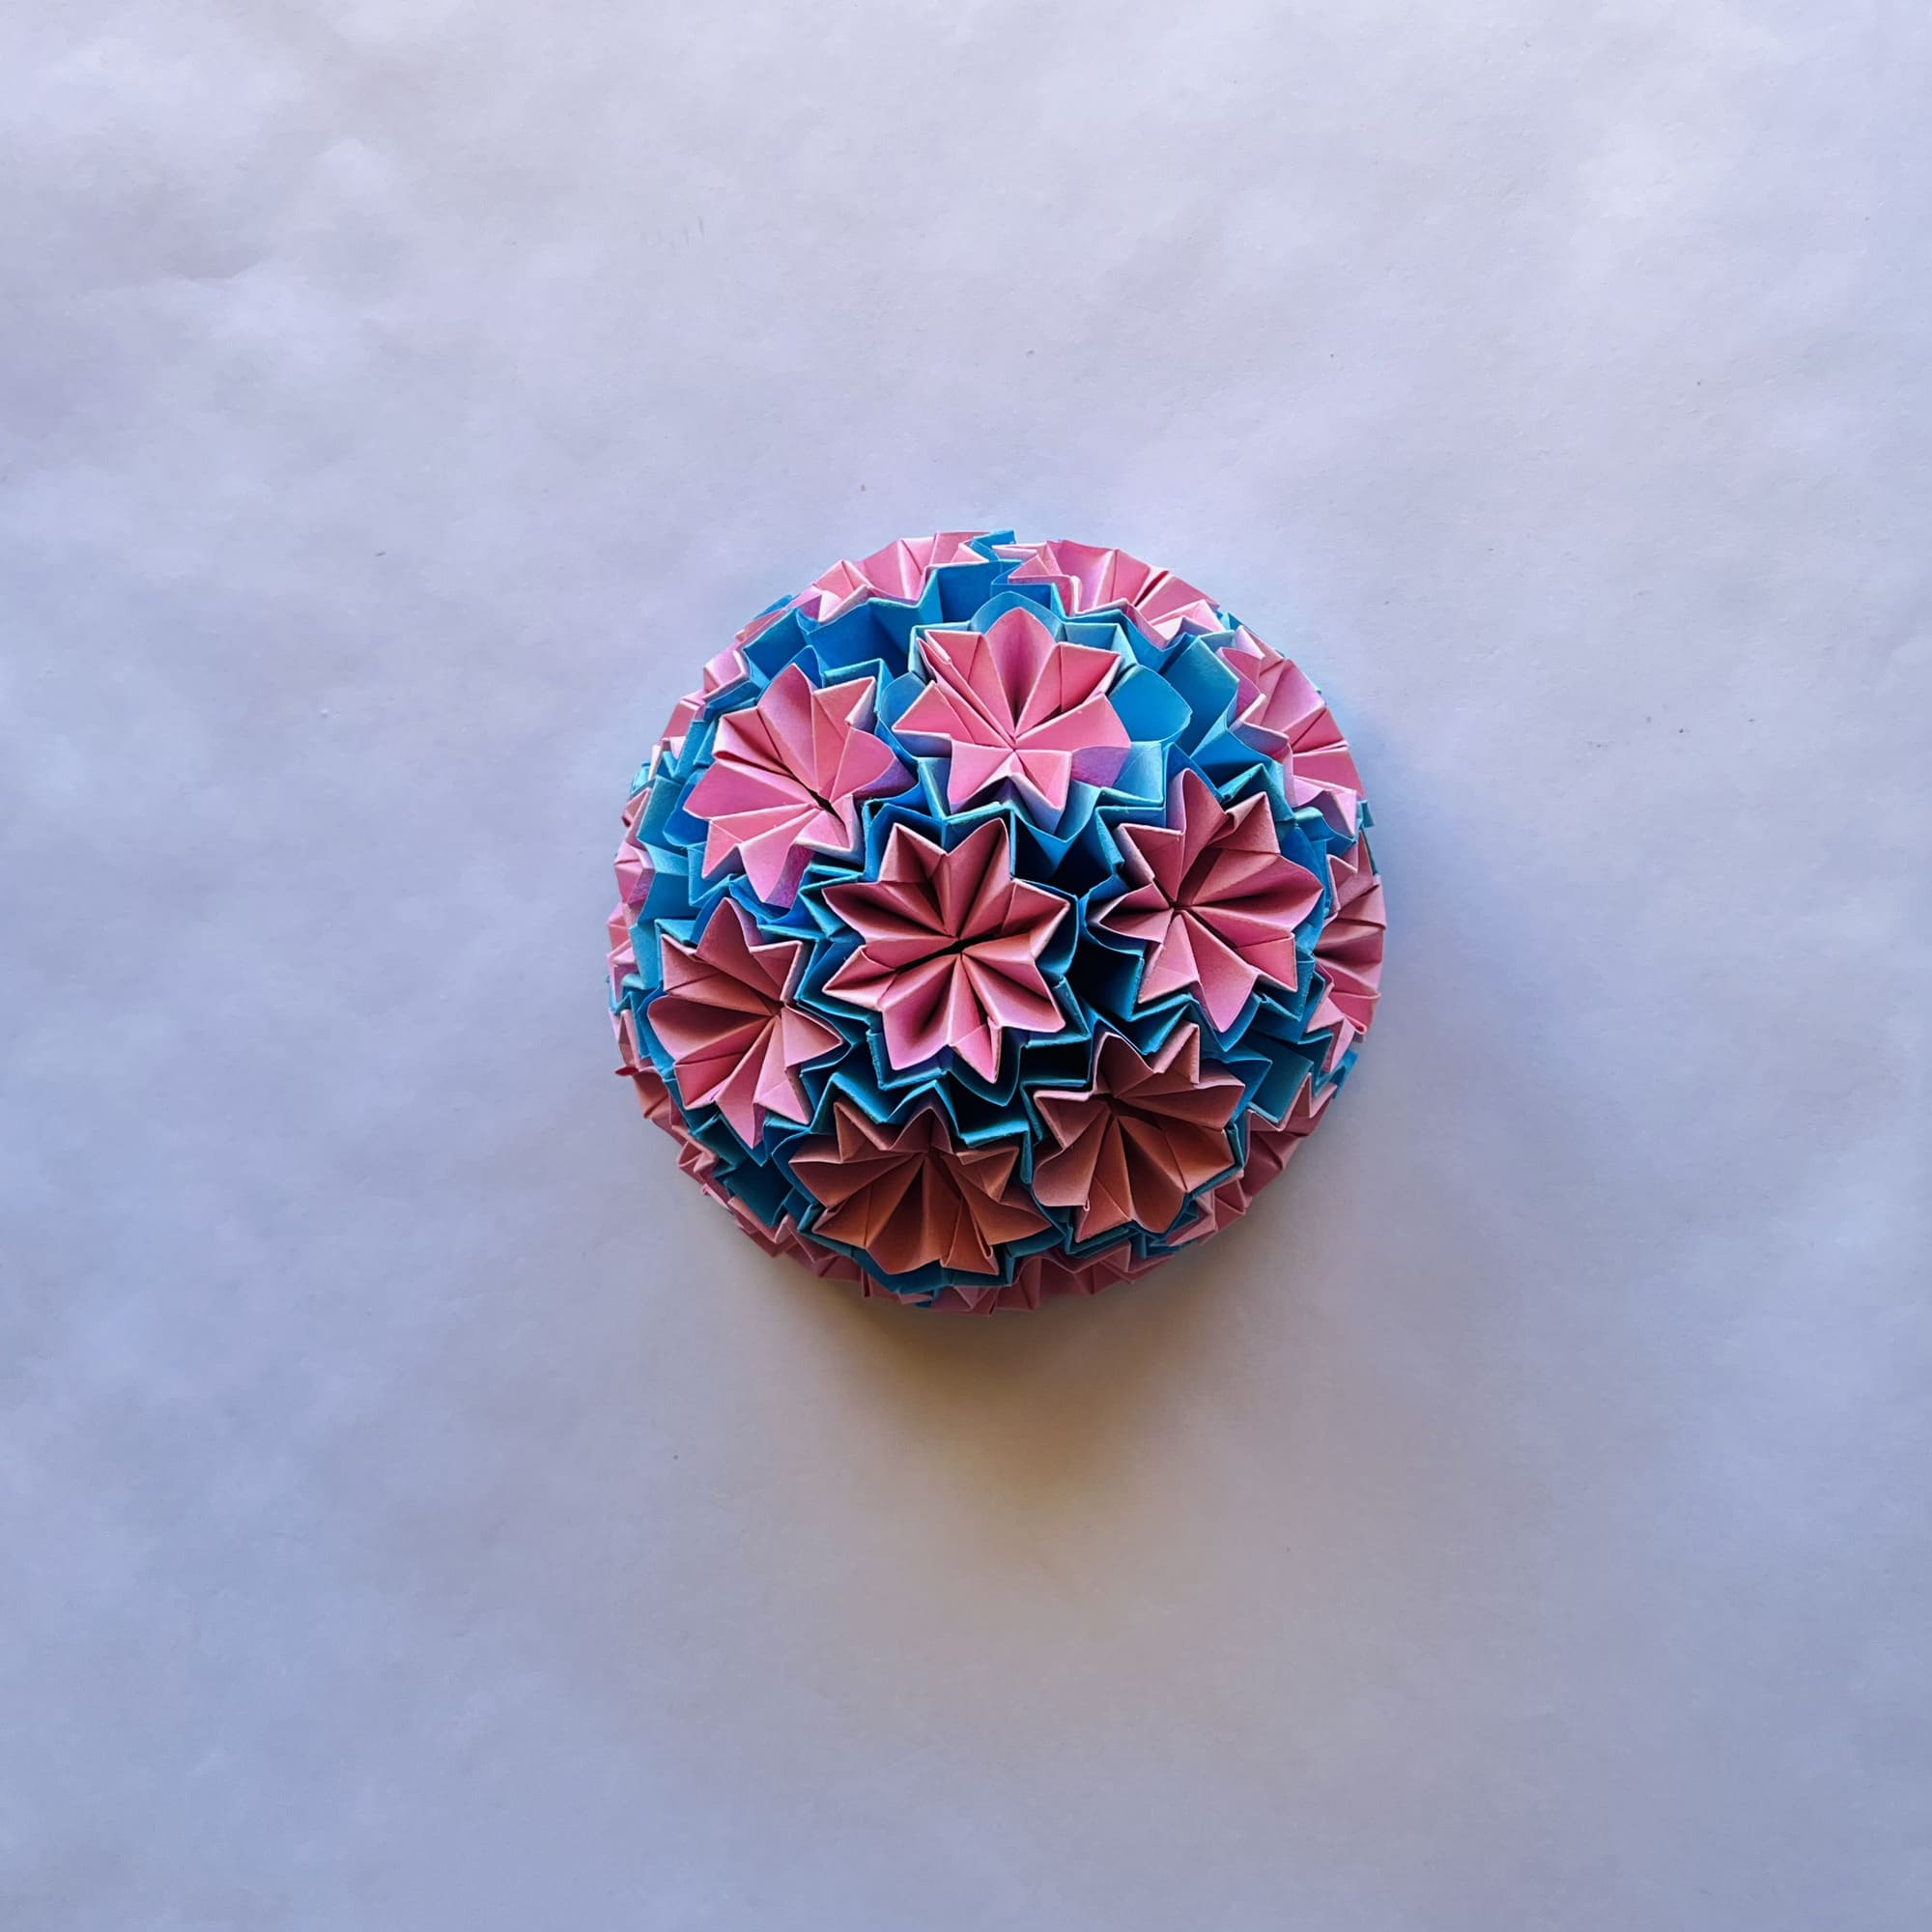
Now, glue the two halves together. Gently press them together and hold for a while until the glue sets.
Done. You are amazing! This is not an exaggeration because you have completed a complex, time-consuming figure and now you can enjoy the result. “Venus” will be a wonderful Christmas tree decoration, decorative ornament, or table setting element. Don’t forget to show off to your guests that you made it with your own hands.