Origami Mushroom
Add this unusual origami to your collection. The level of difficulty is suitable for both children and parents – it will be interesting for everyone. The perfect option to spend an evening together!
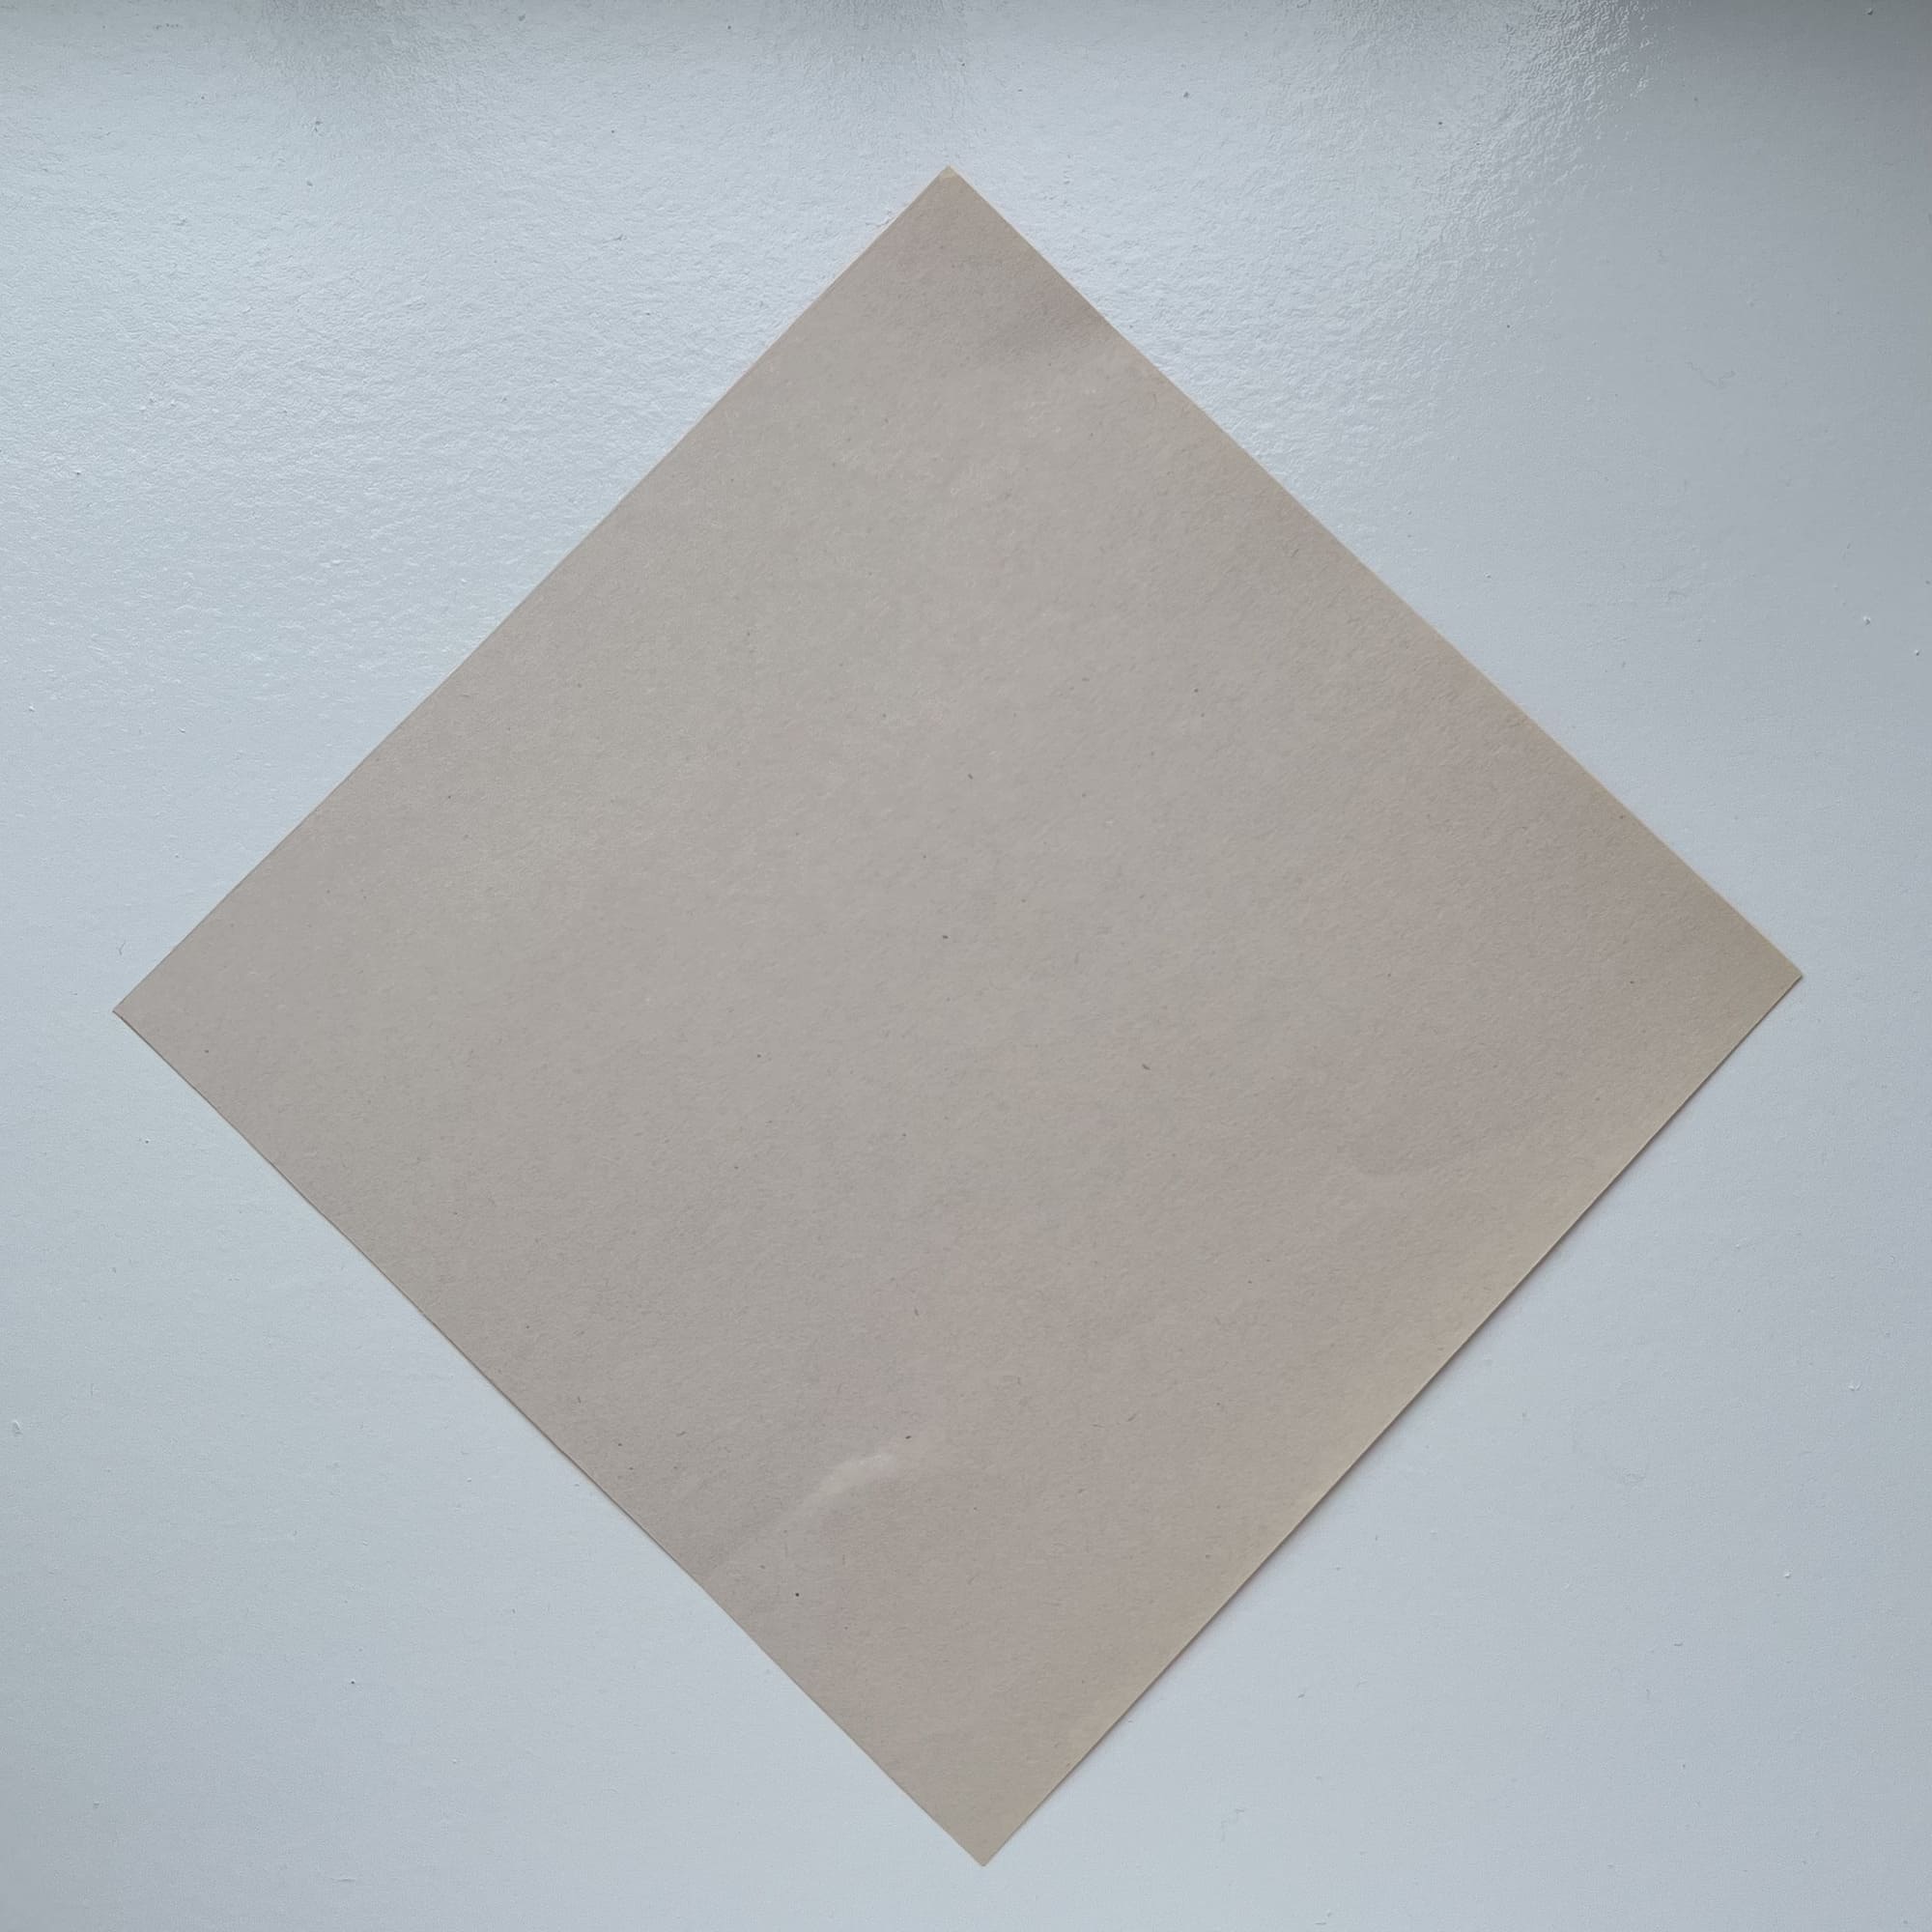
Prepare a square sheet of paper measuring 15×15 cm. If using single-sided paper, place it with the colored side down.
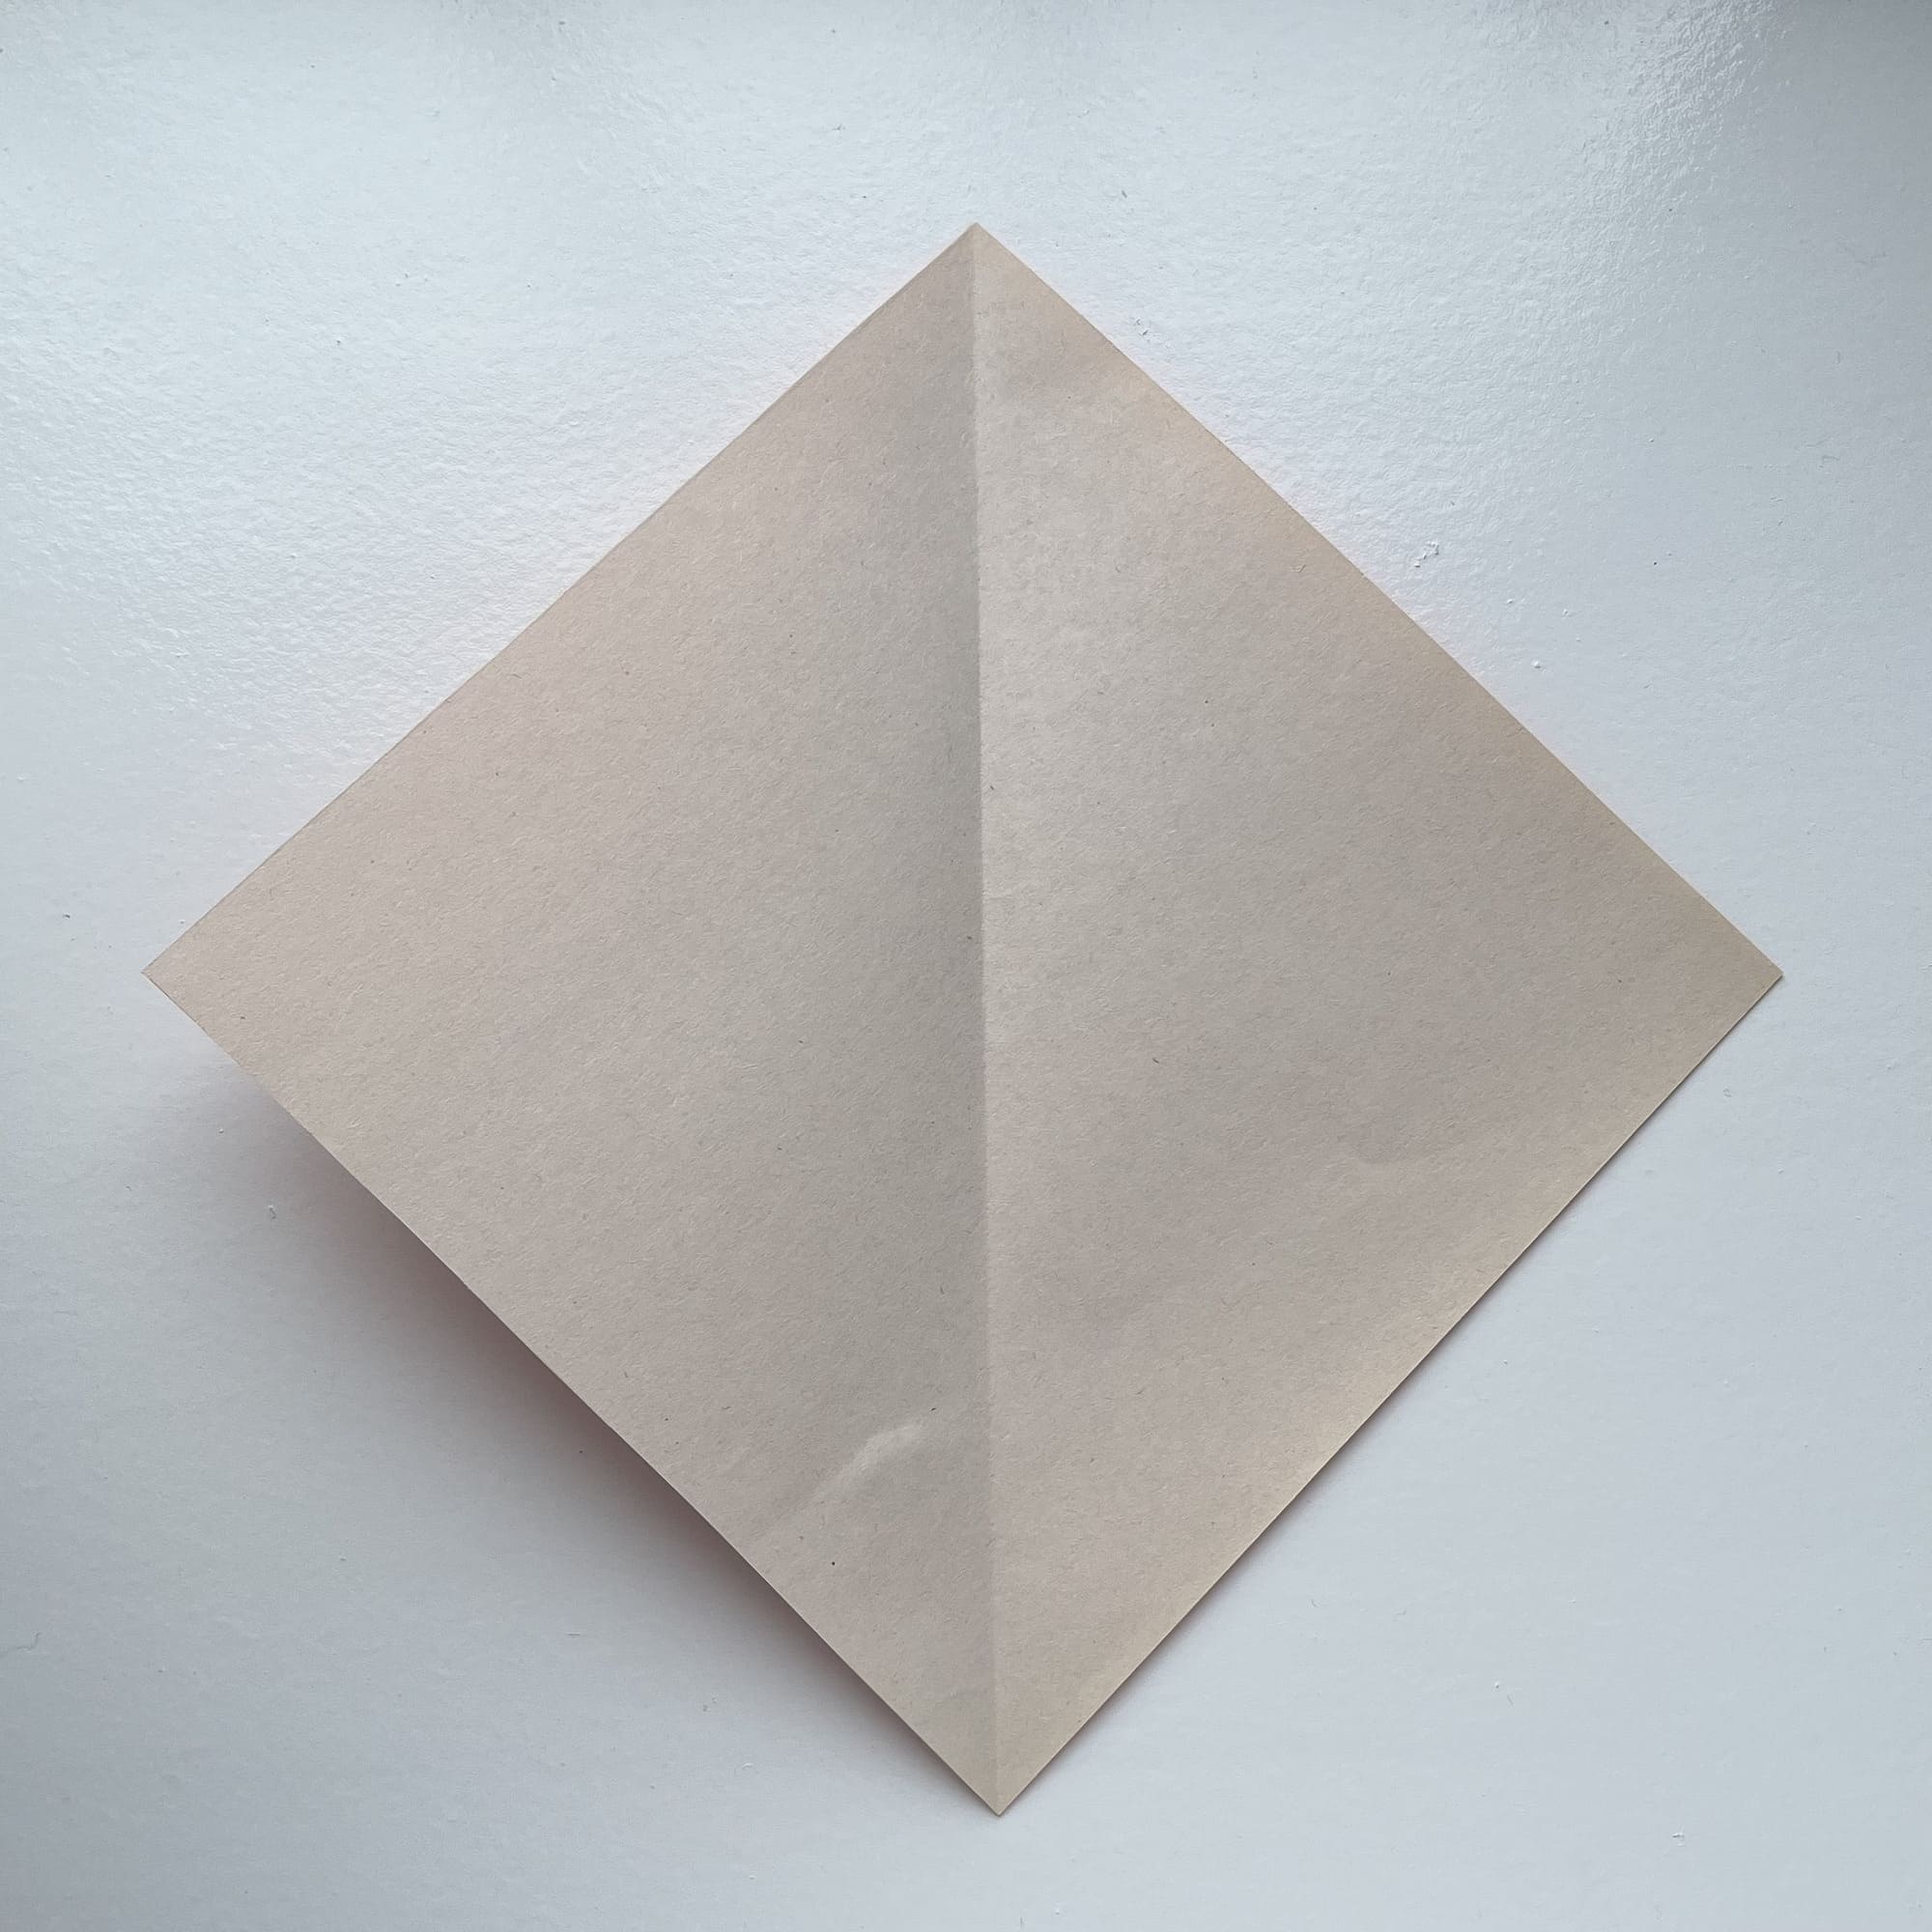
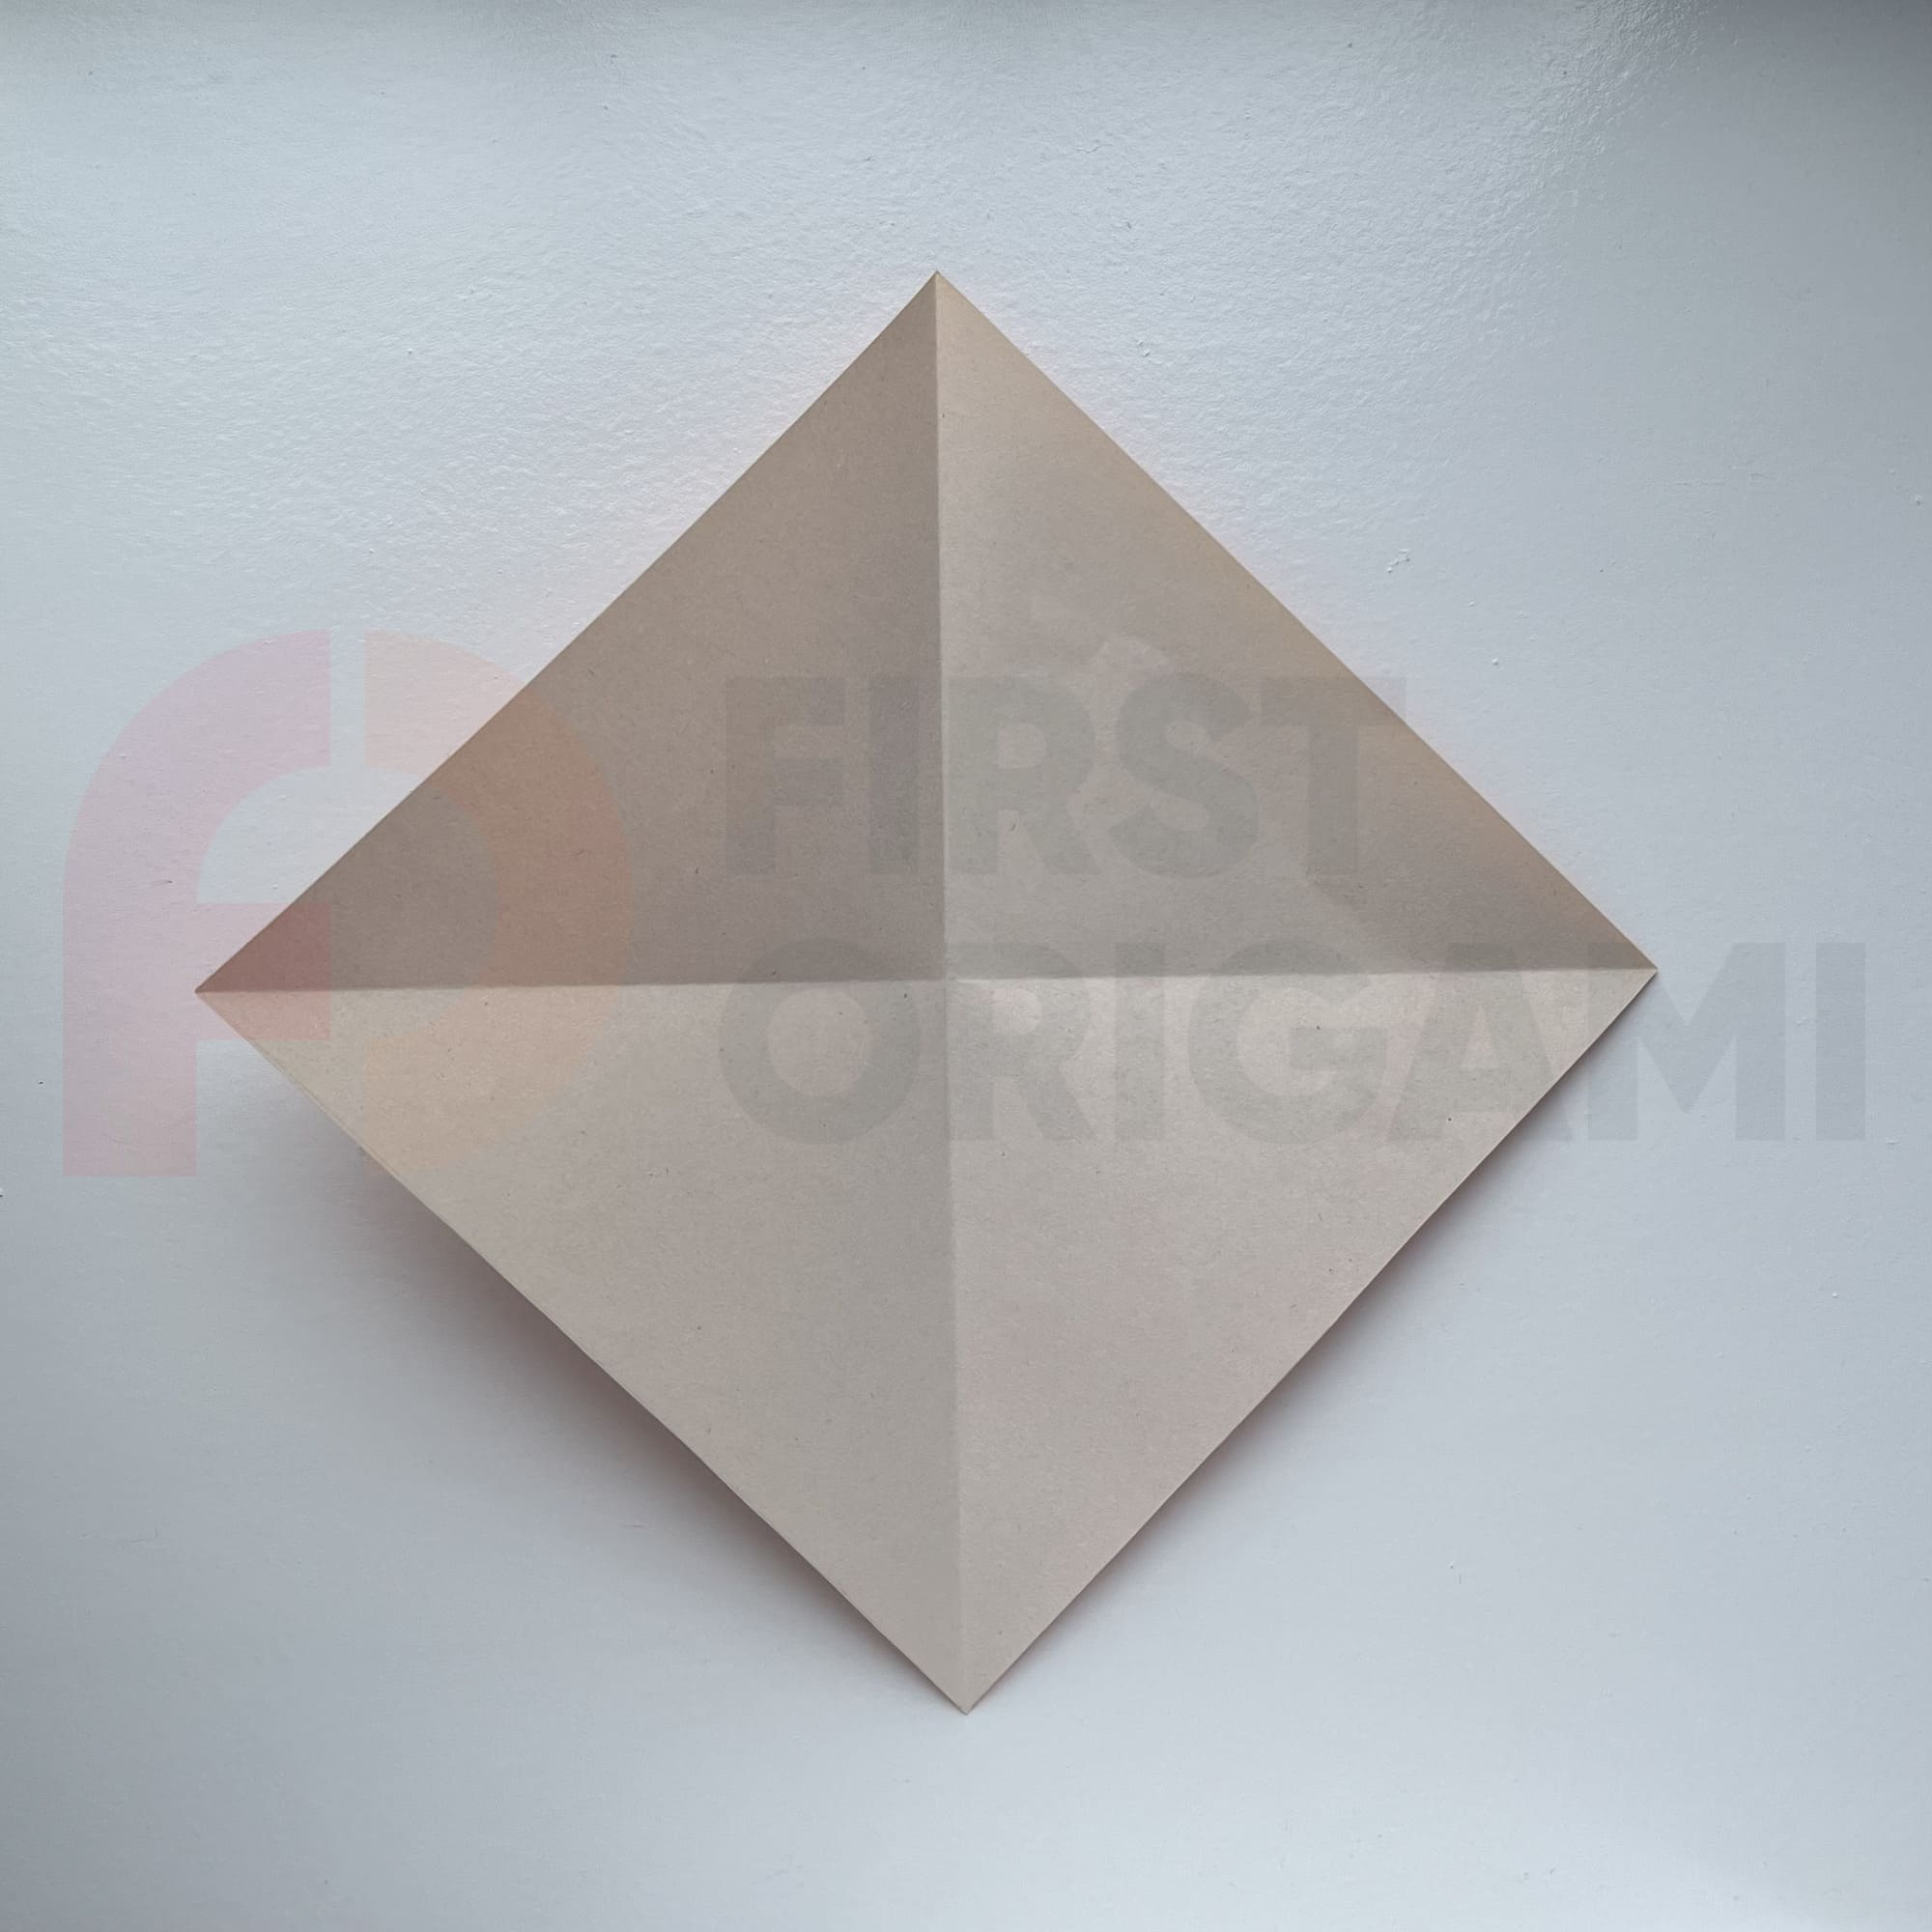
Fold it alternately along two diagonals.
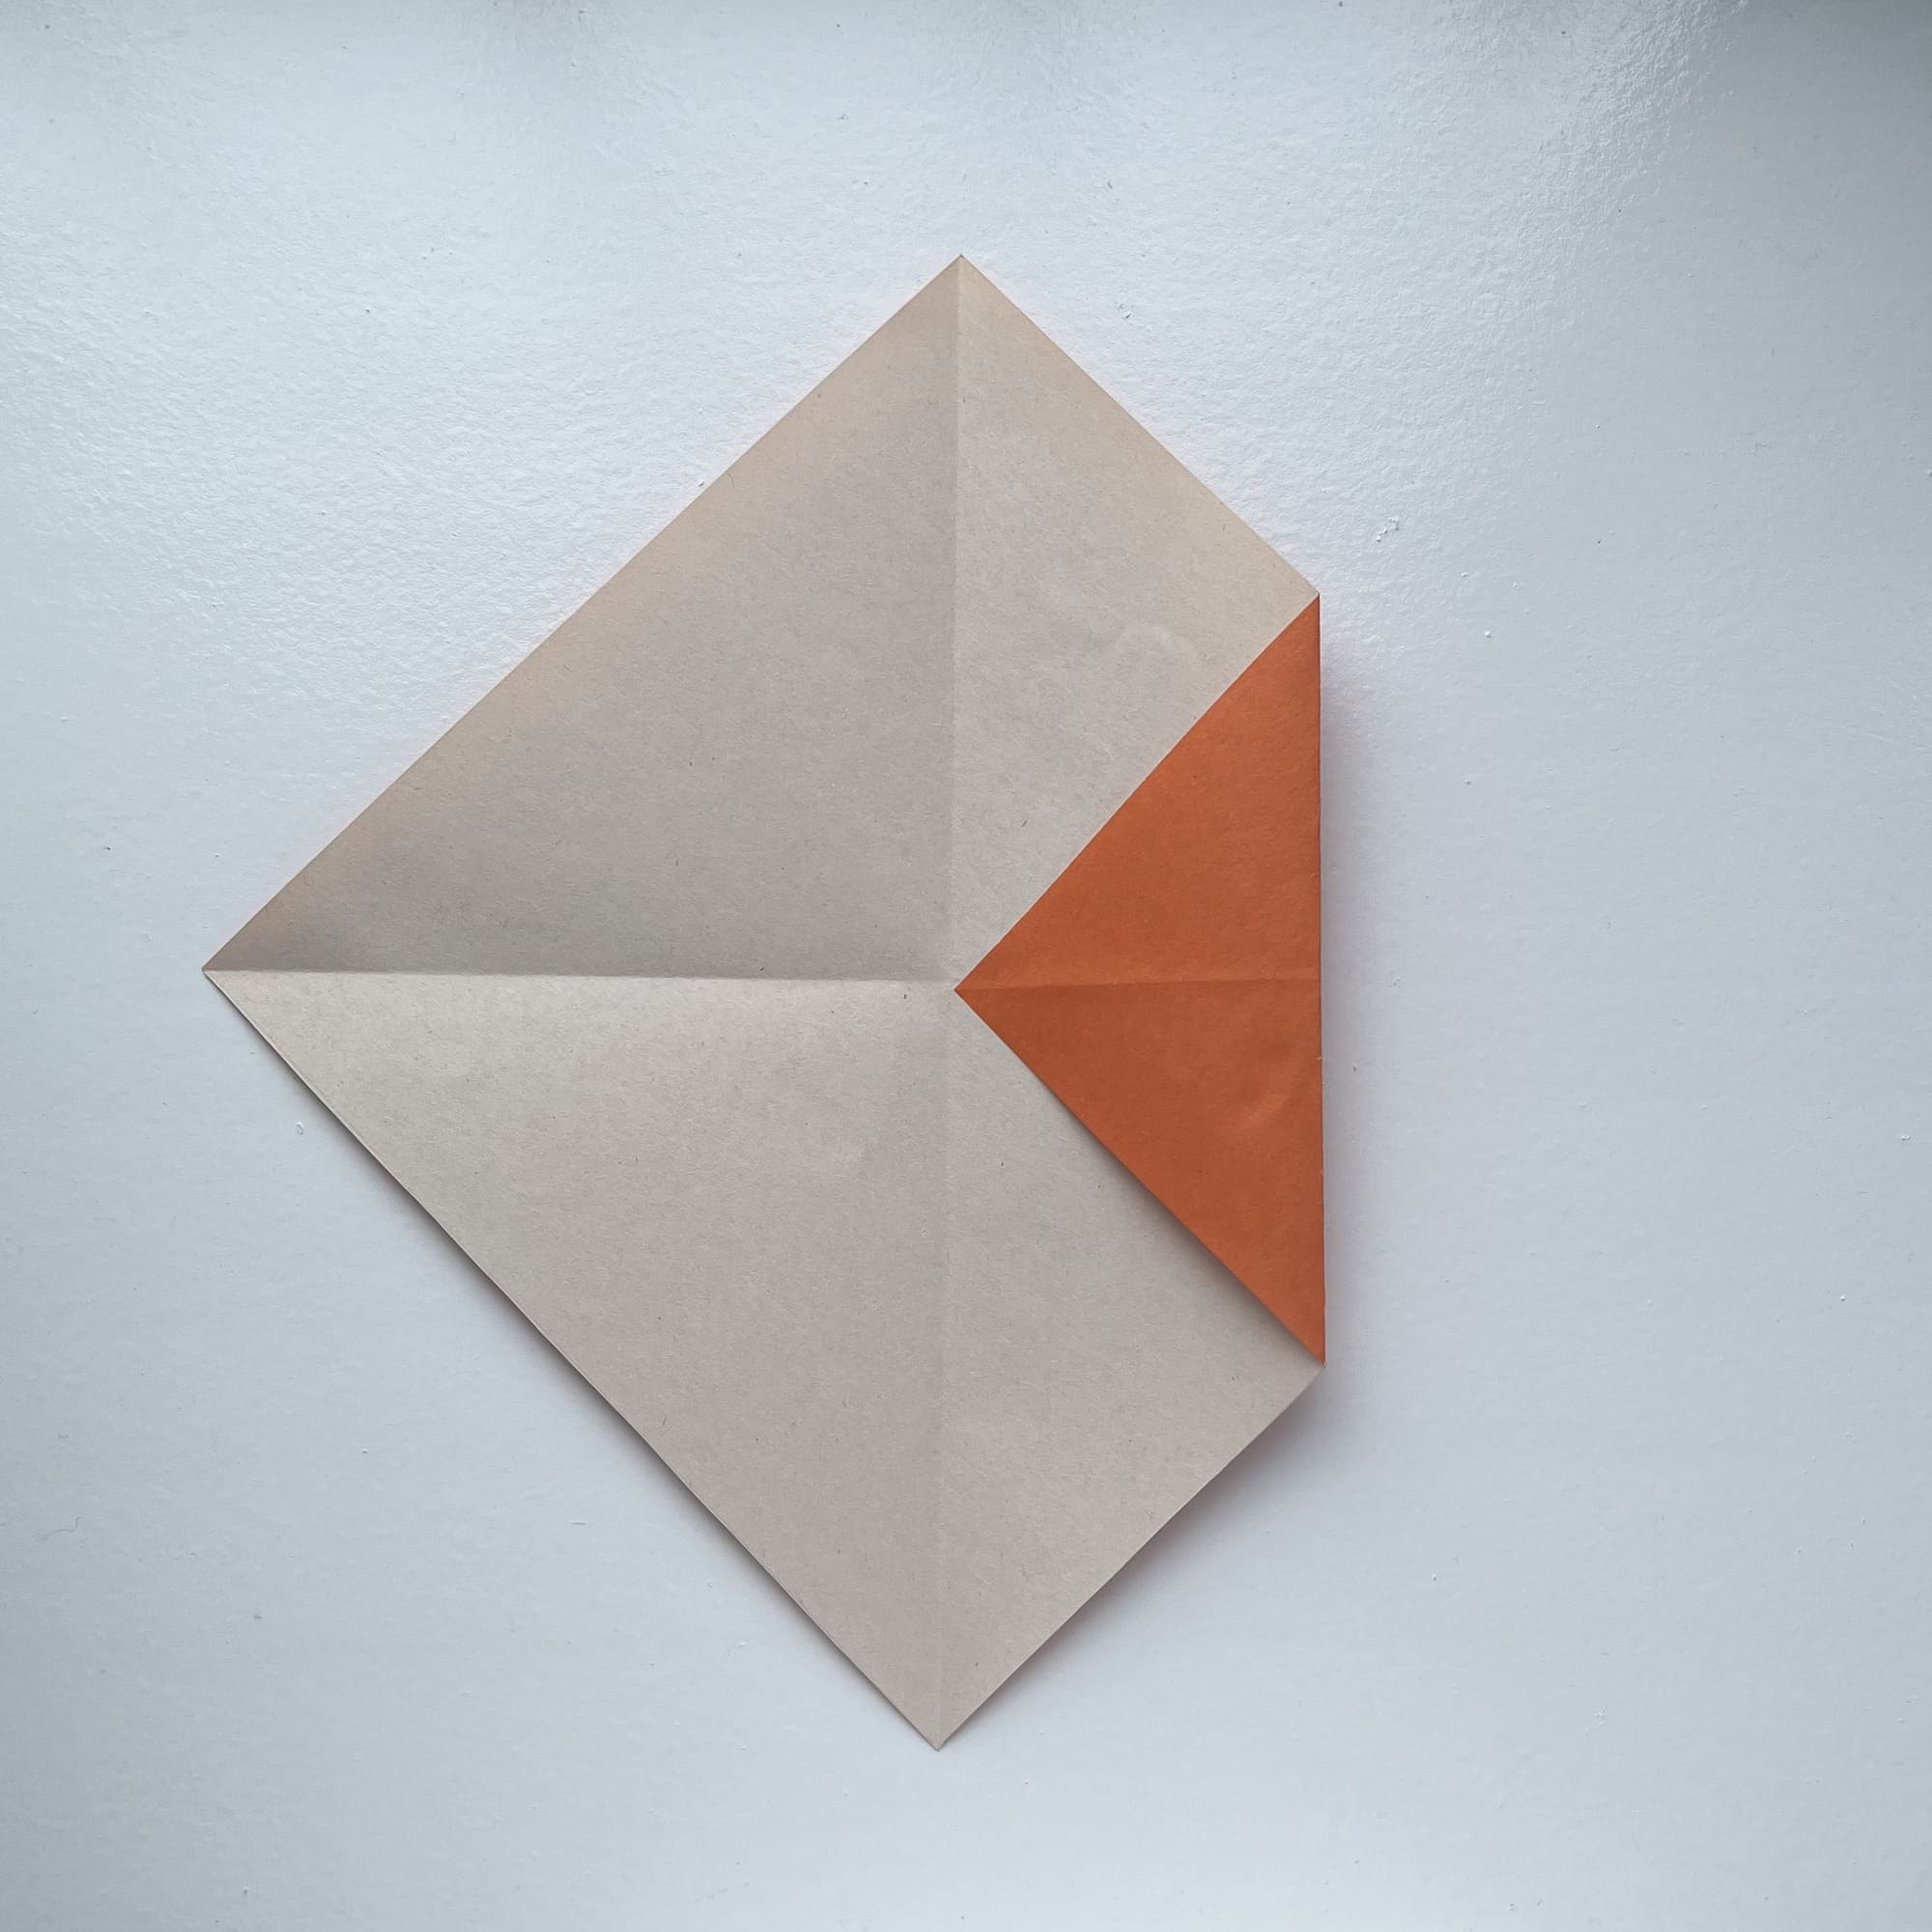
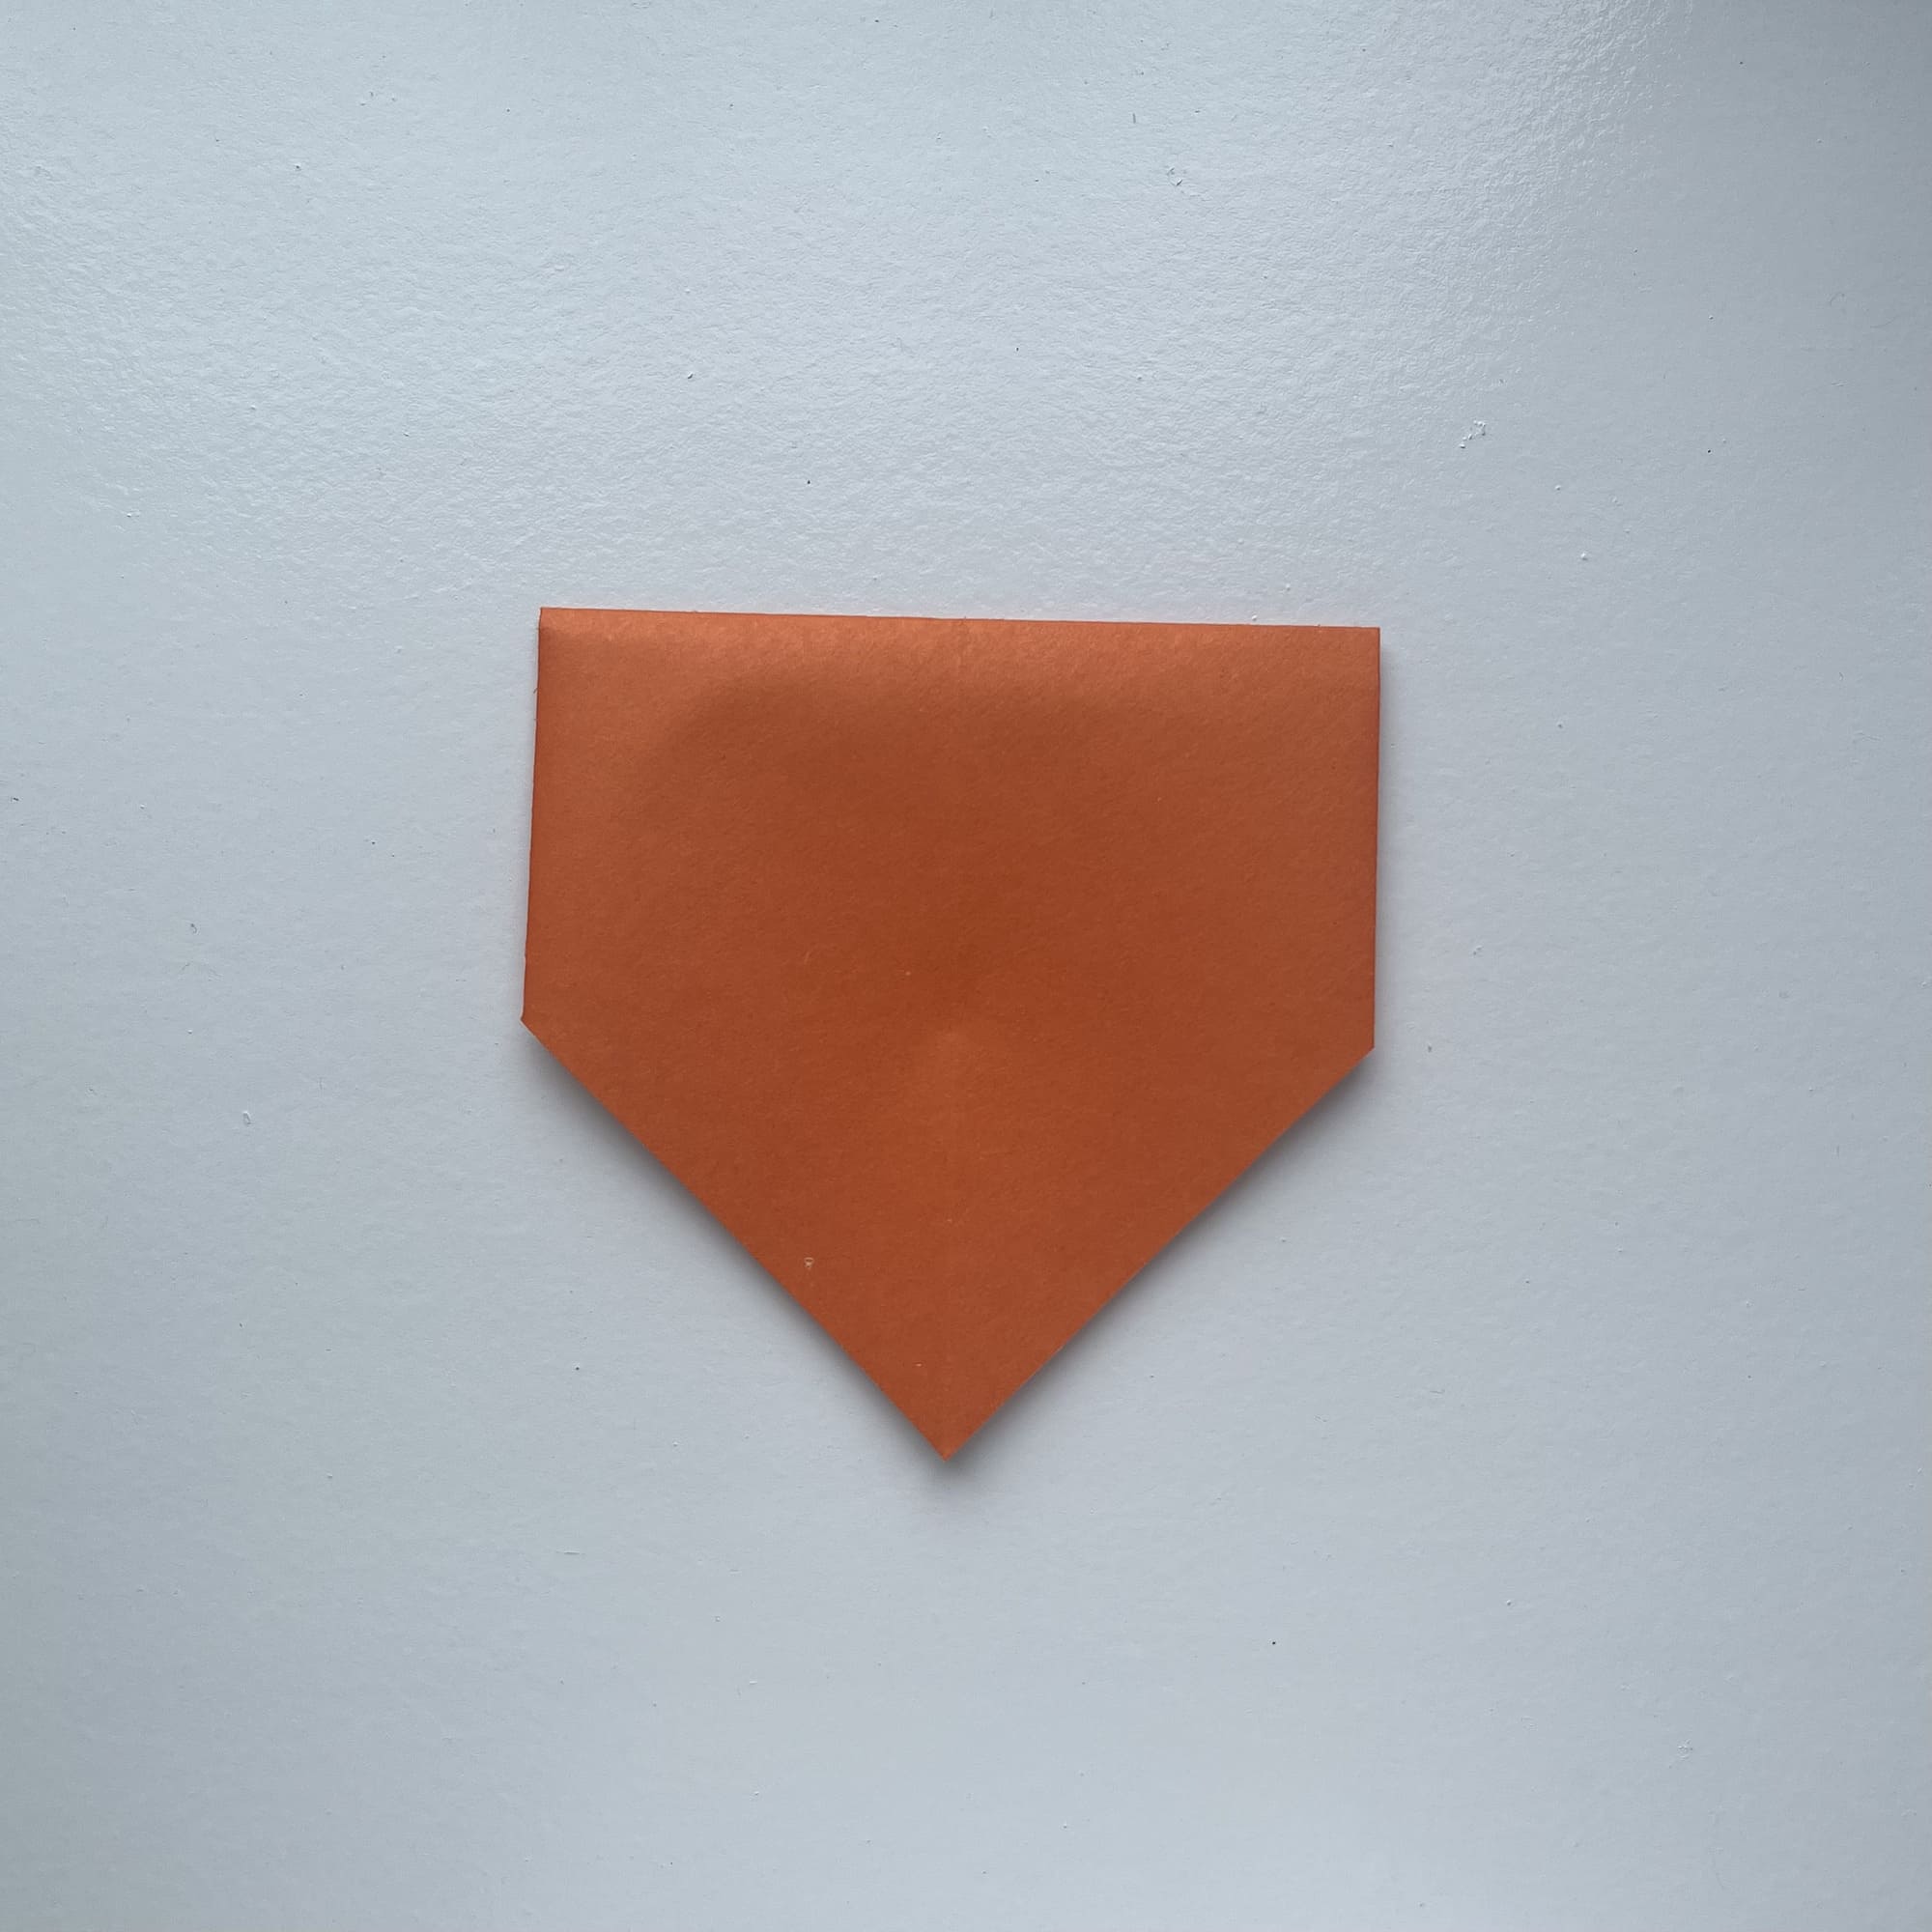
Fold the three corners, so that they meet at the center point.
Fold the top inward along the horizontal line in the center.
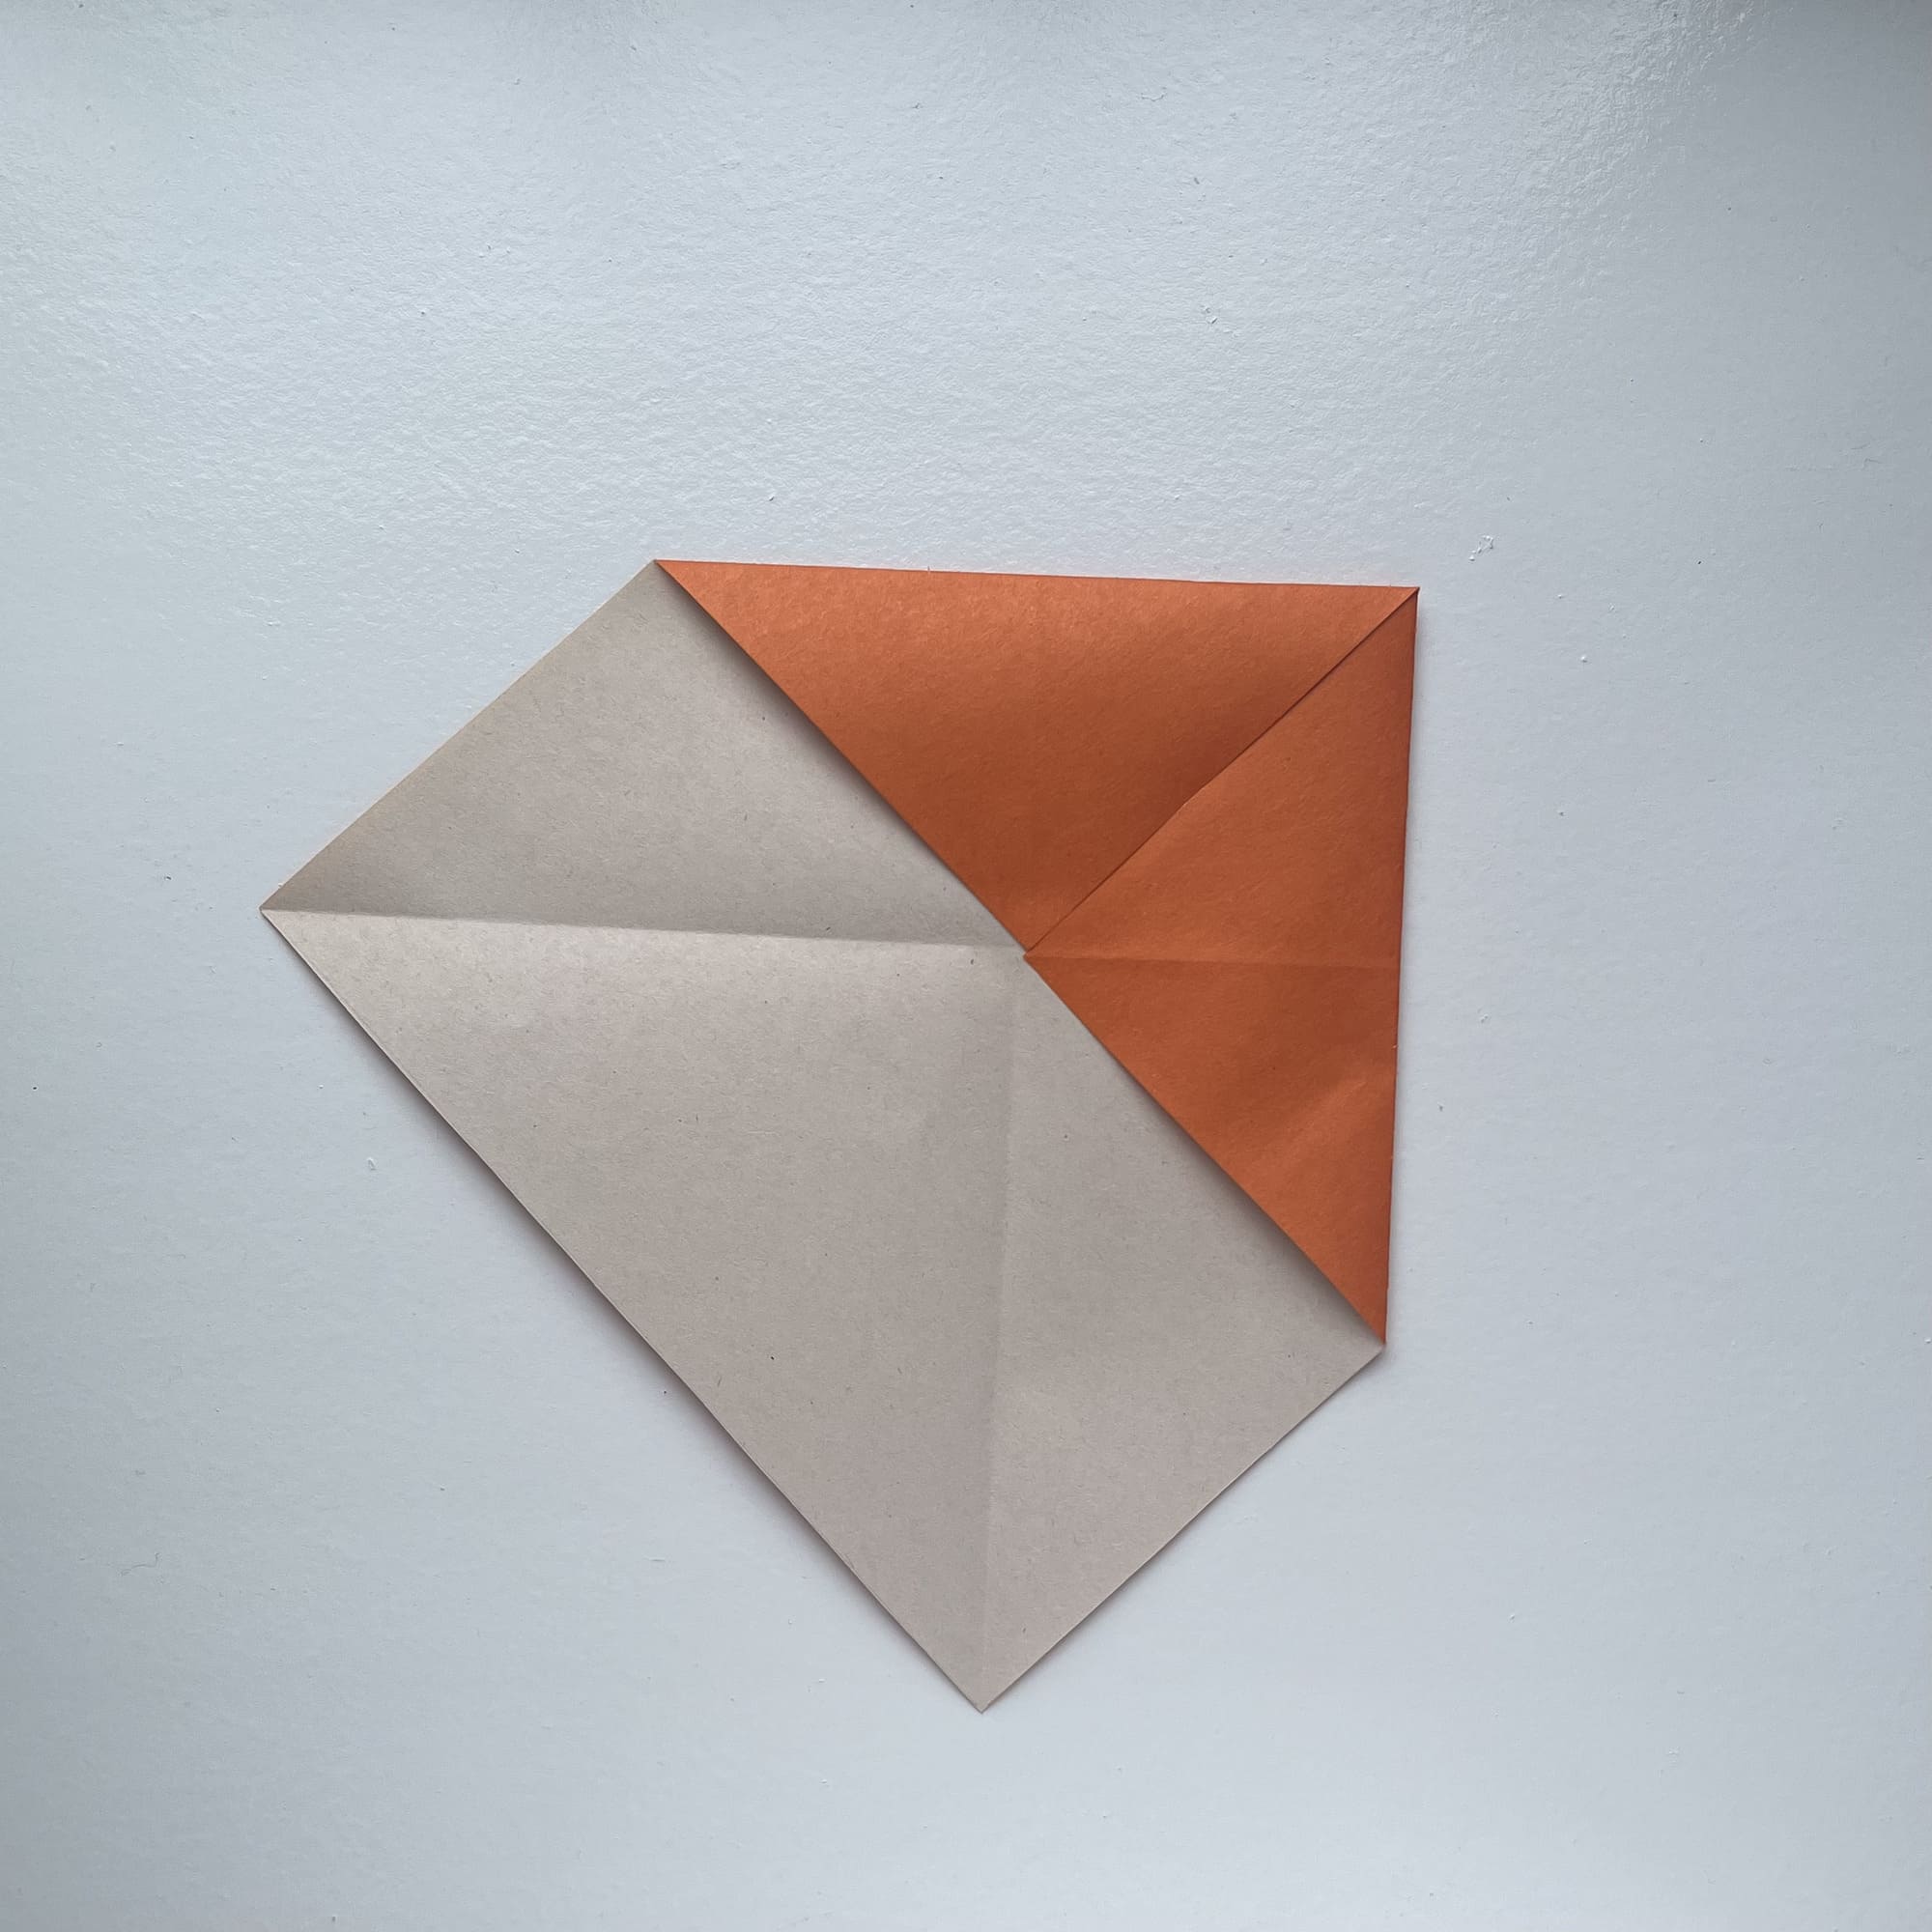
Turn over the paper.
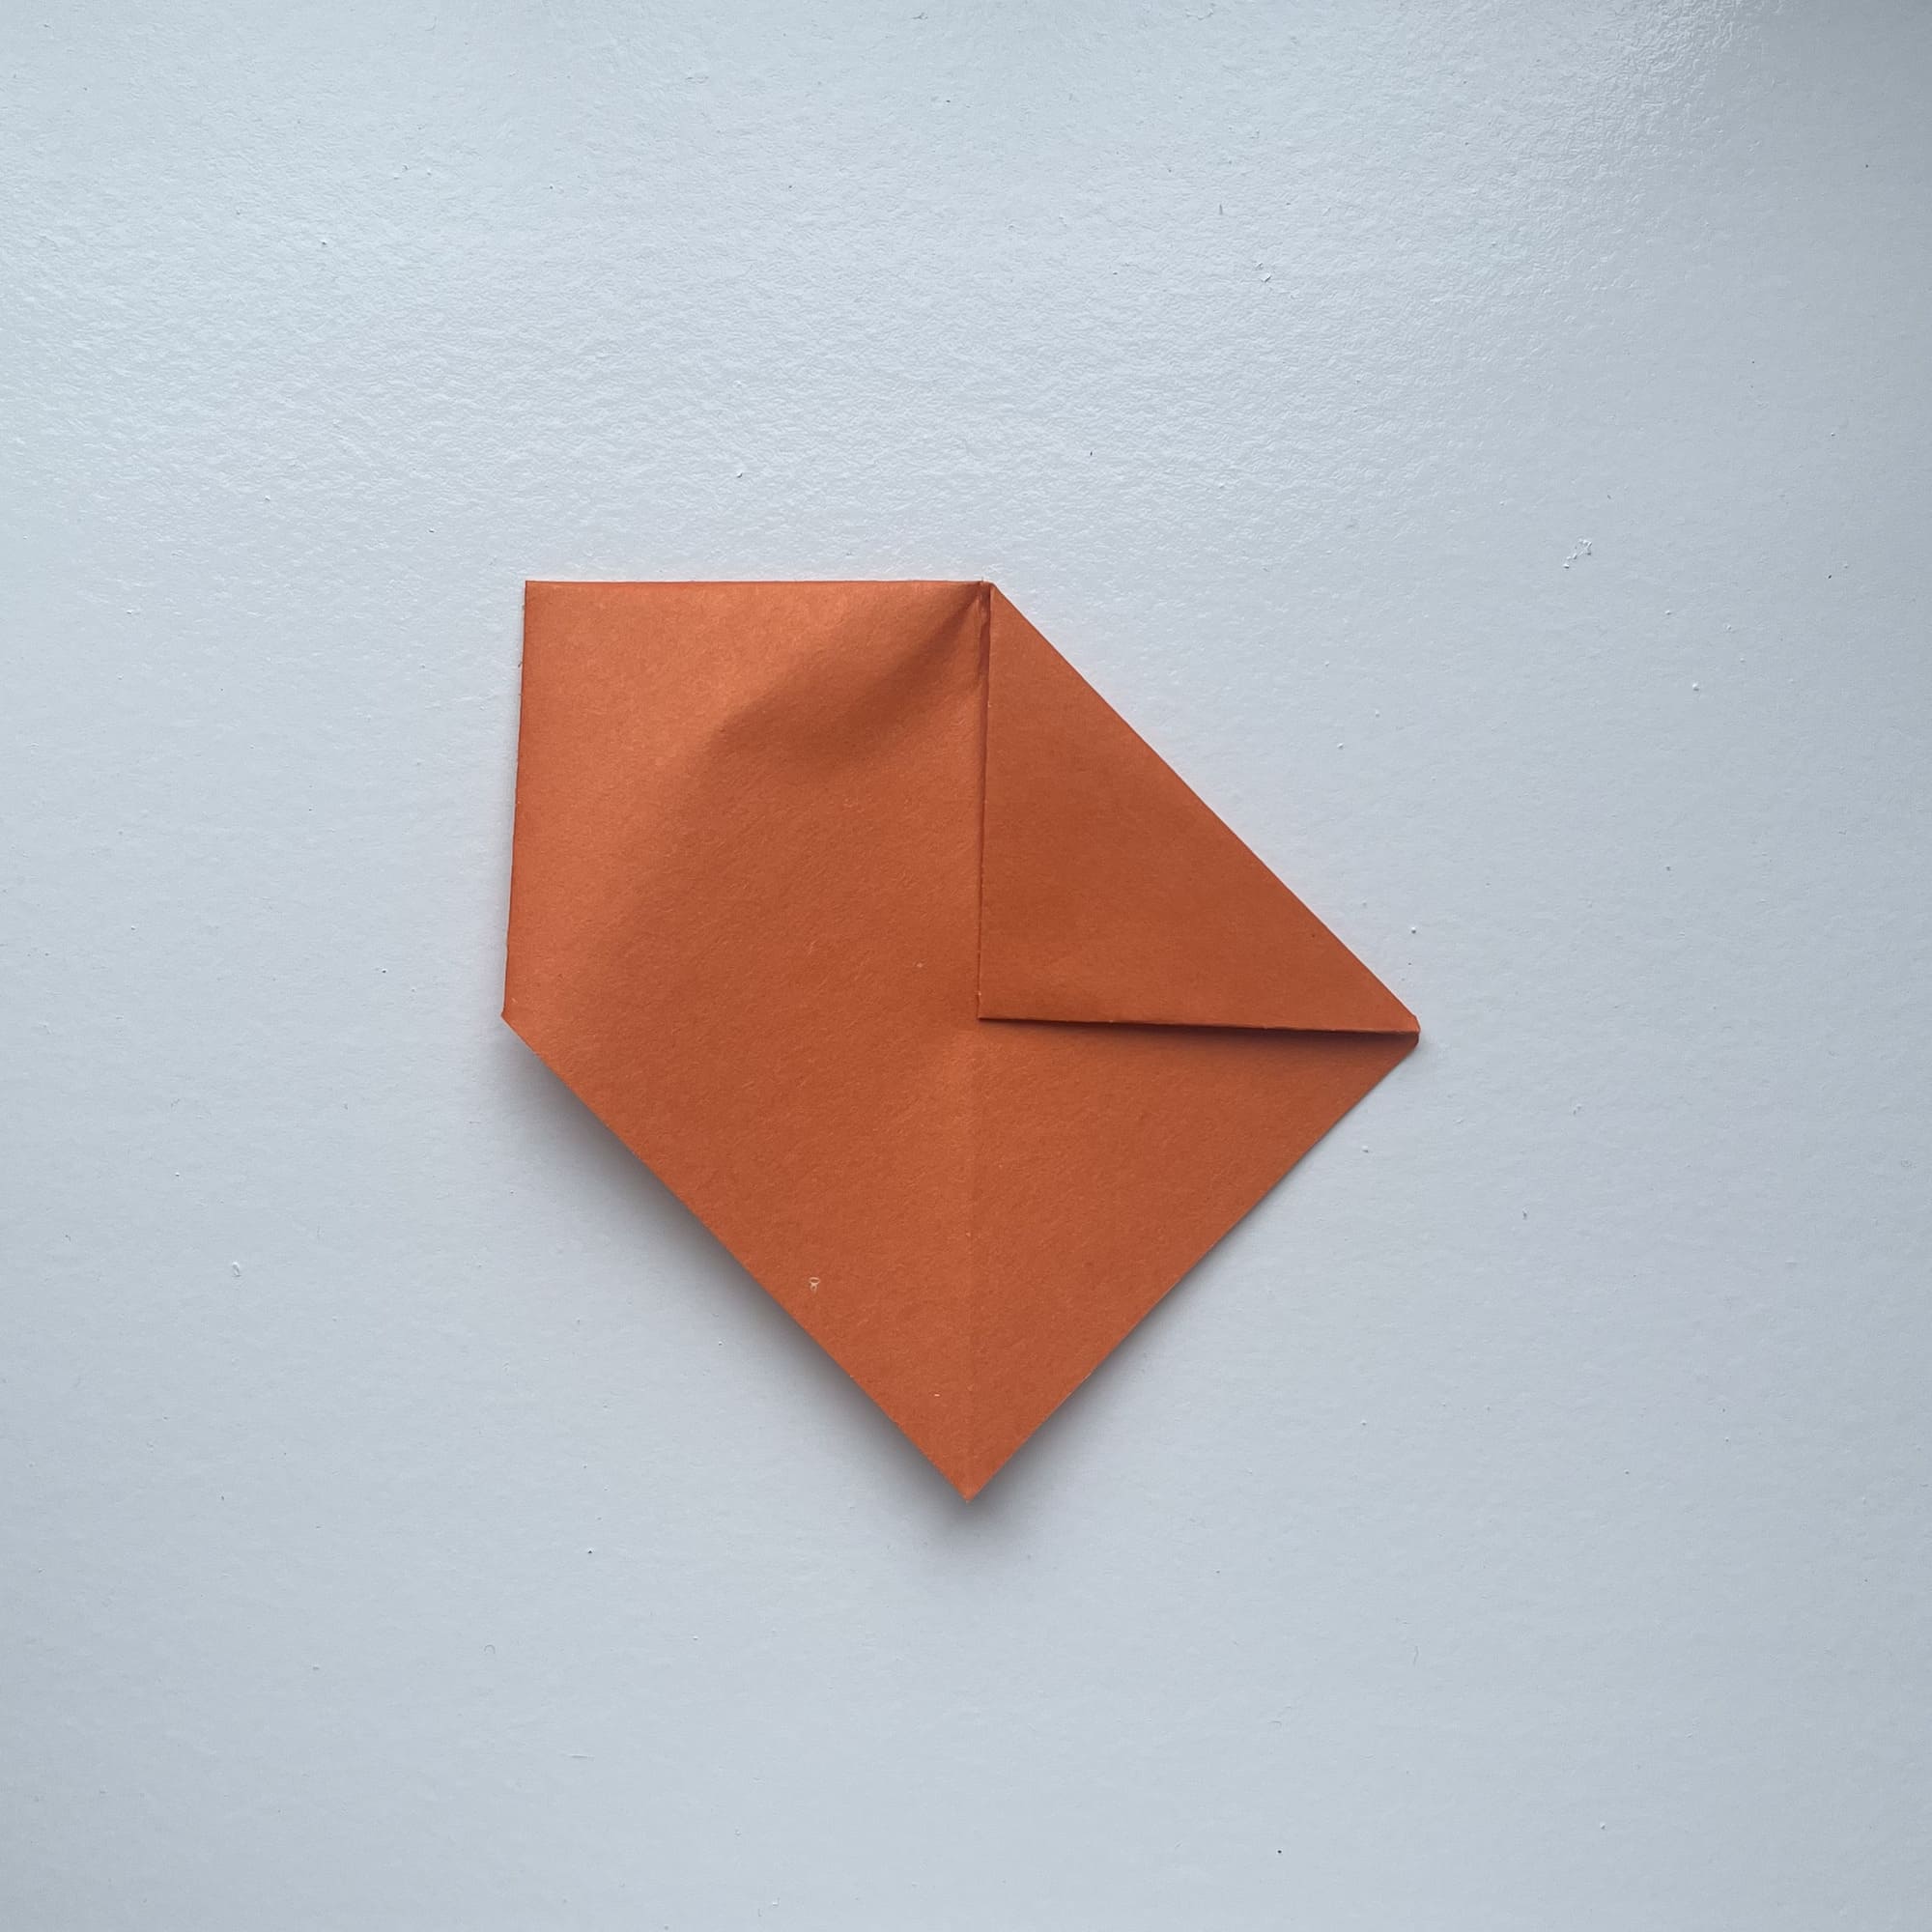
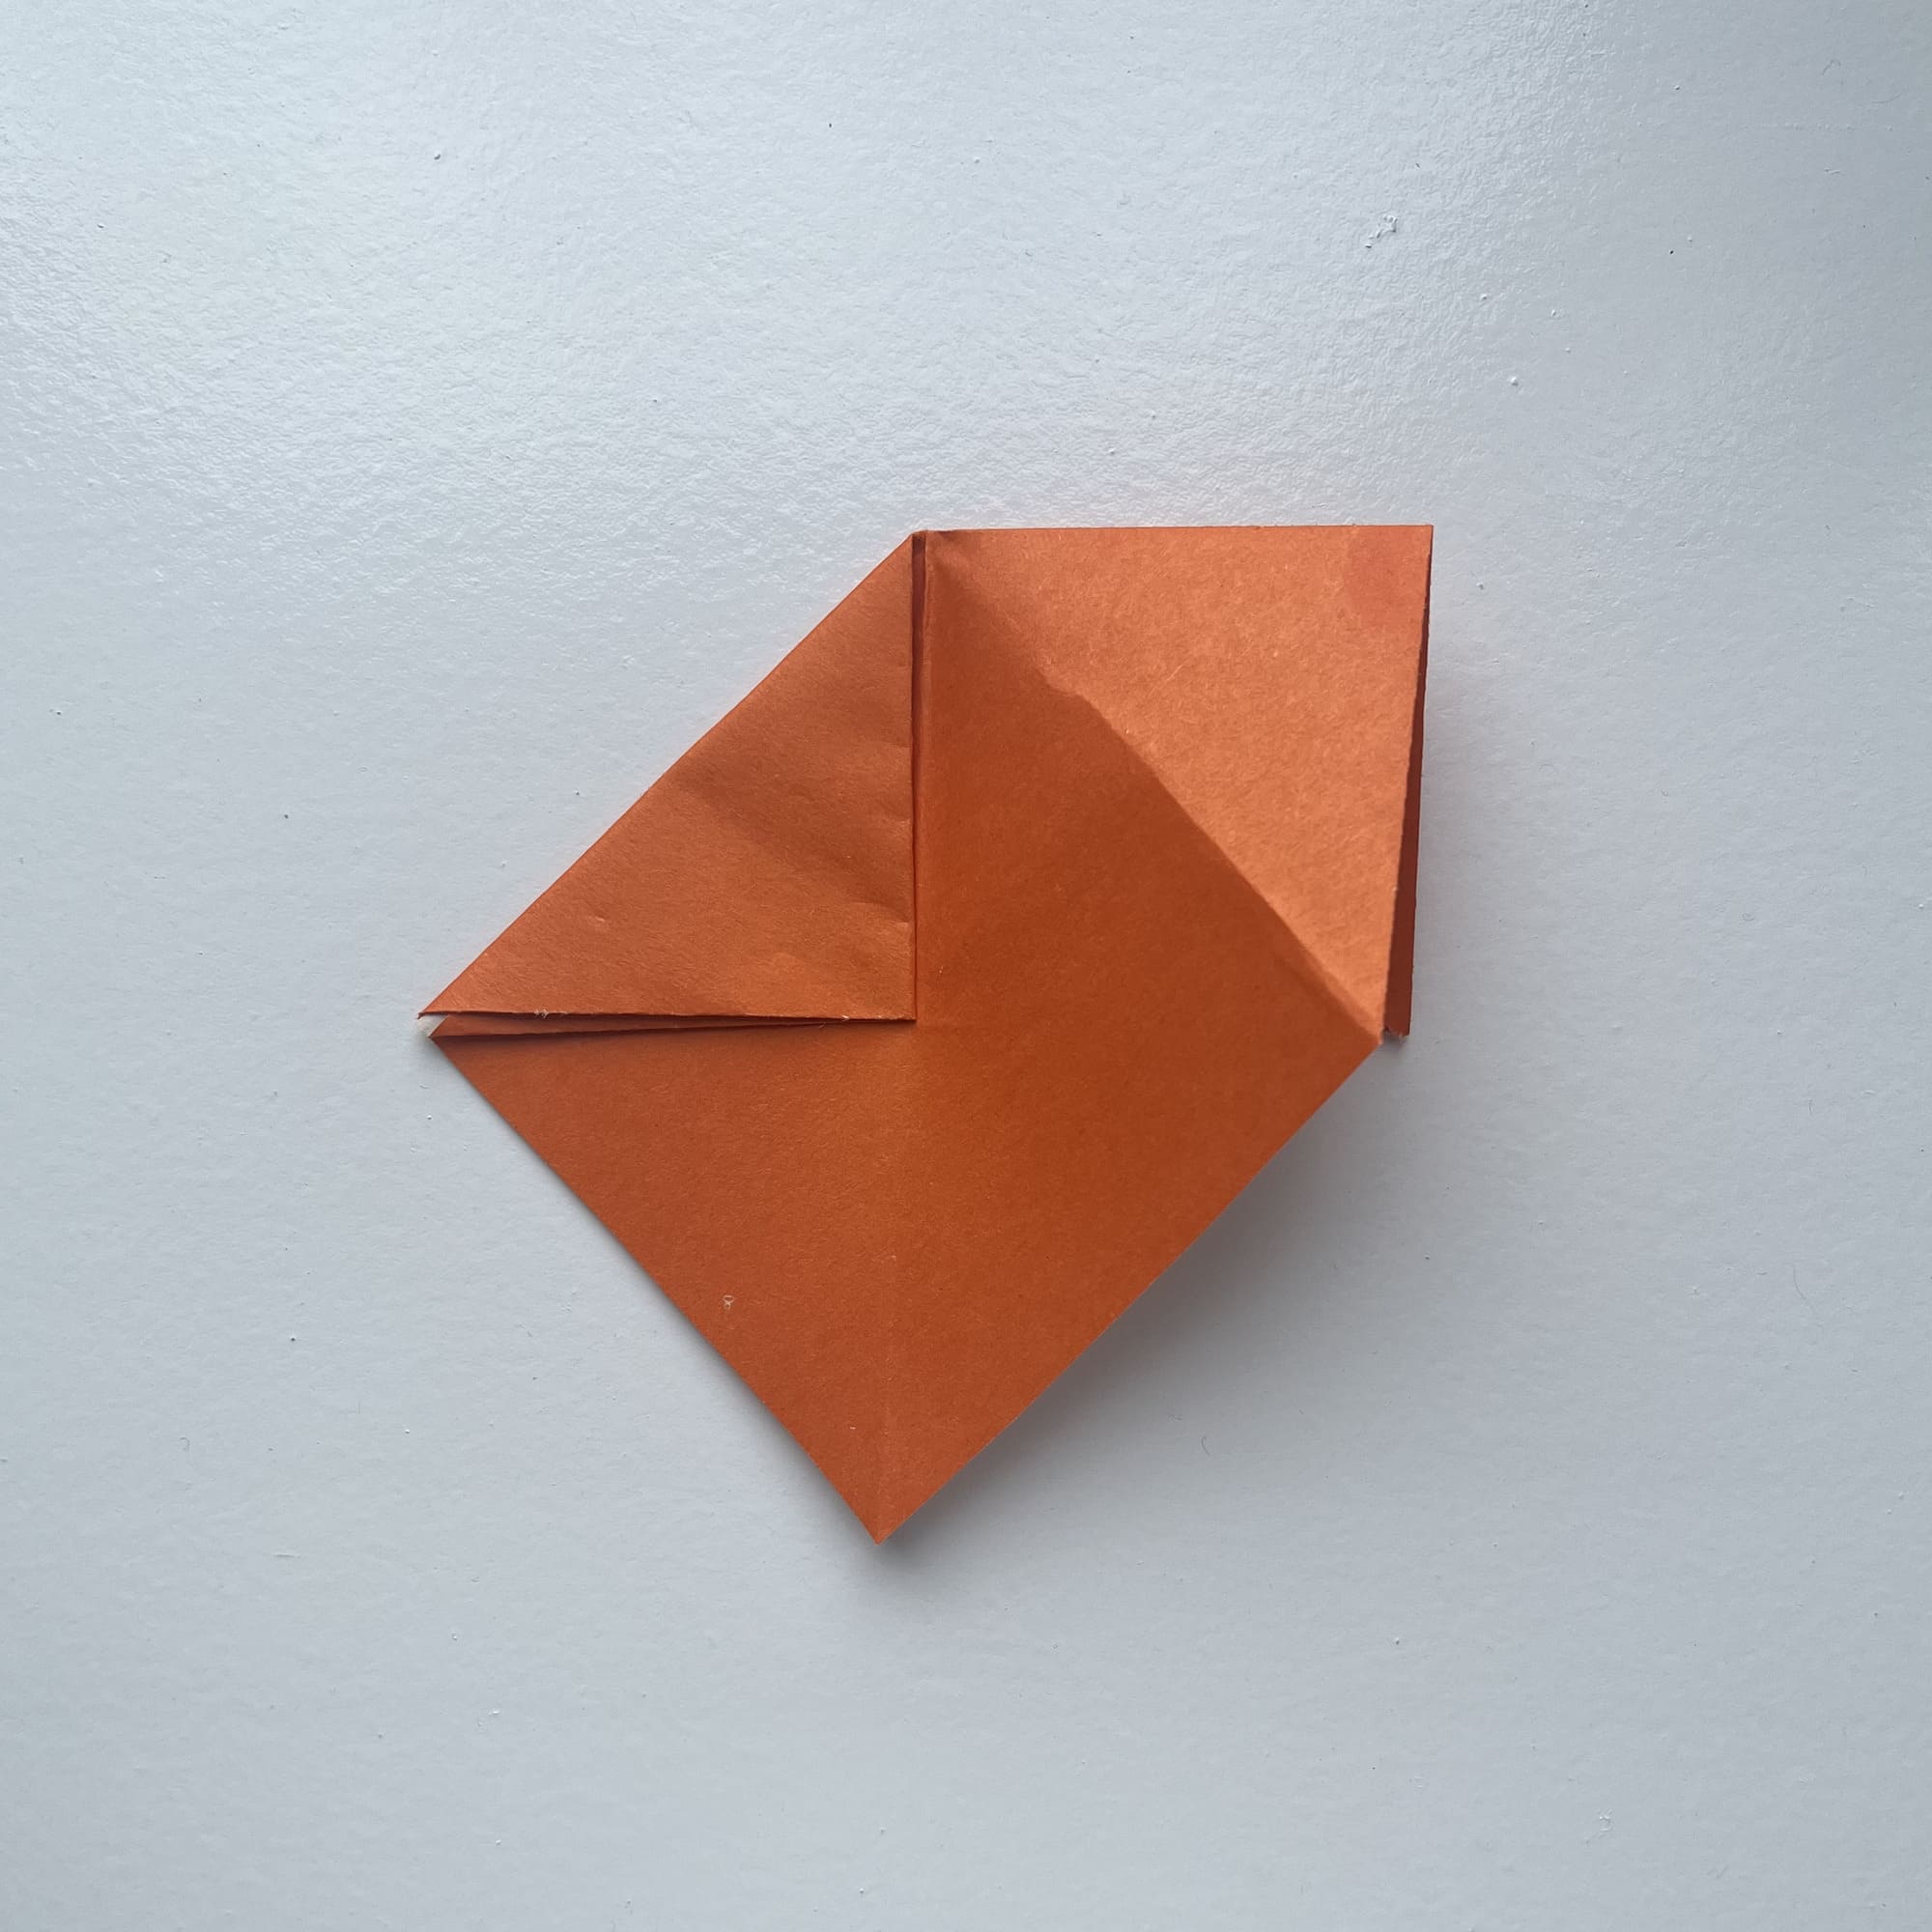
Fold the top two corners together, so that they meet in the center.
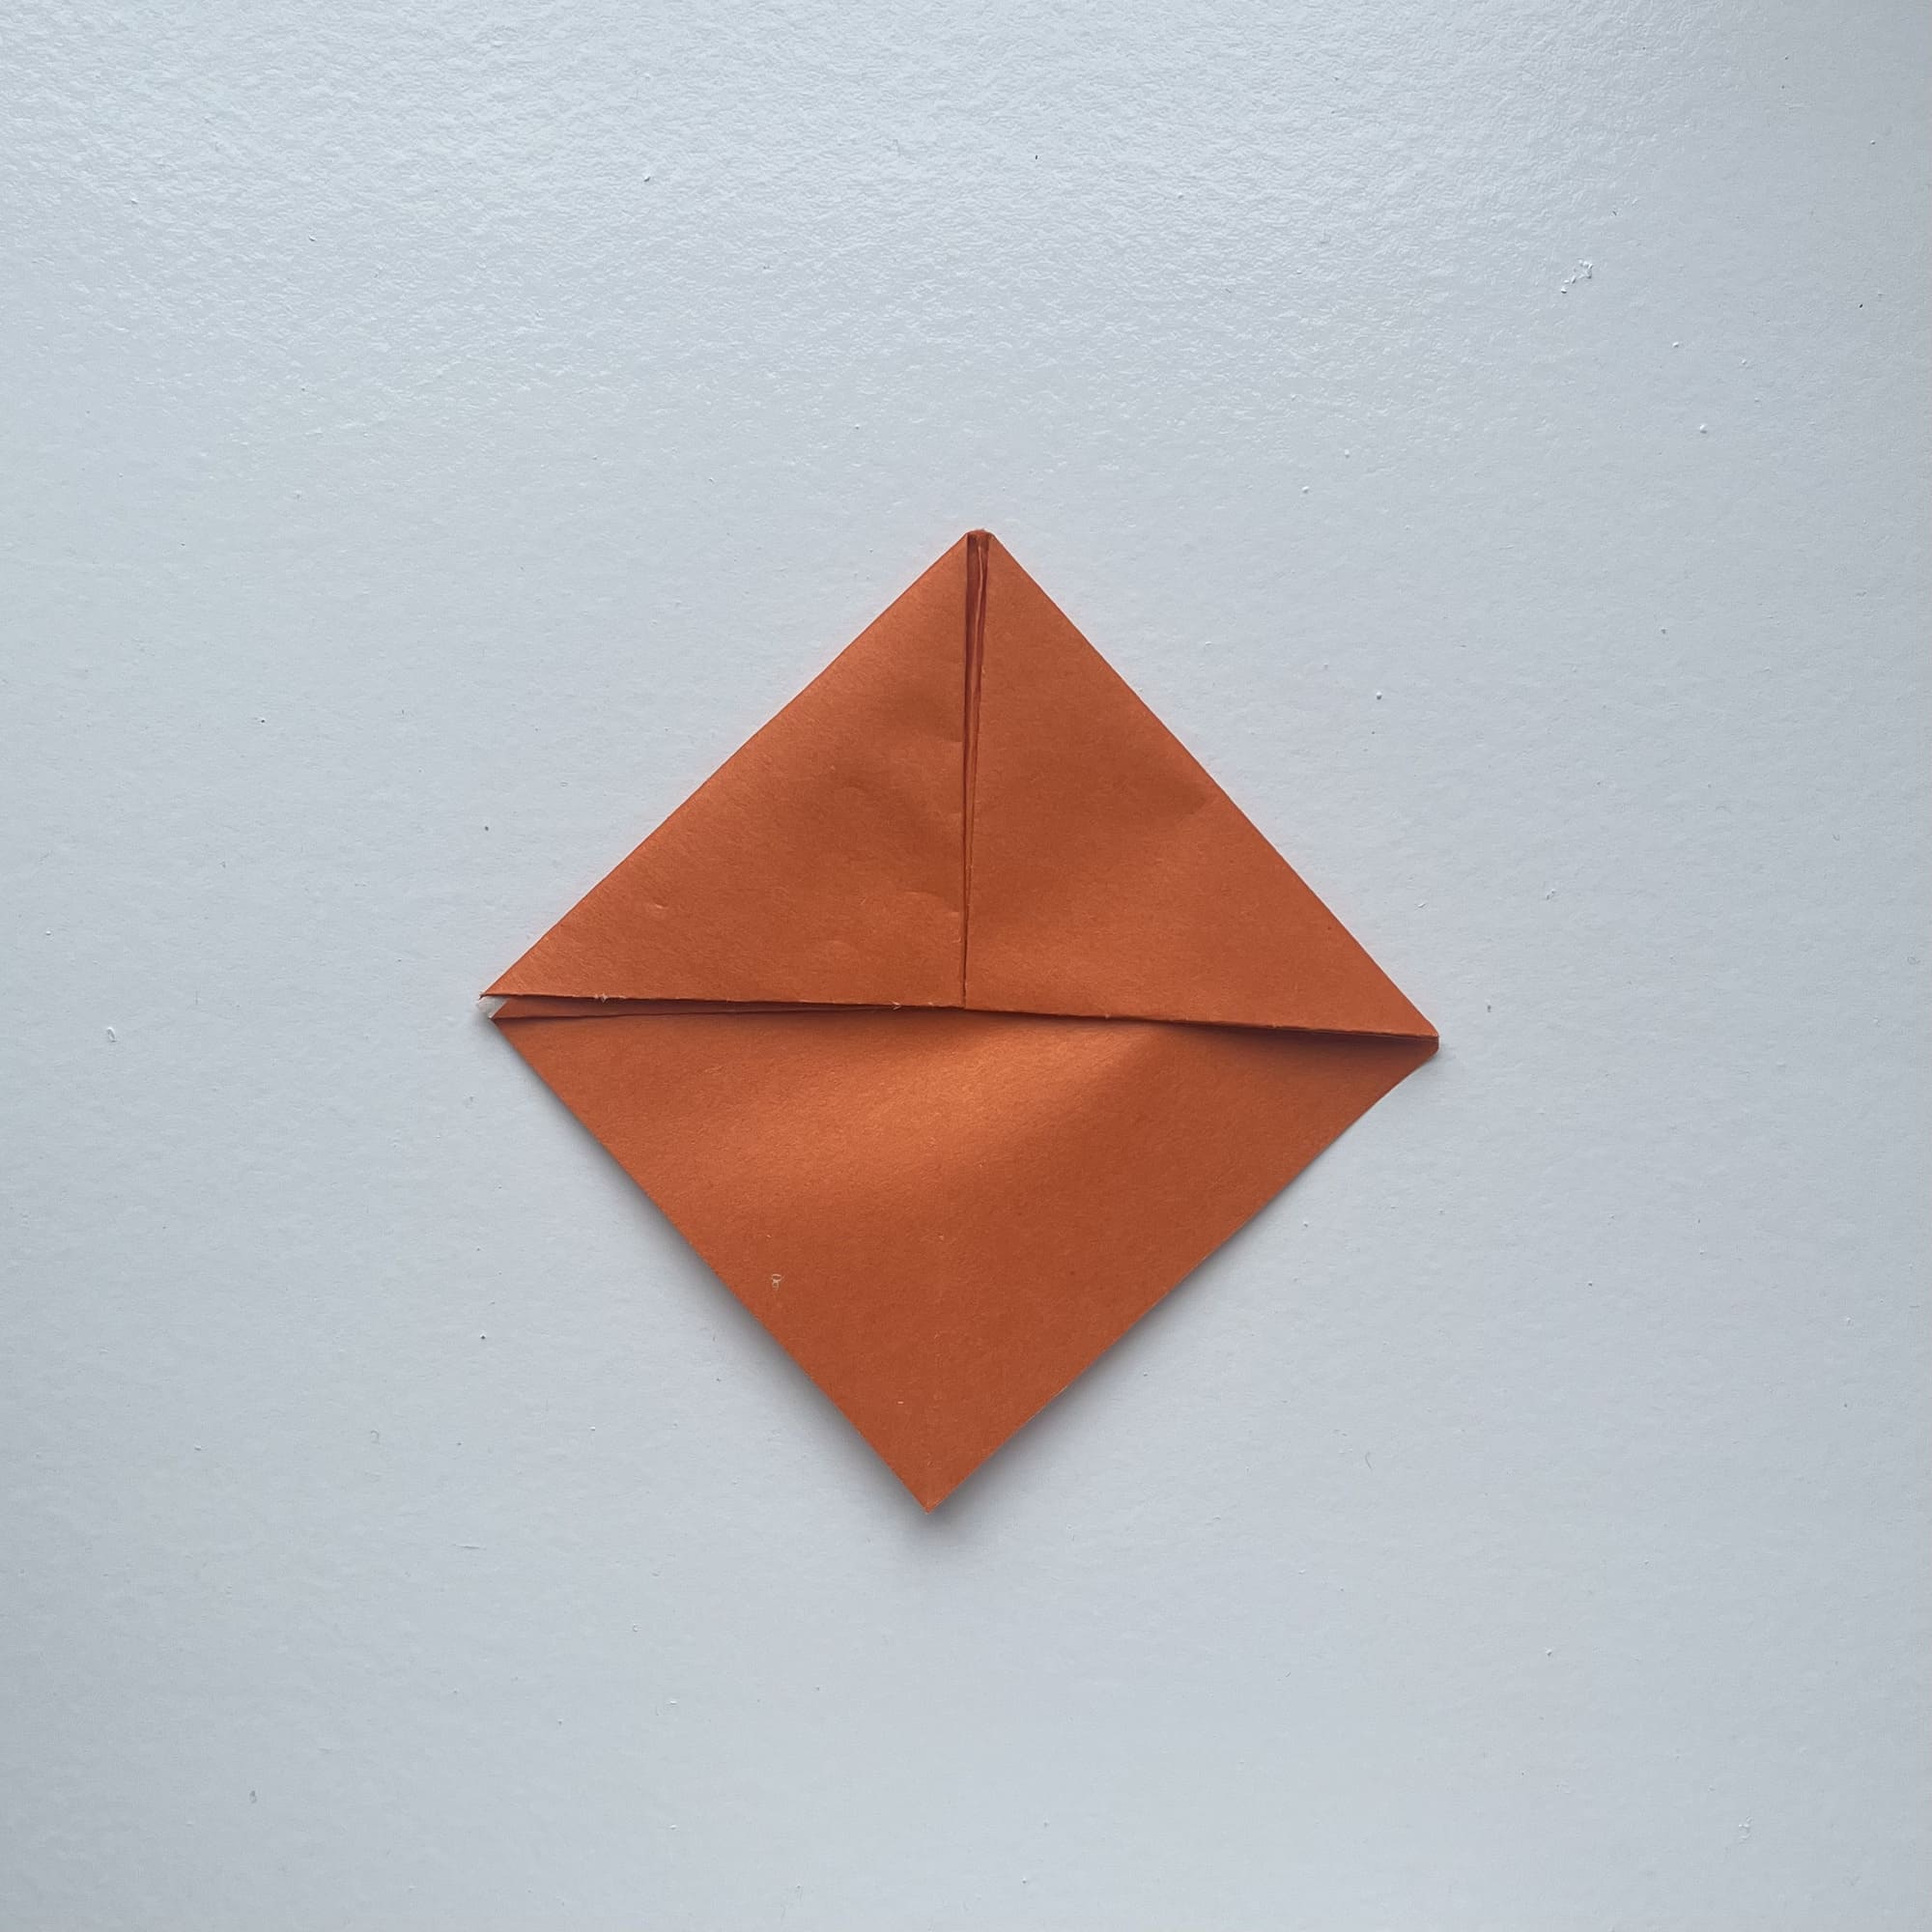
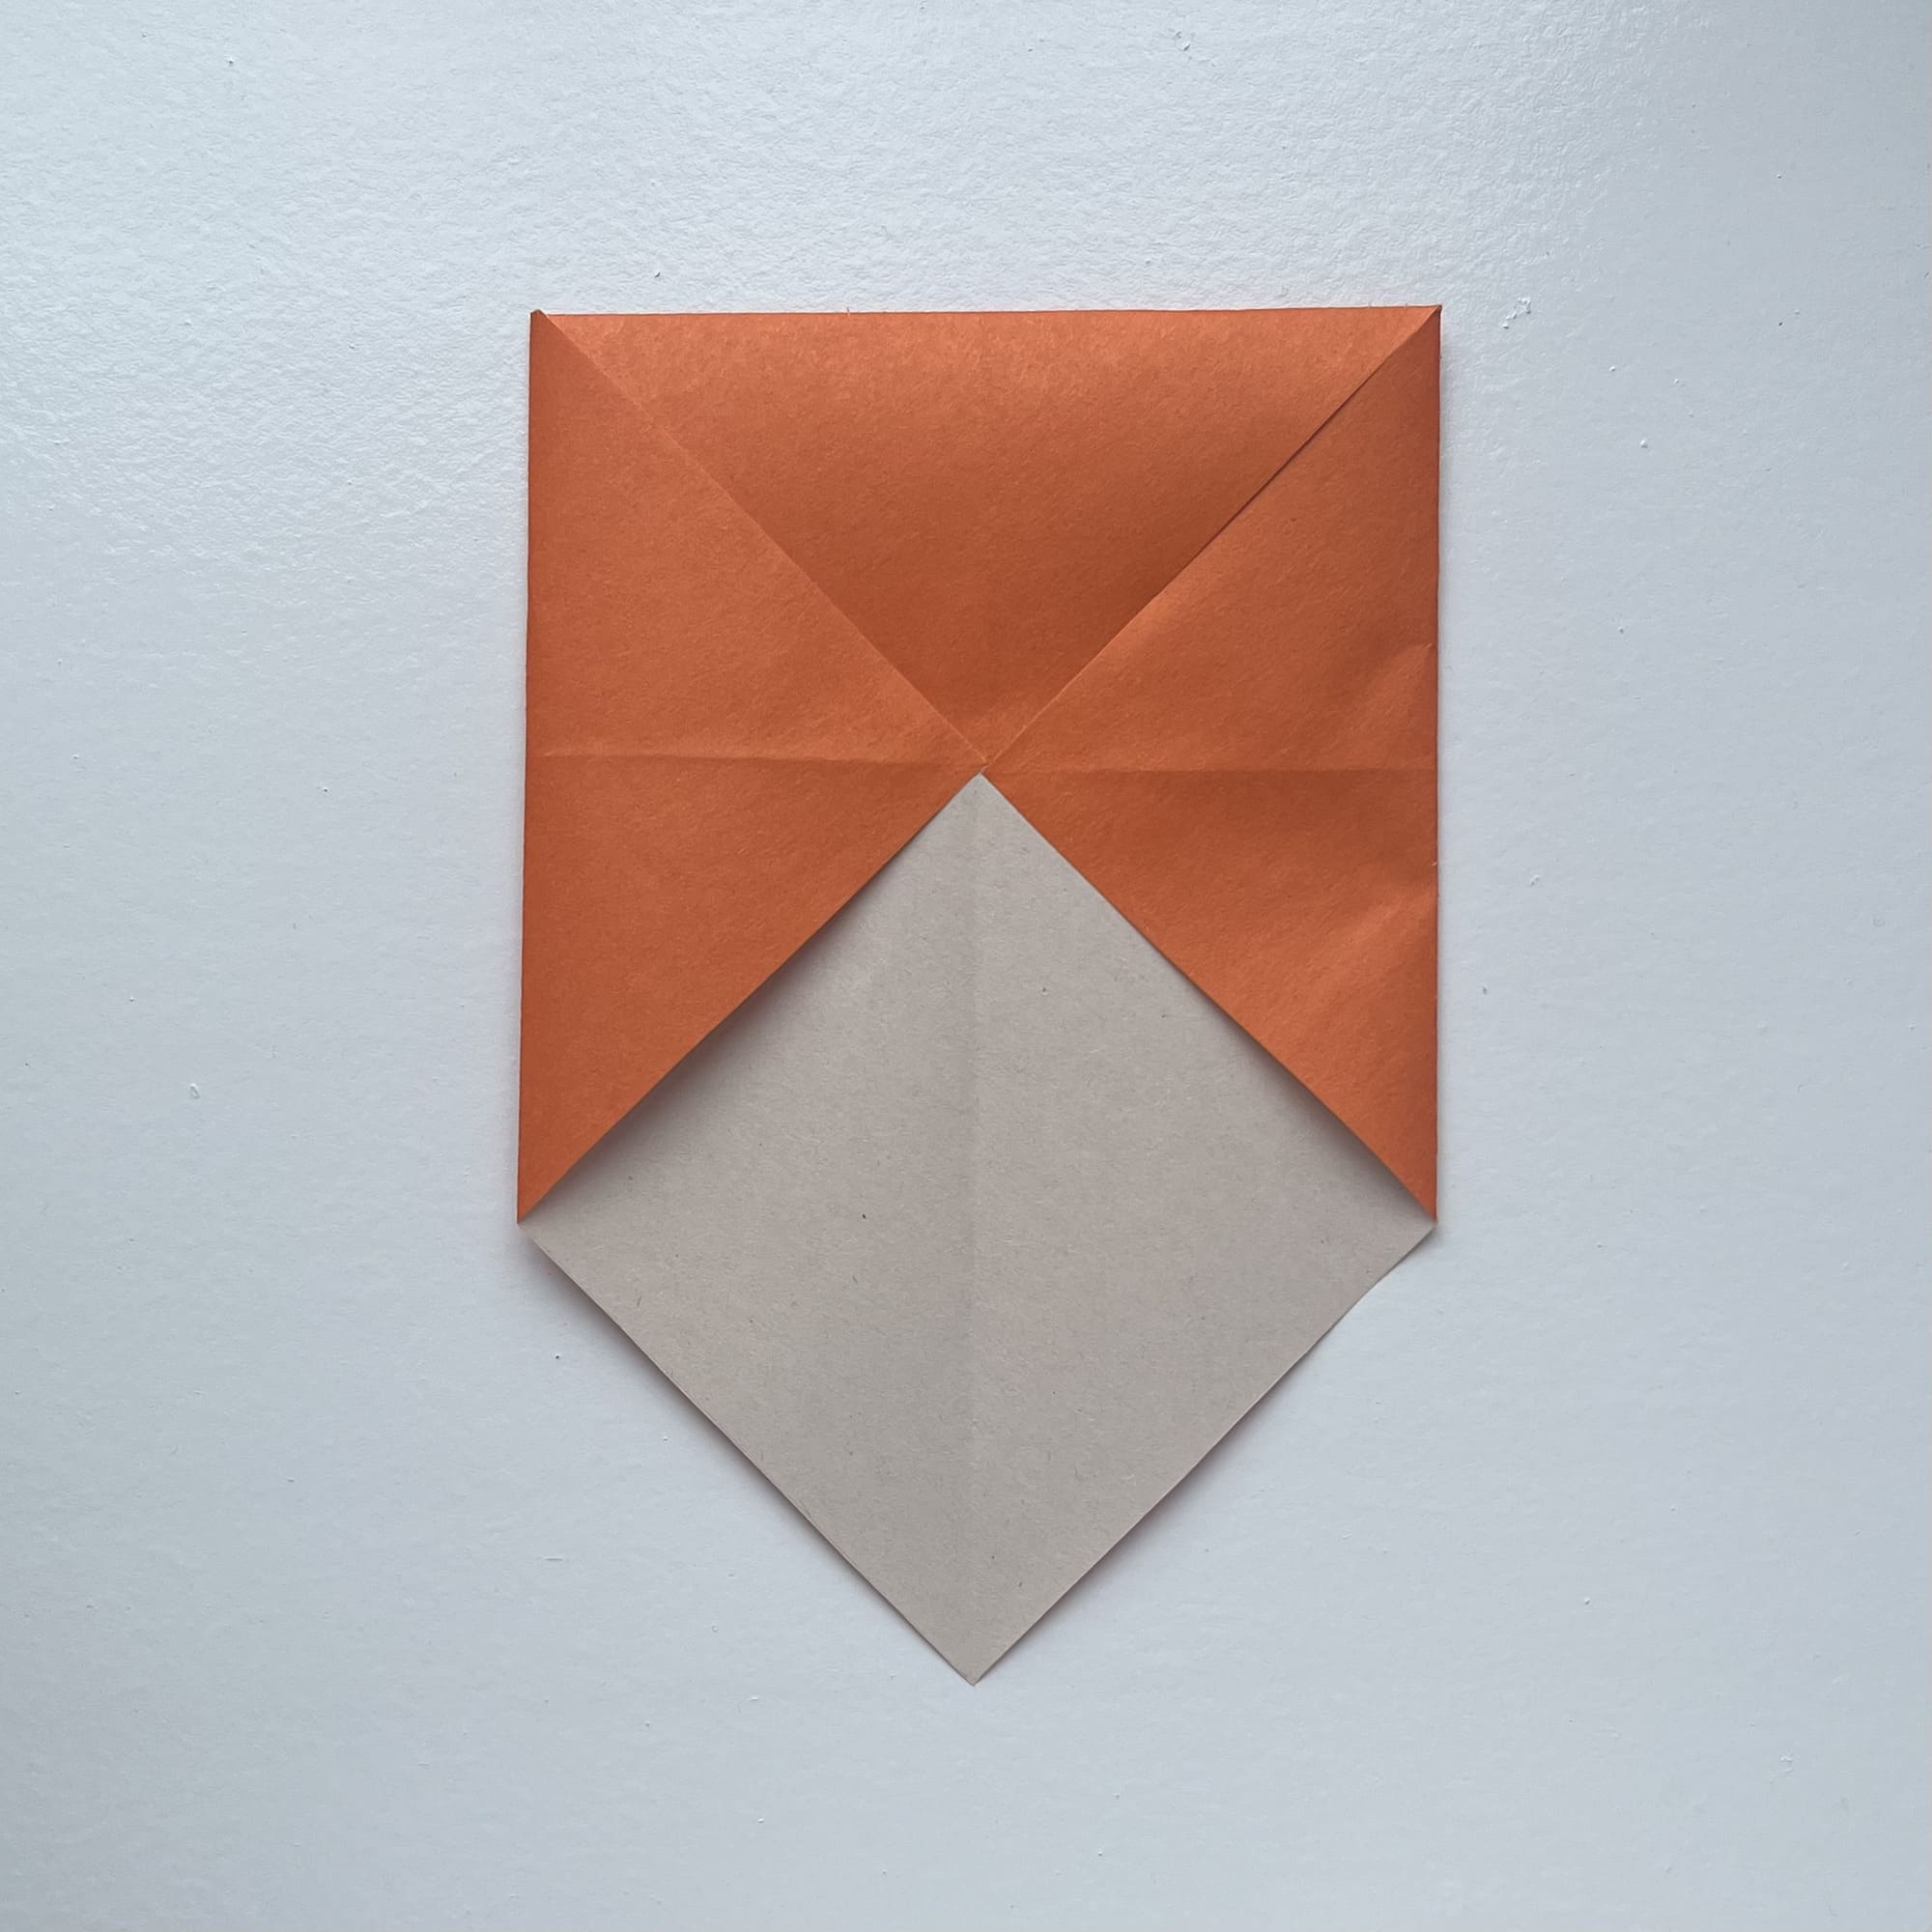
Now, unfold one of them.
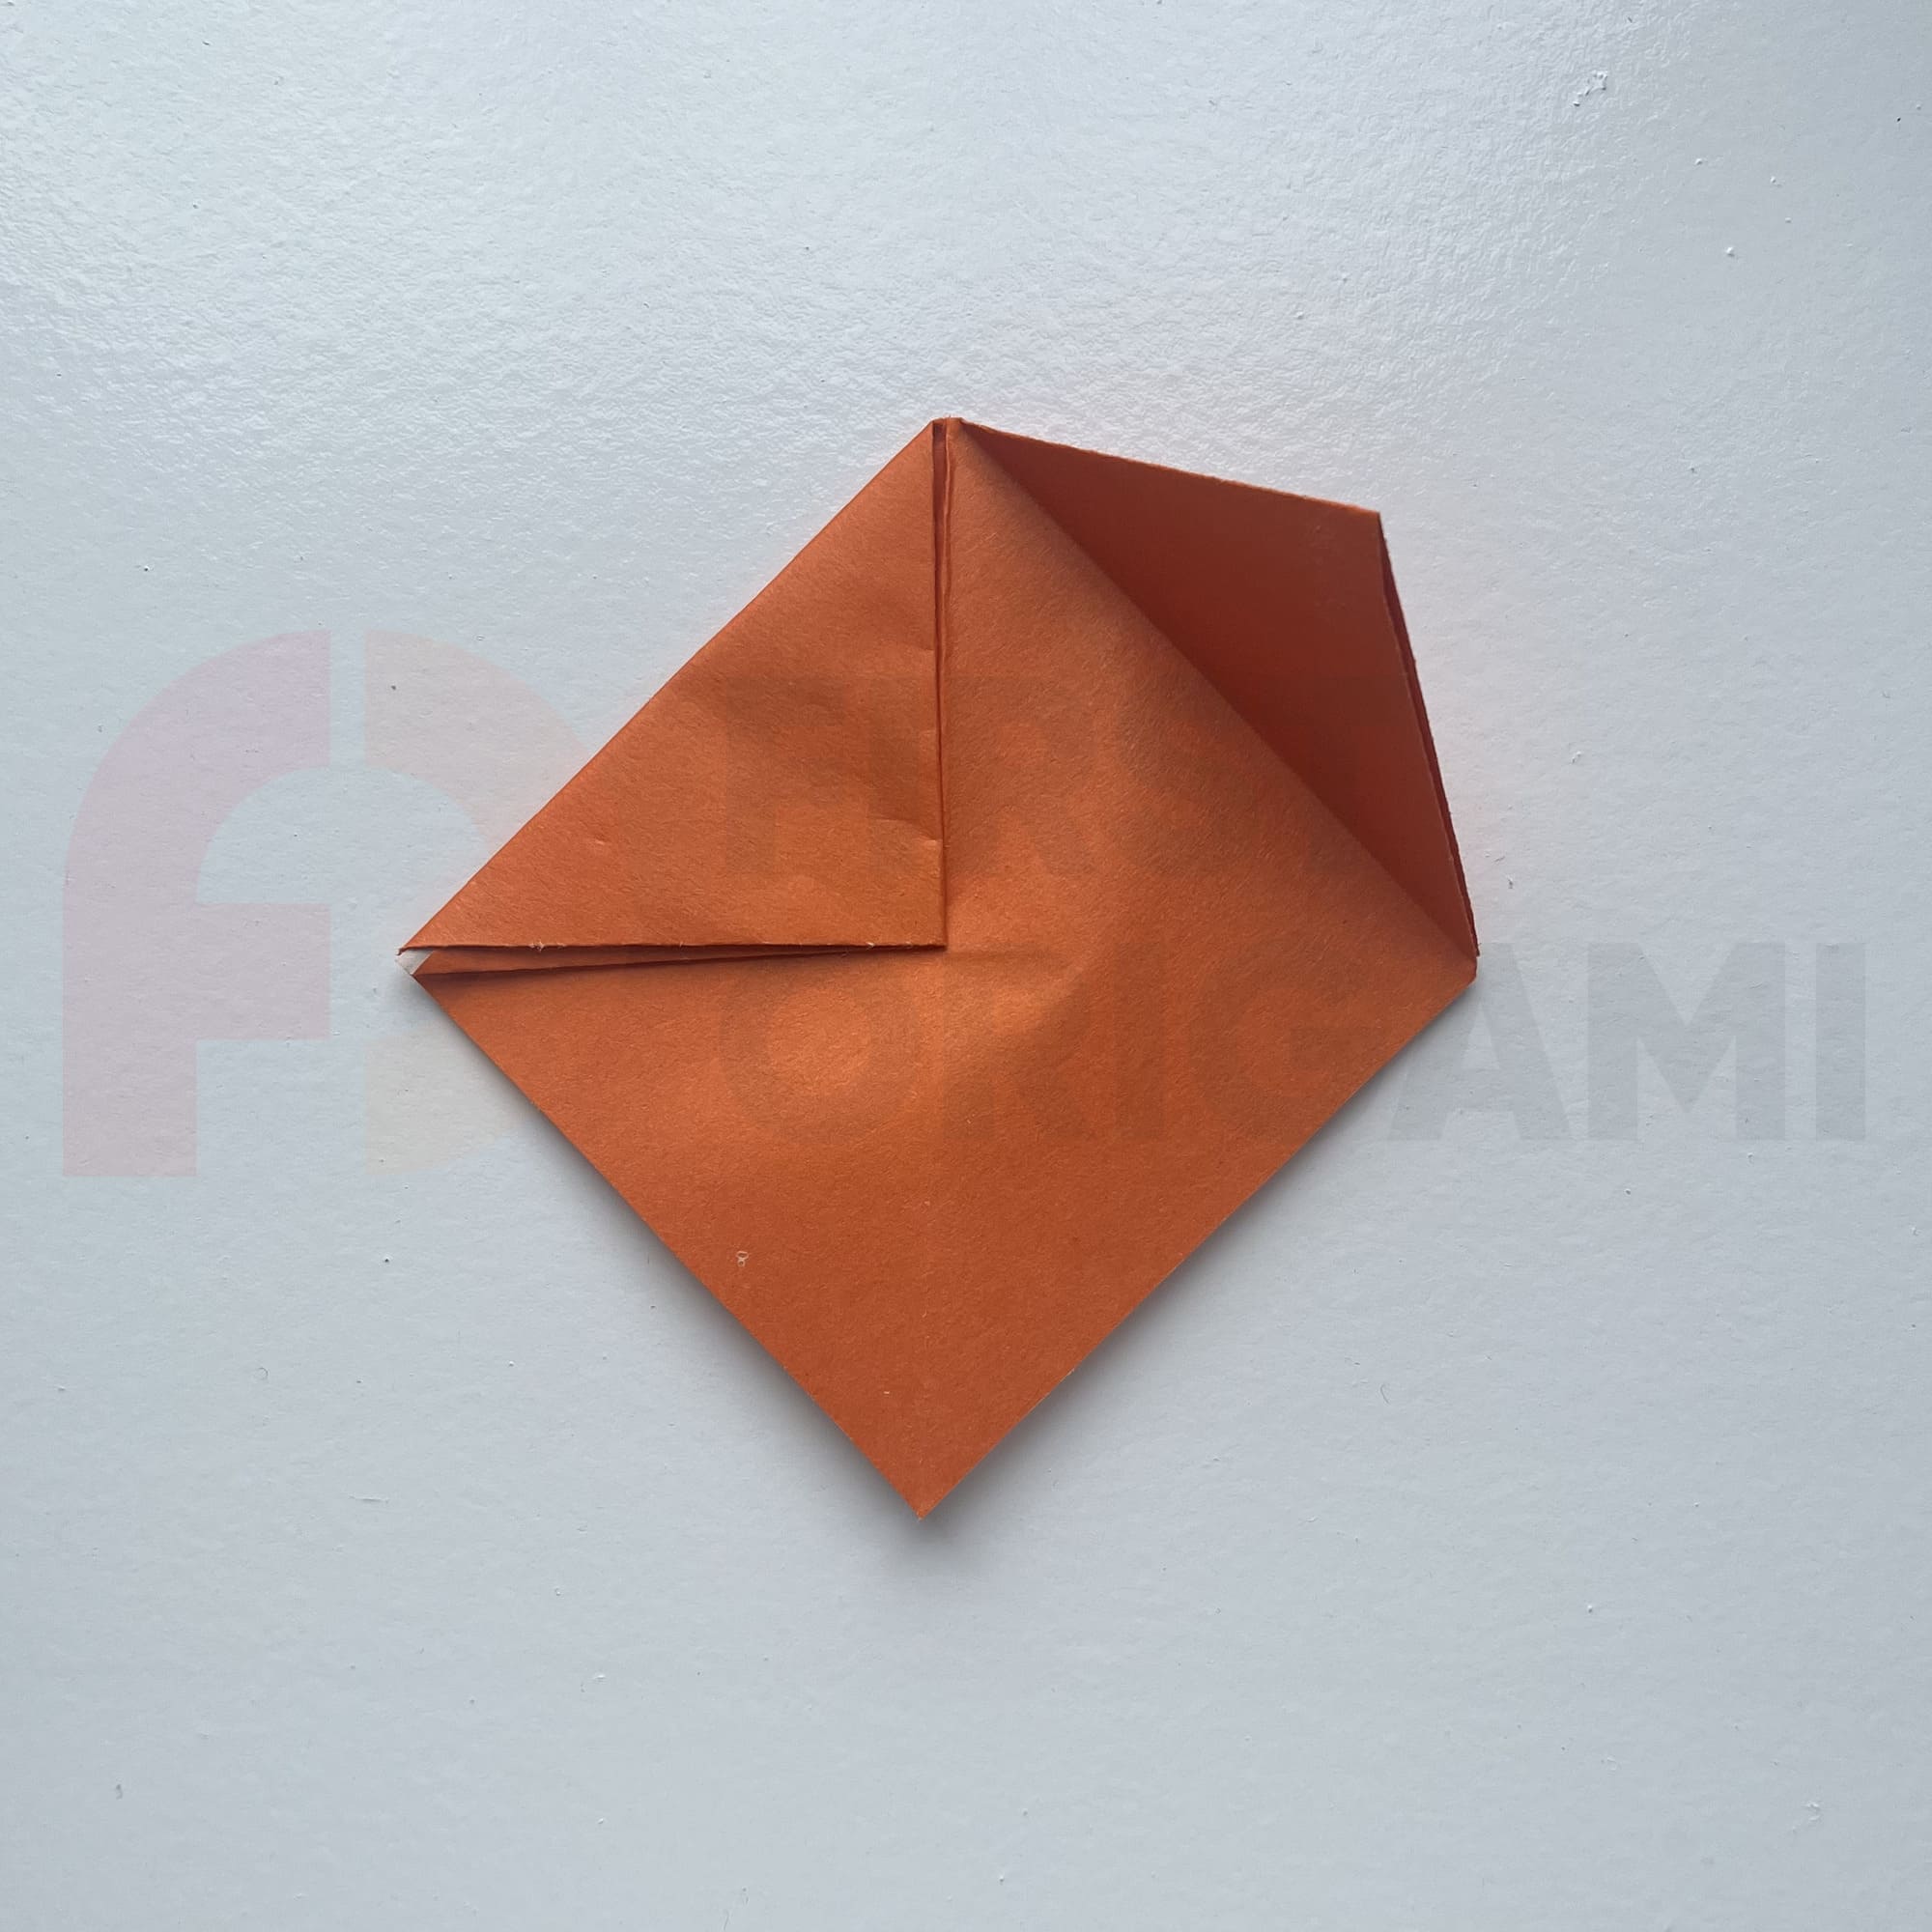
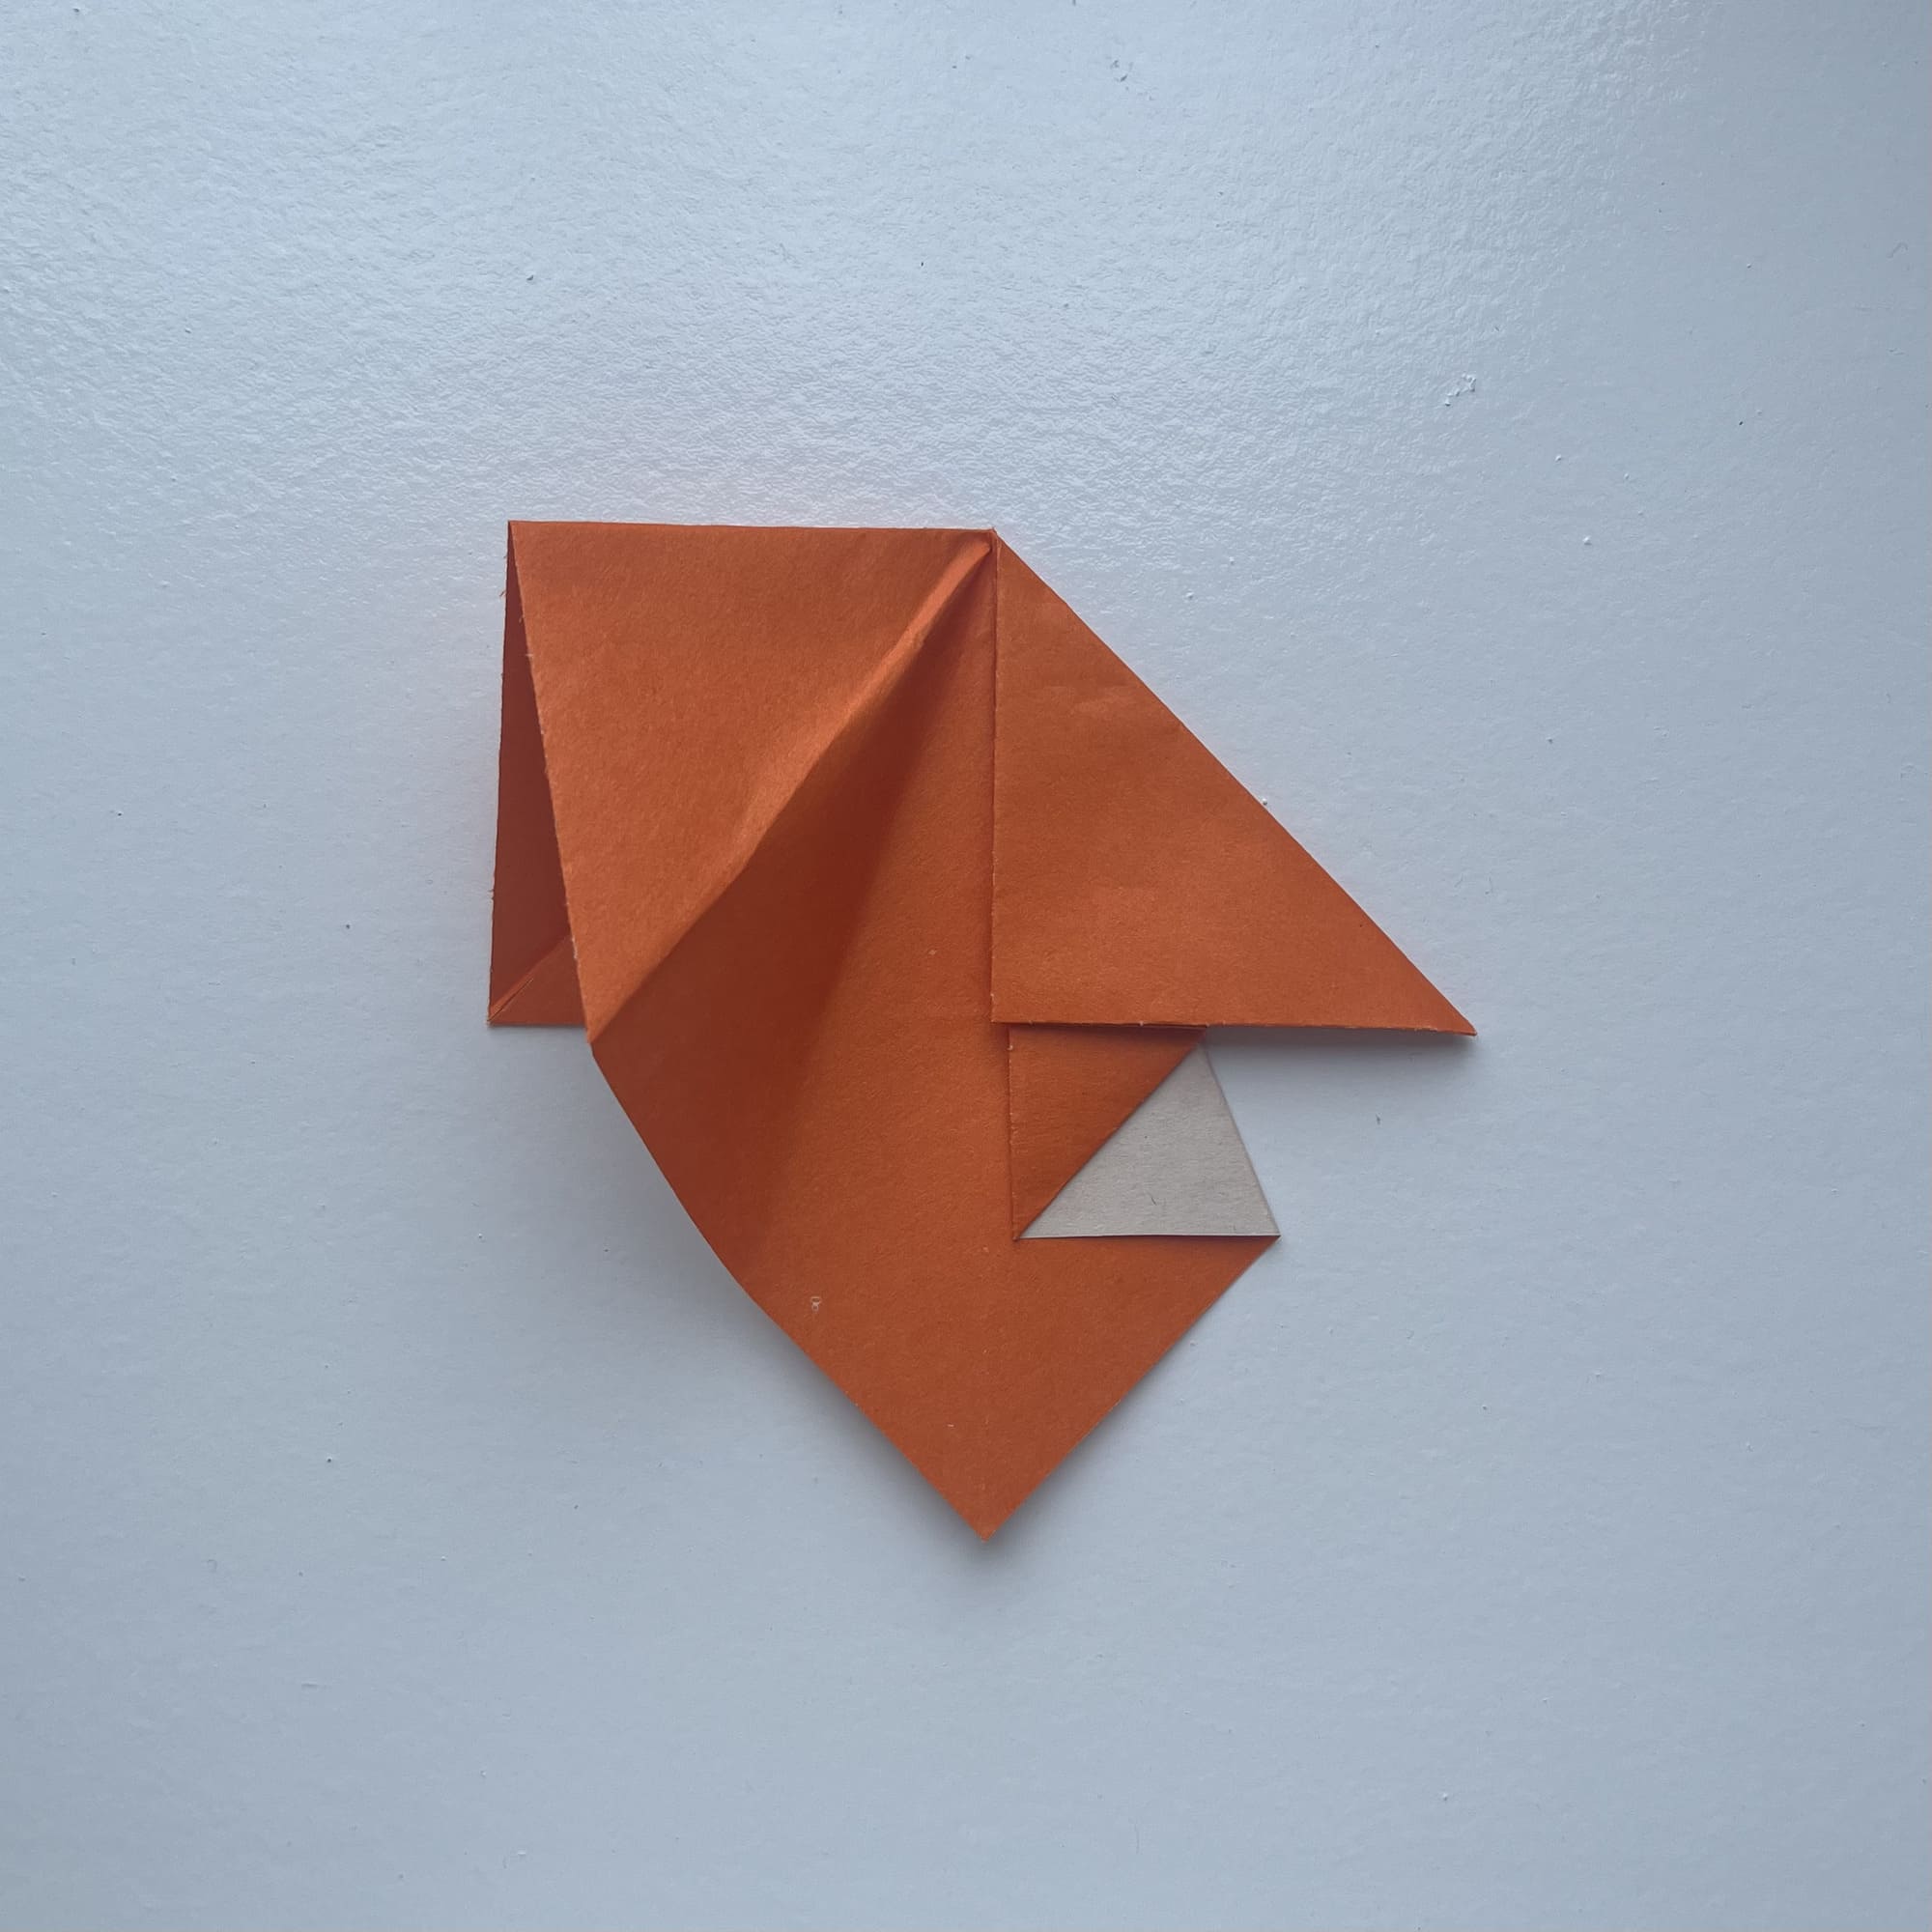
Following the instructions in the photo, fold the paper so that the side fold line is on the center fold line and a vertically standing corner is formed.
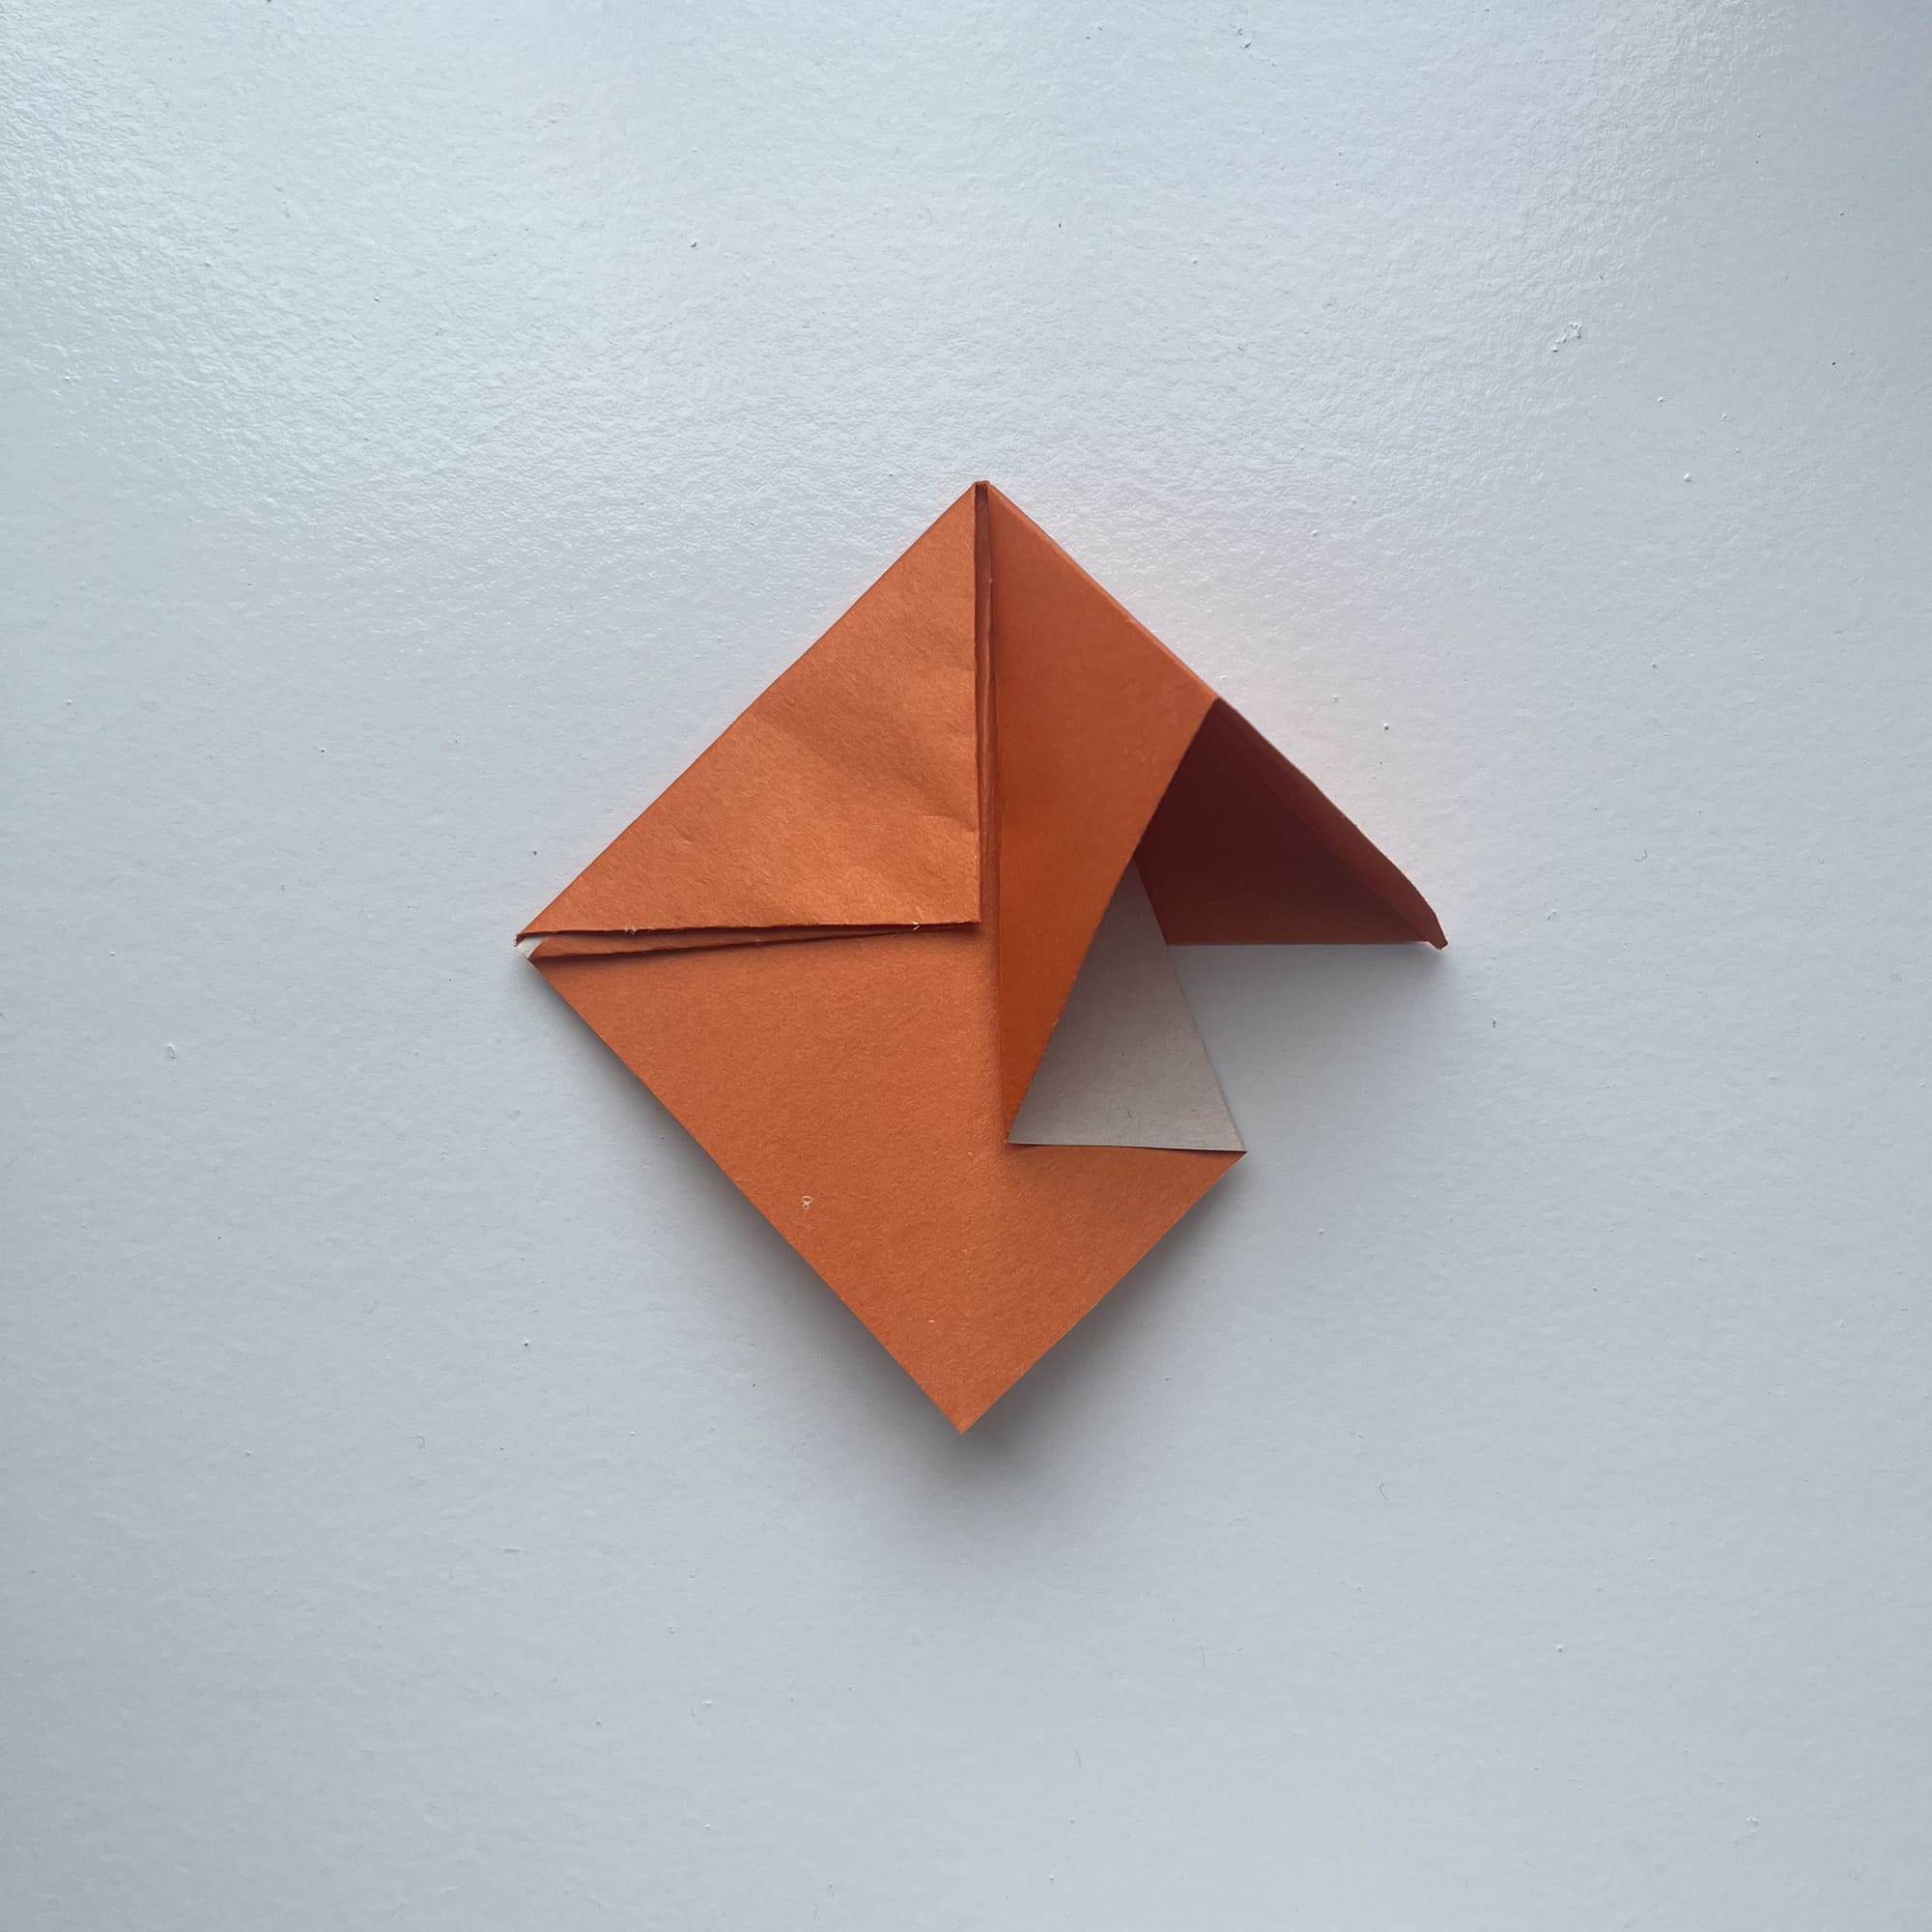
This is a difficult moment, so you can refer to the video instructions on it.

The corner that sticks up should be lowered to the central fold. To do this, make another fold along the dotted line as shown in the photo.

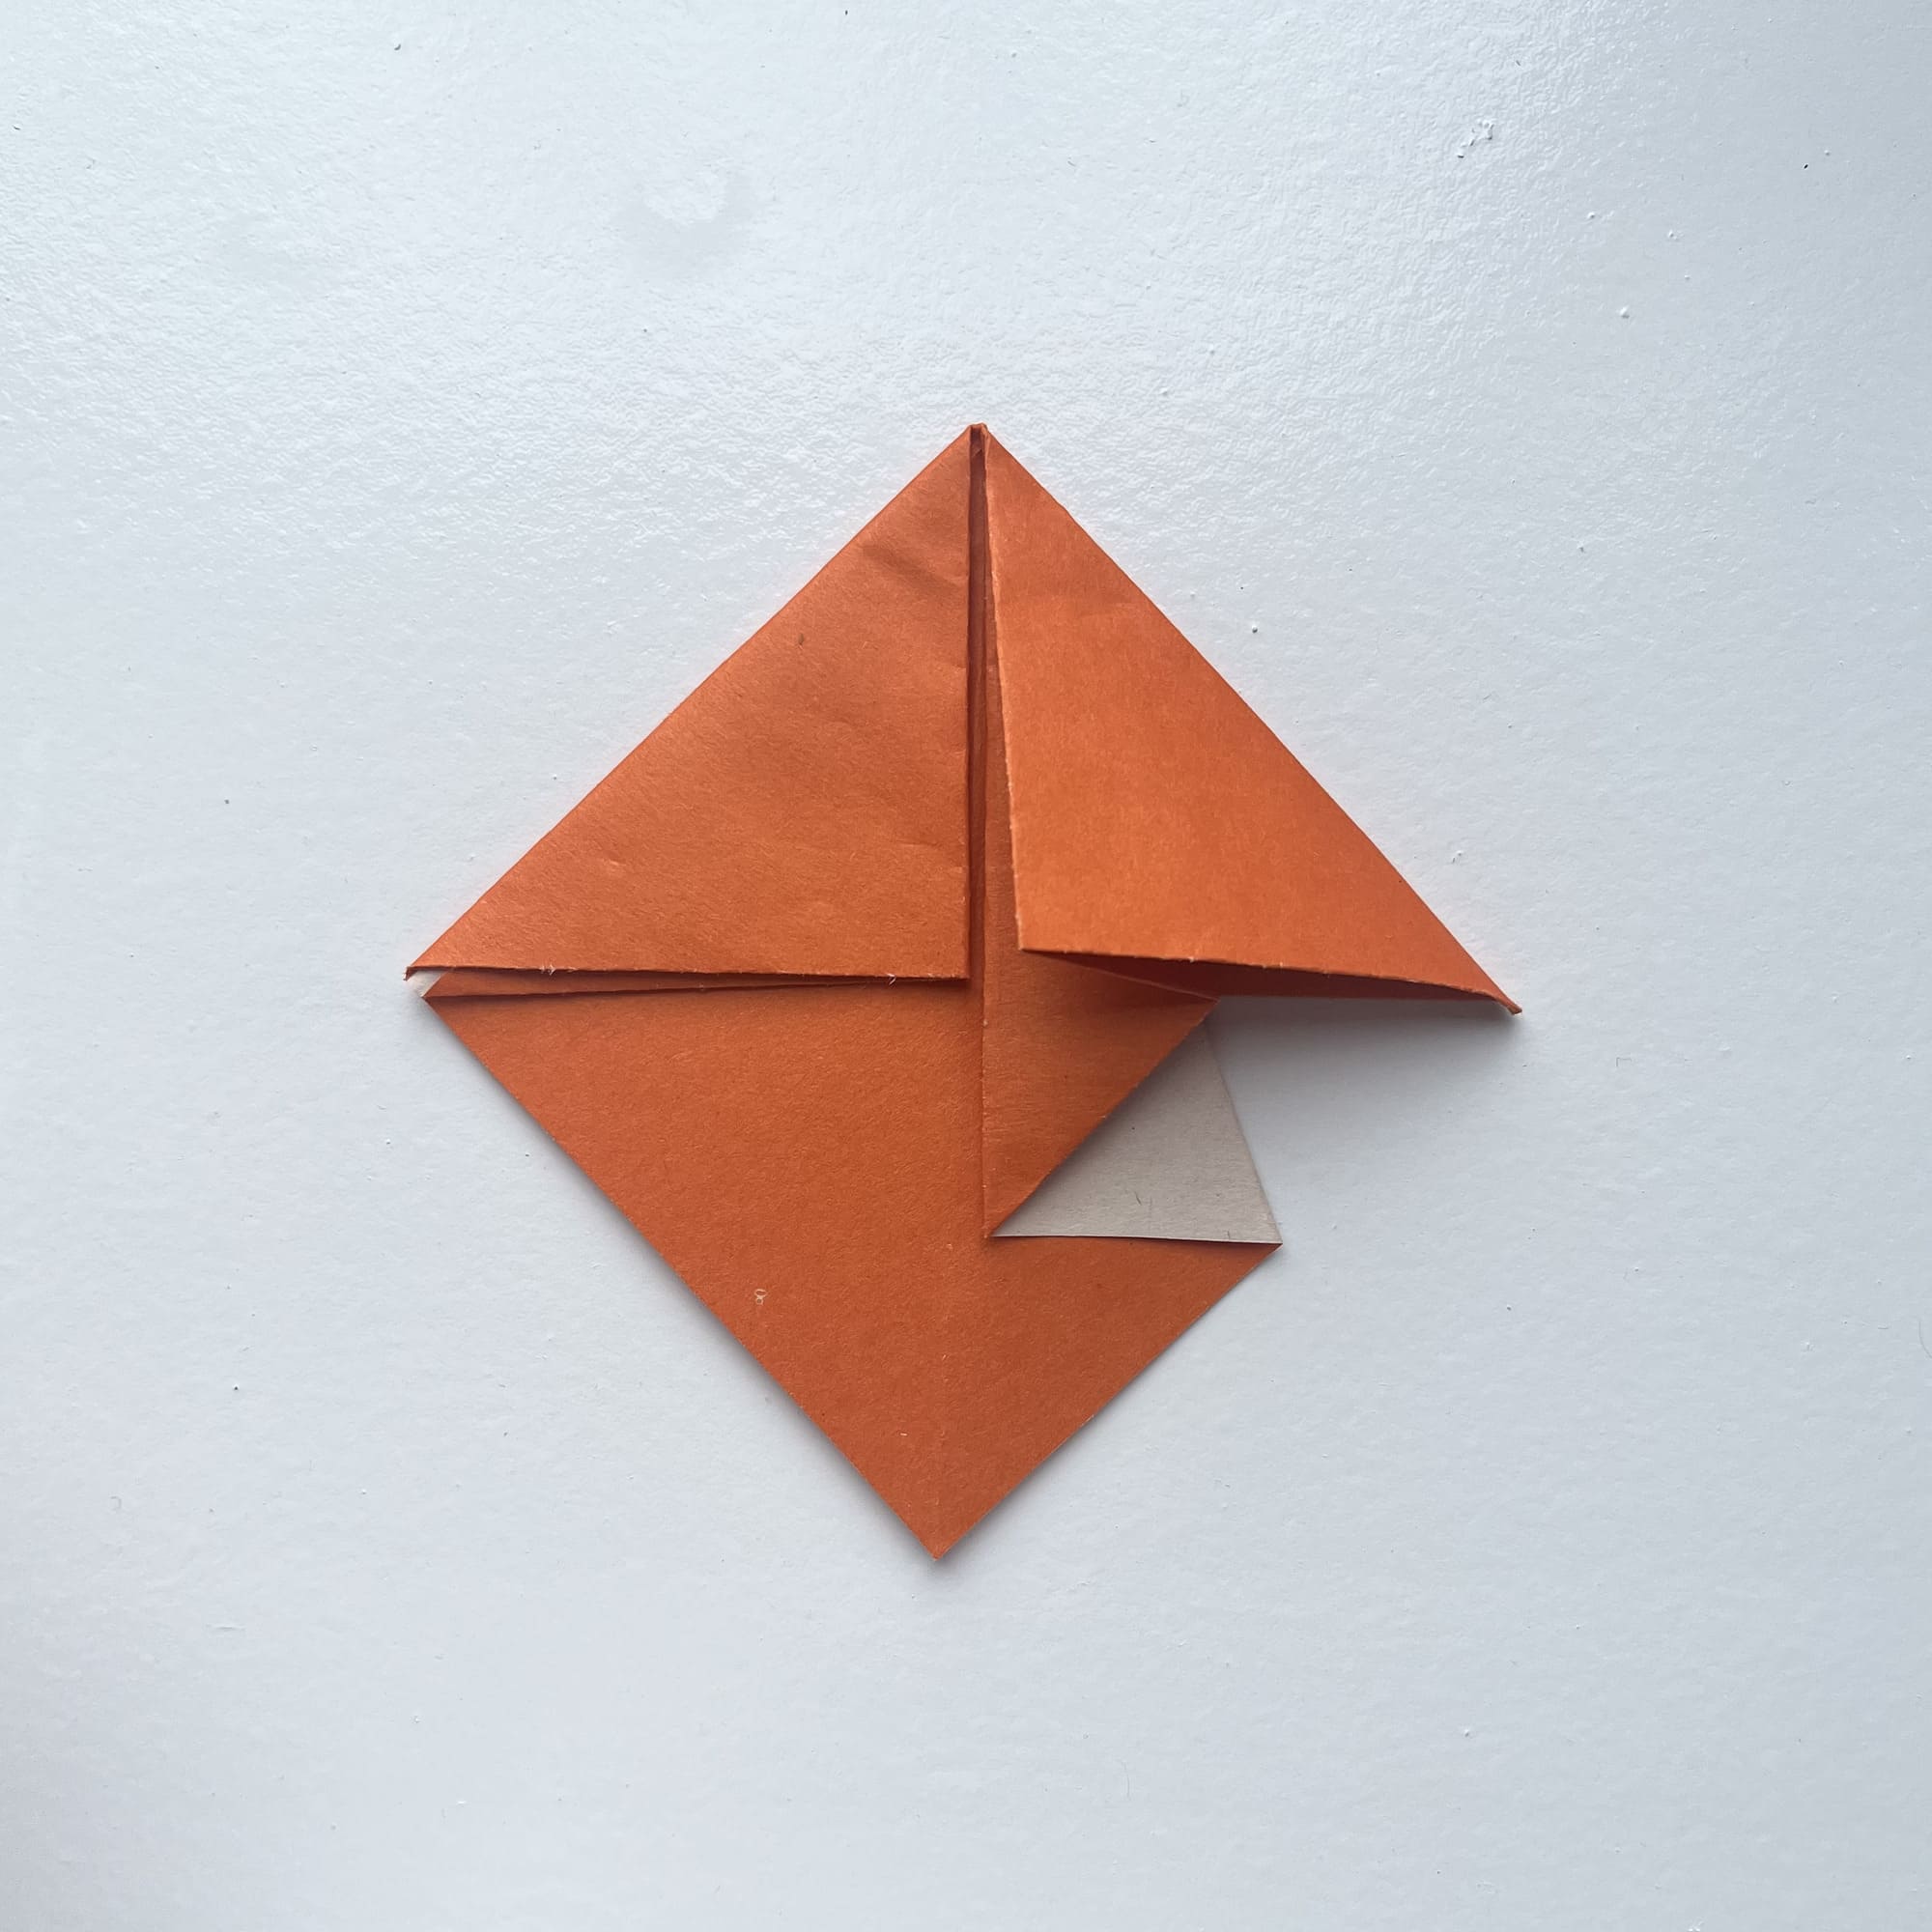
Have you already guessed what will be our next step? That’s right, you need to repeat steps on the opposite side so that the figure becomes symmetrical.
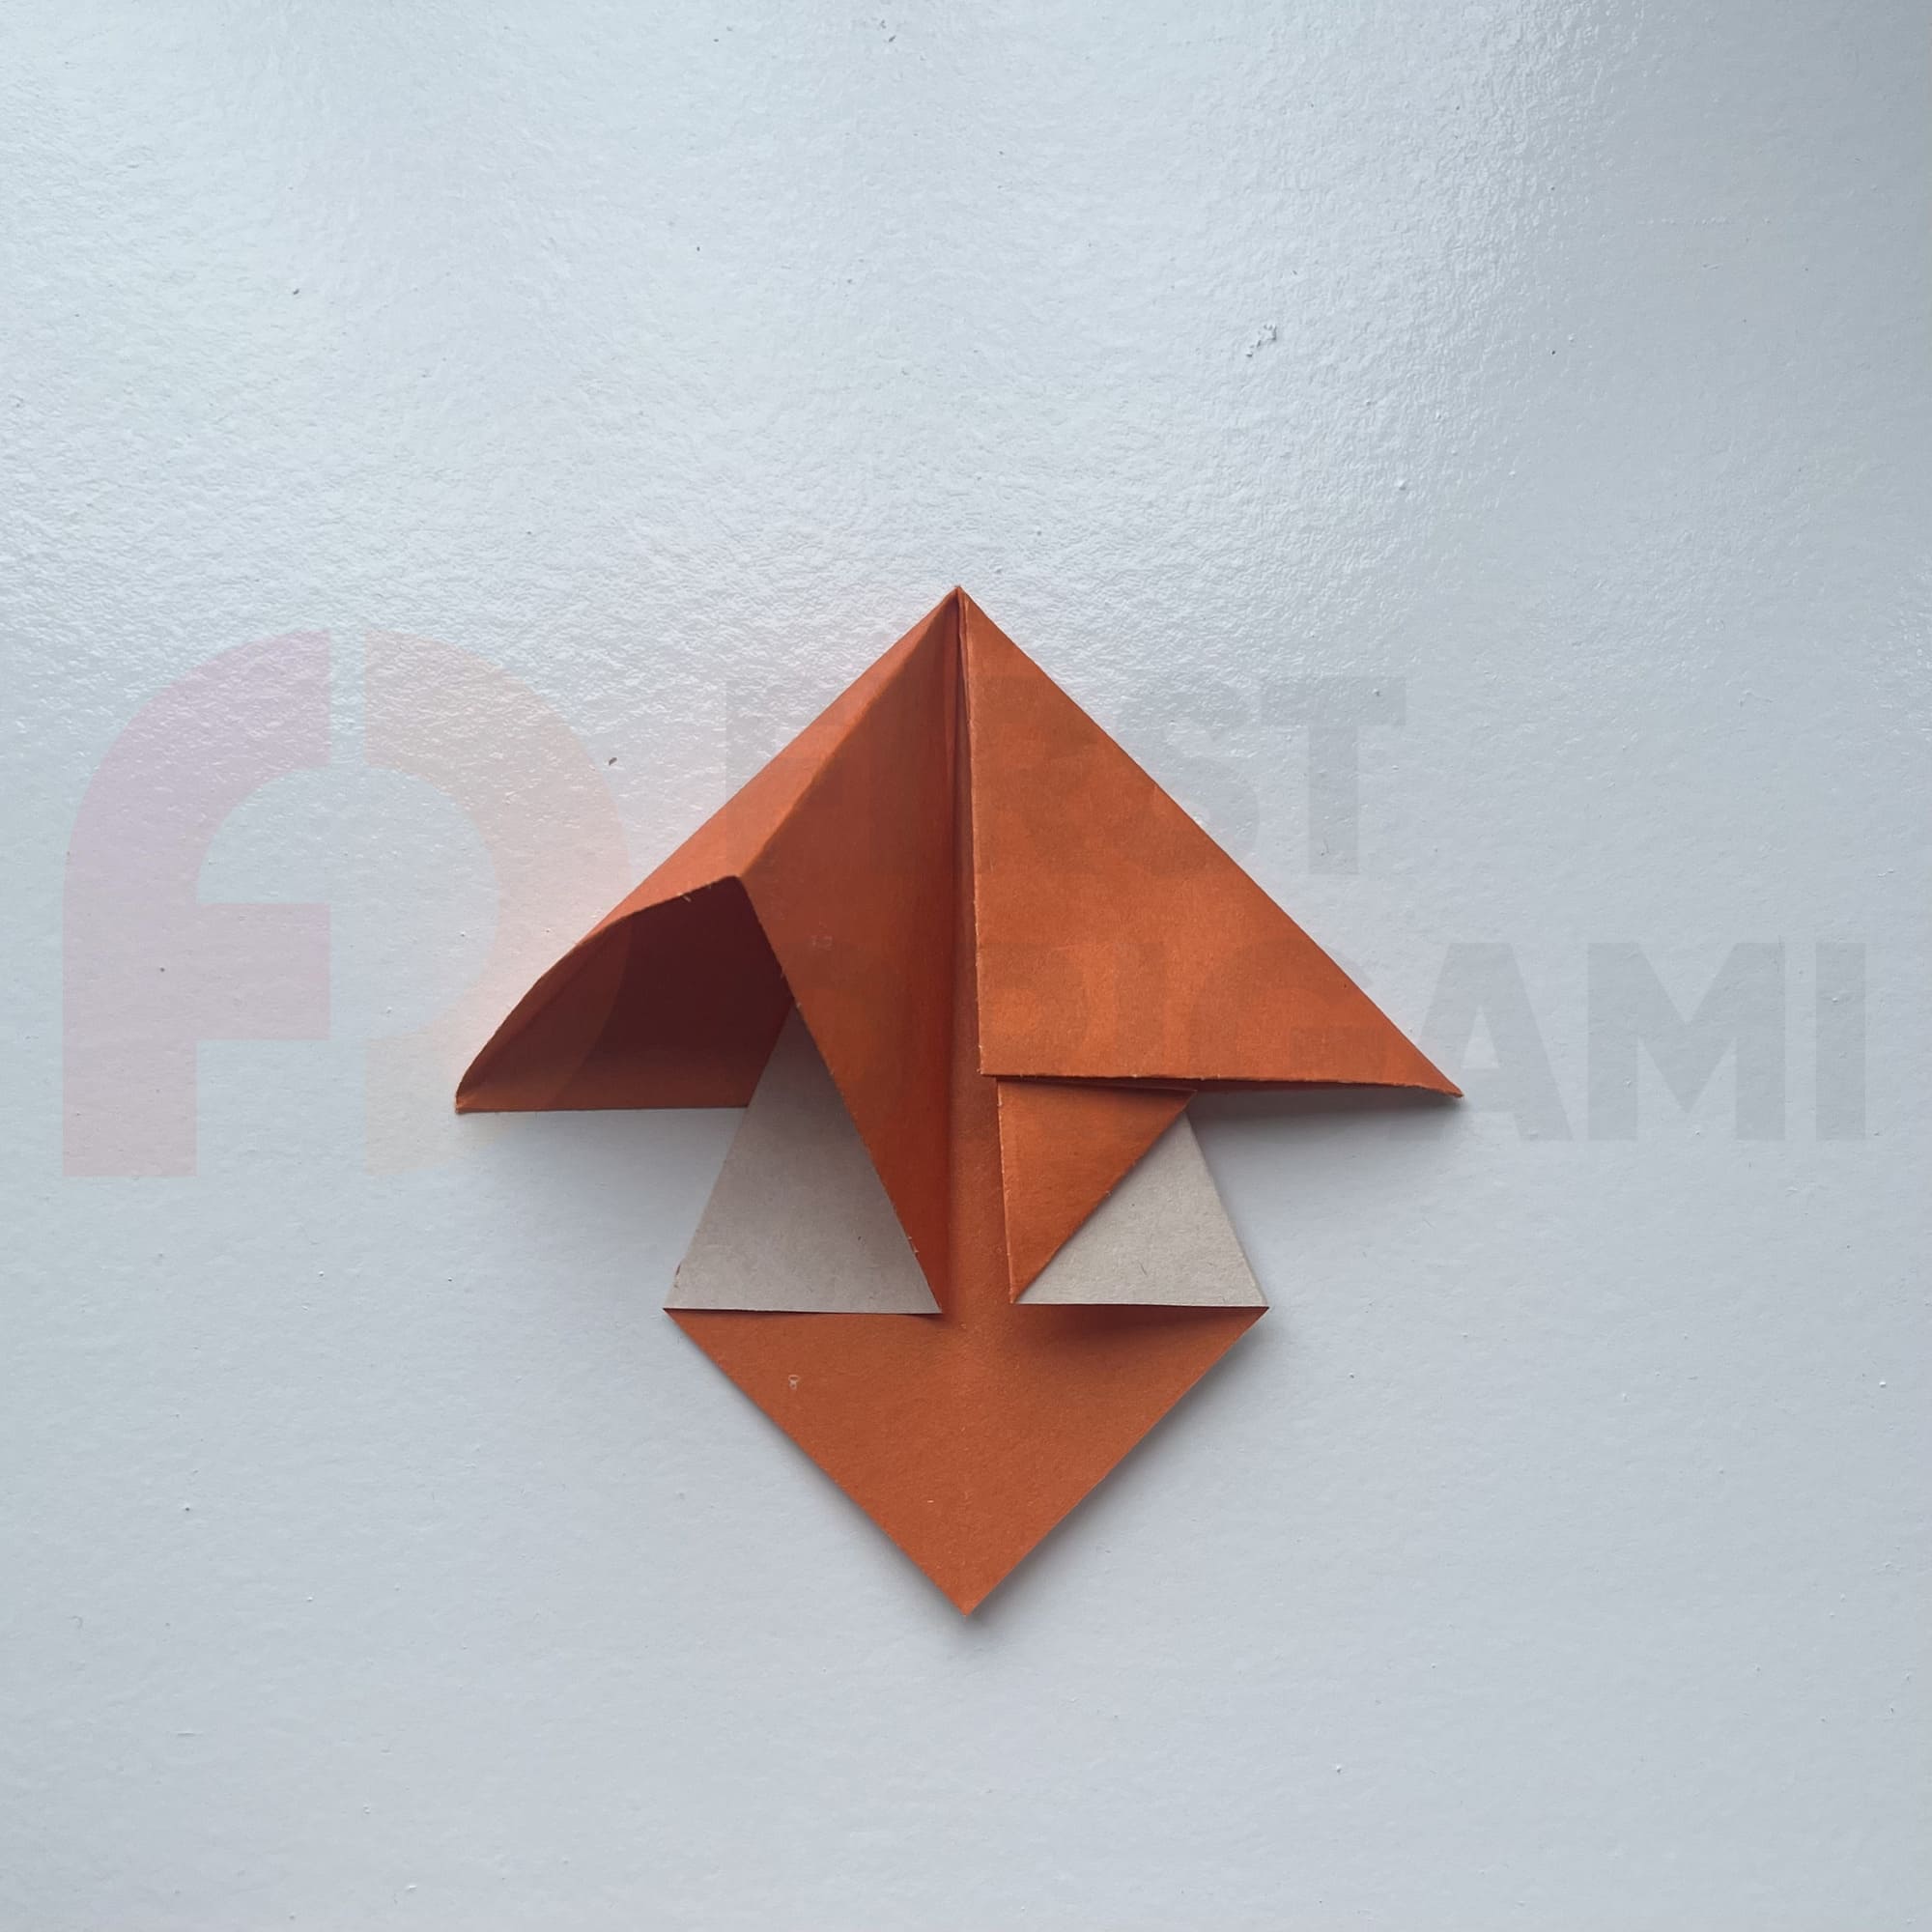

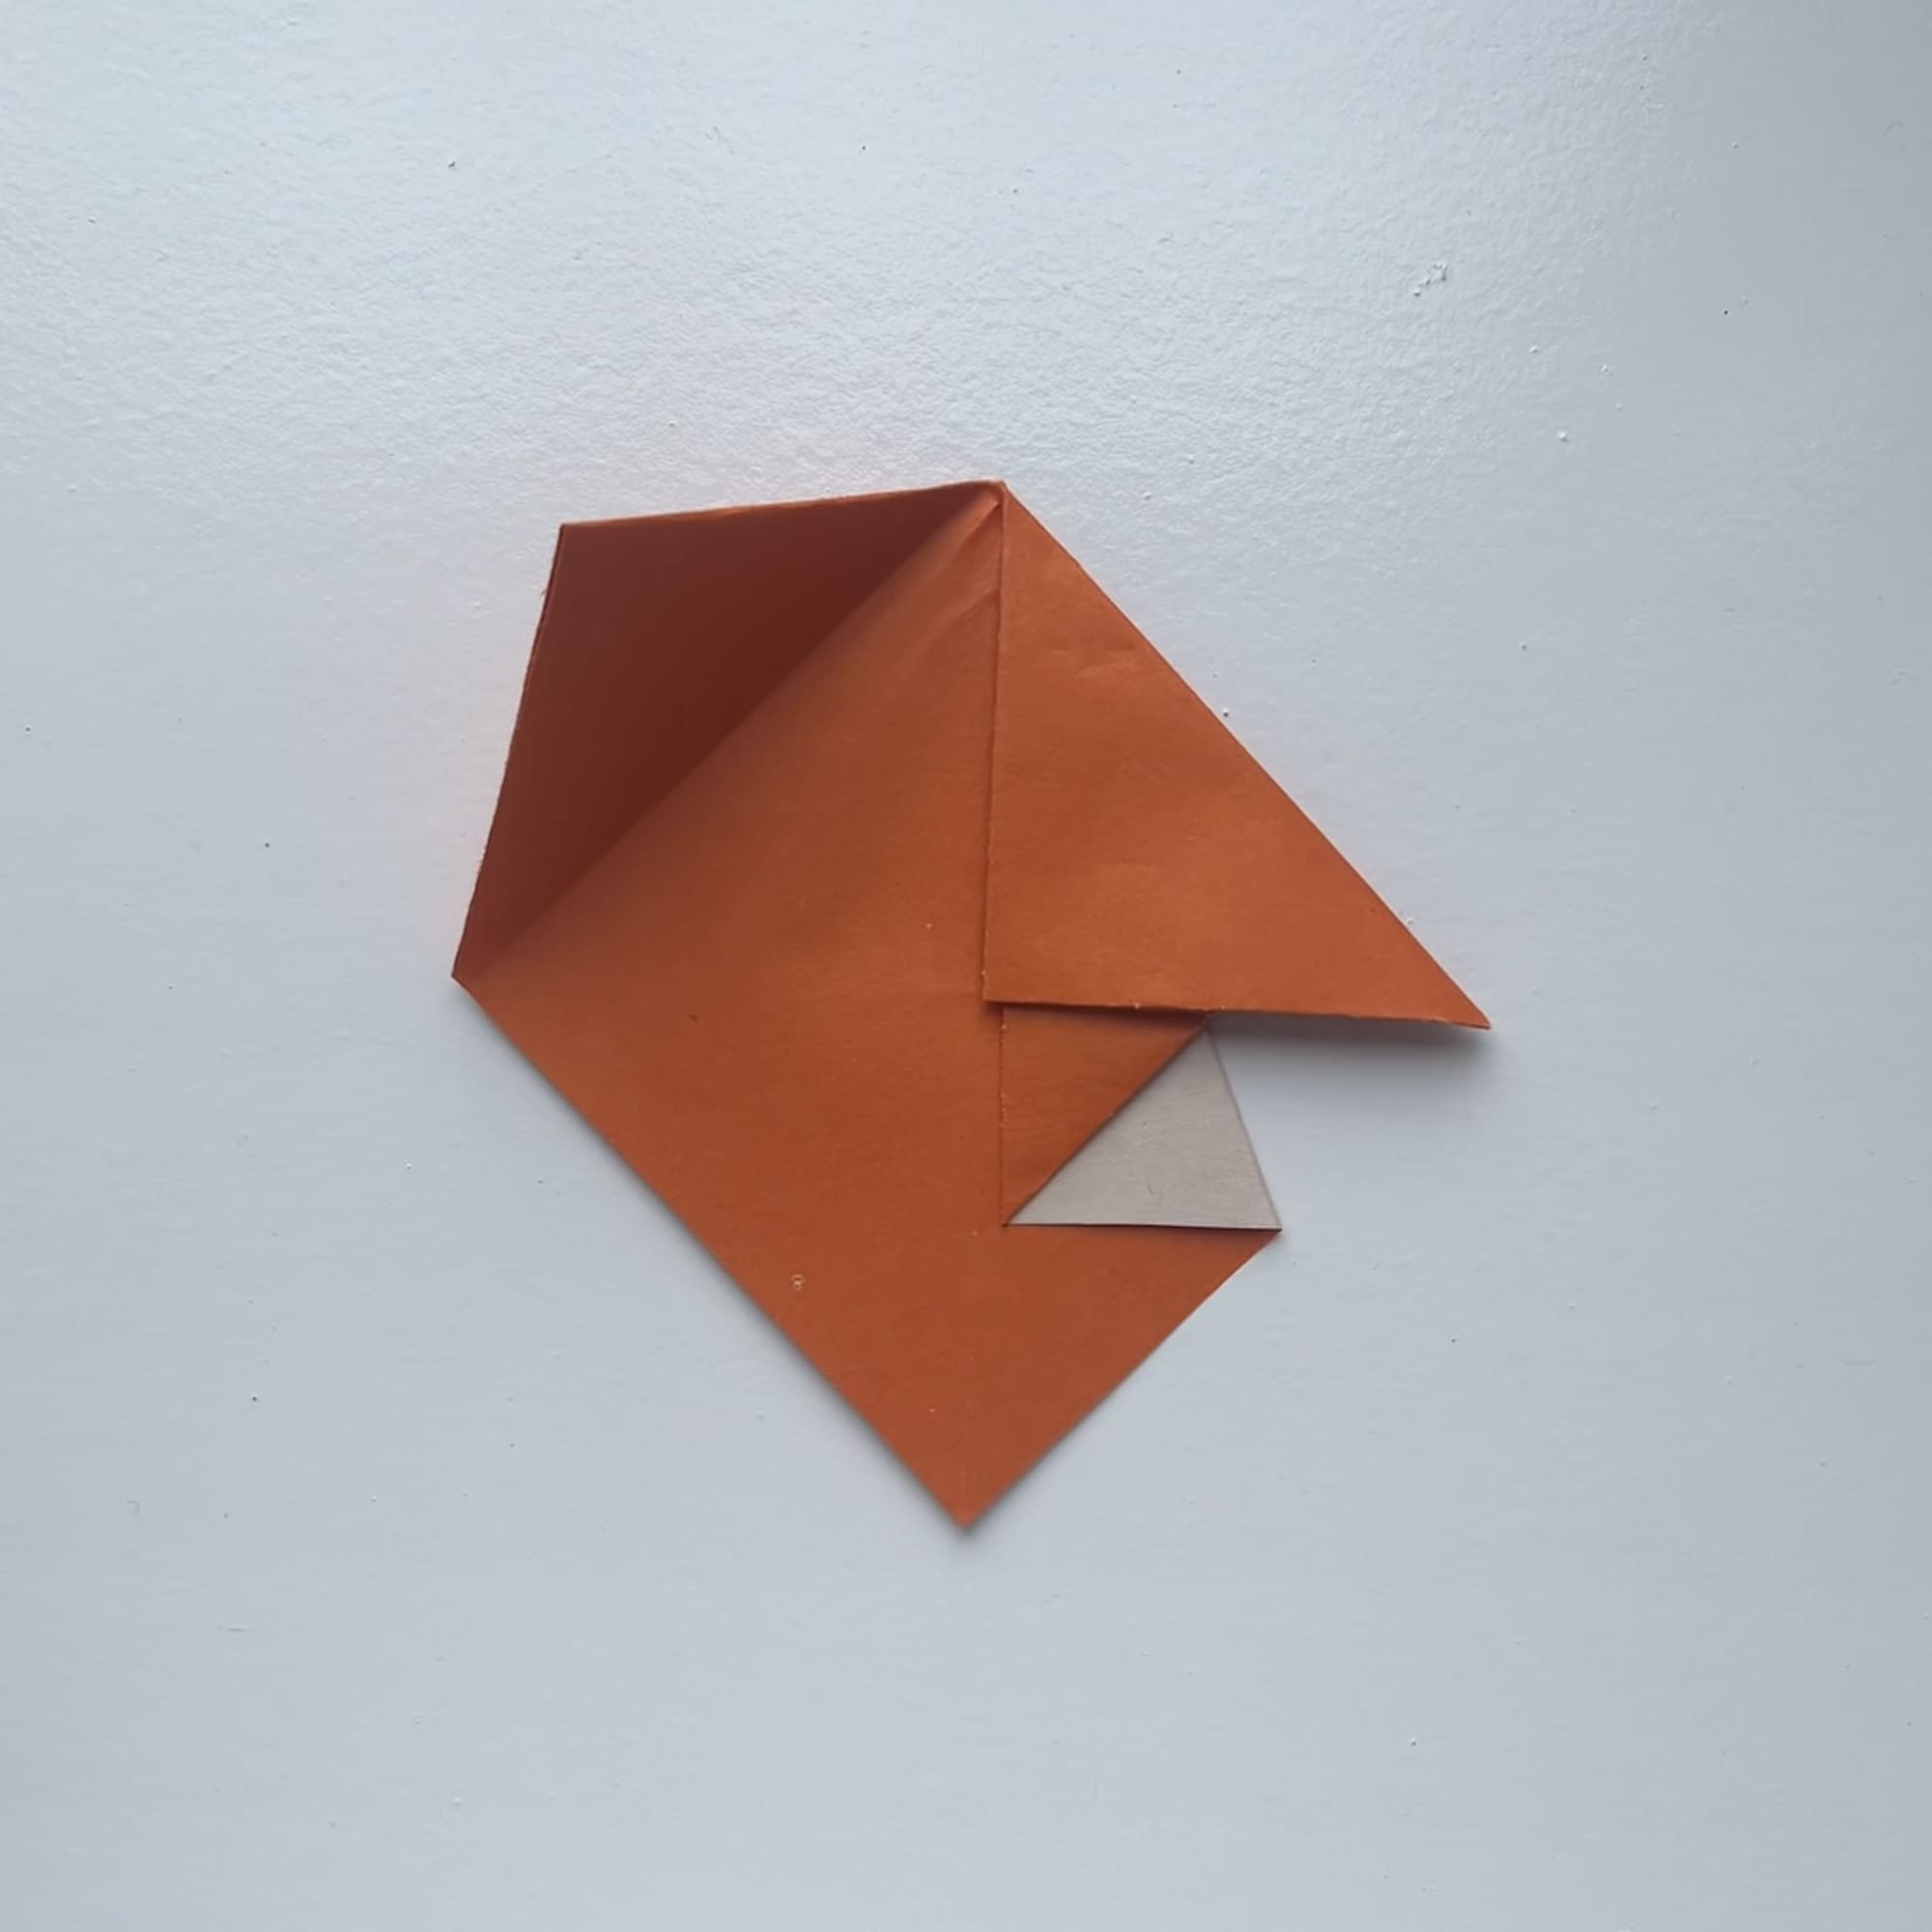
The silhouette of the future mushroom is already looming.
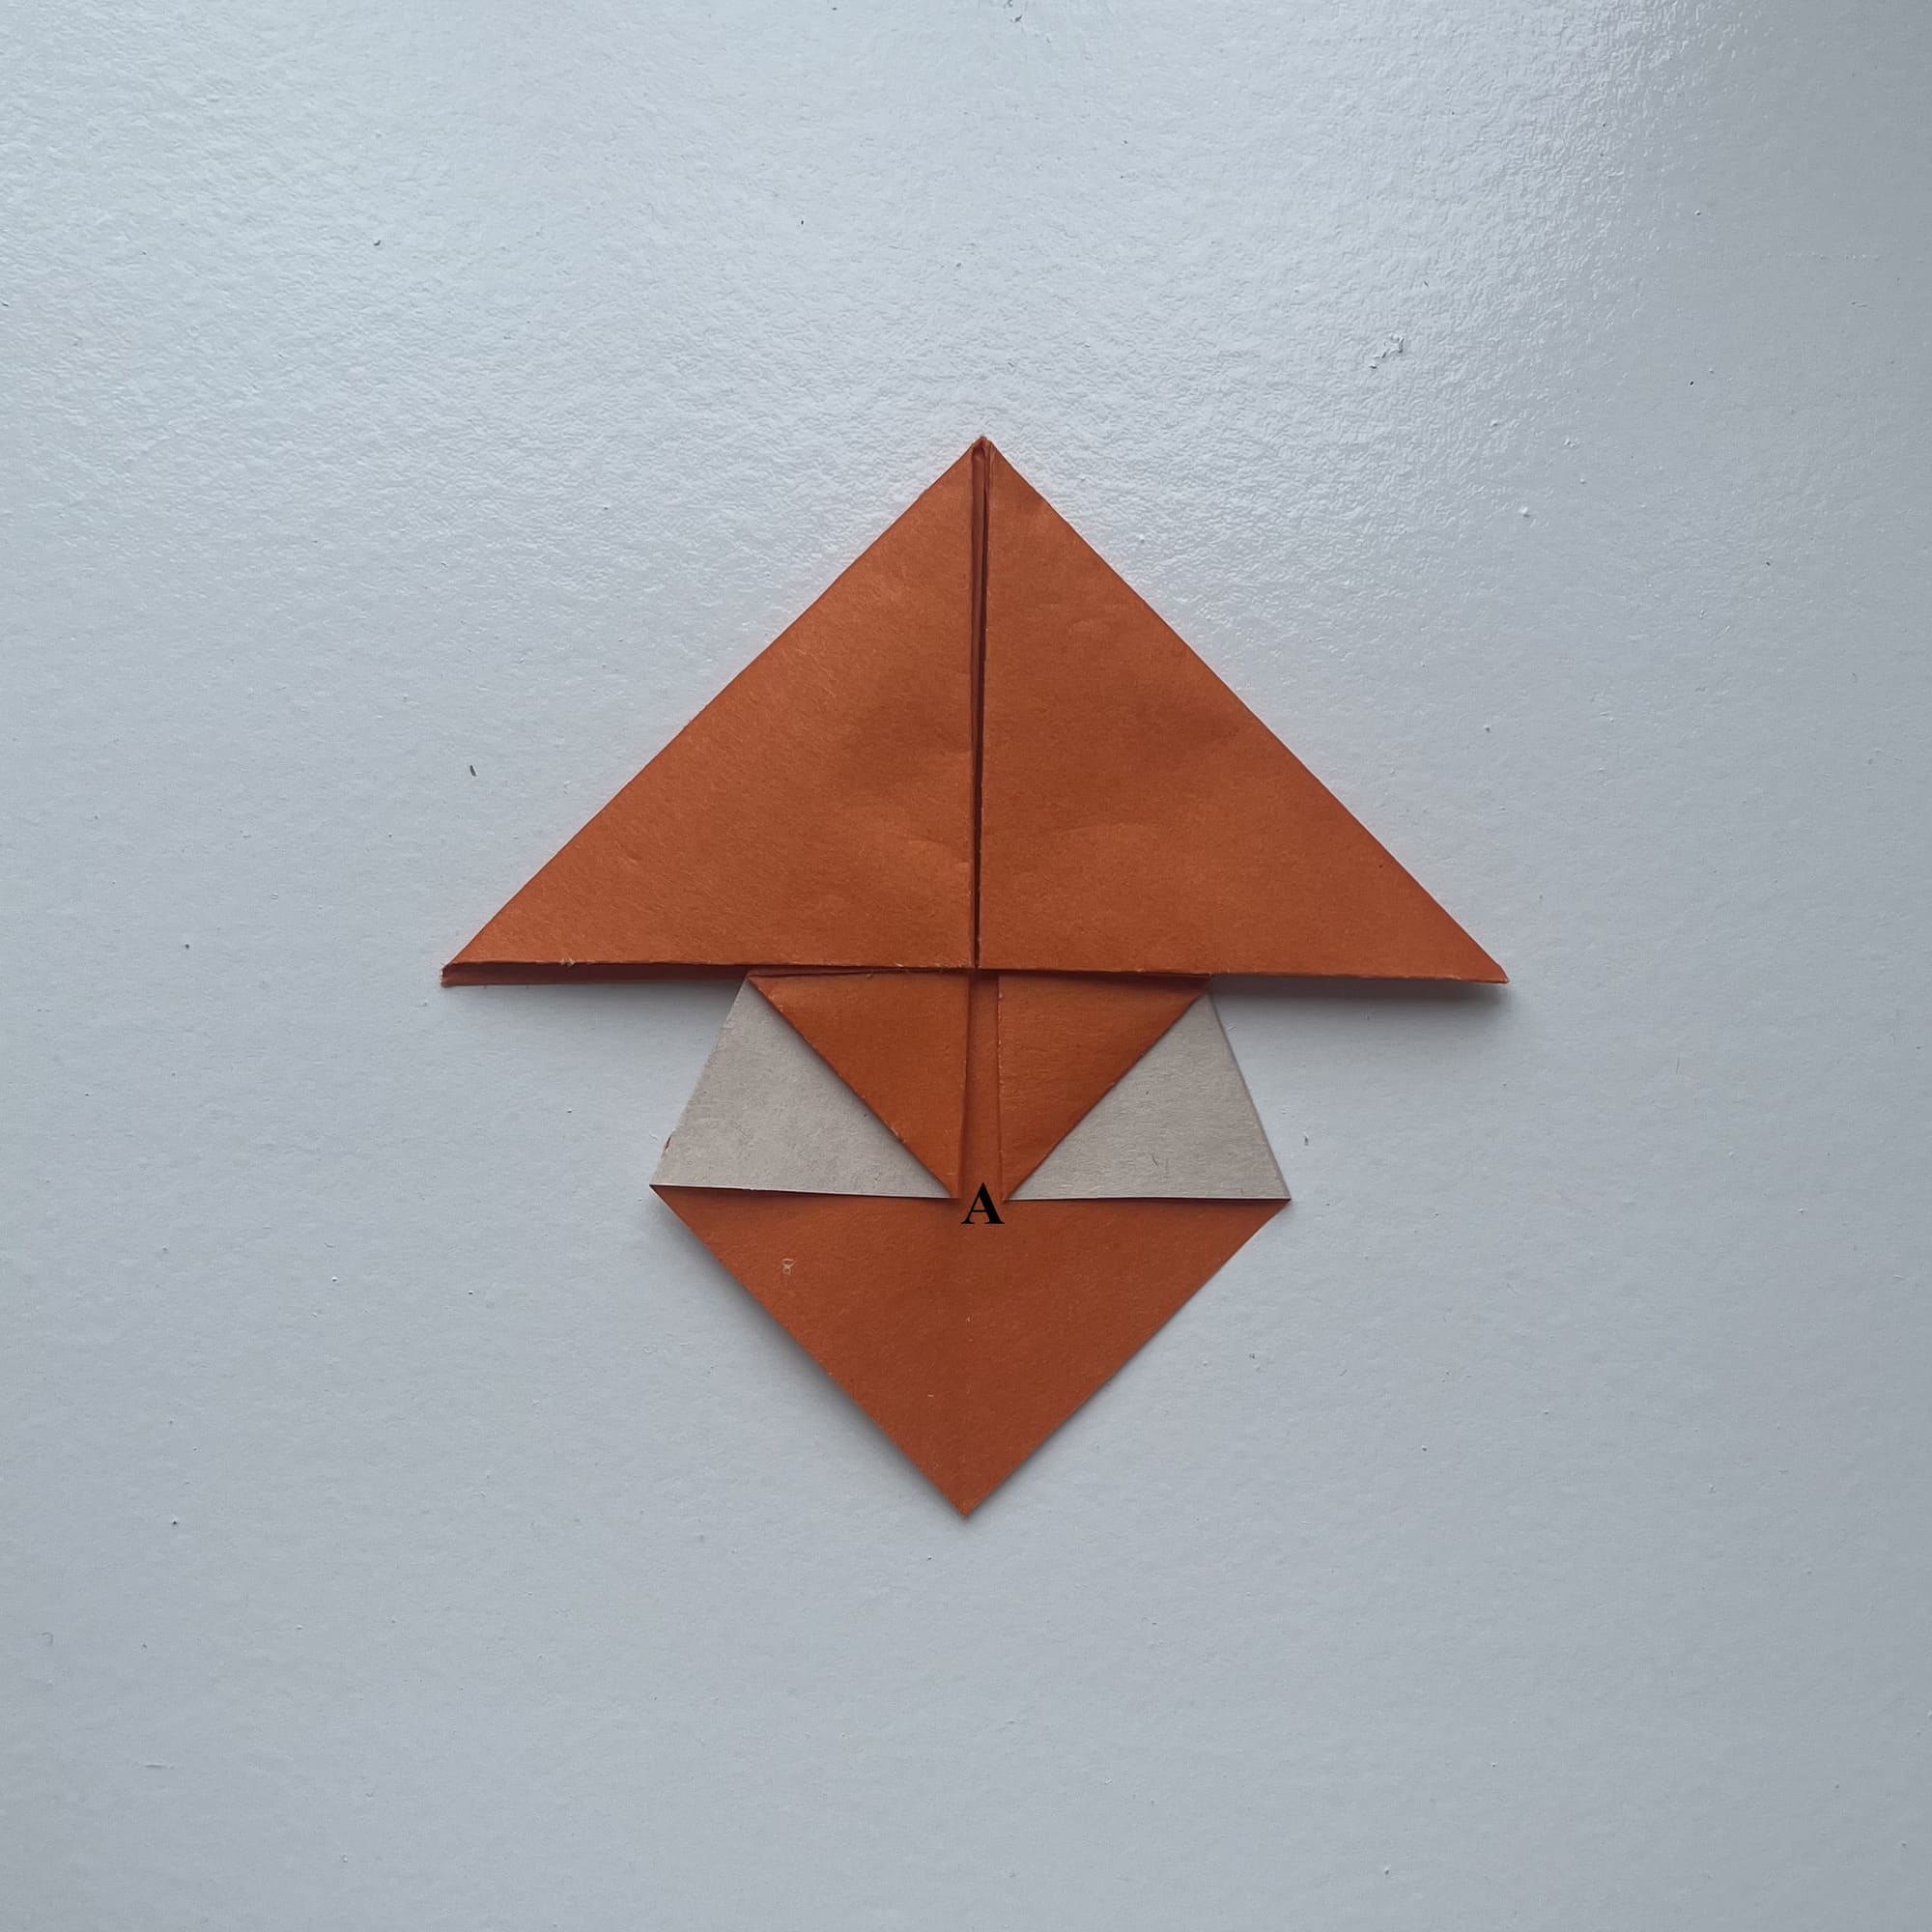
Fold the bottom corner to point A.
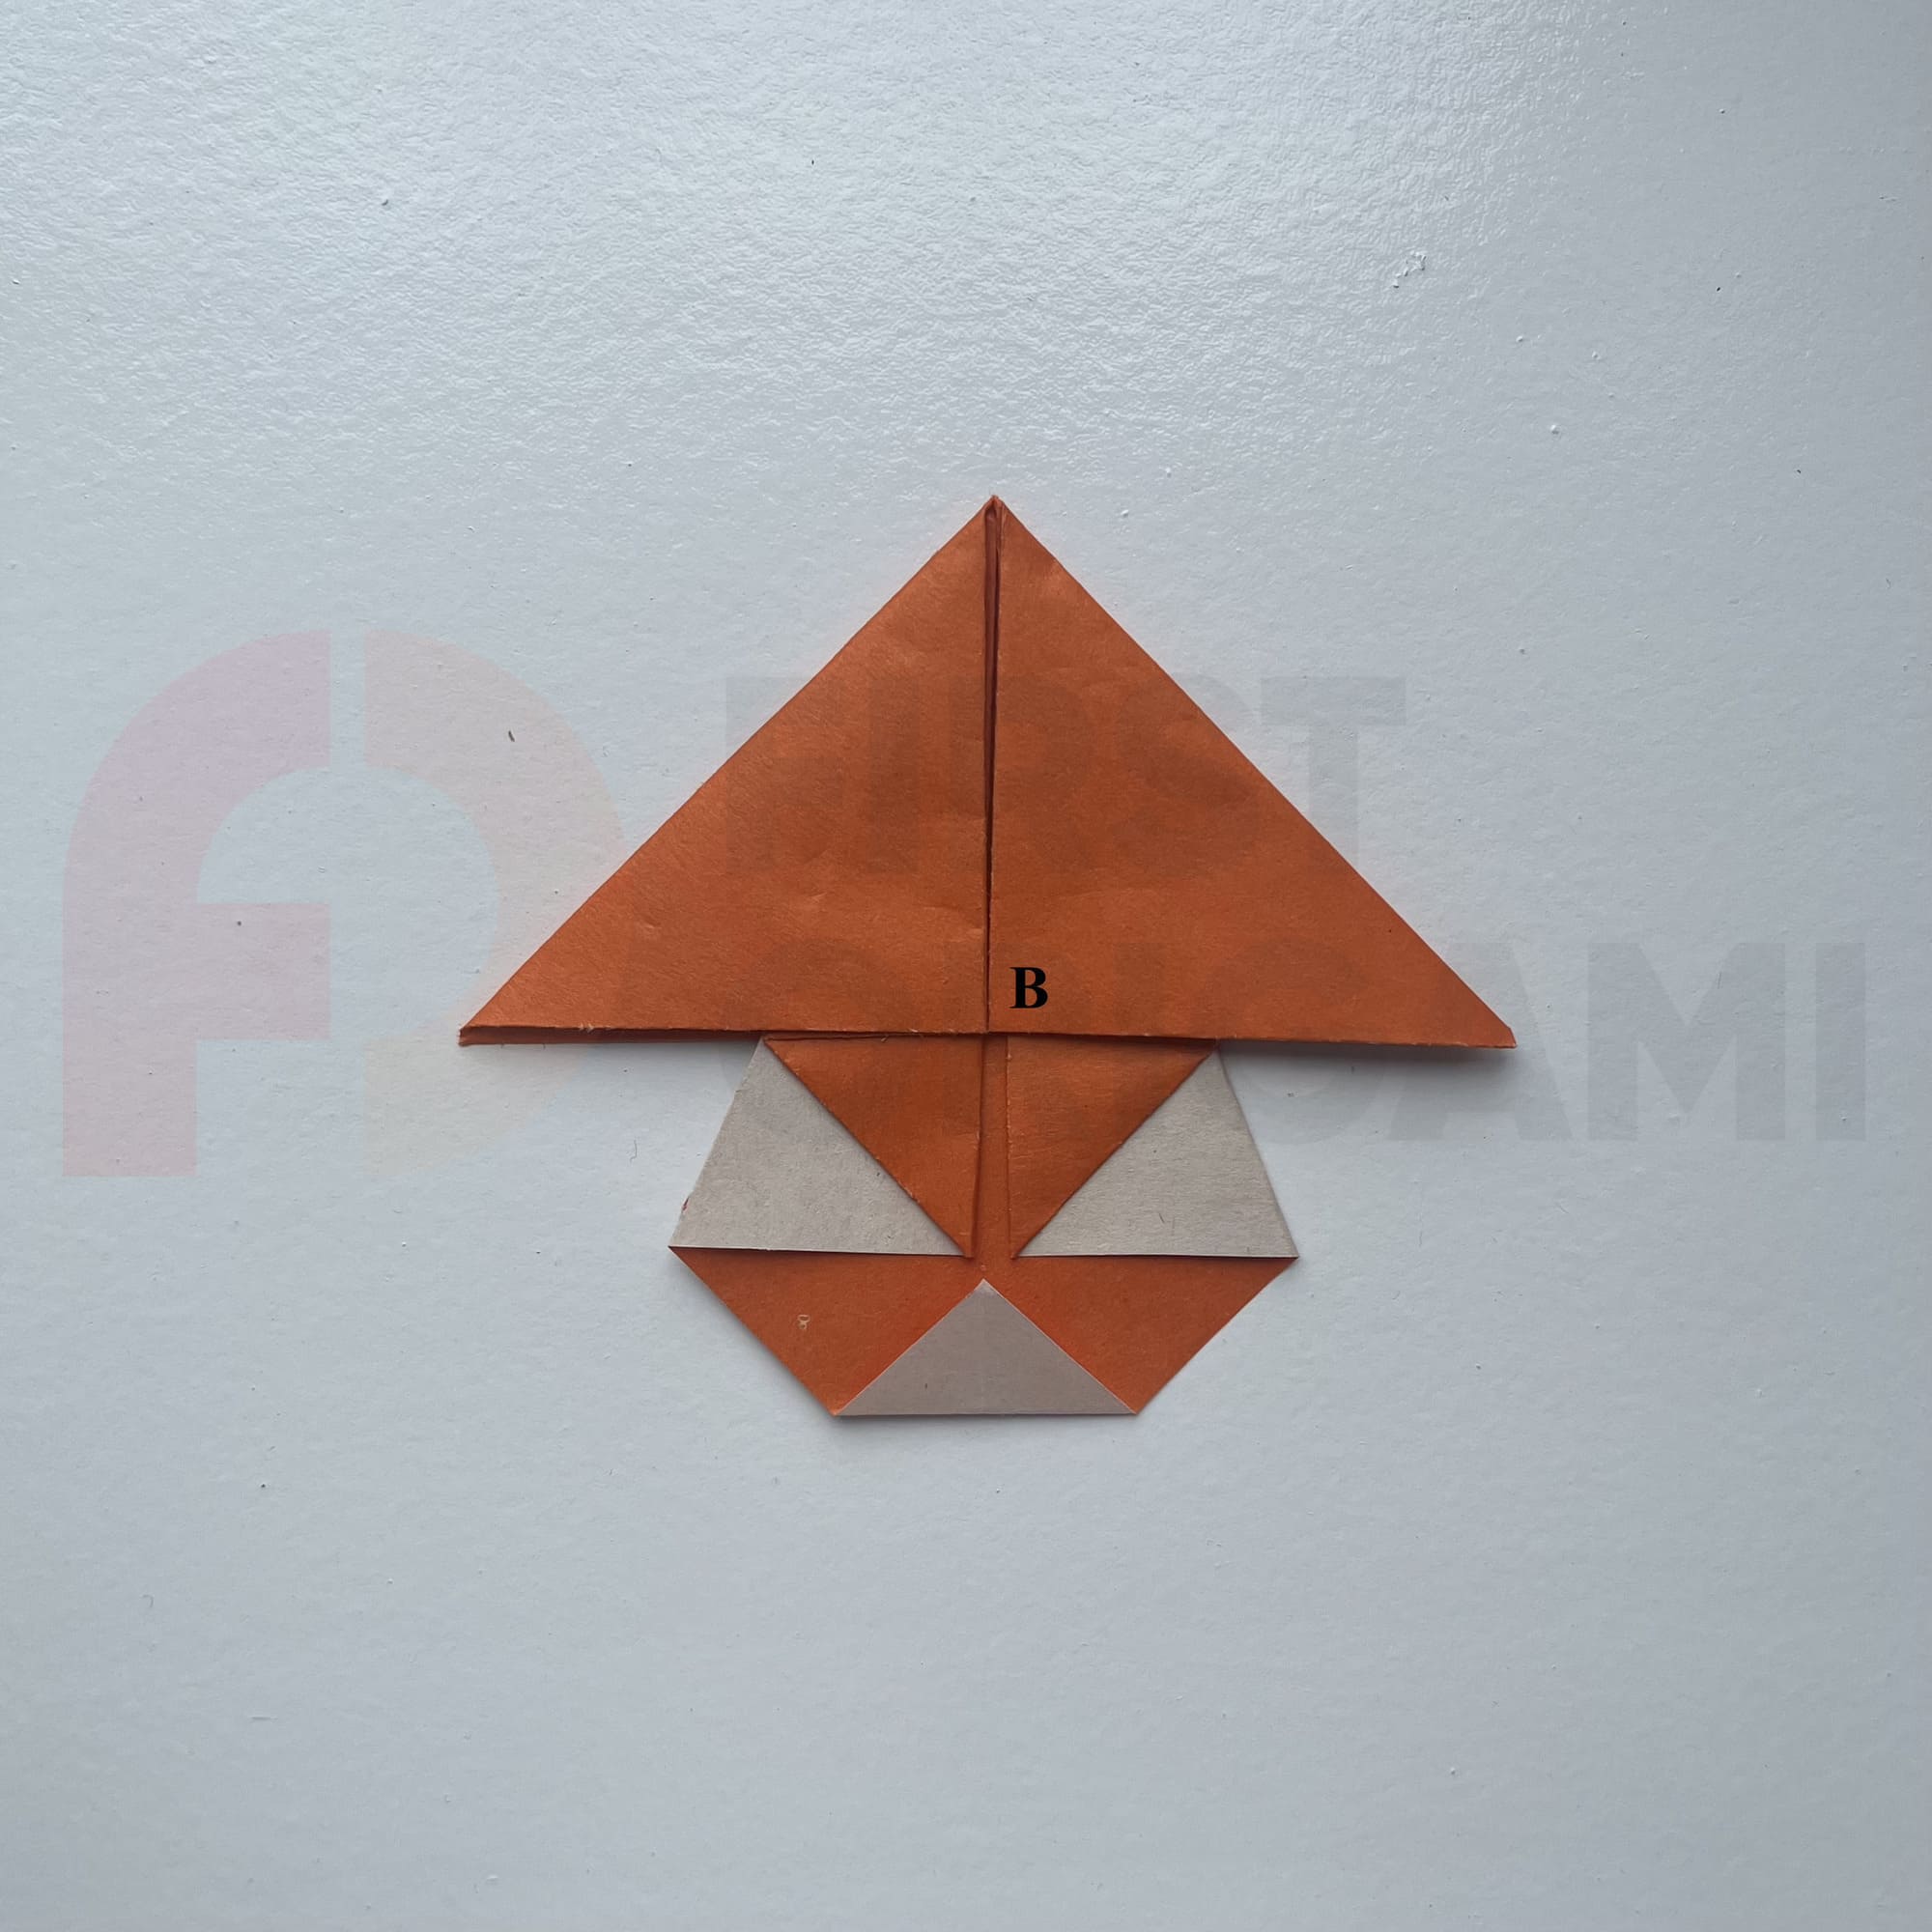
Bend the top corner to point B.
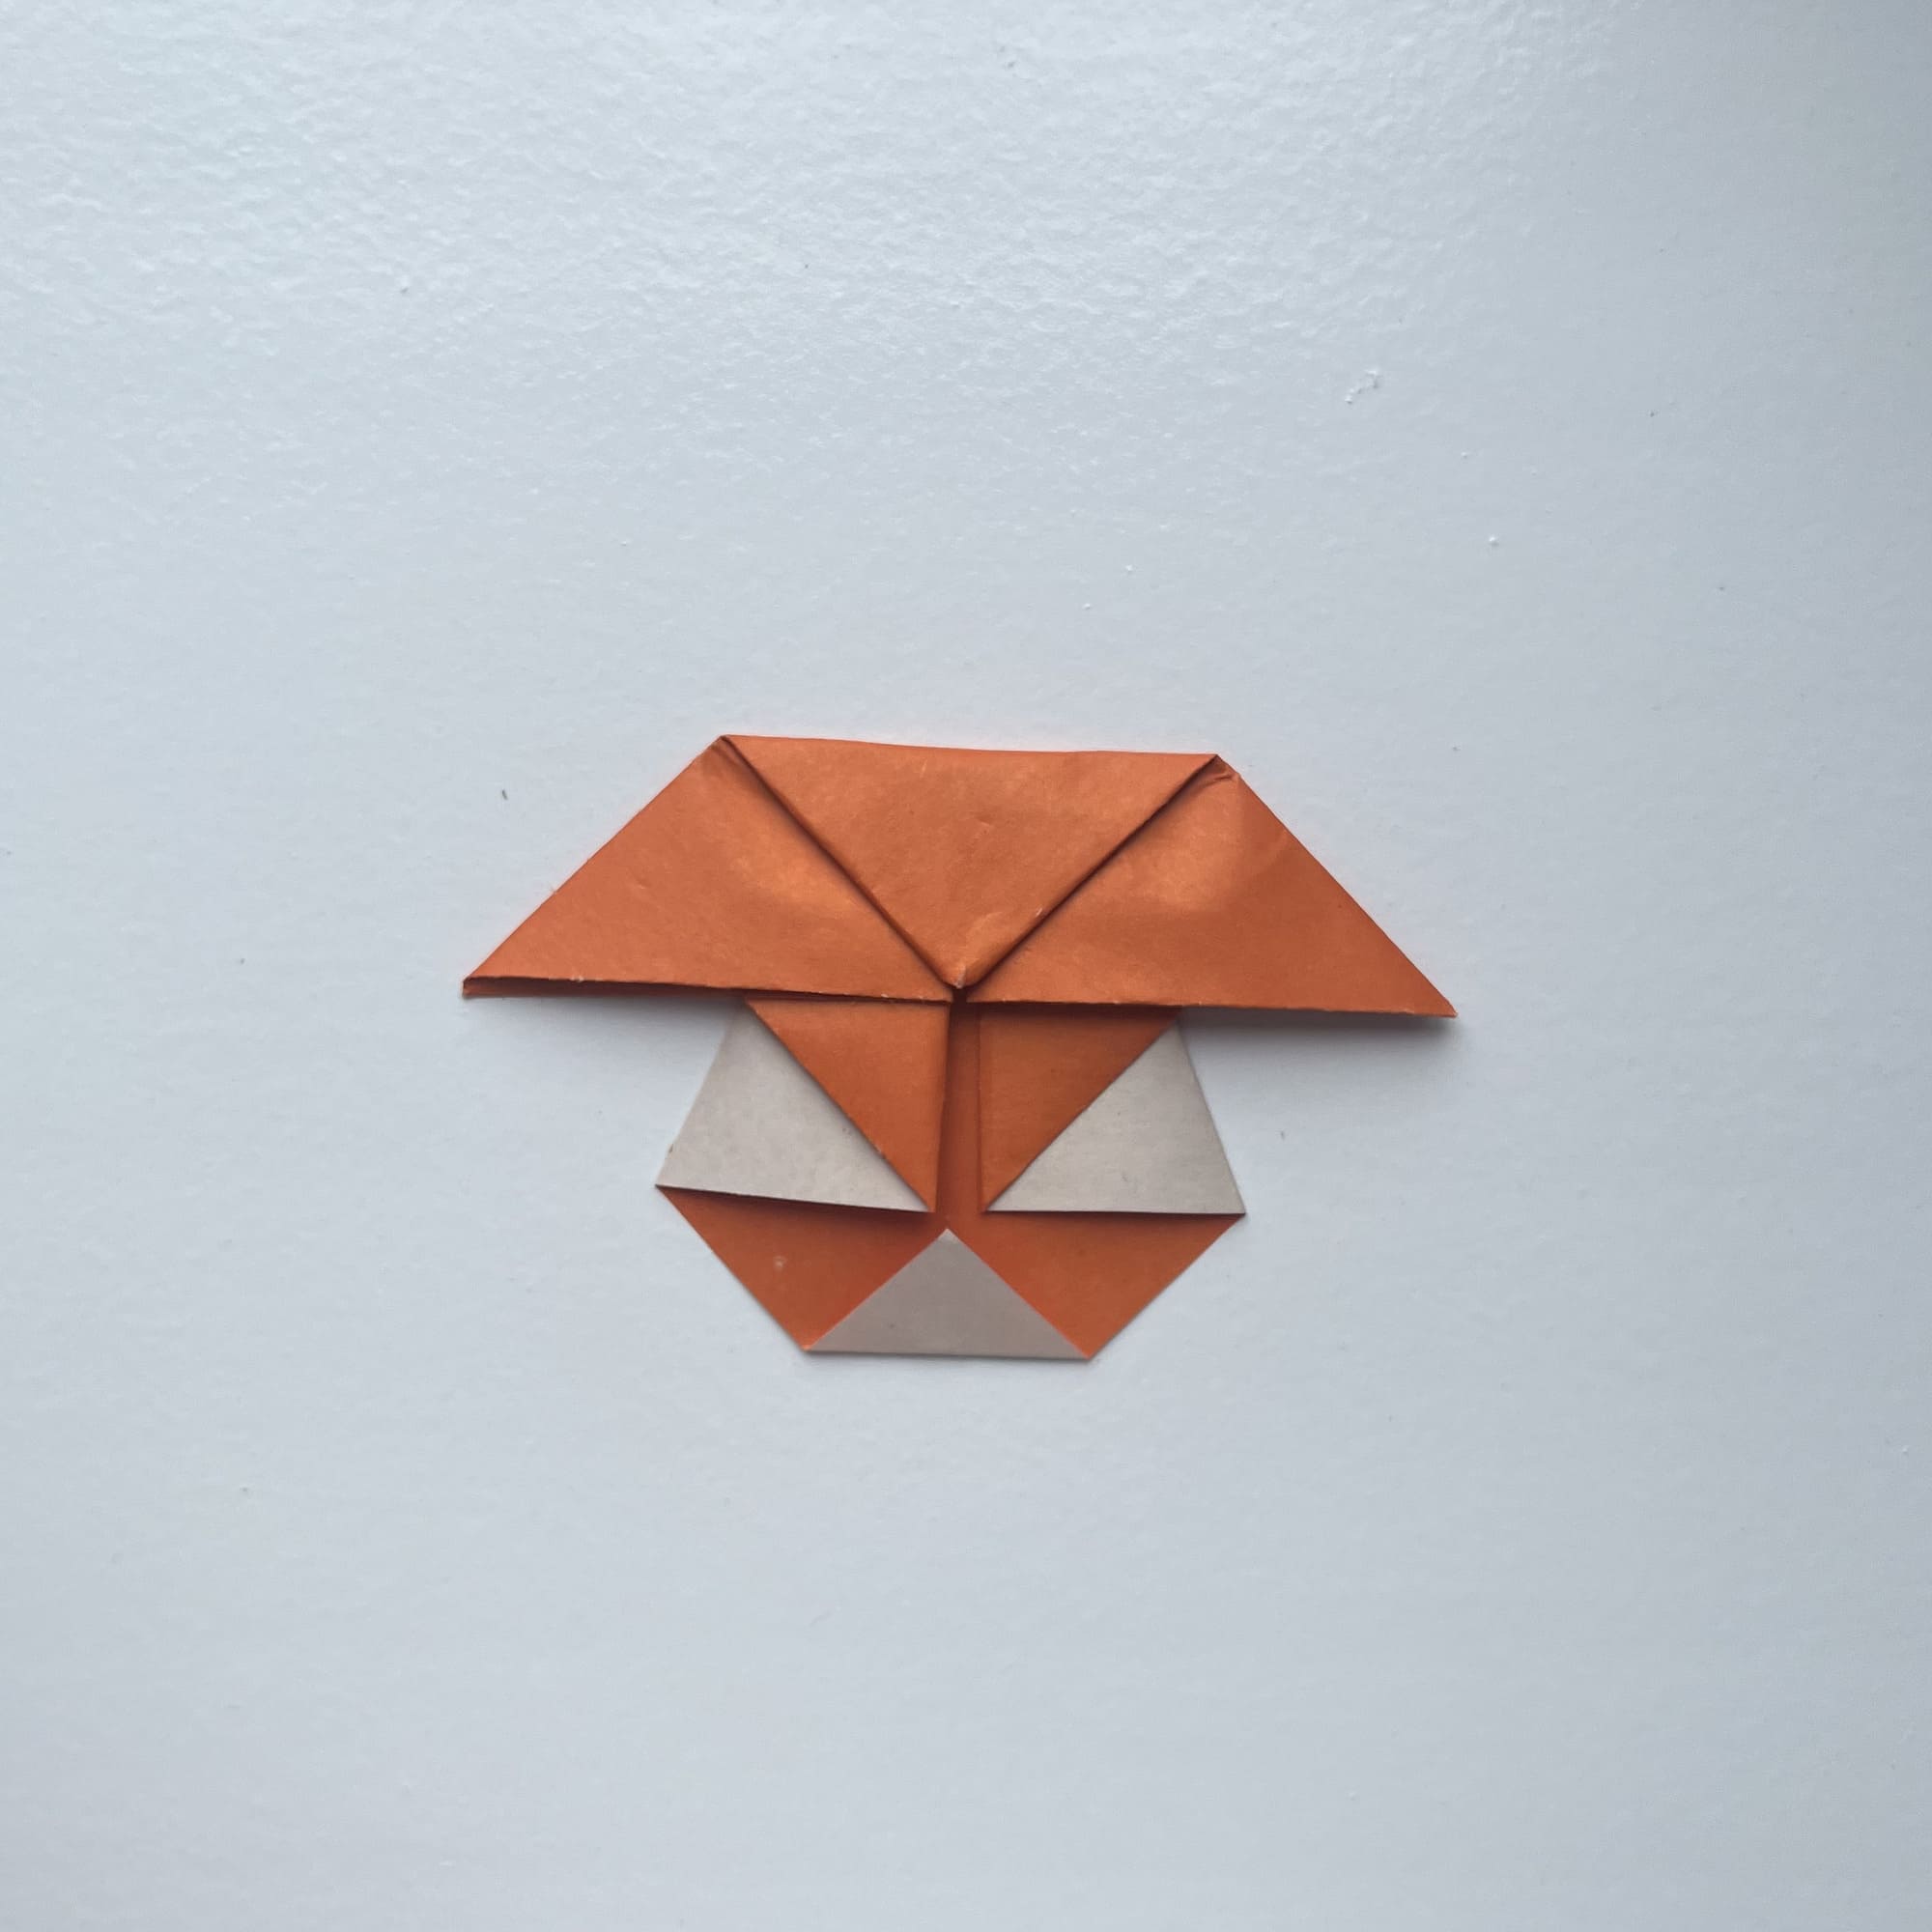
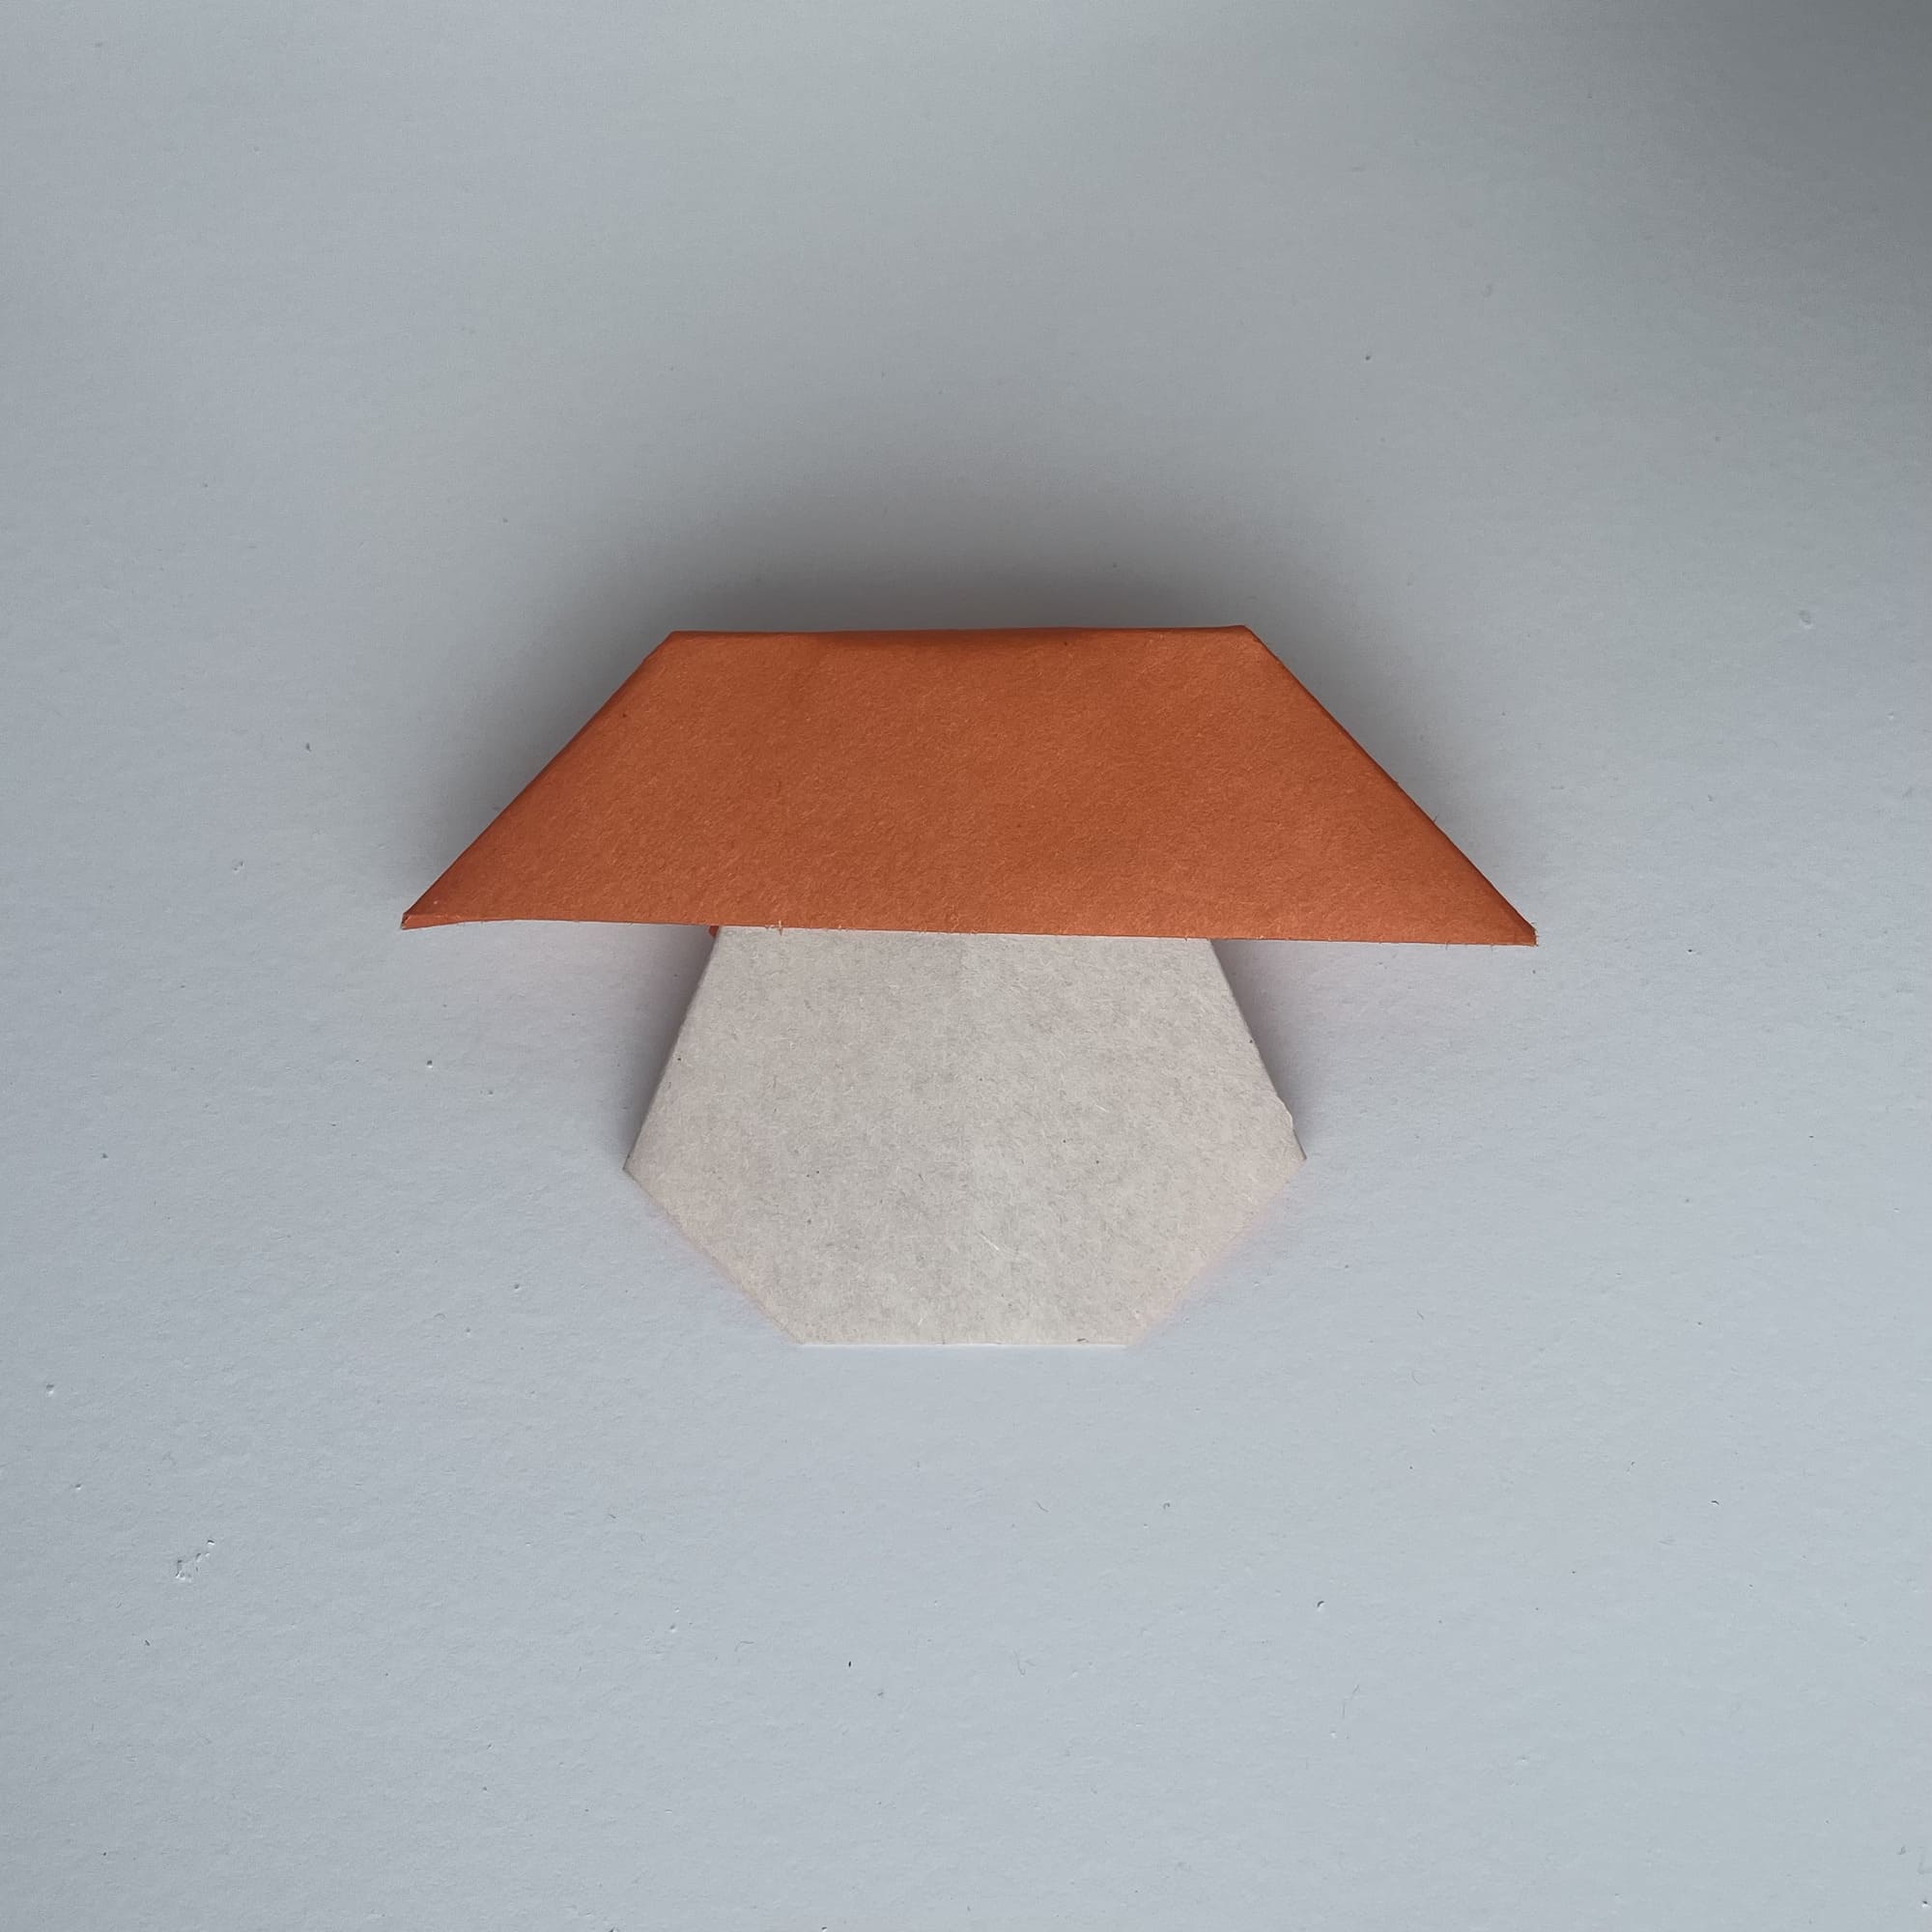
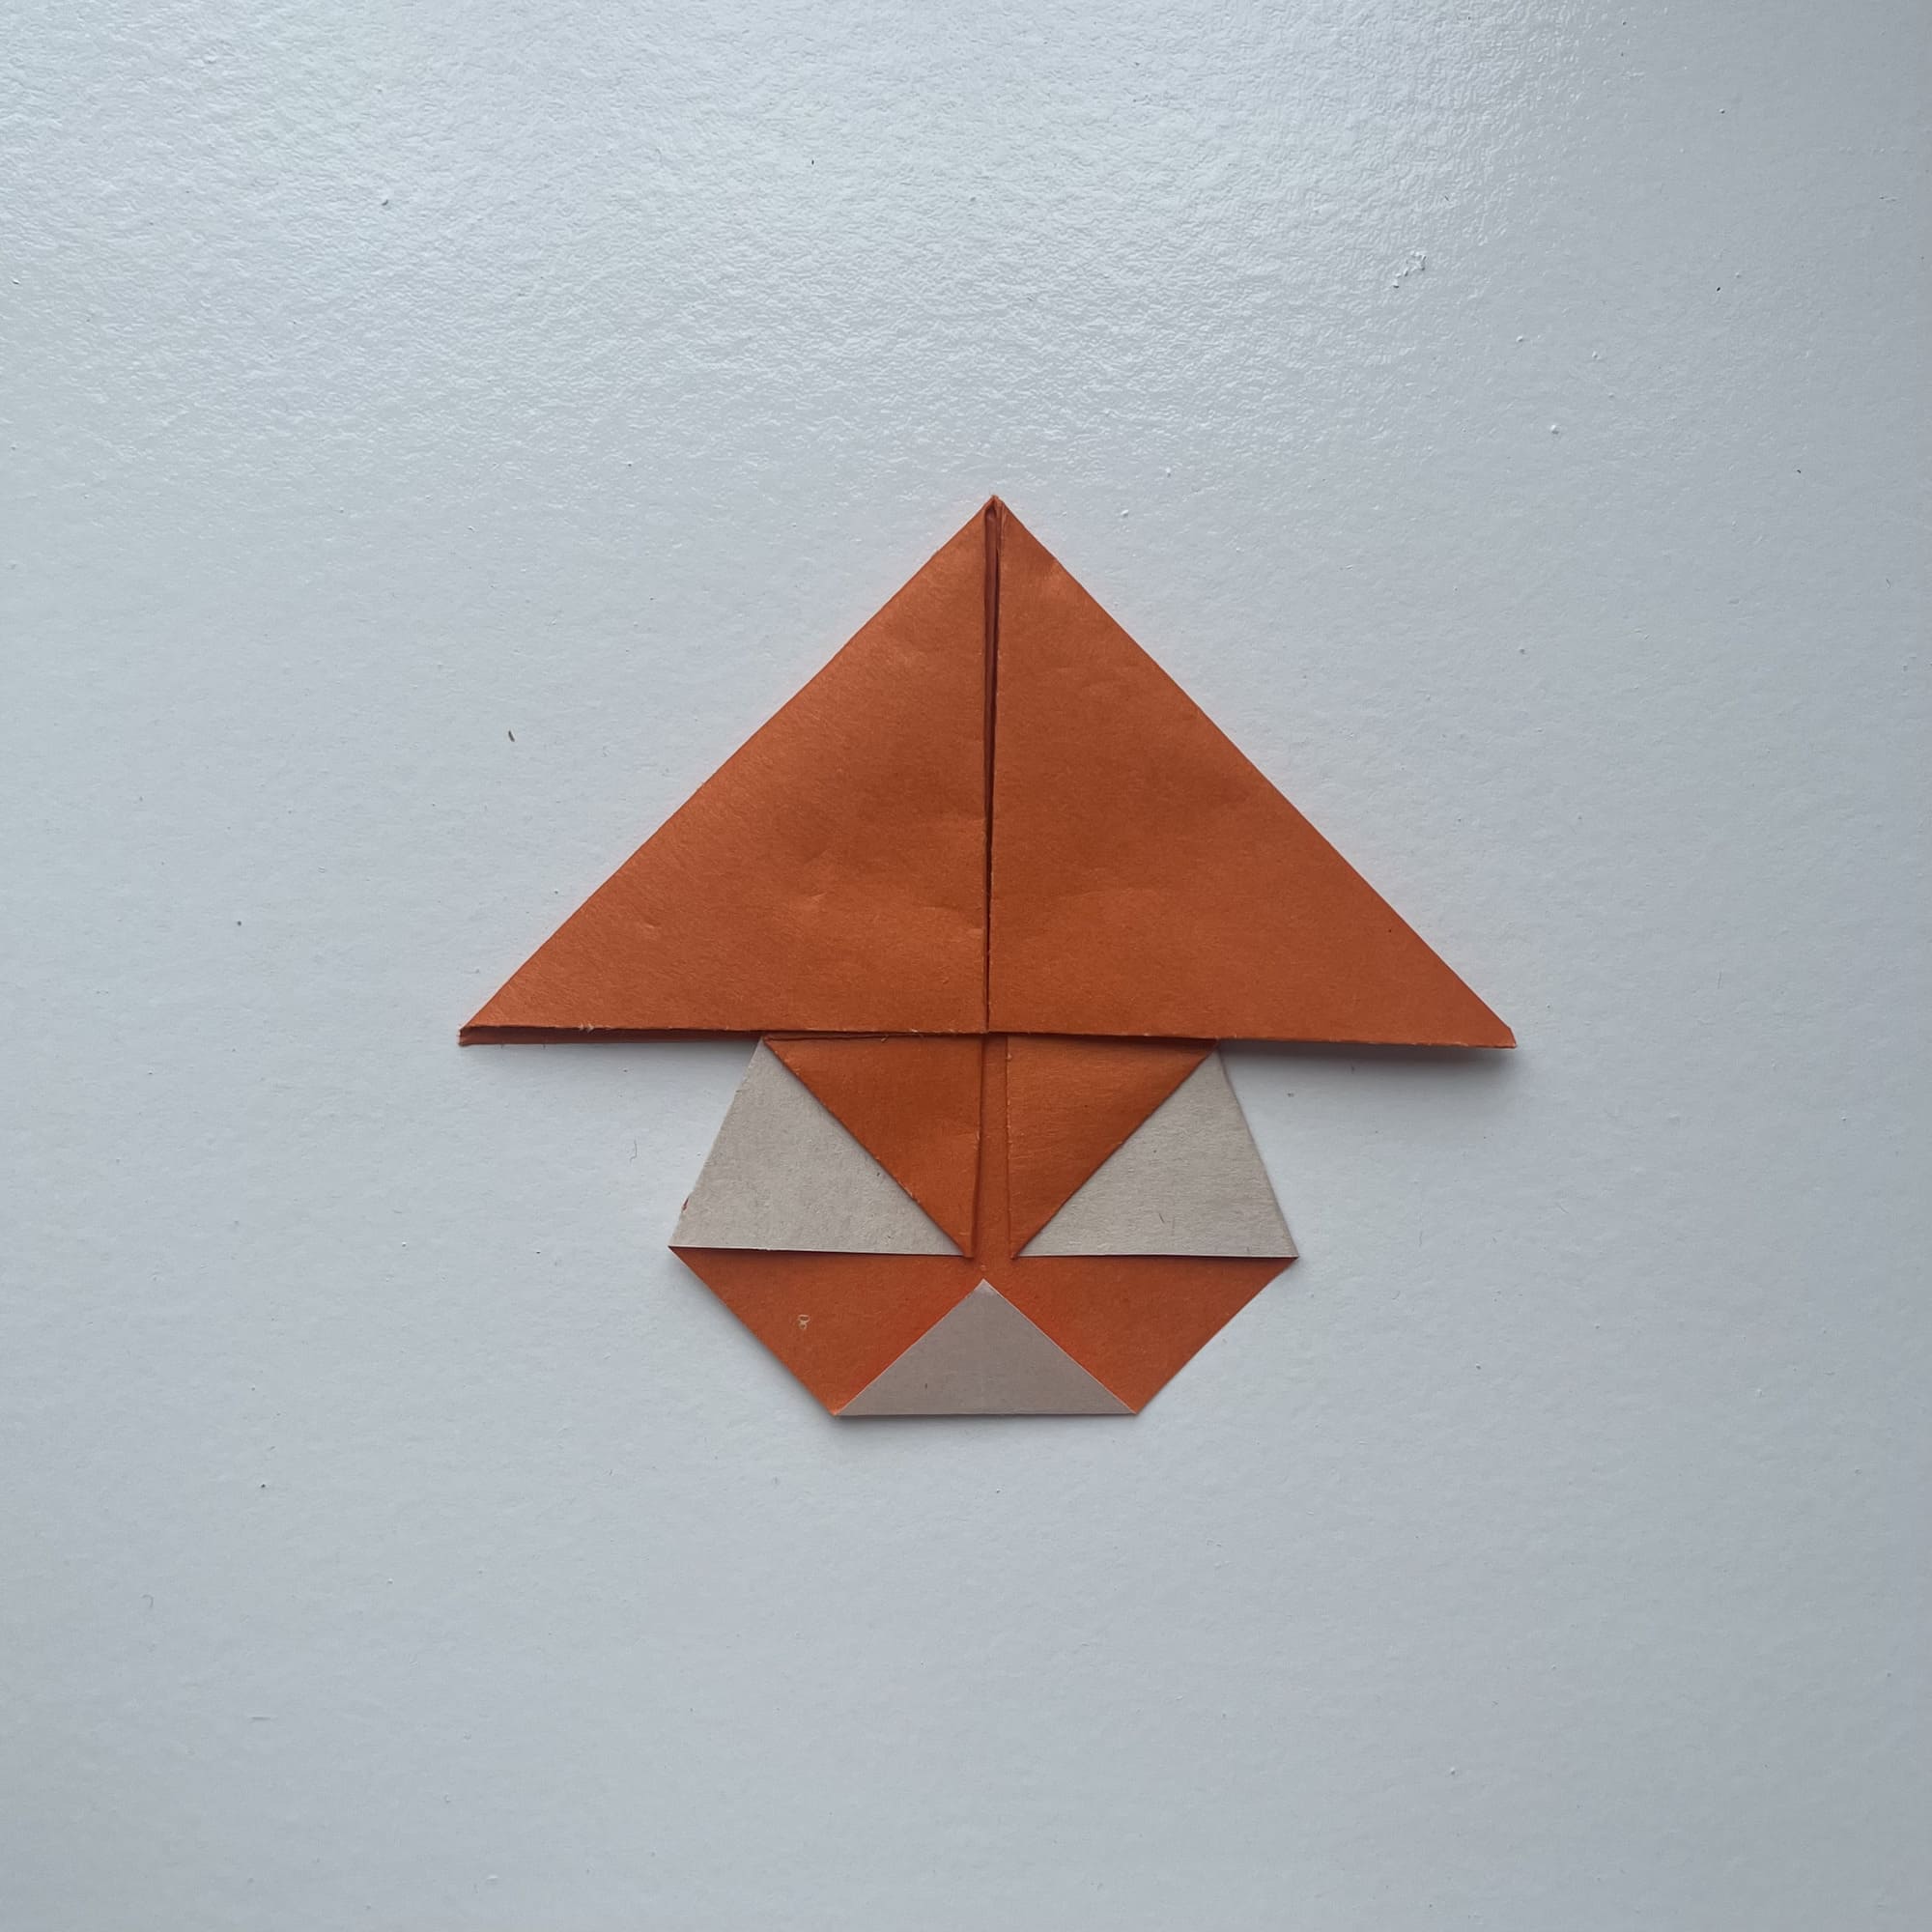
Turn the shape over and you will see that your mushroom is complete.
It can be colored with colored pencils or supplemented with an imaginary meadow with a few more mushrooms. Take square sheets of paper of different sizes so that the mushrooms are not the same.


