Origami rabbit face
Need new ideas on how to spend time with your kids? We have one! Try creating this cute and easy-to-make origami rabbit face, which will be a good option for Easter or children’s room decorations or lessons with toddlers.
Below you will find step-by-step instructions on how to make this little bunny, using only bright origami paper and your hands. In the end, just add your bunny a face, or, probably, you want to craft a whole rabbit family. Try different colors and sizes of paper, and your little ones will be happy!
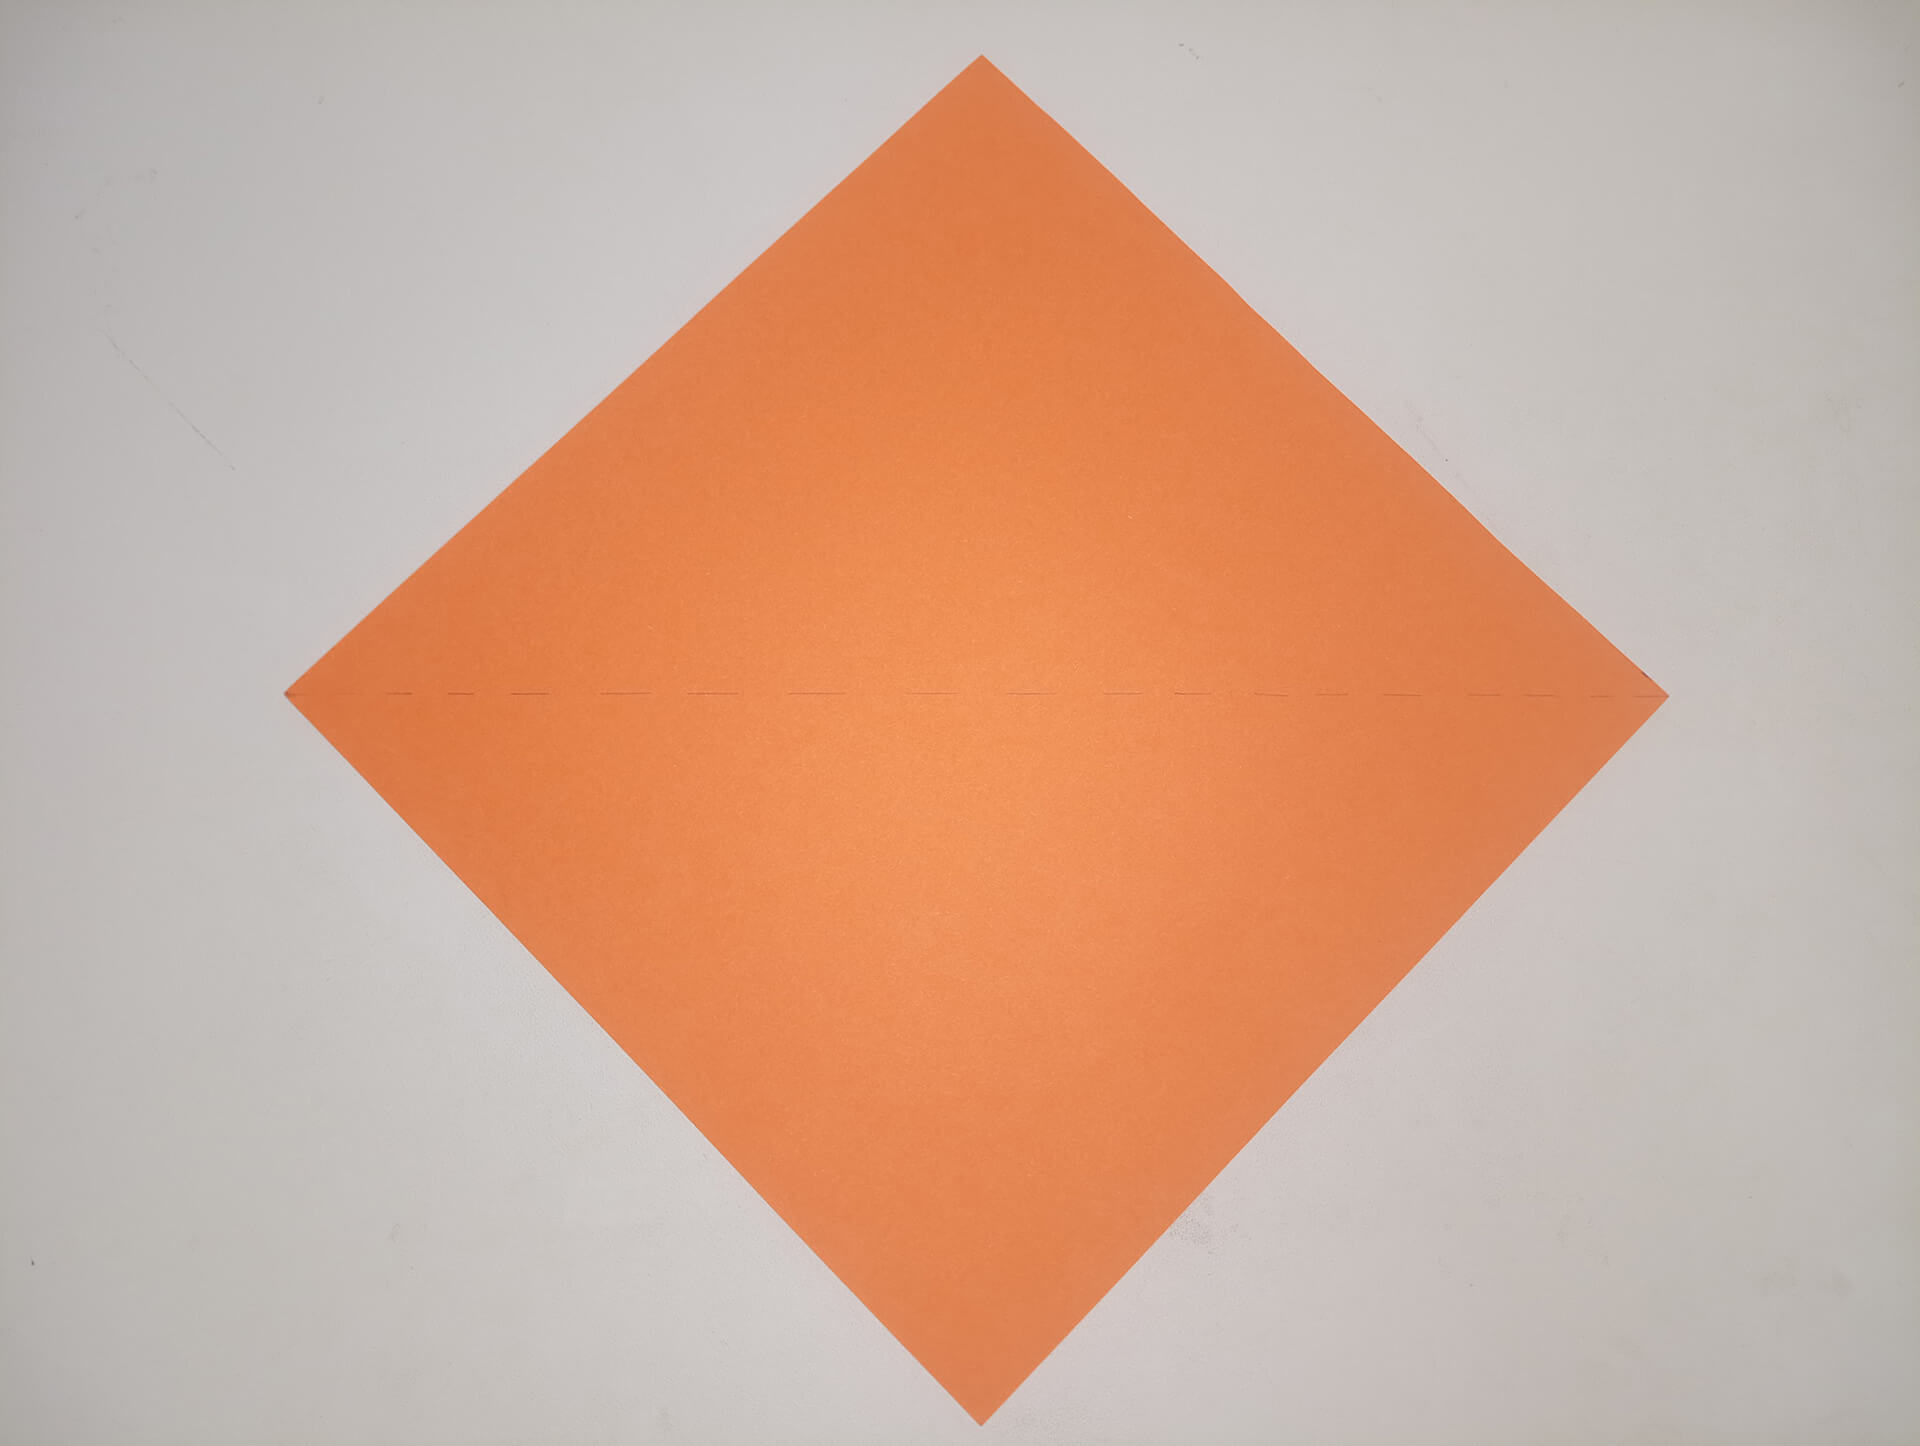
Make a square out of colored origami paper. Additionally, make marks for the fold line from one edge to the other (optional).
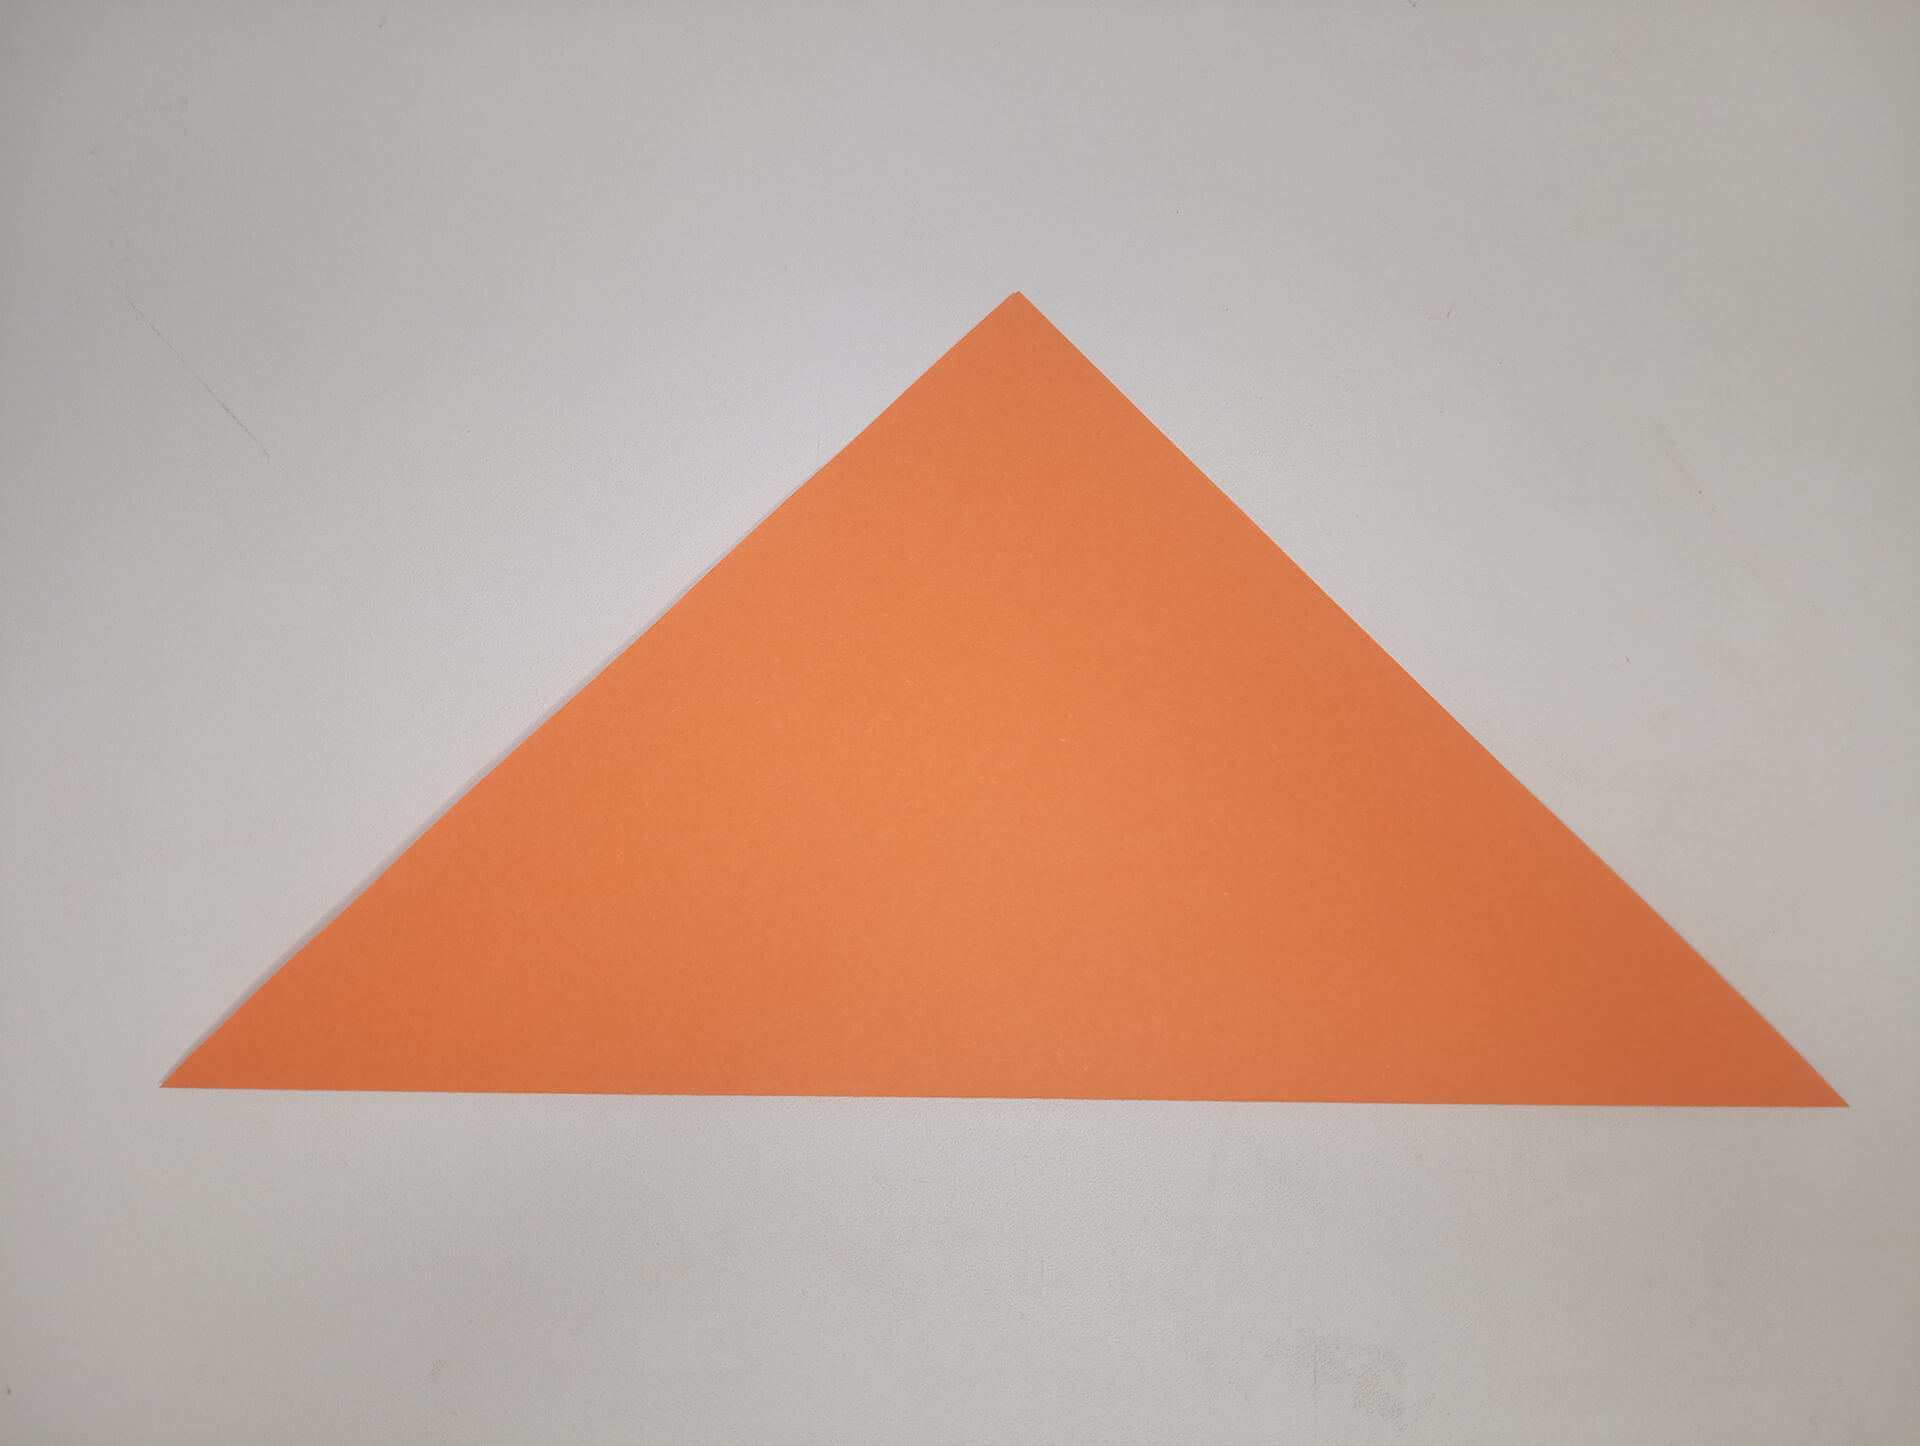
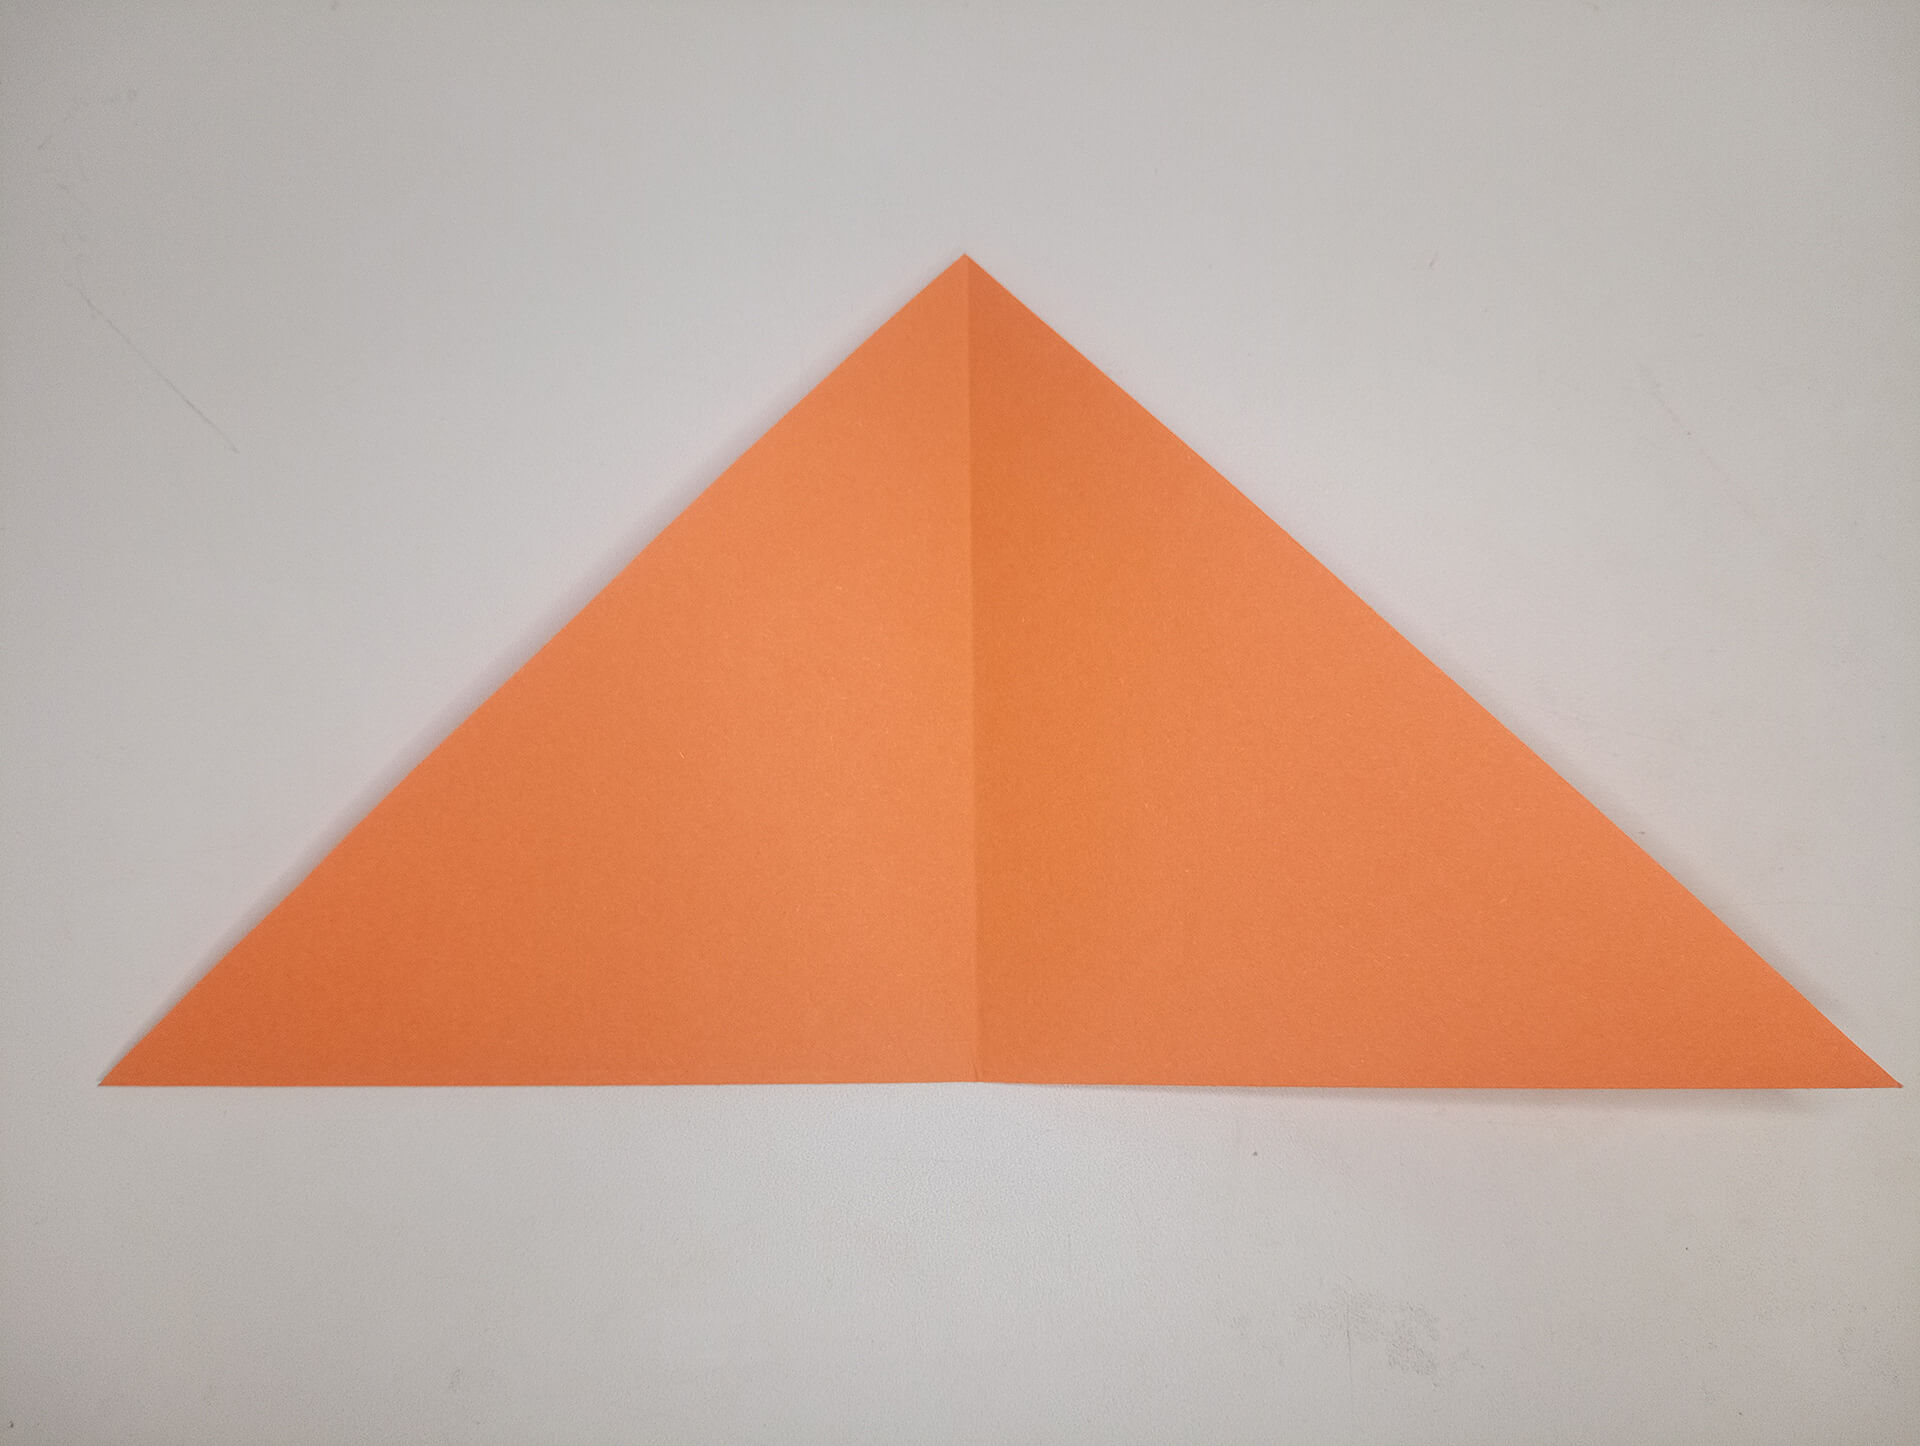
Fold the square of paper in half to make a triangle.
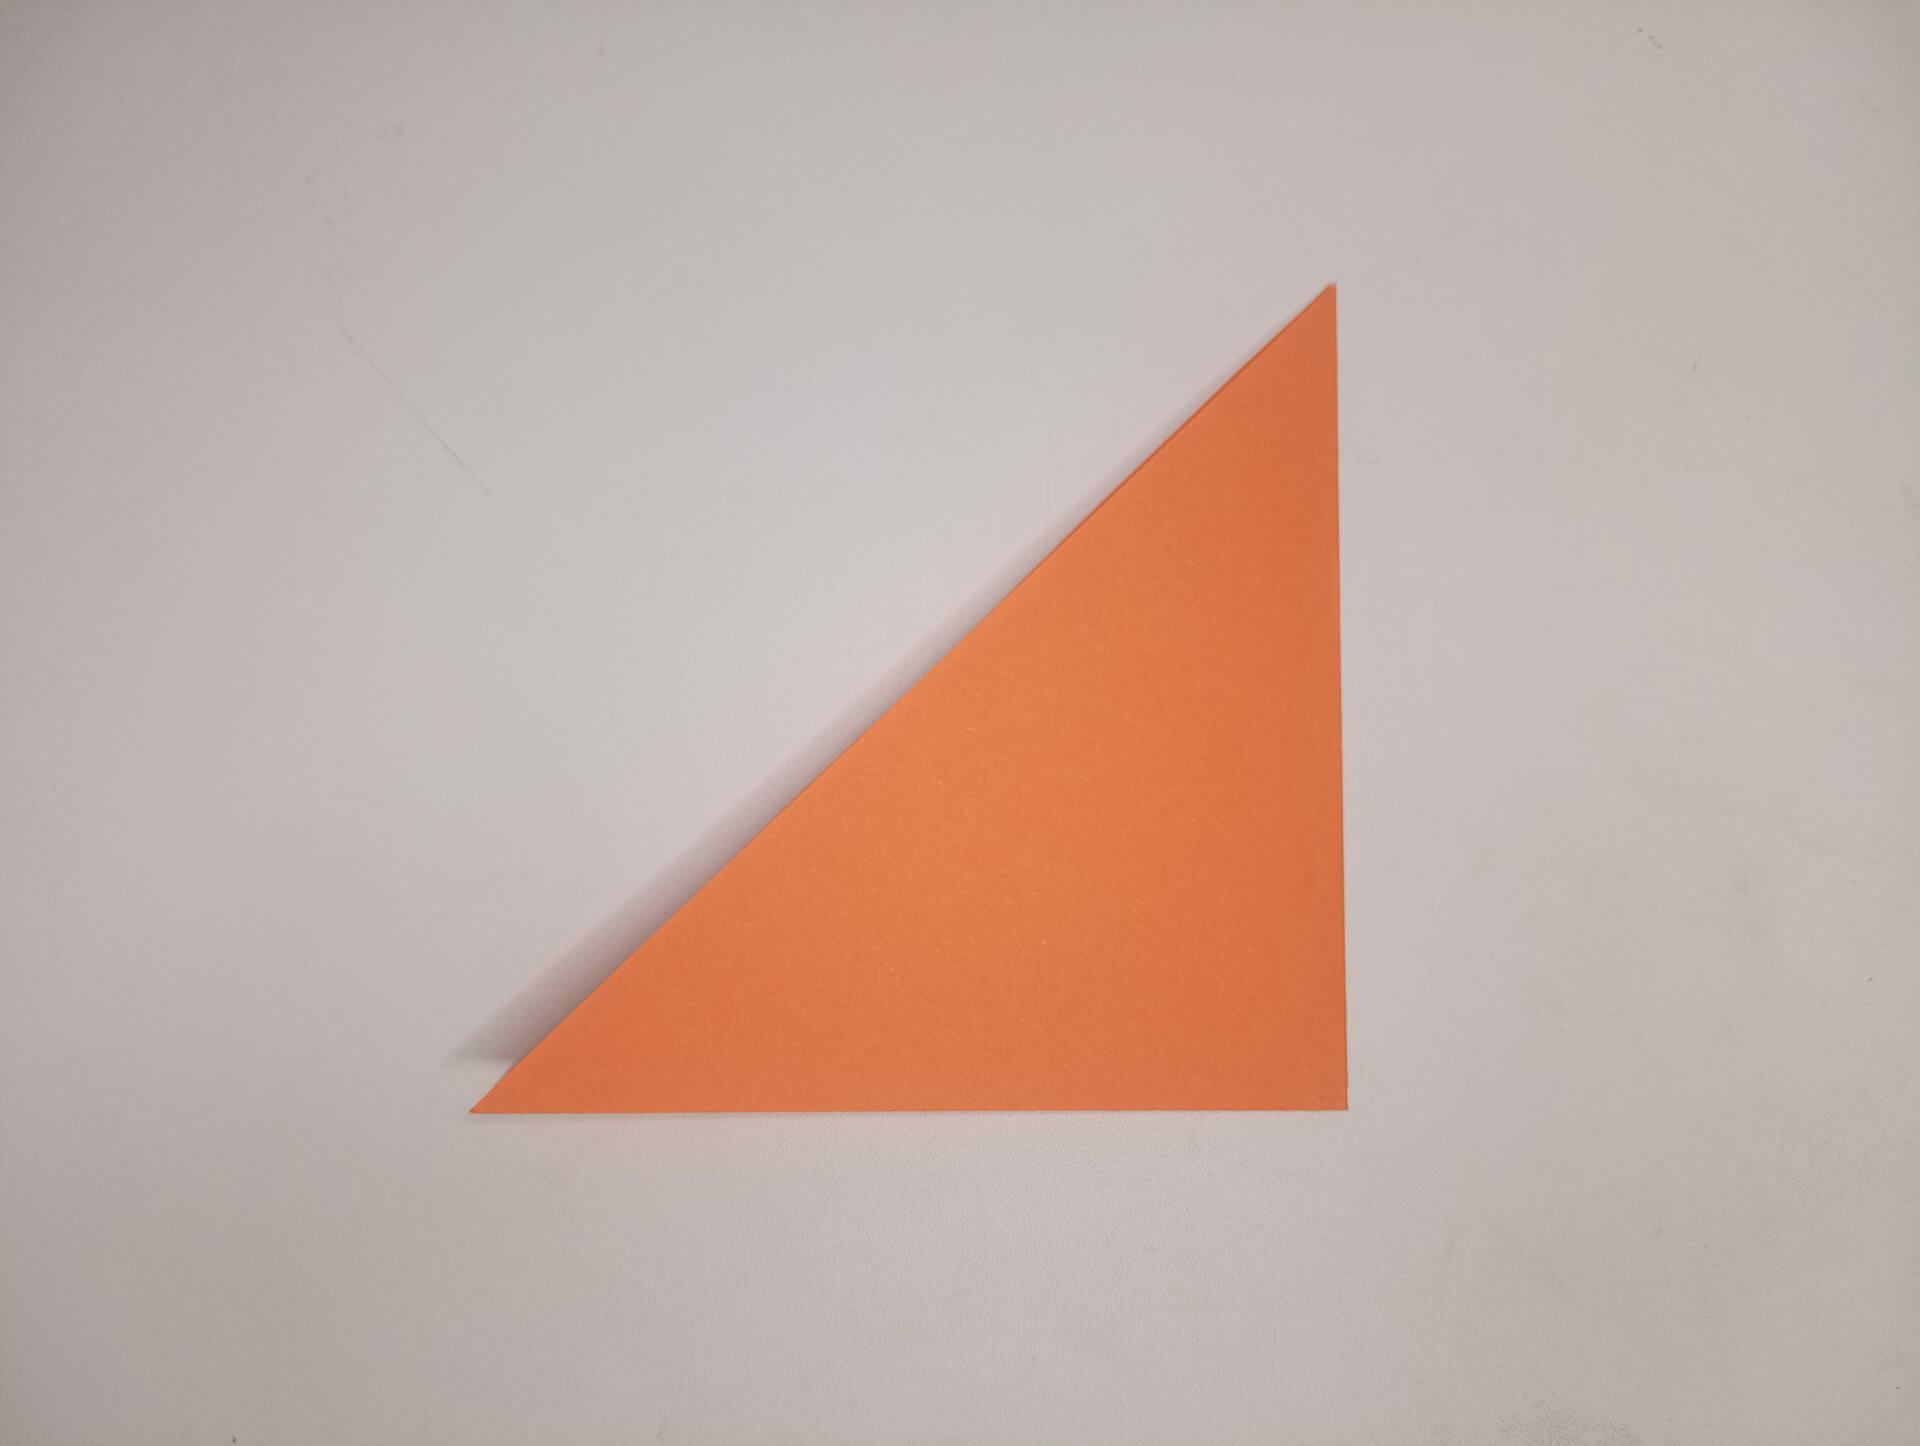
Fold the triangle from right to left to make a triangle, but smaller.
Open the triangle backward so that the fold line remains visible.
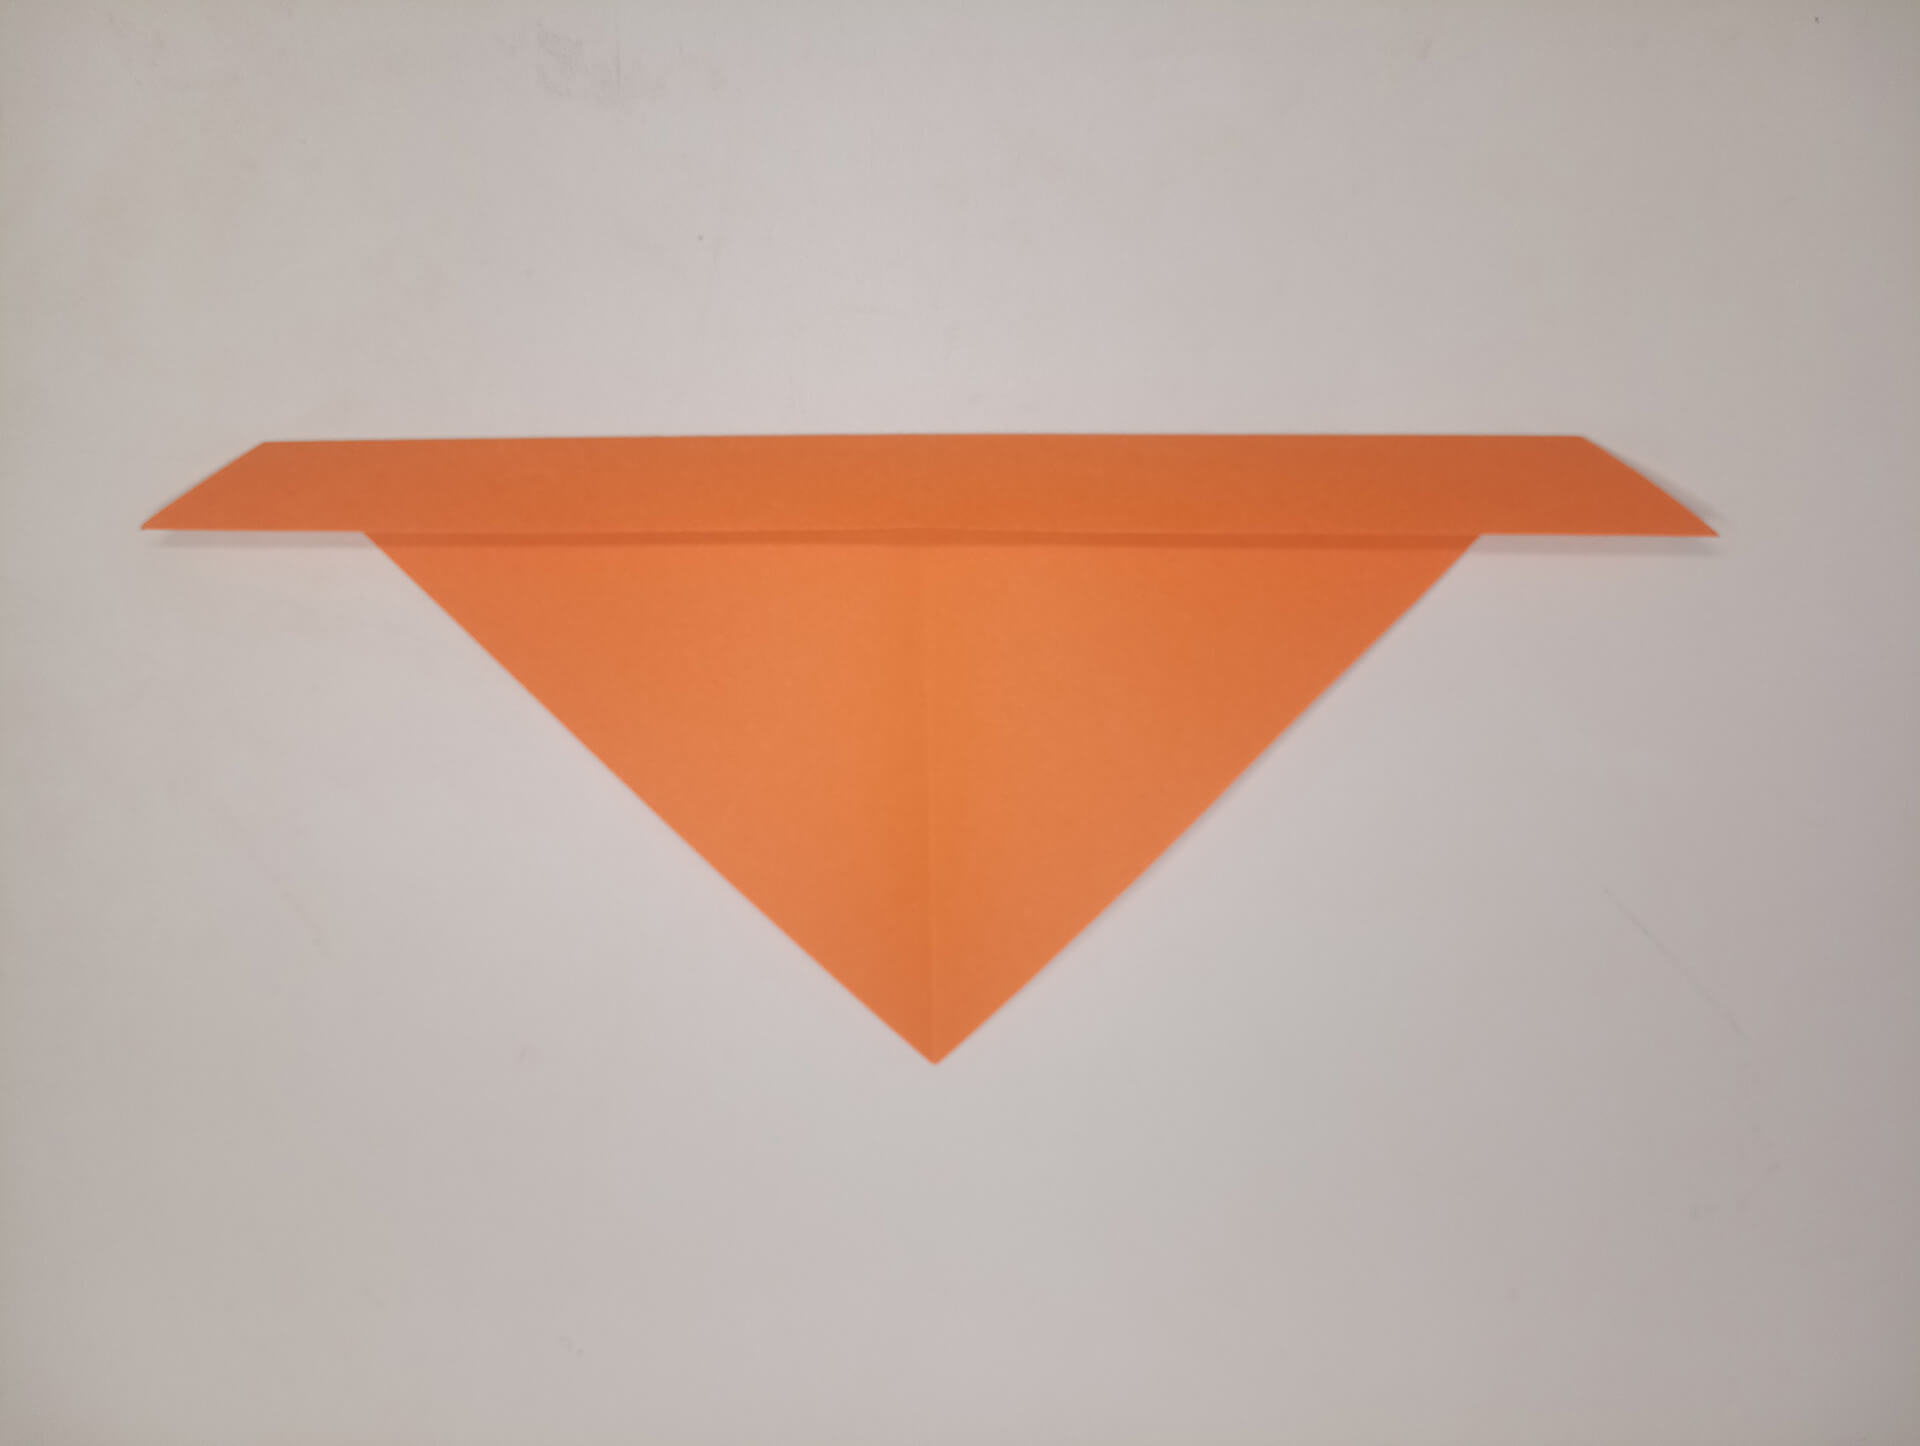
Fold the bottom edge of the triangle by about 1.5 cm (as in the photo).
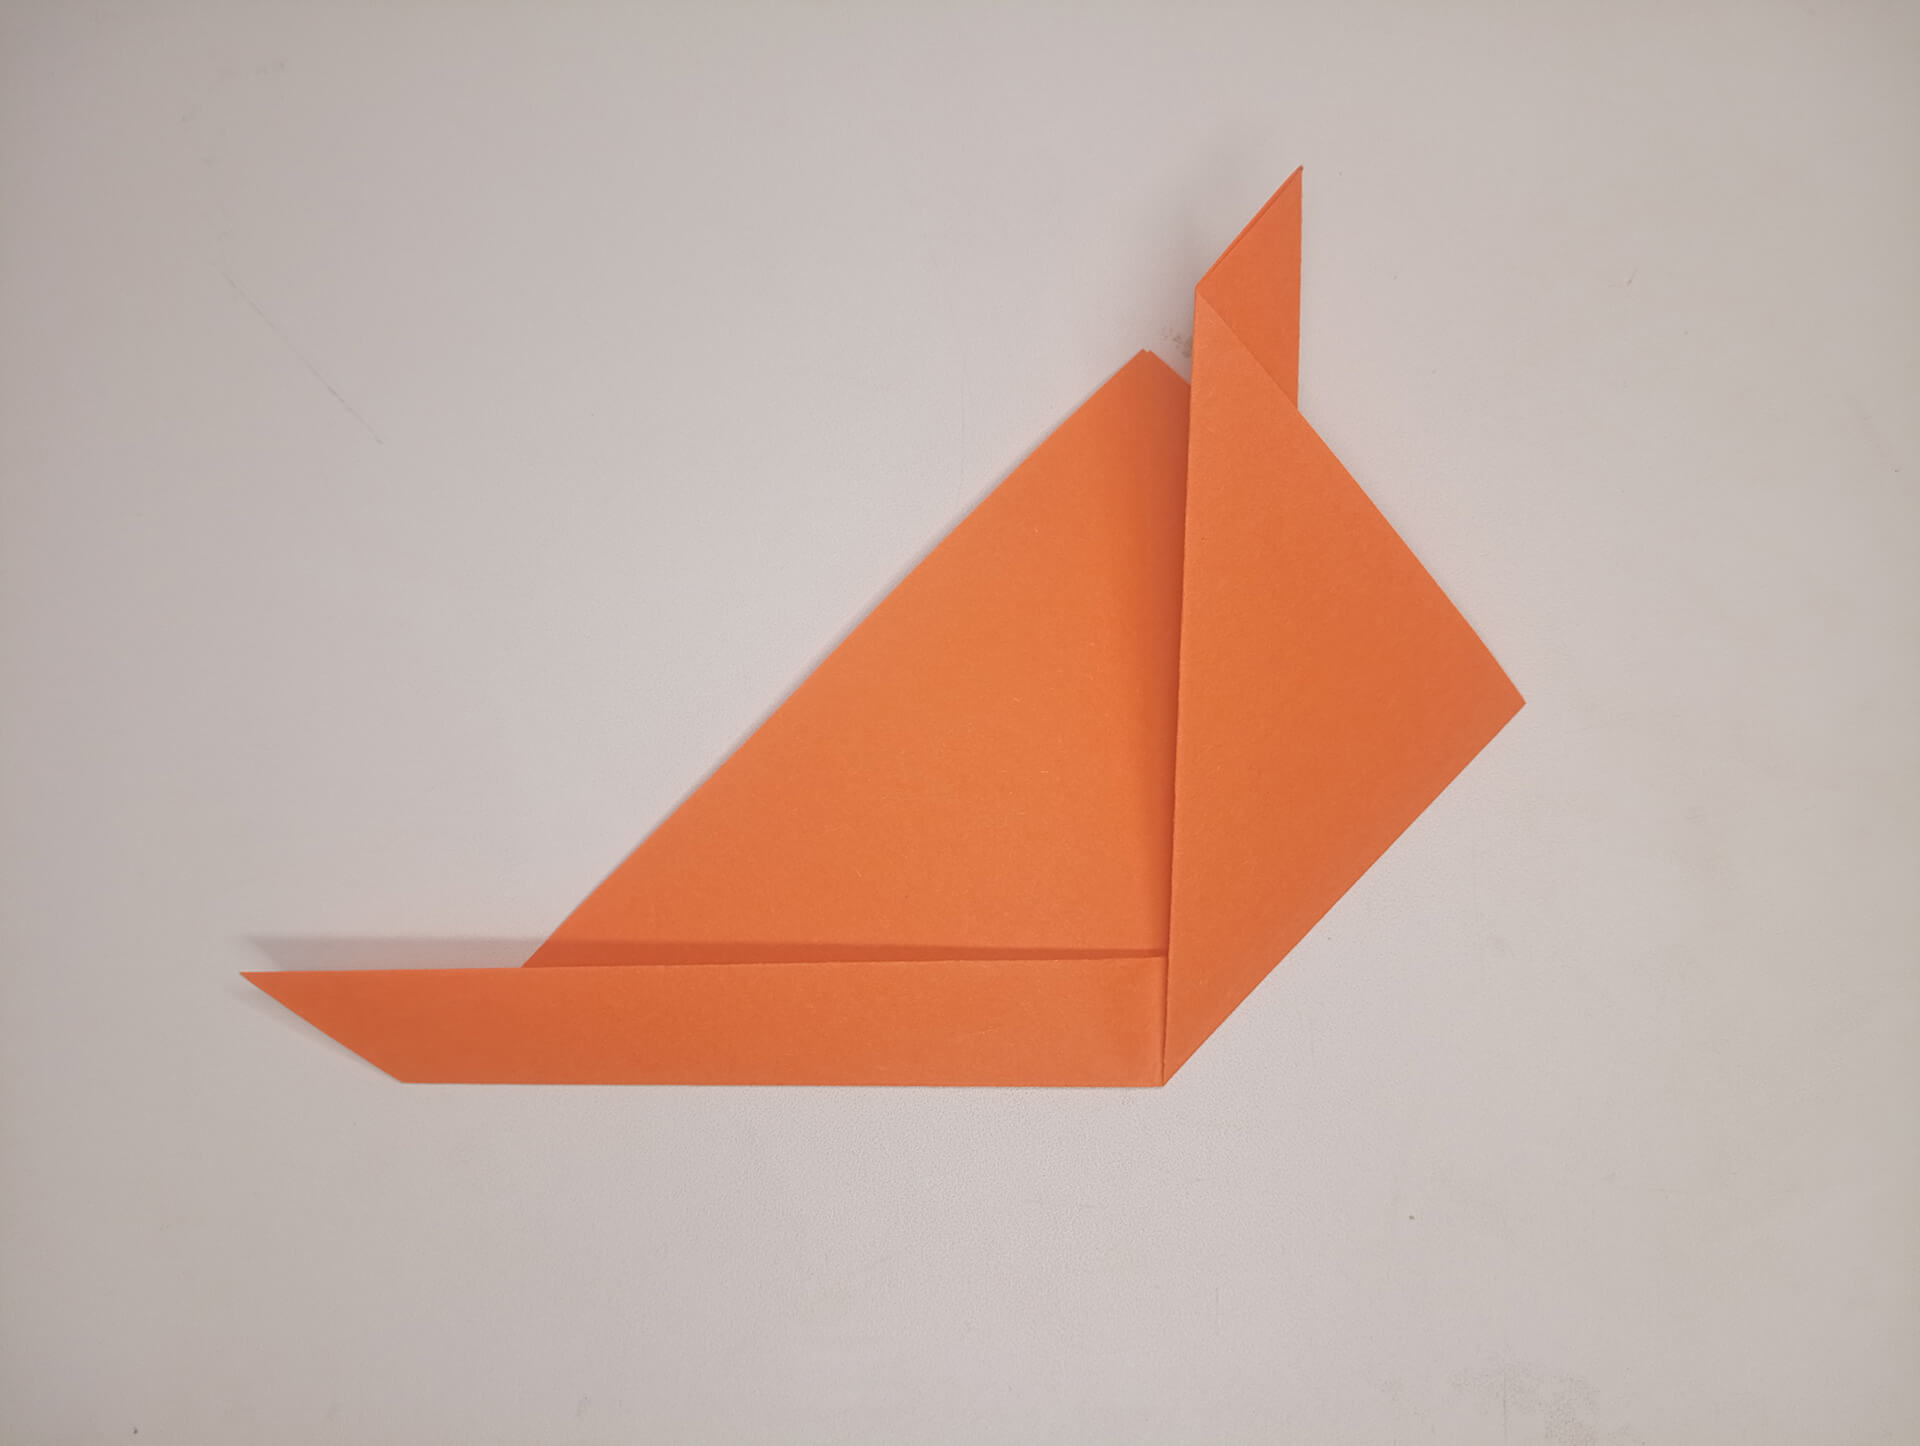
Fold the left edge of the triangle to the center fold line (as in the photo).
Repeat the action with the right side. Both edges should meet in the middle. You should end up with a shape like in the photo.
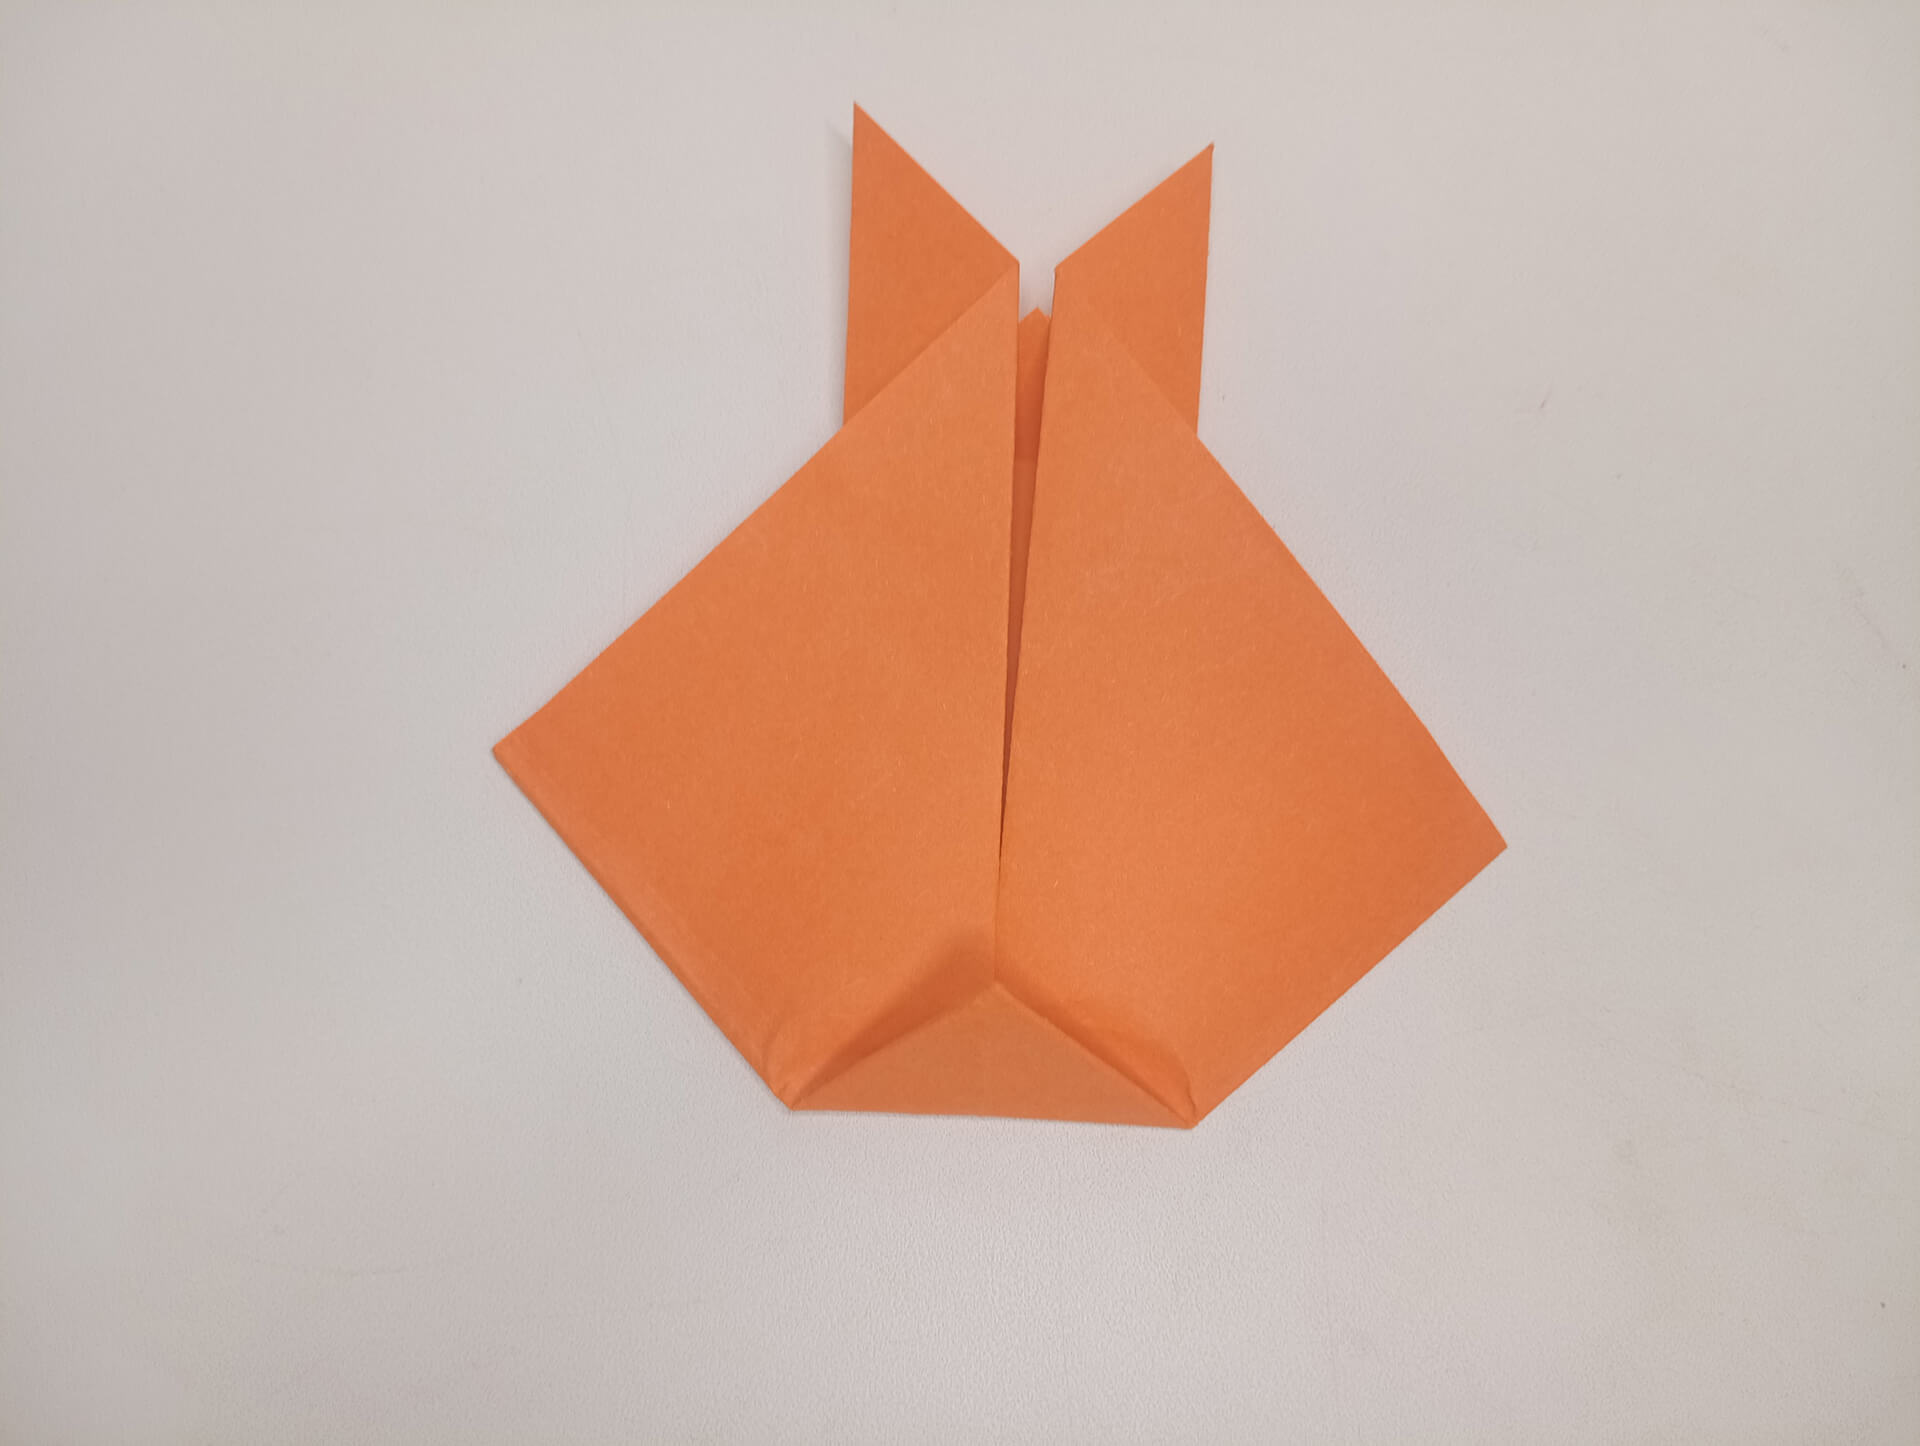
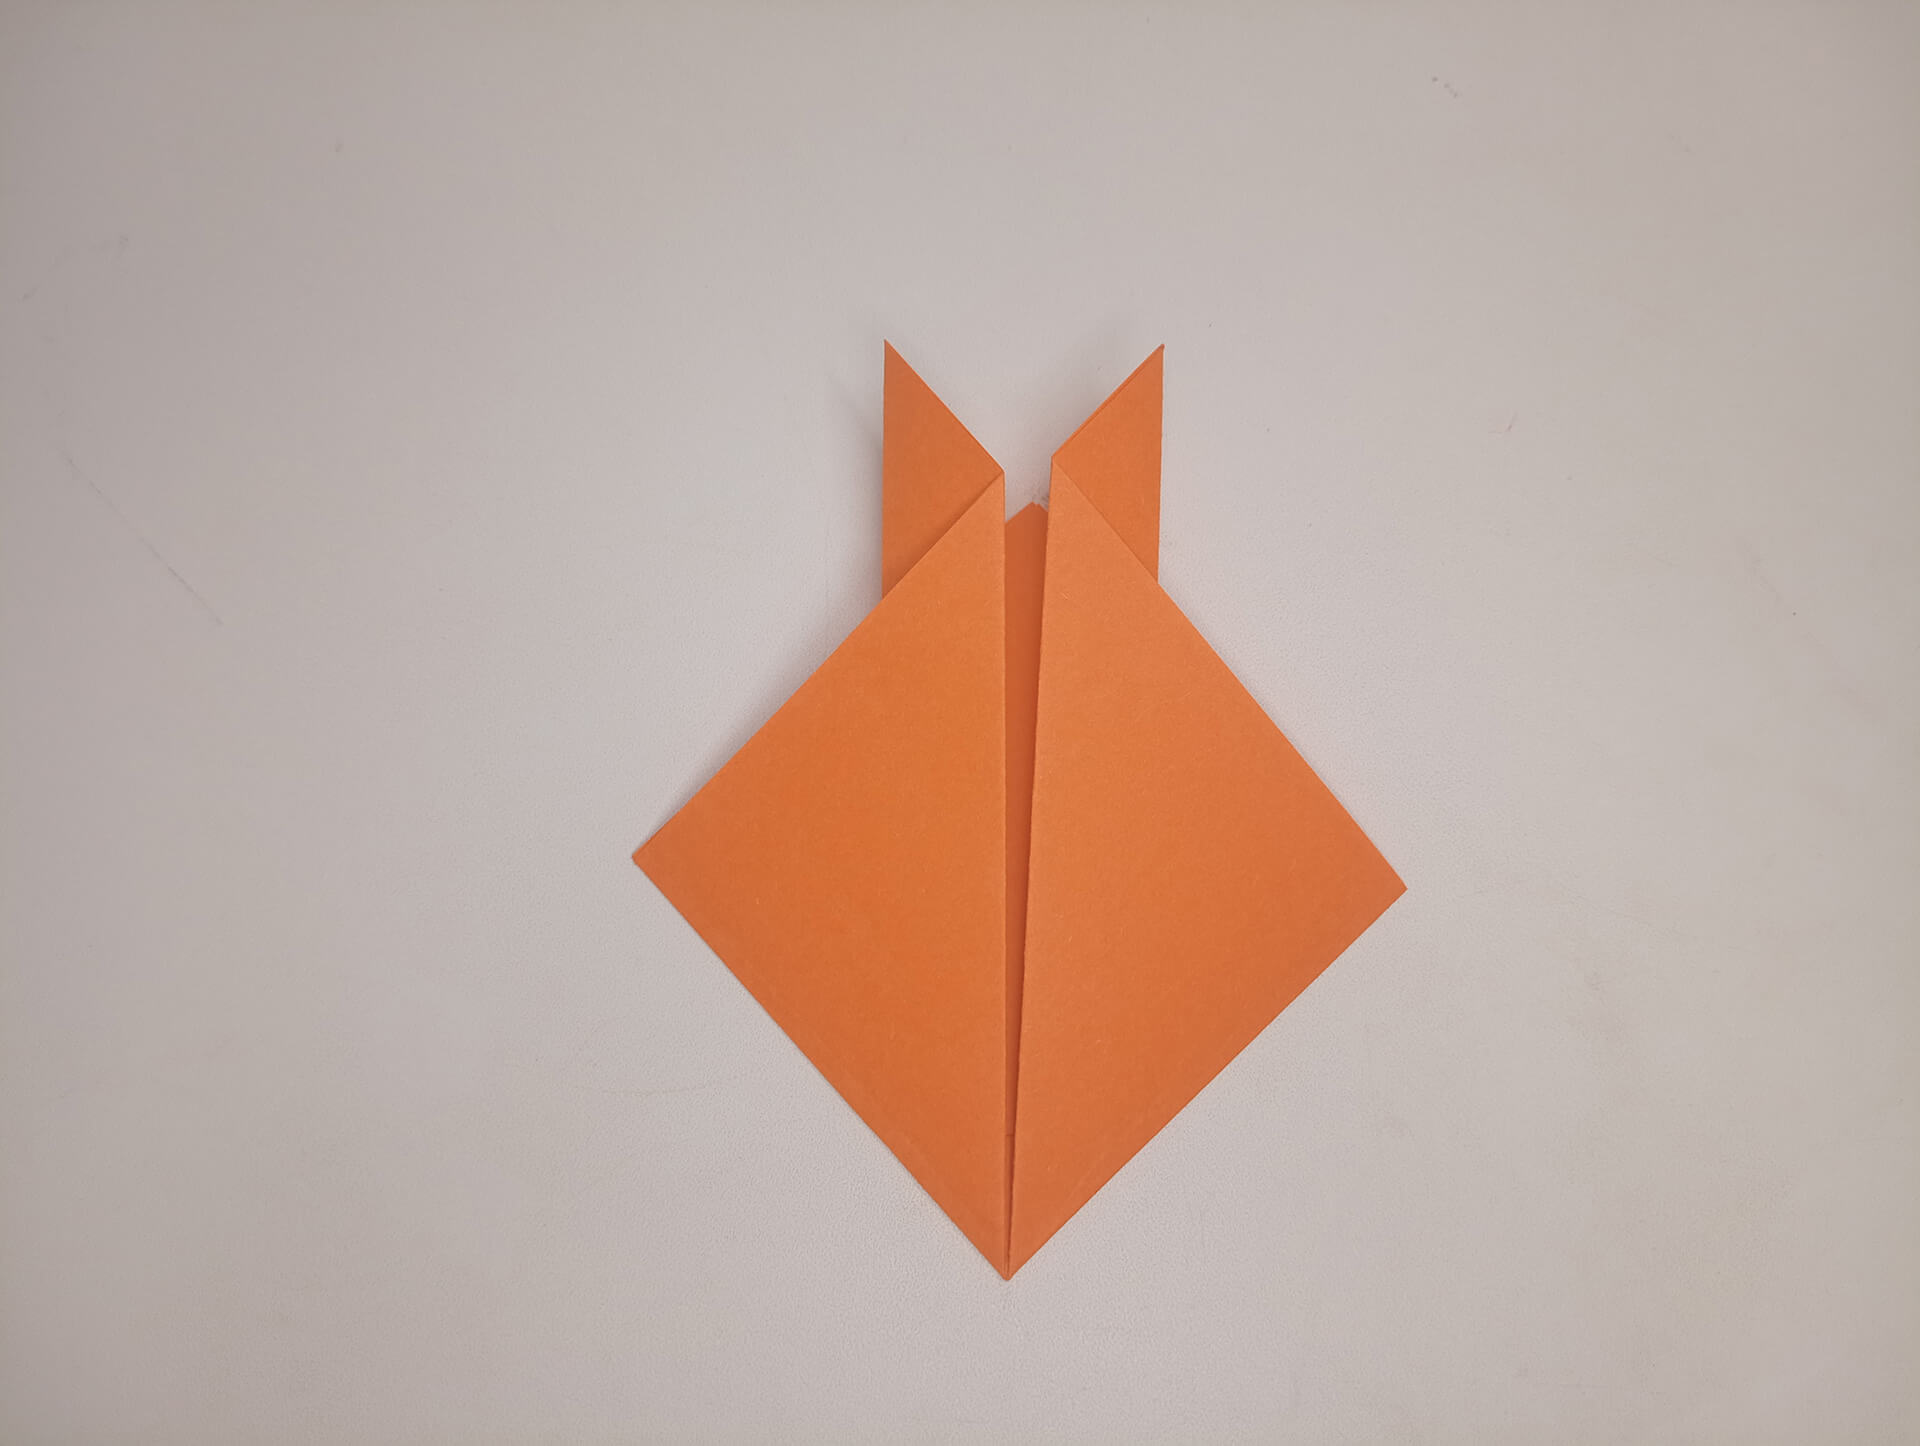
Fold the bottom edge of the shape inwards (see in the photo).
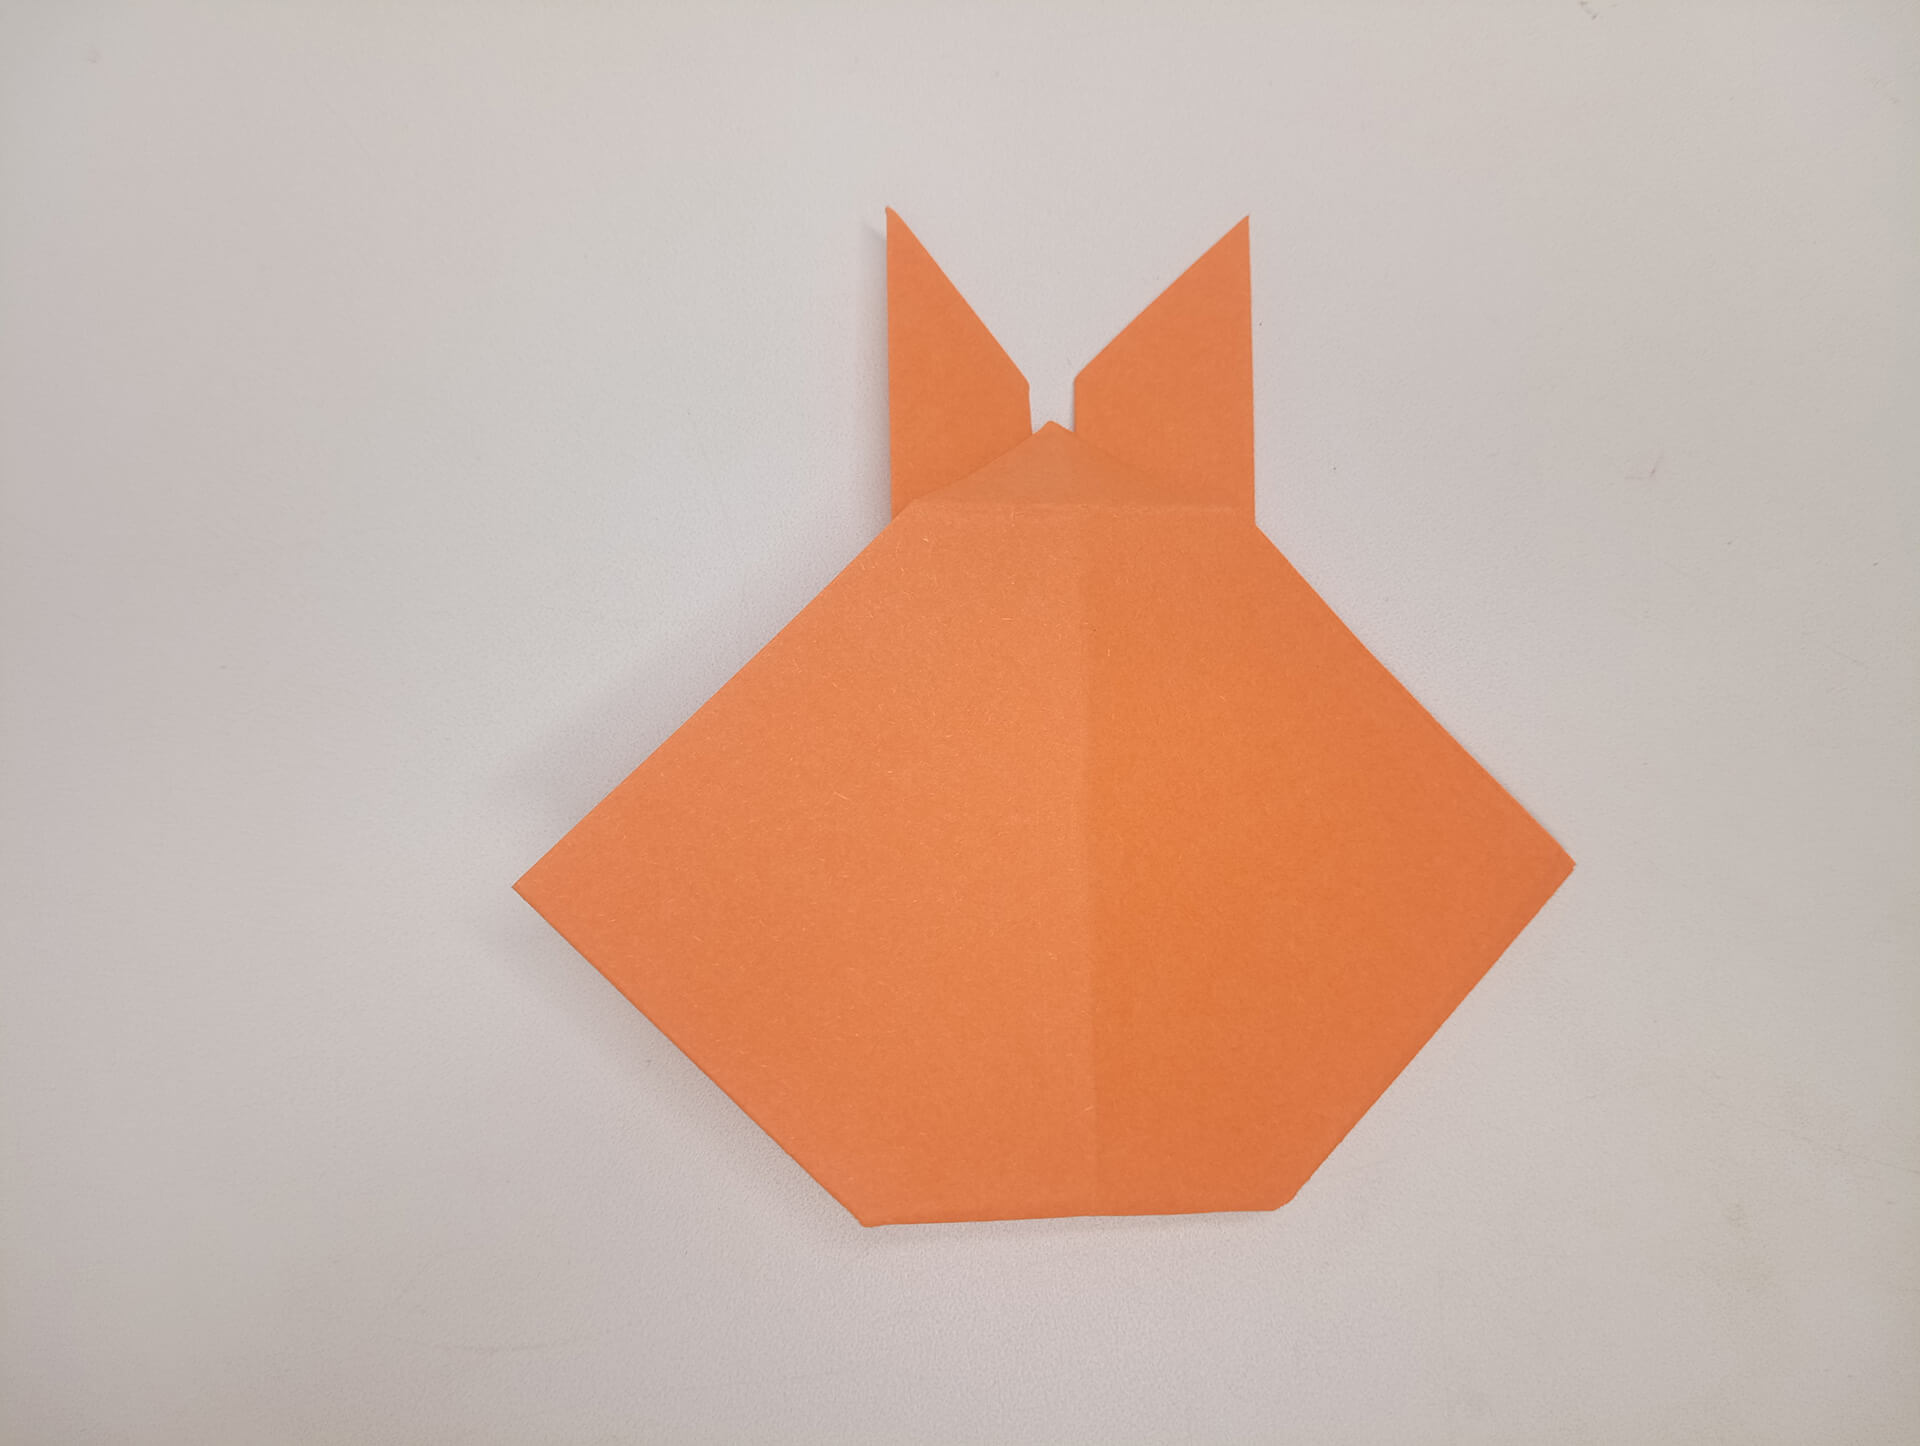
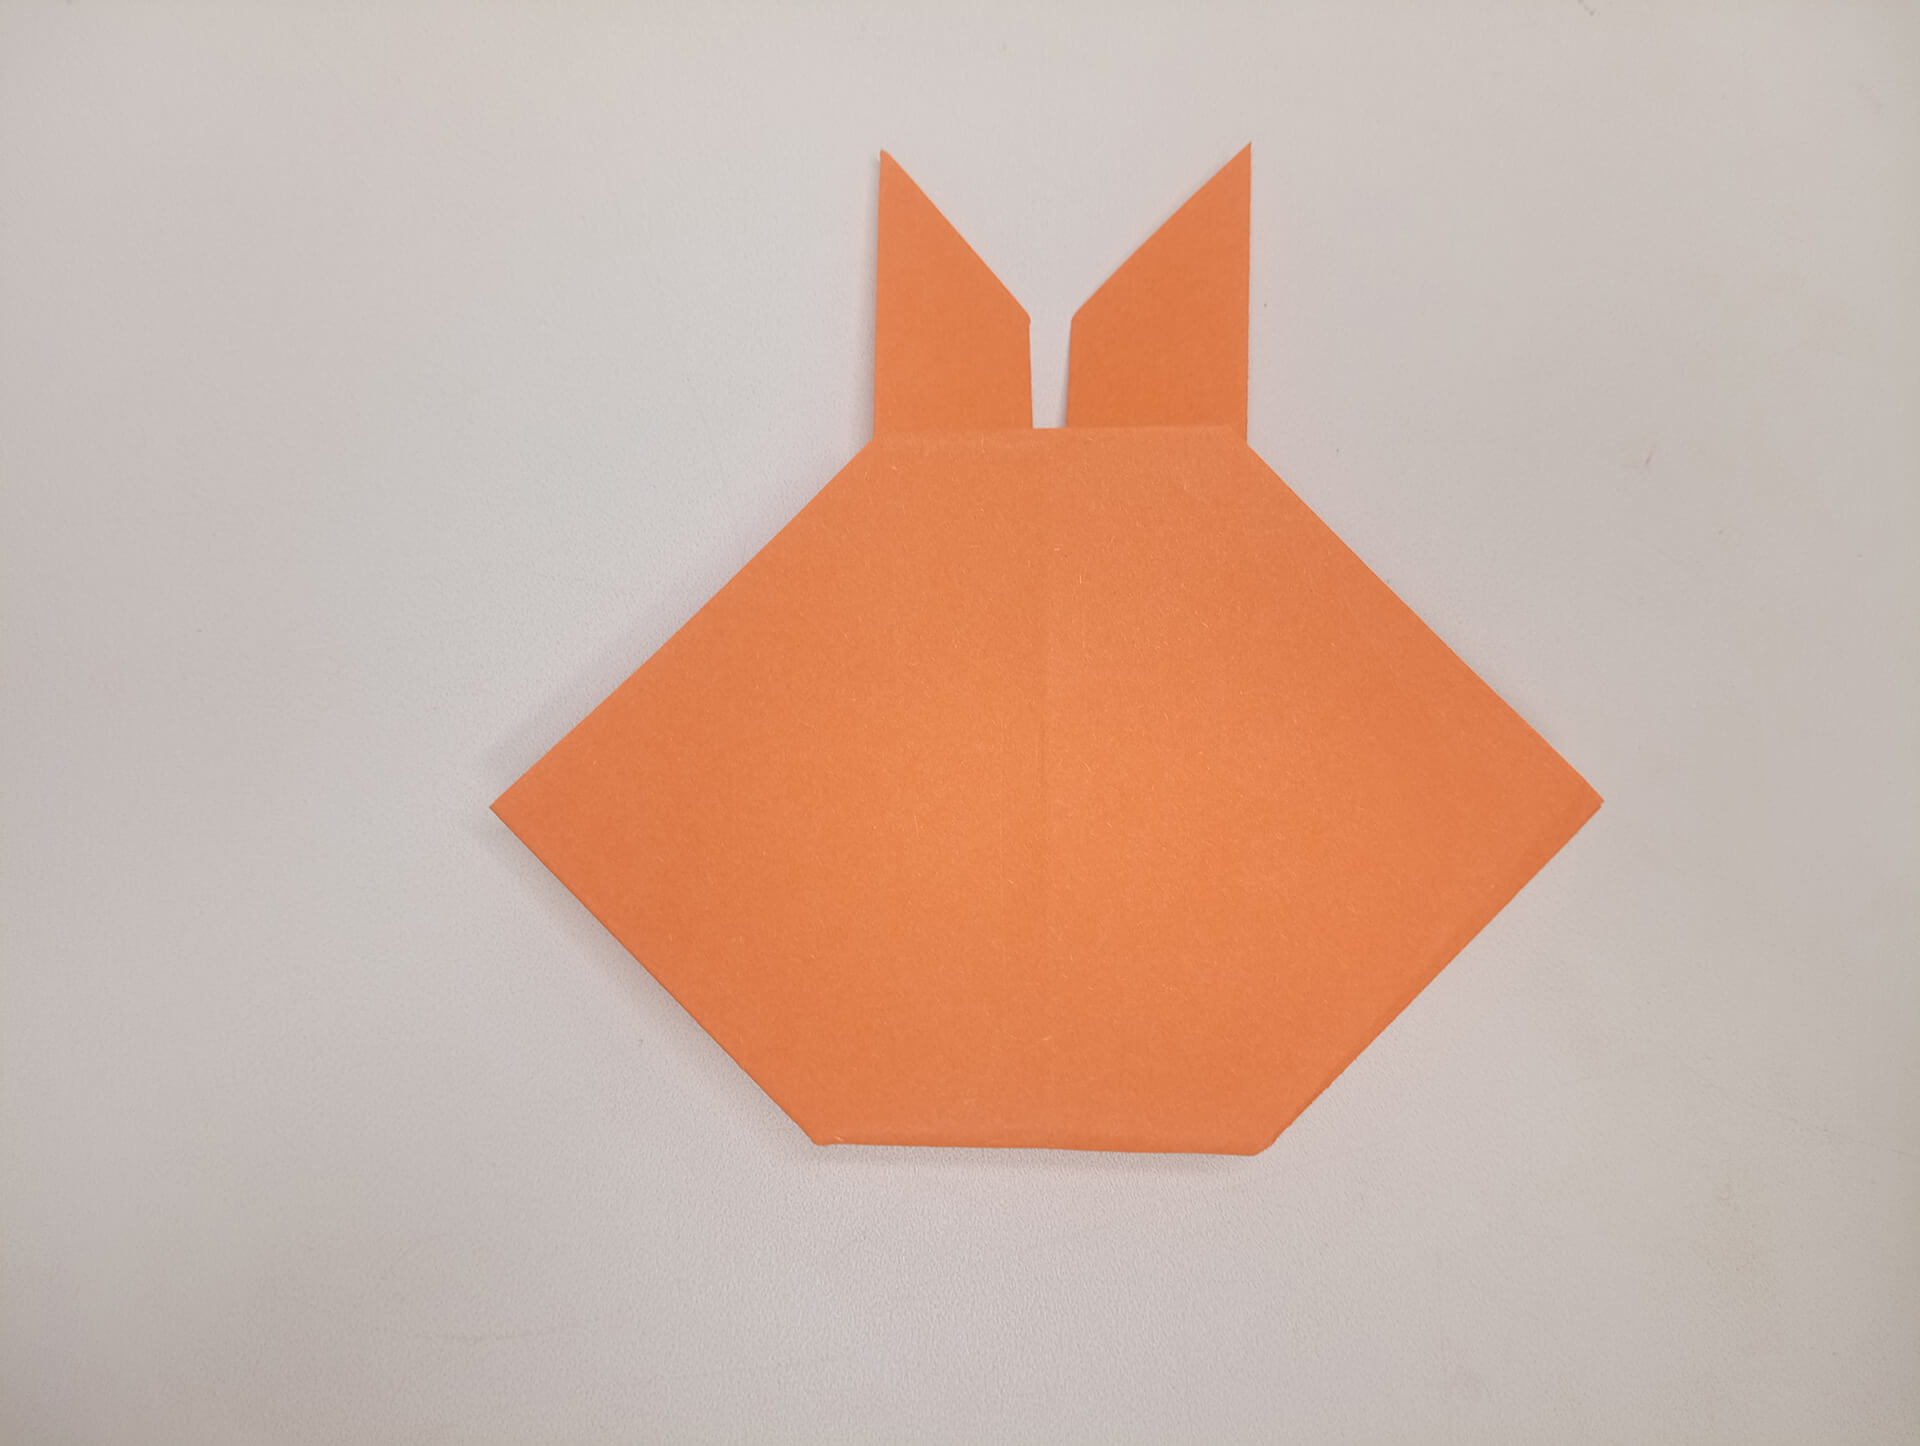
Turn the figure’s face upside down and also fold the top edge between the ears.
You can paint the finished bunny face or just draw eyes and nose.
The original bunny face will delight children and become a good decoration for the holiday!