Origami Triangle Hat
We love practical origami! It’s great when your creativity has additional functions. This Triangular Origami Hat, the instructions for which you will find below, falls into just that category. Depending on the size of the paper, you can create a hat either for yourself or for toys.
Simple and practical! What can be better? Children can fold this hat for themselves or make several for dolls and plushies. It is so elementary in making that even the youngest origami lovers can cope with it.
You can take a colored sheet of paper or make a hat from white paper and then color it. You can also use bright wrapping paper, as the folds in this diagram are not very complex, so the quality of the paper will not affect the final result, hence you are free to experiment with patterns and textures! Why not create a fancy collection of triangle hats?
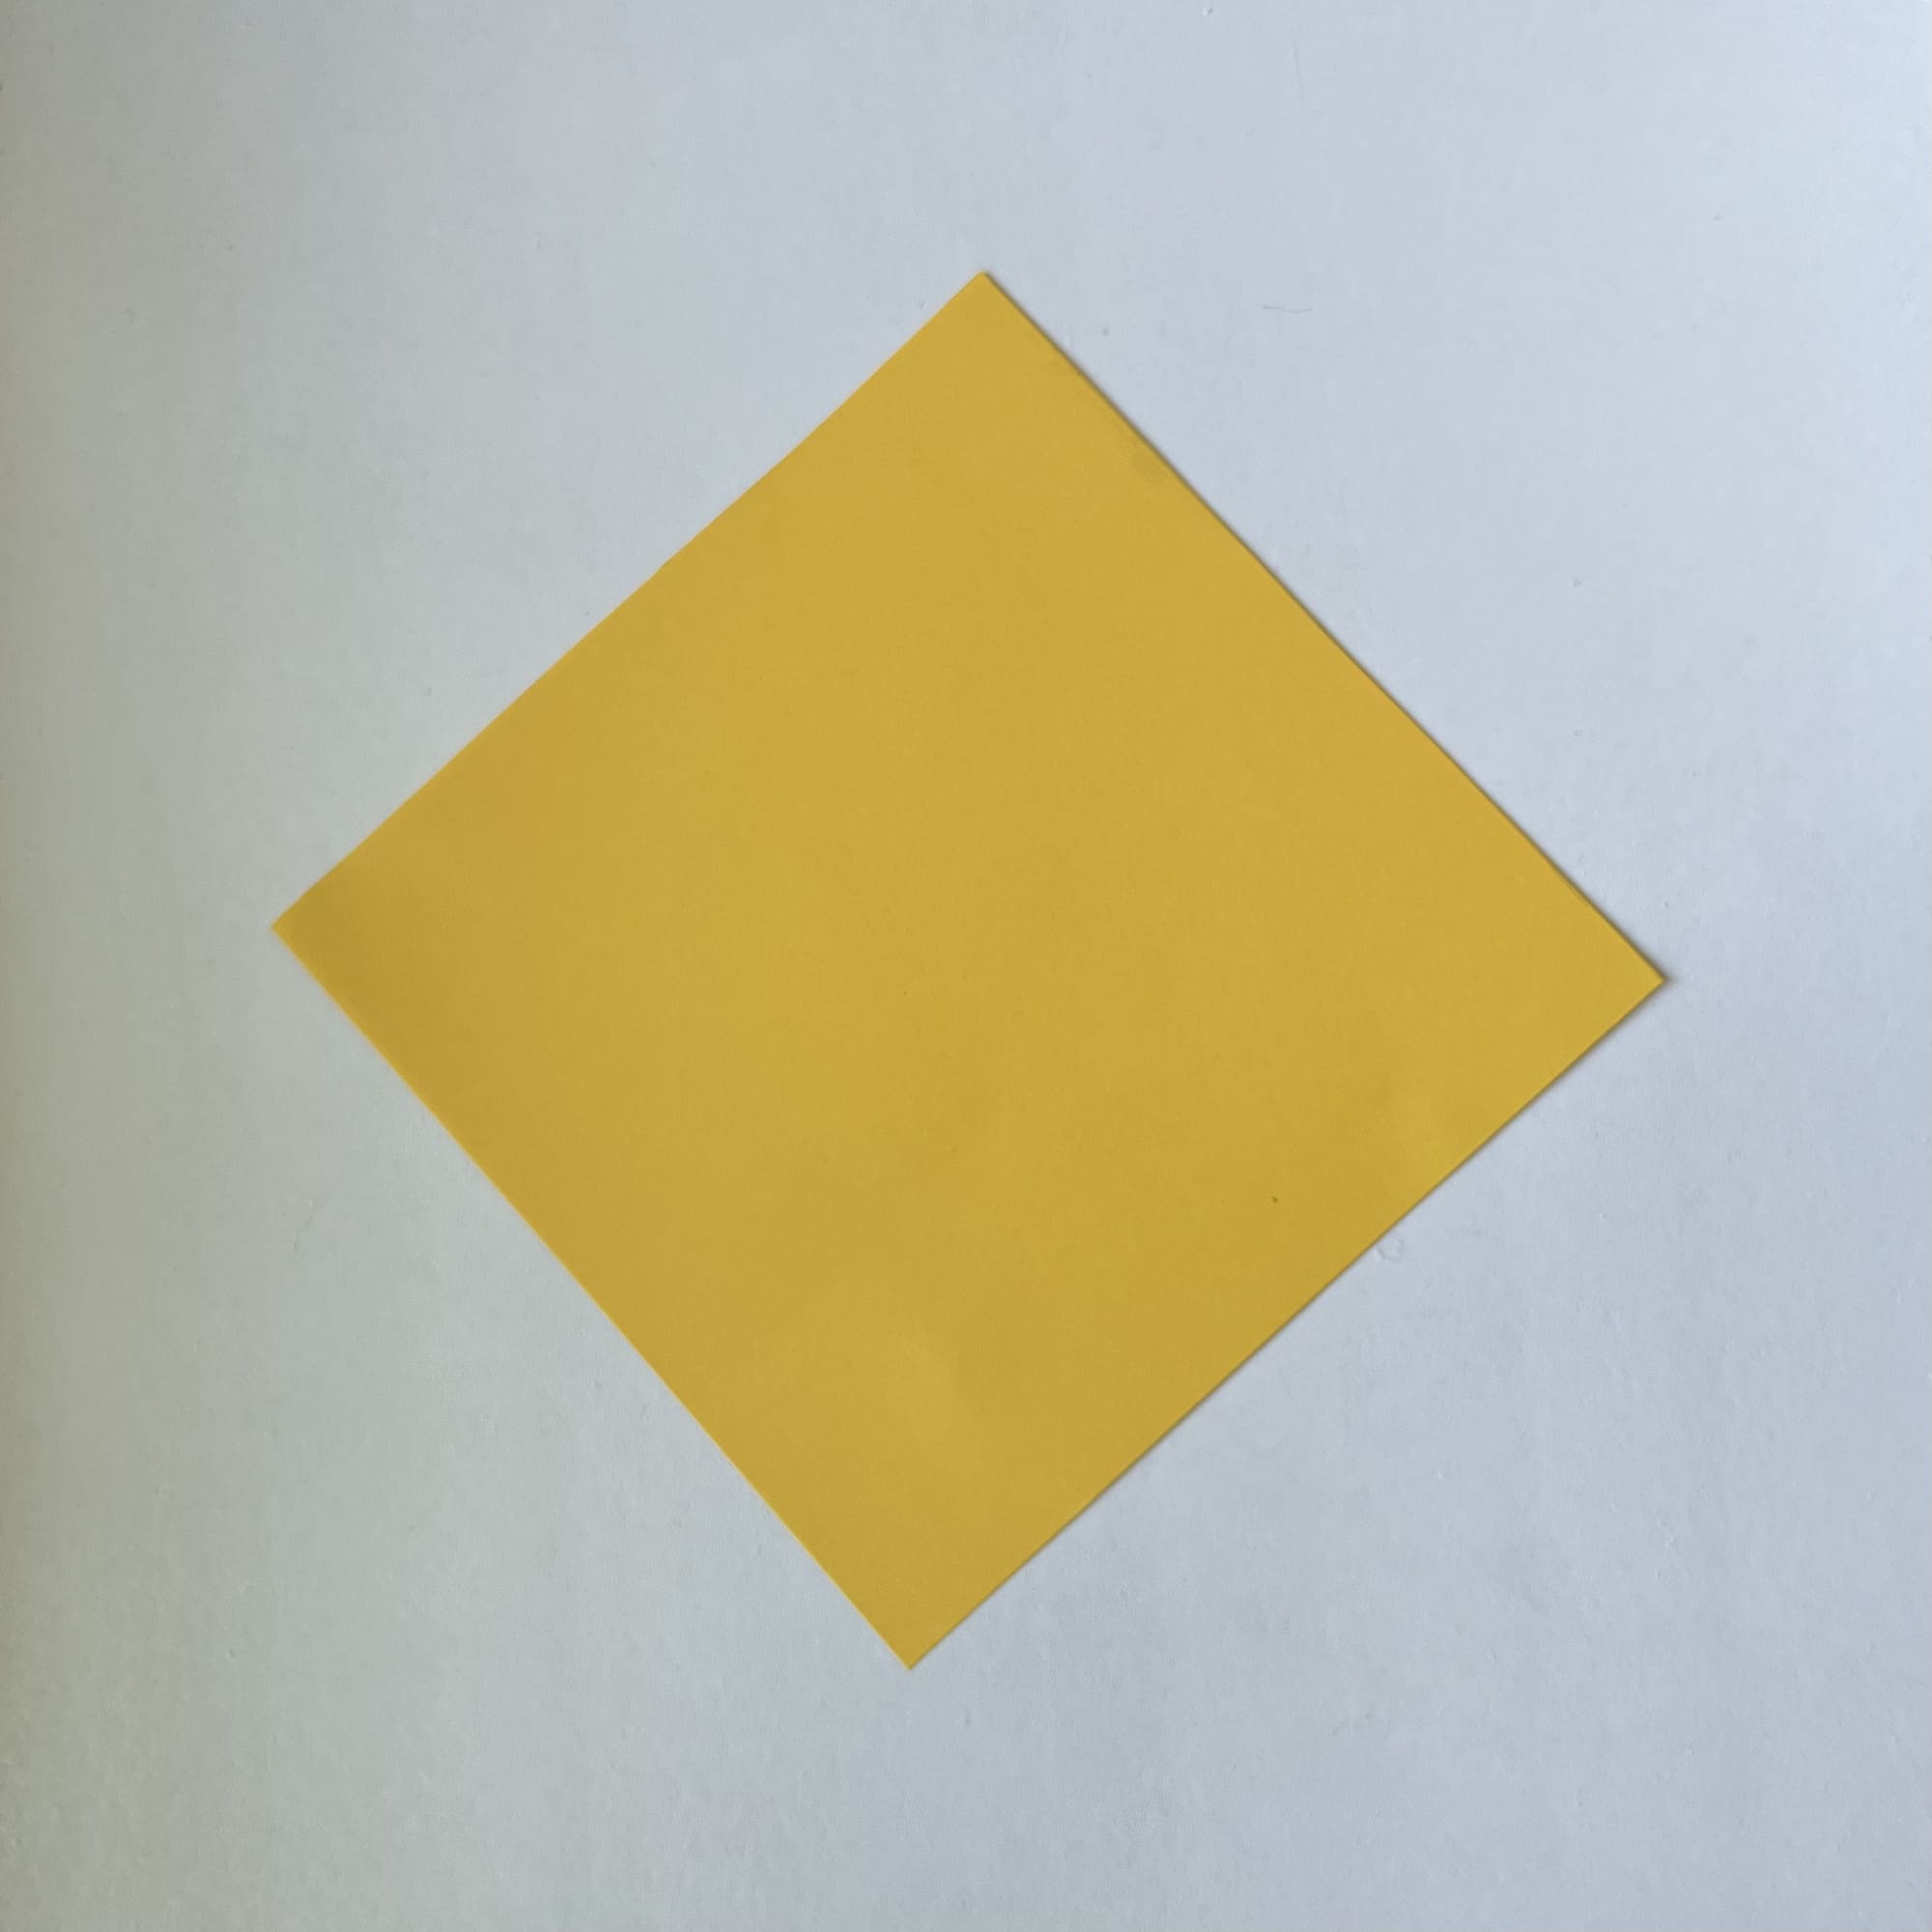
You will need a square sheet of 15×15 cm.
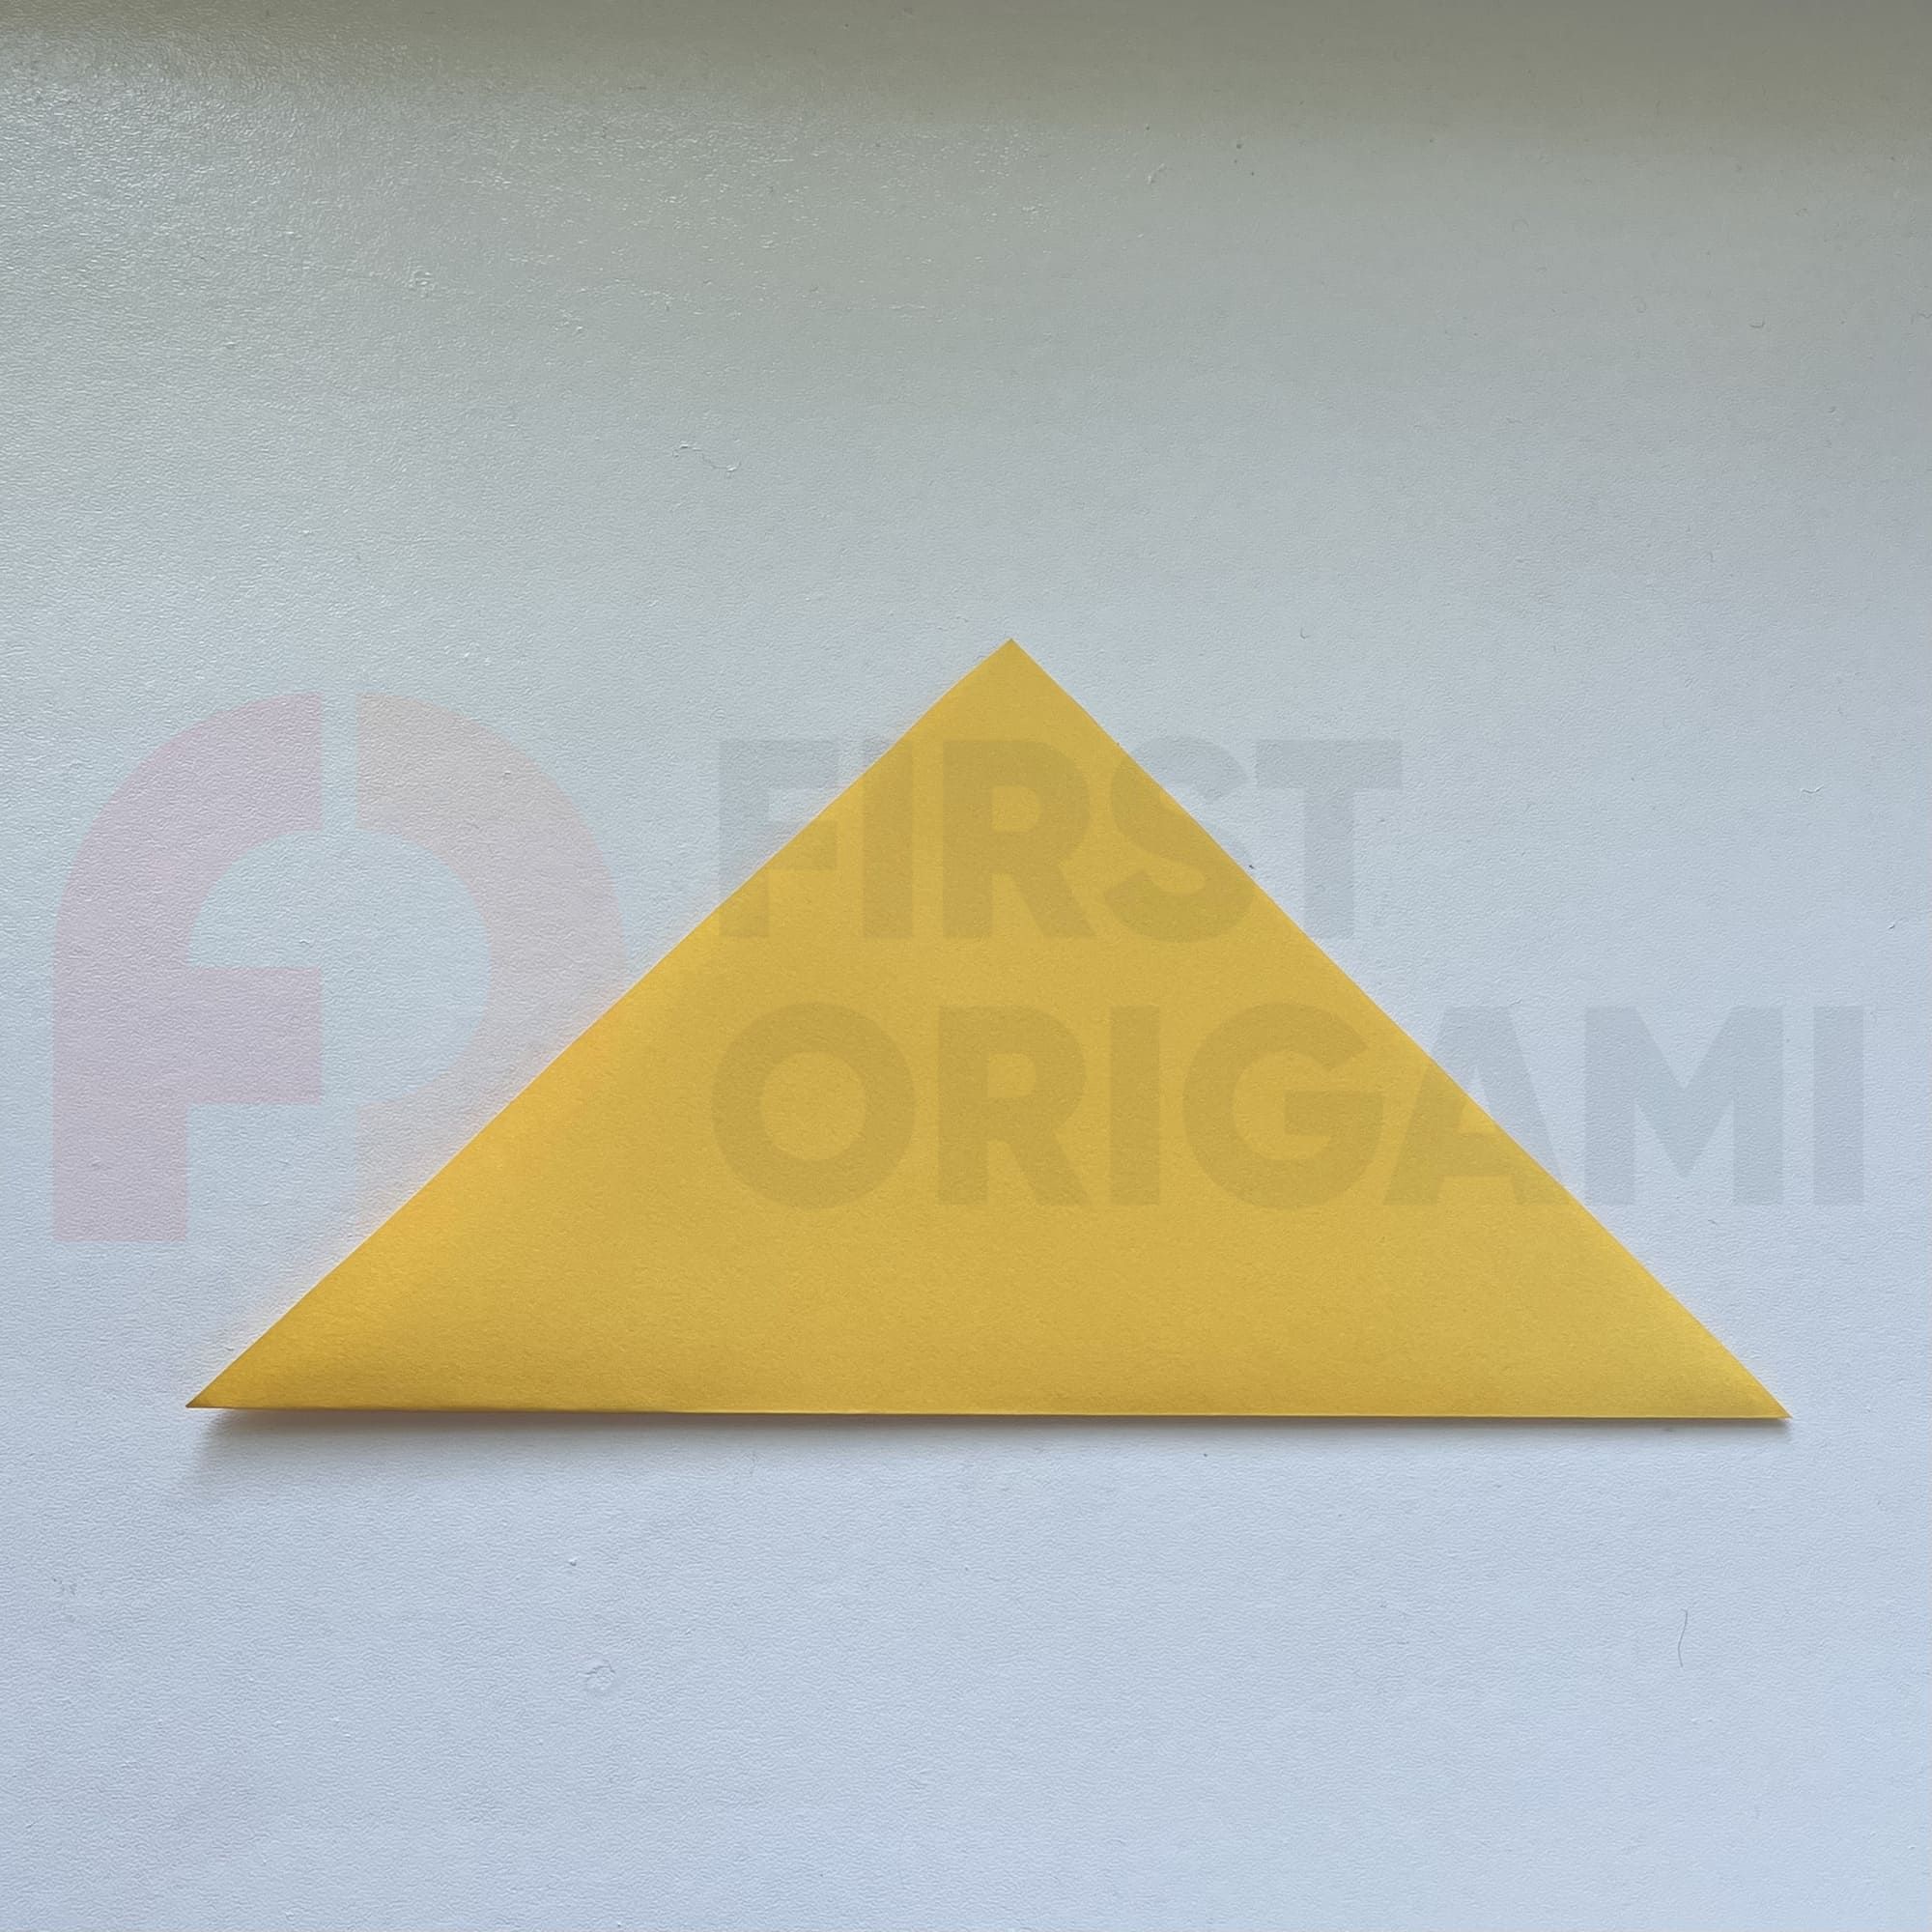
Fold in half, joining the opposite corners.
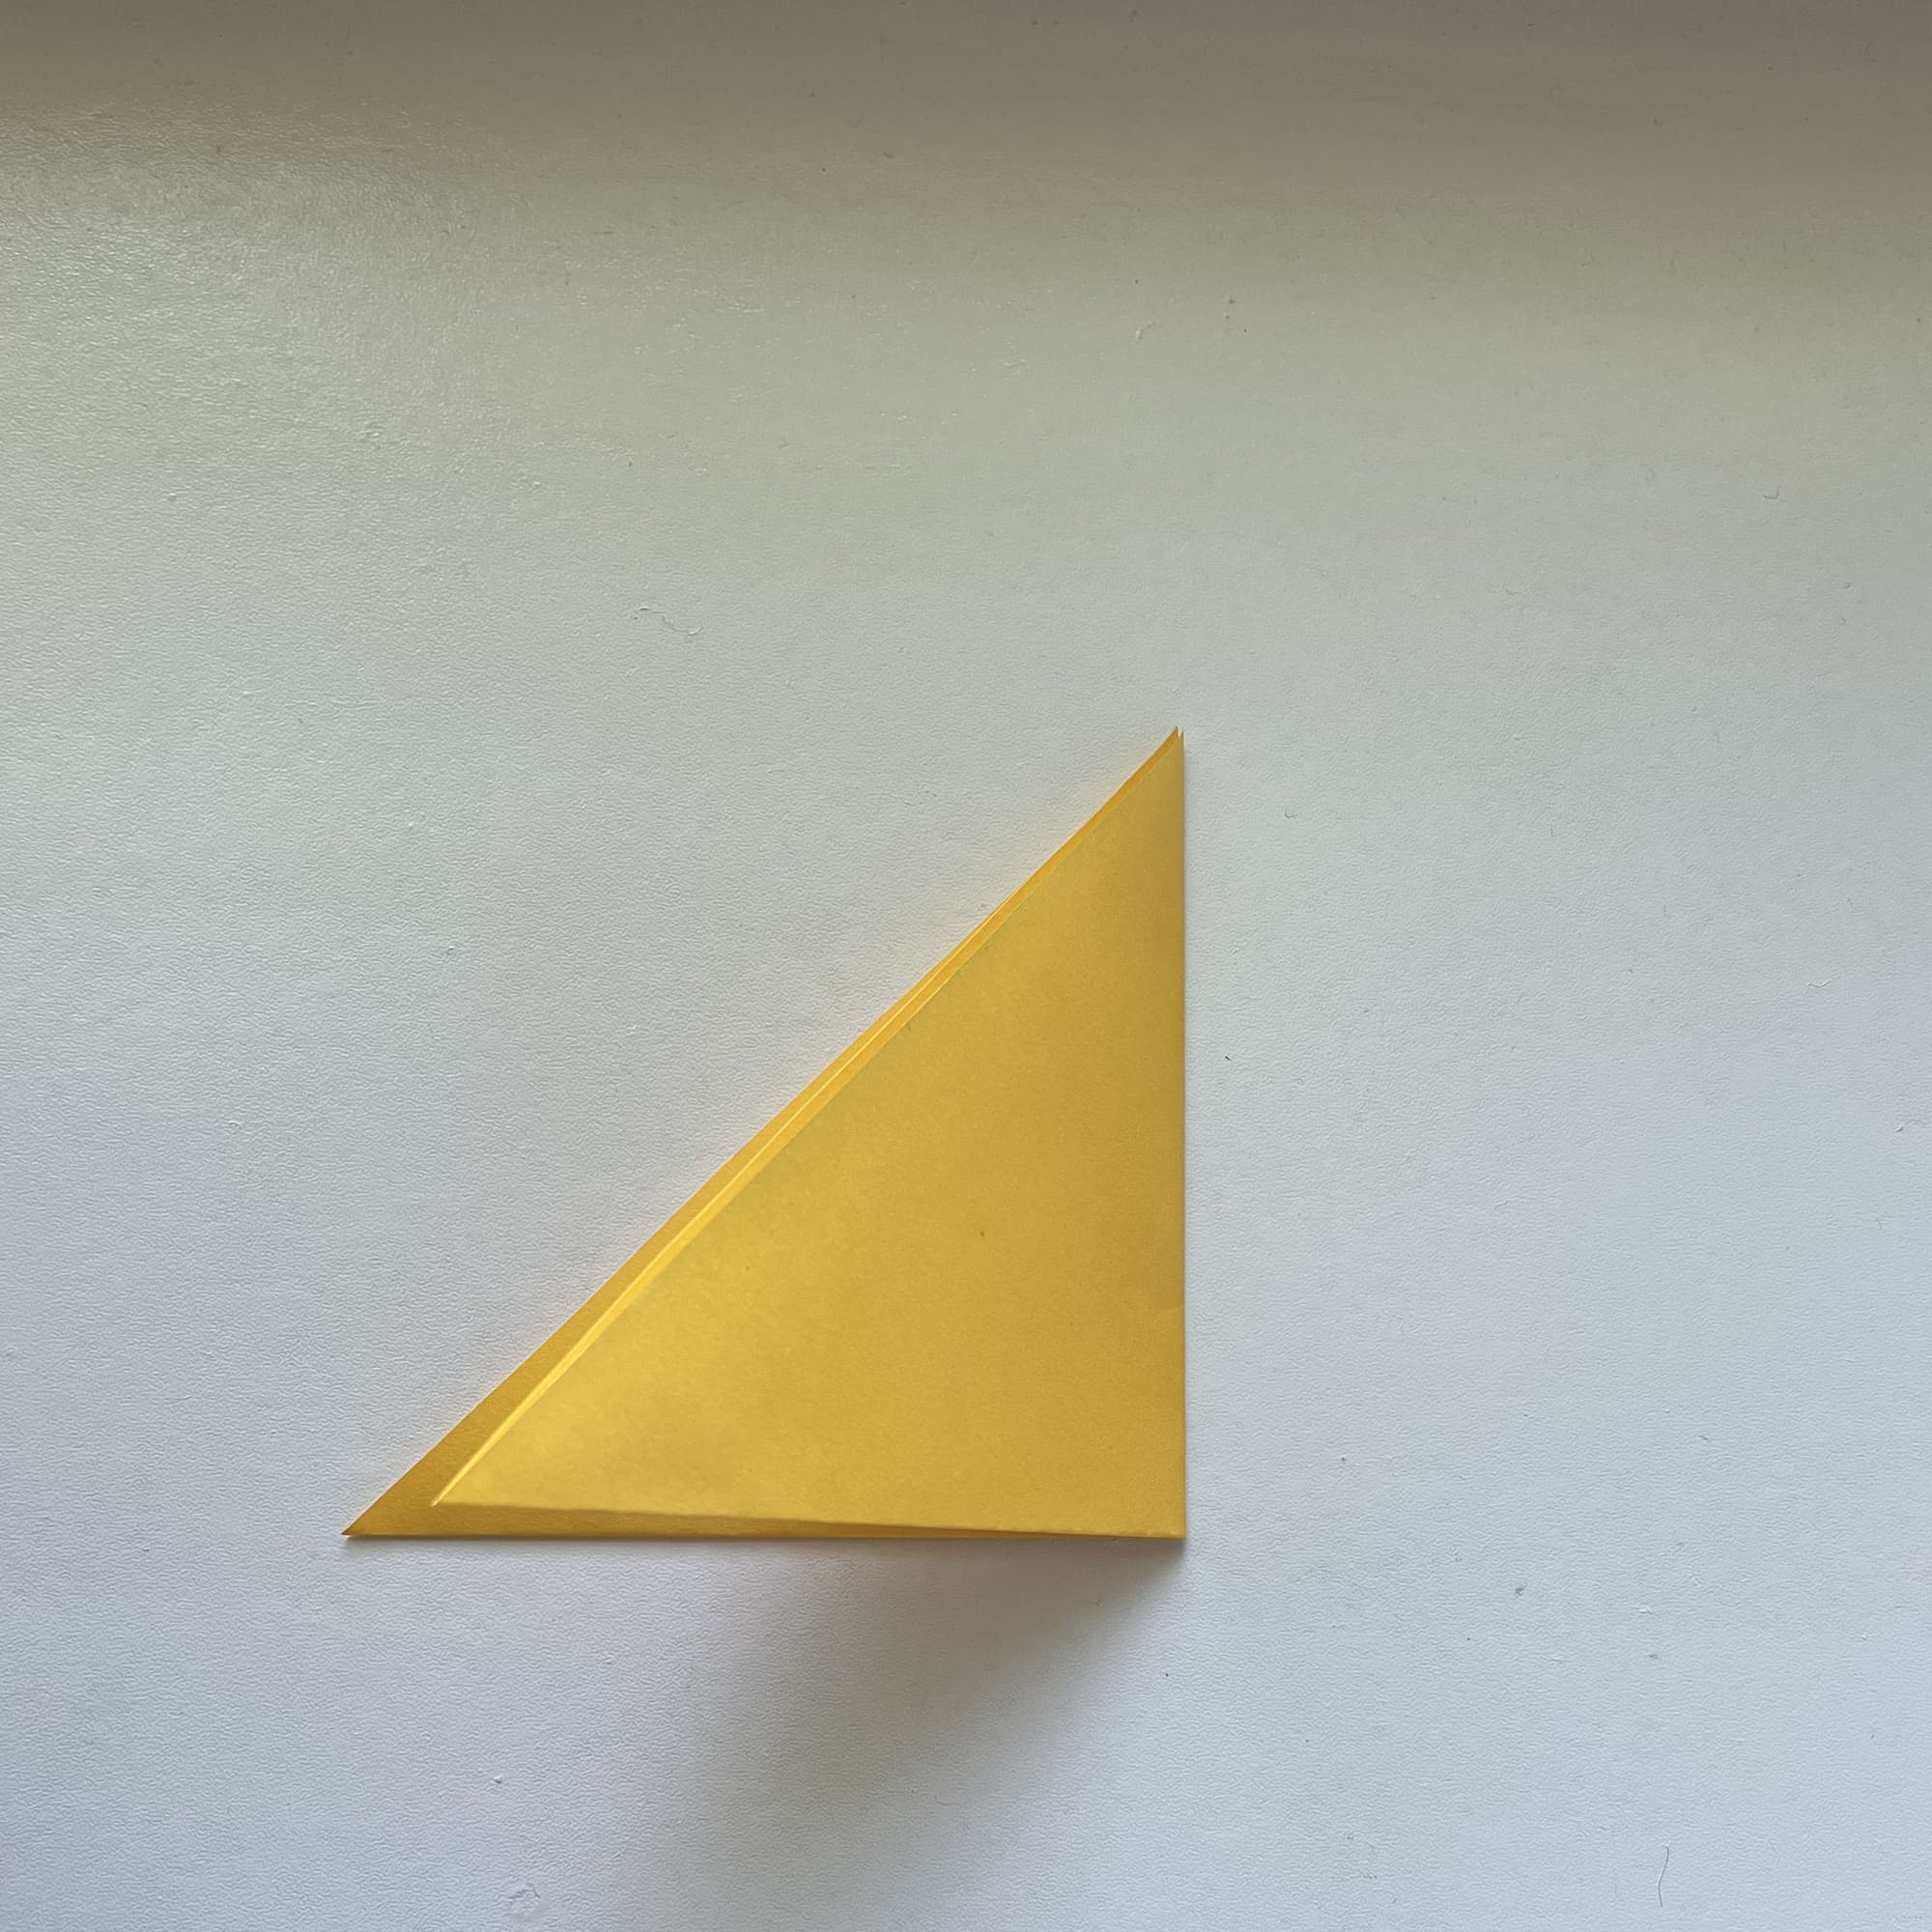
Fold in half again, work out the fold, and unfold.
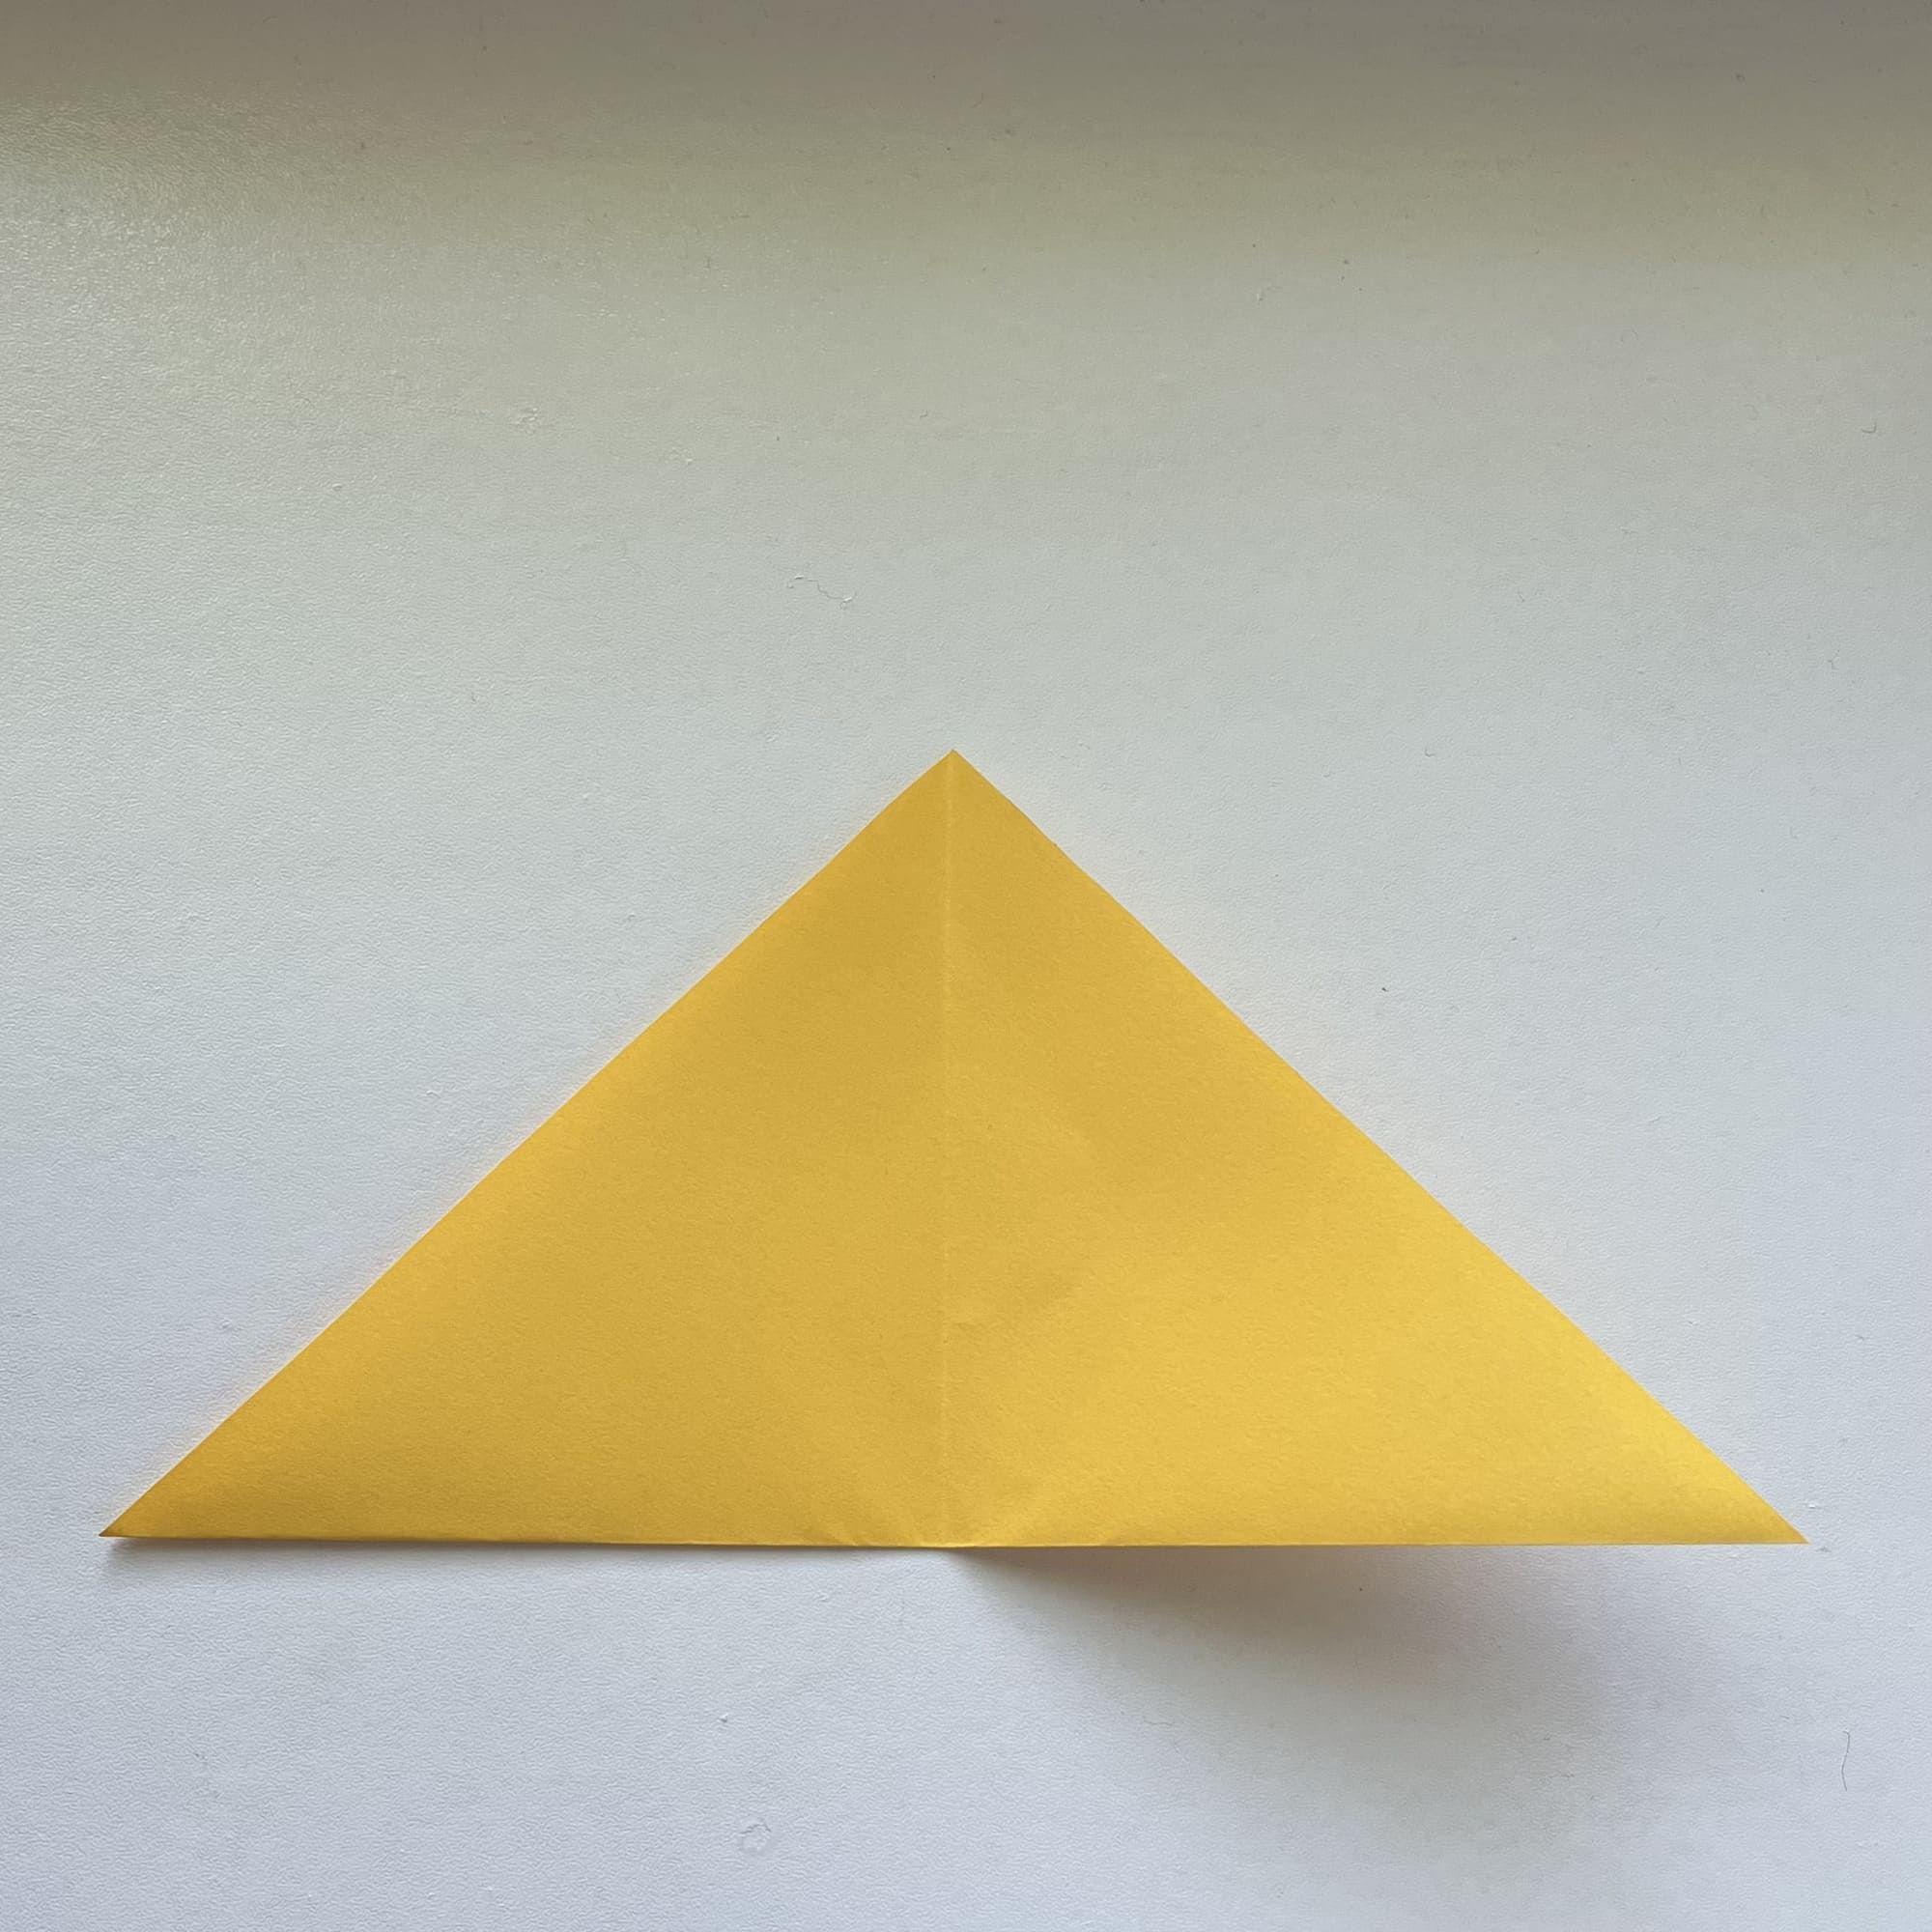
You should get a wide triangle with a vertical folding line coming through its center.
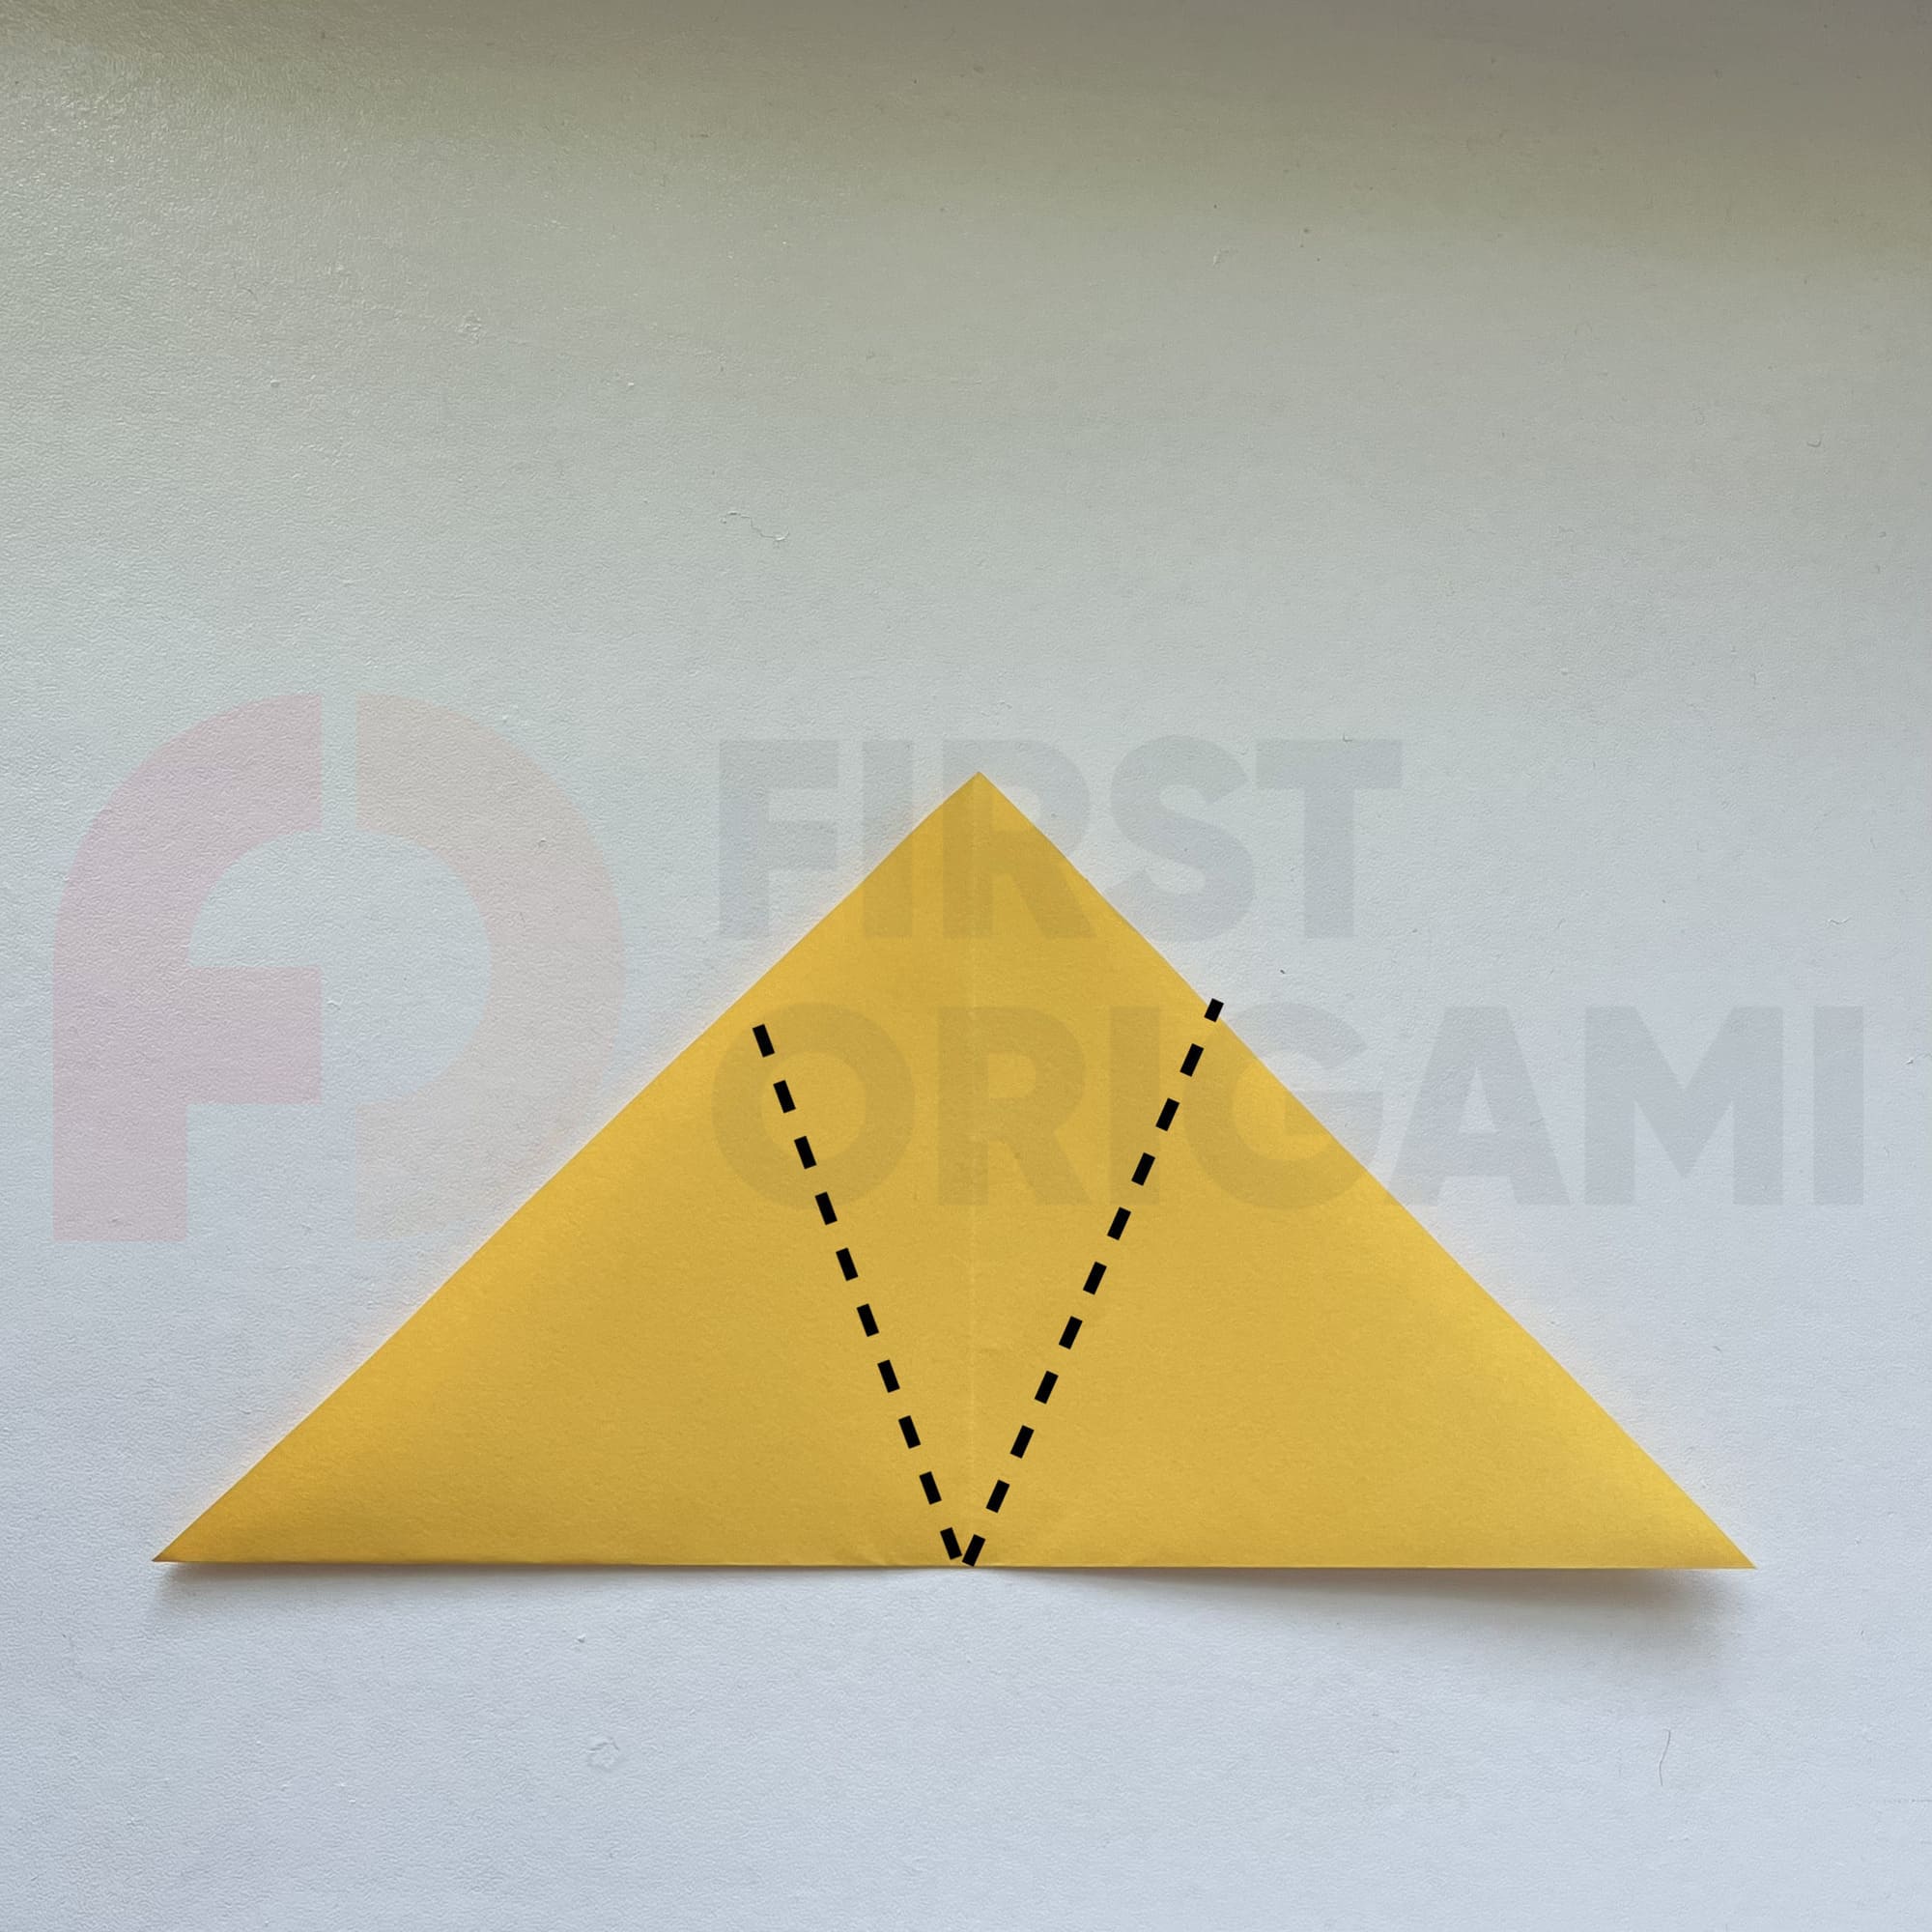
The photo shows dotted lines – on them, you need to bend the side corners inside. Their tips should stick out a little.
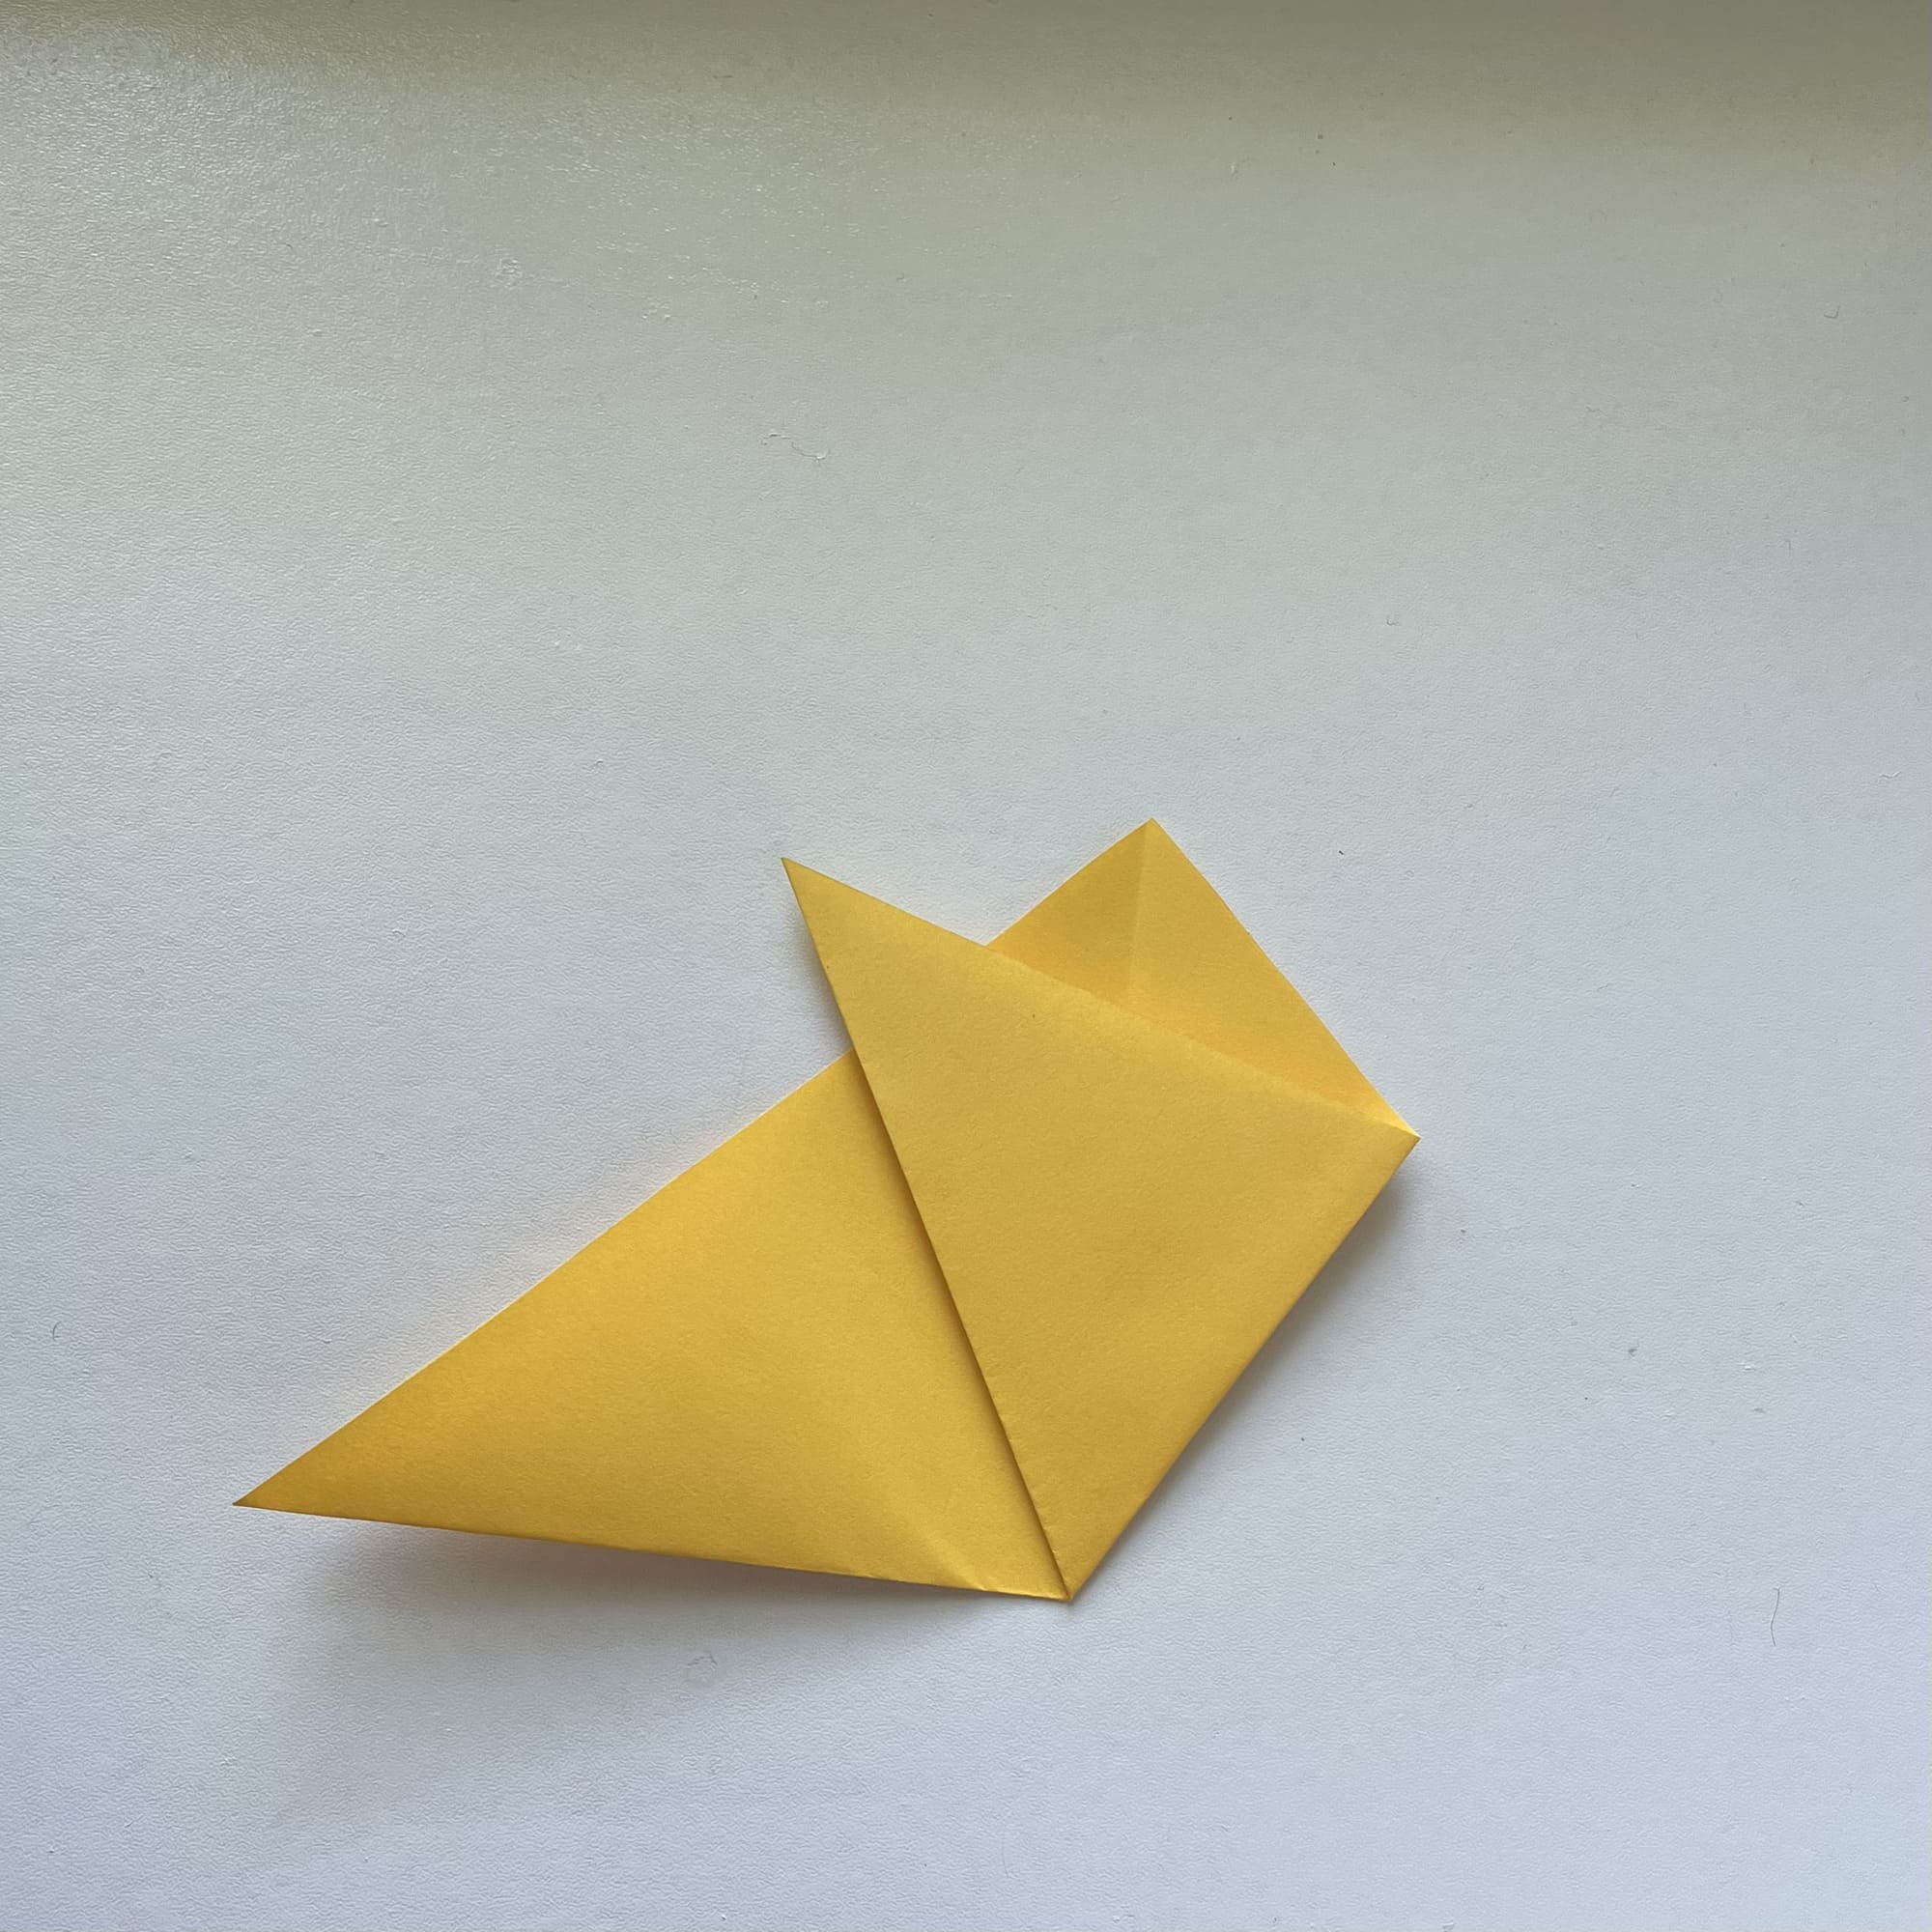
Fold the right side to the left first.
Then do the same with the left part of the triangle, overlapping the right corner.

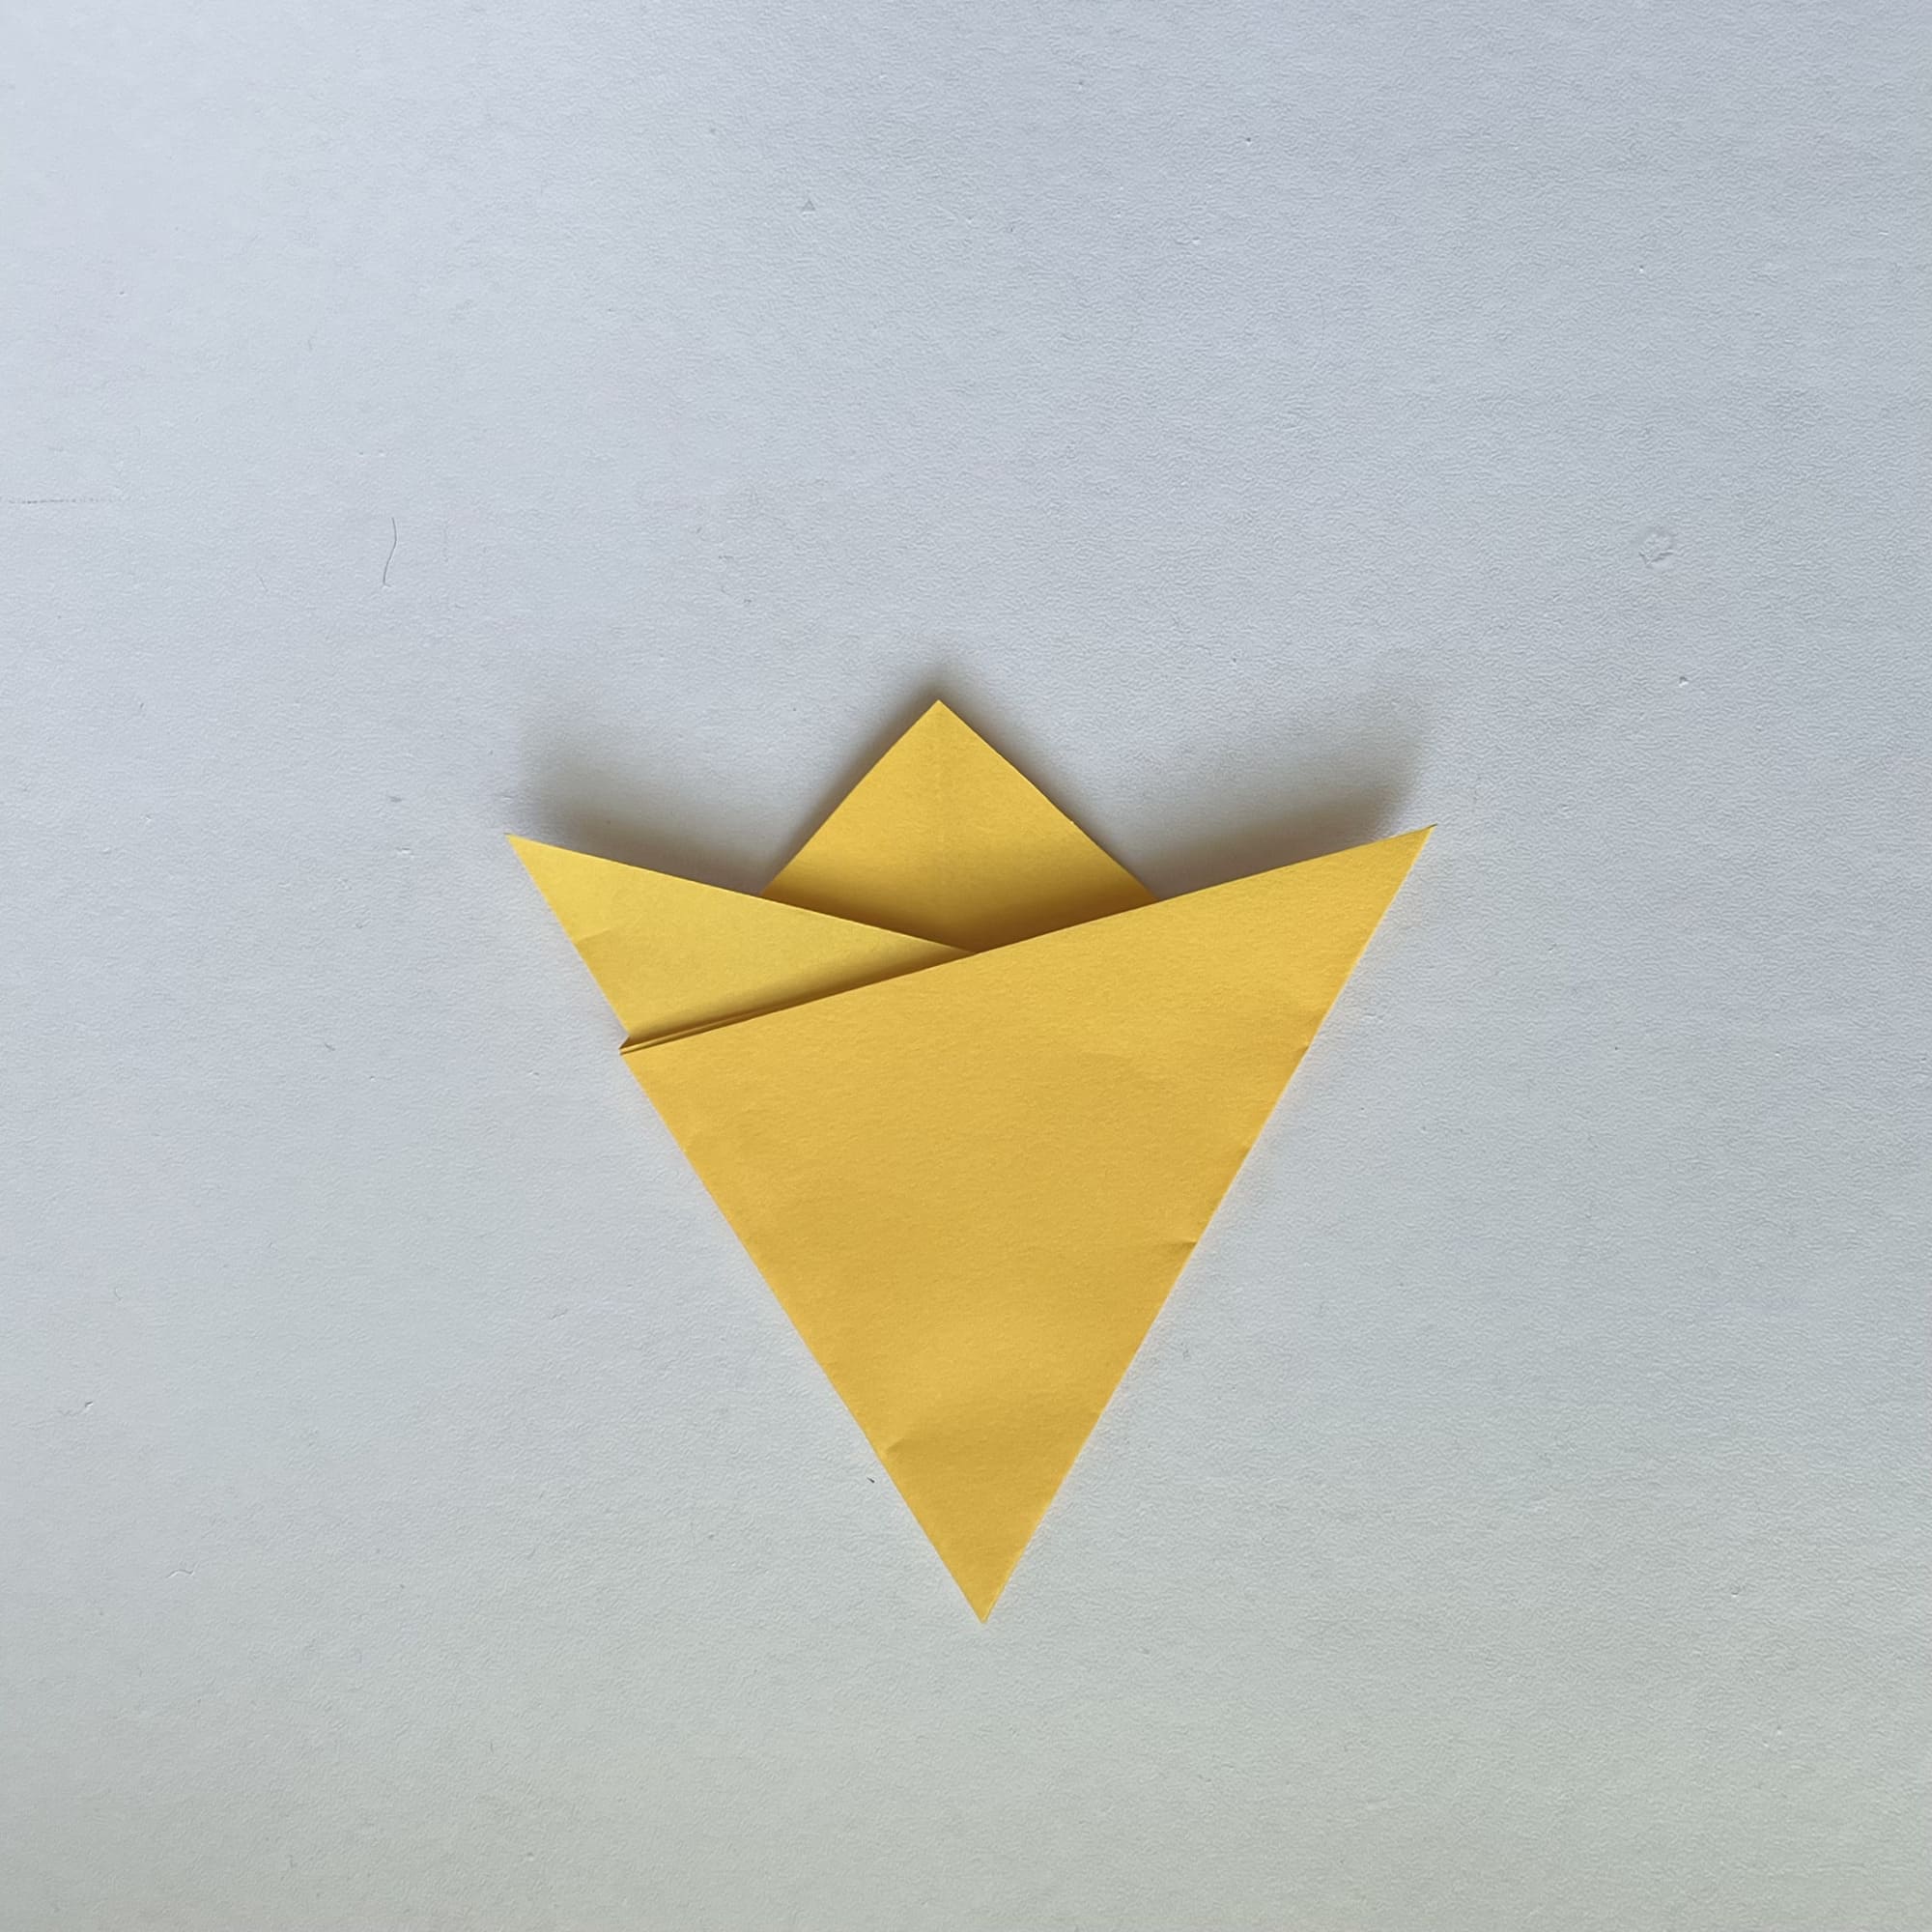
Fold the top part as shown in the photo.
Turn the paper over.
Fold in the top corner.
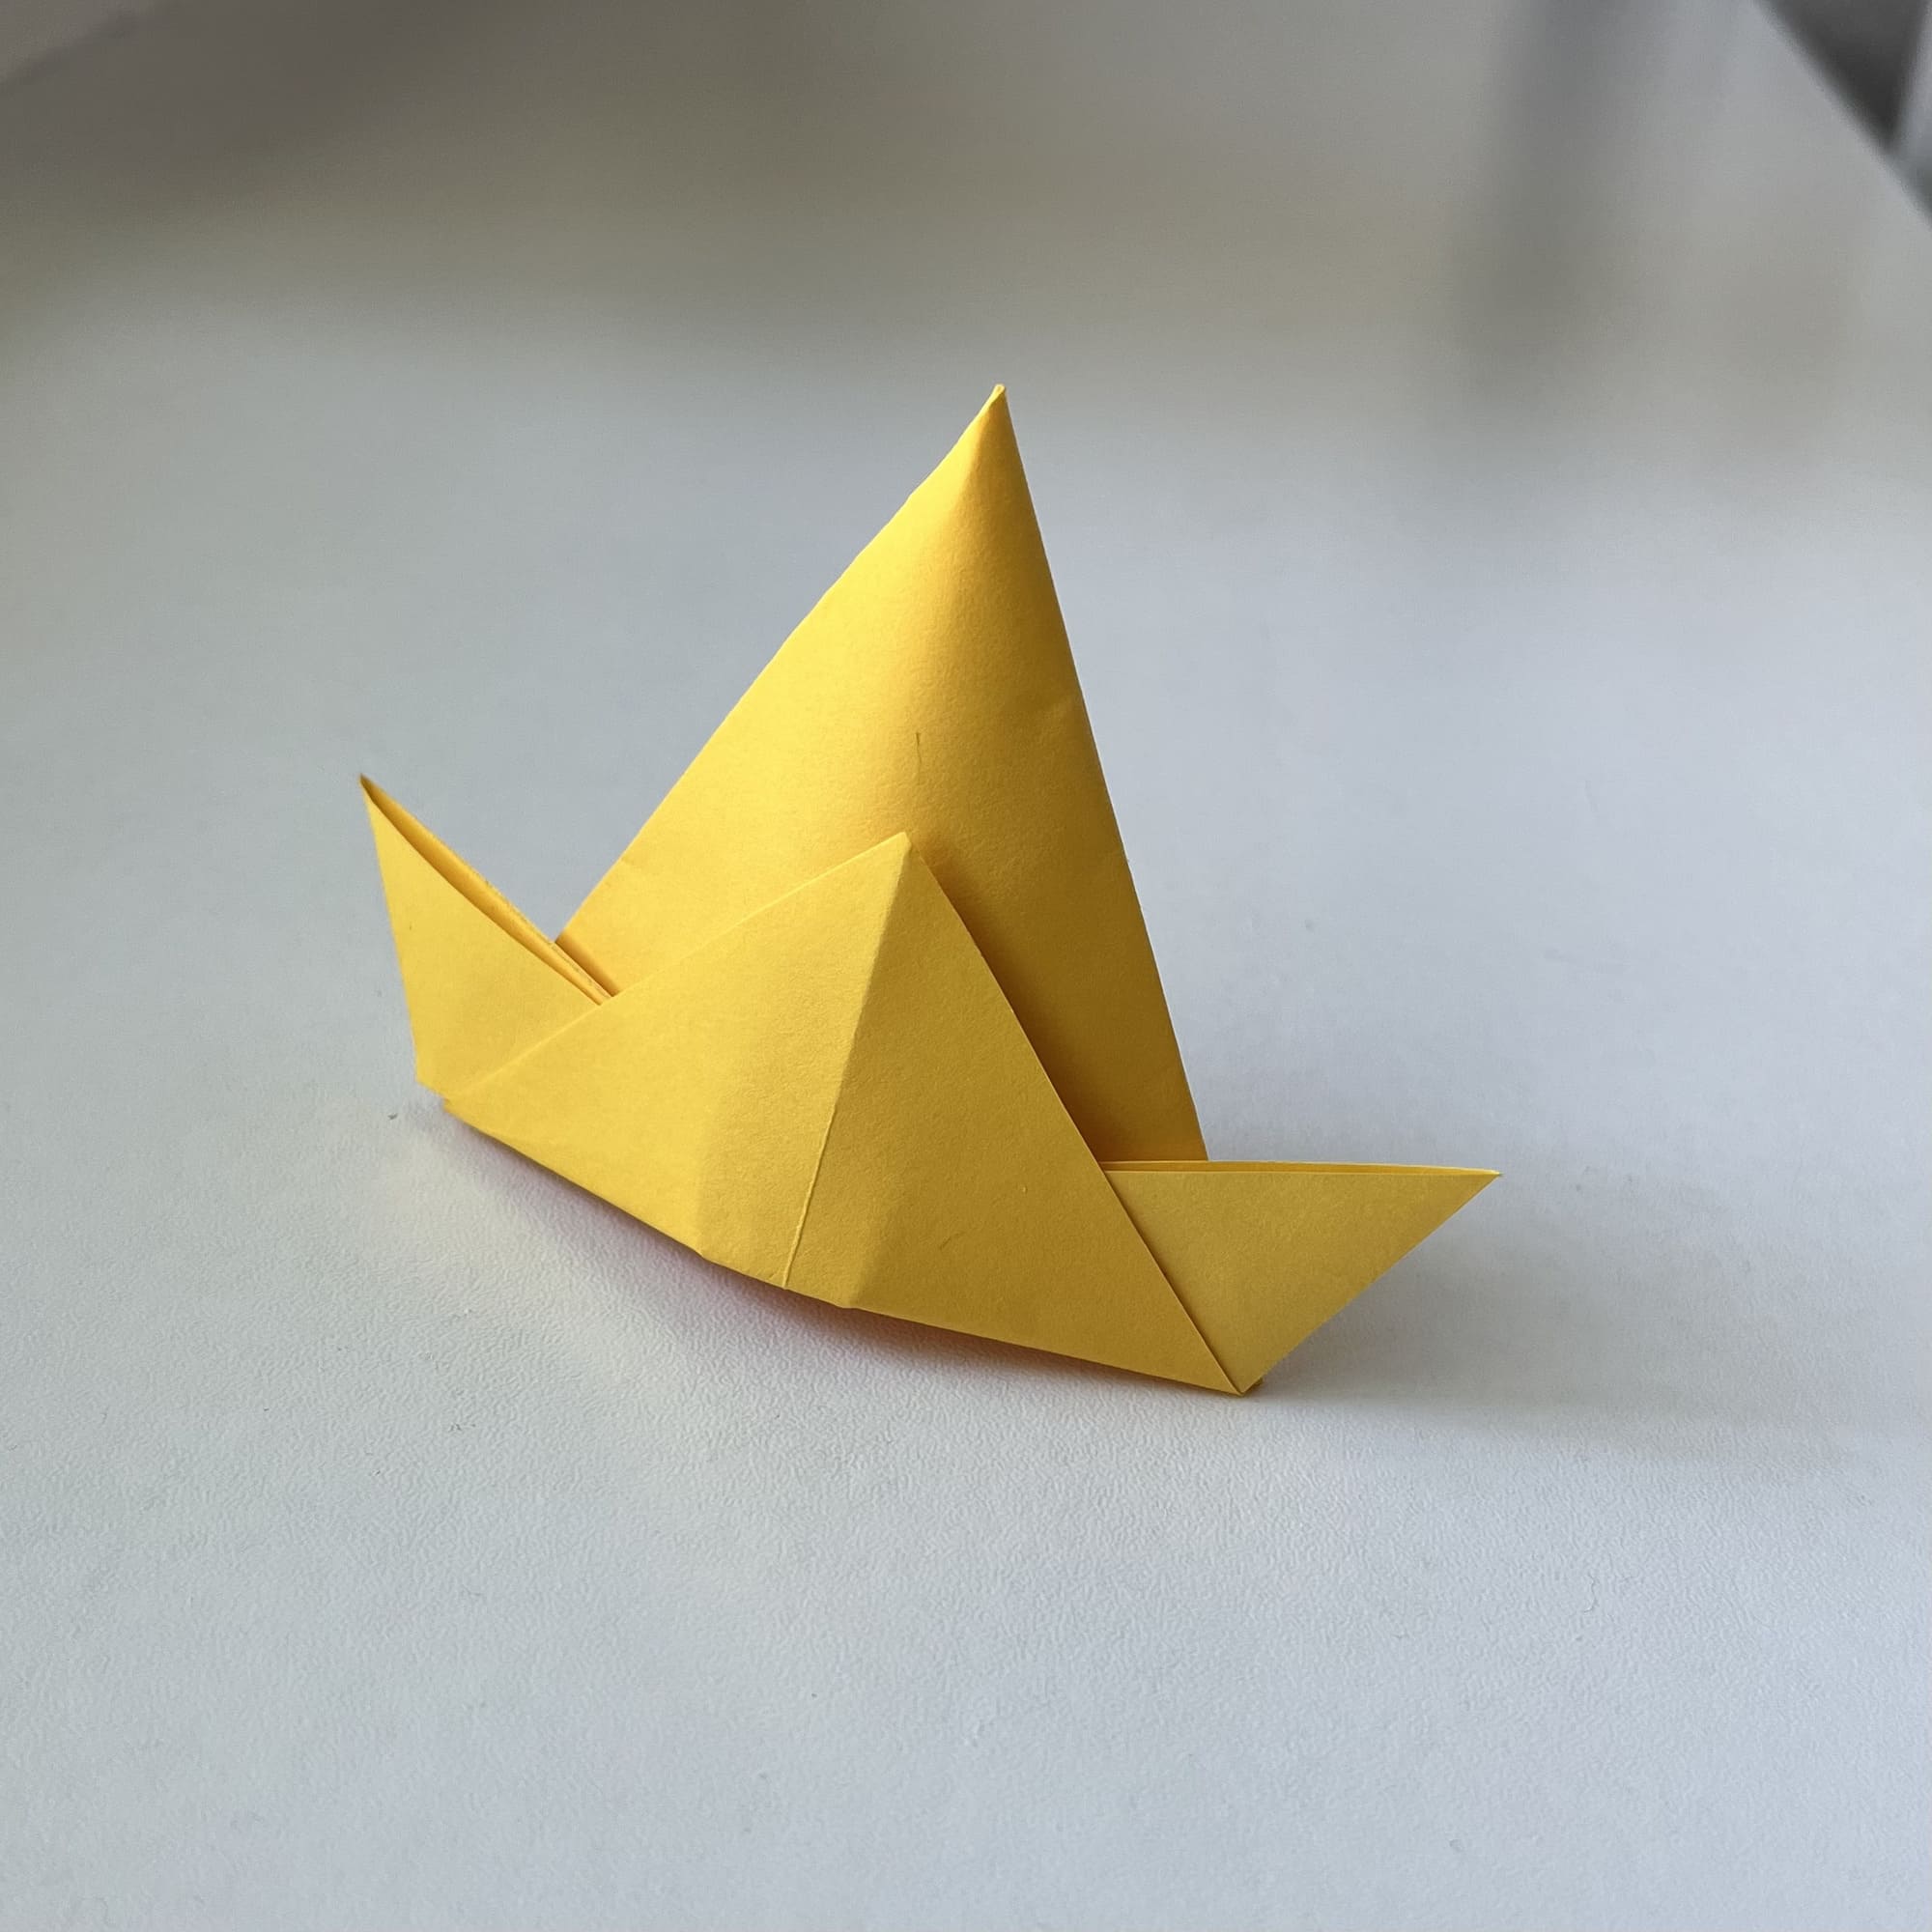
It remains to open the figure a little by squeezing the sides to make it three-dimensional.
Great job! Now you can try on your hat.


