Star Crusher Airplane
This aircraft model is far from the classical form. The design looks very impressive and the flight turns out no less impressive. This origami will be the highlight of your collection of paper planes.
The name “Star Destroyer” may mislead you, but, of course, this plane does not destroy any stars. Such a nickname rather indicates its cosmic scale and unusual shape. It may well be mistaken for a spaceship that makes its way into the depths of our galaxy.
This origami can be attributed to the average level of complexity. The process of its creation is quite laborious and will take a little more time. However, the result is definitely worth it!
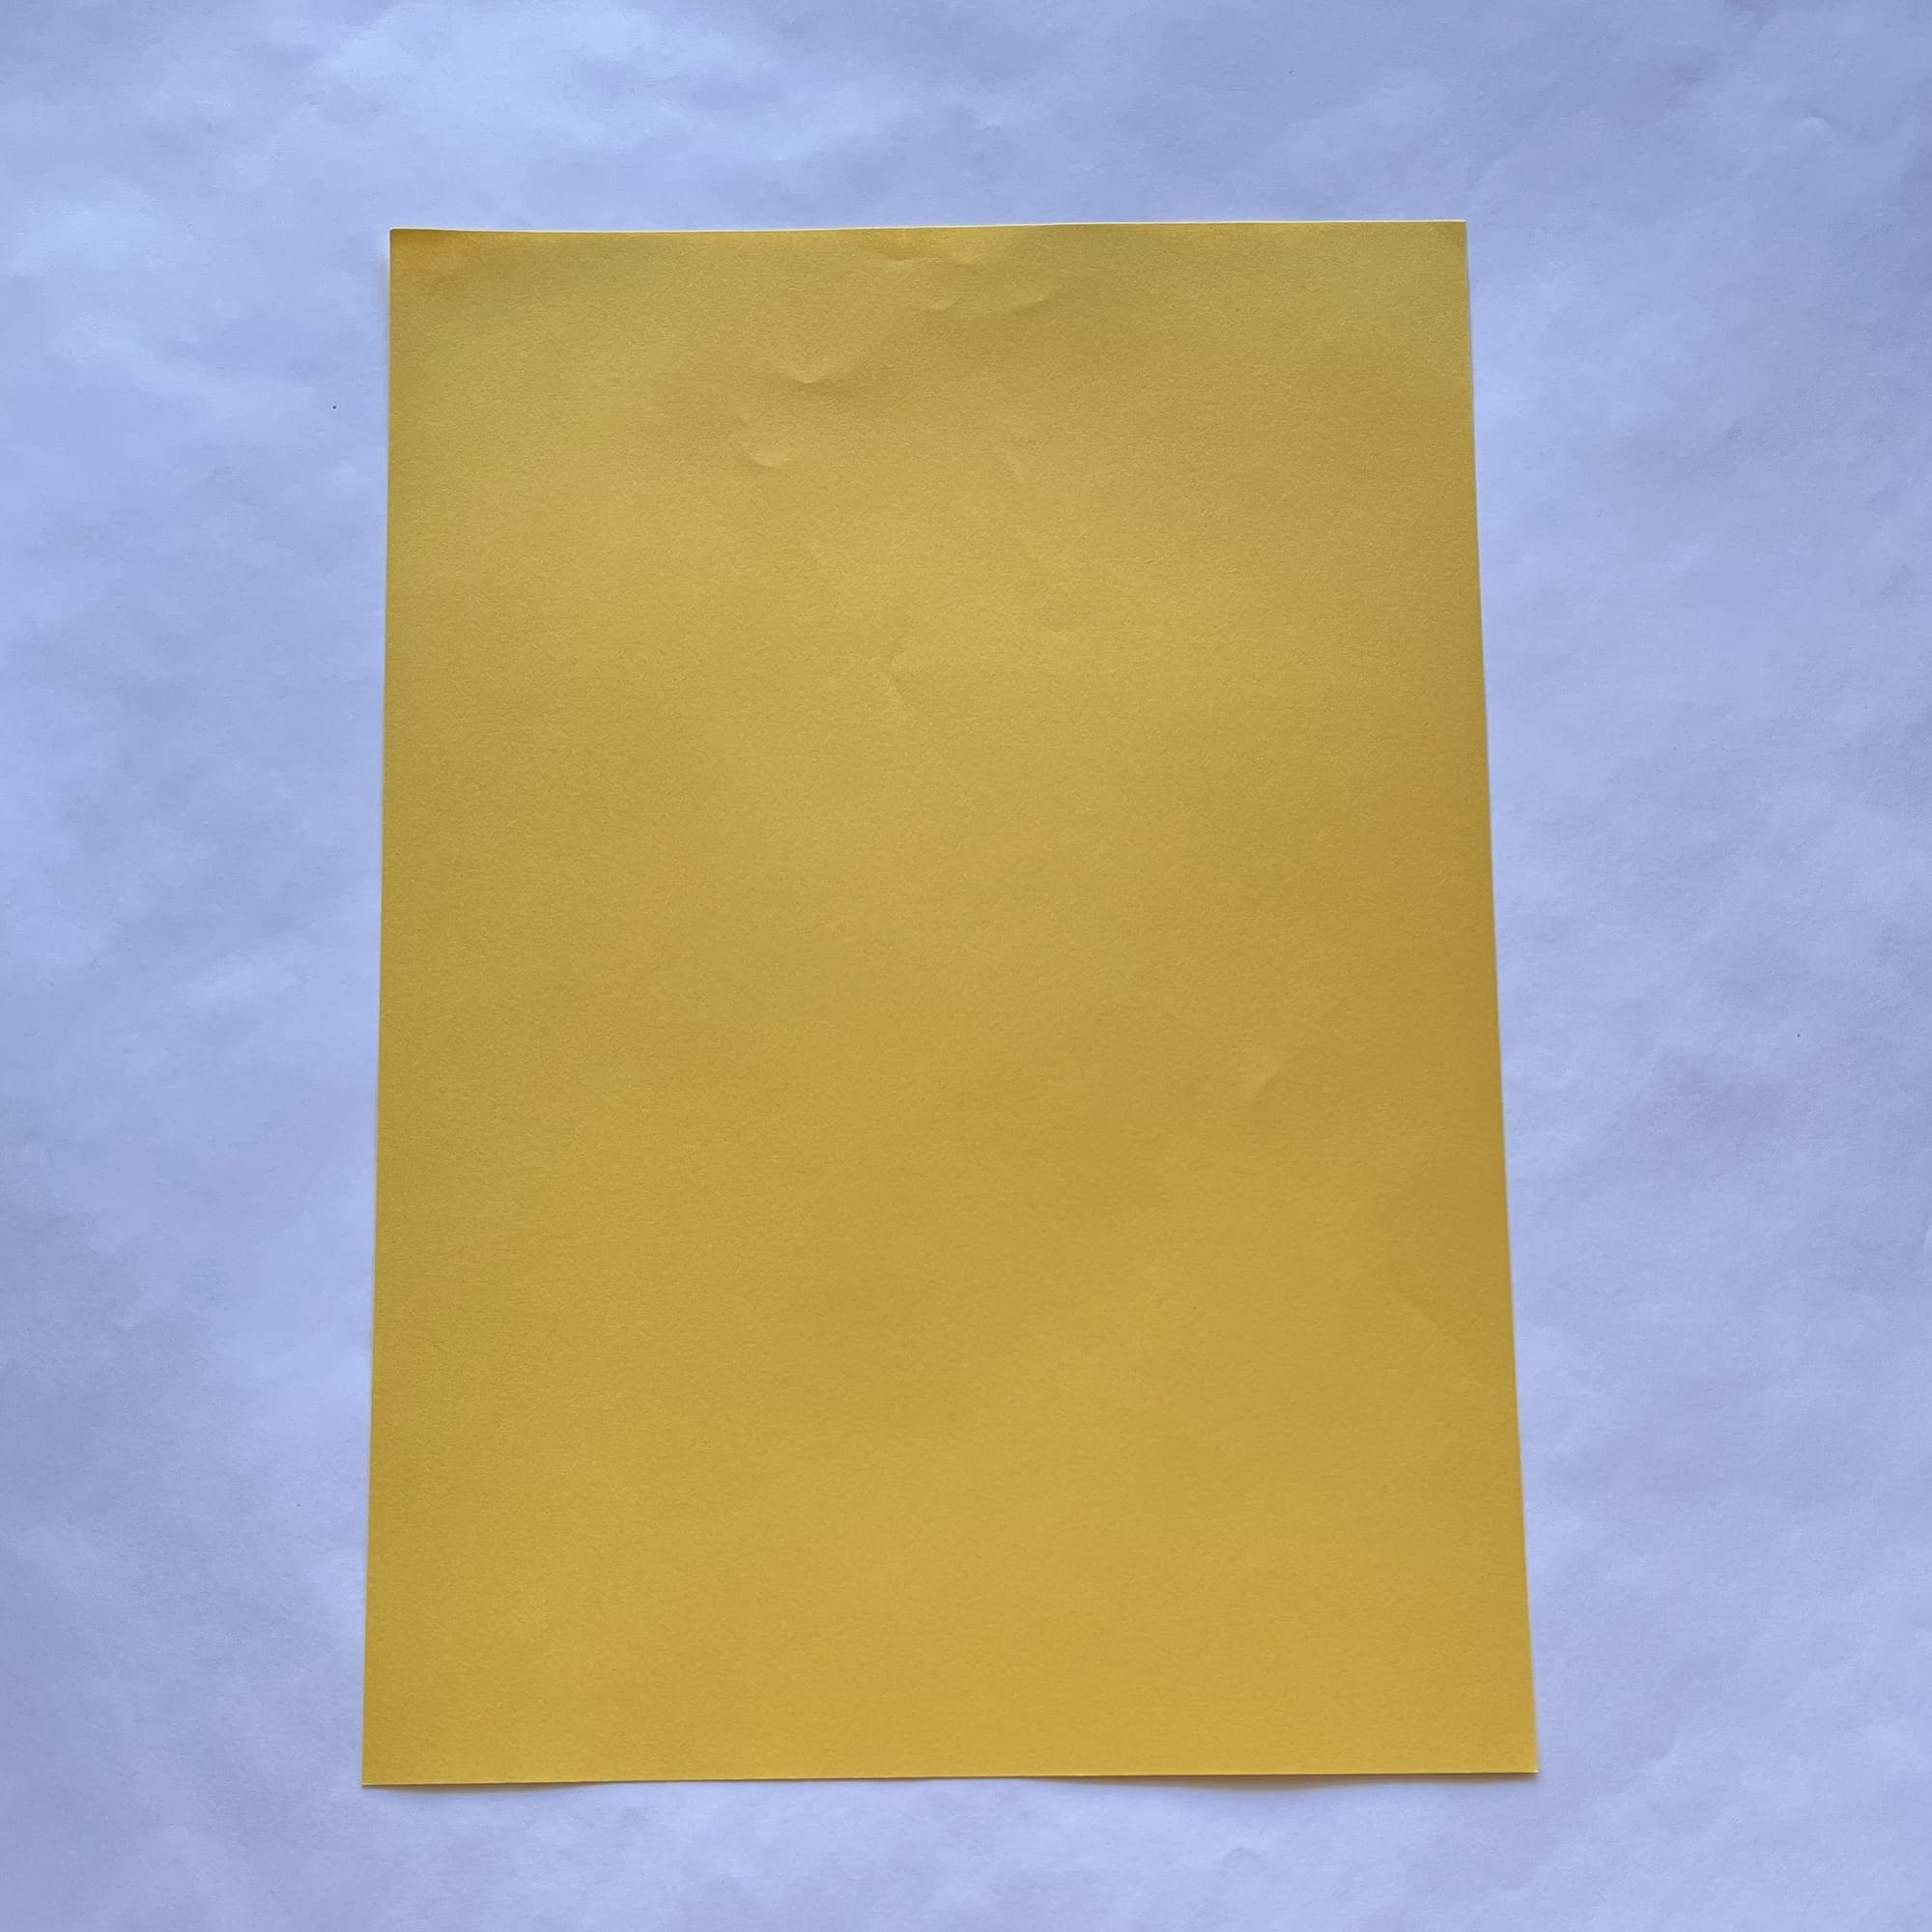
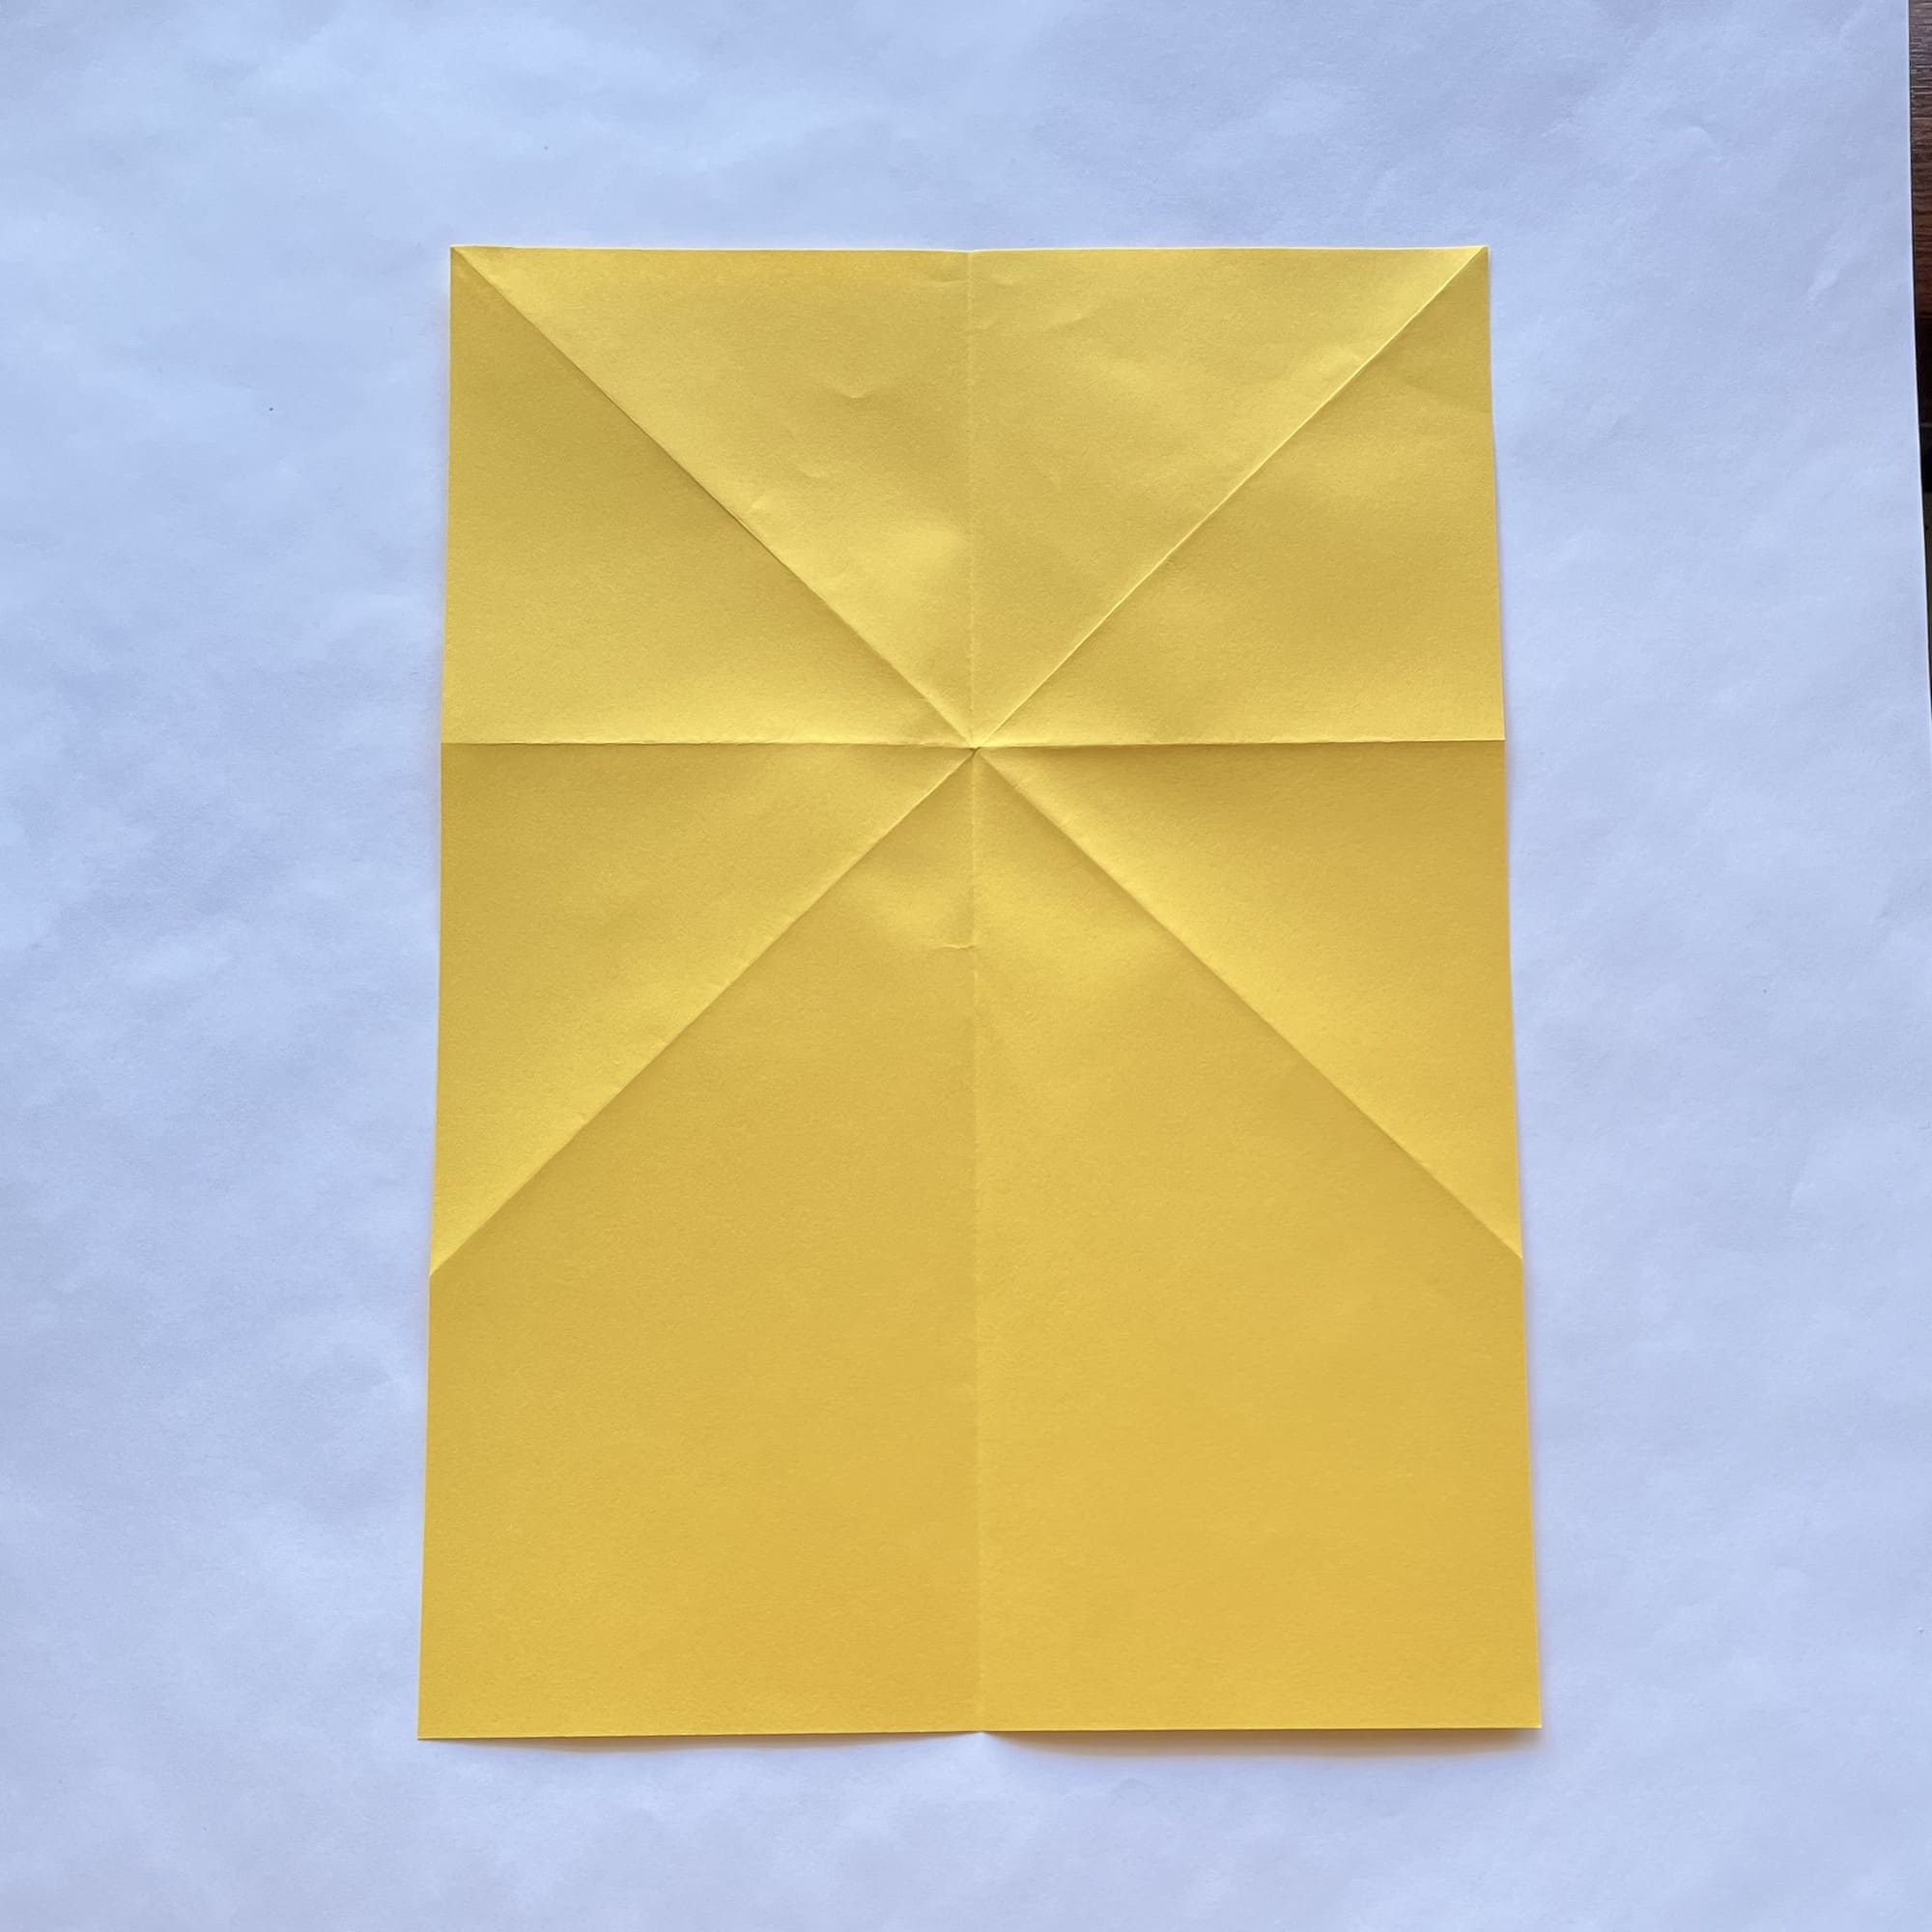
First, you need to prepare A4 size of paper.

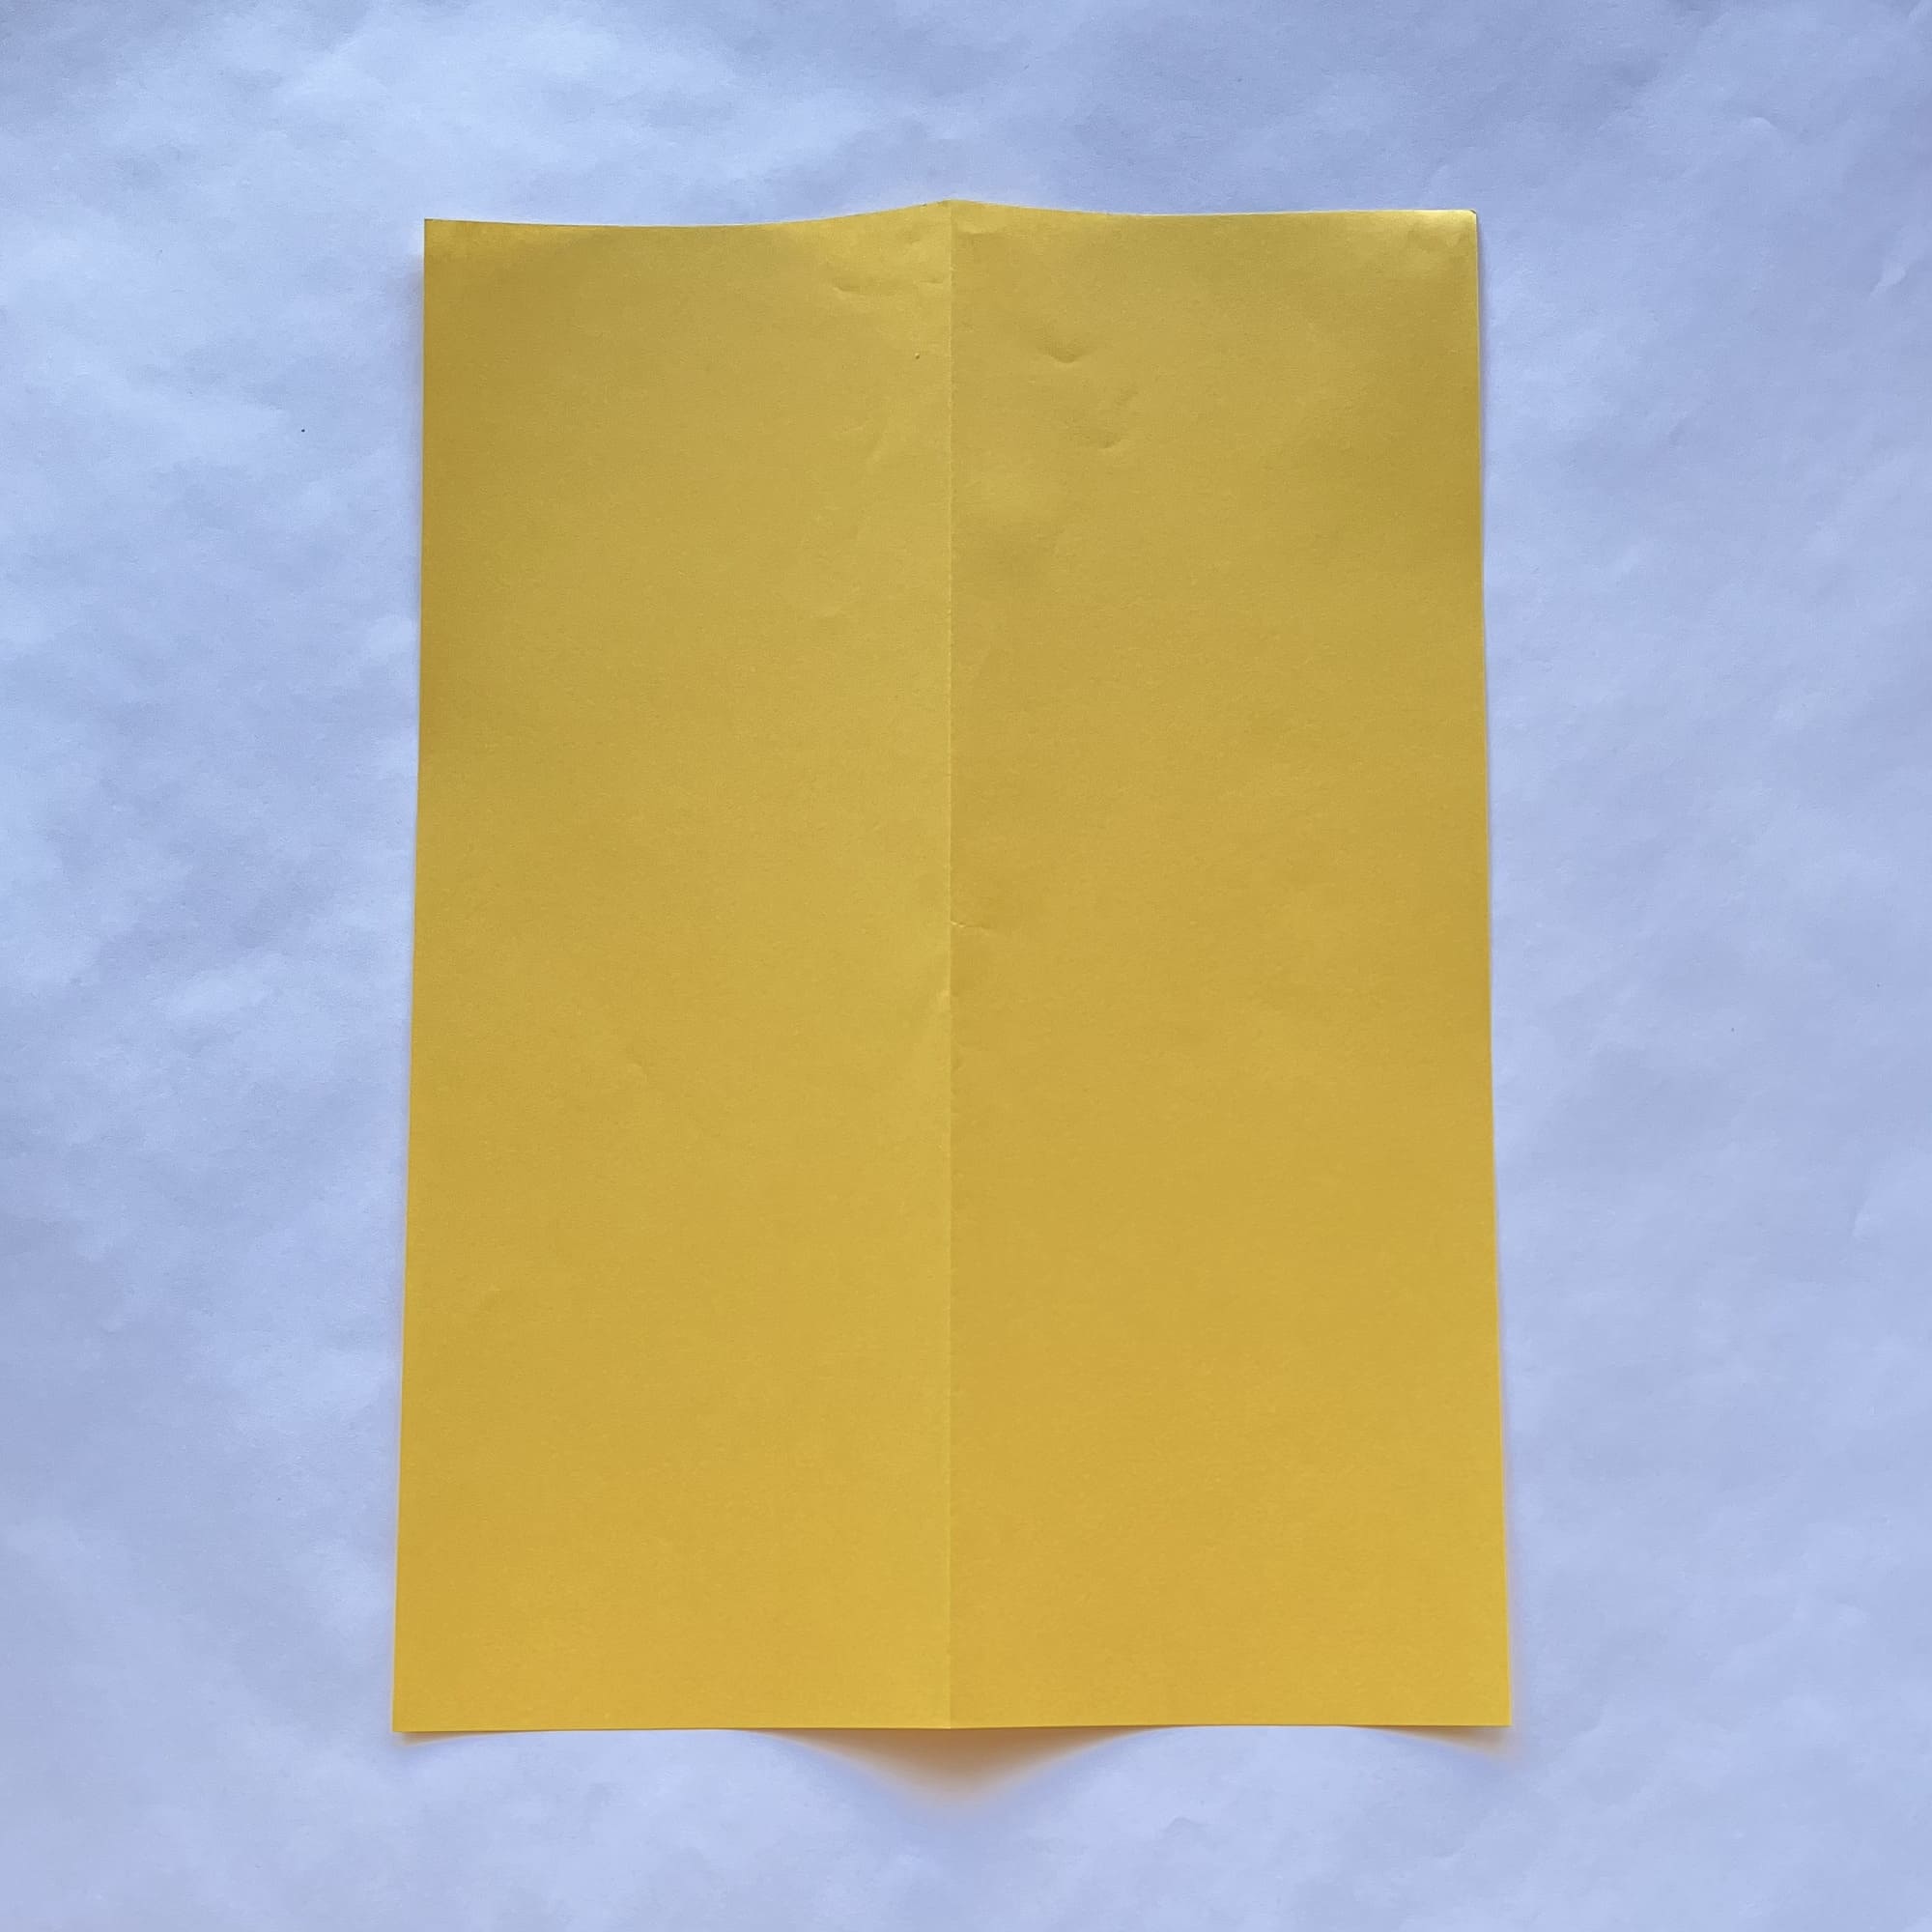
Now, you can fold it in half along the longitudinal axis, crease the fold, and unfold it.
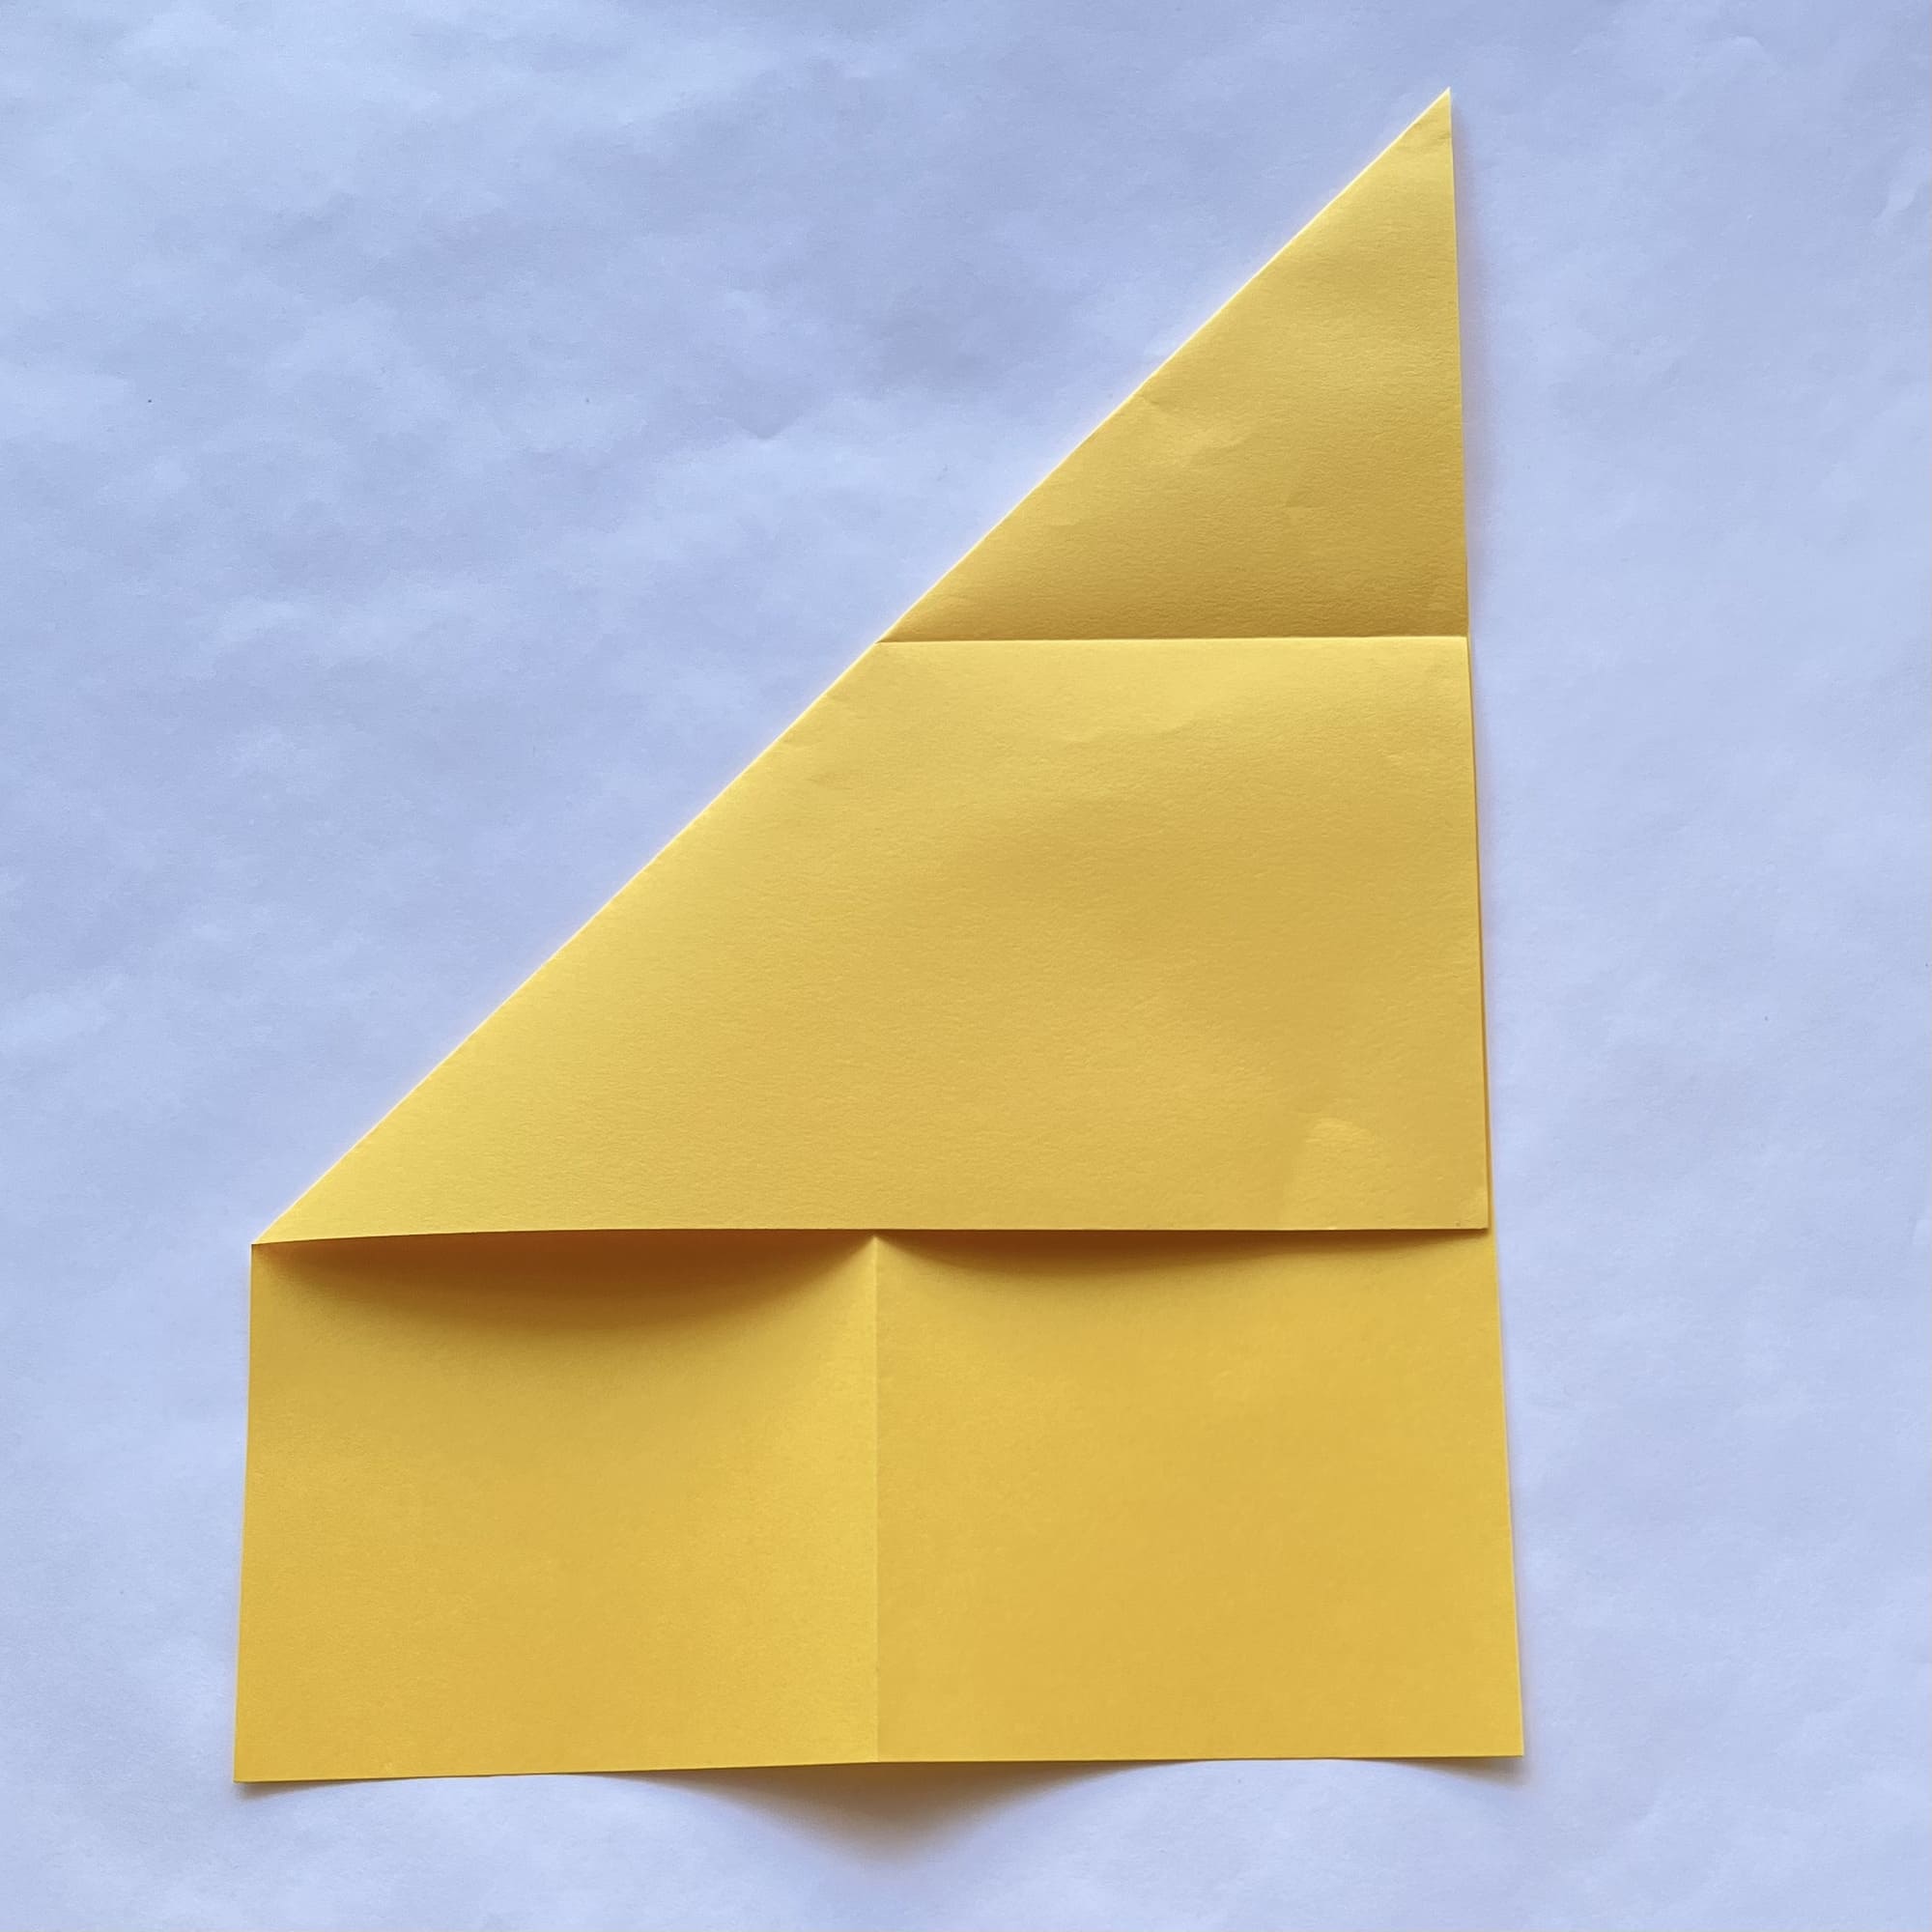
Turn over the sheet, before you start bending the upper left corner inward to the right side.
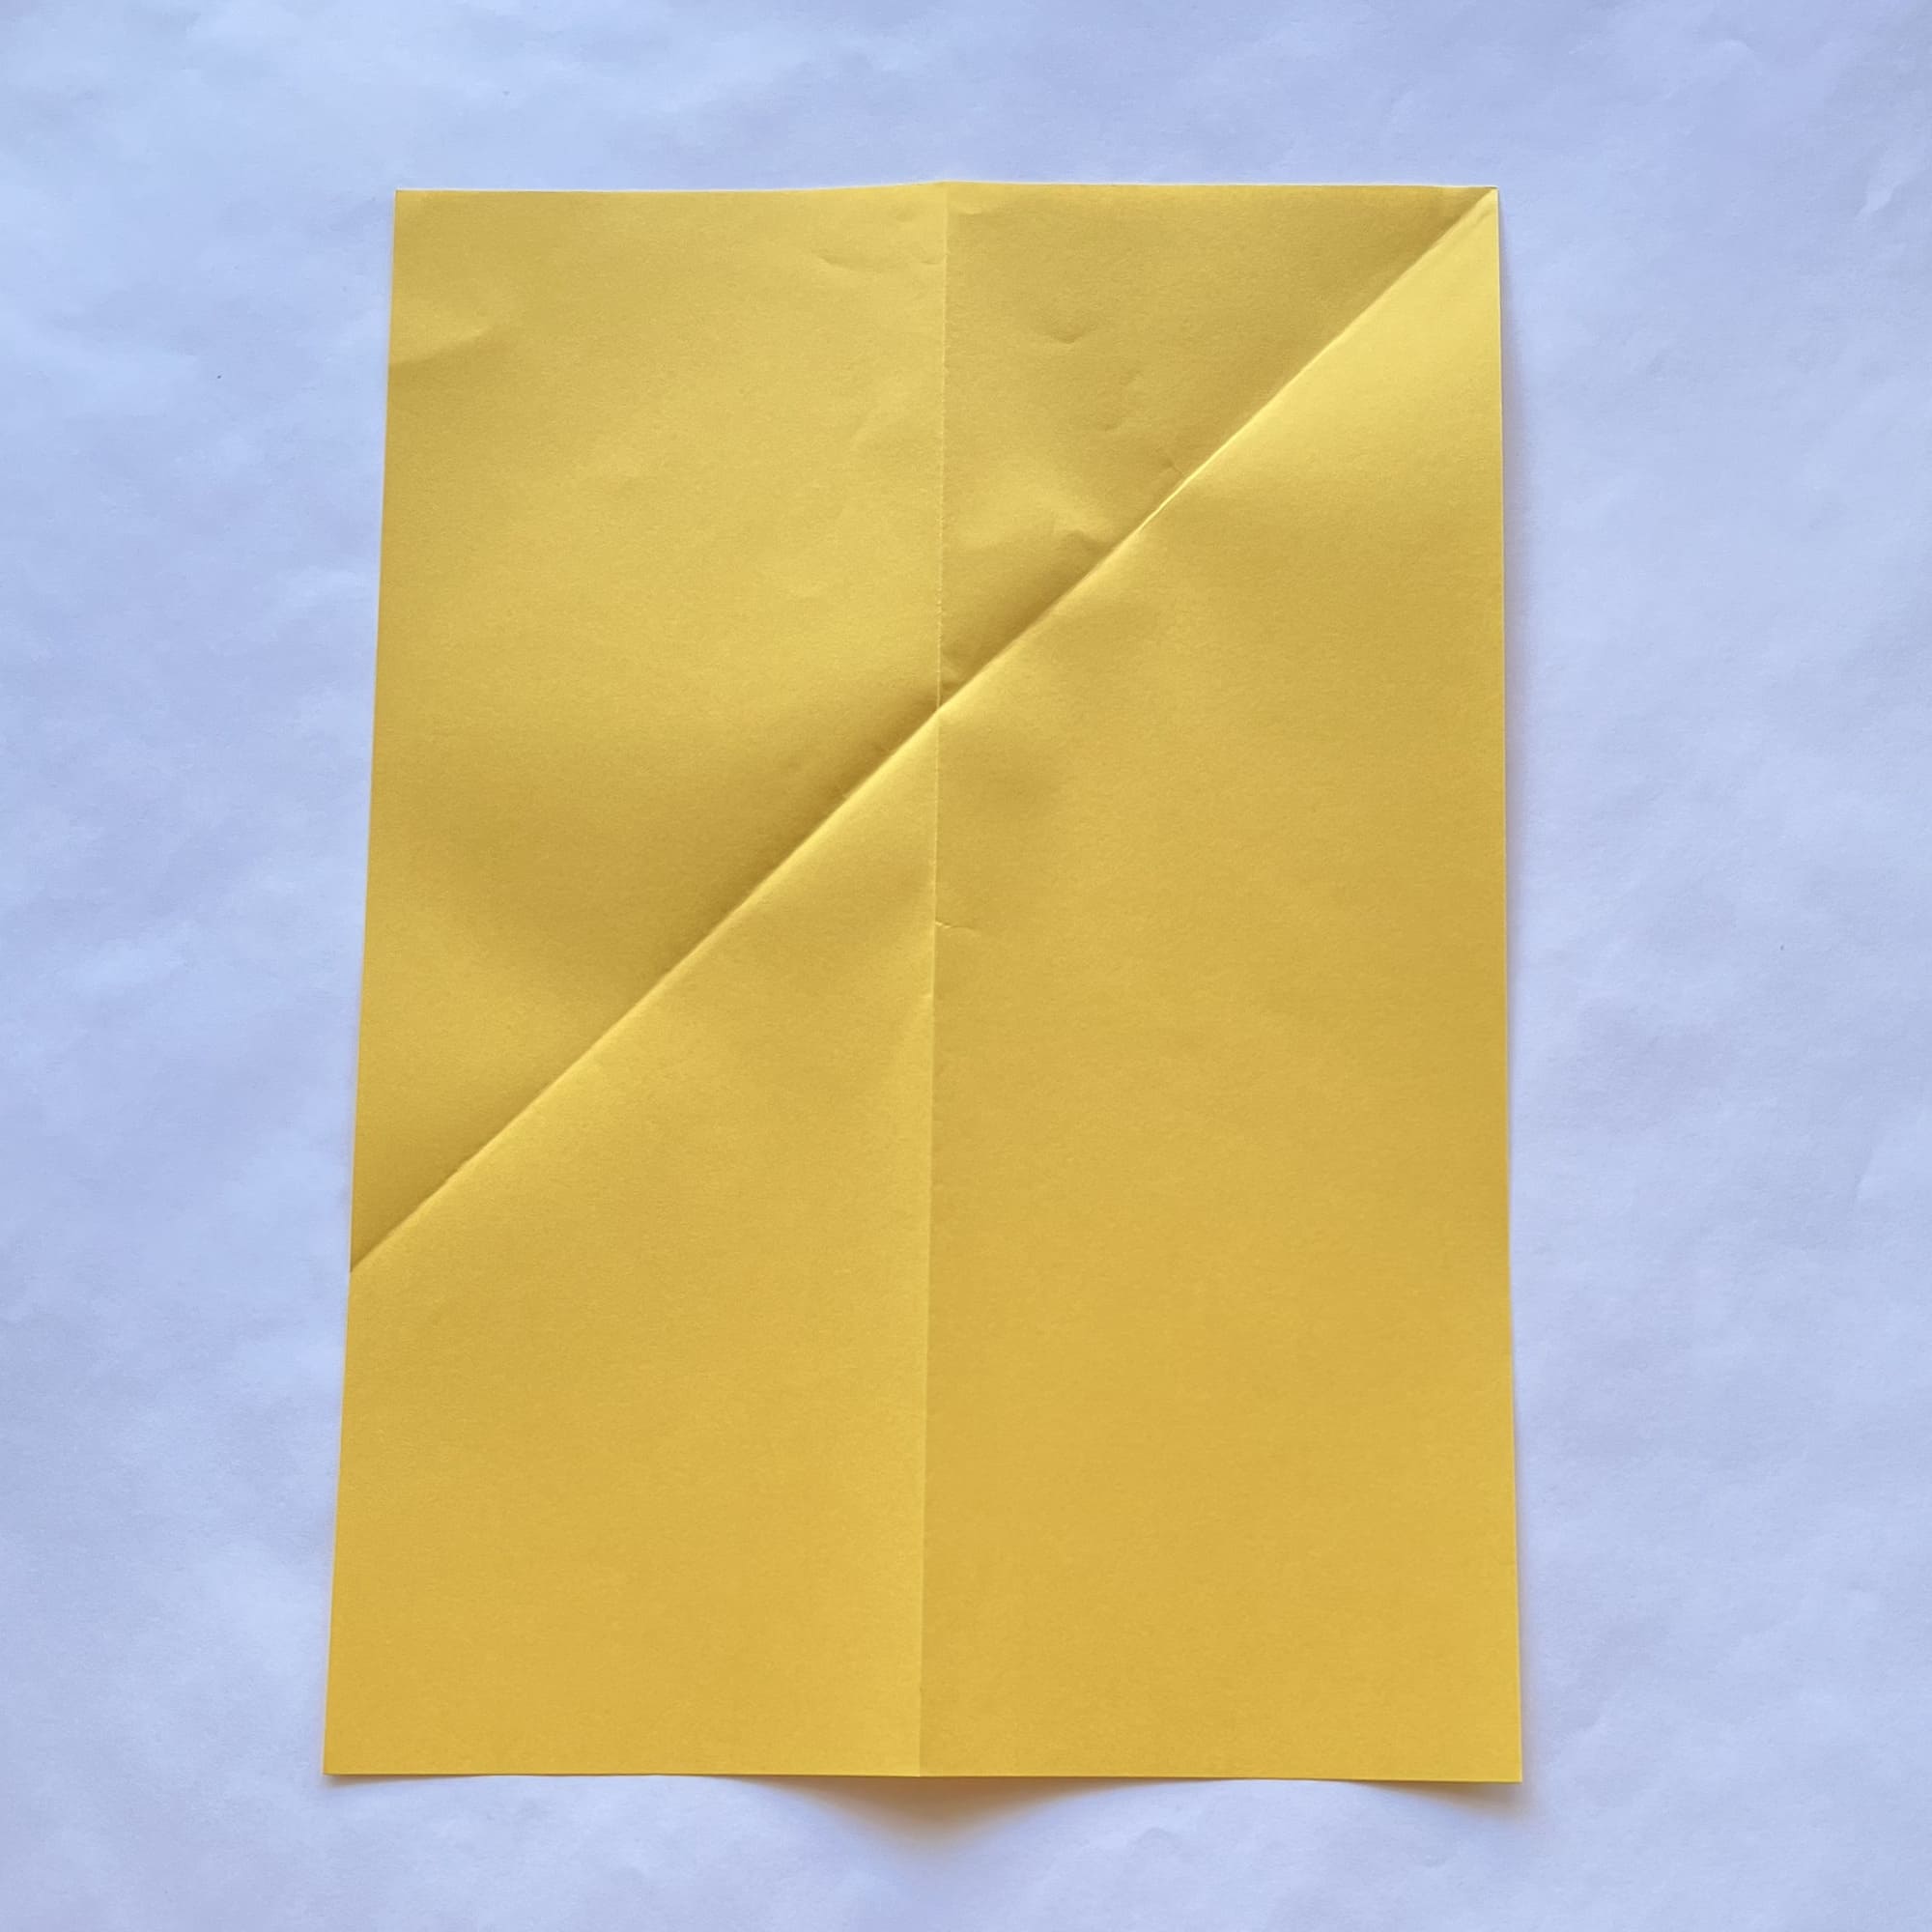
Then, you need to crease the fold and unfold the paper.
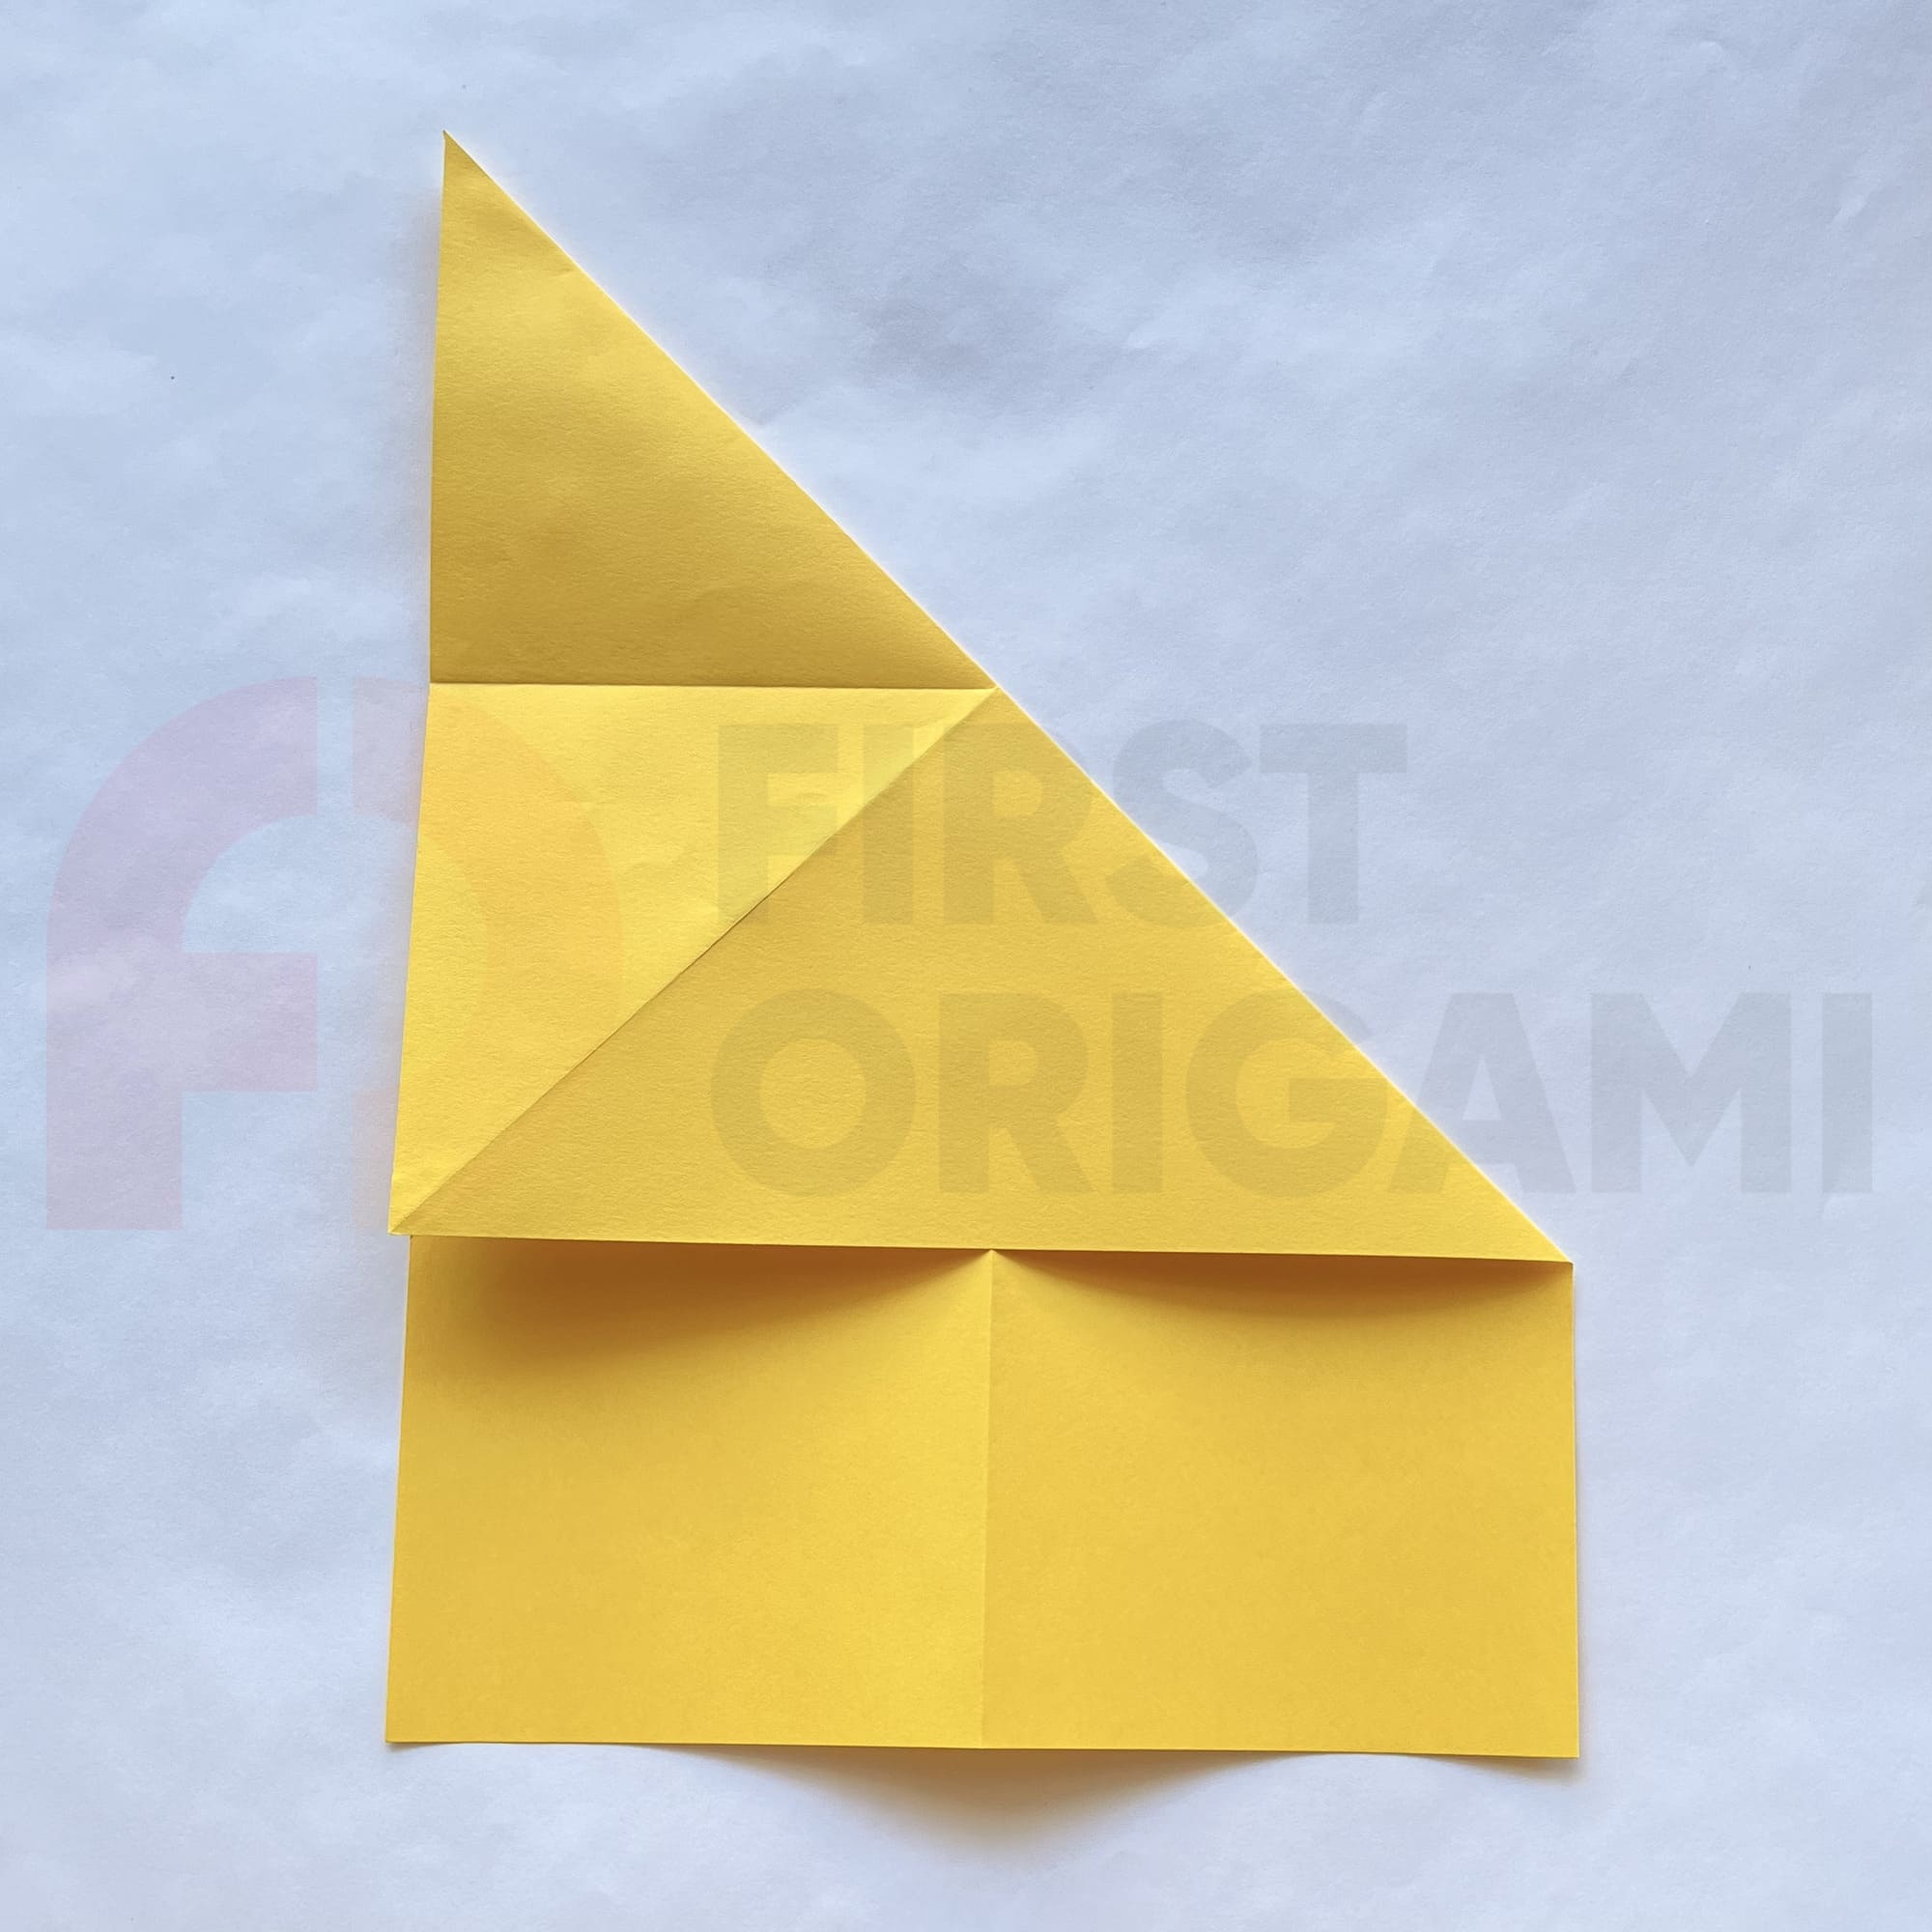
Next, you need to bend the upper right corner to the left side, crease the fold and unfold.
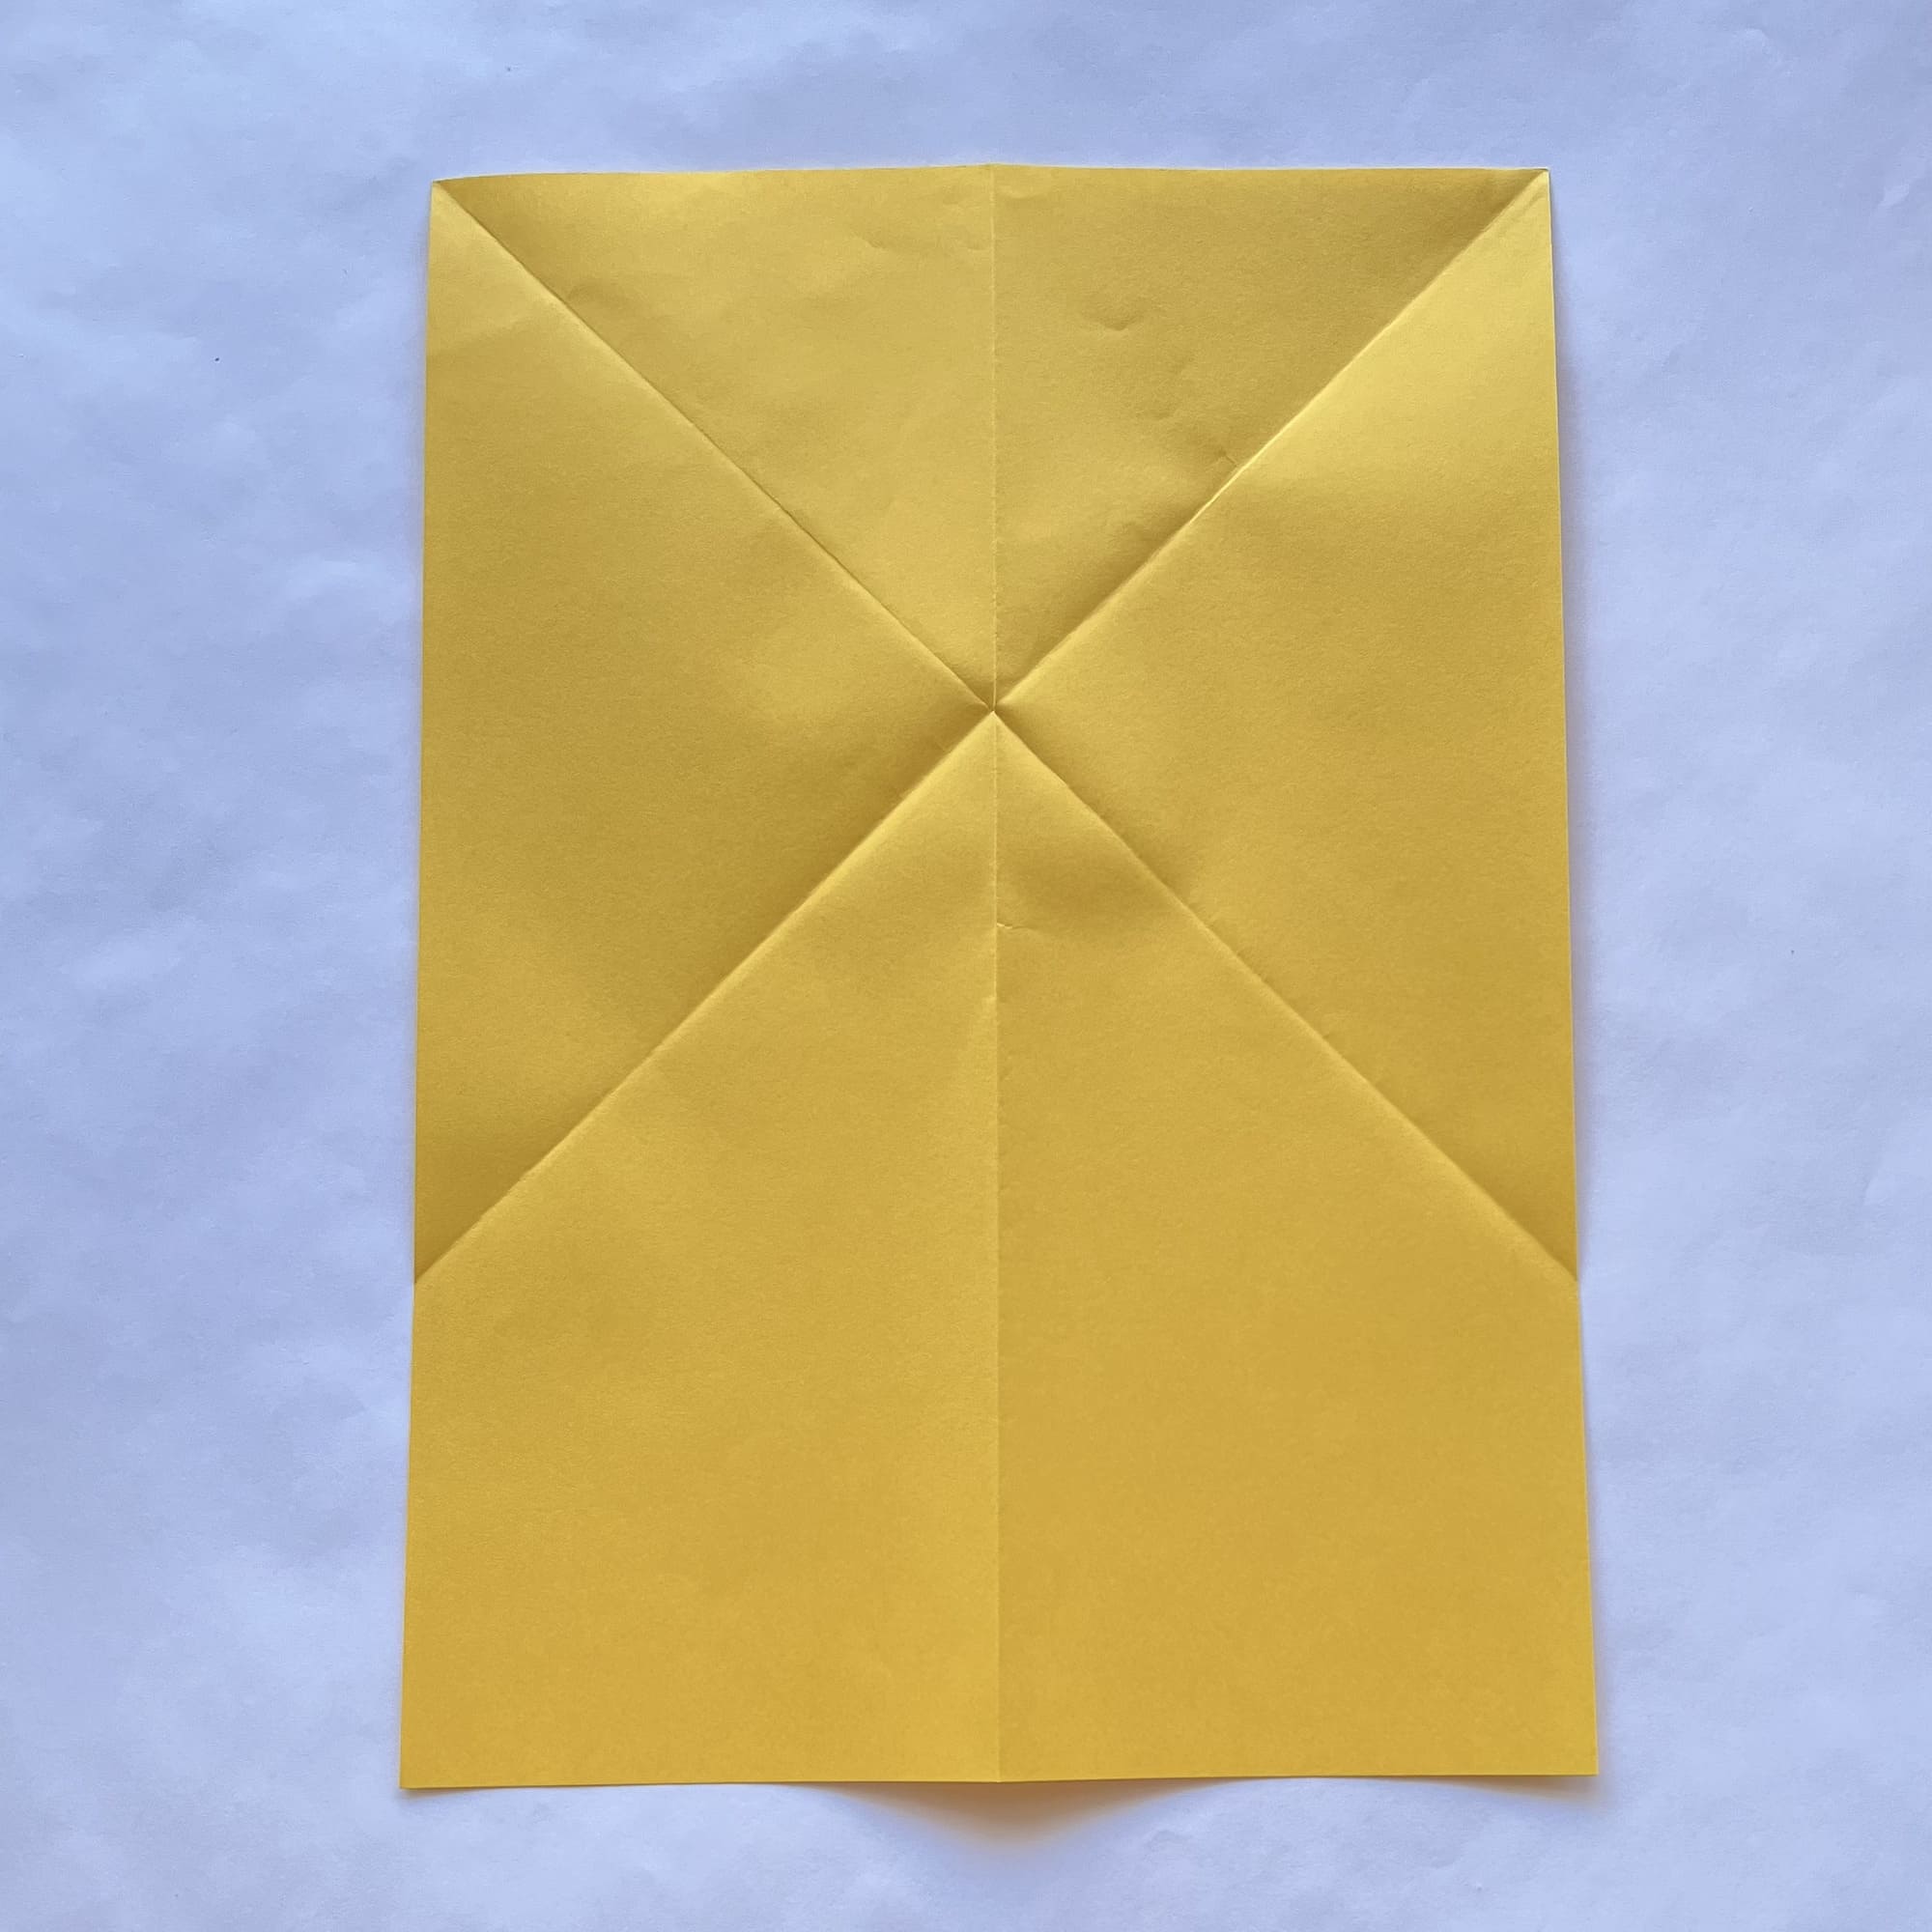
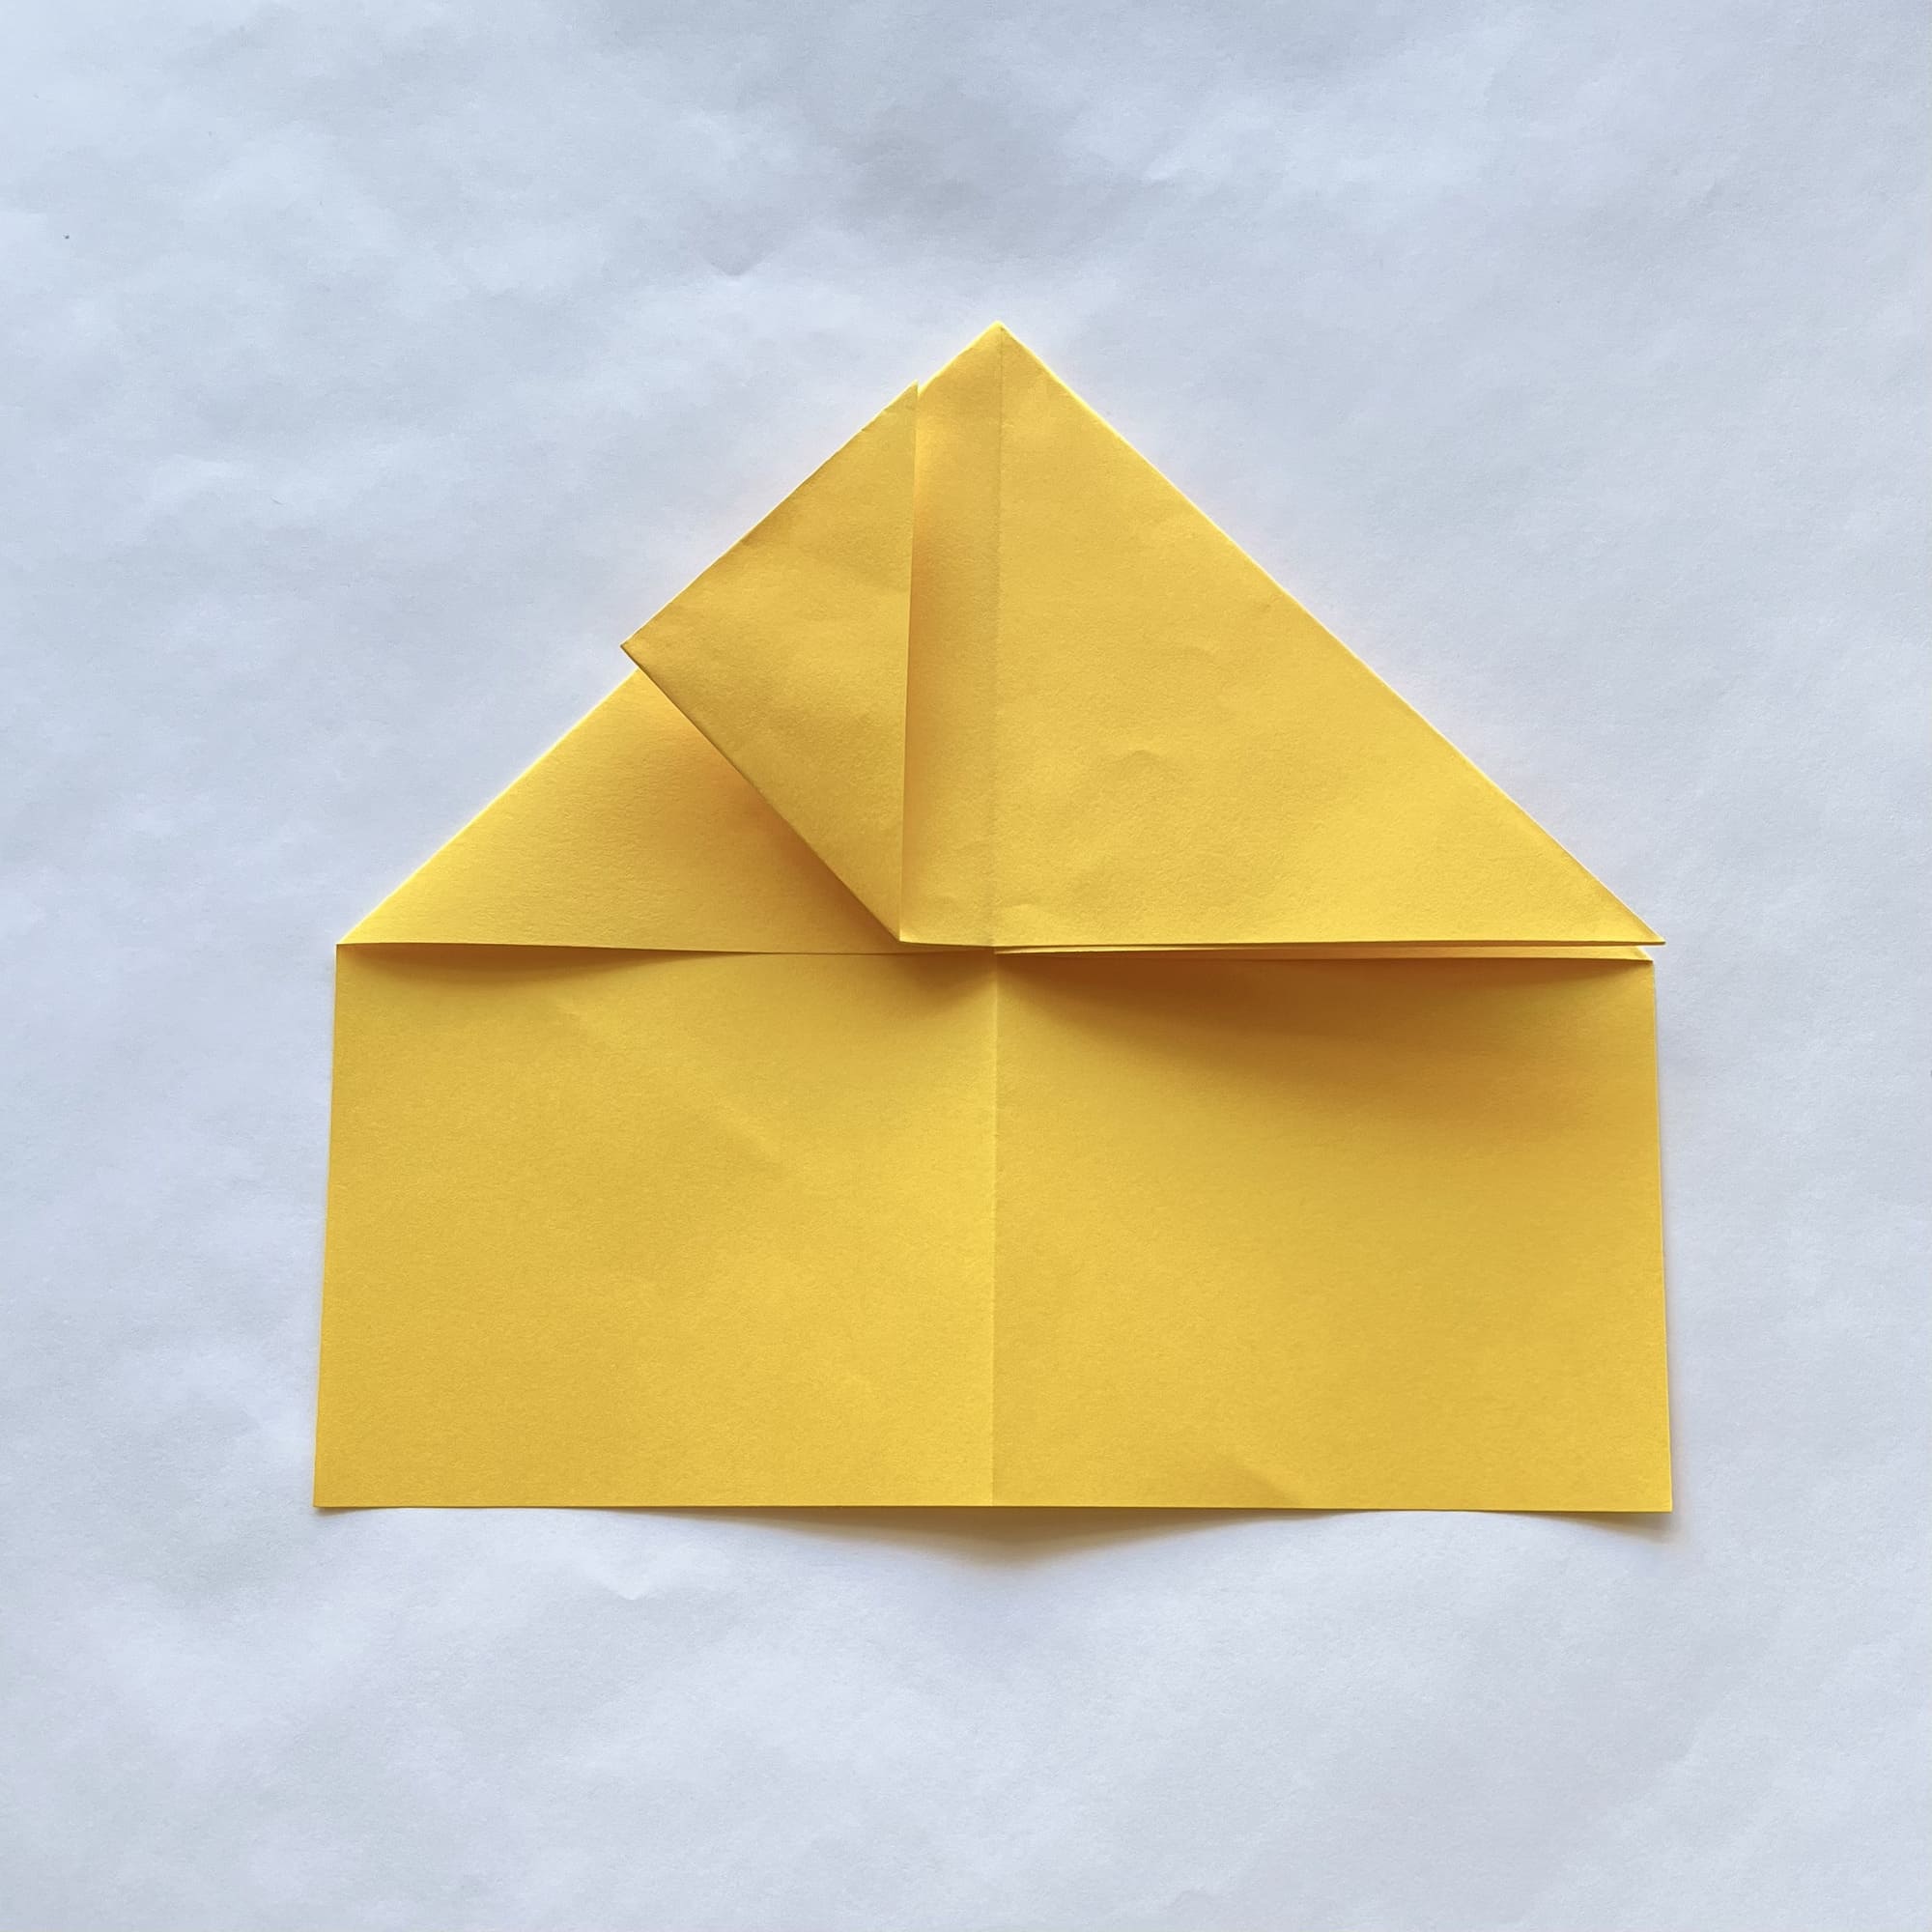
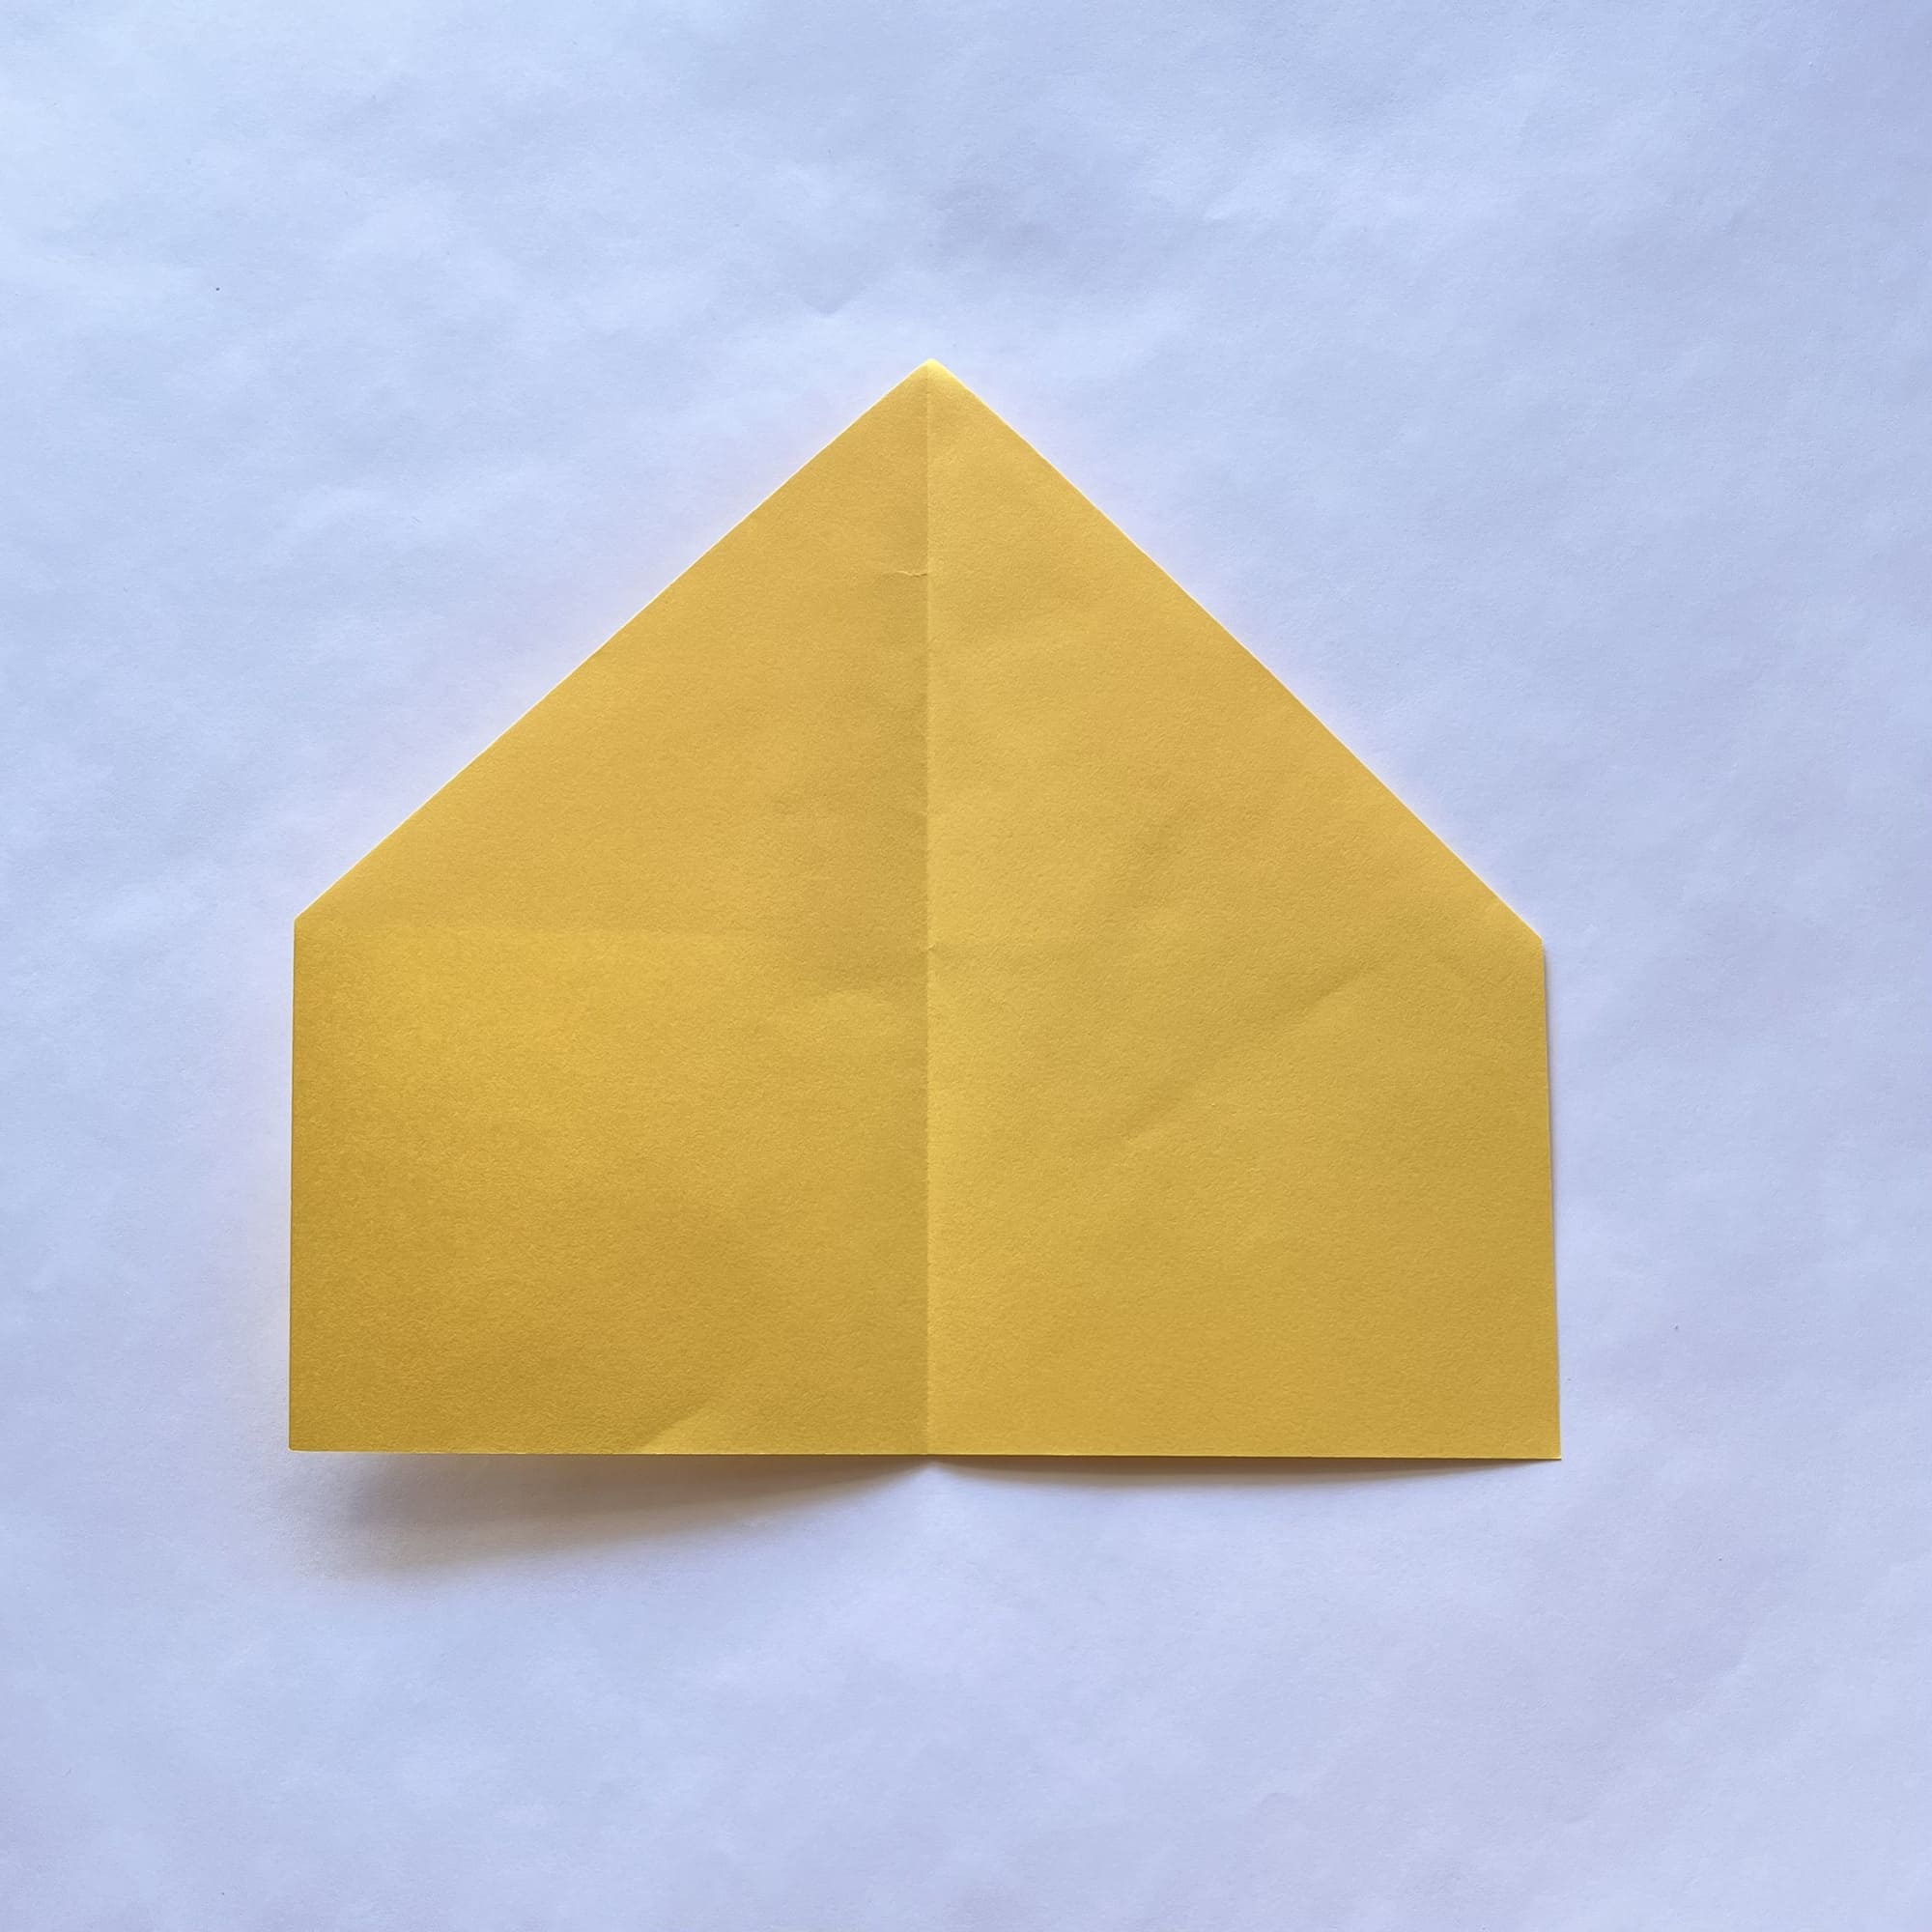
You need to turn over the paper again and fold the top down.
The fold line should pass through the intersection point of the marked lines.
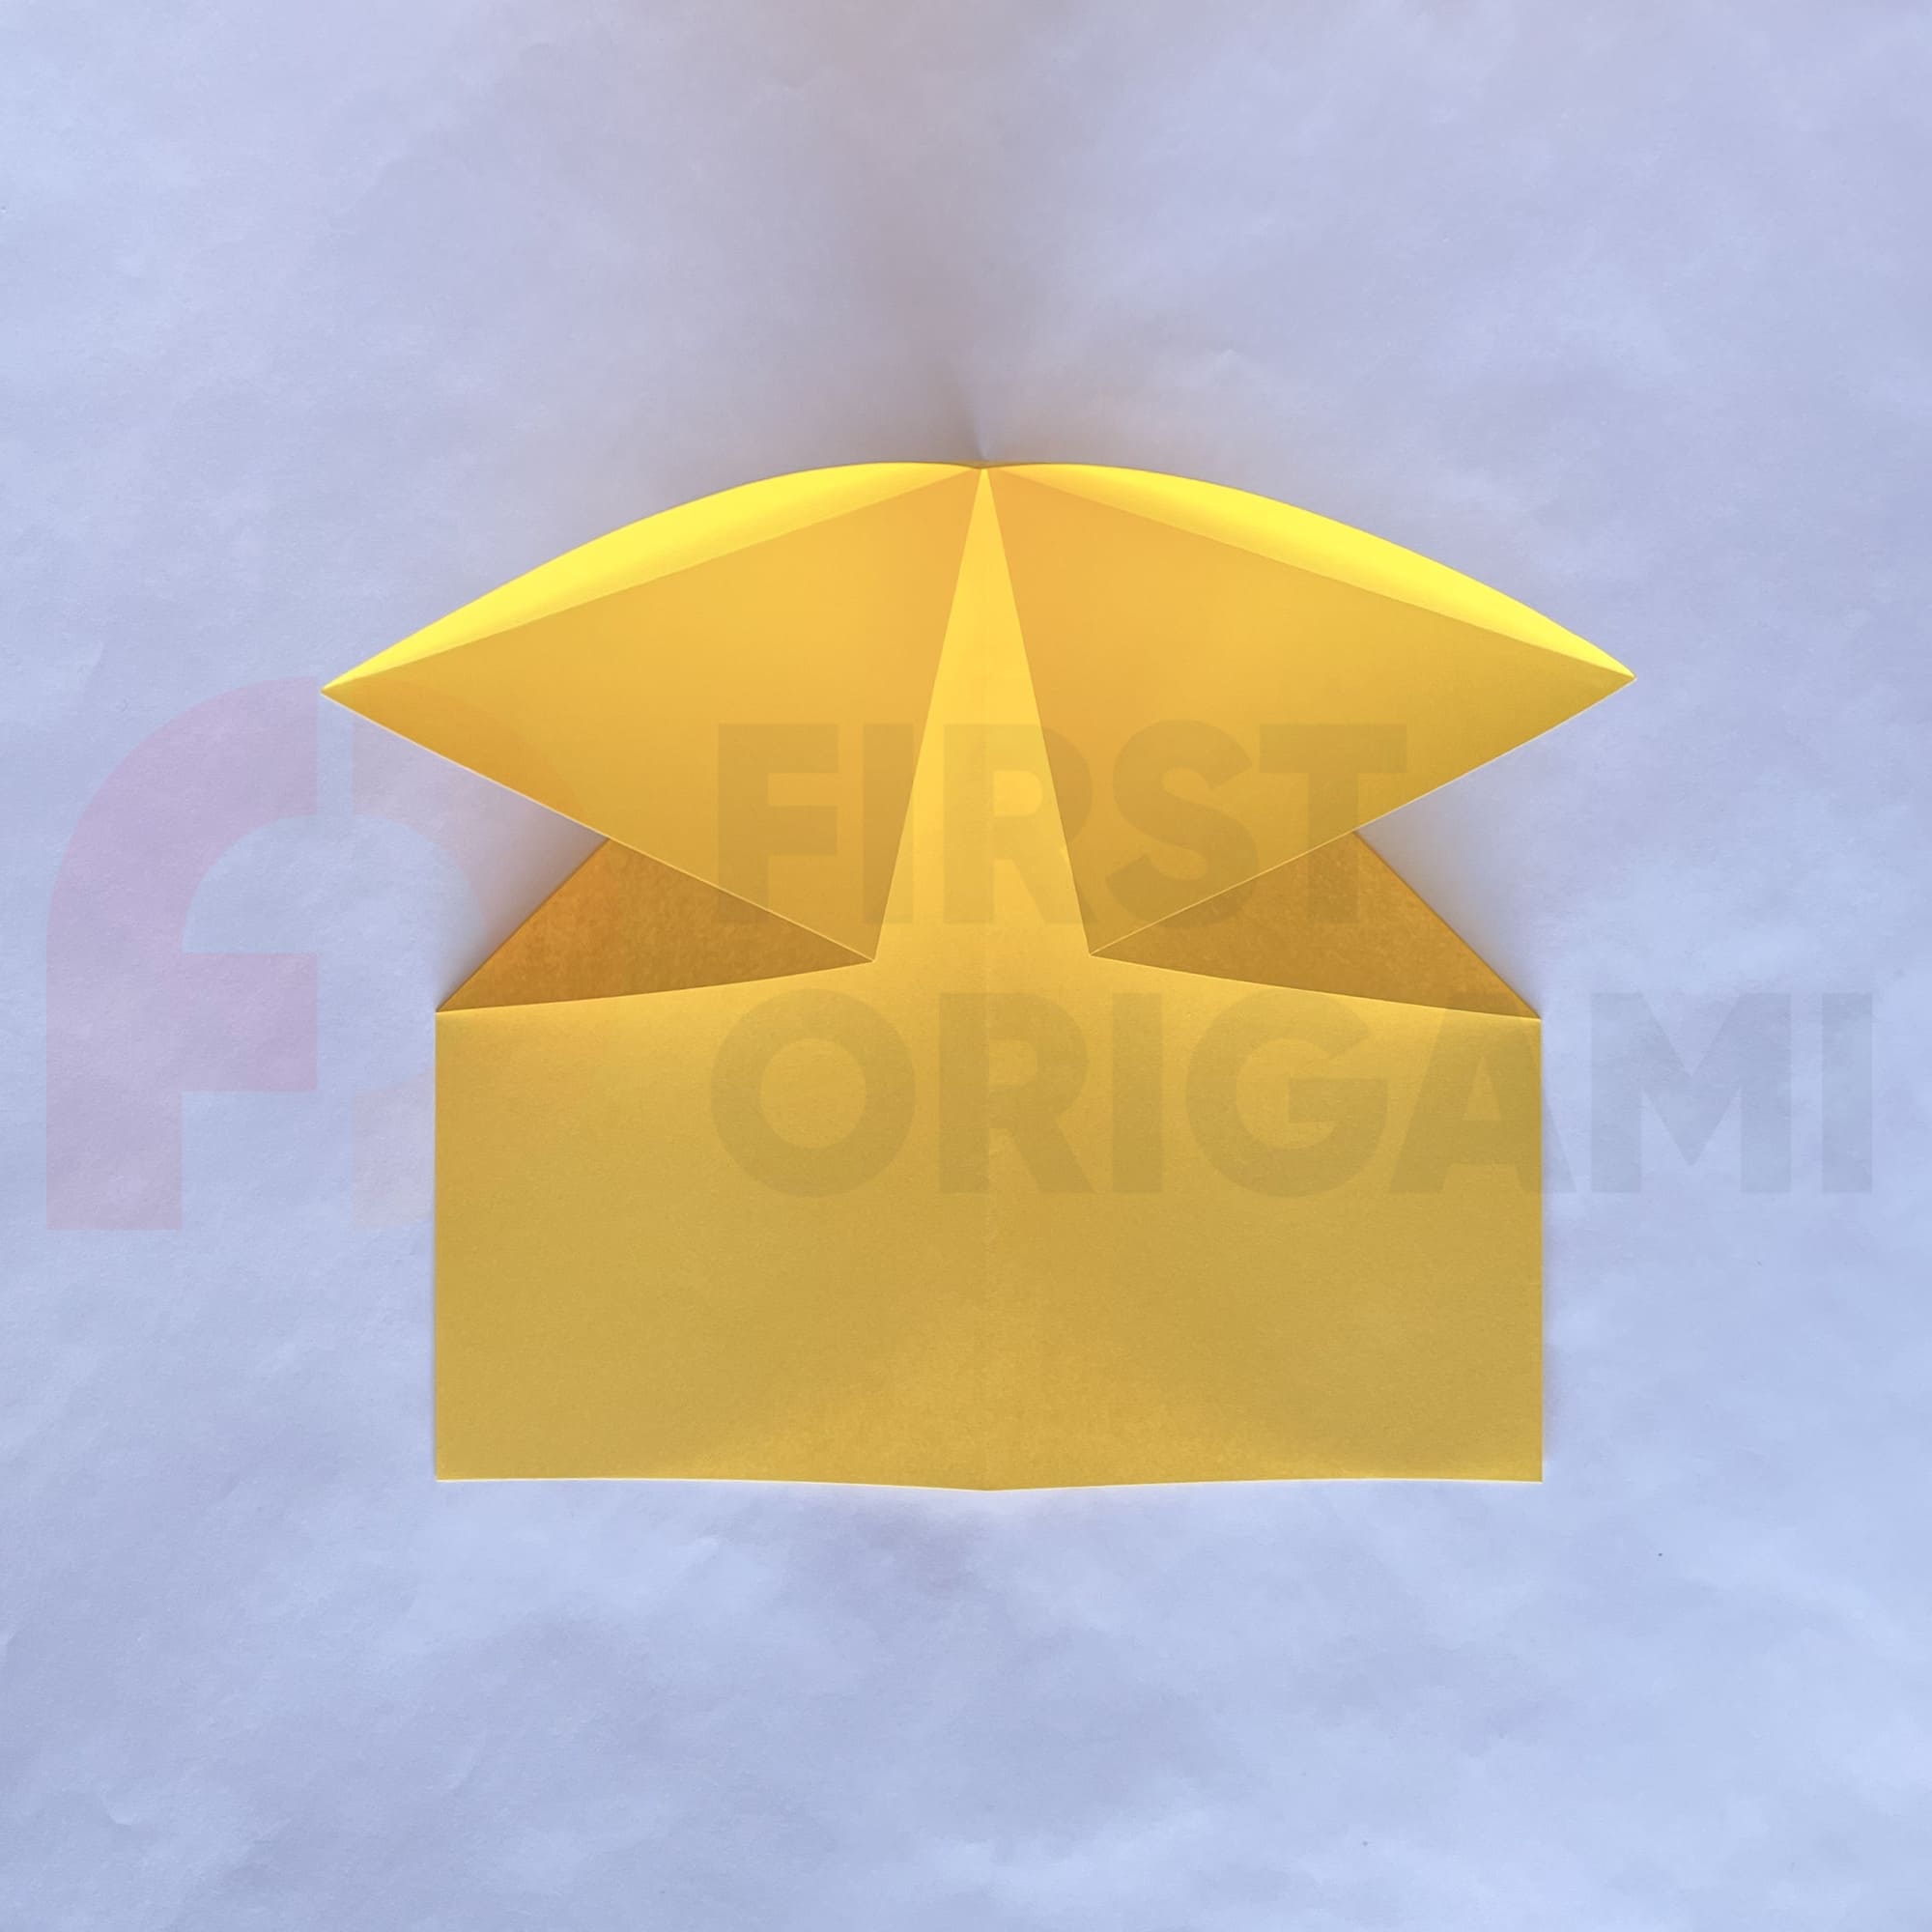
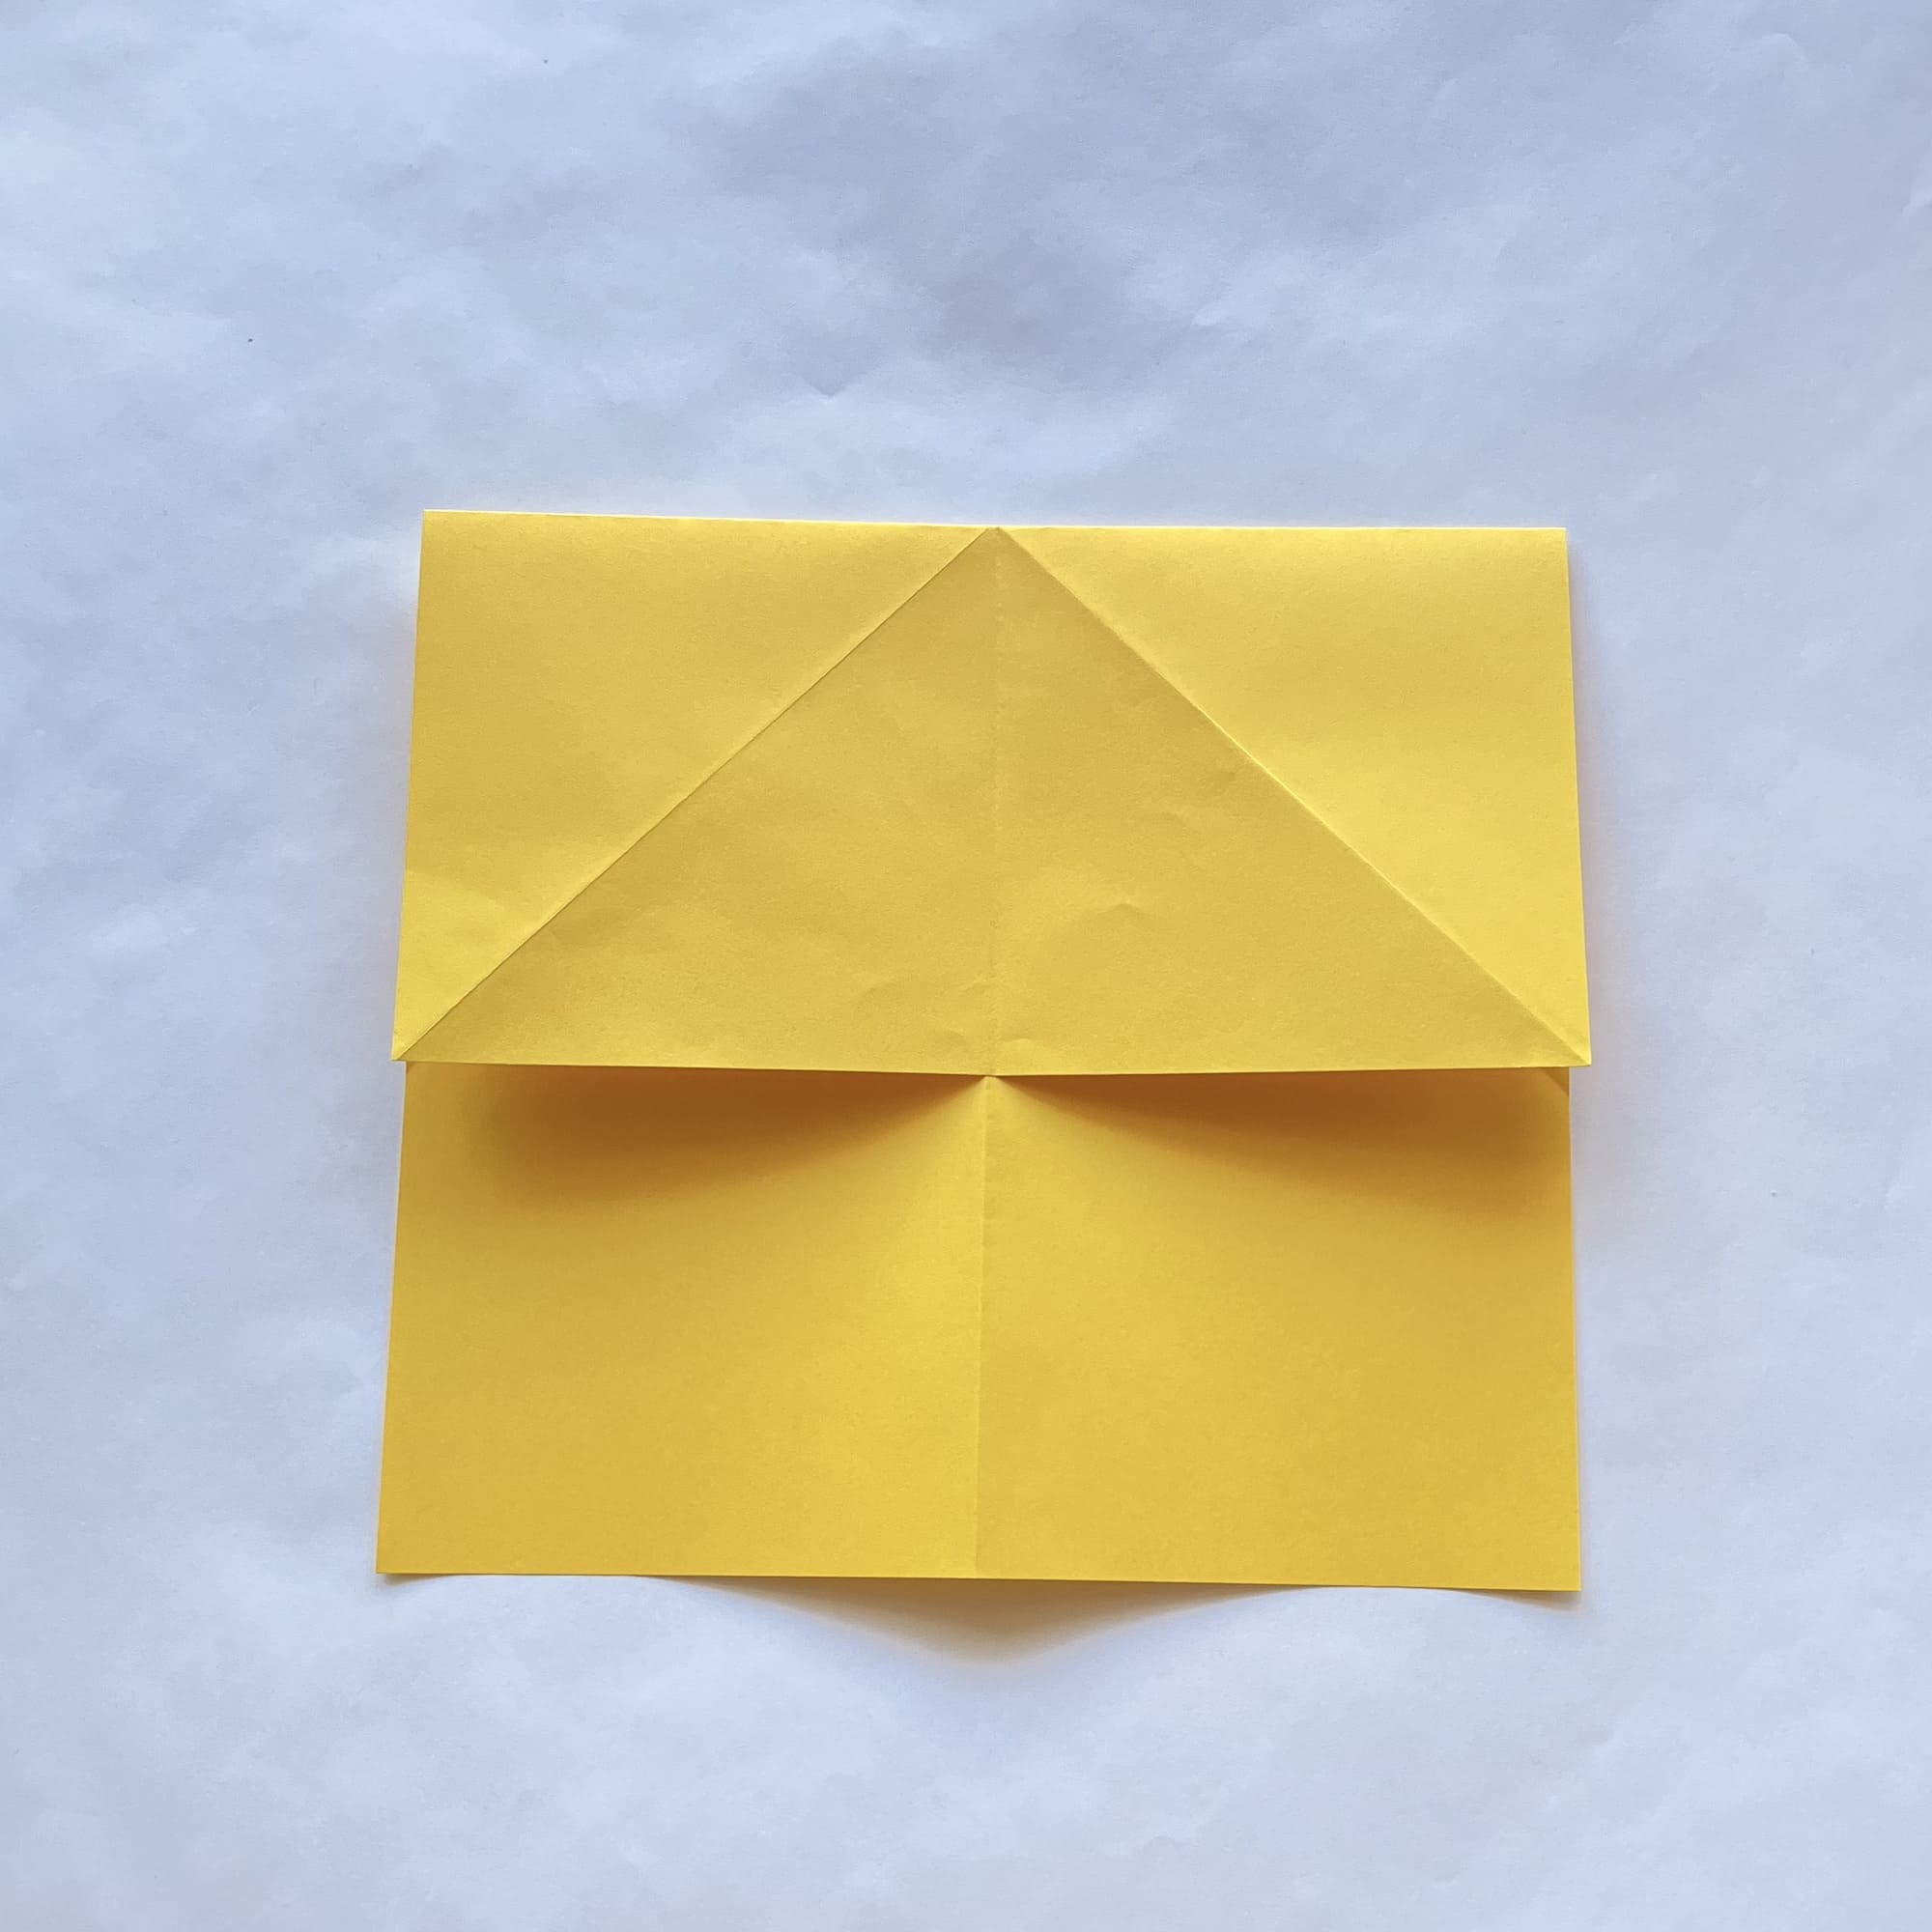
By pressing your finger on the center point, you should ensure that this part “collapses” inward, and the paper closes around it.
As a result, at the top of the figure, you should get a triangle.
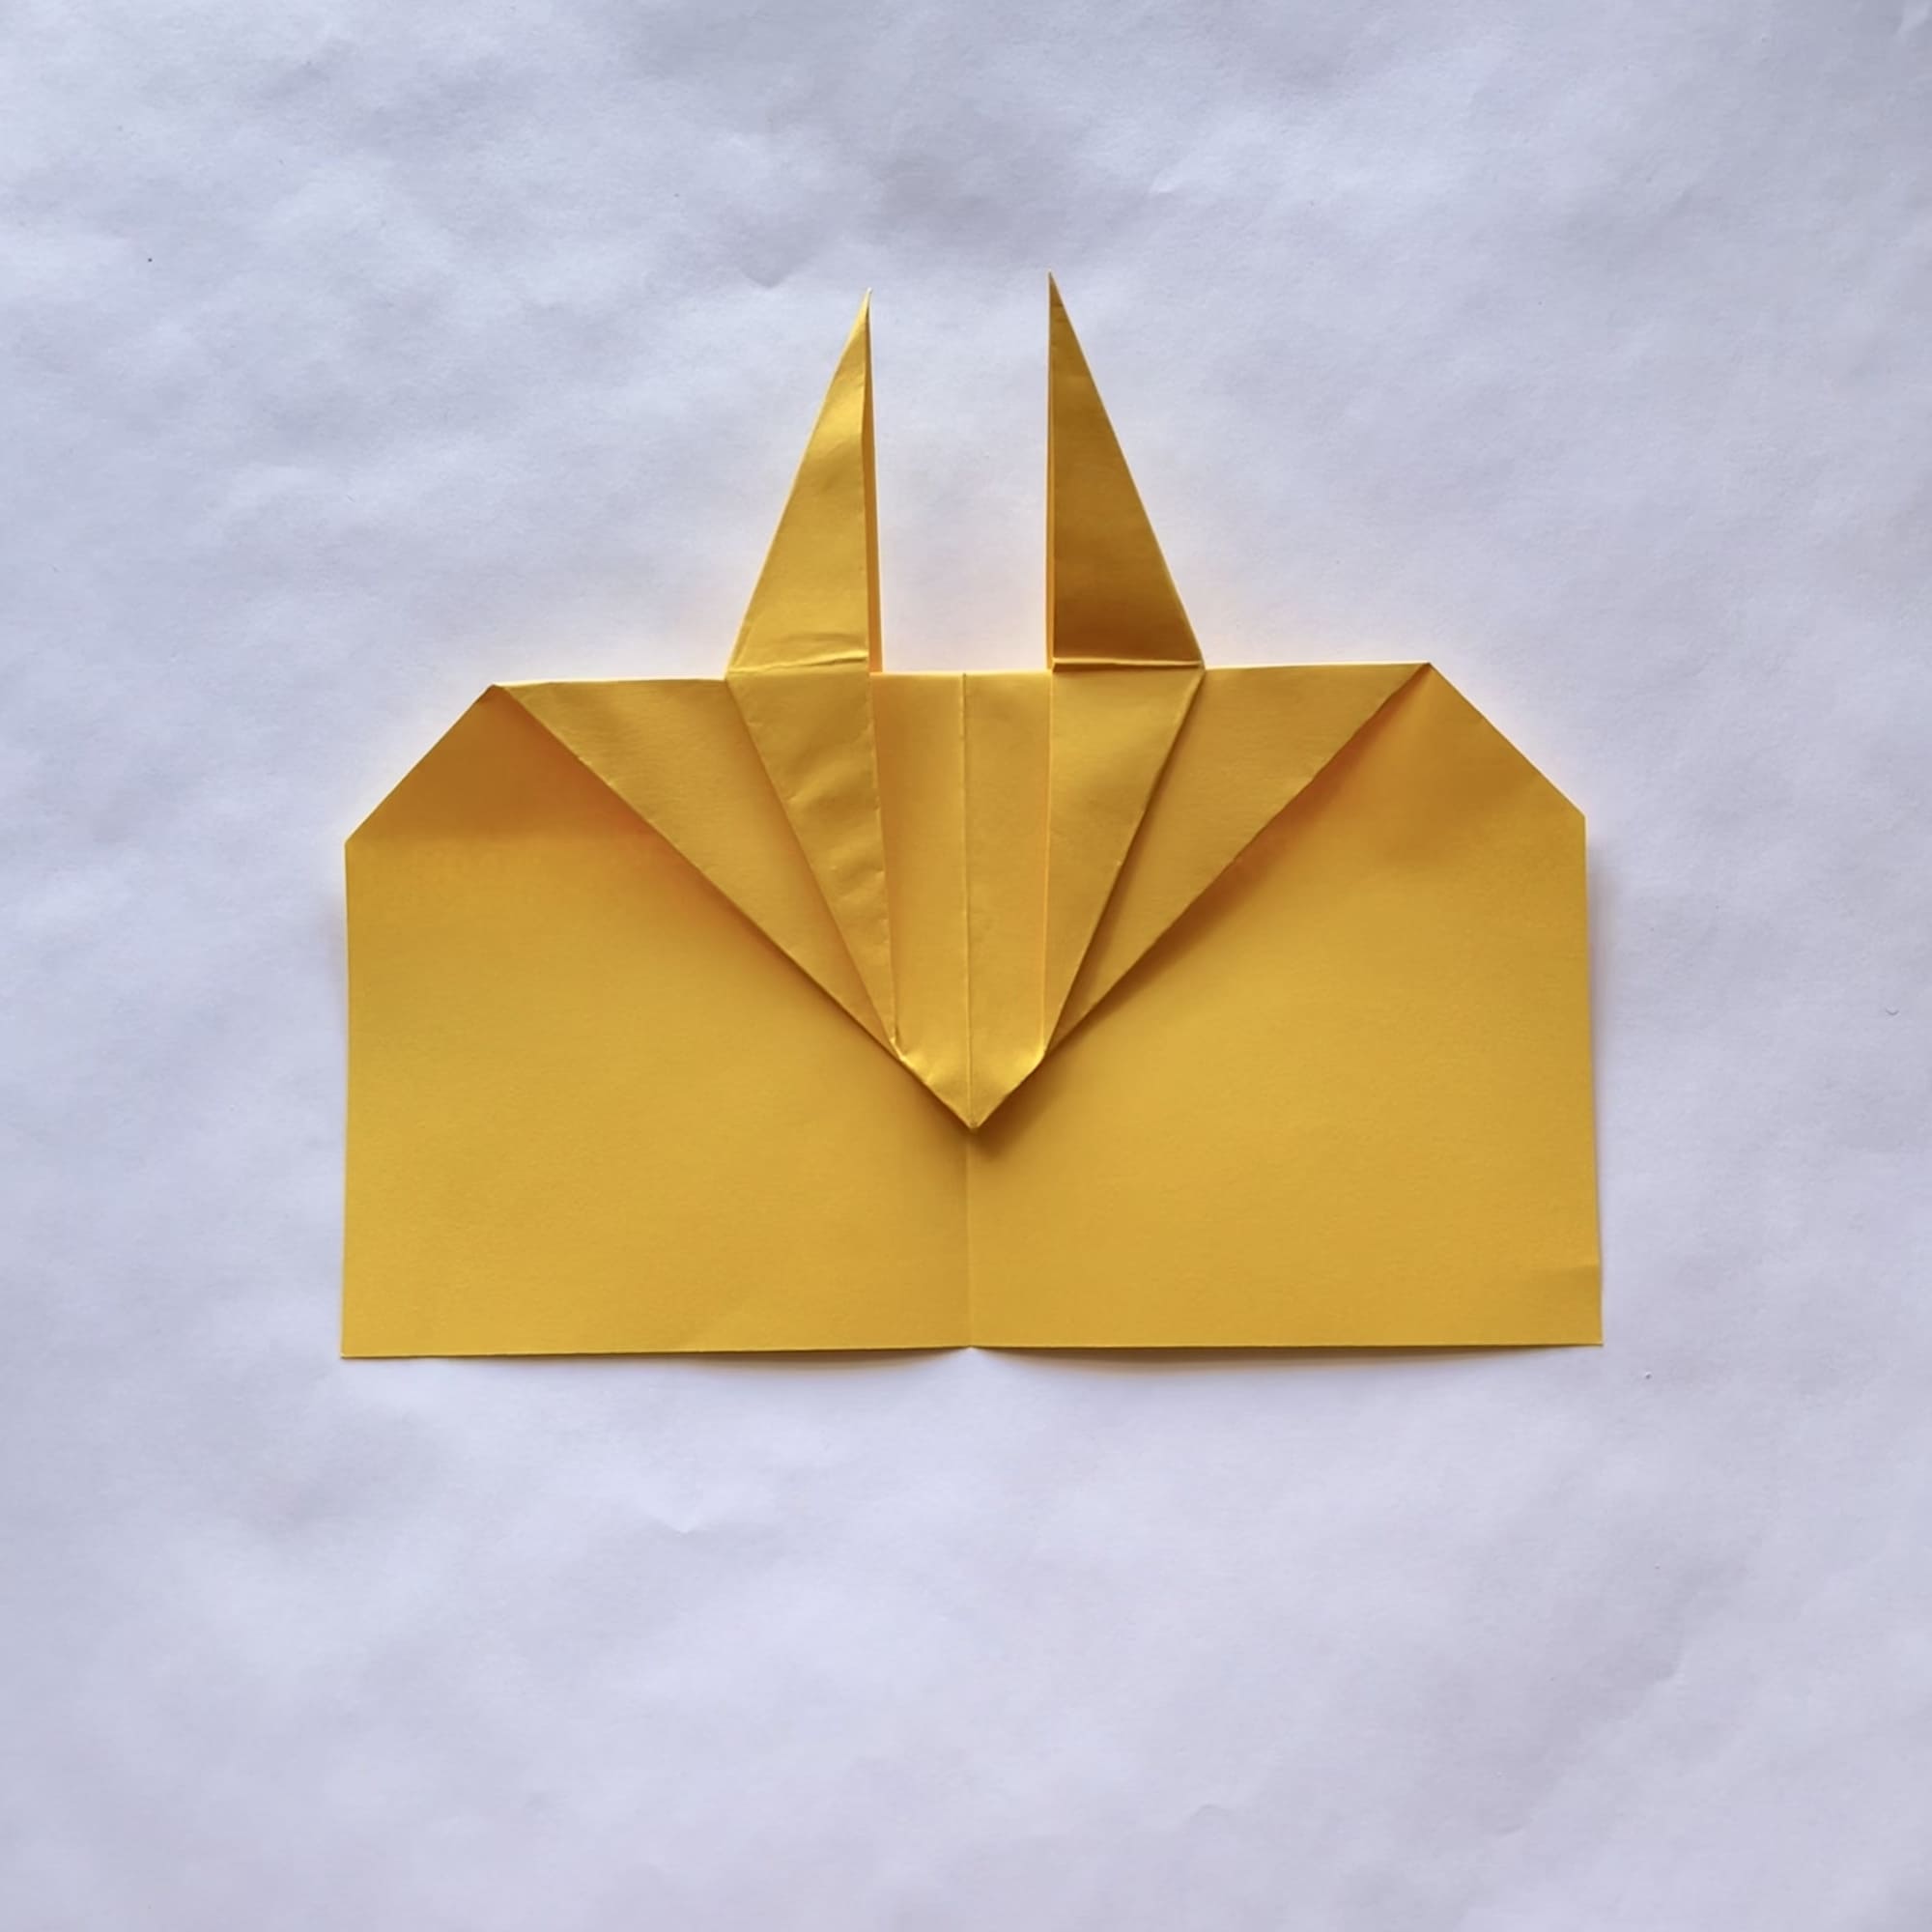
You need to bend the left corner of this triangle (only the top layer) up and towards the center, stepping back slightly from the center line.
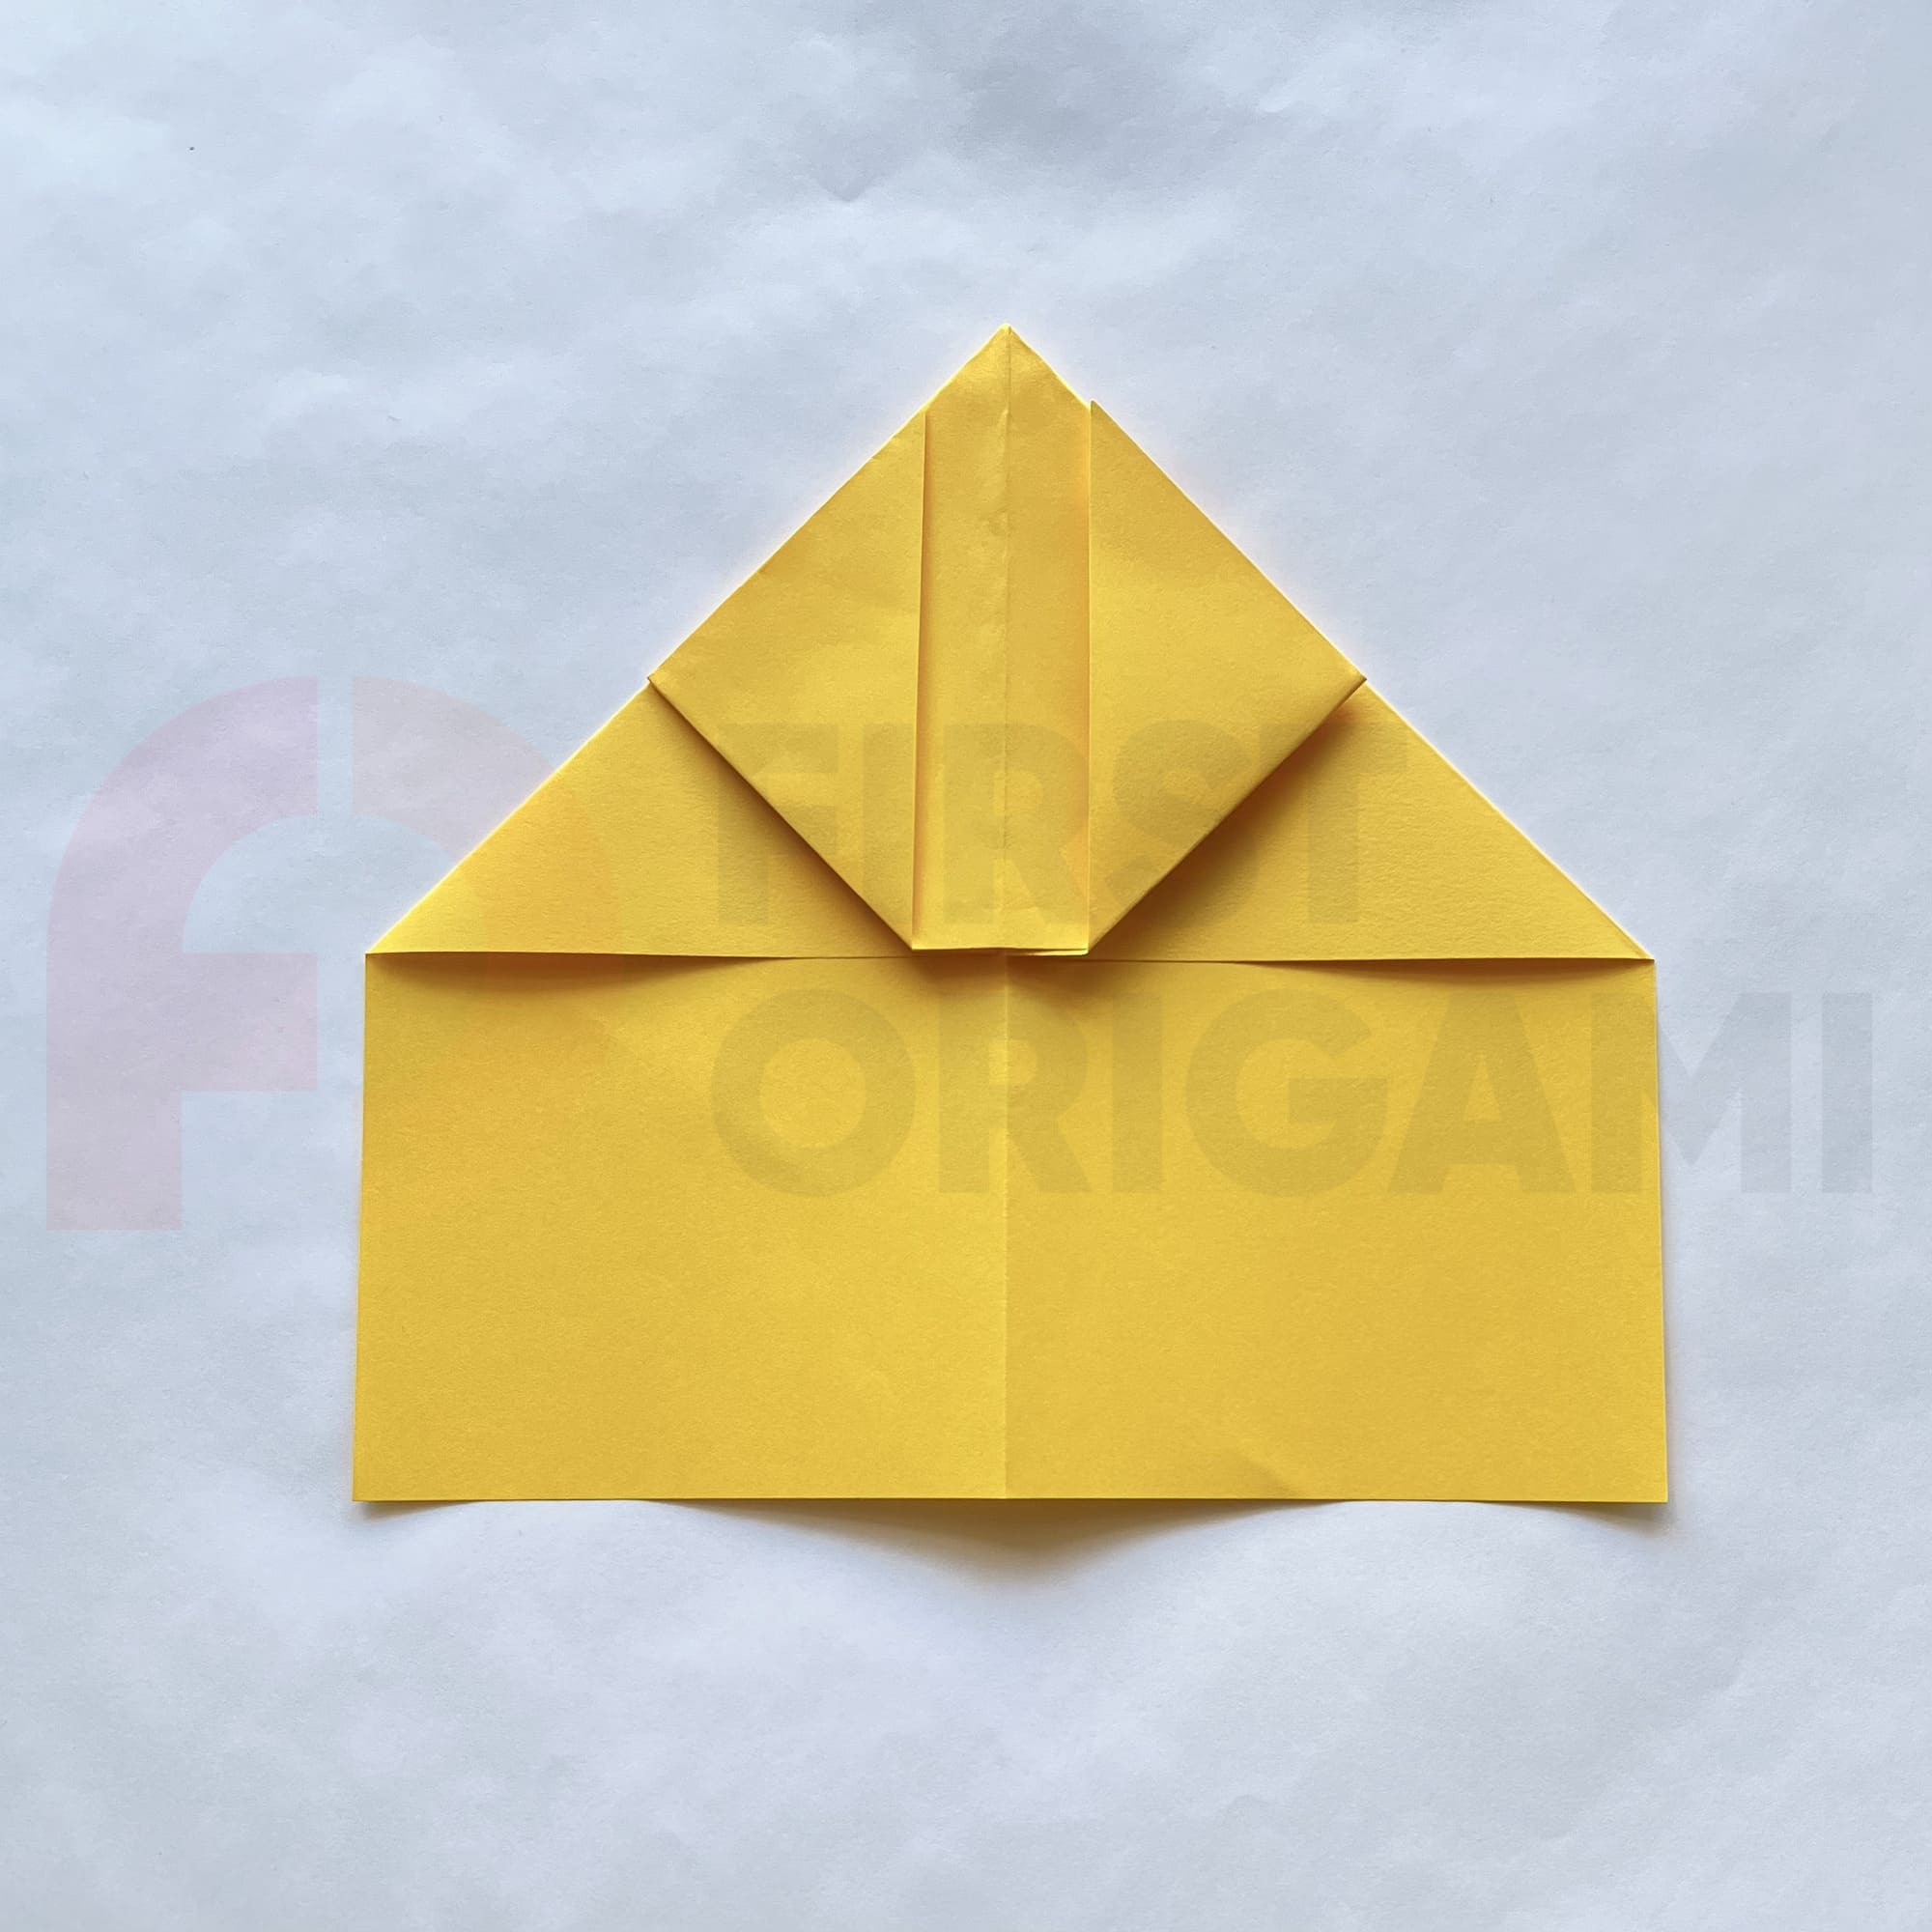
You would continue creating the plane by symmetrically bending the right corner of the triangle. Sometimes, for convenience, you can fold the figure in half.
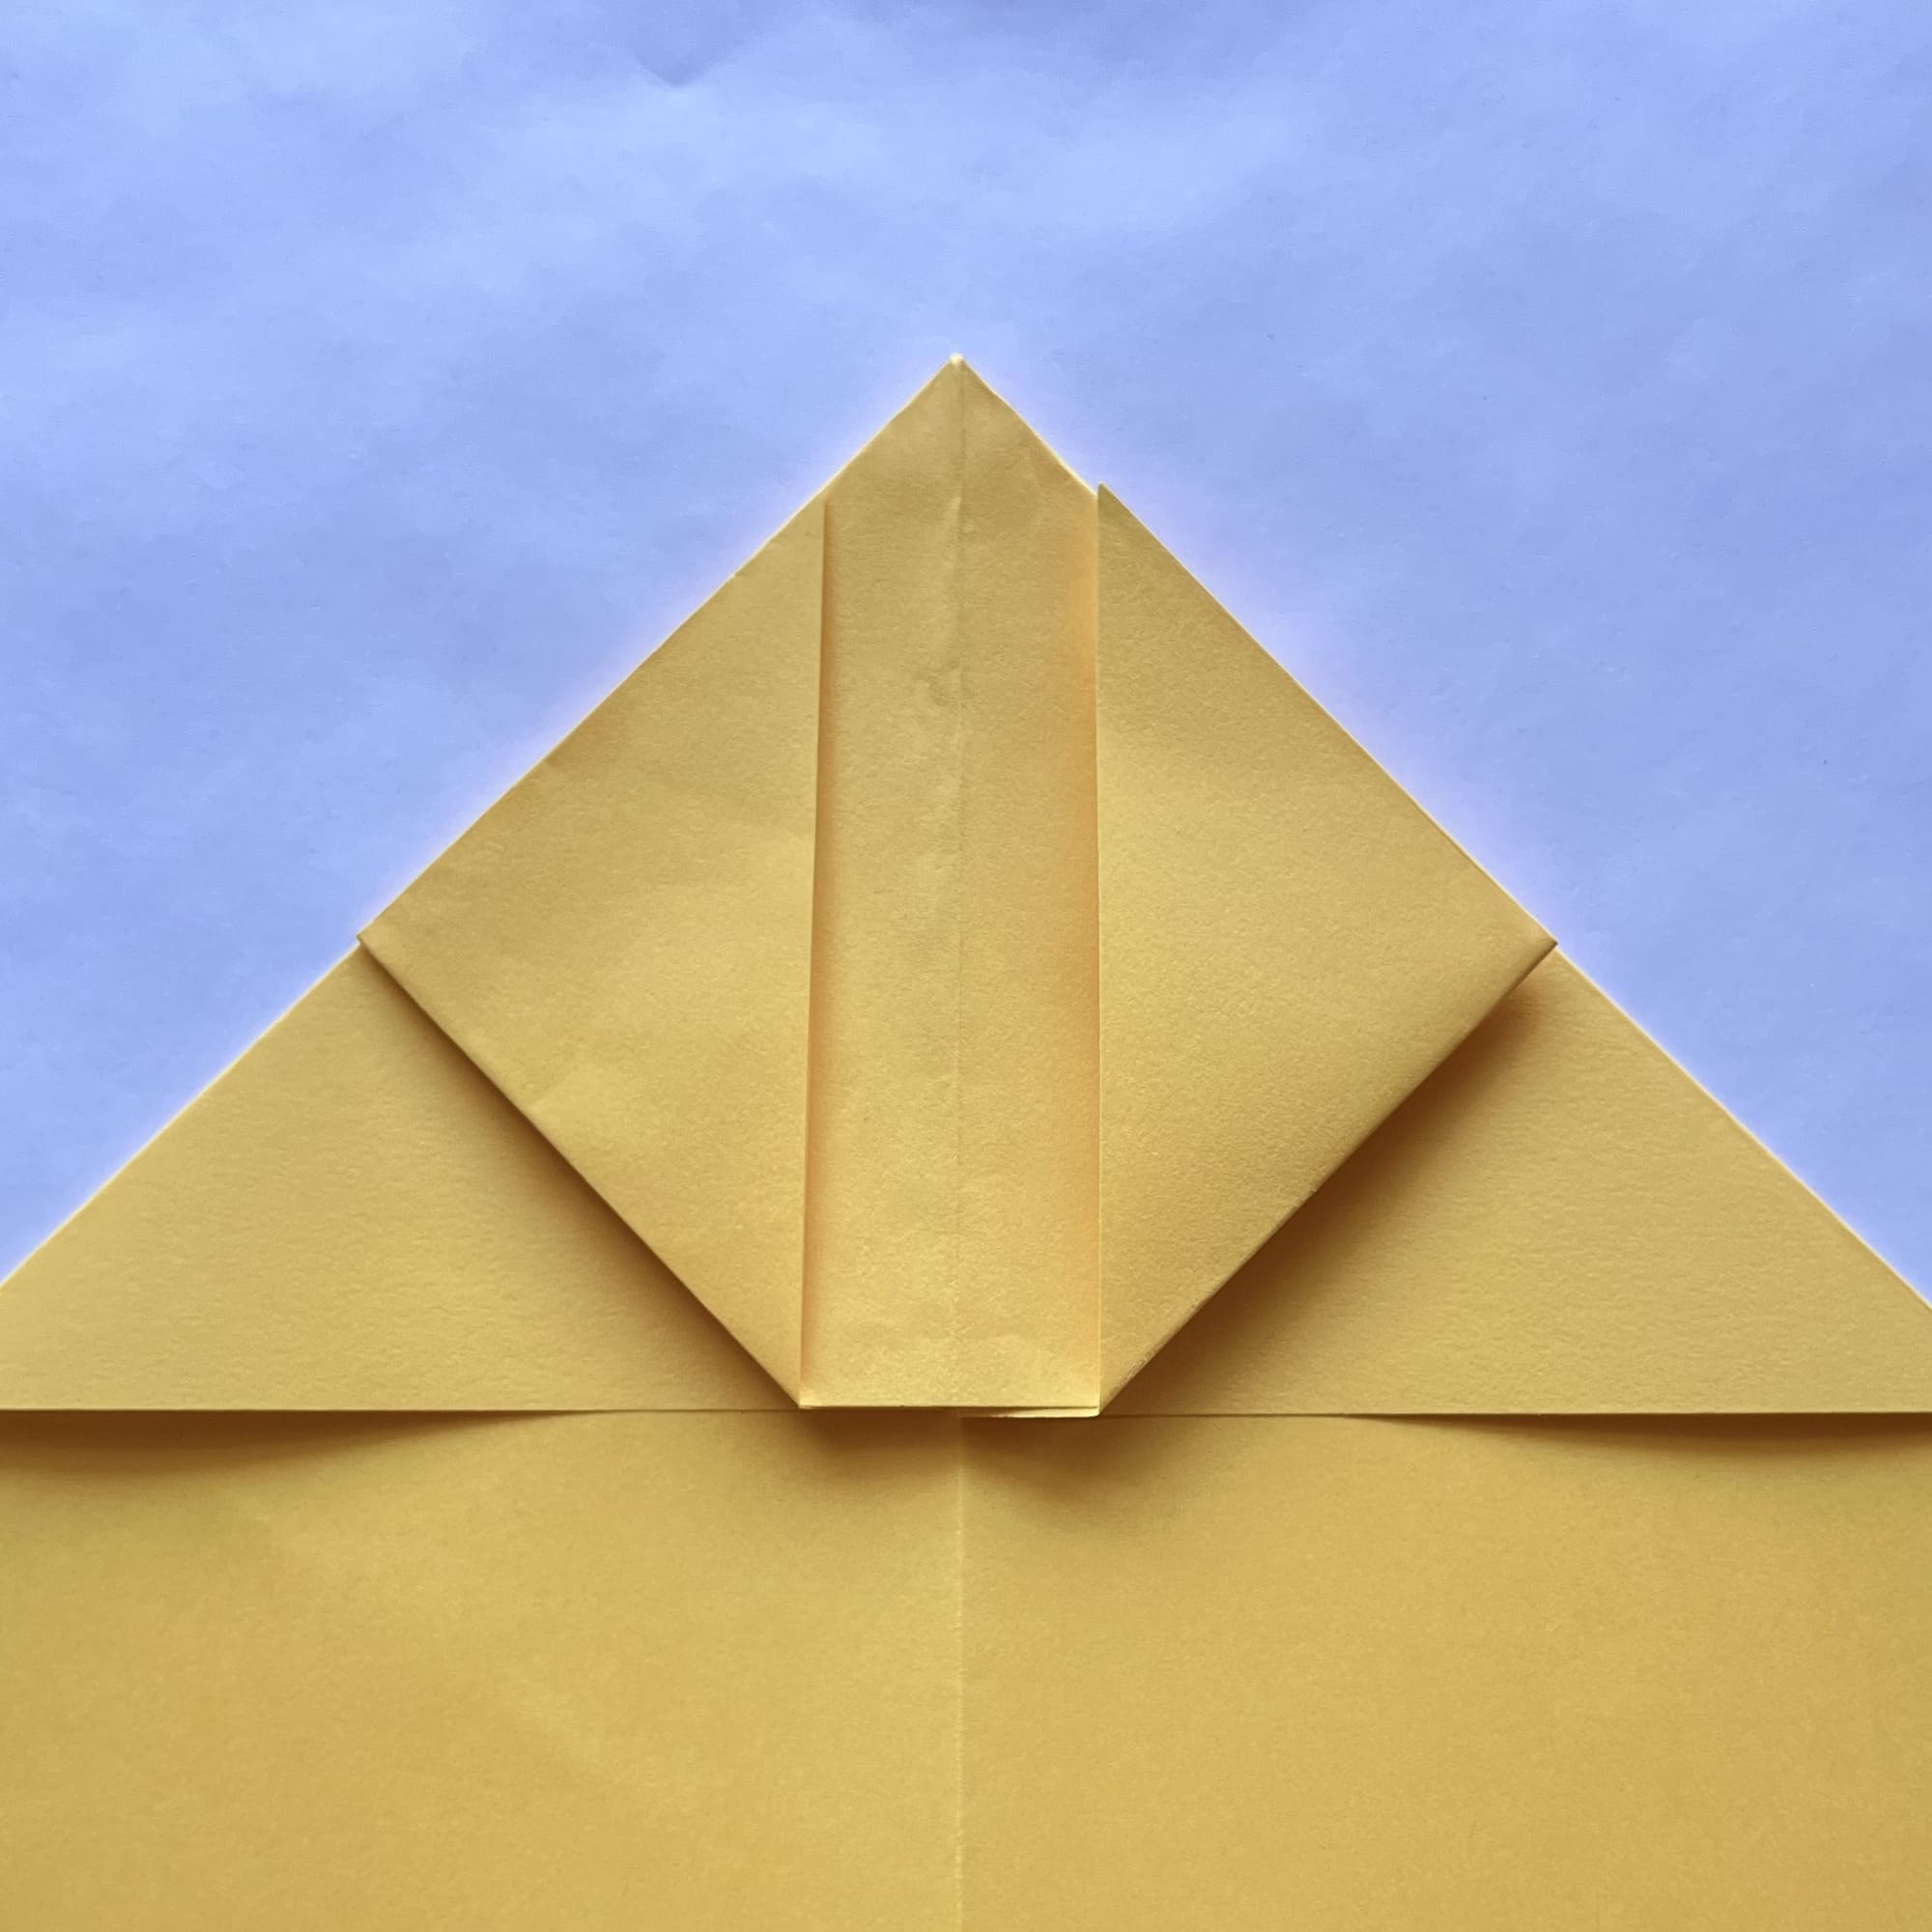
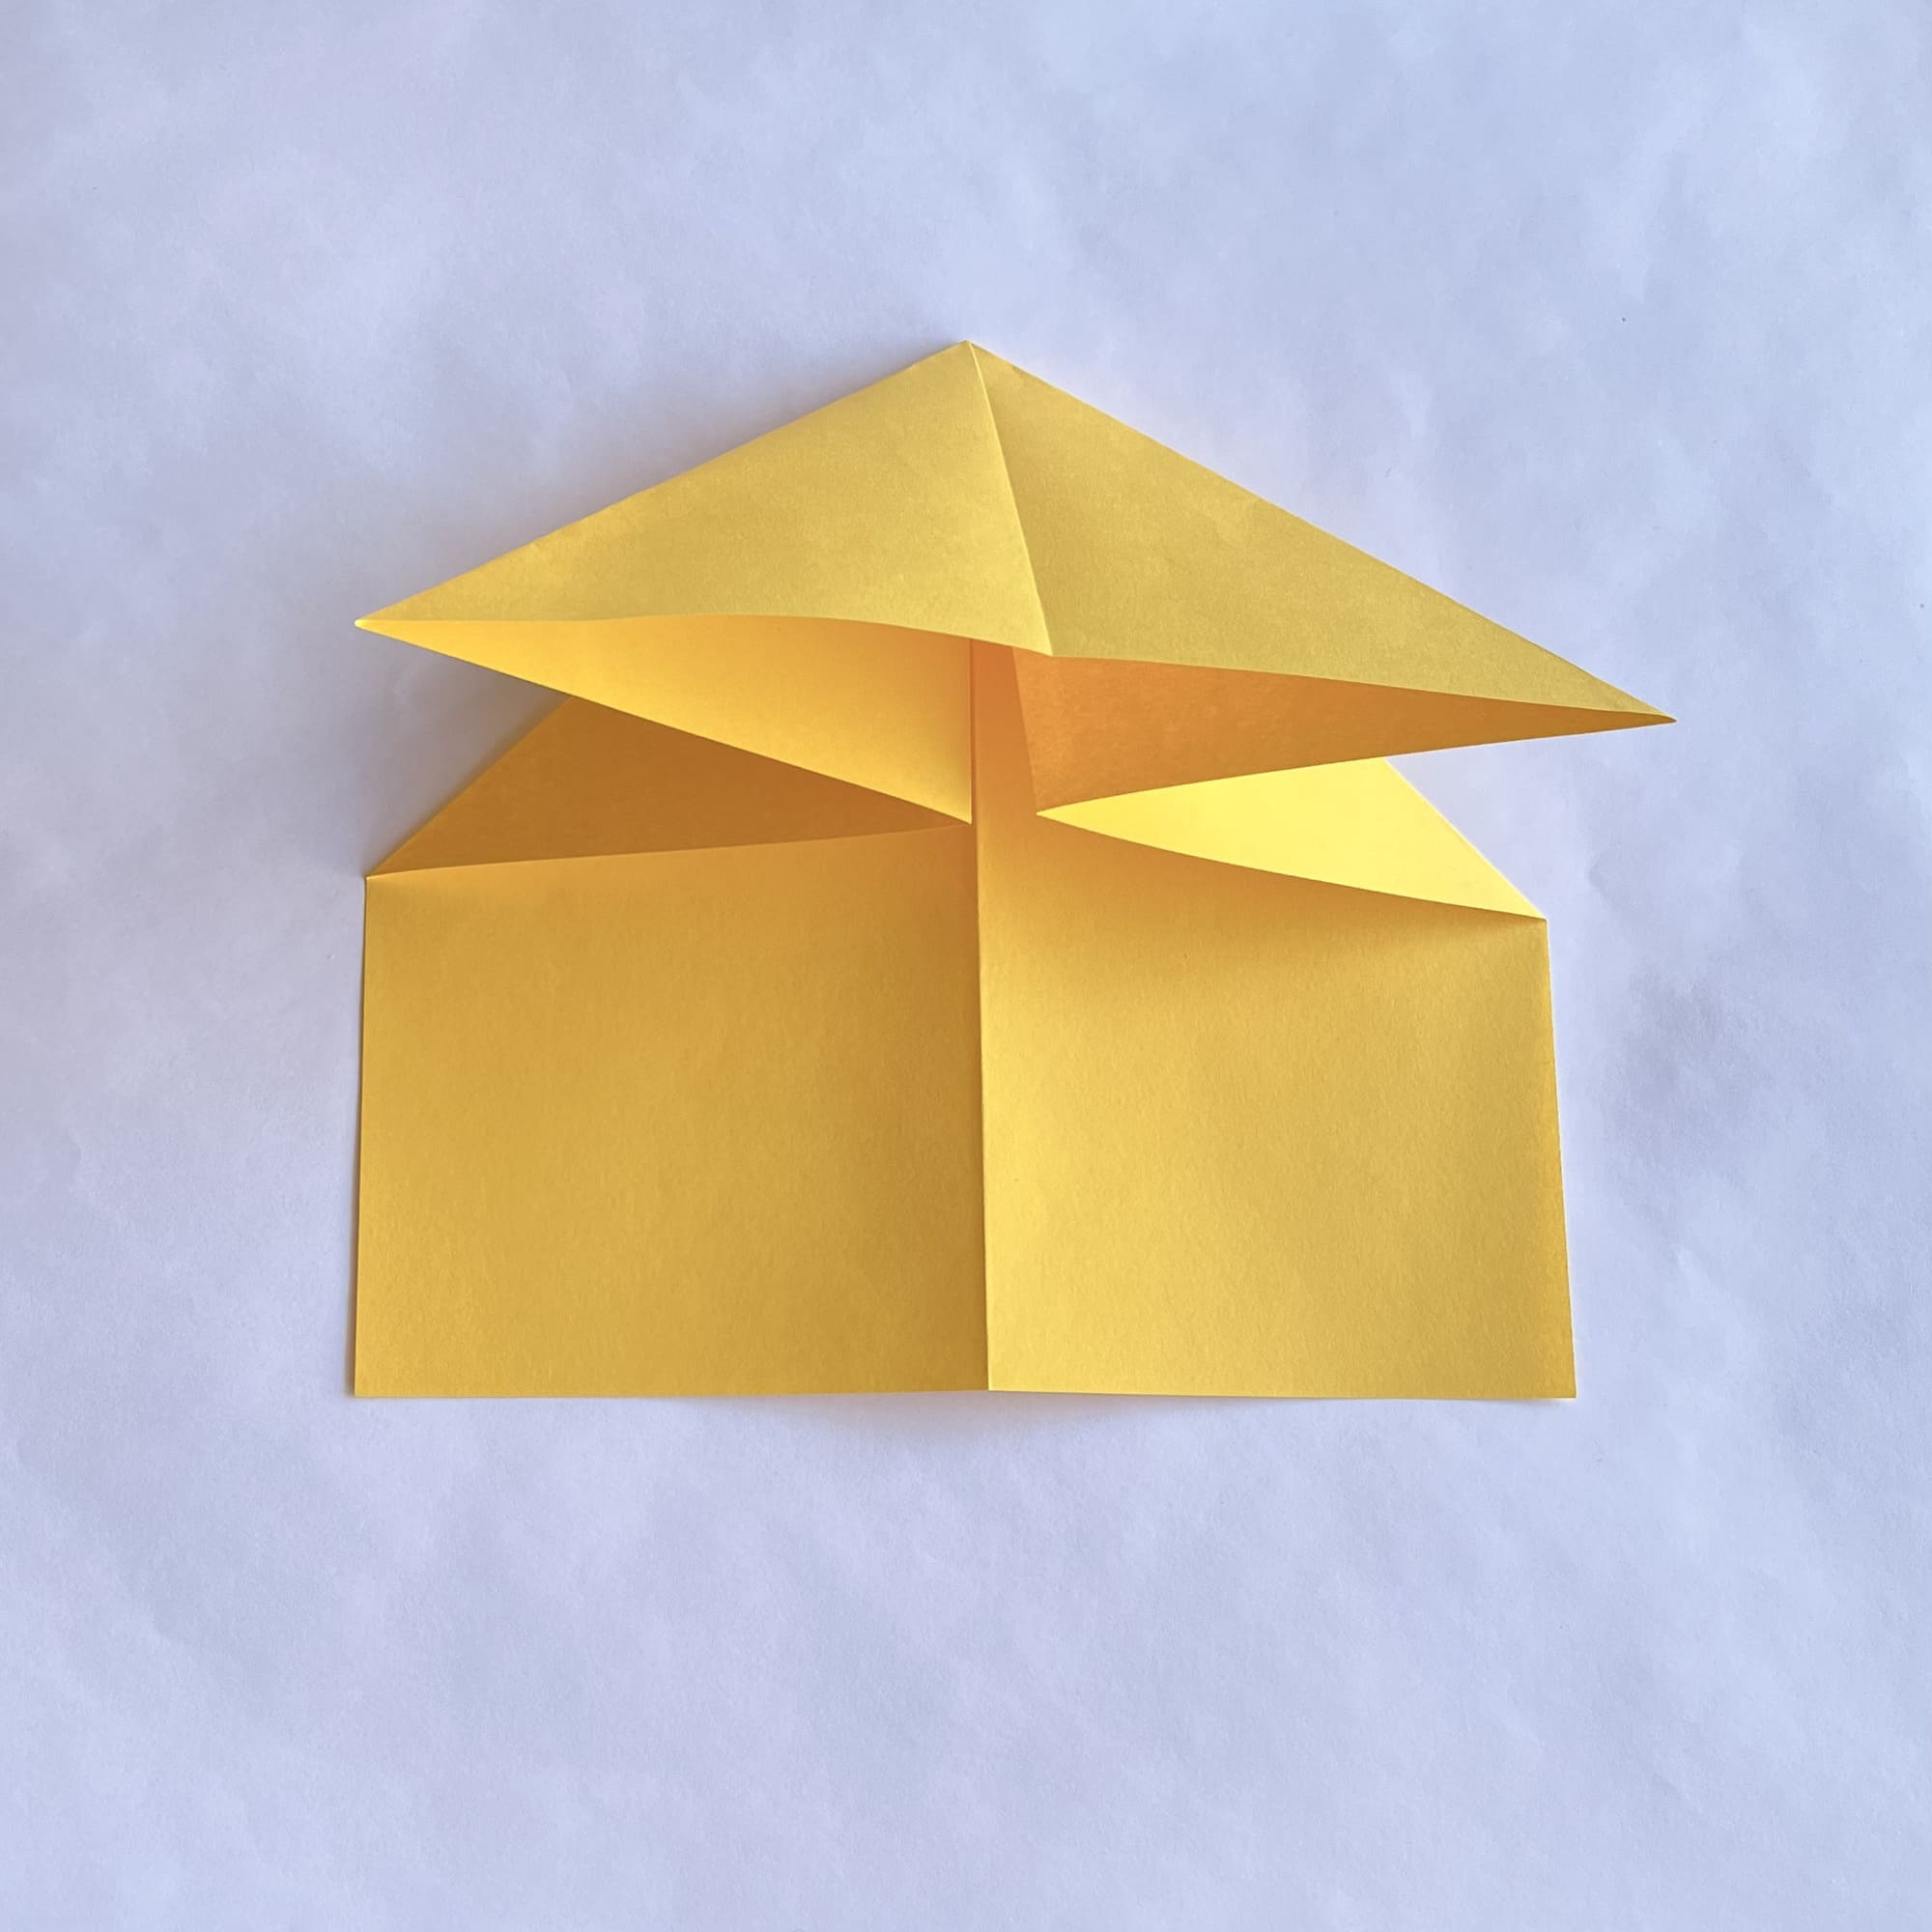
Two small triangles appeared on the sides of the center line. Let’s turn to one of them and bend its upper part and the outer corner inward.
You should not forget to crease the fold well, then unfold.
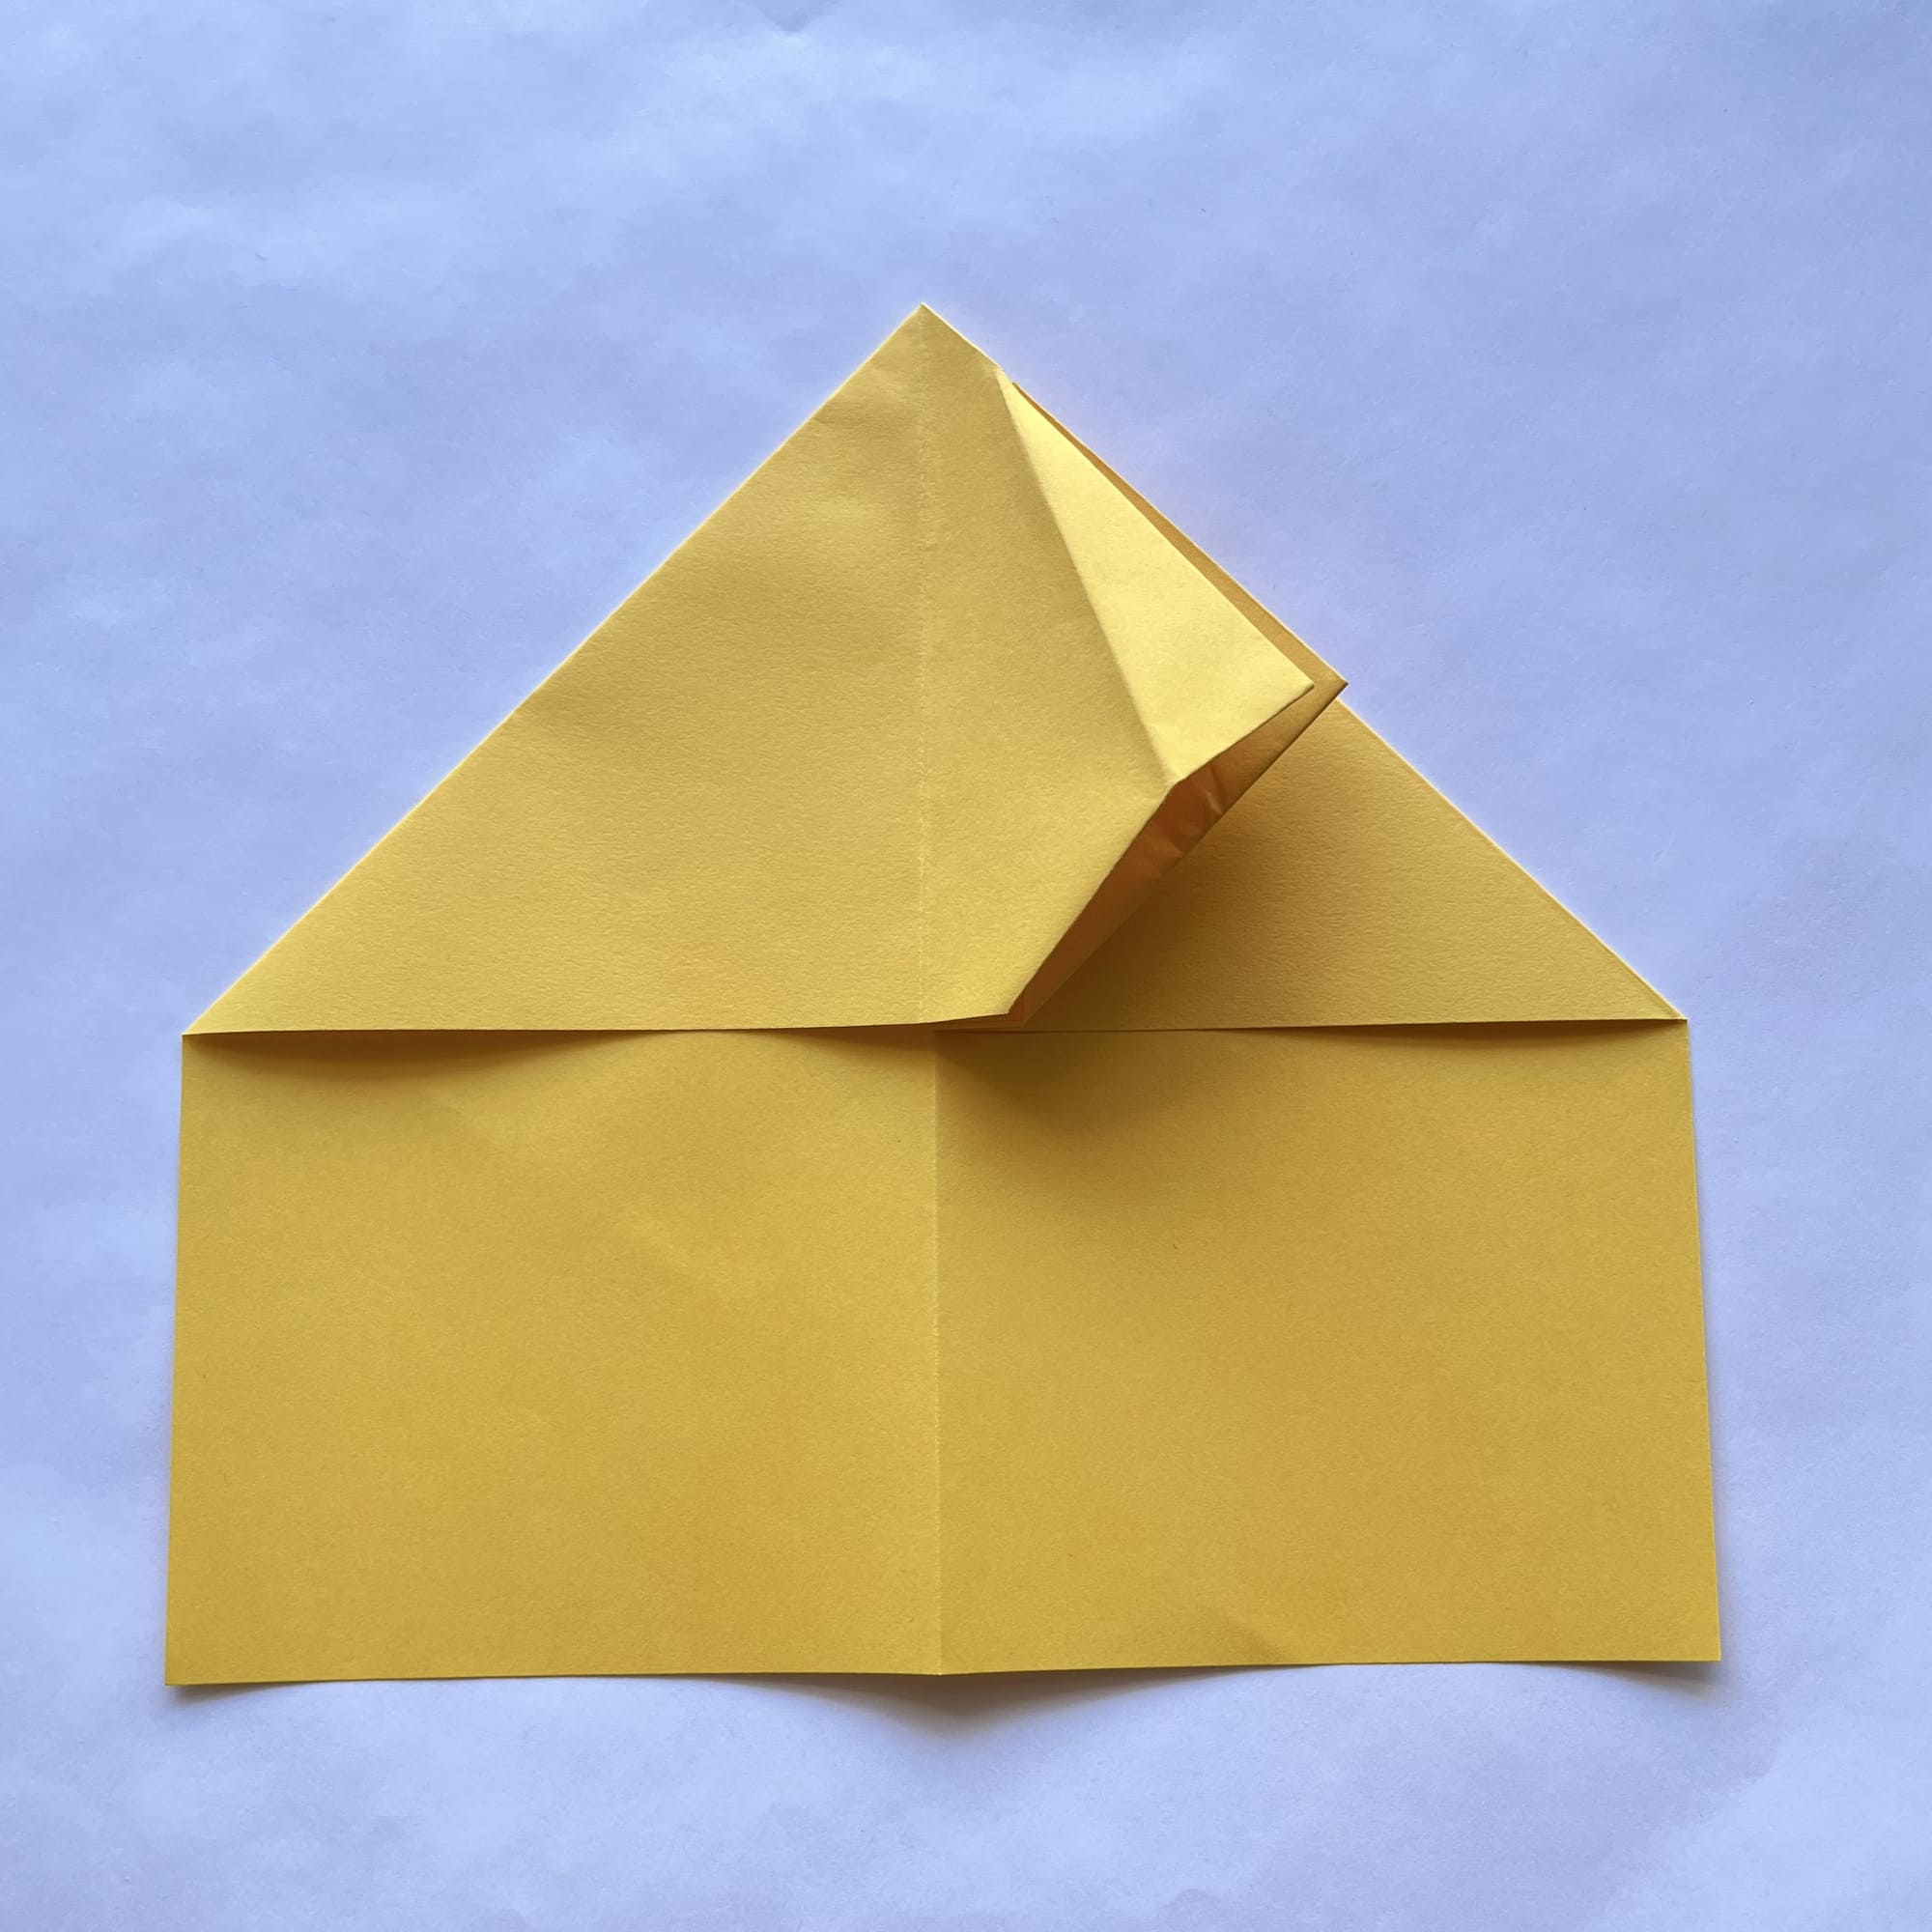
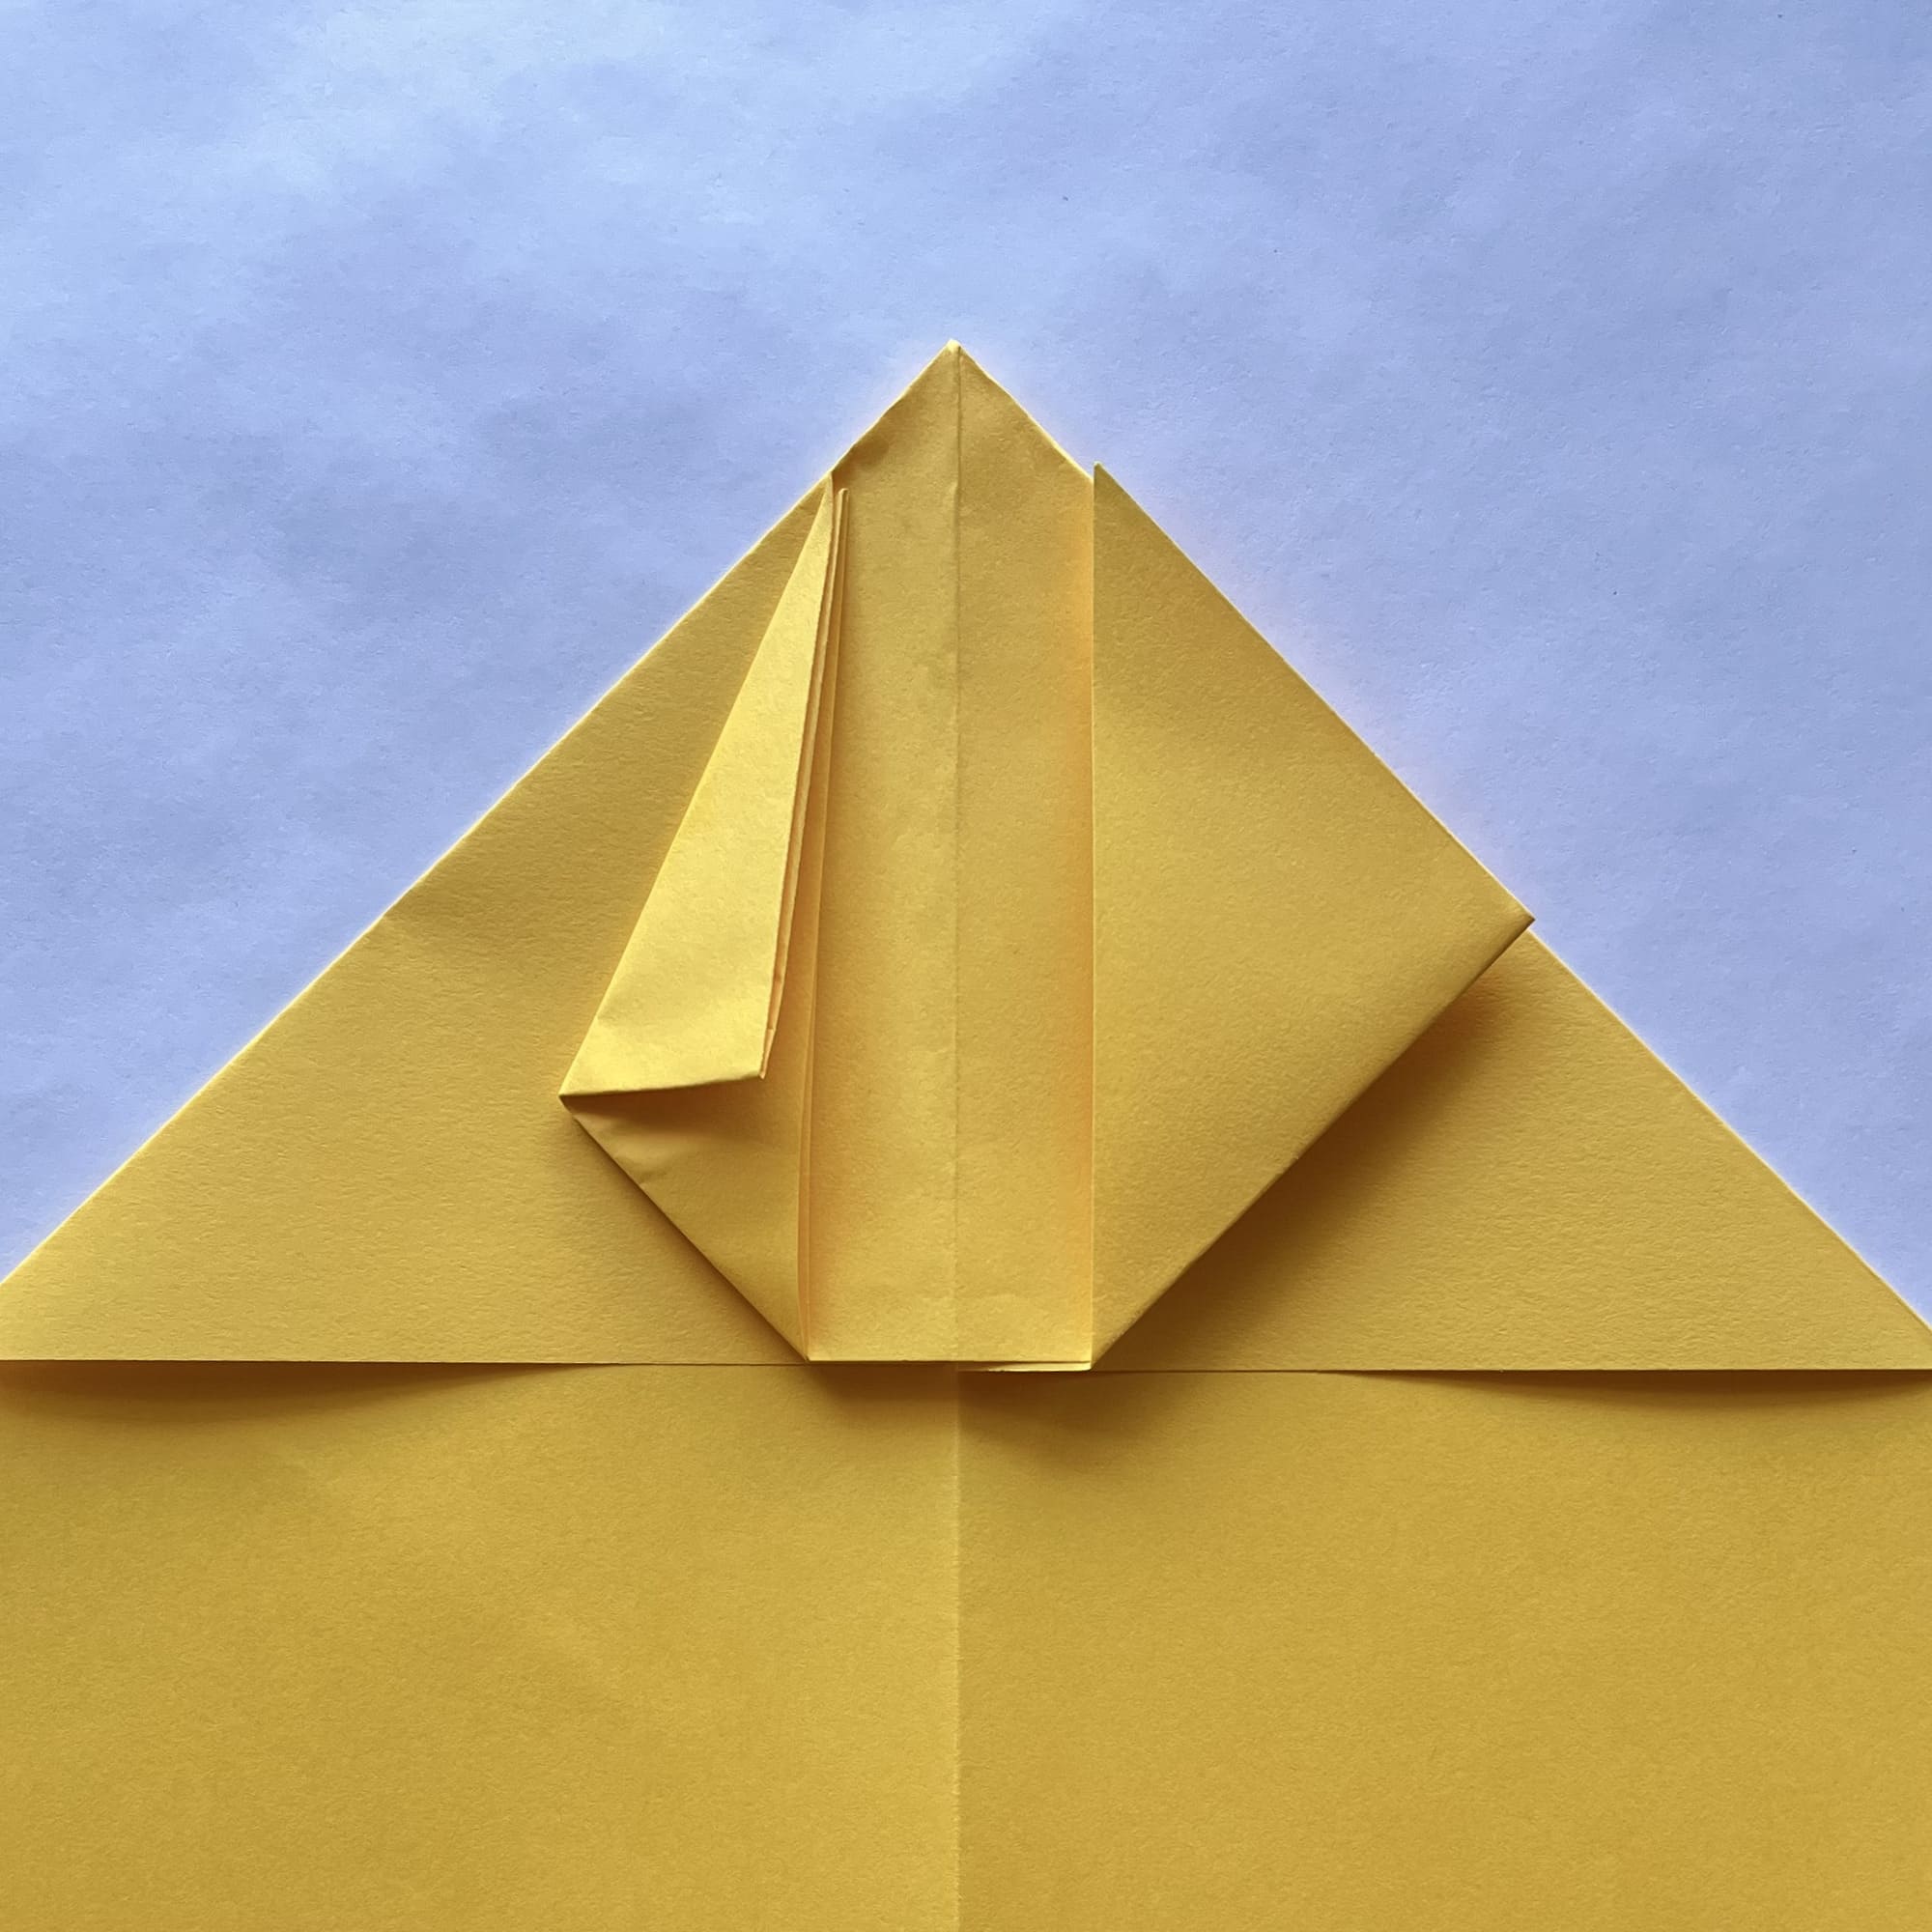
Along the same line, you would bend the corner to the other side, crease the fold, and open the fold.
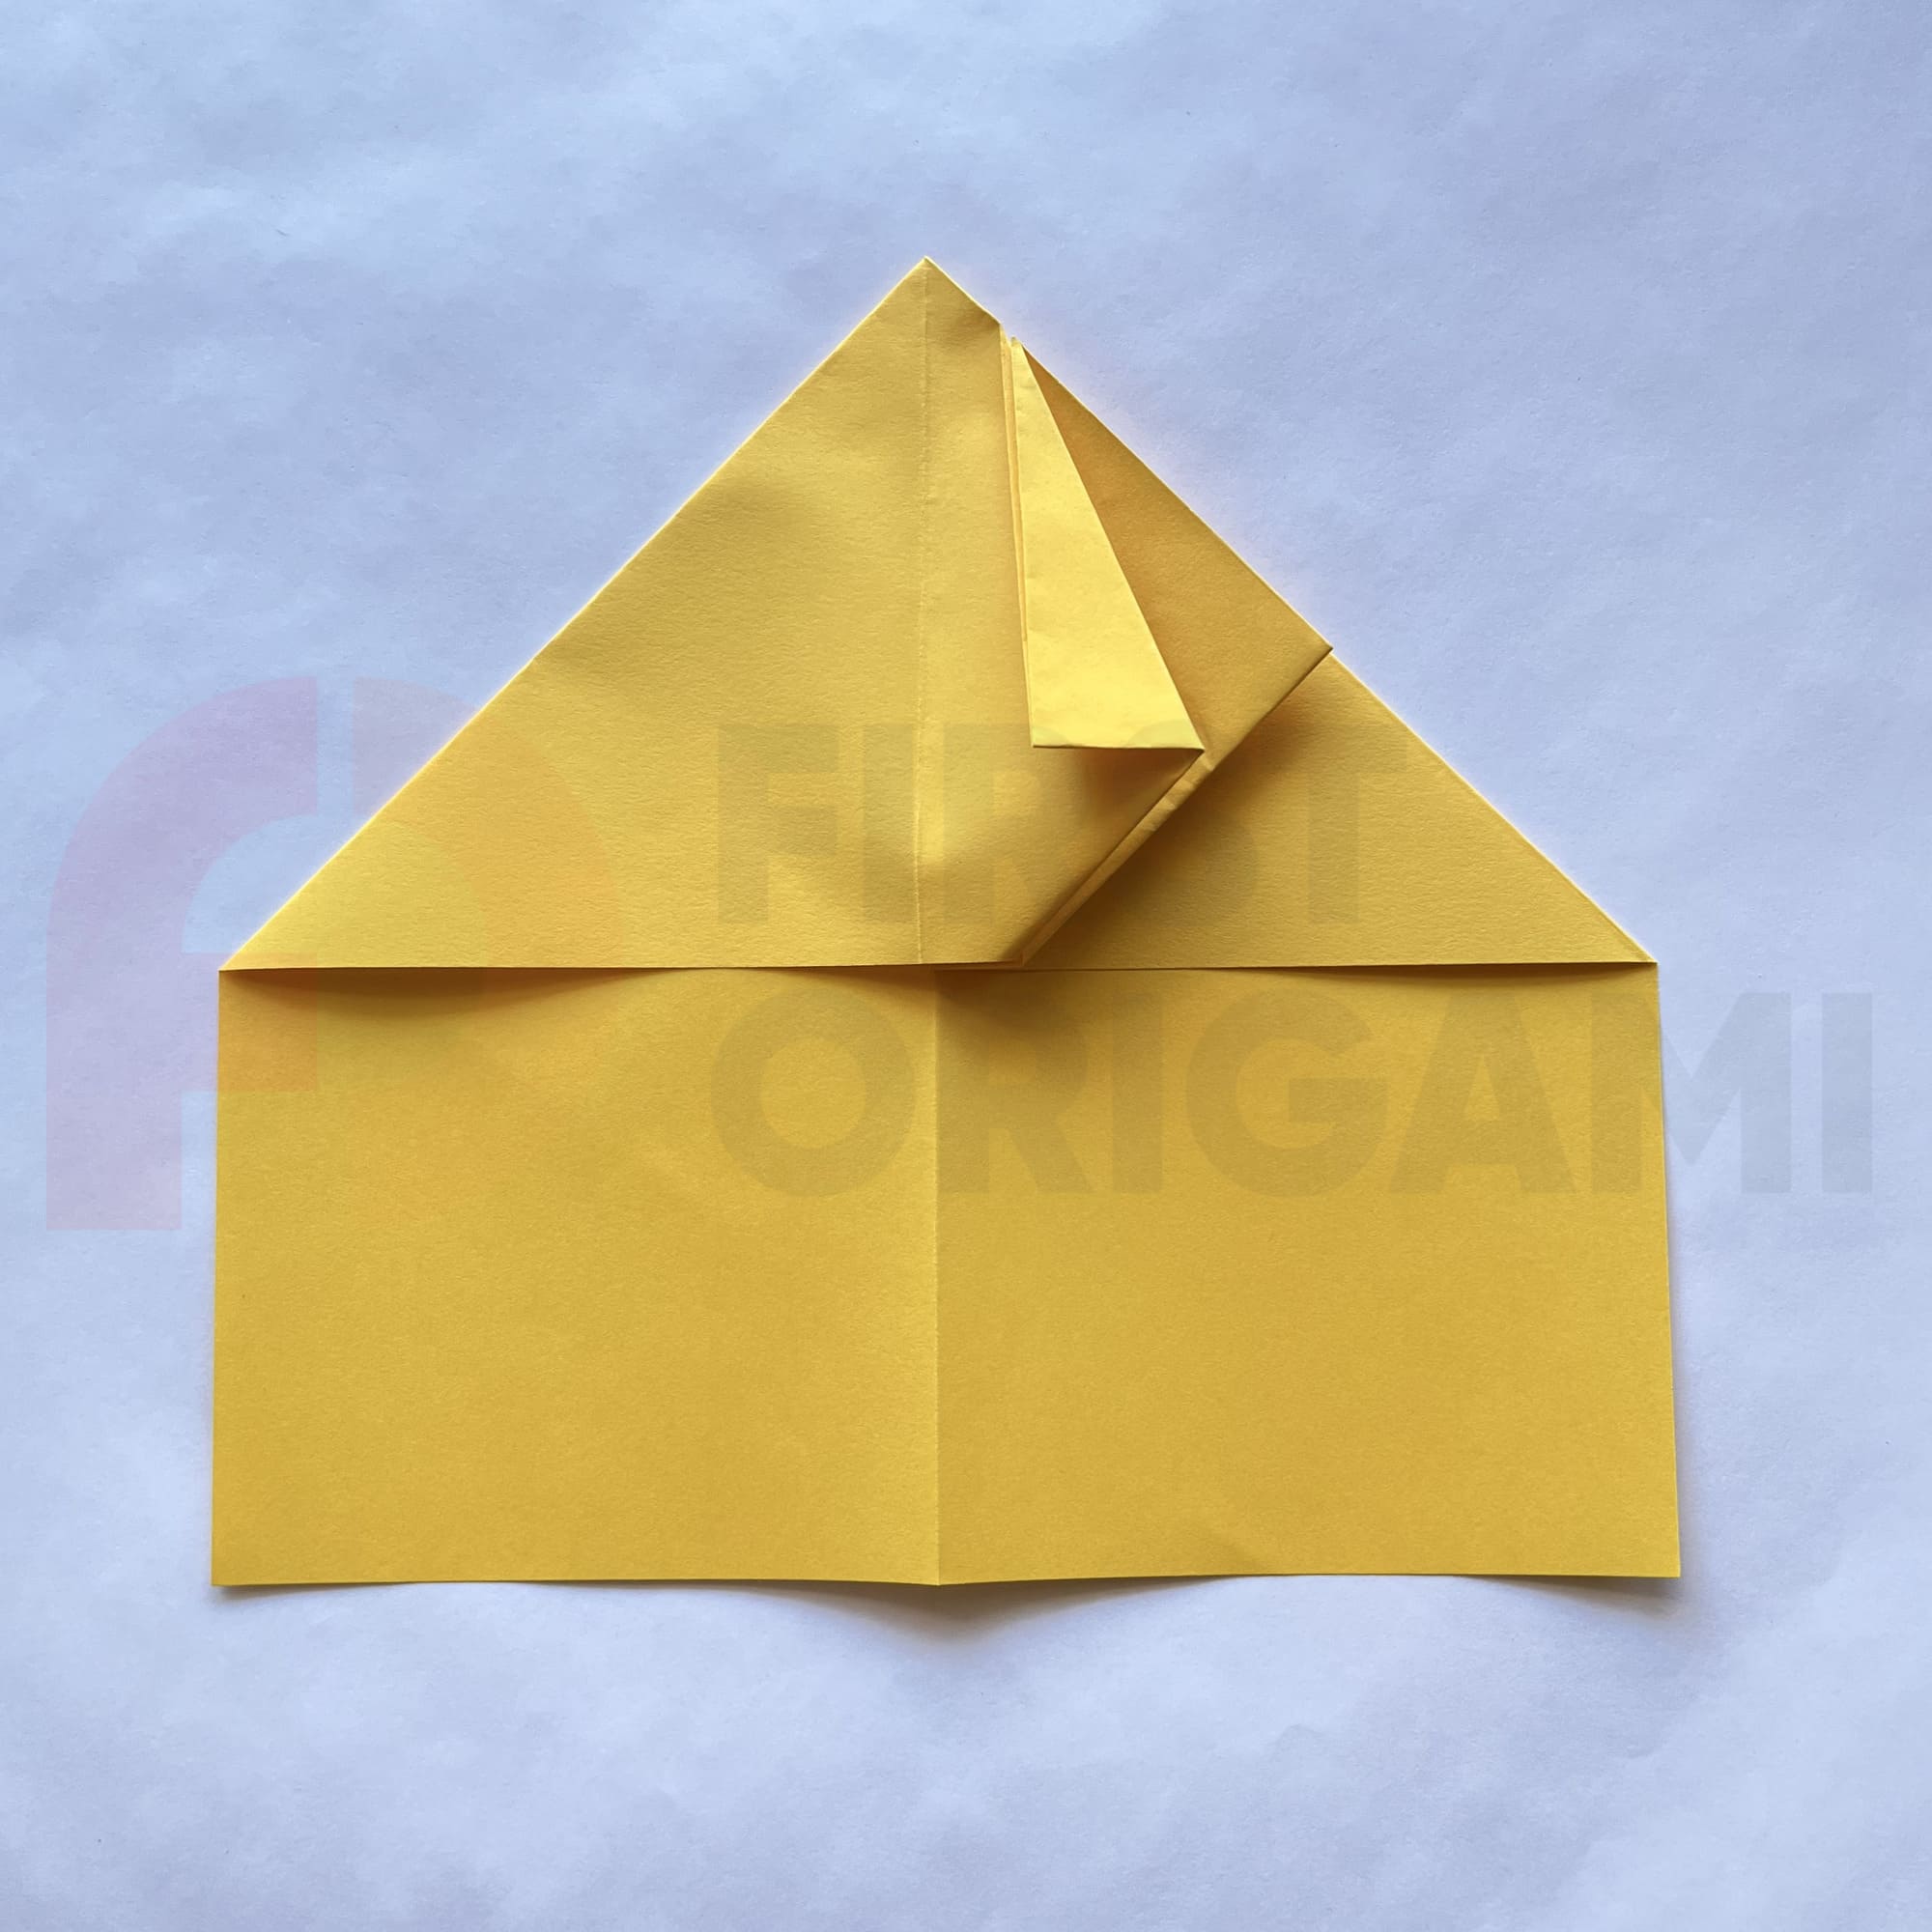

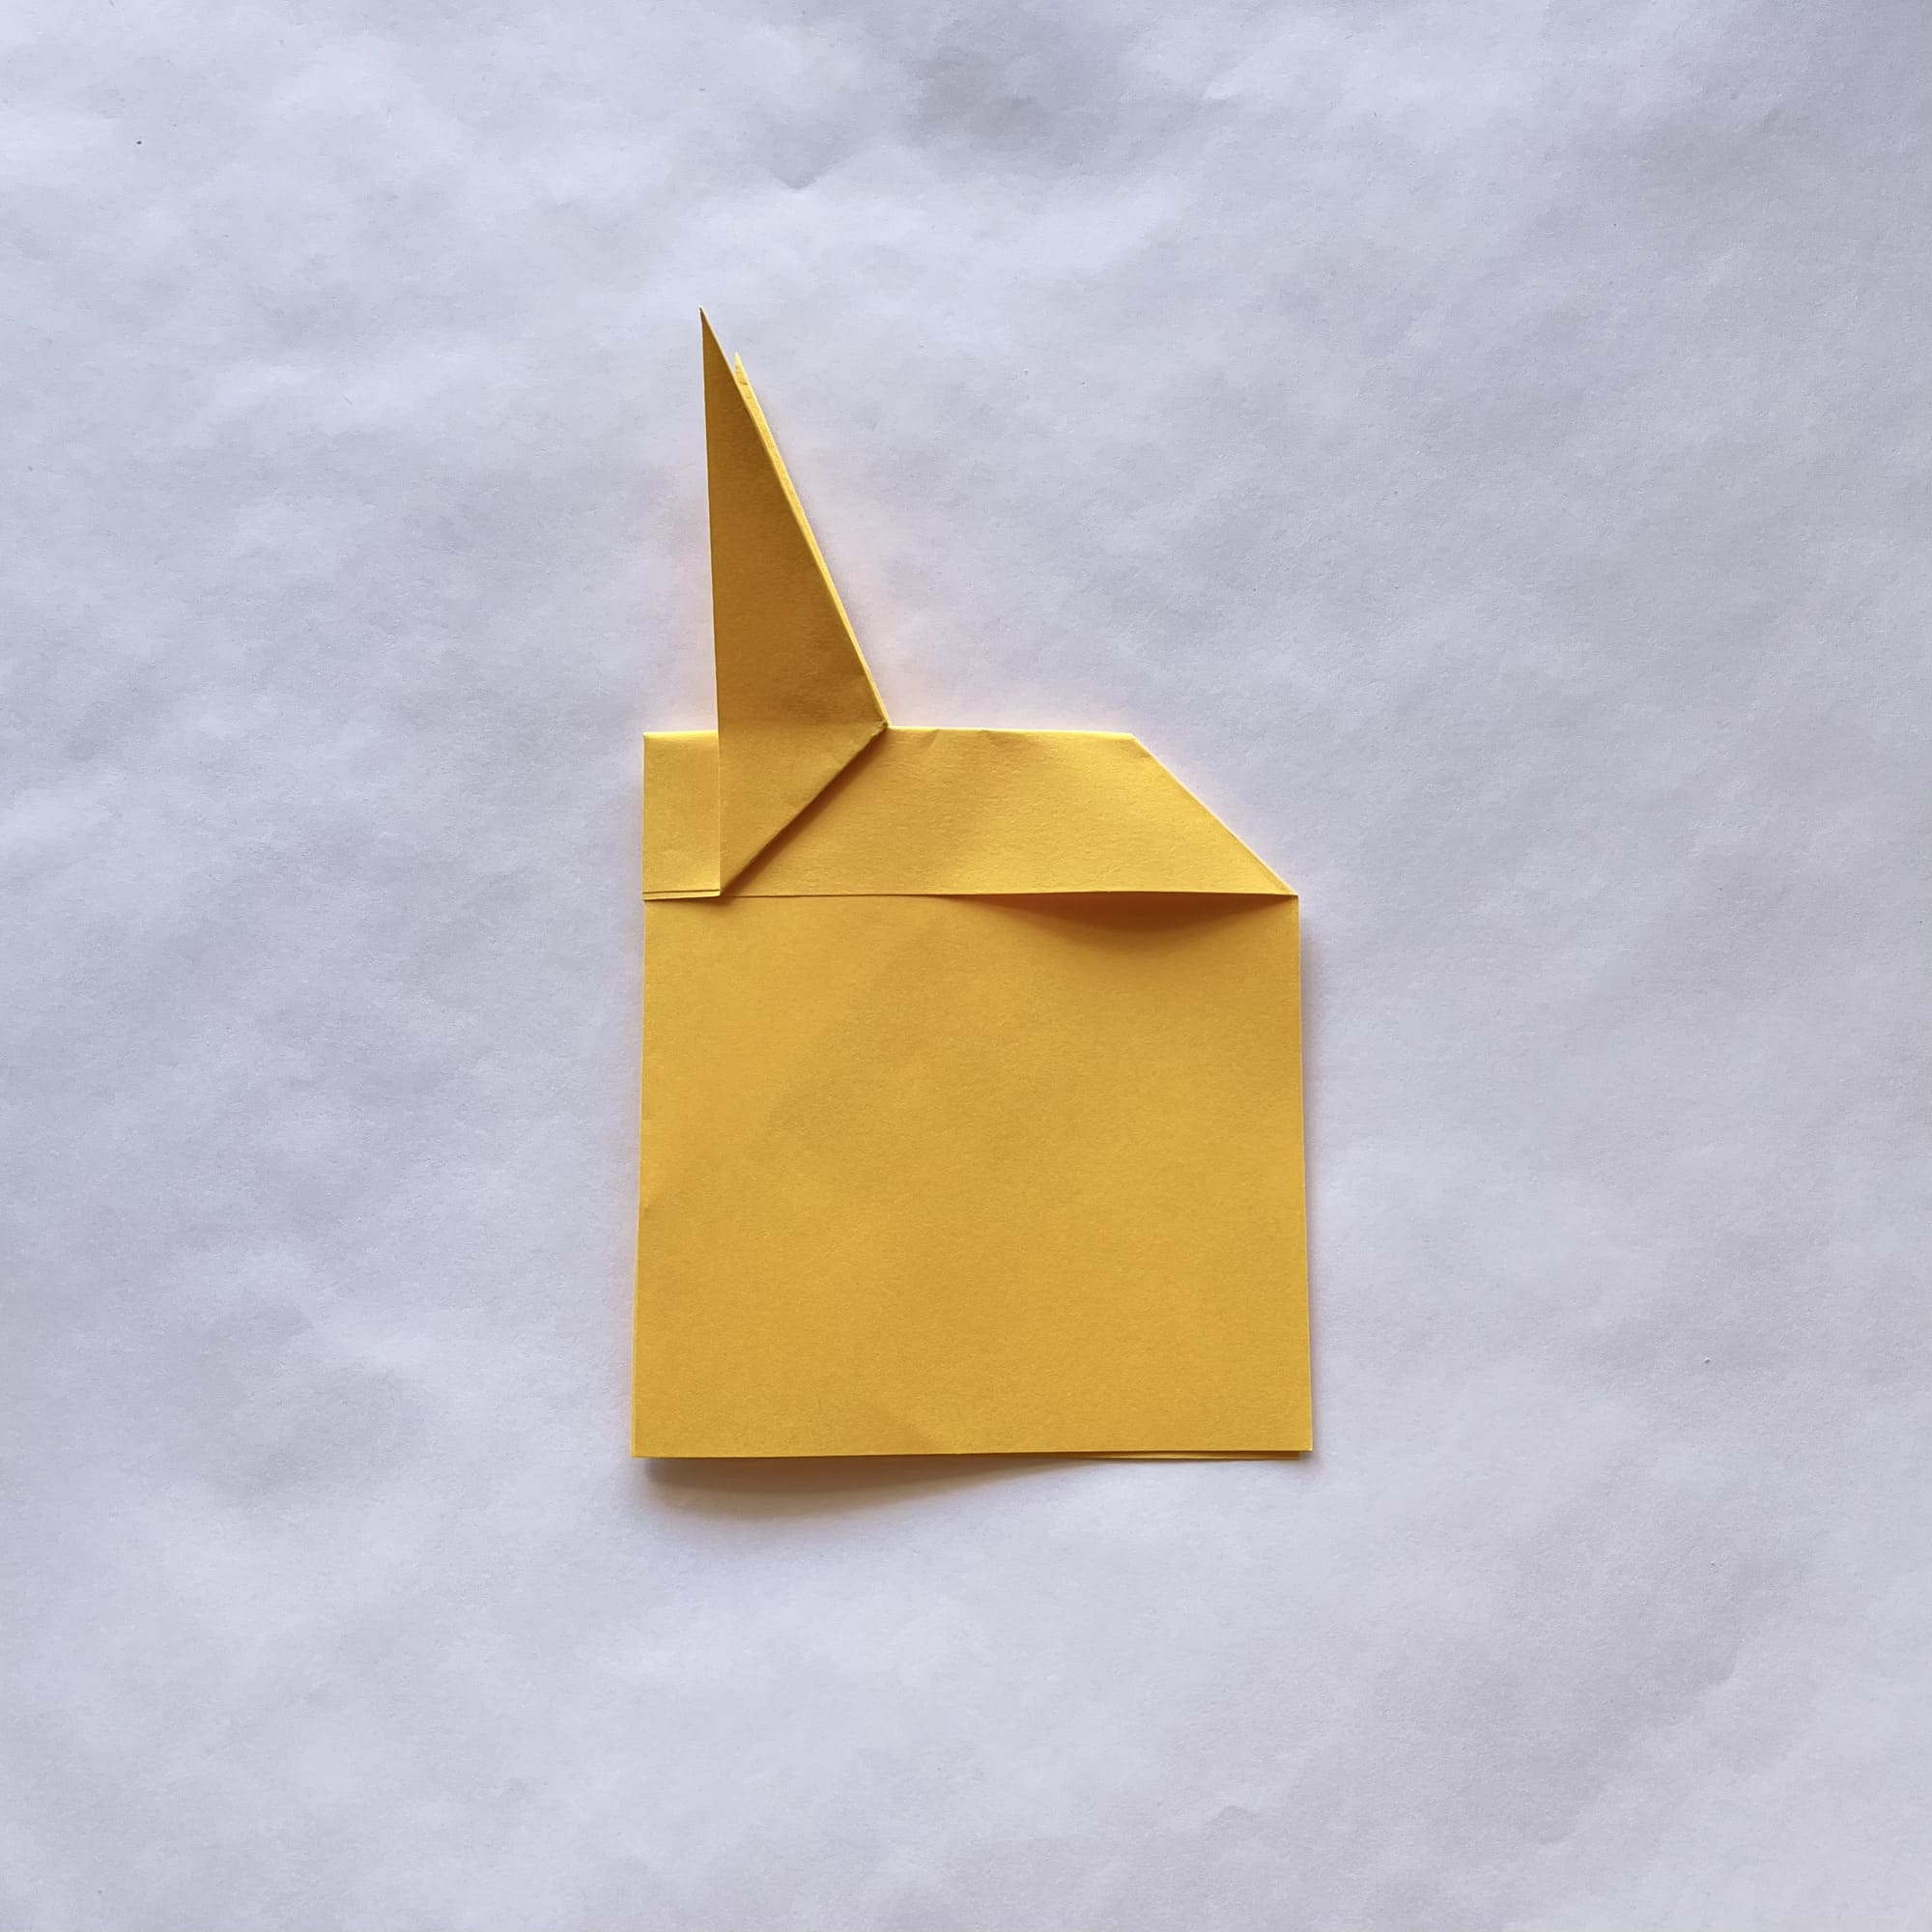
Now, you can open this triangle completely.
Next, you would squeeze this corner on both sides so that the paper folds along the folds.
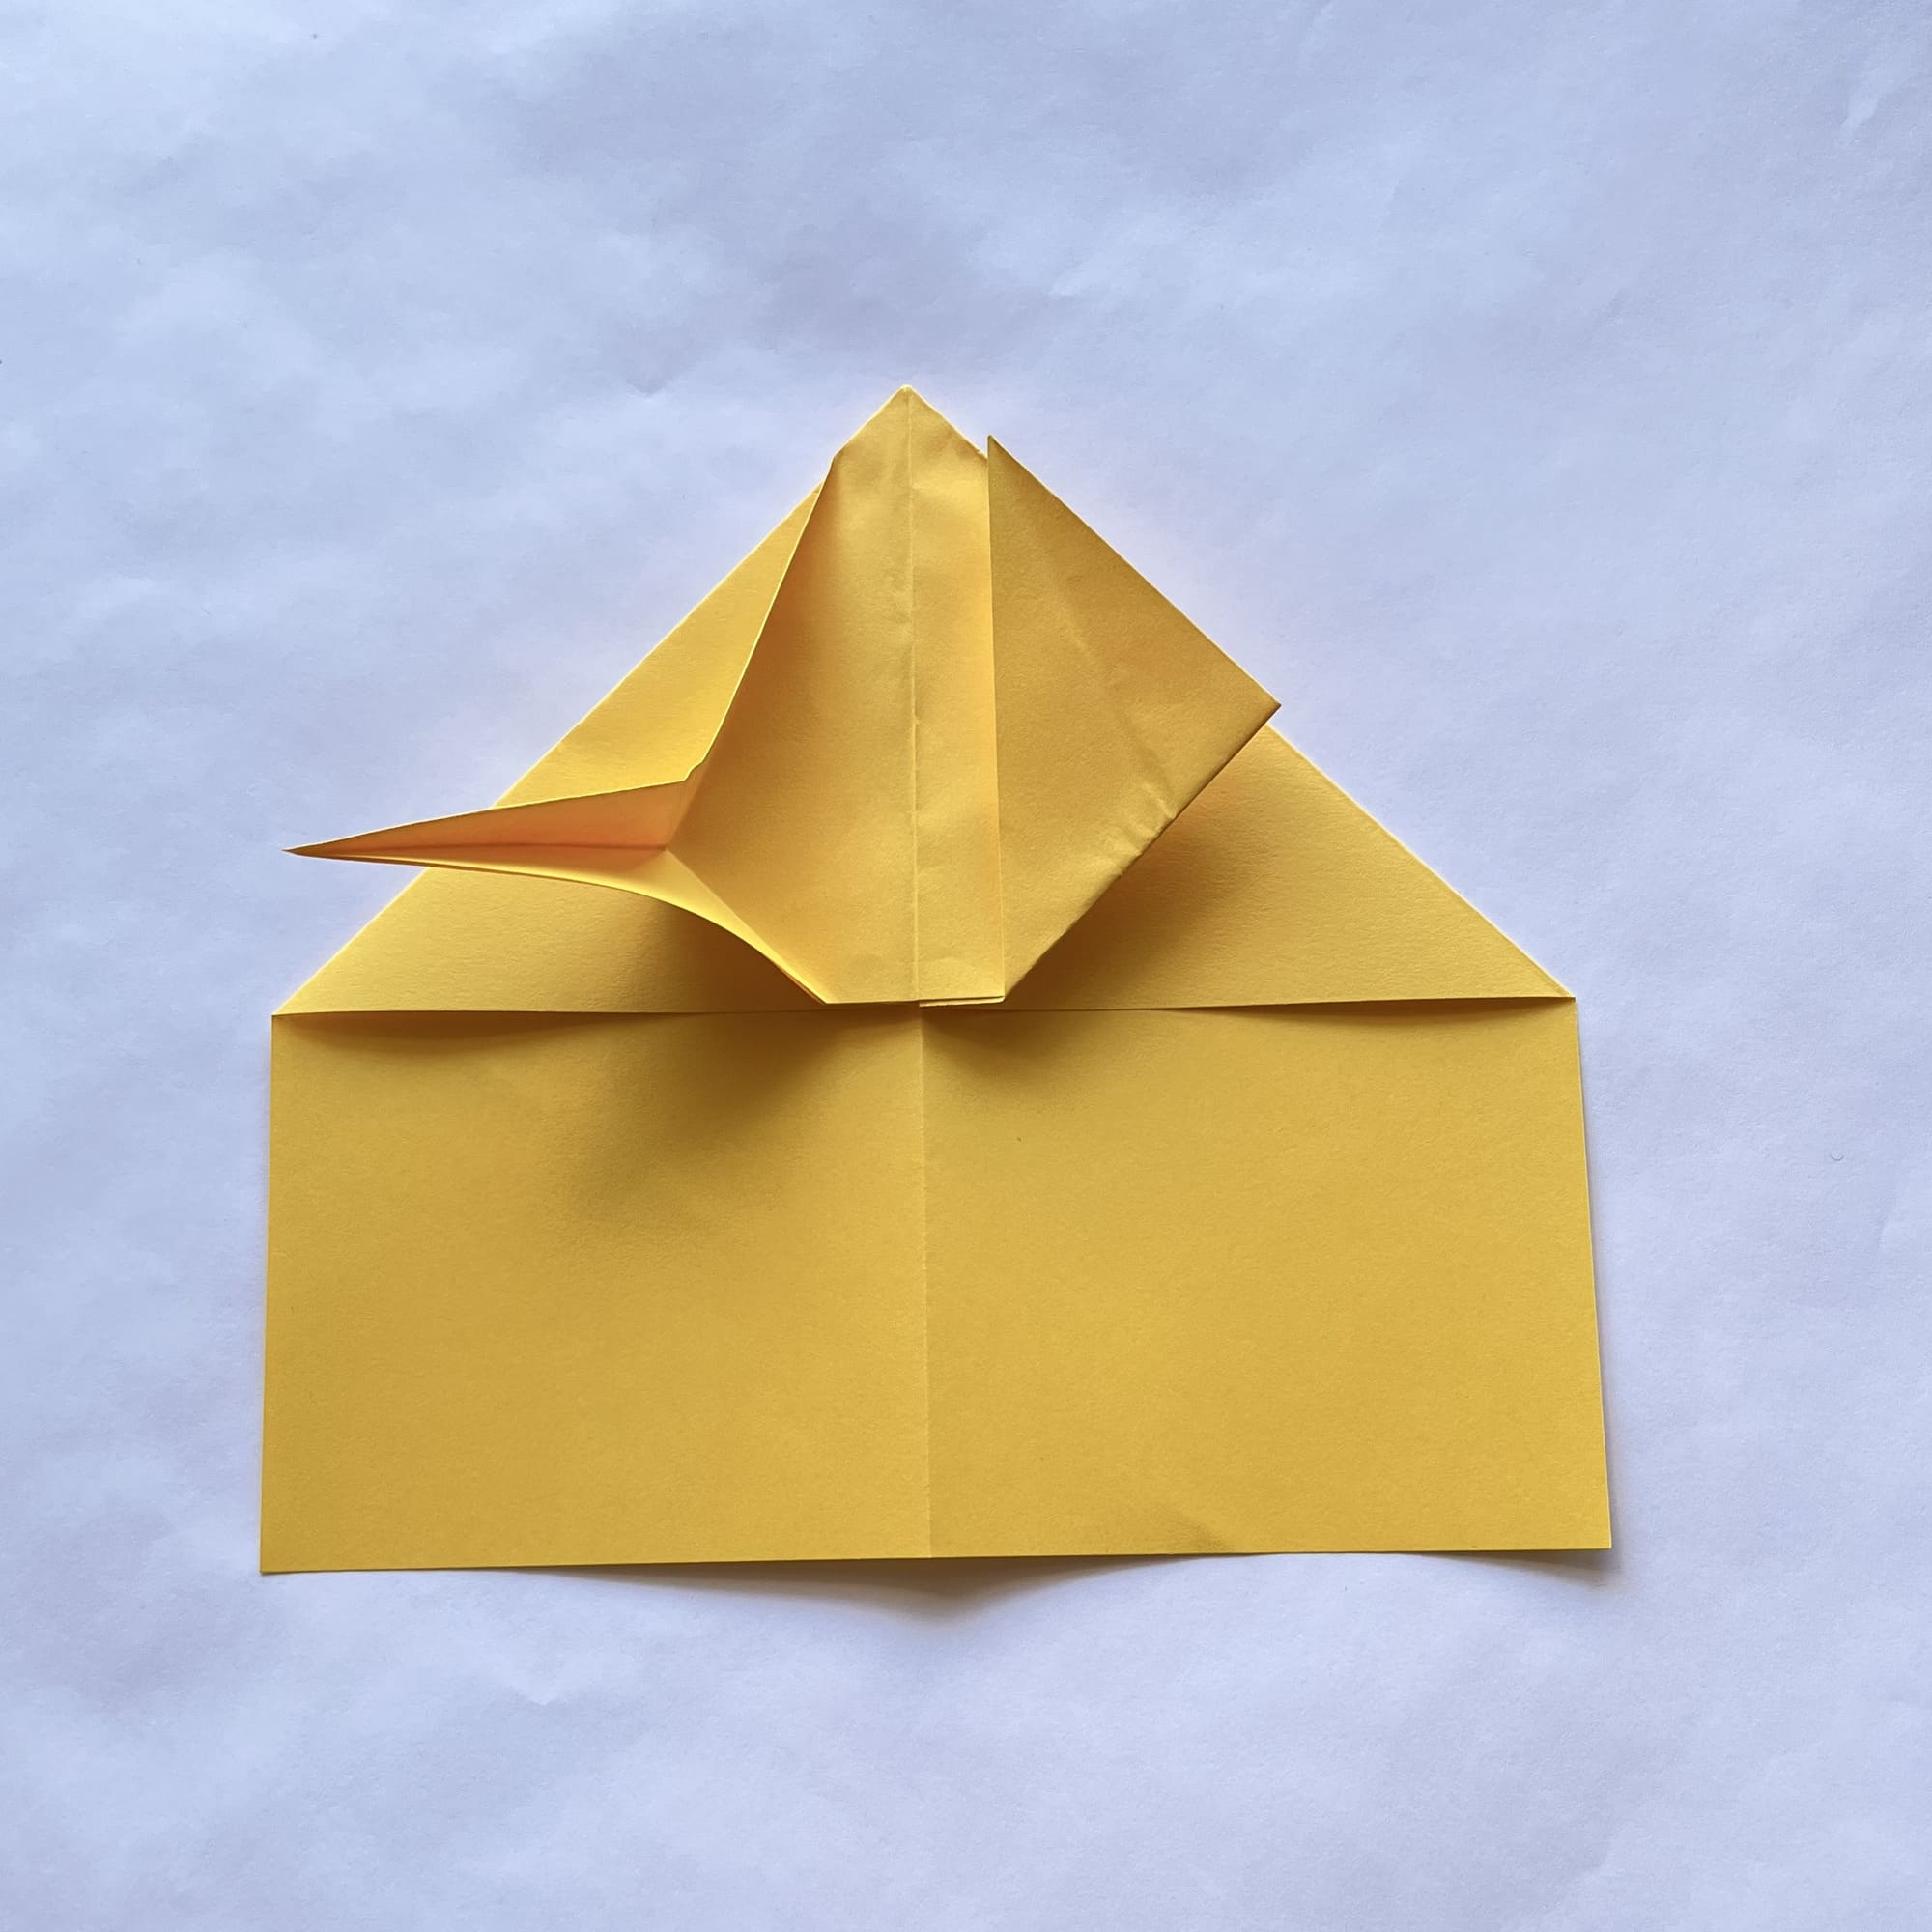
Then, you need to bend the protruding corner up and straighten it on the plane of the table.
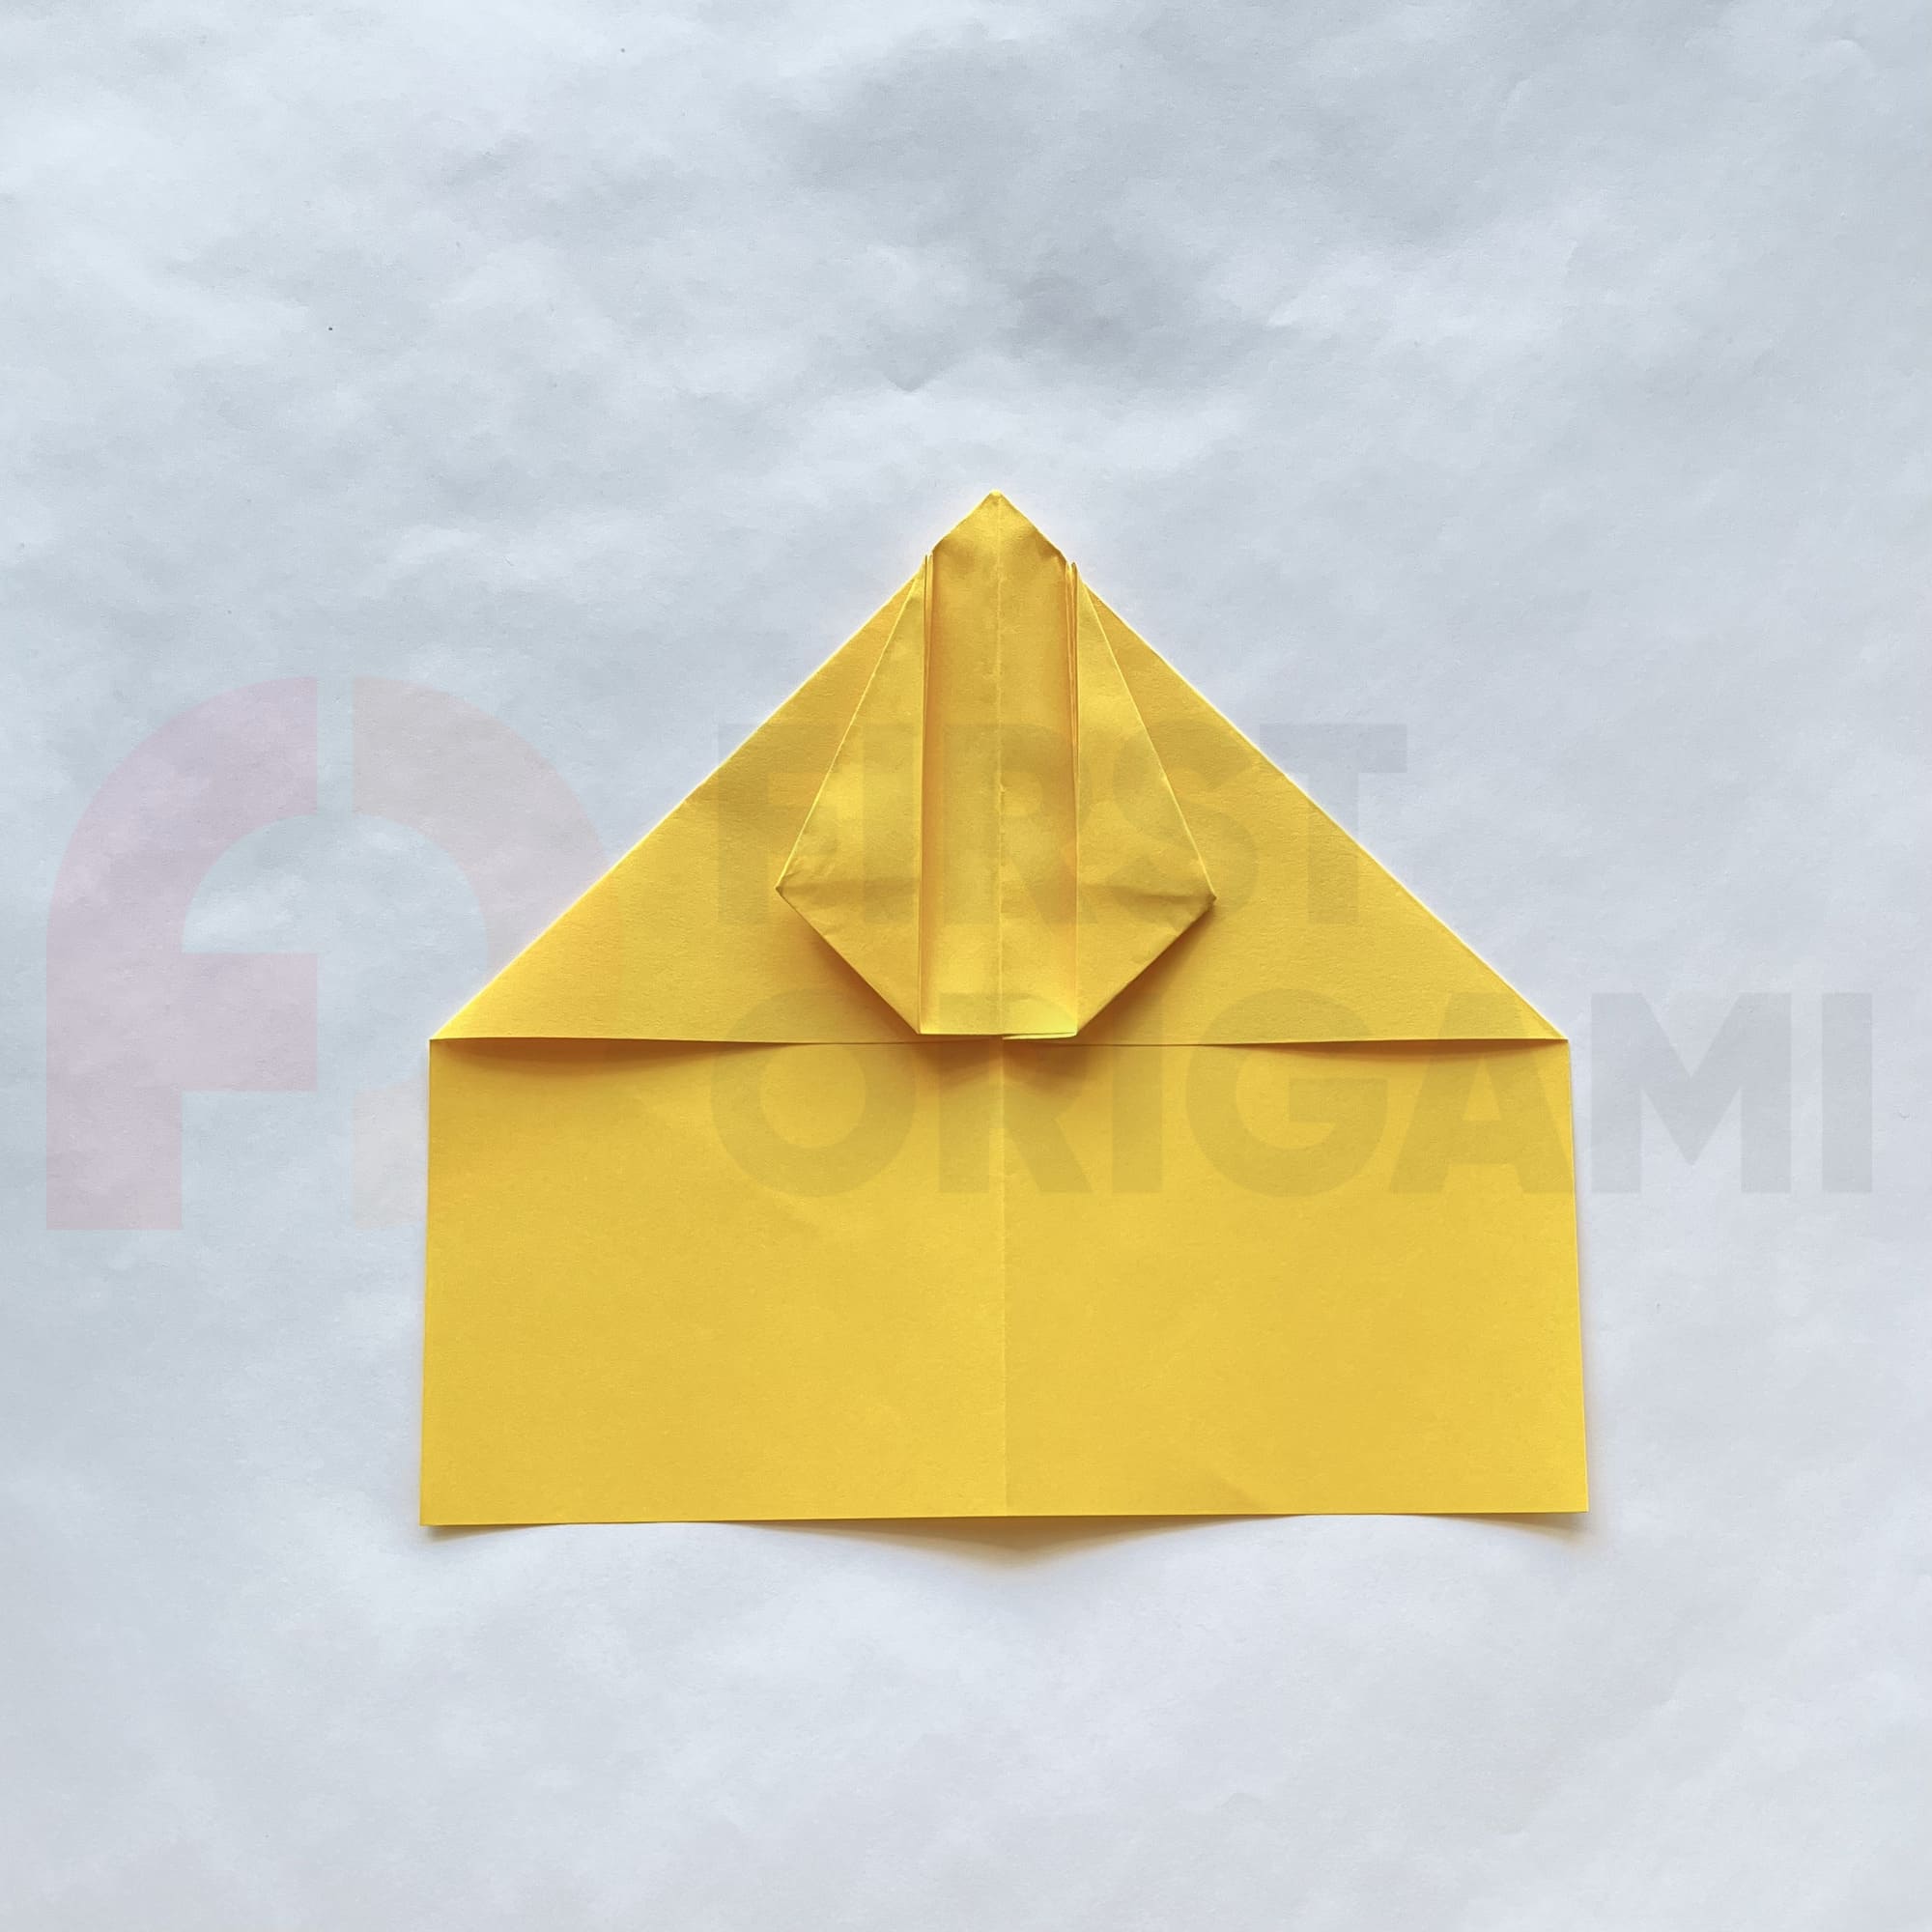
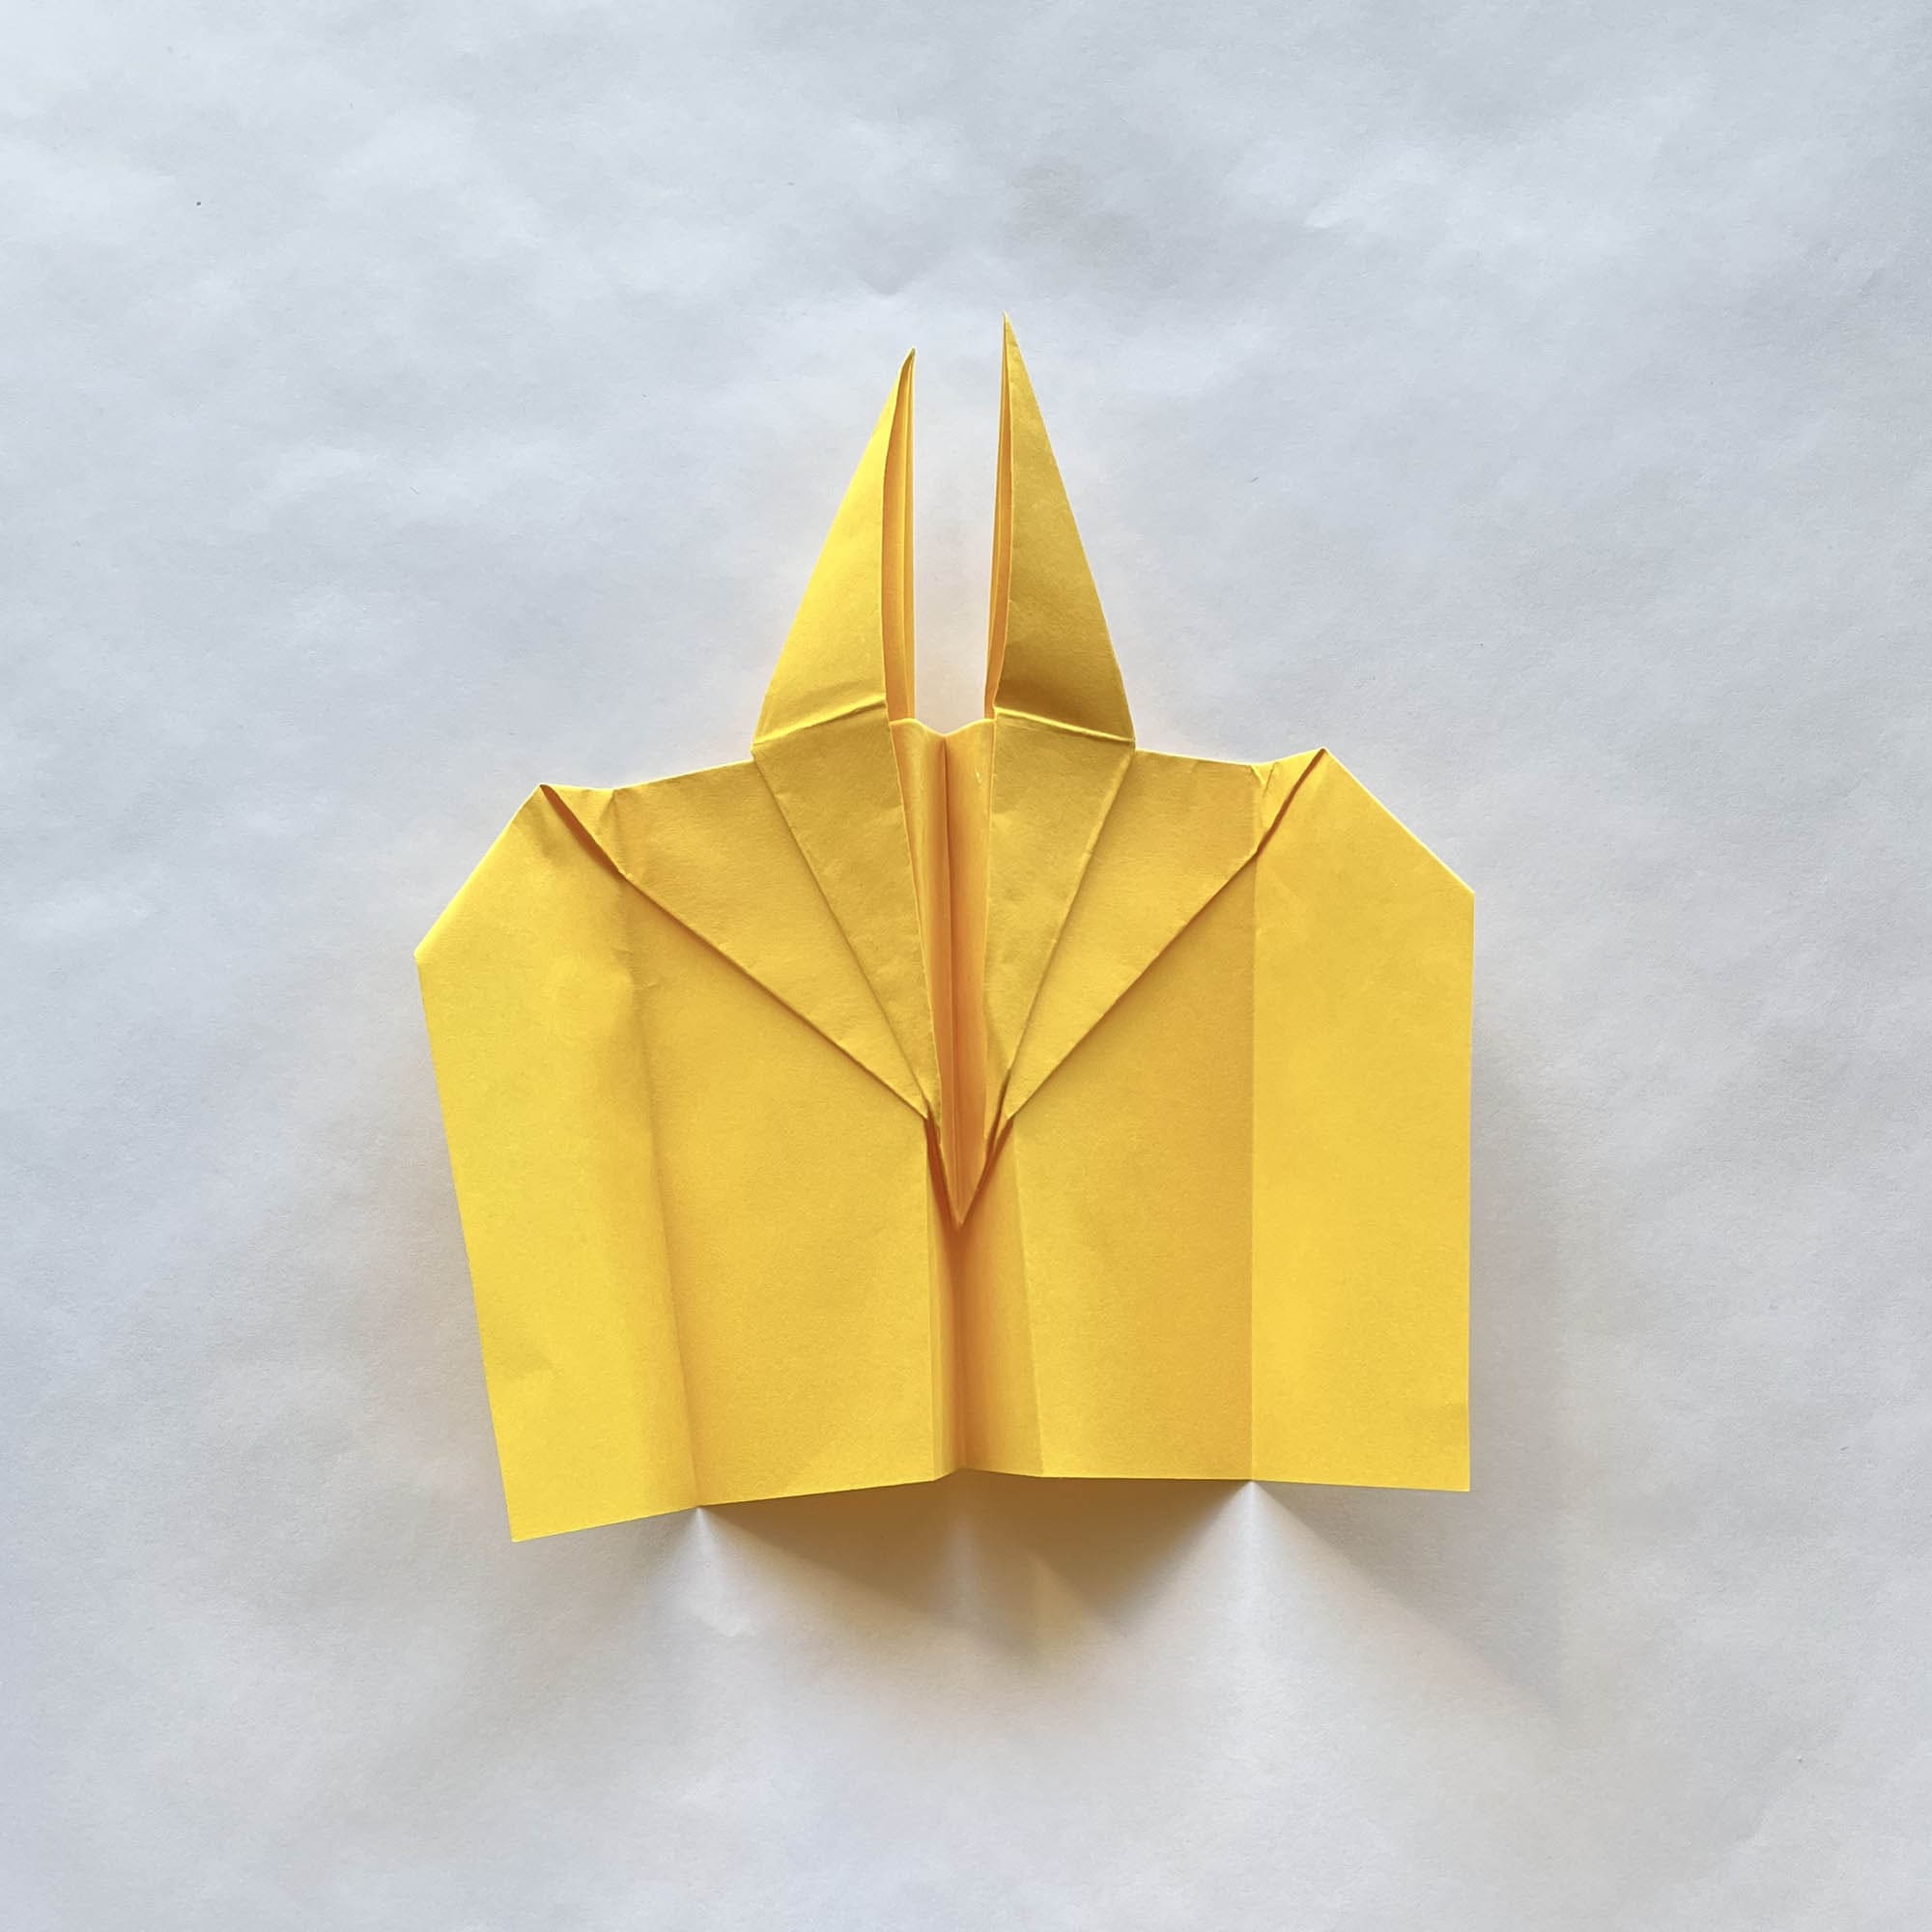
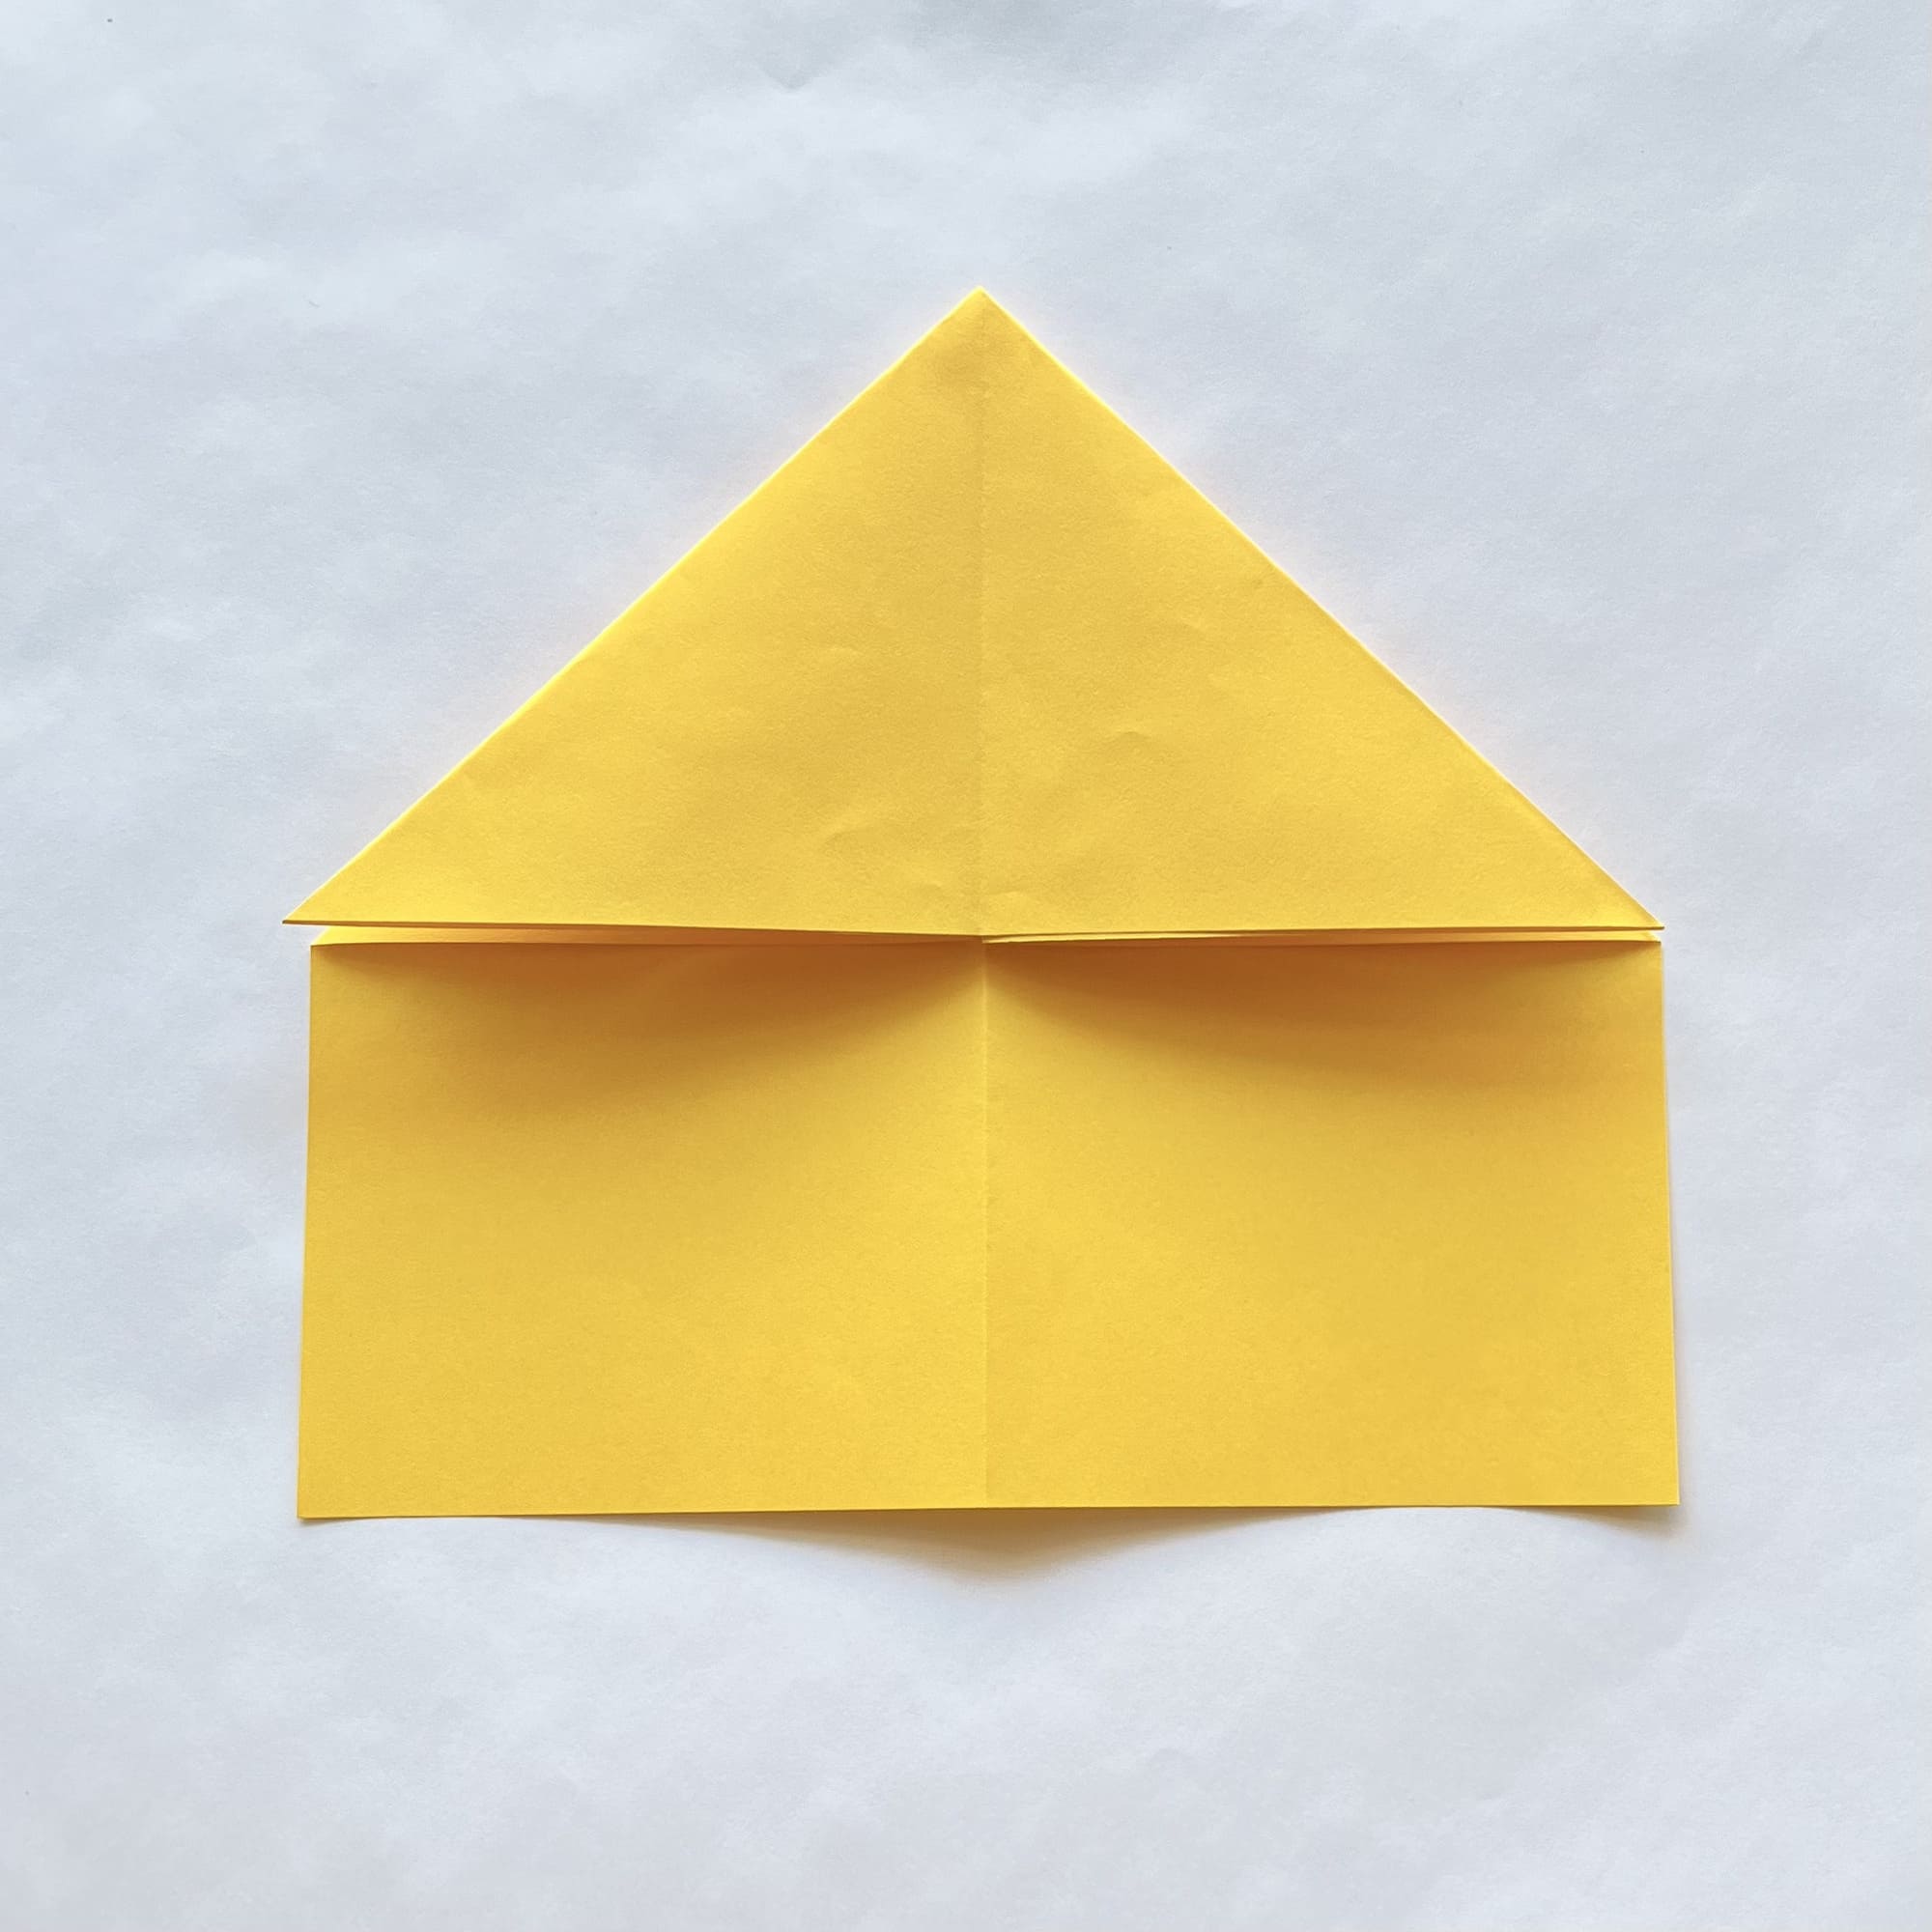
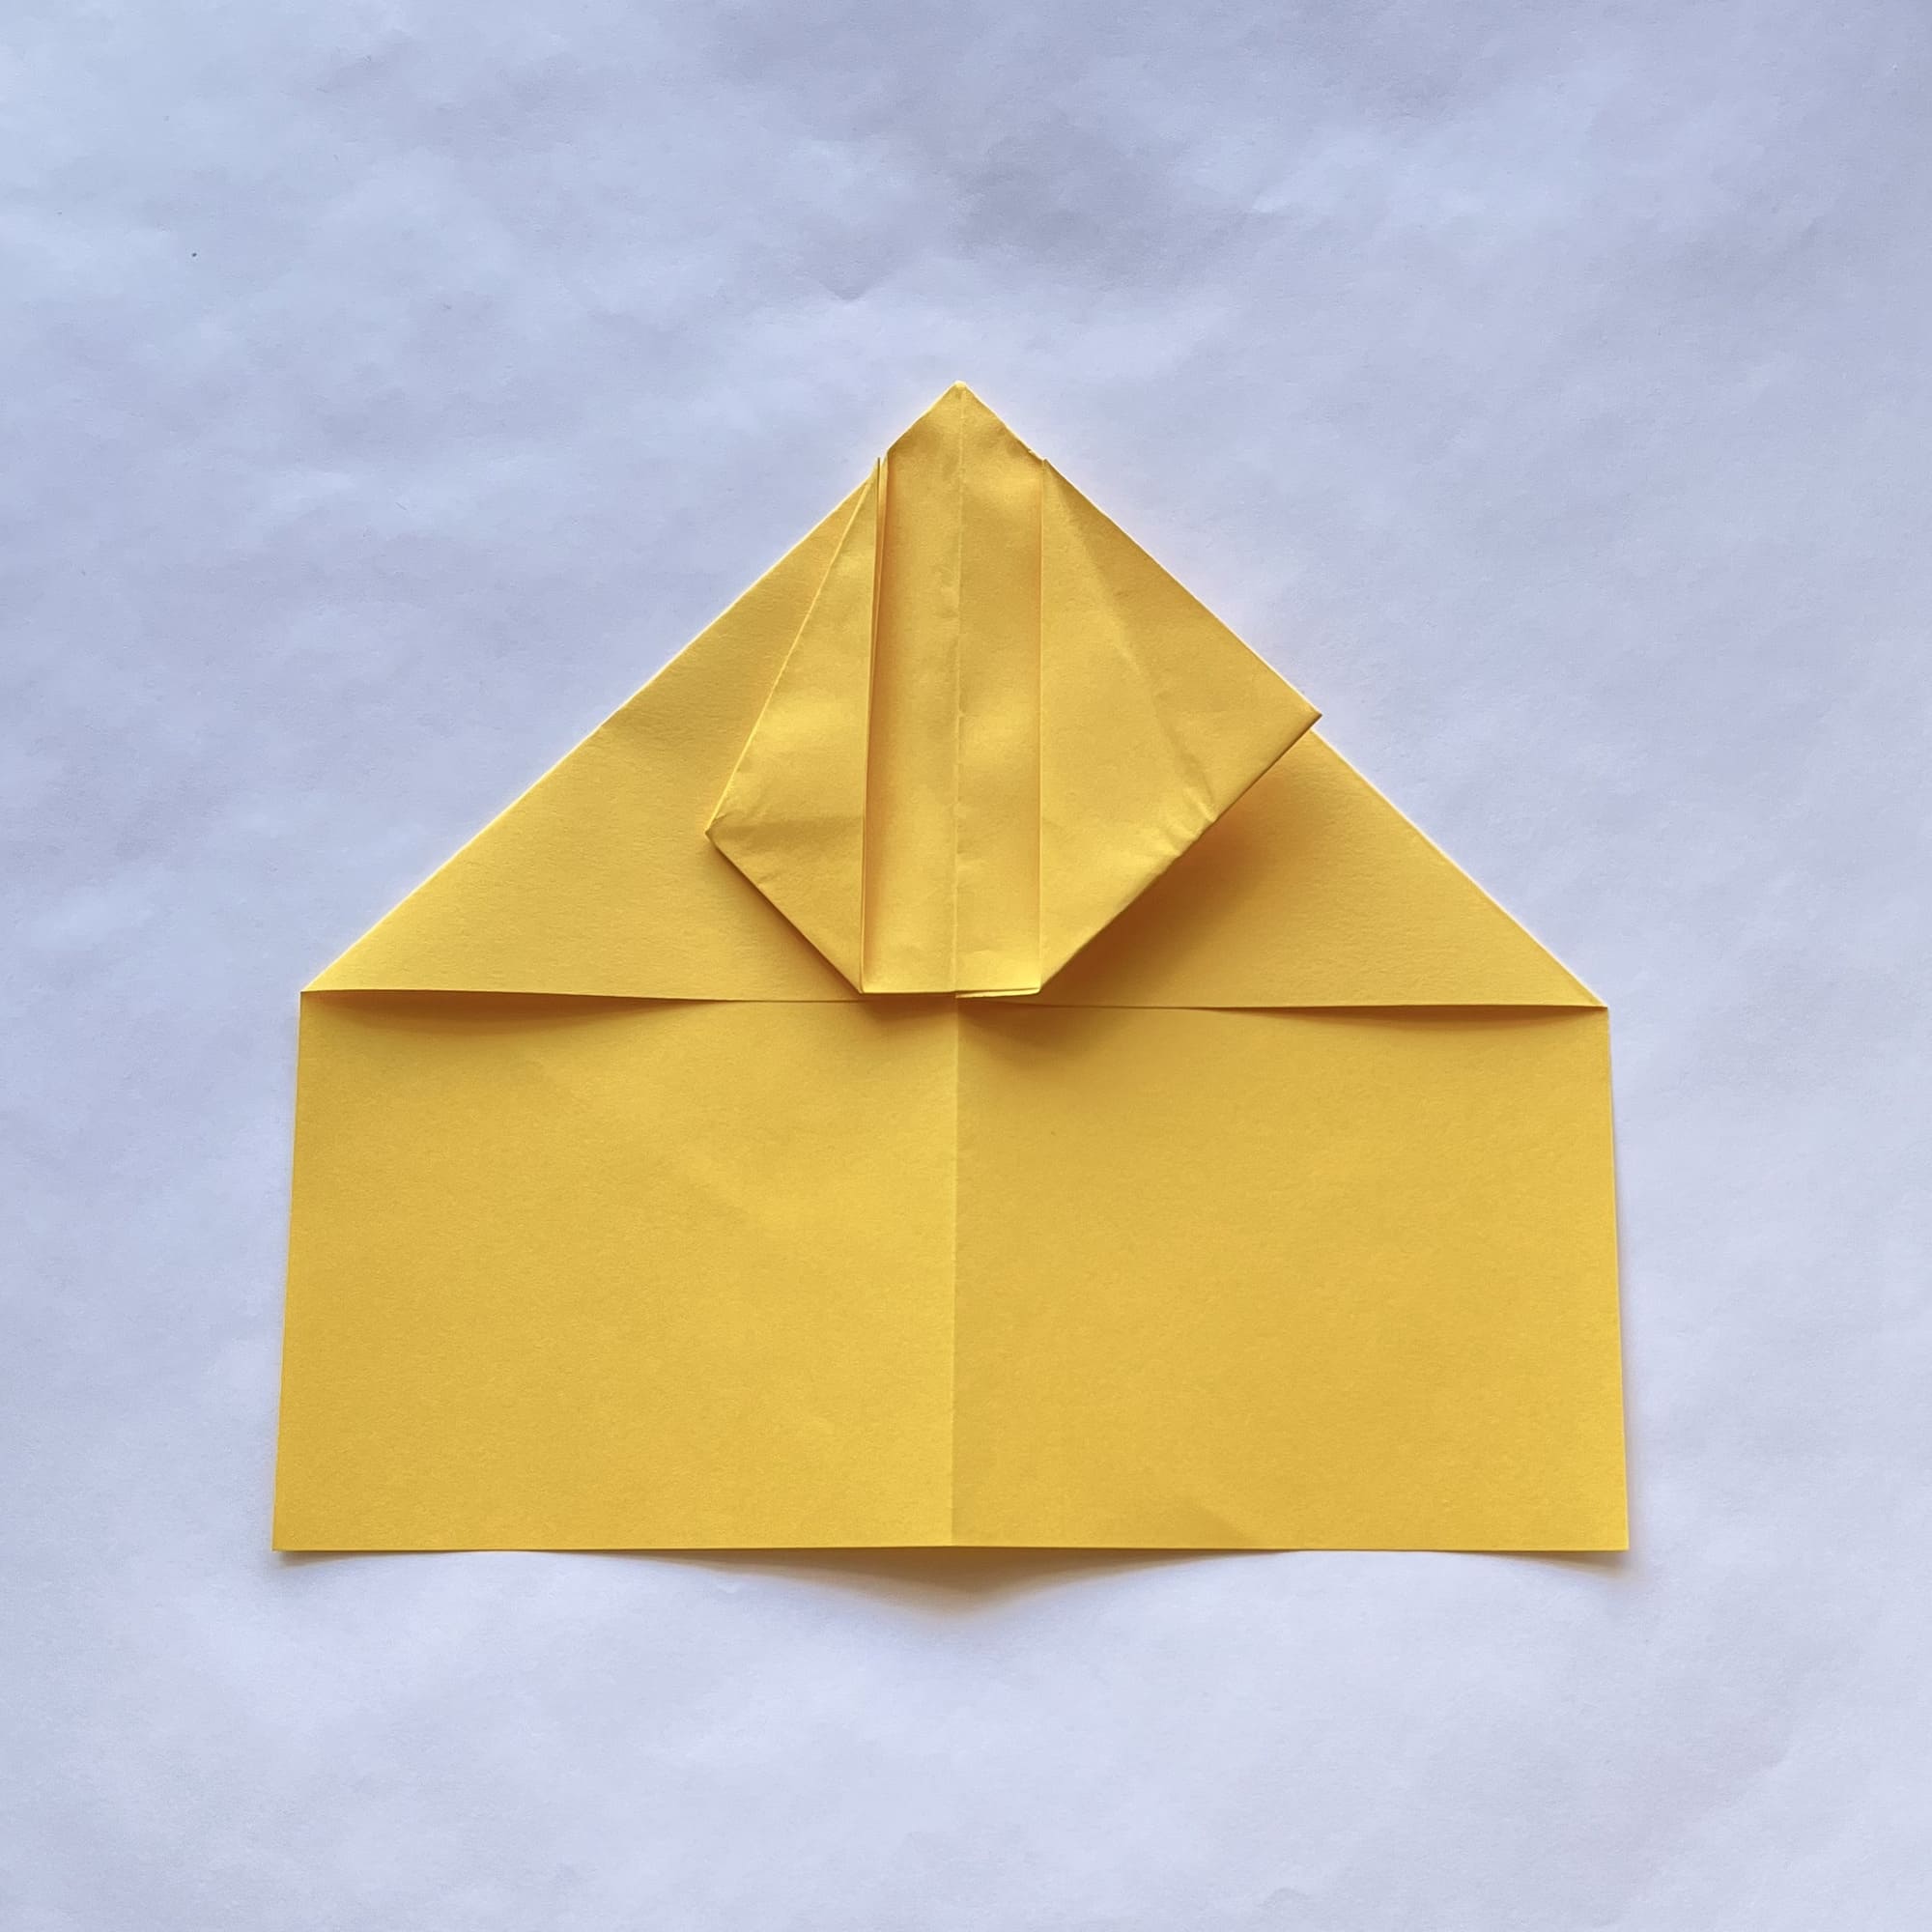
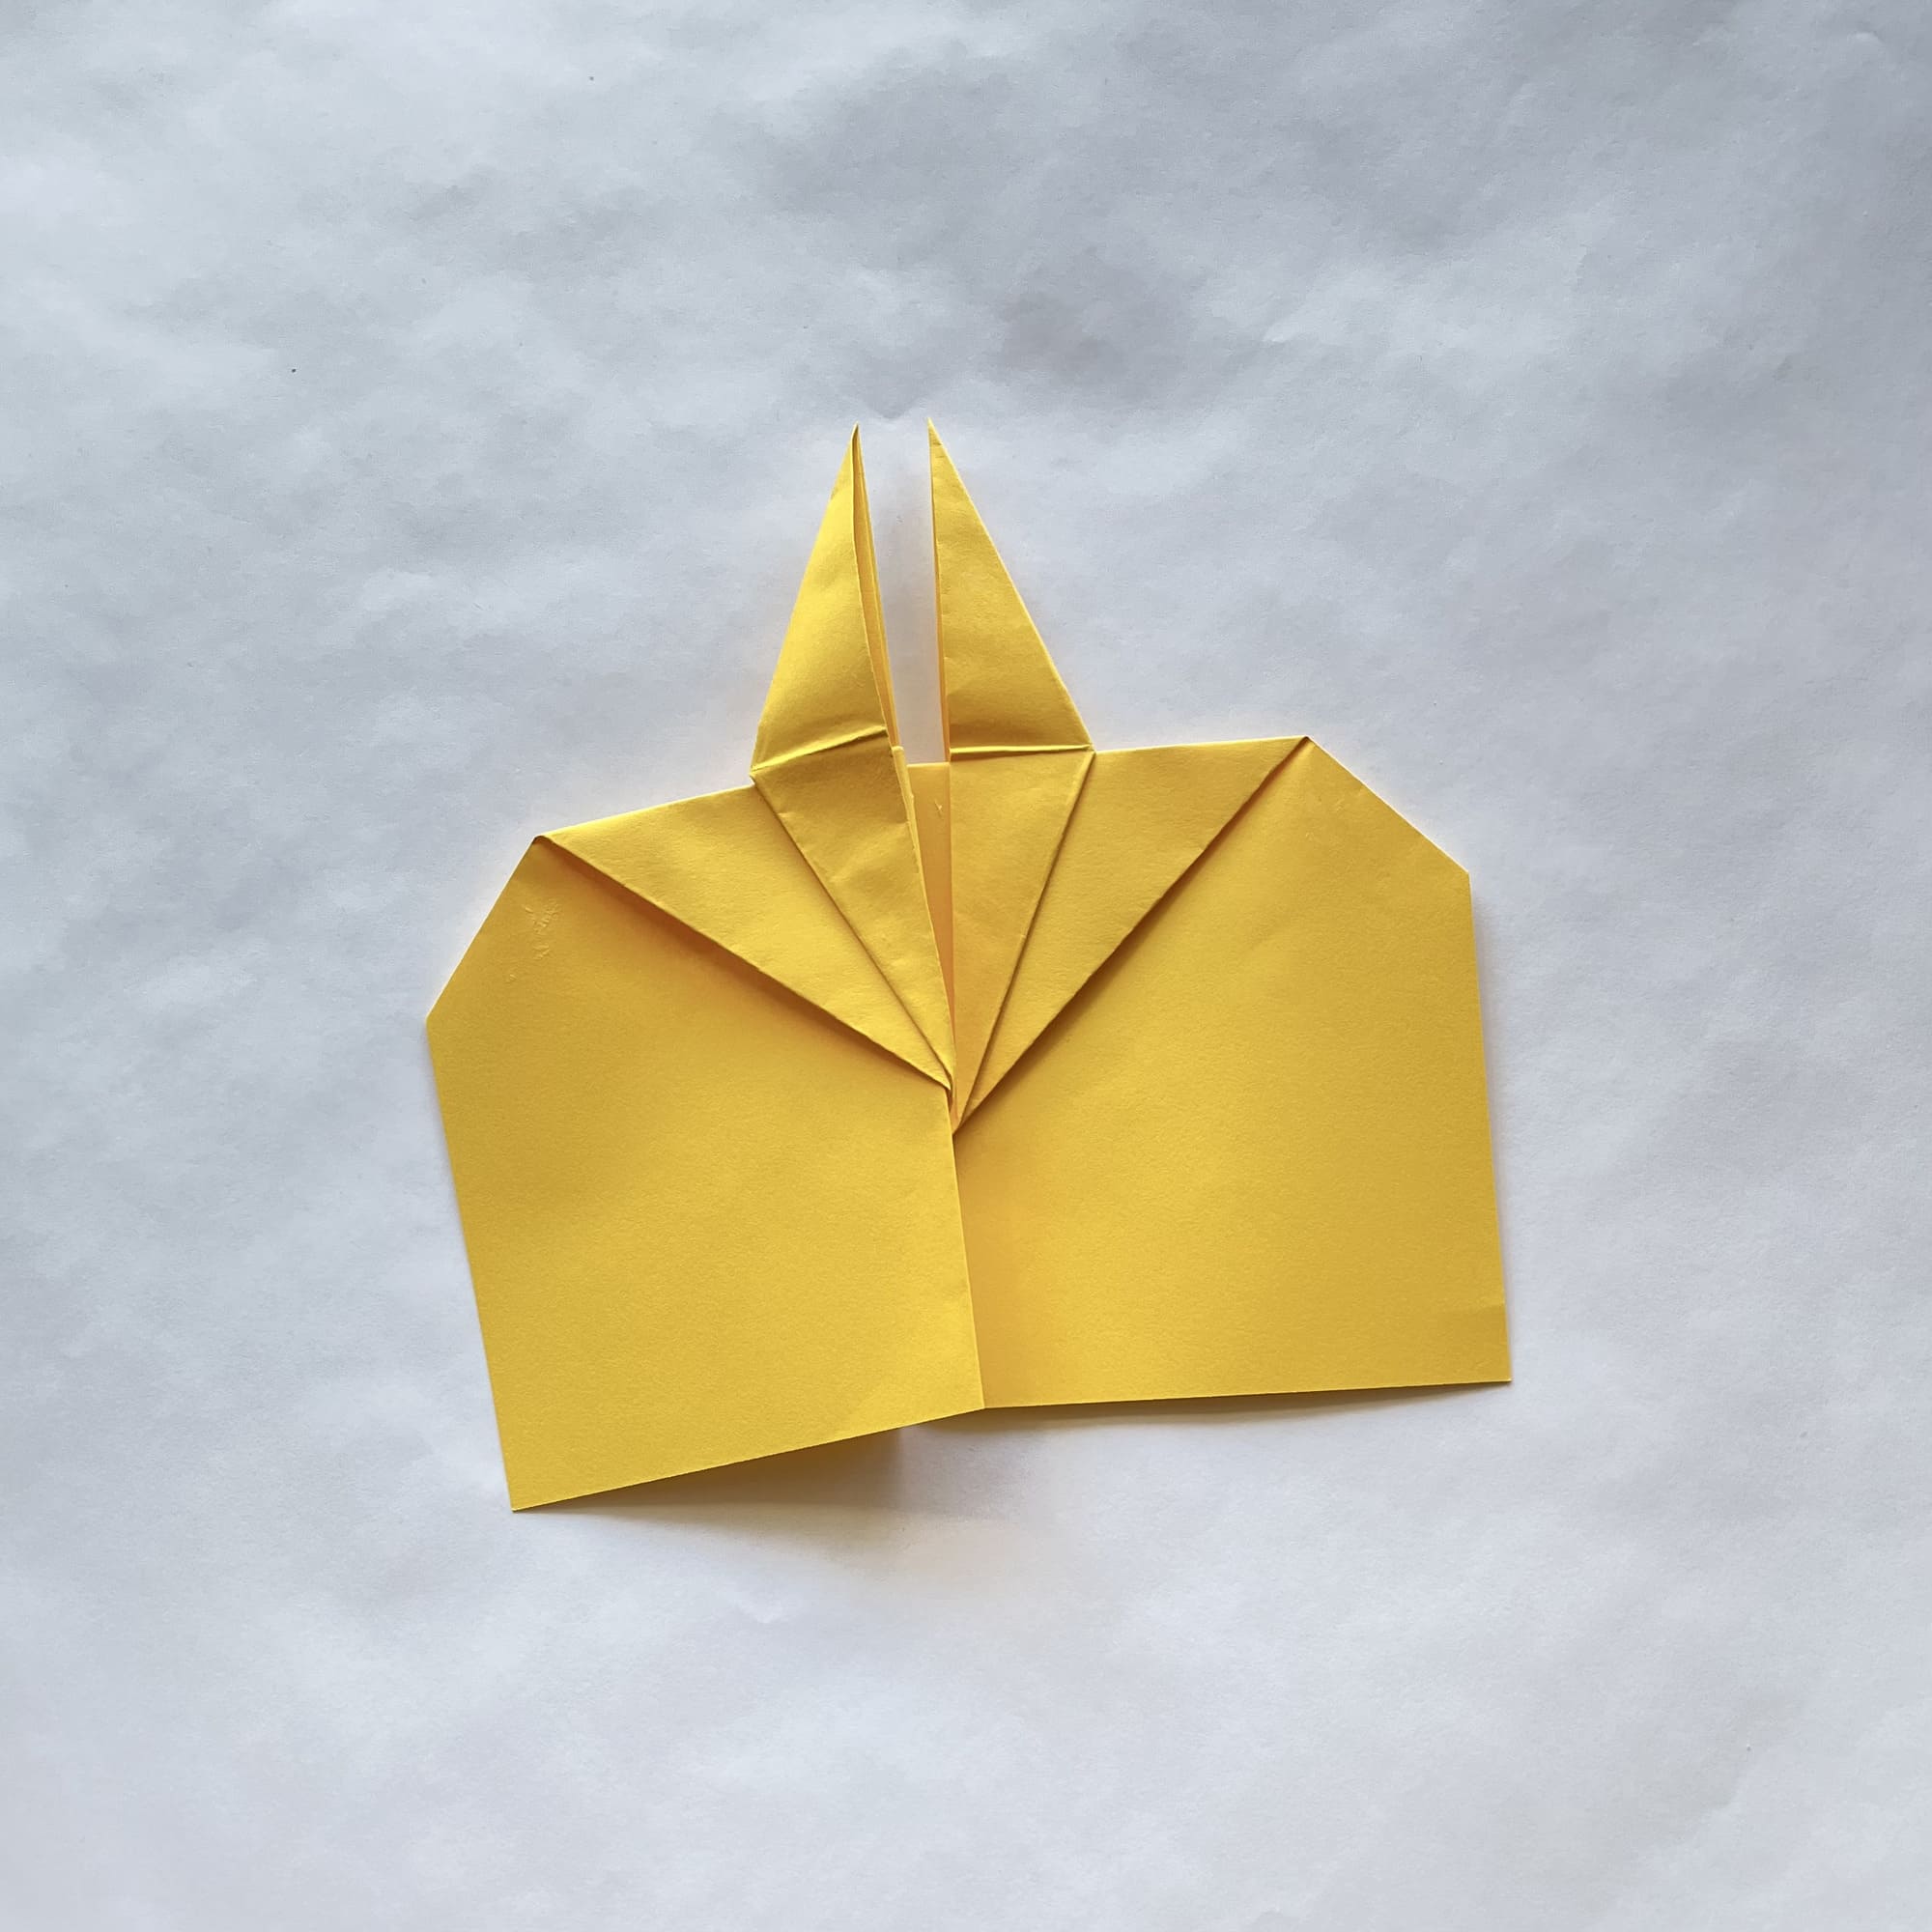
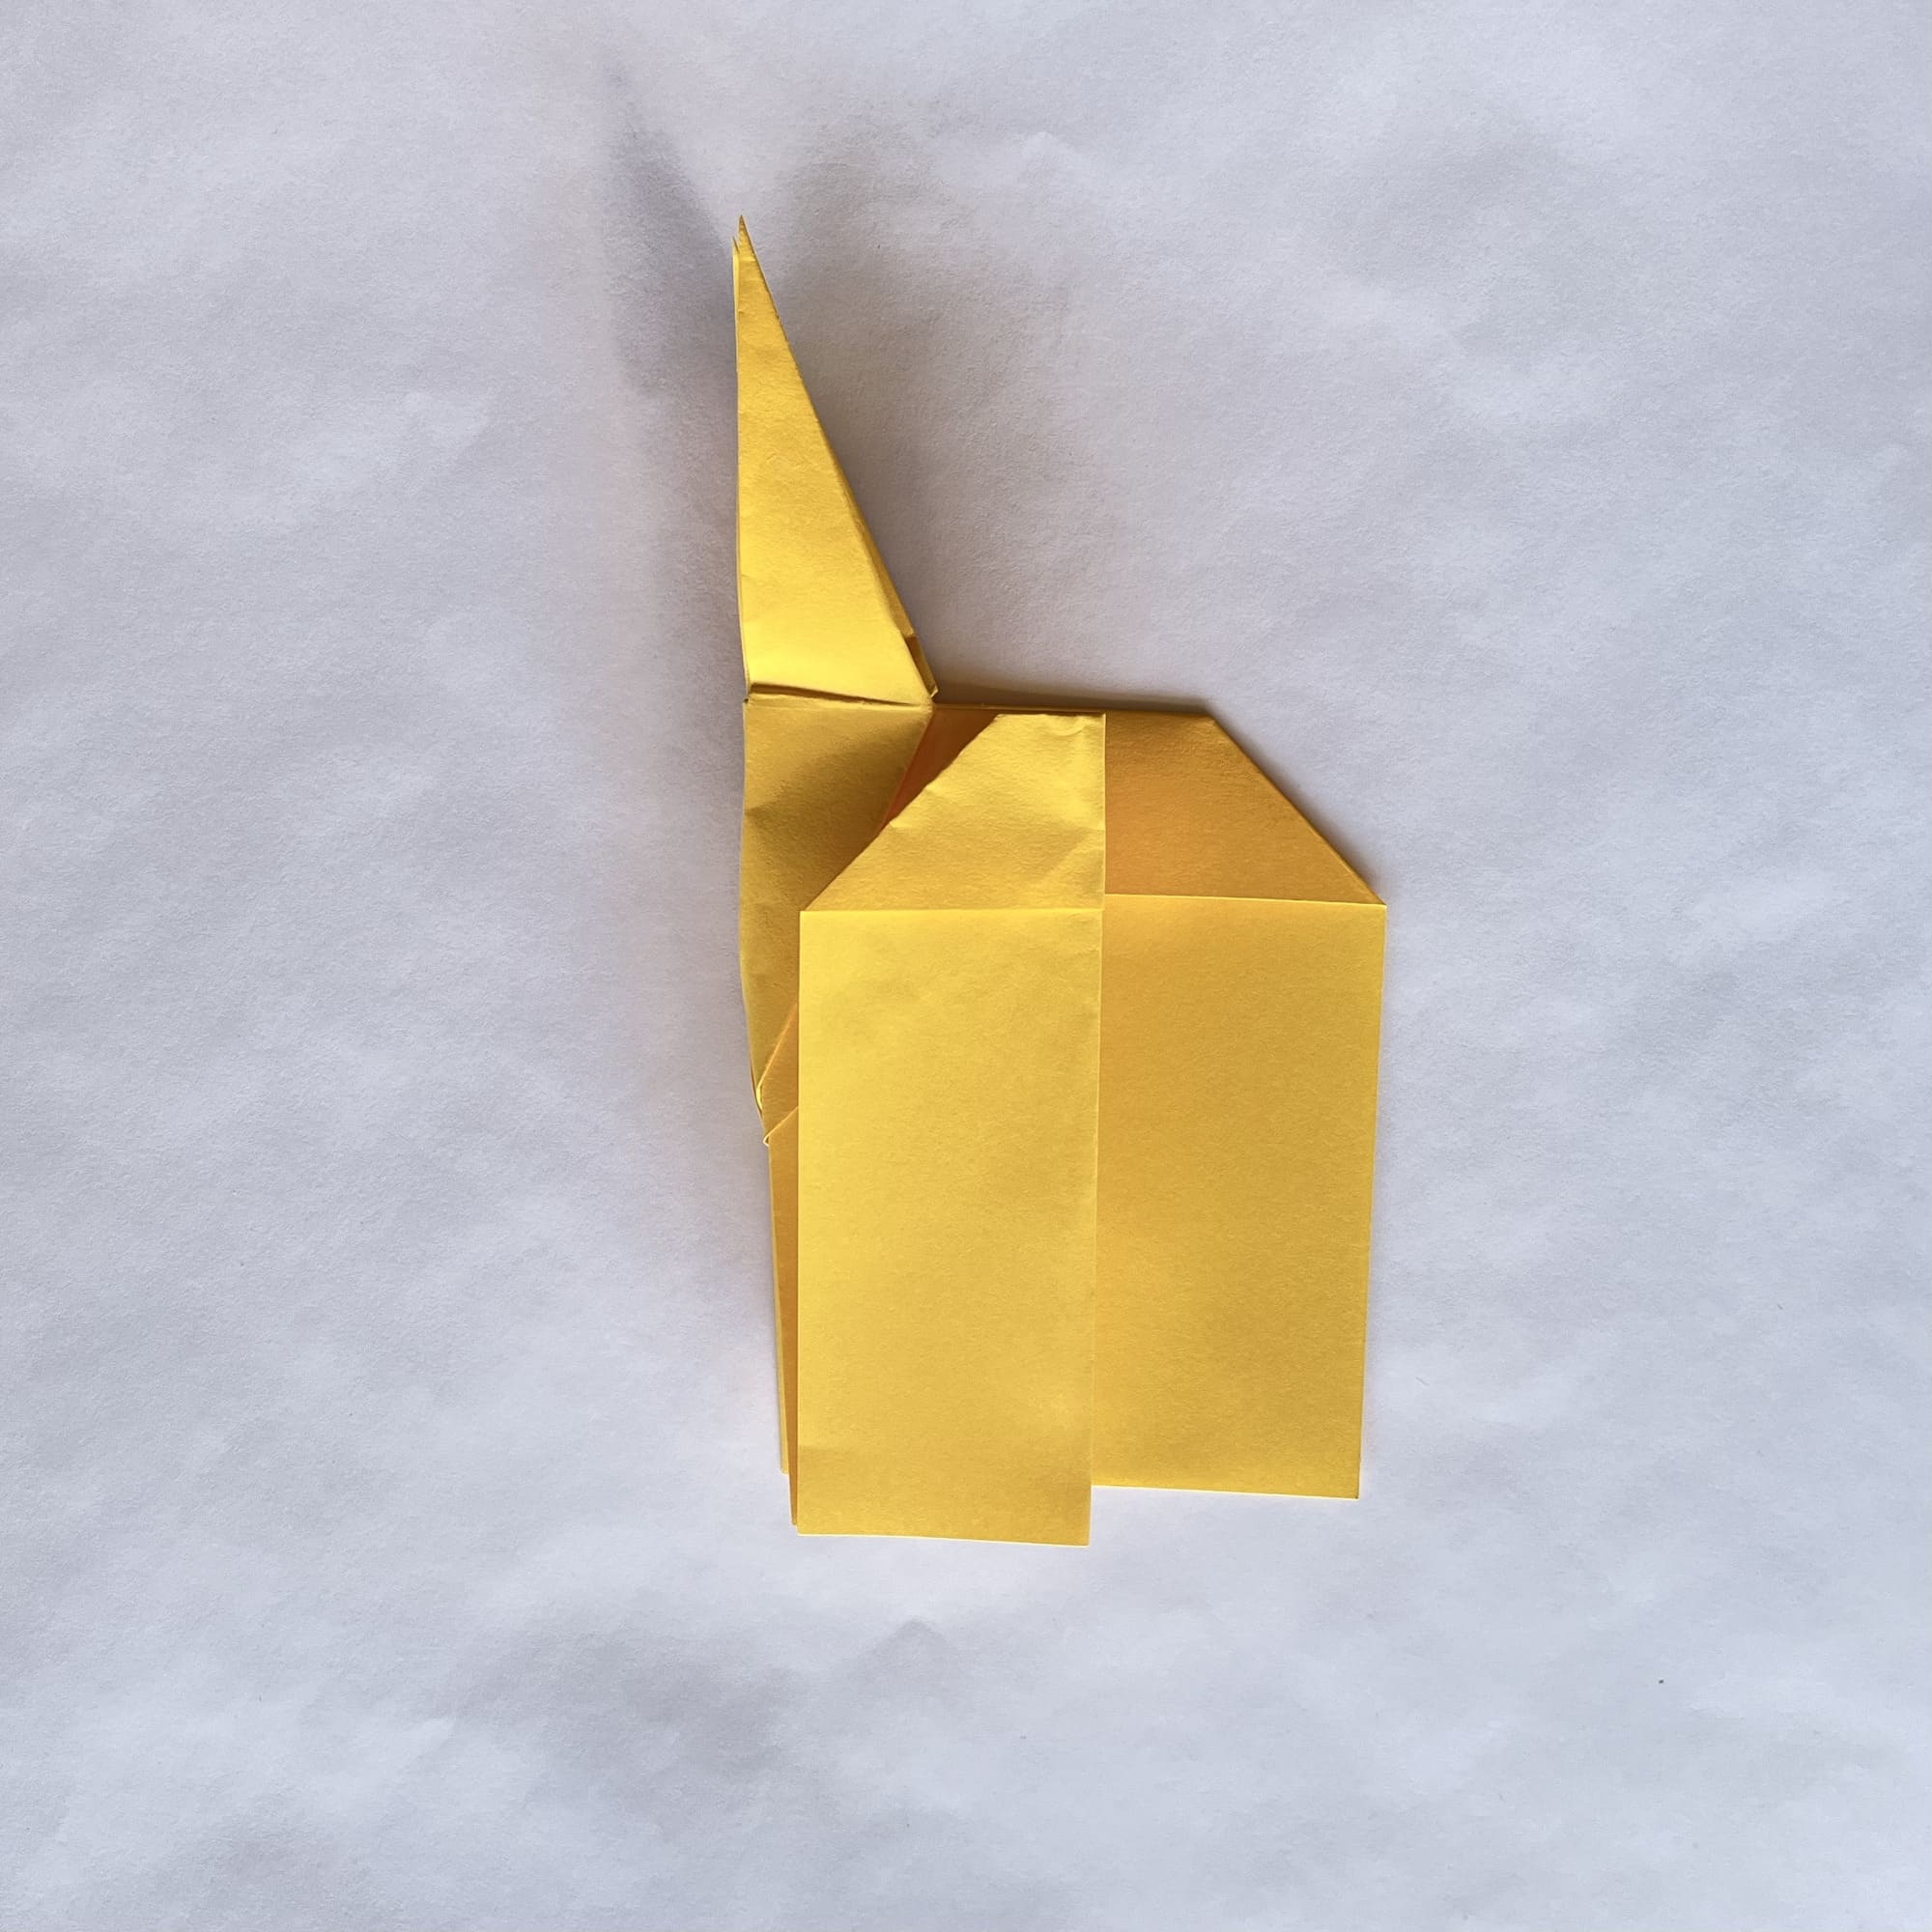
You are at the finishing stretch! You simply need to repeat steps 10-14 on the opposite side. As a result, the figure should look like this.
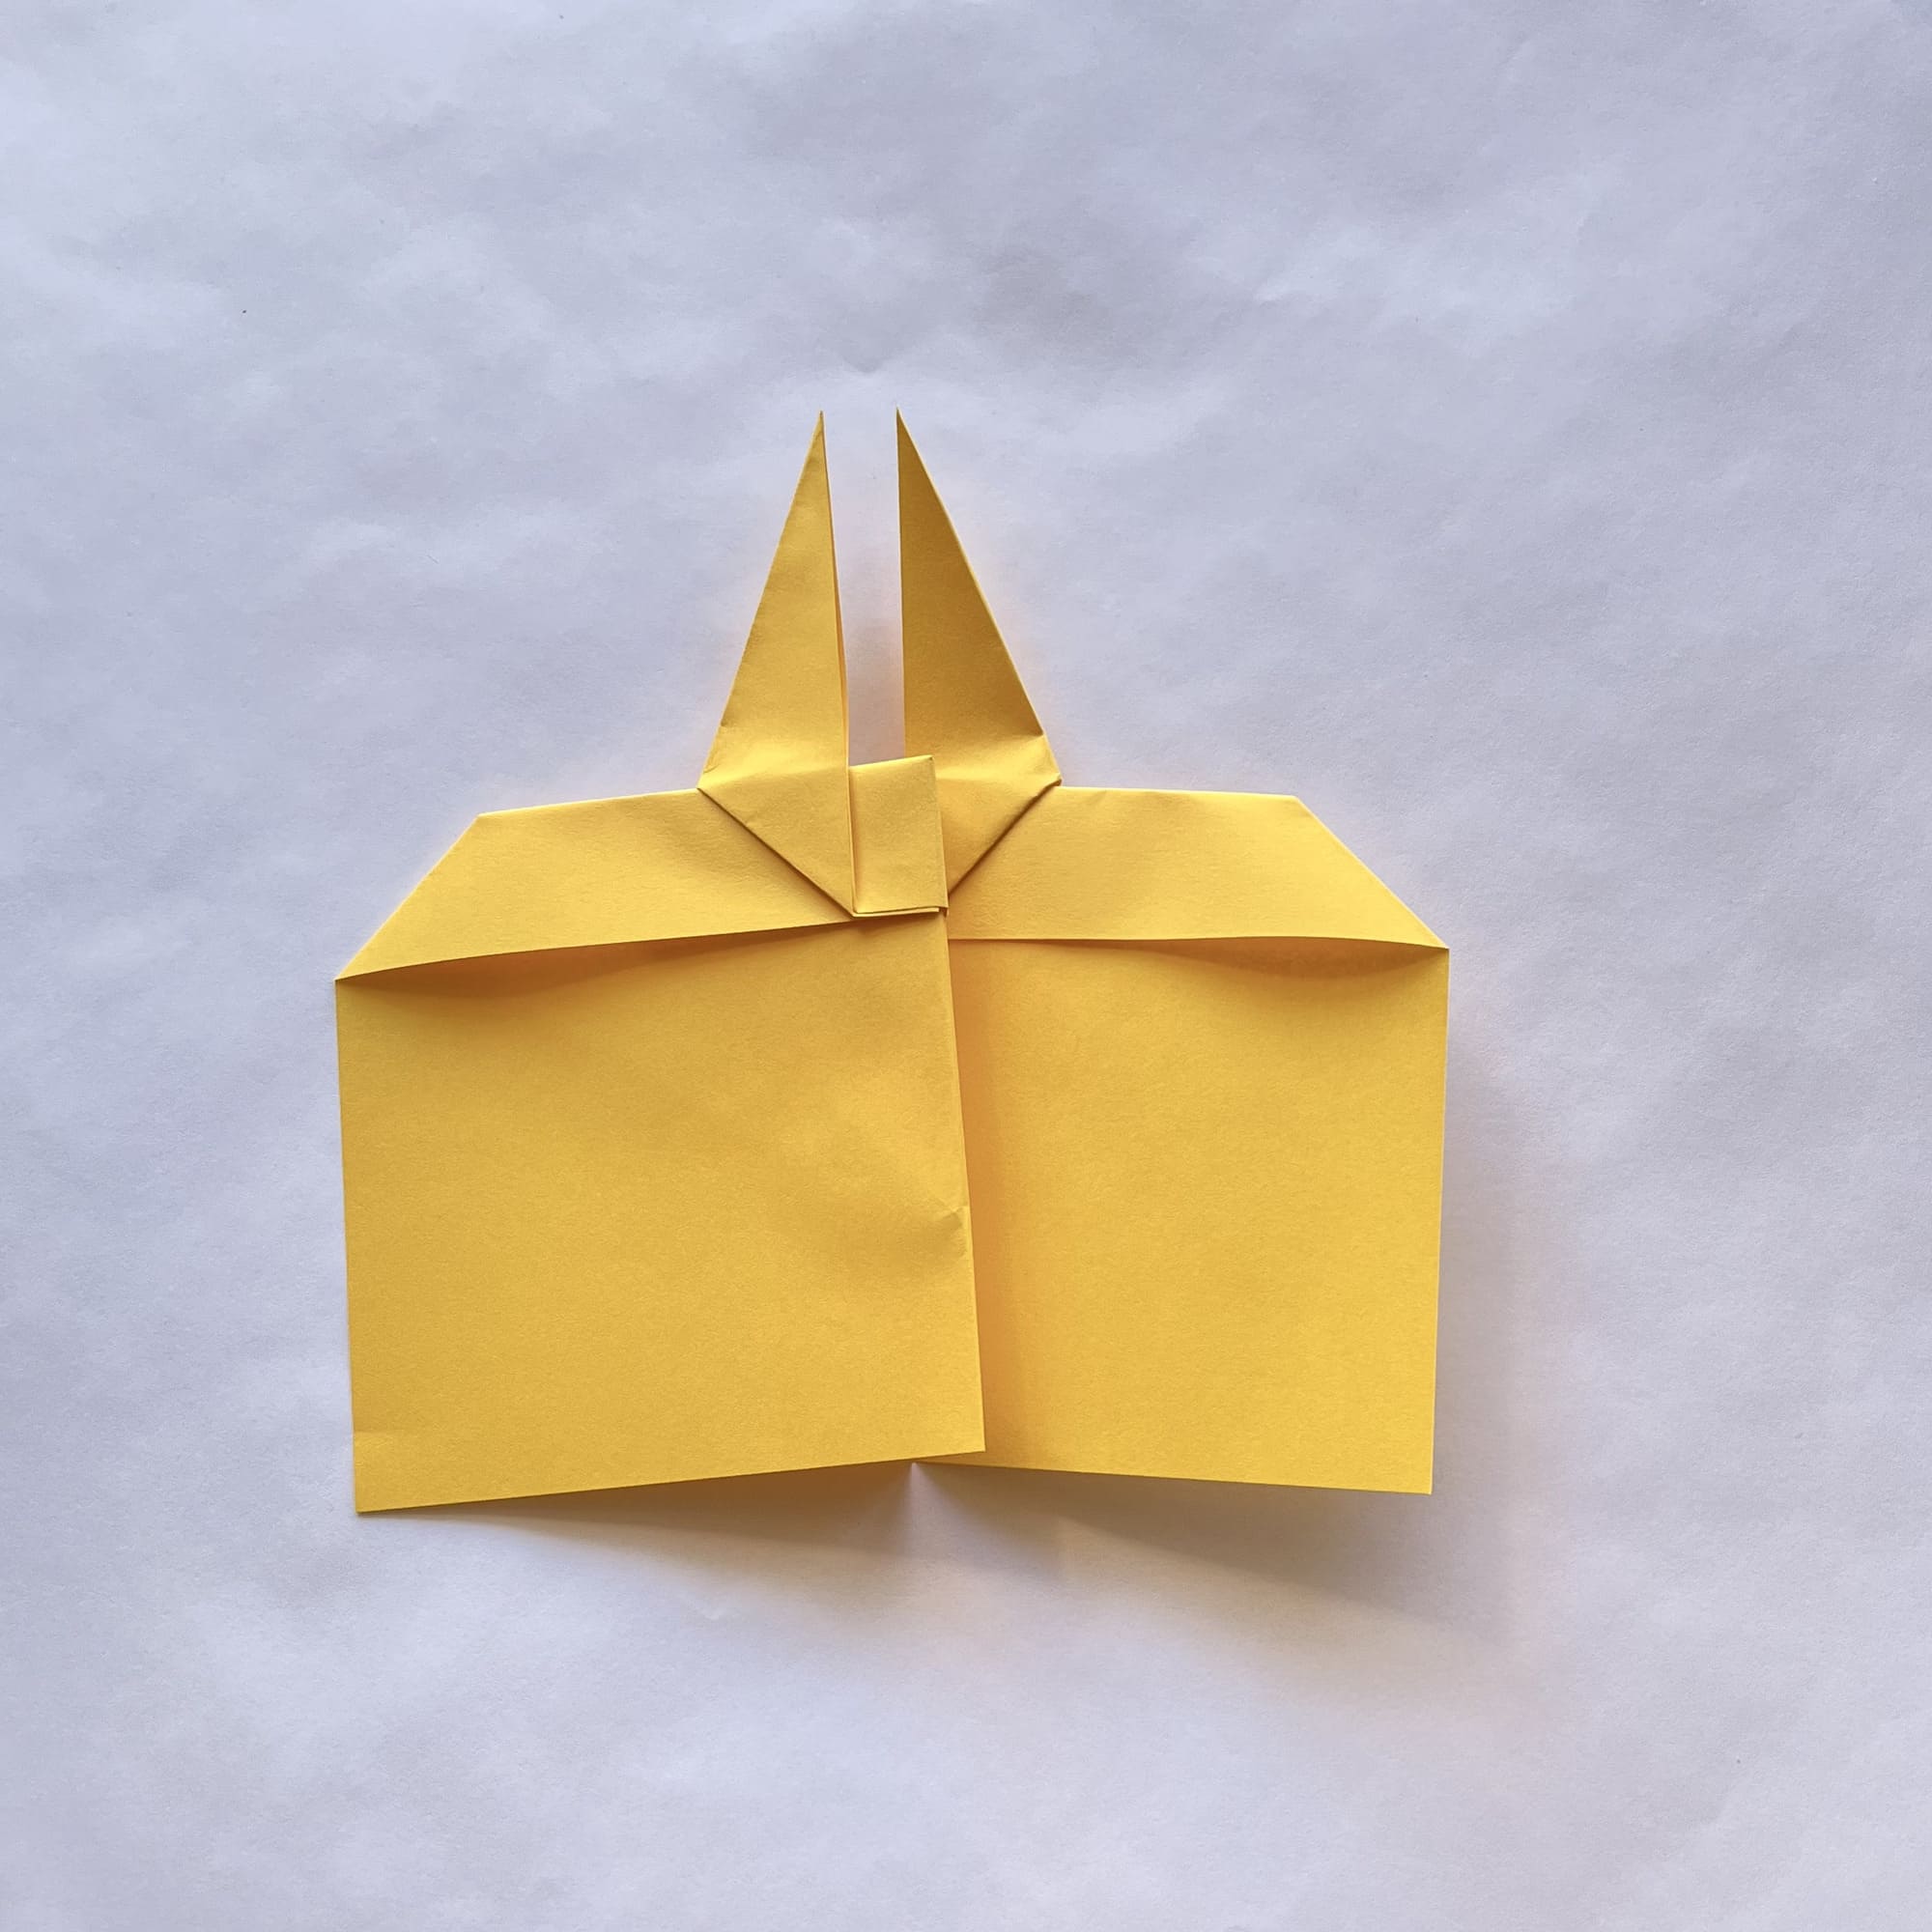
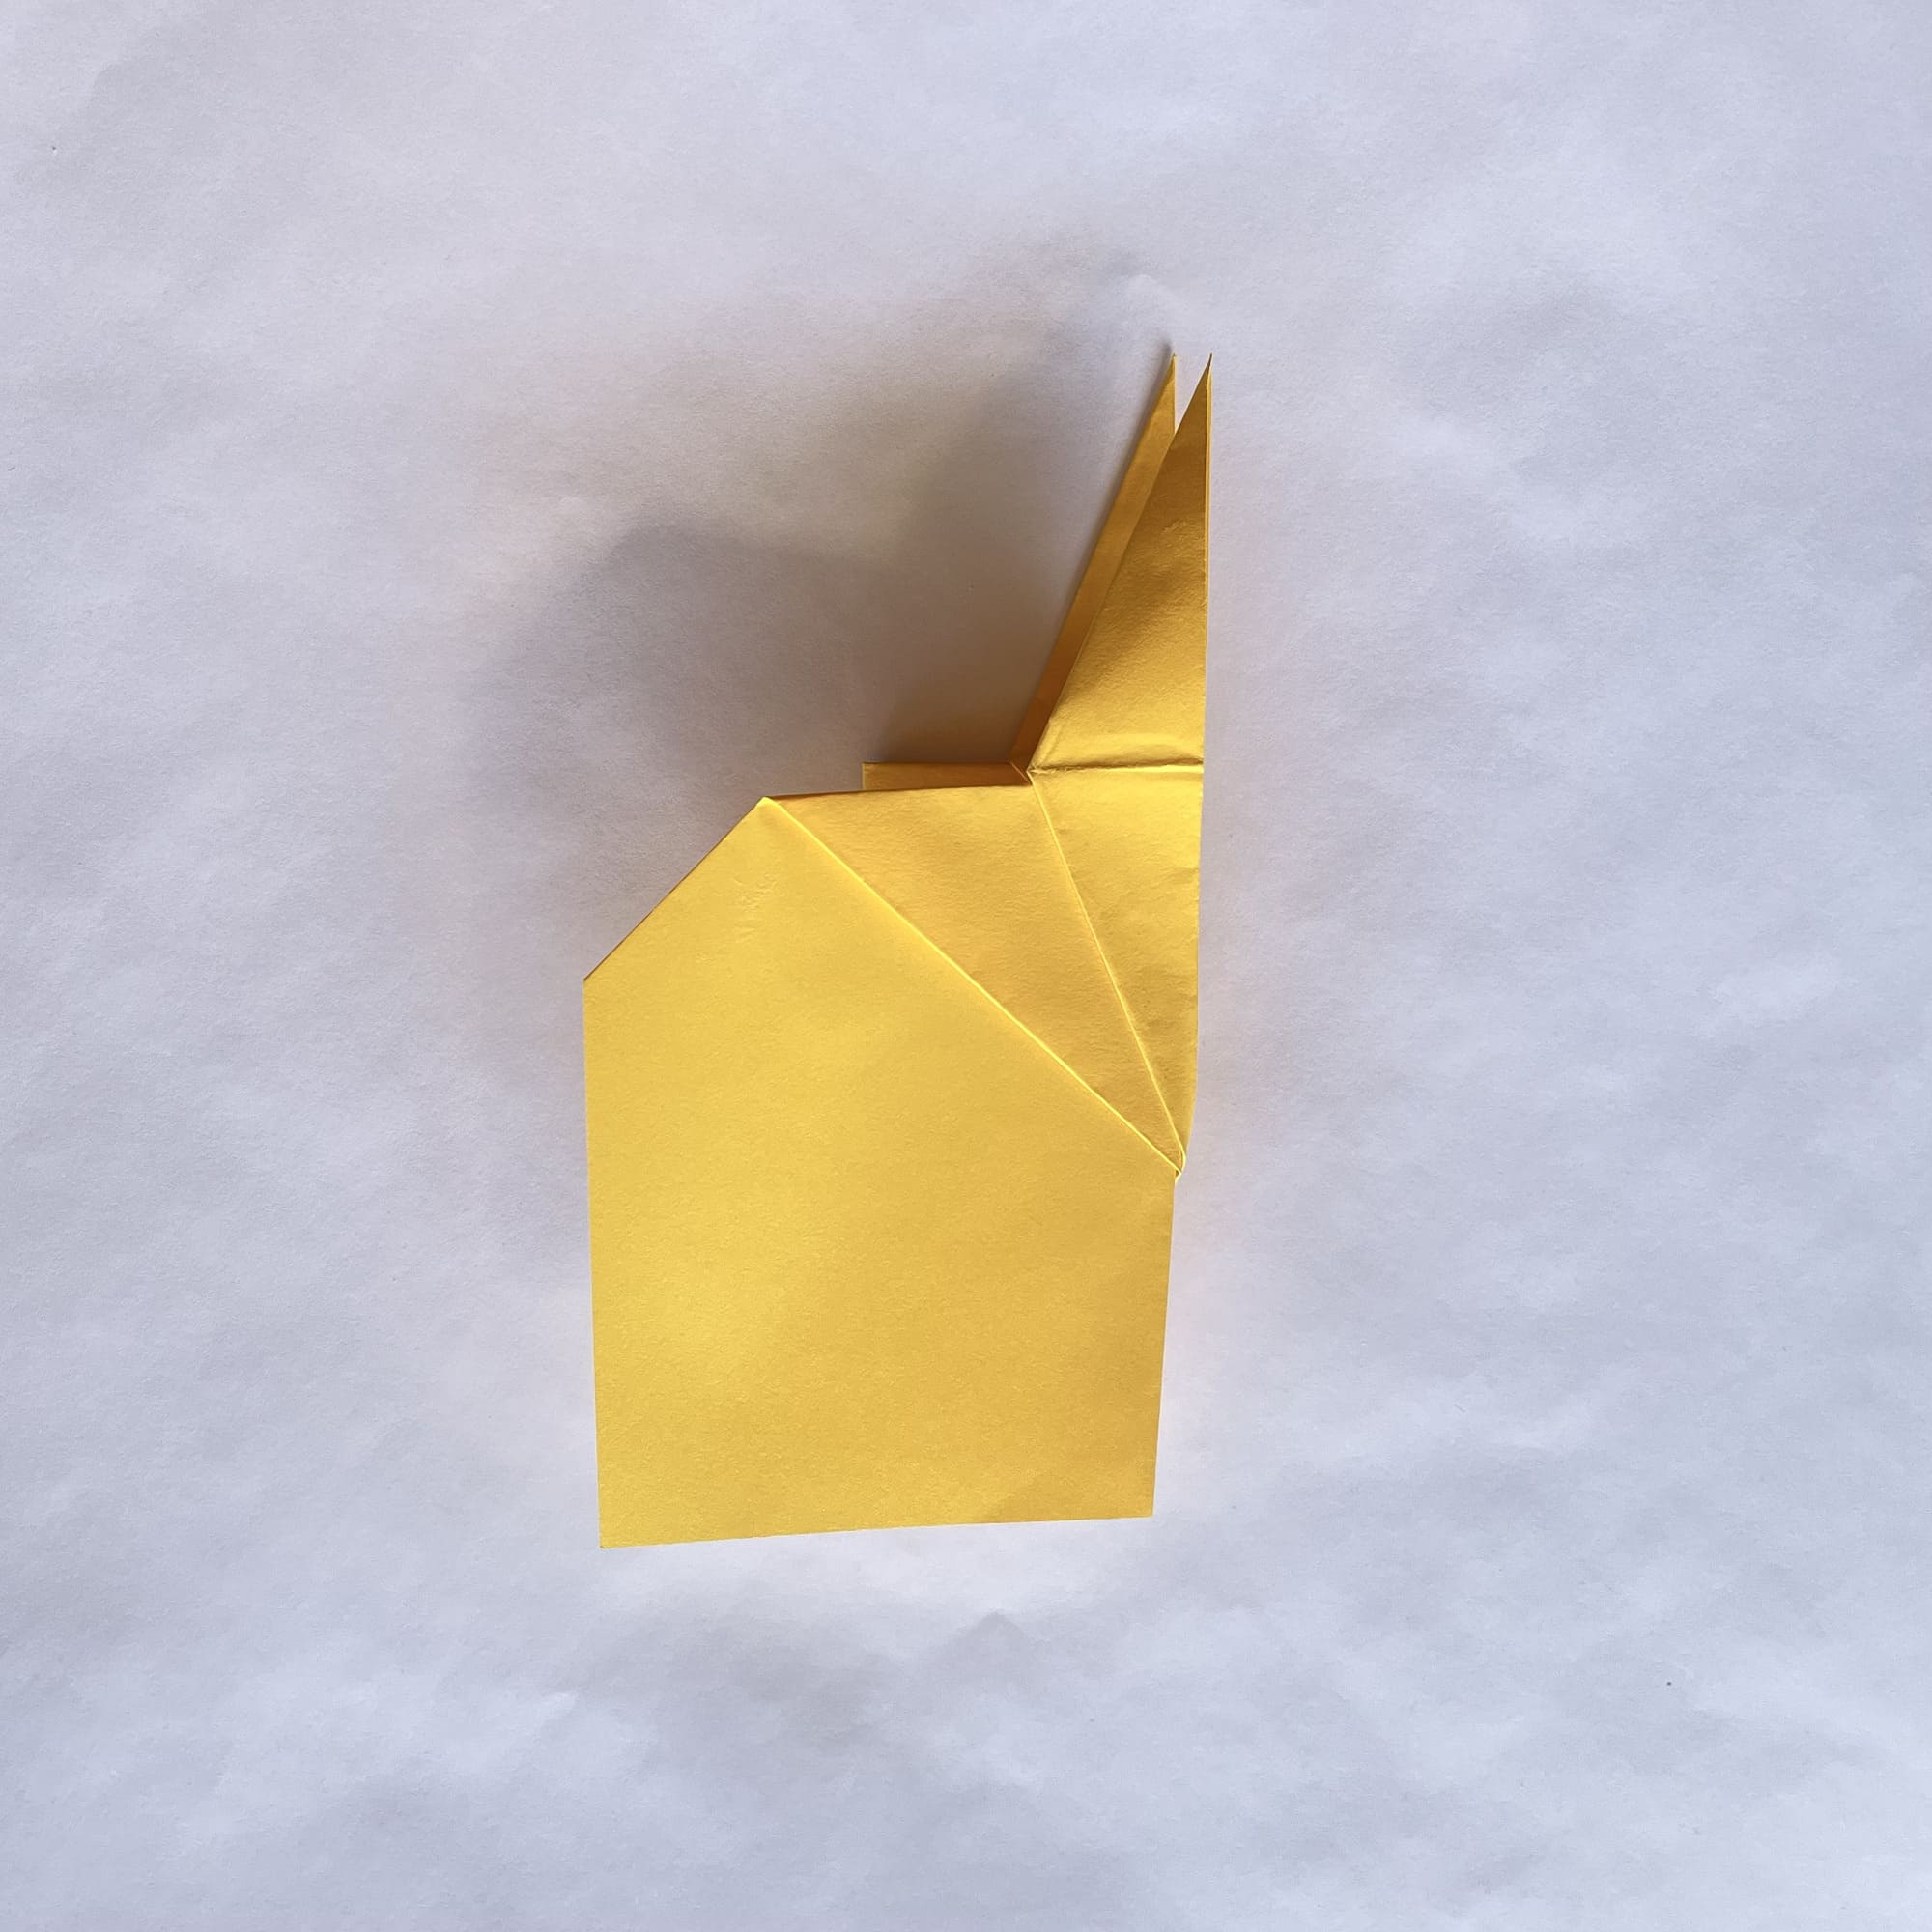
Before making the next fold, turn the paper over.
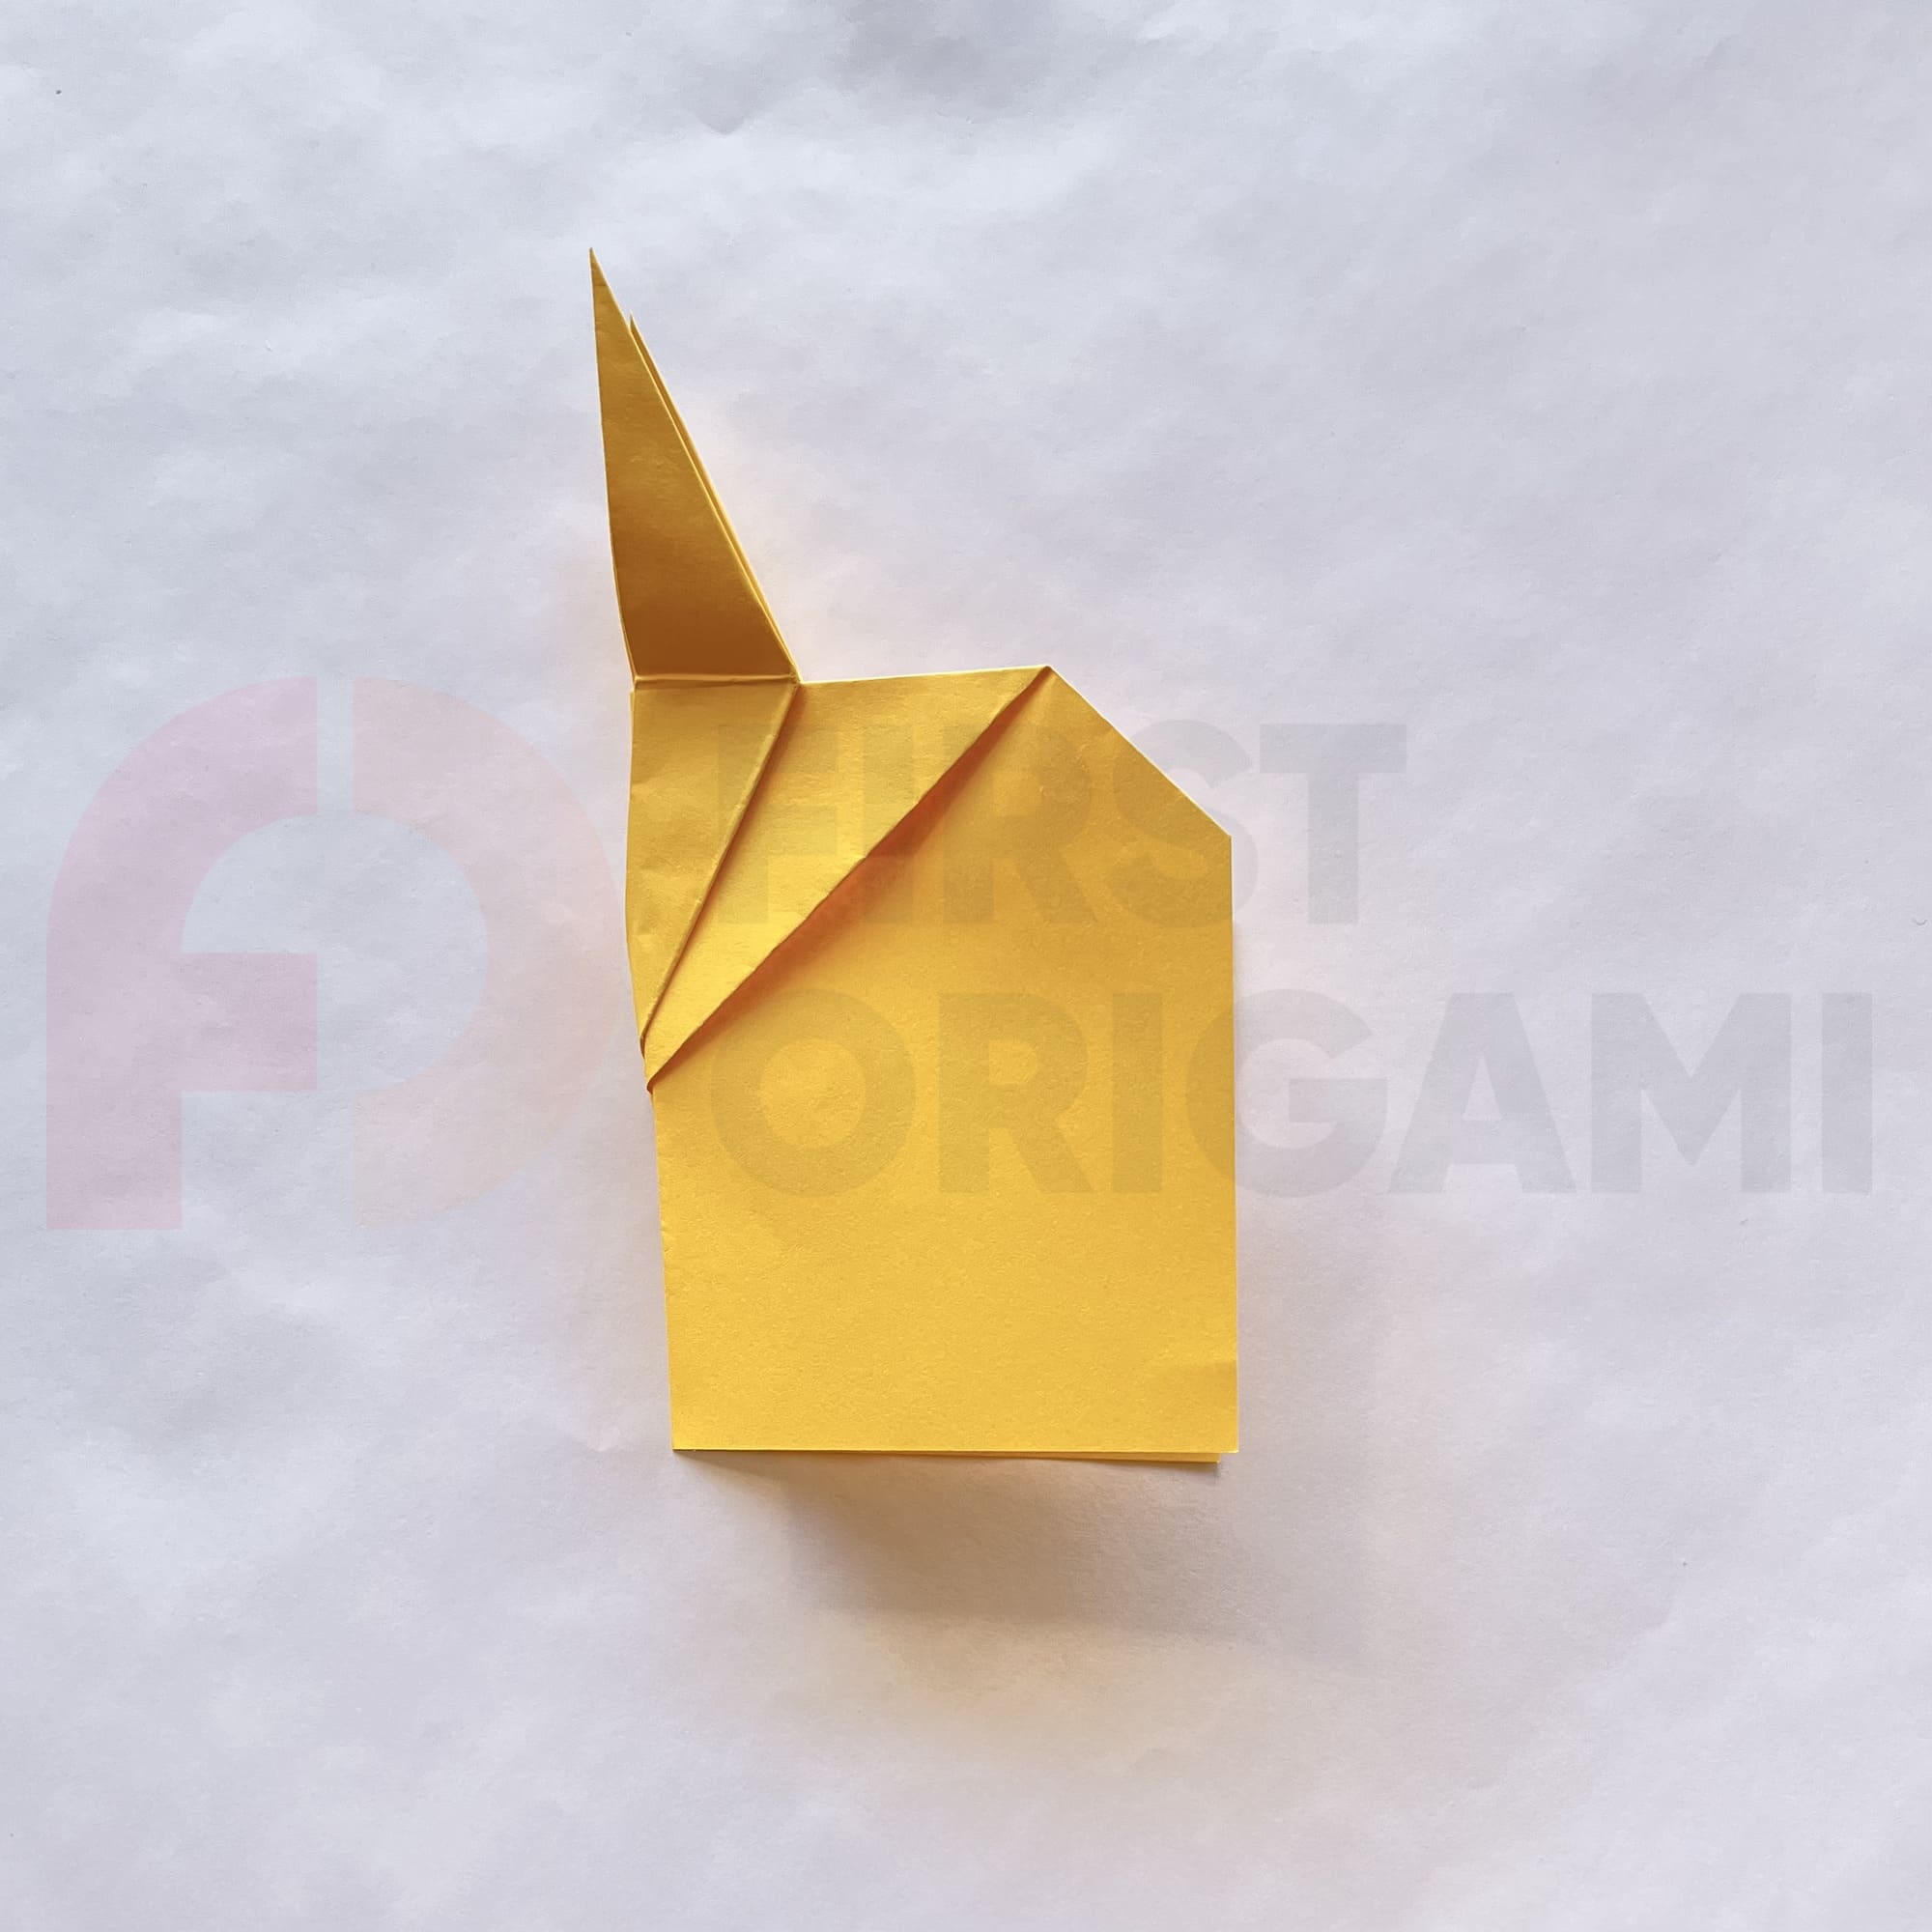
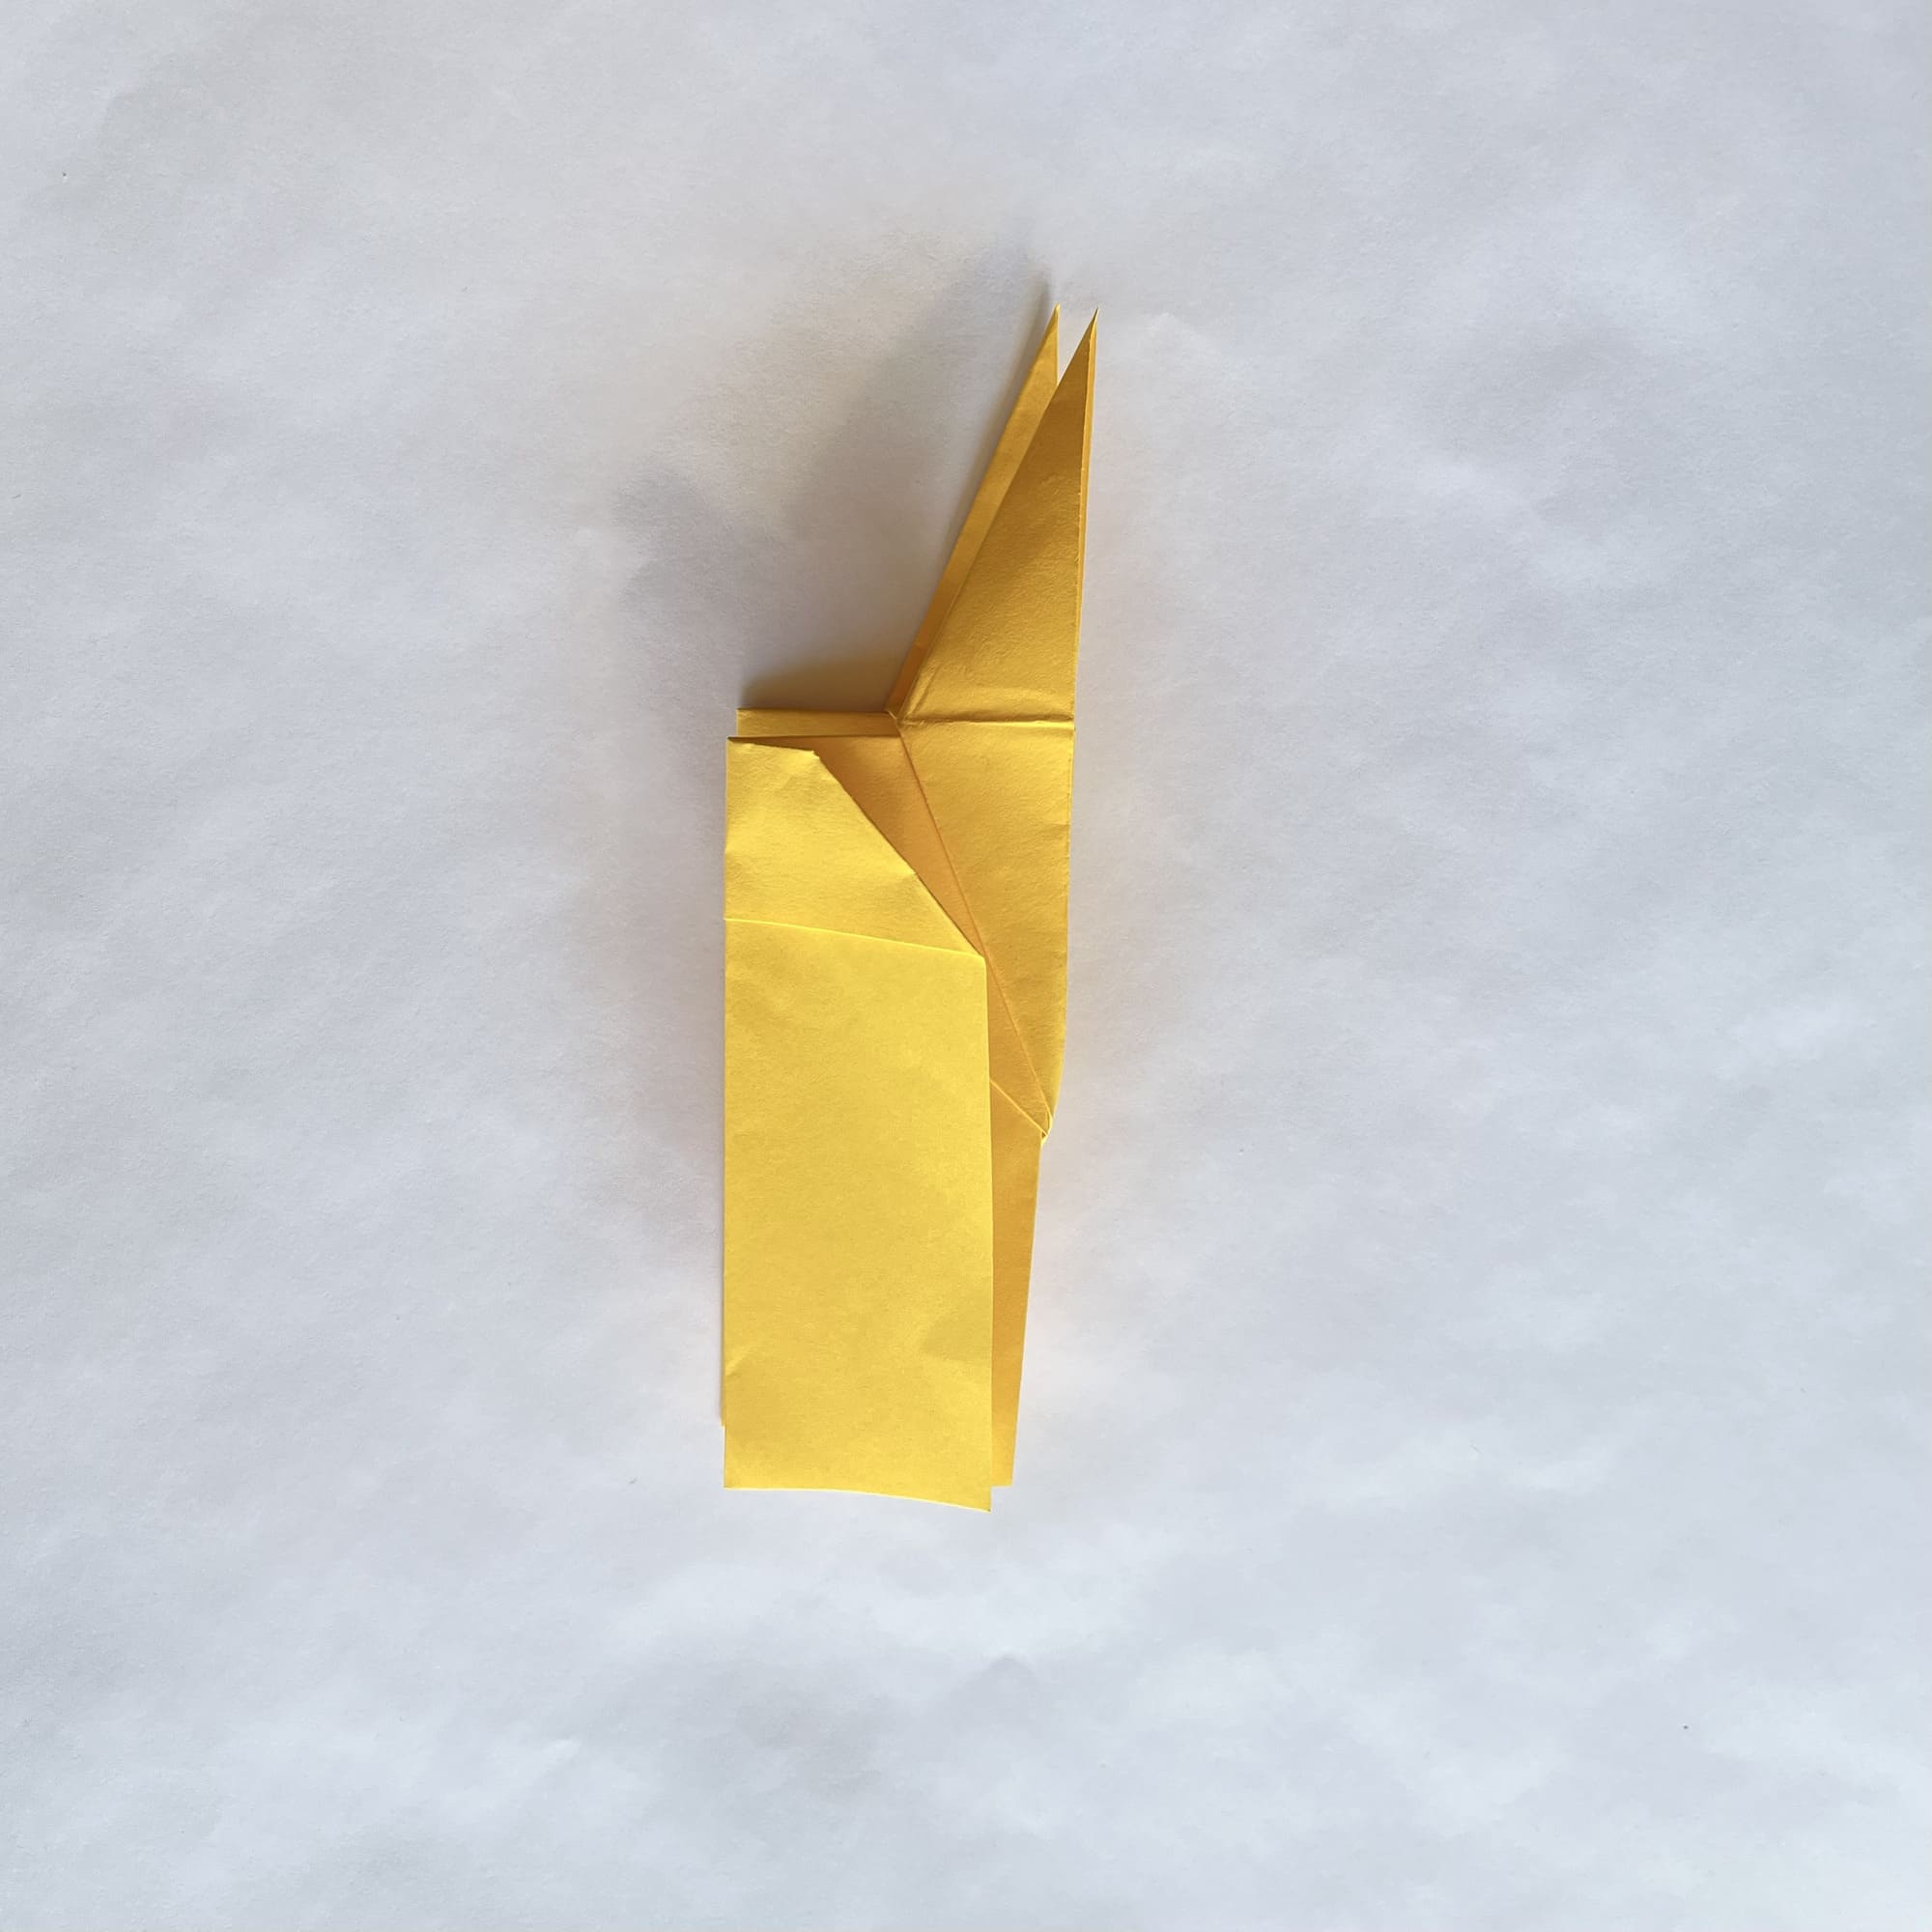
Then, you can fold the top down so that the protruding “horns” are on this side.
To proceed, you would fold the figure in half, as shown in the photo.
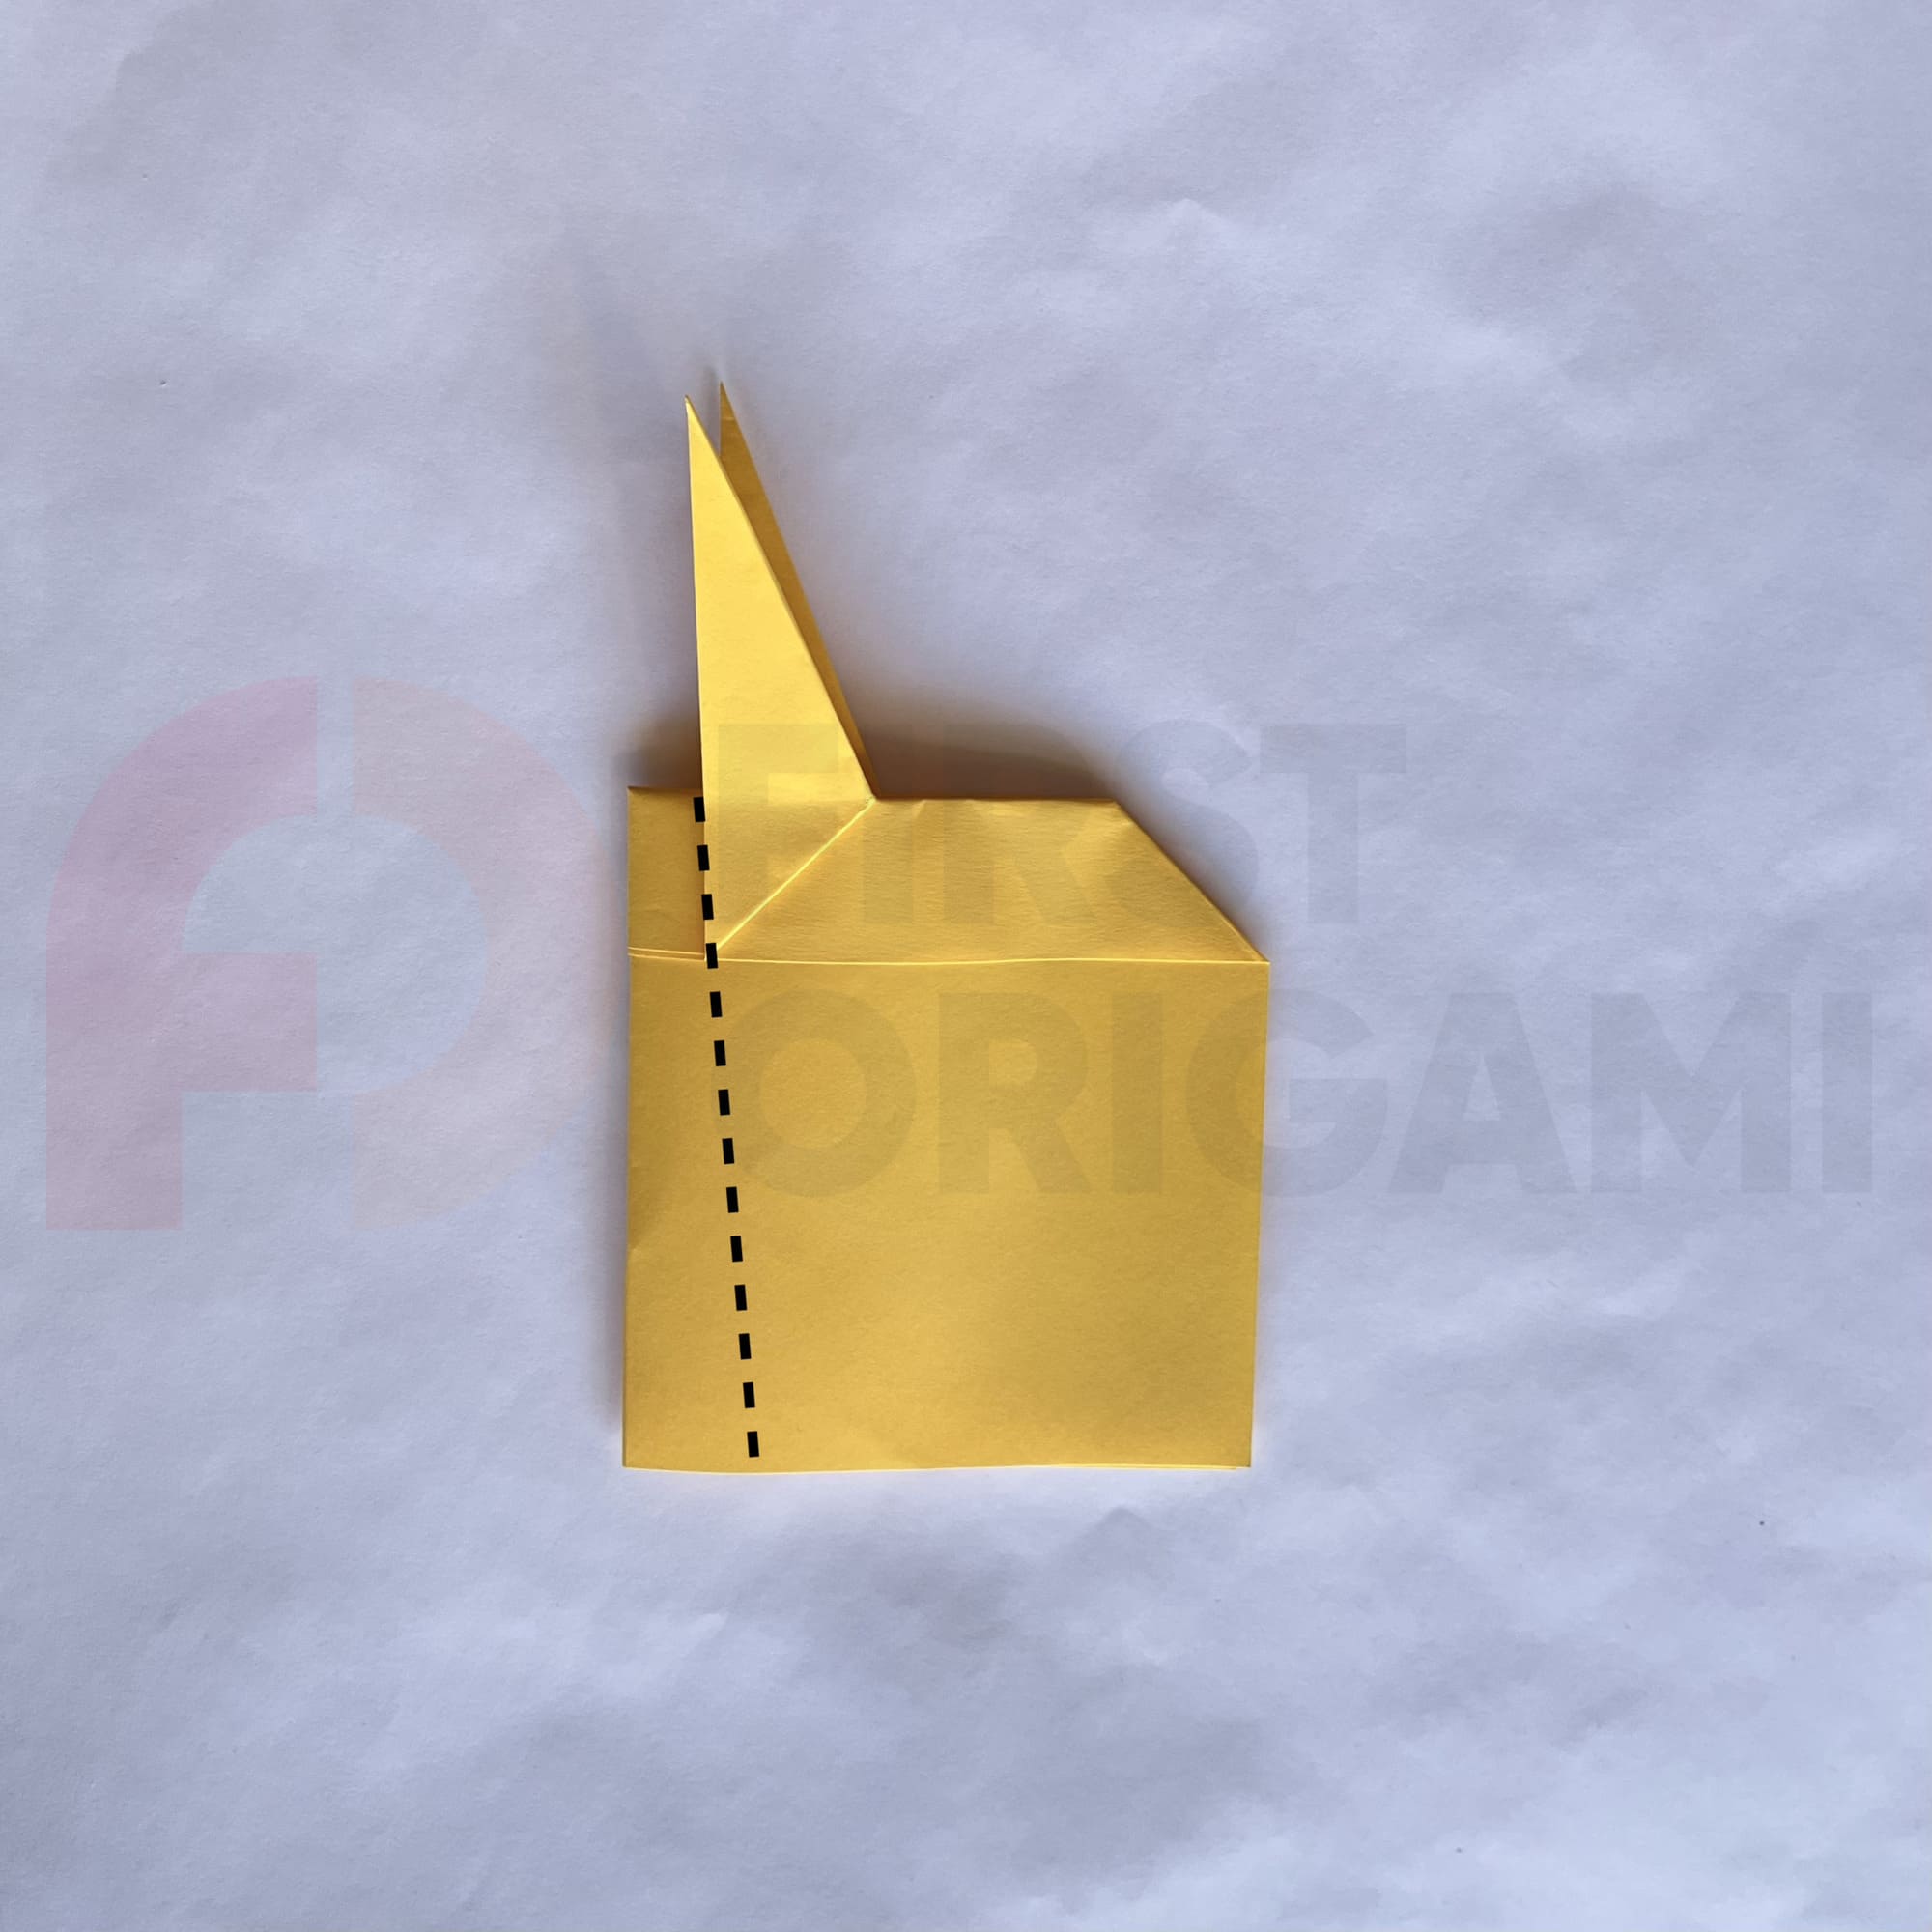
Now, you can bend along the dotted line to make a wing.
You can create a symmetrical second wing, but before that, you should turn over the paper.
To finish your creation, you should alternately bend the edges of both wings outward.
You did it!
All you have left to do is slightly open the paper so that the “fins” on the wings become parallel to the base. Now, you can take your plane and send it flying!


